
Teroka Projek Arduino
Ratusan projek dari pemula hingga mahir: gambar rajah litar, kod dan video. Mulakan di tahap mana pun kamu berada.
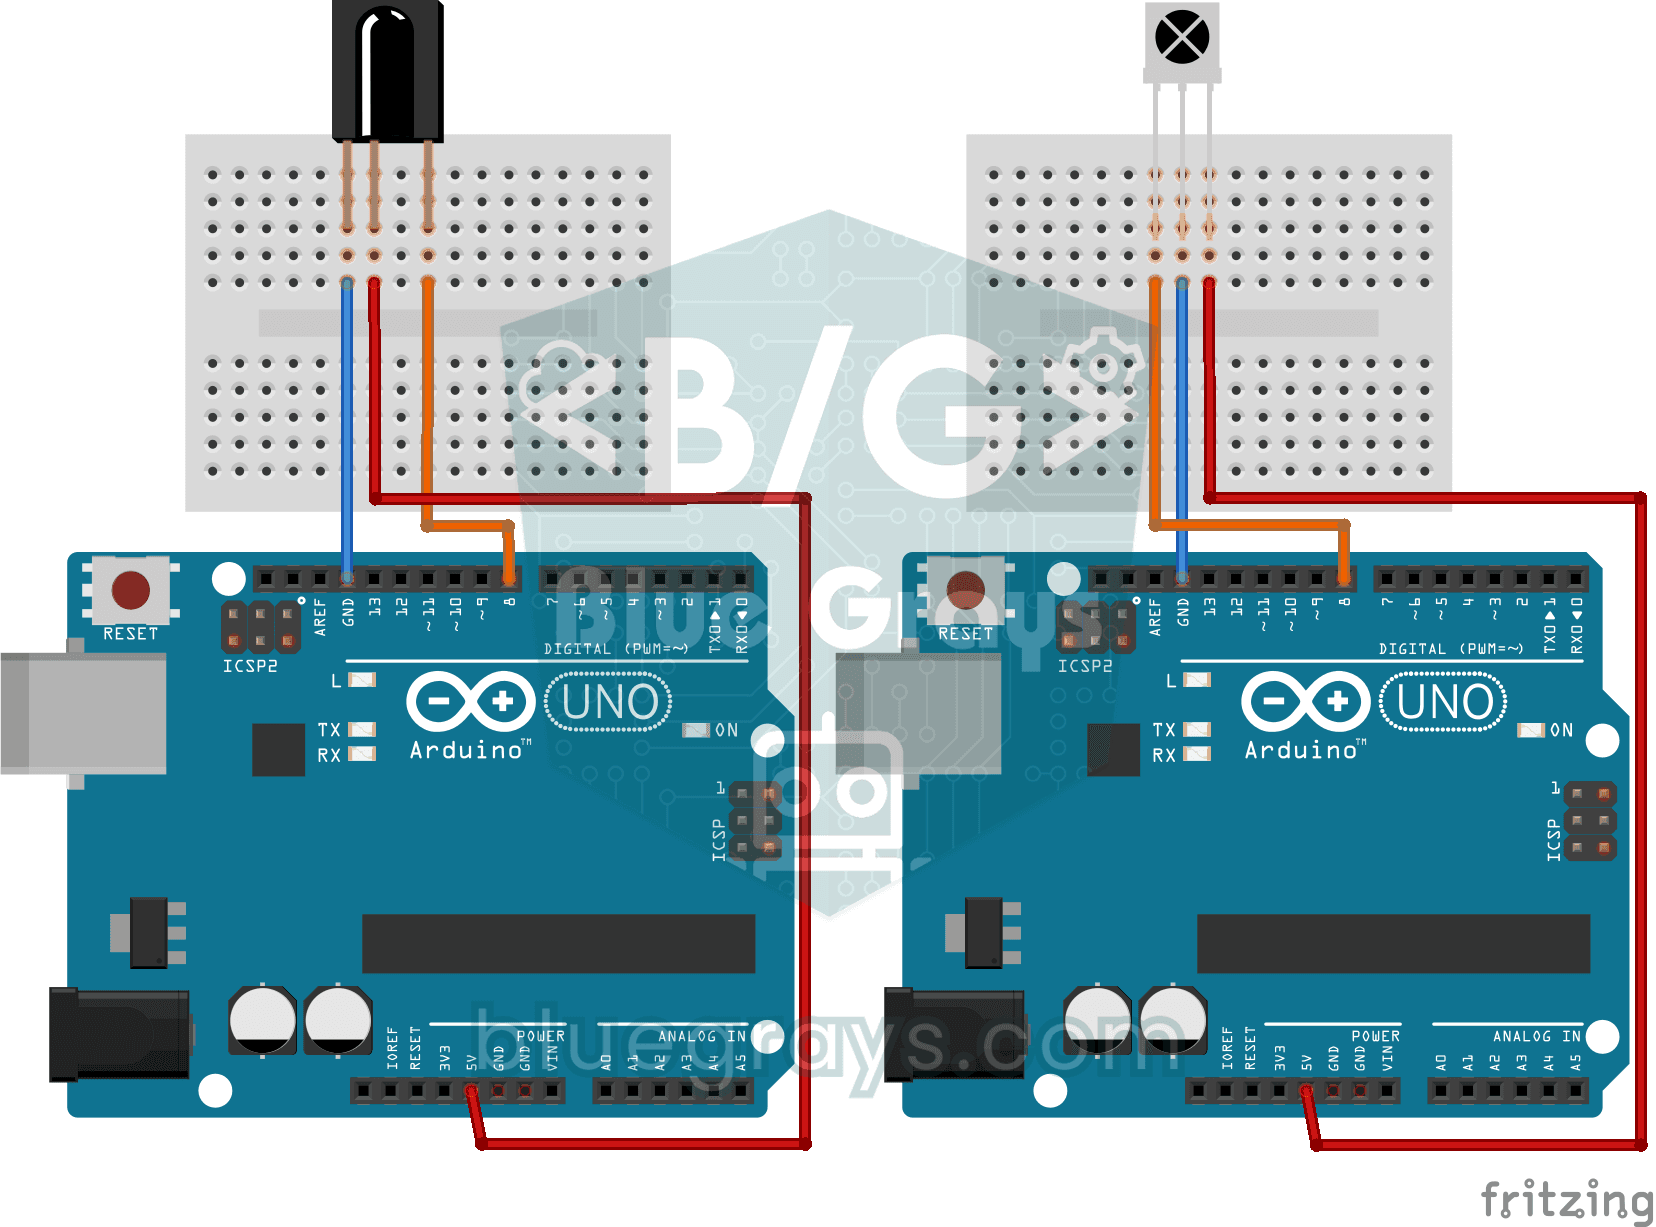
Reading IR Remote Control Codes
Every button on your TV remote sends a secret code using light you cannot see. The infrared receiver catches that light, and the Arduino writes the code of every button you press on your computer…
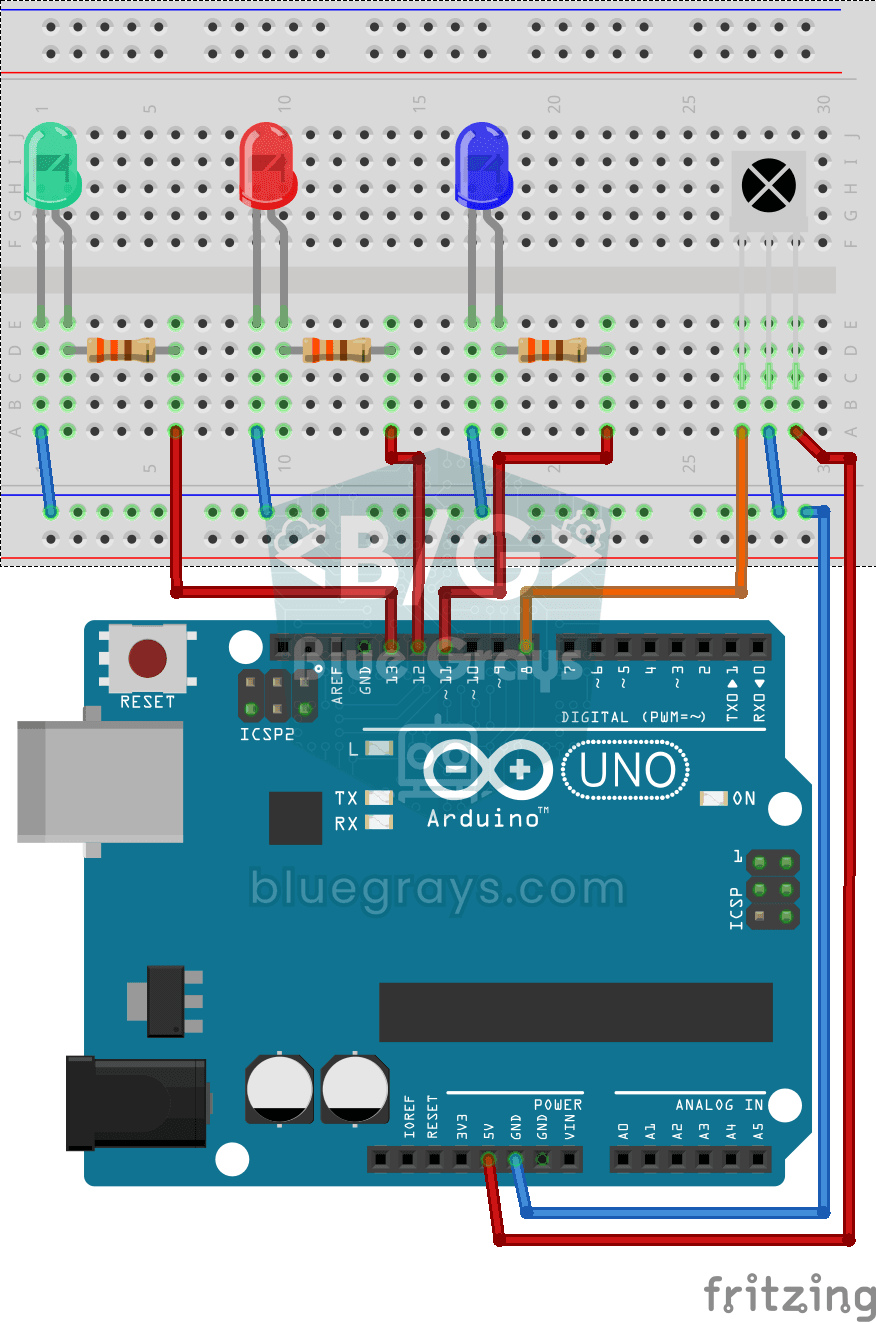
Led On/Off with IR Receiver and Remote Control
Like controlling three separate lamps without leaving your armchair: keys 1, 2 and 3 on the remote turn on the blue, red and green LEDs, and keys 4, 5 and 6 turn them off in the same order.
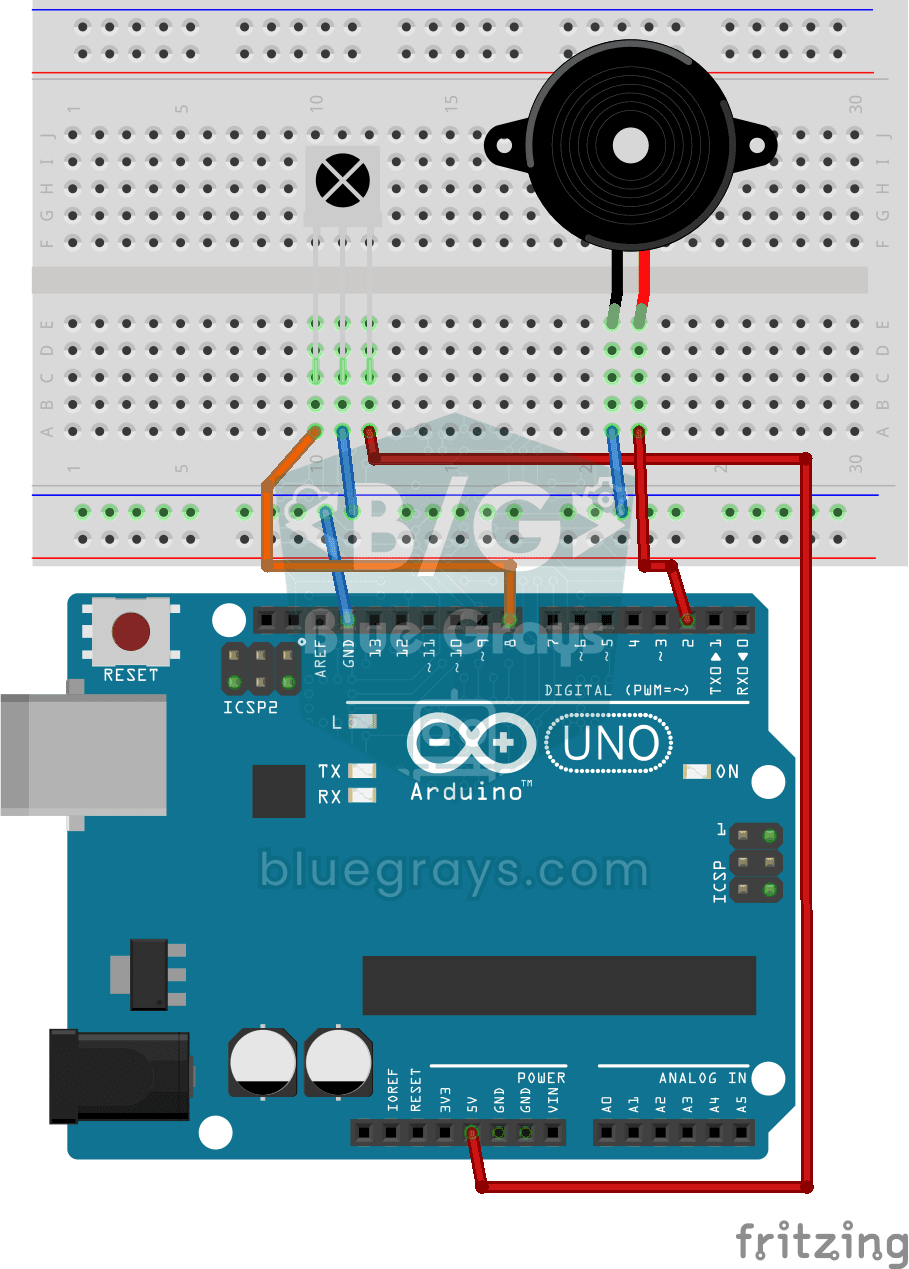
Playing Melodies with an IR Remote and Buzzer
Build a music box that plays tunes with the buttons of a TV remote. An infrared receiver catches the remote's signal; one button plays a lively video game tune through the buzzer, another a familiar…
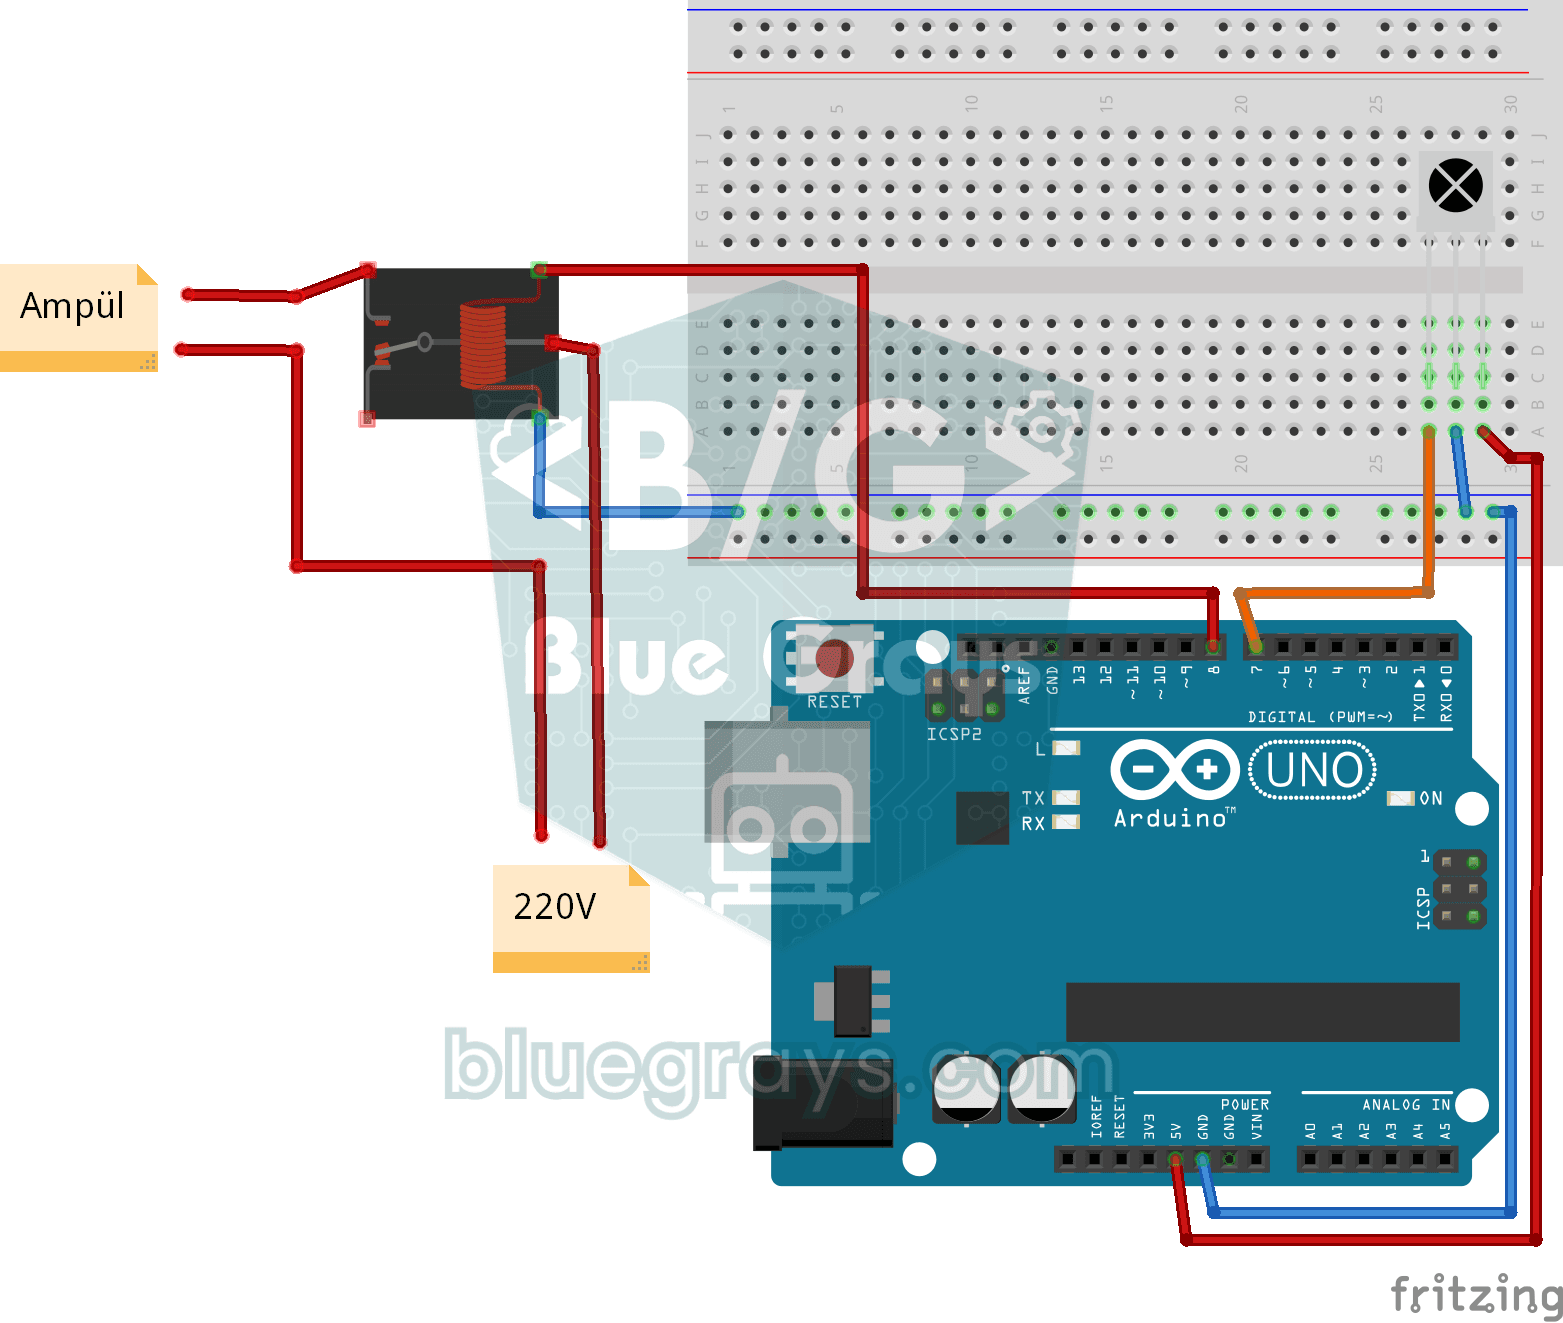
Lighting 220V Bulb with Remote Control
Switch a real light bulb in your home on and off with a TV remote, without getting up from the sofa.
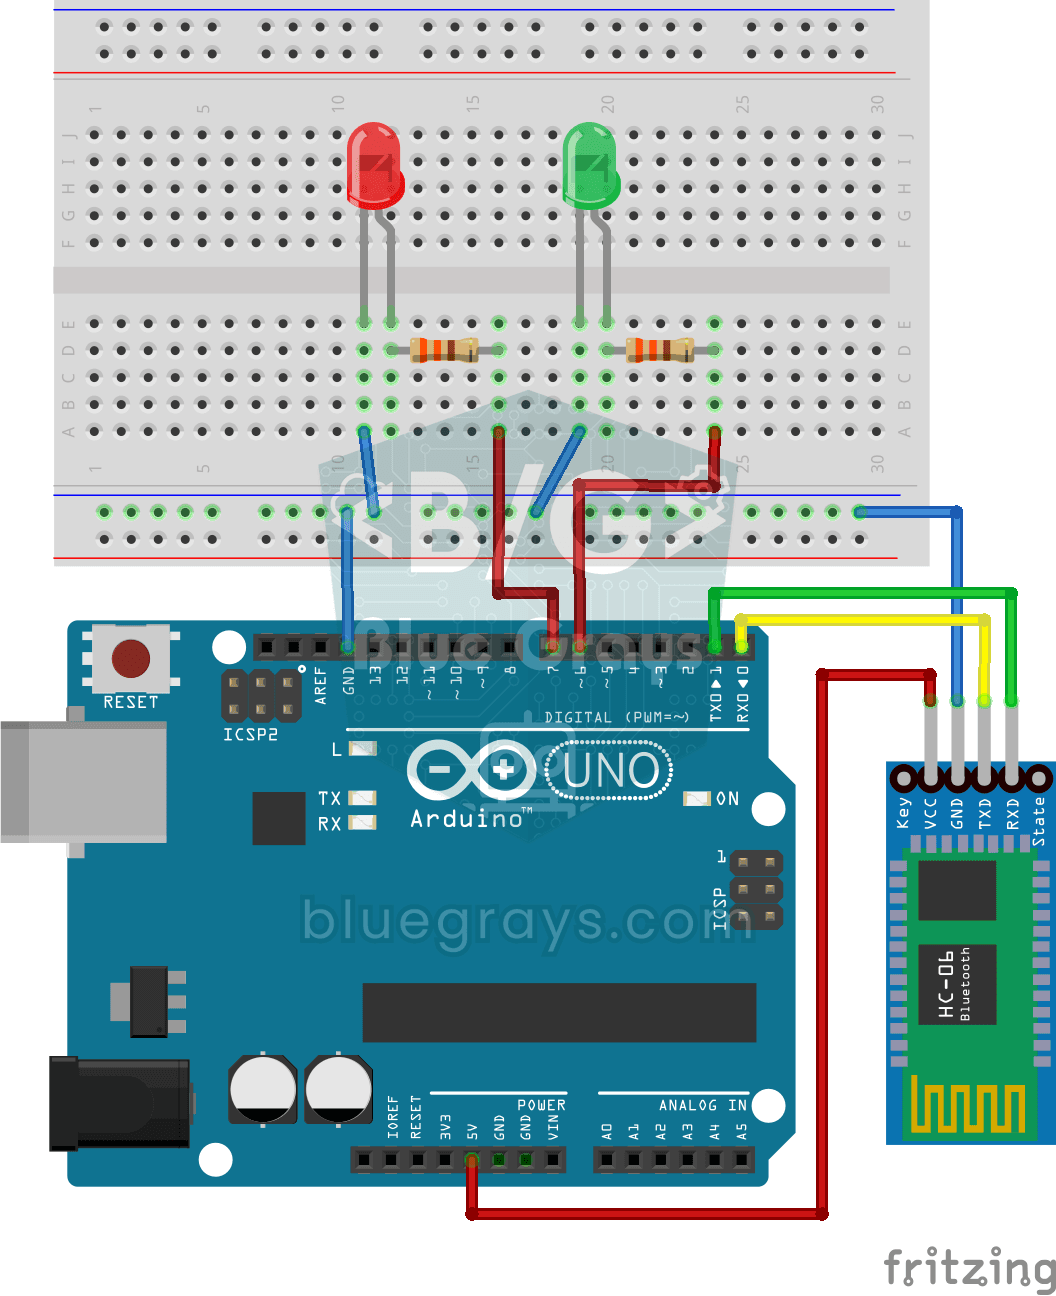
Control an LED from Your Phone via Bluetooth
A small rehearsal for switching the lights in your room on and off from your phone.

Bluetooth Controlled Car with L298N
Turn your phone into a remote and drive your own robot car. The Arduino receives commands from a remote-control app on your phone through a Bluetooth module and spins the wheels with a motor driver…

Remote Control with ESP32 IR Receiver (with LCD Screen)
In this project, we use the TSOP4838 IR receiver module to capture signals from a TV, air conditioner, or any other infrared remote control using the ESP32. With the IRremote v4 library, we display decoded nonzero raw codes on the I2C LCD screen. This example is intended to help identify remote control codes; it does not include turning an LED on or off or adjusting its brightness with the remote. This is a great starting point for converting old remotes into smart home controls.

Real-Time Clock from the Internet via ESP32 NTP
The ESP32 connects to Wi-Fi and fetches the real time from NTP (Network Time Protocol) servers with millisecond precision. configTzTime() applies the Turkey time zone (TRT, UTC+3) automatically, and in countries with daylight saving time the DST switch is handled by a POSIX TZ string. The time is printed both to the Serial Monitor and to an optional I2C LCD.

ESP32 WebSocket Counter (2 Buttons + LCD + Real-Time Web)
In this project, two buttons wired to the ESP32 (GPIO 5 counts up, GPIO 4 counts down) change a counter. The value updates instantly both on a 16x2 I2C LCD and, through the WebSocket support of ESPAsyncWebServer, in every connected browser without reloading the page. Instead of HTTP polling a single persistent connection is used, and the ESP32 sends the new value to everyone with ws.textAll().

ESP32 mDNS: Accessing the Device via bluegrays-esp.local (with LCD Screen)
In this project we add an mDNS (Multicast DNS) service to the ESP32, so you reach it by a readable host name like bluegrays-esp.local instead of an IP address. Even if the IP assigned by DHCP changes, the device always answers to the same name. A small web server on the board lets you control the LED from your browser at http://bluegrays-esp.local/.

ESP32 OTA Update — Wireless Firmware Installation (With LCD Screen)
In this project you'll learn to upload new firmware to the ESP32 over Wi-Fi, without a USB cable. With the ArduinoOTA library the ESP32 becomes visible on the network and shows up automatically as bluegrays-ota under "Network port" in the Arduino IDE. The first upload goes over USB; after that every update is wireless, a key feature for devices out in the field.

ESP32 HTTPClient + Weather API (with LCD Screen)
In this project the ESP32 makes a REST API call over the internet to a weather API (wttr.in) using HTTPClient.h. The JSON response is parsed with ArduinoJson v7, and the city, temperature, humidity, weather and wind are shown on an I2C LCD. wttr.in needs no API key; just type the name of any city.