
Arduino loyihalarini kashf qil
Boshlang‘ichdan yuqori darajagacha, sxemali, kodli va videoli yuzlab loyihalar. Qaysi darajada bo‘lsang, o‘sha yerdan boshla.

ESP32 RGB LED Control
Unlimited color generation with a single RGB LED instead of 3 separate LEDs. As in Arduino, we make a rainbow transition by setting the R/G/B values with analogWrite(). Color theory (such as red+green=yellow) is seen practically.

ESP32 Night Light with LDR
Night light where the LED automatically turns on in the dark and off in the light. The D0 (digital out) pin of the LDR Sensor Module is used - the dark threshold is set with the small potentiometer on the module, the module itself generates the HIGH/LOW output. ESP32 just reads this signal with digitalRead(), the code is very simple.

Reading Light Intensity with the ESP32 LDR Module
Real-time monitoring of the LDR module's raw ADC value and relative light percentage calculated from dark and light reference values in the Serial Monitor. This percentage is not a lux measurement. Teaches the module’s calibration logic. It is ideal to complete this before Project 10, as it is used to determine the threshold value.

ESP32 Melody Playback with Buzzer
Playing a simple melody (Twinkle Twinkle Little Star) with a passive buzzer. We play notes with tone() and noTone() functions like in Arduino - ESP32 works with the same syntax as Arduino Core 3.0+. Passive buzzer must be used (active buzzer does not play melody).
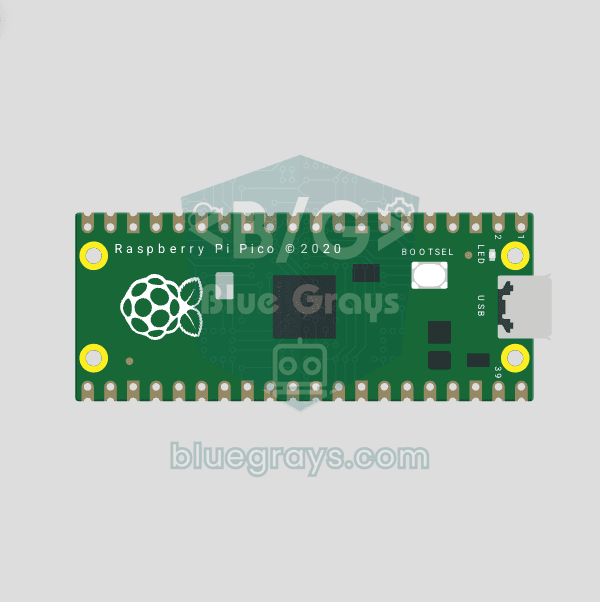
Raspberry Pi Pico Onboard LED Blink (Pico and Pico W)
The opening project of the Raspberry Pi Pico series! We blink the Pico's green built-in LED to confirm the board works, the classic "Hello World" first experiment. No external parts needed, just the Pico and a USB cable. The code is written in MicroPython, the language officially supported by the Raspberry Pi Foundation.
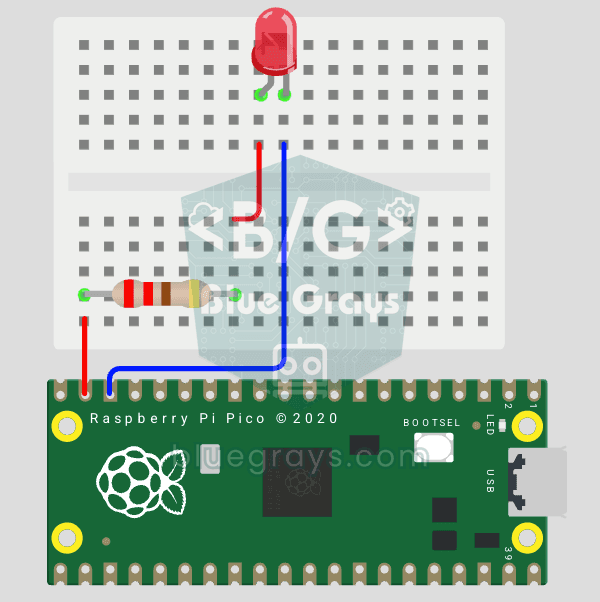
Raspberry Pi Pico: Controlling an External LED (Breadboard)
The next step after the Pico's built-in LED: connect an external LED on a breadboard and control it through pin GP14. You'll learn how to use any of the Pico's GPIO pins as an output, the LED's polarity (long leg = anode/+, short leg = cathode/–) and why a current-limiting resistor (220Ω) is a must. Without the resistor, too much current flows through the LED and it can burn out.
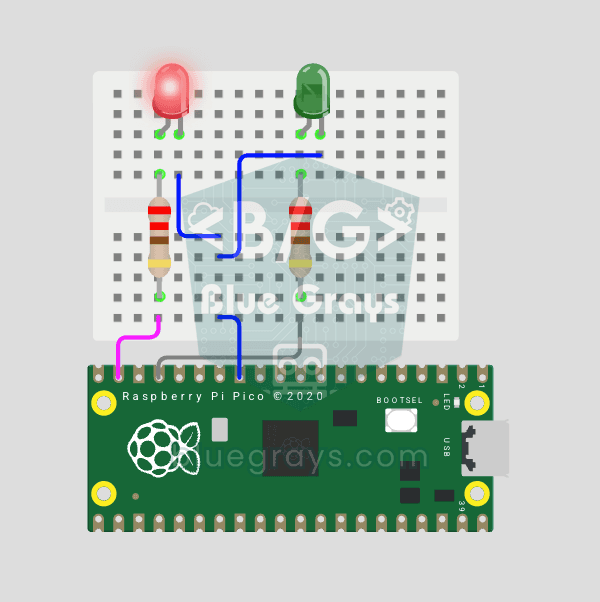
Raspberry Pi Pico Alternating Two LEDs (Blink-Flip Pattern)
The next step after the Pico's single LED: the classic flip-flop animation, with two LEDs blinking in turn. One LED turns off as the other turns on, the most basic example of handling multiple GPIOs. Two LEDs of different colors (red on GP14, green on GP13) swap every 500 ms. With MicroPython's Pin.toggle() method, the code stays short and readable.
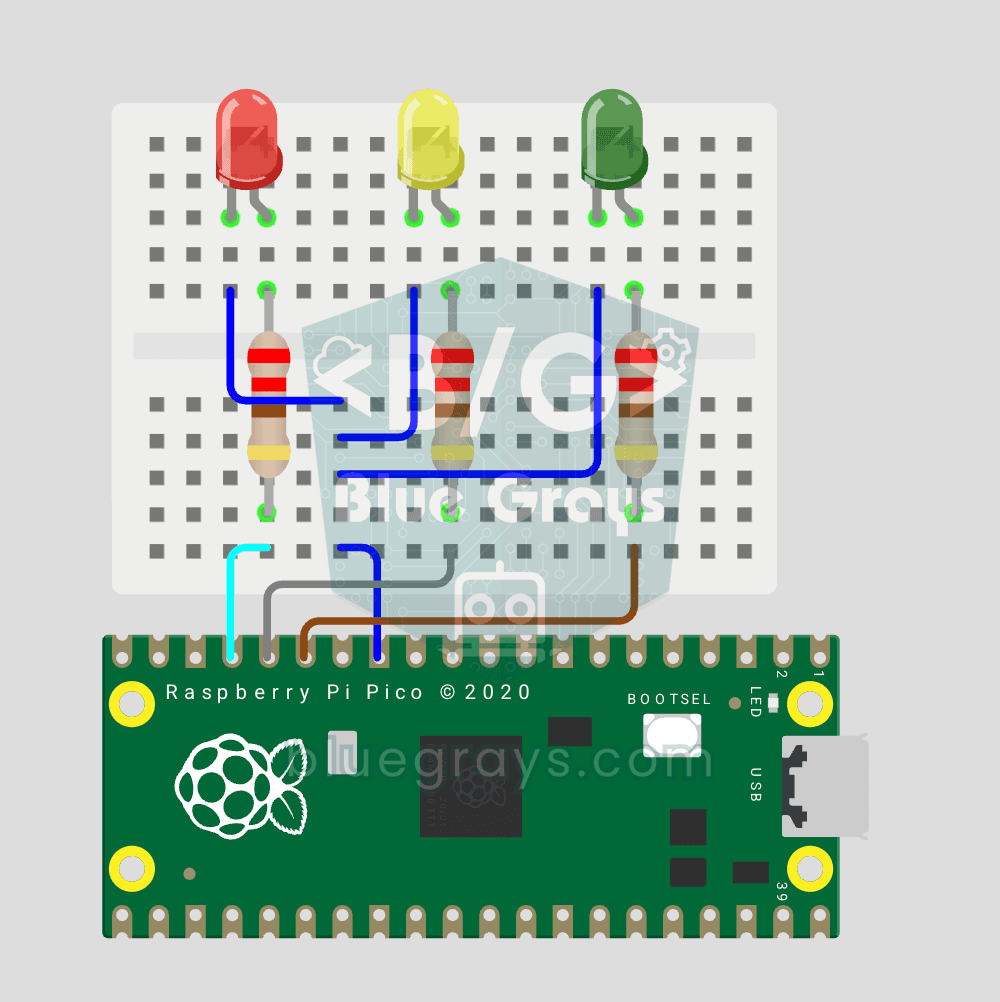
Raspberry Pi Pico Traffic Light Simulator (3 LEDs Sequential)
We recreate real traffic light logic with red, yellow and green LEDs, the first Pico project to move up to 3 LEDs! Green says "go" for 4 seconds, yellow "get ready" for 1.5 seconds, red "stop" for 3 seconds, and red+yellow "set off" for 1 second (the European traffic light pattern). You'll learn to define functions (def all_off()), state machine logic and multi-GPIO synchronization.
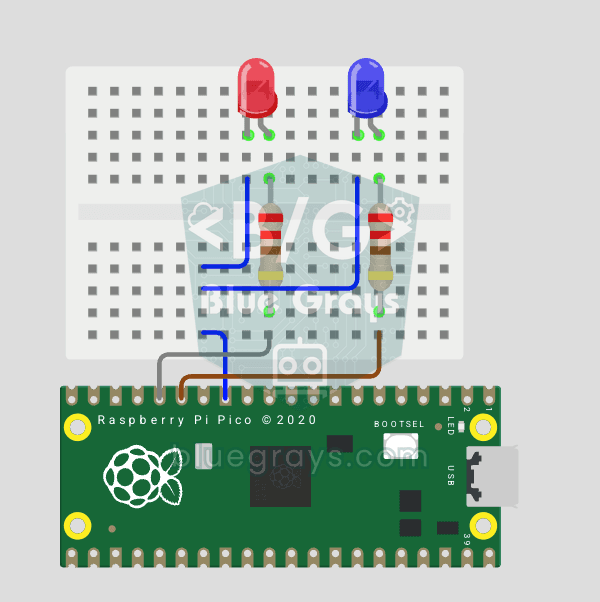
Raspberry Pi Pico Police Strobe Light Effect (Red + Blue)
We simulate a police car's light bar with a Raspberry Pi Pico in its simplest form! The red and blue LEDs take turns (flip-flop): while red is on, blue is off, and they swap every 0.3 seconds, forever. The code writes the two steps directly in a single while True loop; the speed is set with the WAIT_MS constant.
Raspberry Pi Pico 3-Burst Police Flip-Flop (2 LEDs)
Rhythmic variation of the police strobe project — 3-burst flip-flop! Same 2-LED circuit (GP11 red + GP12 blue), but a different pattern: red LED flashes 3 times rapidly, then blue flashes 3 times, forever. This "burst + switch" pattern is the most recognizable rhythm of real police siren lights. Learn parametrized function def burst(led, count, duration_ms), rhythm design, and generating different visual effects with code on same circuit.
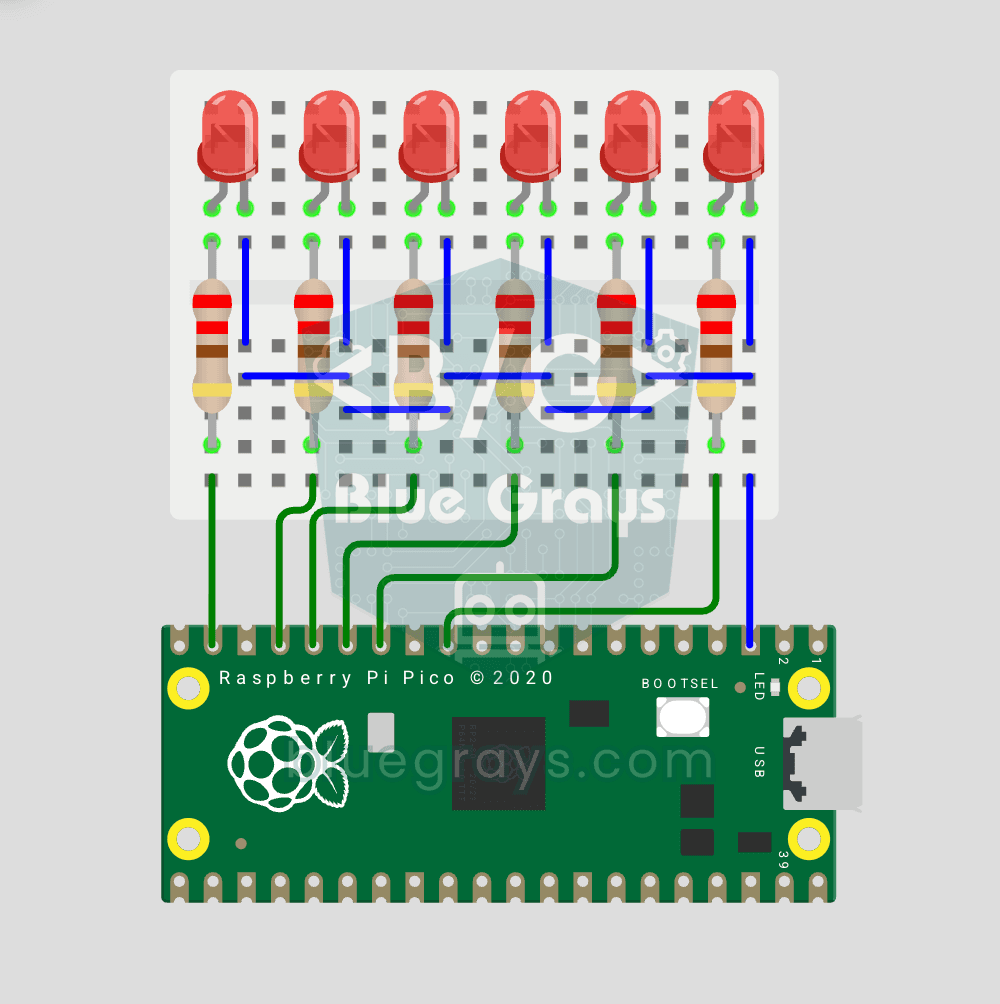
Raspberry Pi Pico Chasing LED (6 LEDs)
The classic "running LED" animation with the Pico, 6-LED version! Six LEDs light up one after another from left to right, as if the light were walking along the row. You'll learn Python lists (LED_PINS = [14, 13, 12, 11, 10, 9]), list comprehensions, controlling pins with a for loop and enumerate(). Six LEDs go on pins GP9-GP14, each with a 220Ω current-limiting resistor.
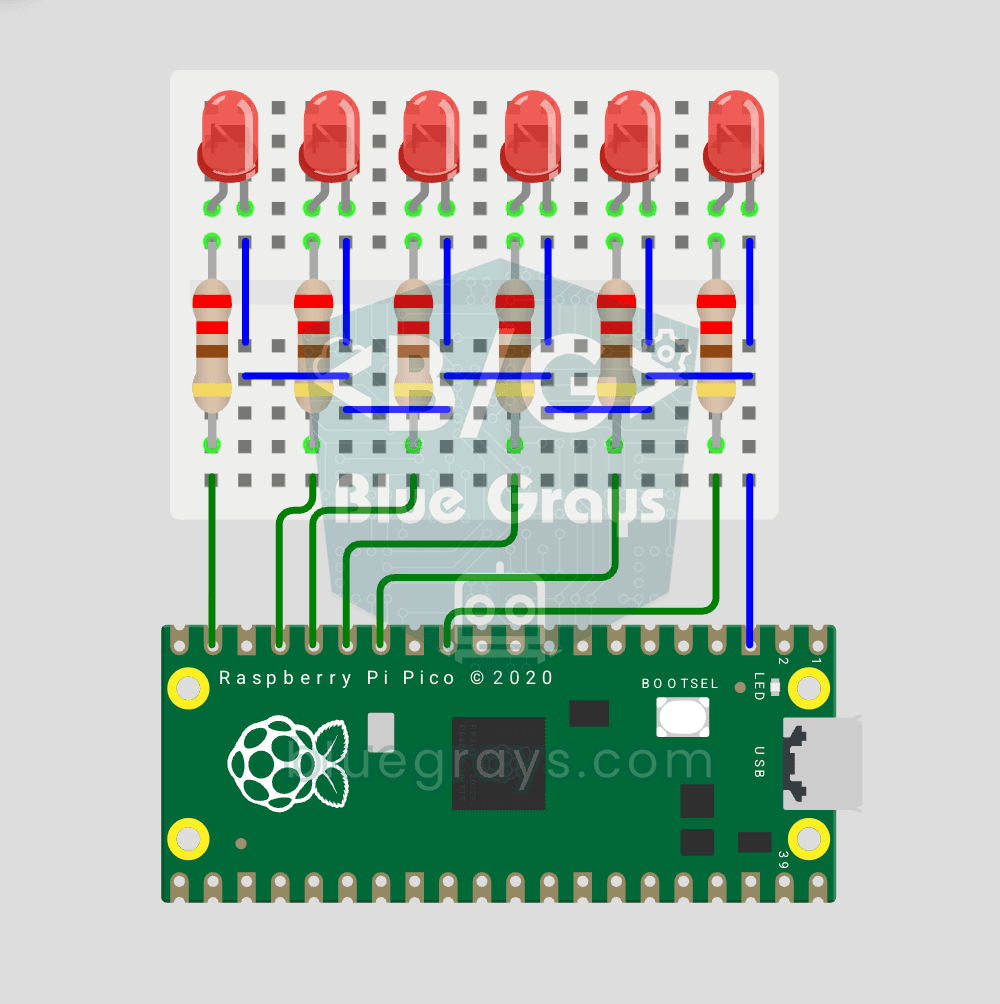
Raspberry Pi Pico Knight Rider LED Scanner (6 LED Back-Forth)
Classic "Knight Rider" LED scanner effect with Pico! 6 LEDs go left-to-right, then right-to-left, forever. Like the front grille of KITT car from the iconic 80s TV series. This project is an upgrade of the Chasing LED project: same 6 LED circuit (GP9-GP14), different code pattern. Learn reversed() function for list reversal, two separate for loops for back-and-forth pattern, and generating multiple animations on same circuit.