
What Is a Breadboard? Internal Connections and How to Use It Properly
What is a breadboard, how is it connected inside and how do you use it with Arduino? Rows, power rails, the center channel, sizes and the most common mistakes in a guide with examples.
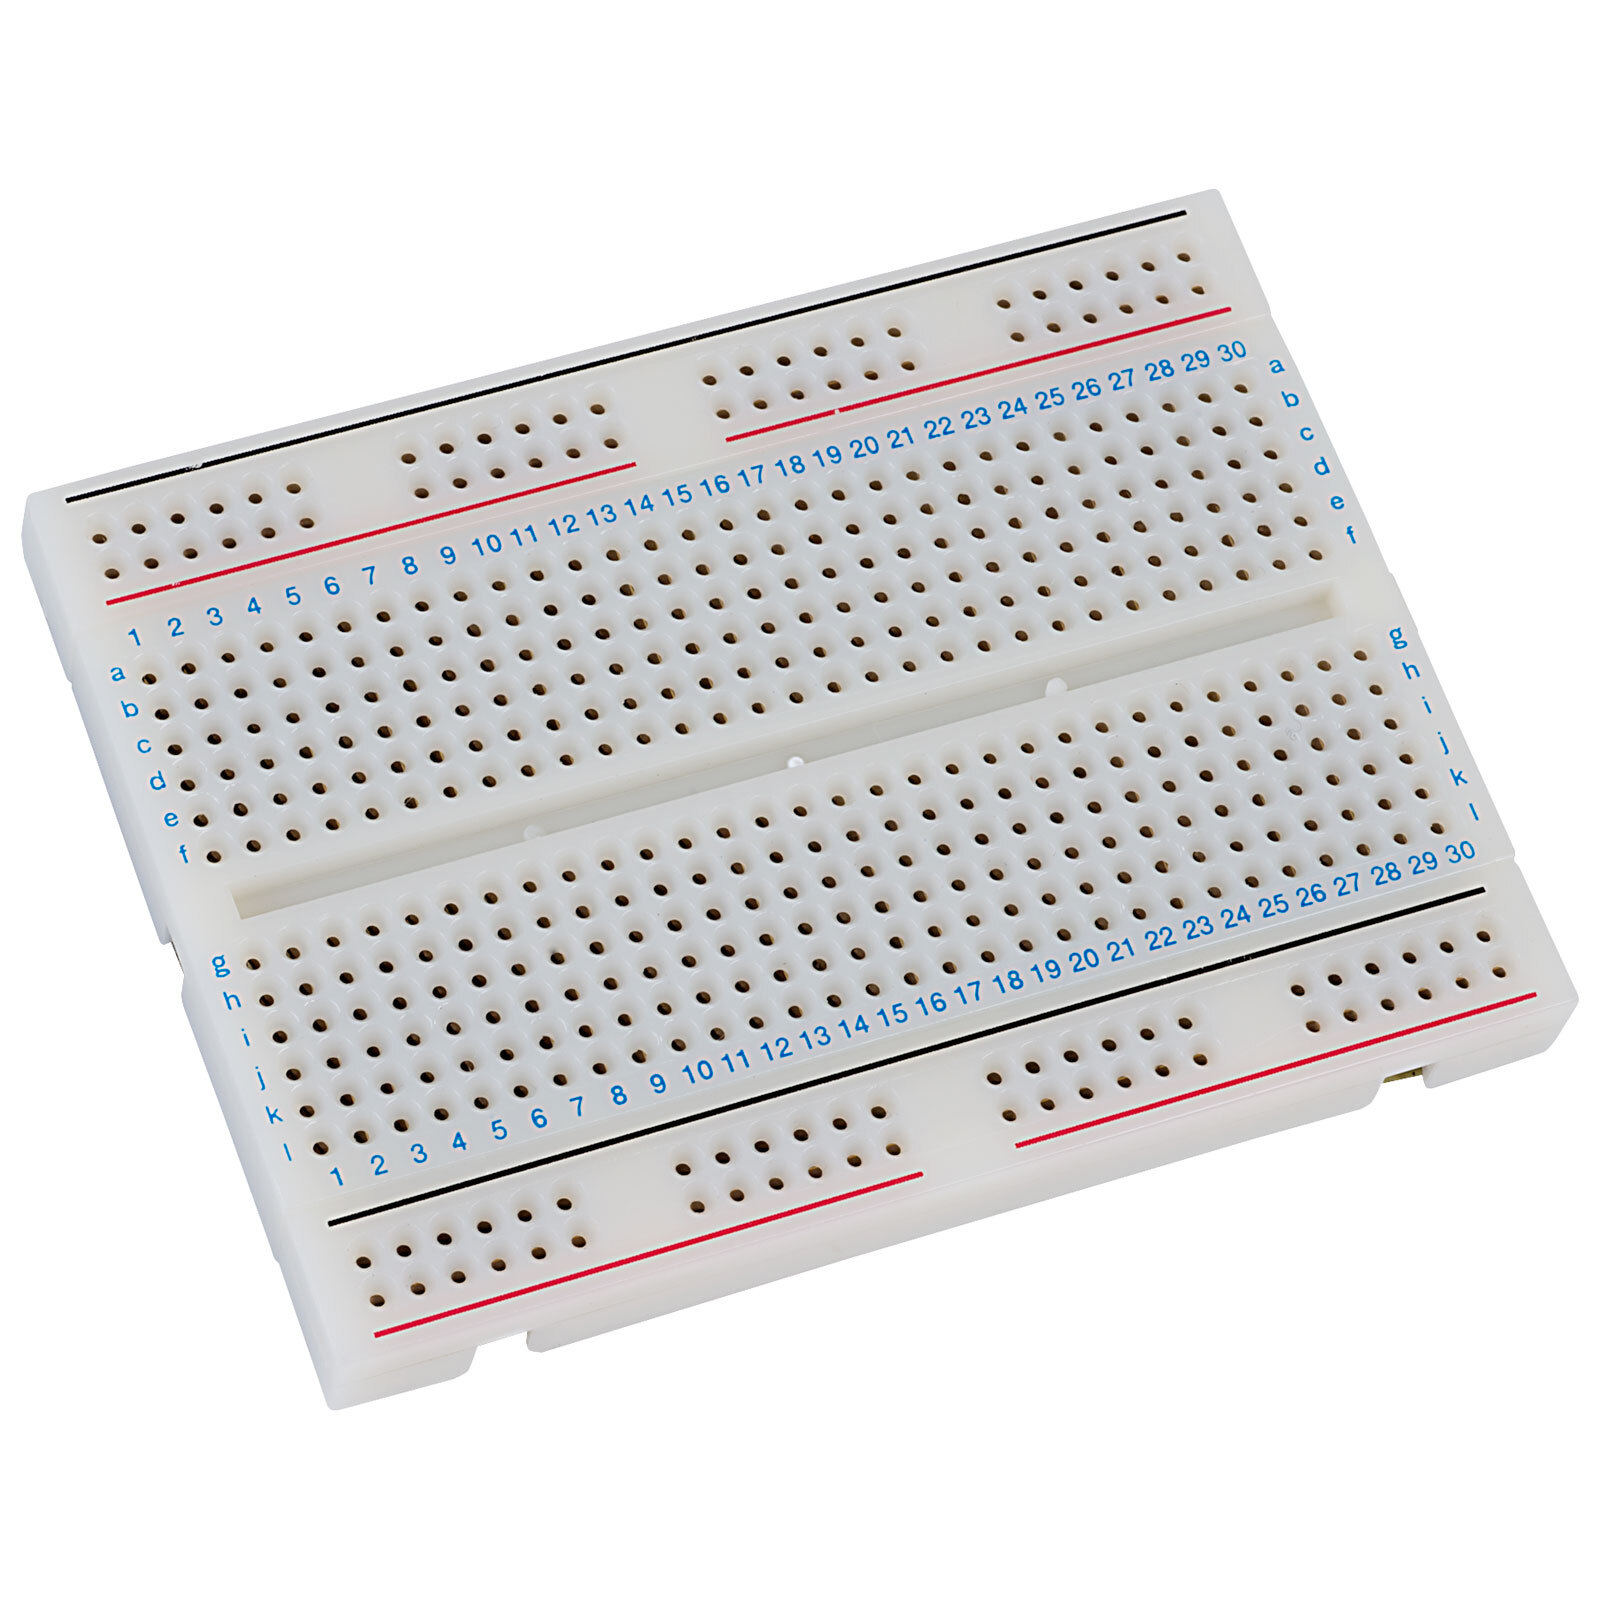
A breadboard (also called a solderless breadboard or prototyping board) is a plastic board full of holes that lets you connect parts and build circuits without soldering. Under the holes are springy metal clips; when you push a leg into a hole, the clip grips it and connects it electrically to the other holes on the same strip. That's why you can build, change and take apart a circuit in minutes.
Almost every beginner project with Arduino, ESP32 or Raspberry Pi Pico is built on a breadboard. Once you understand how a breadboard is connected inside, moving circuit diagrams onto the board becomes much easier.
How is a breadboard connected inside?
A breadboard has two different areas: the connection rows in the middle and the power rails along the edges. The holes are 2.54 mm (0.1 inch) apart; Arduino pins, sensor modules and chips are made with the same spacing.
- Connection rows: the 5 holes in each numbered row (a–e and f–j) are connected to each other. Two legs plugged into the same row are connected.
- Center channel: the groove in the middle separates the a–e and f–j groups. Chips (DIP) sit across this channel so that each leg lands in its own row.
- Power rails: the long strips with red (+) and blue or black (−) lines along the edges are connected end to end. Connect the Arduino's 5V and GND pins here to distribute power to the whole circuit.
- Split rails: on some large breadboards the power rails are split in the middle. If you see a gap in the red line, join the two halves with a short wire.
Breadboard sizes
| Size | Tie points | Good for |
|---|---|---|
| Mini | 170 | A single sensor or small module tests; no power rails |
| Half size | 400 | Most beginner projects; the size most often used with an Arduino Uno |
| Full size | 830 | Bigger circuits with several sensors, a display and chips |
Breadboards can snap together side by side, so you can add a second board as your project grows. To start, an 830-point full-size board and a pack of male-to-male jumper wires is the most comfortable choice.
Build your first circuit with Arduino: lighting an LED on a breadboard
- Connect the Arduino's 5V pin to the red (+) rail and its GND pin to the blue (−) rail.
- Plug the LED into two separate rows: the long leg (anode, +) in row 10 and the short leg (cathode, −) in row 11.
- Plug one leg of a 220 Ω resistor into the same row as the LED's short leg (11) and the other leg into the blue (−) rail.
- Connect the Arduino's digital pin 8 with a jumper wire to the row with the LED's long leg (10).
- Upload the code below; the LED should blink once a second.
const int LED_PIN = 8;          // LED'in bağlı olduğu pin / pin the LED is wired to

void setup() {
  pinMode(LED_PIN, OUTPUT);       // pini çıkış yap / set the pin as output
}

void loop() {
  digitalWrite(LED_PIN, HIGH);    // LED'i yak / LED on
  delay(1000);                    // 1 sn bekle / wait 1 s
  digitalWrite(LED_PIN, LOW);     // LED'i söndür / LED off
  delay(1000);                    // 1 sn bekle / wait 1 s
}
To choose the resistor value for the LED color and supply voltage, use the LED resistor calculator, and to read the value of a resistor you have, use the resistor color code tool. We explain why an LED isn't connected without a resistor in What Is an LED?.
The most common breadboard mistakes
- Plugging both legs of a part into the same row: if both ends of an LED or resistor are in the same row, they're shorted and the part acts as if it isn't there. Each leg must be in a different row.
- Forgetting a split power rail: if one half of the board works and the other doesn't, the power rail is probably split in the middle.
- Not sharing GND: if you use an external power supply or a second board, all GNDs must be connected together; otherwise signals read as nonsense.
- Inserting a button the wrong way: 4-leg tactile buttons sit across the center channel. If it's turned the wrong way, the button reads as always pressed.
- Giving 5 V to a 3.3 V module: the ESP-01 and some sensors run on 3.3 V. Always check which voltage you put on the power rail.
- Leaving wires too long: long, messy wires make debugging harder. Use wires as short as possible and stick to a color scheme: red for 5V, black for GND, other colors for signals.
What comes after the breadboard?
Once your circuit works and you want to make it permanent, you can solder it onto perfboard or design your own printed circuit board (PCB). But while learning and experimenting, the breadboard is the fastest method: swapping a part takes seconds.
In every beginner project on BlueGrays, the breadboard wiring is shown step by step together with the circuit diagram. To see where your board's pins are, check the pinout tool, and if you're new to Arduino, read What Is Arduino?.
Frequently asked questions
Can you solder on a breadboard?
No. A breadboard is designed to be used without solder; soldering damages the clips inside. For a permanent circuit, use perfboard or a PCB.
What do the red and blue lines on a breadboard mean?
They mark the power rails along the edges. Usually positive (5V or 3.3V) goes on the rail with the red line and negative (GND) on the blue or black one. These rails run end to end, but on some boards they're split in the middle.
Which jumper wires should I buy?
Male-to-male wires are used on the breadboard, while male-to-female and female-to-female wires connect to module pins. Buying one pack of each type is the most practical way to start.
Does an ESP32 fit on a breadboard?
Wide ESP32 DevKit boards can cover the pins on one side when plugged into a standard breadboard. Using two breadboards side by side, or placing the board at the edge and wiring the free side, works well.
Why do my breadboard connections drop out now and then?
On old or heavily used boards the clips can loosen, and parts with thin legs may not seat properly. Try plugging the part into a different row; if the problem continues, replace the board.
More articles
Learn the internal connections and power rails of the breadboard, which lets you build circuits without soldering, plus the mistakes beginners make most often.


