
ESP32 IoT RGB LED Strip (WS2812B)
Control your room's light from your phone: pick a color, set the brightness, turn on the rainbow or breathe effect. This project is the step-by-step guide to the RGB LED strip IoT template in the app, built with an ESP32 and a 30-LED WS2812B strip using three wires. Go to Workshop › Devices › Add a device and pick RGB LED strip; Ohmi prepares the code with your own device key. The code on this page is an example: the key and Wi-Fi details are placeholders.
Control this device from the app
Connect your ESP32 or Raspberry Pi Pico W to Wi-Fi, then switch it on and off and watch live readings from your phone. Ohmi prepares the code; you just enter your Wi-Fi details and upload it.
Template in the app: RGB LED strip
- Where is it in the app?Add a new device from the Tools tab or Workshop › Devices and pick this template.
- Arduino libraryOpen the Library Manager in the Arduino IDE, search for BlueGraysIoT and install it.
The free plan includes 1 device, 1 chart and 24 hours of history. Premium adds more devices, more charts and longer history.
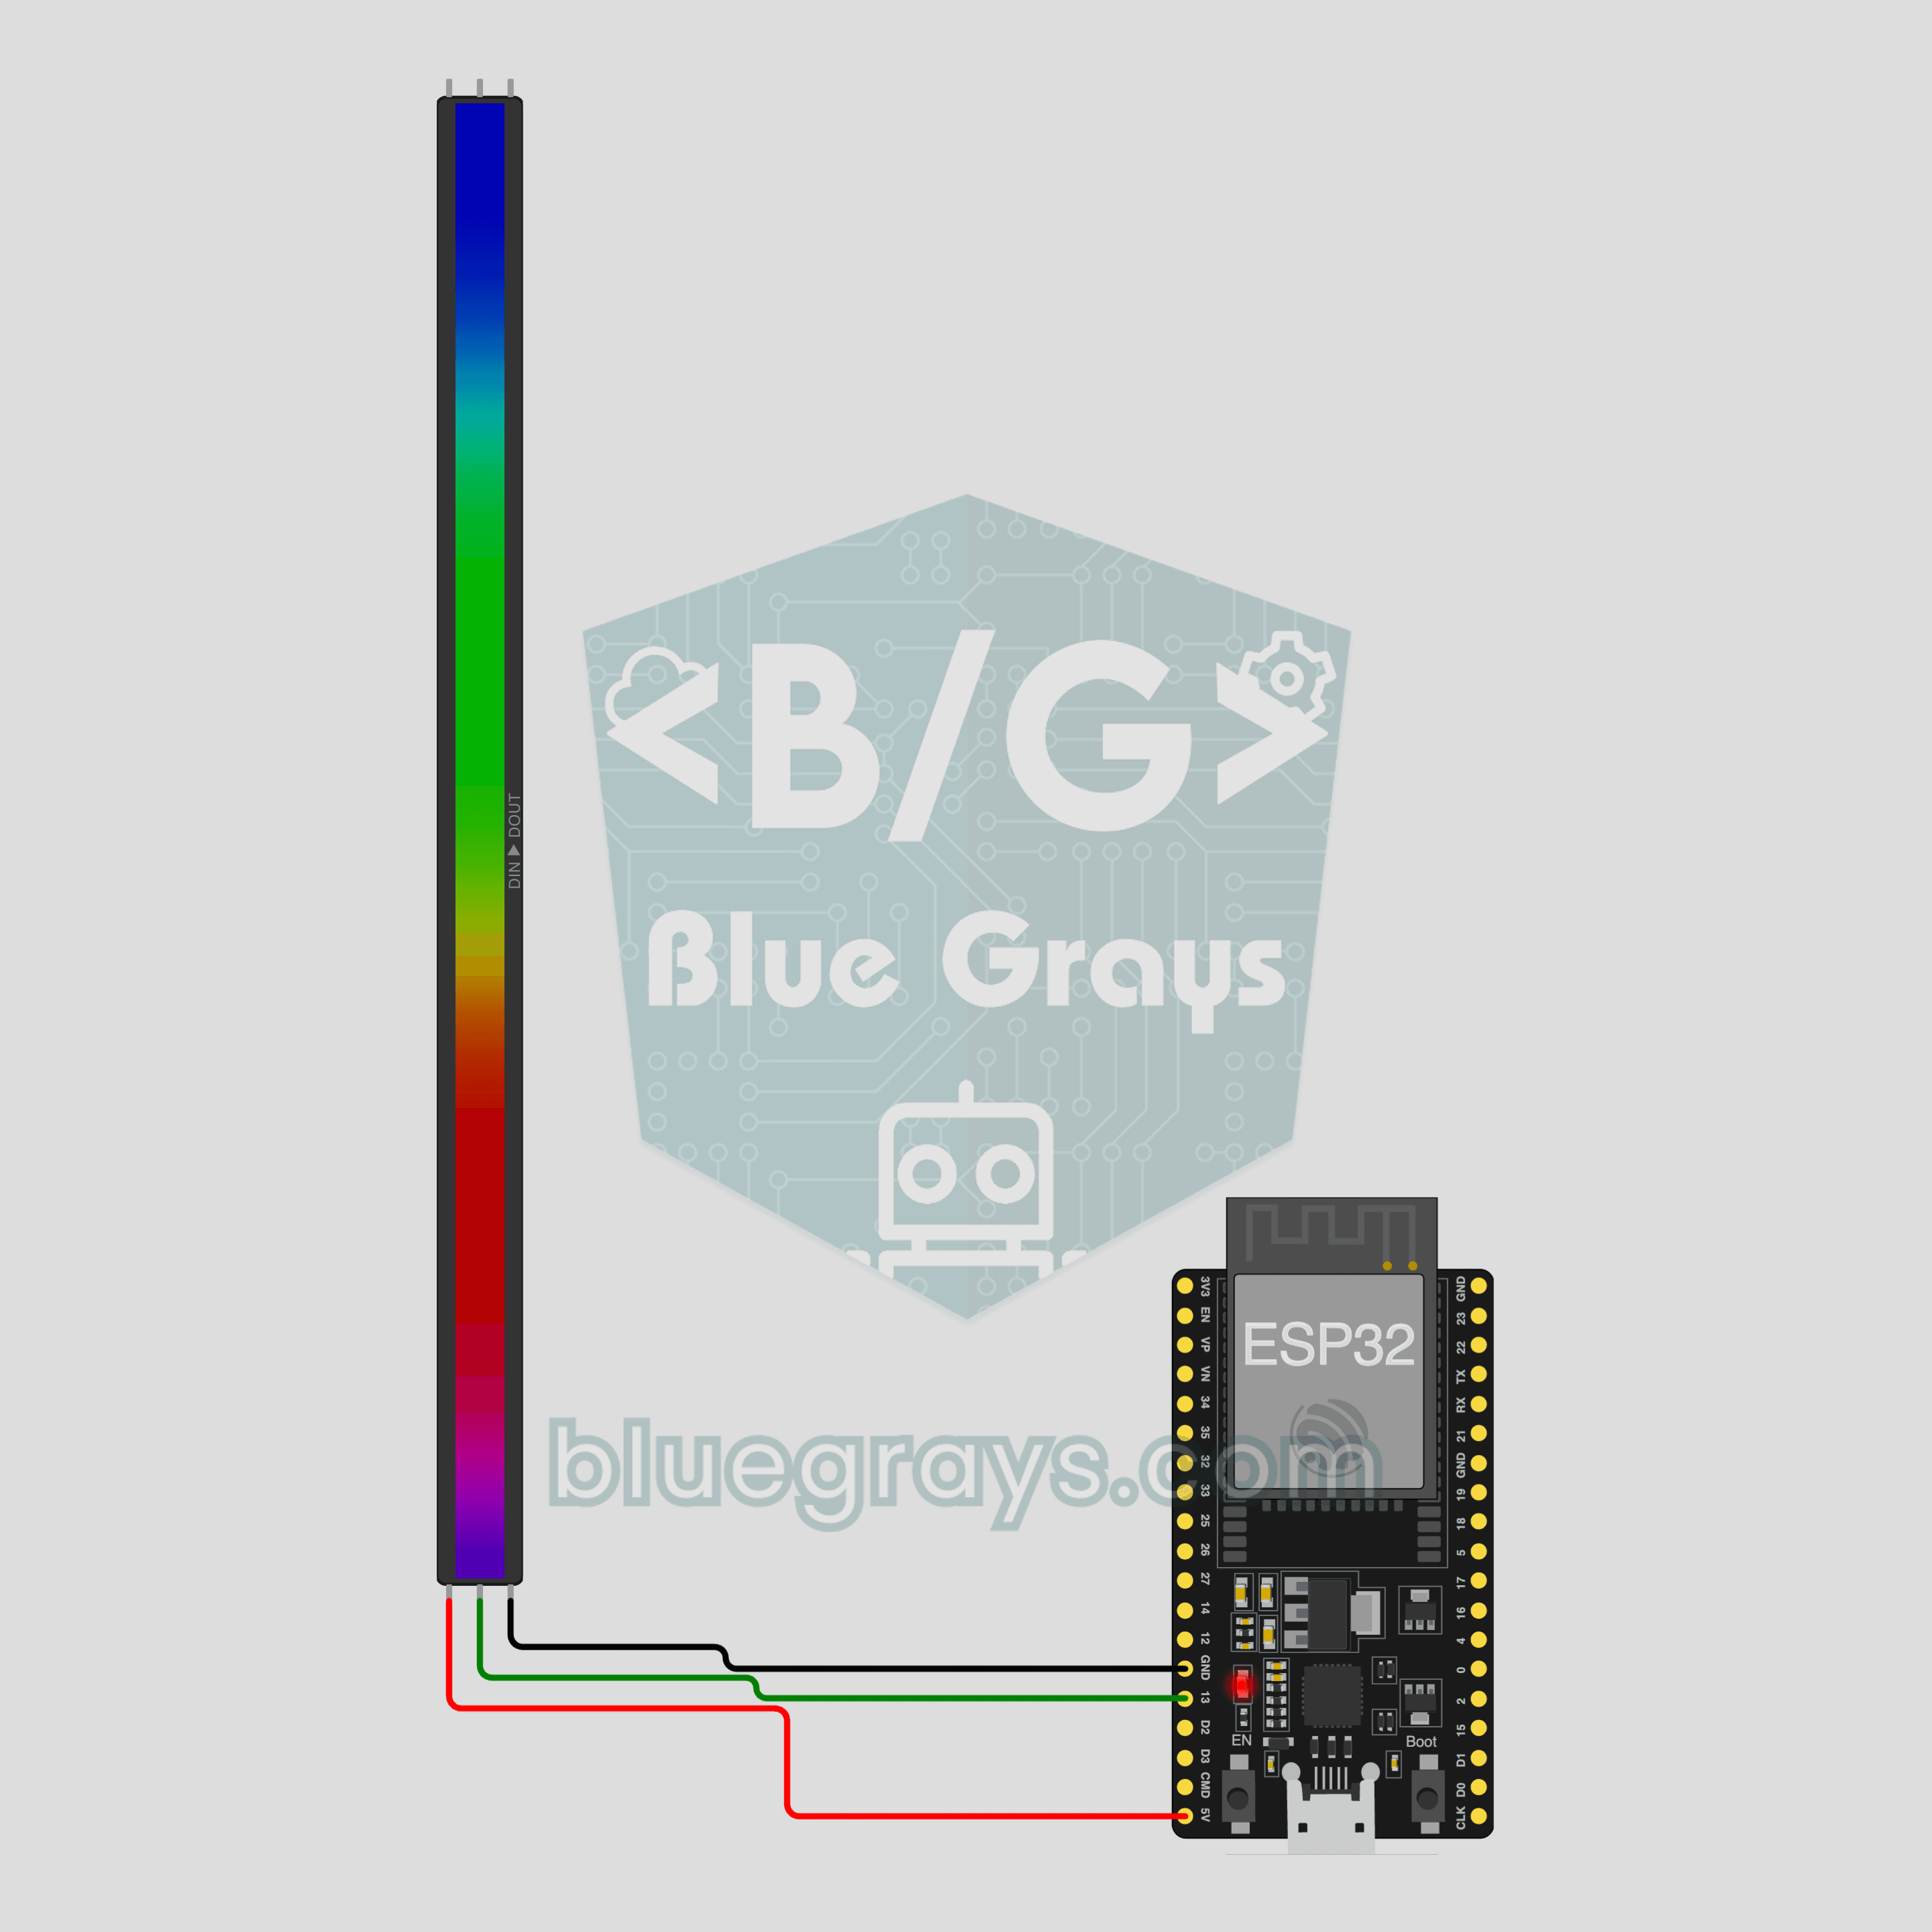
Circuit Diagram
Source Code
1// ─────────────────────────────────────────
2//   BlueGrays · bluegrays.com
3//   ESP32 IoT RGB LED Strip (WS2812B)
4// ─────────────────────────────────────────
5// The "RGB LED strip" IoT template from the BlueGrays app: change the
6// light, color, brightness and effect (solid, rainbow, breathe, blink) of
7// a 30-LED WS2812B strip from your phone. Ohmi prepares the real code in
8// the app with your own device key (Workshop › Devices › Add a device);
9// the code here is an example, the device key and Wi-Fi details are
10// placeholders. Library Manager: BlueGraysIoT (with its dependencies) and
11// Adafruit NeoPixel. The board only joins 2.4 GHz Wi-Fi networks. For 30
12// LEDs at full brightness, power the strip from a separate 5 V 2 A adapter
13// and join the grounds.
14//
15// Pins:
16//   GPIO13 -> WS2812B strip DIN
17//   5V, GND -> Strip 5V, GND
18//   Pico W: strip DIN GP2, 5V VBUS
19
20/*
21 * RGB LED strip · BlueGrays IoT
22 * BlueGrays · bluegrays.com
23 * Do not share this code: it contains your device key and Wi-Fi password.
24 */
25
26#include <BlueGraysIoT.h>
27#include <Adafruit_NeoPixel.h>  // Library Manager: 'Adafruit NeoPixel'
28
29const char *DEVICE_KEY = "YOUR_DEVICE_KEY";
30const char *WIFI_NAME = "YOUR_WIFI_NAME";
31const char *WIFI_PASSWORD = "YOUR_WIFI_PASSWORD";
32
33BlueGraysIoT bg(DEVICE_KEY);
34
35const int LED_COUNT = 30;
36Adafruit_NeoPixel strip(LED_COUNT, 13, NEO_GRB + NEO_KHZ800);
37bool isOn = false; uint8_t cr = 255, cg = 255, cb = 255; int brightness = 70; String effect = "sabit";
38void paint() {
39  strip.setBrightness(isOn ? map(brightness, 0, 100, 0, 255) : 0);
40  for (int i = 0; i < LED_COUNT; i++) strip.setPixelColor(i, strip.Color(cr, cg, cb));
41  strip.show();
42}
43
44void setup() {
45  Serial.begin(115200);
46  strip.begin();
47  paint();
48  bg.onSwitch("acik", [](bool on) { isOn = on; paint(); });
49  bg.onColor("renk", [](uint8_t r, uint8_t g, uint8_t b) { cr = r; cg = g; cb = b; paint(); });
50  bg.onNumber("parlaklik", [](float v) { brightness = (int)v; paint(); });
51  bg.onChoice("efekt", [](const char *e) { effect = e; paint(); });
52  bg.setDebug(Serial);
53  bg.setLanguage(BG_LANG_EN);
54  bg.begin(WIFI_NAME, WIFI_PASSWORD);
55}
56
57void loop() {
58  bg.loop();  // avoid long delay() calls here
59  if (isOn && effect == "gokkusagi") {
60    static uint16_t hue = 0; hue += 64;
61    for (int i = 0; i < LED_COUNT; i++) strip.setPixelColor(i, strip.gamma32(strip.ColorHSV(hue + i * 2000)));
62    strip.show(); delay(5);
63  } else if (isOn && effect == "nefes") {  // slowly fades out and in
64    float wave = (sin(millis() / 600.0) + 1.0) / 2.0;
65    strip.setBrightness((uint8_t)(map(brightness, 0, 100, 0, 255) * (0.15 + 0.85 * wave)));
66    strip.show(); delay(10);
67  } else if (isOn && effect == "yanip_sonme") {  // blinks every half second
68    strip.setBrightness((millis() / 500) % 2 ? map(brightness, 0, 100, 0, 255) : 0);
69    strip.show(); delay(10);
70  }
71}
72FAQ
Can I upload the code on this page straight to my board?
You can, but it will not connect: the device key and Wi-Fi details in it are placeholders. In the app go to Workshop › Devices › Add a device and pick RGB LED strip; Ohmi prepares the code with your key, network name and password. Copy that code and upload it. You can see the full code later in Device › Code and key.
Does it work with a Pico W?
Yes. Pick Pico W as the board when you add the device; the code stays the same and only the data pin changes: the strip's DIN goes to GP2, 5V to VBUS and GND to GND. In Arduino IDE install the "pico" package from Boards Manager and Adafruit NeoPixel from Library Manager. The circuit and photo on this page were made with an ESP32.
Can I power the strip from USB?
For short tests yes, but be careful: each LED draws about 60 mA at full white, so 30 LEDs at full brightness can reach 1.8 A. That is more than USB and the board can carry. For long use or high brightness, power the strip from a separate 5 V 2 A adapter and connect the adapter's GND to the board's GND. The code is for 30 LEDs; if your strip is longer, change LED_COUNT and pick the adapter to match.
What can I change in the app?
The device screen has four controls: the Light switch turns the strip on and off, the Color picker paints all LEDs one color, the Brightness slider goes from 0 to 100, and the Effect list offers Solid, Rainbow, Breathe or Blink. After a power cut, your last color, brightness and effect come back as soon as the board reconnects.