
ESP32-CAM Projects: 12 Ideas From Security Cam to QR Reader
12 ESP32-CAM projects: Telegram photos, PIR security camera, time-lapse, robot car, QR reading, with a resolution, power and difficulty table and ready code.
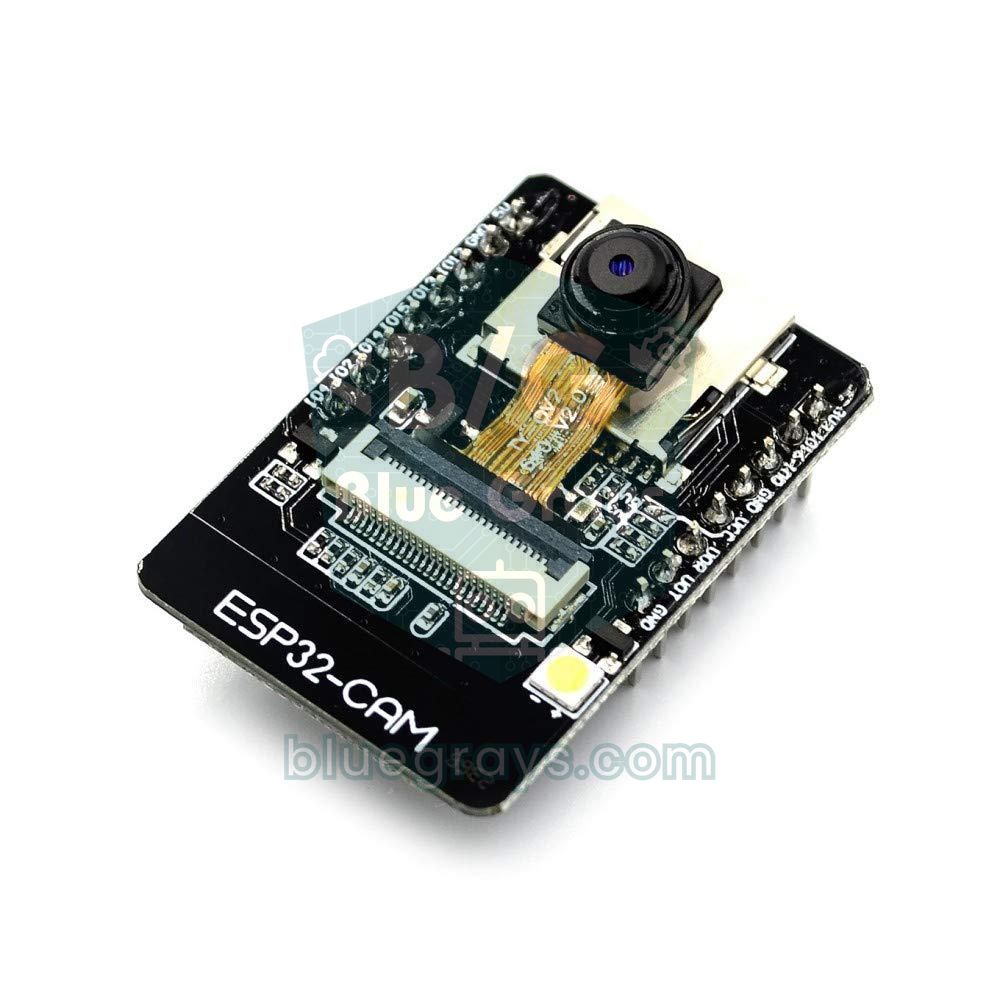
ESP32-CAM projects combine this matchbox-sized board's 2-megapixel OV2640 camera, its Wi-Fi and its microSD slot: a live stream you watch on your home network, a photo that lands on your phone when motion is detected, a time-lapse that records a plant growing for days, or a small image processing experiment that reads a QR code. The board is cheap, but the resolution, power supply and skills each project needs are very different. People who start with the wrong project usually end up fighting brownout errors or an overflowing memory instead of working with the camera.
In this guide we compare 12 project ideas, from easy to hard, in a single table: for each one you get the recommended resolution, how to power it, which extra parts it needs and its difficulty. We also explain how the AI-Thinker ESP32-CAM differs from the newer ESP32-S3 camera boards, and we give you ready code that wakes on a PIR sensor or on a timer and saves a photo to microSD. If you have never used the board, first finish setup and your first upload with the ESP32-CAM guide.
Know the board's limits before you start an ESP32-CAM project
At the heart of the ESP32-CAM sits an ordinary ESP32; what makes it a camera board is the 4 MB PSRAM on the board and the camera's 24-pin ribbon cable. The camera delivers images directly as JPEG, so the ESP32 never has to compress pixel by pixel. A 1600×1200 JPEG frame takes 100–250 KB and only fits in PSRAM. After the pins used by the camera, the SD card and the PSRAM, only a few free GPIOs are left: with the SD card in 1-bit mode you get GPIO 12 and 13, and without an SD card GPIO 2, 14 and 15 are free as well. This pin shortage shapes the plan of any project with motors or several sensors from the start. Power is the other limit: the board draws about 180 mA with the flash off, Wi-Fi peaks briefly go much higher, and a weak supply makes the board reboot.
| Feature | AI-Thinker ESP32-CAM | ESP32-S3 camera board (e.g. XIAO ESP32S3 Sense) |
|---|---|---|
| Processor | ESP32, dual core, 240 MHz | ESP32-S3, dual core, 240 MHz, vector instructions |
| PSRAM | 4 MB | 8 MB (faster octal PSRAM) |
| USB | None; needs USB-TTL or ESP32-CAM-MB | Built-in USB-C; uploads directly |
| Free GPIO | 2 pins with SD in 1-bit mode (GPIO 12, 13) | 5–10 pins depending on the board |
| Camera | OV2640, 2 MP | OV2640 or OV3660 (depends on the board) |
| Extras | microSD, flash LED | microSD, most have a digital microphone |
| AI | Face detection is slow and low resolution | Clearly faster with ESP-DL |
| Approx. price | $6–10 (with programmer board) | $15–25 |
| Best for | Live stream, photos, Telegram, time-lapse | Face detection, audio + video, projects needing many pins |
AI-Thinker or an ESP32-S3 camera board?
For most projects on this list the AI-Thinker ESP32-CAM is more than enough. Everything you need for live streaming, single photos, Telegram alerts and recording to microSD is on this board, and it is the cheapest option. The real difference shows up in image processing projects. The ESP32-S3's vector instructions run the neural networks in Espressif's ESP-DL library many times faster than the classic ESP32, and its 8 MB PSRAM easily holds bigger models and frame buffers. Built-in USB also removes the hassle of tying IO0 to GND for every upload. In short: if you want face detection, a baby monitor with a microphone or three or four sensors next to the camera, get an ESP32-S3 based camera board; if you want to take photos and send or save them, the AI-Thinker is enough.
12 ESP32-CAM projects: resolution, power and difficulty table
| # | Project | Recommended resolution | Power | Extra parts | Difficulty |
|---|---|---|---|---|---|
| 1 | Wi-Fi live stream camera | VGA (640×480) | 5 V / 2 A adapter | None | Easy |
| 2 | Instant photo and flash from a web page | UXGA (1600×1200) | 5 V / 2 A adapter | None | Easy |
| 3 | Photo to Telegram on motion | SVGA (800×600) | 5 V / 2 A adapter | PIR sensor | Medium |
| 4 | PIR security camera that records to microSD | UXGA | Adapter or 18650 + 5 V boost | PIR, microSD card | Medium |
| 5 | Time-lapse camera | UXGA or HD | Adapter or 18650 + deep sleep | microSD card | Medium |
| 6 | Bird box and wildlife camera | SVGA | 18650 + solar panel | PIR, NoIR lens, 850 nm IR LEDs | Hard |
| 7 | Robot car with live video | QVGA (320×240) | 2 × 18650 | Motor driver, chassis | Hard |
| 8 | Pan-tilt baby and pet camera | VGA | 5 V / 2 A adapter | 2 × SG90 servo, pan-tilt bracket | Medium |
| 9 | QR code reader | QVGA, grayscale | 5 V adapter | None | Medium |
| 10 | Face detection | QVGA or 240×240 | 5 V / 2 A adapter | ESP32-S3 board recommended | Hard |
| 11 | Video doorbell (Home Assistant) | VGA | 5 V / 2 A adapter | Button, buzzer | Medium |
| 12 | Water or gas meter reading | SVGA | 5 V adapter | Enclosure for a fixed frame | Hard |
The resolutions in the table are a starting point. In streaming projects a lower resolution means a higher frame rate: you get 20–30 frames per second at QVGA but drop to 2–5 at UXGA. In projects that save or send photos the frame rate does not matter, so you can pick the highest resolution. These 12 items are project ideas, and we give you what you need to build them for real. The ESP32 projects in the BlueGrays app teach the building blocks of these ideas step by step: ESP32 Motion Alarm System (PIR + Buzzer + LED + Telegram) covers motion detection and Telegram alerts, ESP32 Deep Sleep — Battery Saving covers deep sleep, and ESP32 Temperature Logger shows how to write files to microSD.
Starter projects (1–3): live stream, instant photo and Telegram
Project 1 needs no code from you at all: in the CameraWebServer example in the Arduino IDE, set the board model to CAMERA_MODEL_AI_THINKER, enter your Wi-Fi details and upload. When you type the IP address shown in the Serial Monitor into a browser, the settings page opens; the live stream comes from the /stream address on port 81. Put the board in a fixed spot such as a bedroom or a garage and watch it over your home network. Project 2 uses the same server's /capture address, which returns a single JPEG on every request. Add a button to your own web page, switch the flash on via GPIO 4, take the photo a few hundred milliseconds later, and you can look inside a dark cupboard or at a 3D printer bed whenever you like.
Project 3 is the most popular one on the list: when a PIR sensor detects motion, the ESP32-CAM takes a photo and sends it to your phone through a Telegram bot. Because a secure (HTTPS) connection is made to Telegram's server and the photo is uploaded in chunks, SVGA or XGA is a good balance between speed and sharpness. Setting up the bot, finding the chat ID and the full code are in the ESP32-CAM Telegram photo article. If you would rather start without a camera, the ESP32 Motion Alarm System project in the BlueGrays app builds the same Telegram logic with a PIR, a buzzer and an LED; adding the photo afterwards is easy.
Recording projects (4–6): PIR camera, time-lapse and bird box
Project 4 and Project 5 share the same code: the board wakes up, takes a photo, saves it to microSD and goes back to deep sleep. Because it never connects to the internet, it finishes much faster and works in a garden or a shed without Wi-Fi. The code below uses two wake-up sources together: when the PIR sensor on GPIO 13 sees motion, the board wakes immediately and starts the file name with pir_; even without motion it wakes every 10 minutes and saves a time-lapse frame starting with tl_. So the same board is both a security camera and a time-lapse camera.
| Part | ESP32-CAM pin | Note |
|---|---|---|
| PIR (HC-SR501) VCC | 5V | The module has its own regulator and runs on 5 V |
| PIR OUT | GPIO 13 | The output is 3.3 V and connects directly; this pin is free with SD in 1-bit mode |
| PIR GND | GND | Common ground |
| microSD card | Slot on the board | FAT32 formatted; 1-bit mode only uses GPIO 2, 14 and 15 |
| Power | 5V and GND | 5 V / 2 A; a 470–1000 µF capacitor between 5V and GND |
1// ESP32-CAM: zamanlayıcı ya da PIR ile uyan, fotoğrafı microSD'ye kaydet, uyu
2// ESP32-CAM: wake on timer or PIR, save a photo to microSD, go back to sleep
3// Kart / Board: AI Thinker ESP32-CAM
4#include "esp_camera.h"
5#include "FS.h"
6#include "SD_MMC.h"
7#include <Preferences.h>
8#include "driver/rtc_io.h"
9
10#define SLEEP_MINUTES 10        // zaman atlamalı çekim aralığı / time-lapse interval
11#define PIR_PIN GPIO_NUM_13     // PIR çıkışı (SD 1-bit modda boş) / PIR output (free in SD 1-bit mode)
12#define FLASH_PIN 4             // flaş LED'i / flash LED
13
14// AI-Thinker kamera pinleri / AI-Thinker camera pins
15#define PWDN_GPIO_NUM 32
16#define RESET_GPIO_NUM -1
17#define XCLK_GPIO_NUM 0
18#define SIOD_GPIO_NUM 26
19#define SIOC_GPIO_NUM 27
20#define Y9_GPIO_NUM 35
21#define Y8_GPIO_NUM 34
22#define Y7_GPIO_NUM 39
23#define Y6_GPIO_NUM 36
24#define Y5_GPIO_NUM 21
25#define Y4_GPIO_NUM 19
26#define Y3_GPIO_NUM 18
27#define Y2_GPIO_NUM 5
28#define VSYNC_GPIO_NUM 25
29#define HREF_GPIO_NUM 23
30#define PCLK_GPIO_NUM 22
31
32Preferences prefs;
33
34bool startCamera() {
35  camera_config_t config = {};
36  config.ledc_channel = LEDC_CHANNEL_0;
37  config.ledc_timer = LEDC_TIMER_0;
38  config.pin_d0 = Y2_GPIO_NUM;
39  config.pin_d1 = Y3_GPIO_NUM;
40  config.pin_d2 = Y4_GPIO_NUM;
41  config.pin_d3 = Y5_GPIO_NUM;
42  config.pin_d4 = Y6_GPIO_NUM;
43  config.pin_d5 = Y7_GPIO_NUM;
44  config.pin_d6 = Y8_GPIO_NUM;
45  config.pin_d7 = Y9_GPIO_NUM;
46  config.pin_xclk = XCLK_GPIO_NUM;
47  config.pin_pclk = PCLK_GPIO_NUM;
48  config.pin_vsync = VSYNC_GPIO_NUM;
49  config.pin_href = HREF_GPIO_NUM;
50  config.pin_sccb_sda = SIOD_GPIO_NUM;
51  config.pin_sccb_scl = SIOC_GPIO_NUM;
52  config.pin_pwdn = PWDN_GPIO_NUM;
53  config.pin_reset = RESET_GPIO_NUM;
54  config.xclk_freq_hz = 20000000;
55  config.pixel_format = PIXFORMAT_JPEG;
56  config.frame_size = FRAMESIZE_UXGA;     // 1600x1200, PSRAM gerekir / needs PSRAM
57  config.jpeg_quality = 10;               // 0-63, küçük sayı = yüksek kalite / lower = better
58  config.fb_count = 1;
59  config.fb_location = CAMERA_FB_IN_PSRAM;
60  config.grab_mode = CAMERA_GRAB_LATEST;
61  return esp_camera_init(&config) == ESP_OK;
62}
63
64void goToSleep() {
65  digitalWrite(FLASH_PIN, LOW);
66  rtc_gpio_hold_en(GPIO_NUM_4);           // uykuda flaş sönük kalsın / keep flash off while asleep
67  // PIR hâlâ HIGH ise bırakmasını bekle (en fazla 10 sn) / wait for PIR to release (max 10 s)
68  unsigned long t0 = millis();
69  while (digitalRead(PIR_PIN) == HIGH && millis() - t0 < 10000) delay(100);
70  esp_sleep_enable_ext0_wakeup(PIR_PIN, 1);                           // PIR HIGH olunca uyan / wake on PIR HIGH
71  esp_sleep_enable_timer_wakeup((uint64_t)SLEEP_MINUTES * 60ULL * 1000000ULL);  // ya da süre dolunca / or on timer
72  Serial.println("Uykuya geciliyor / Going to sleep");
73  Serial.flush();
74  esp_deep_sleep_start();
75}
76
77void setup() {
78  Serial.begin(115200);
79  rtc_gpio_hold_dis(GPIO_NUM_4);
80  pinMode(FLASH_PIN, OUTPUT);
81  digitalWrite(FLASH_PIN, LOW);
82  pinMode(PIR_PIN, INPUT);
83
84  bool byMotion = esp_sleep_get_wakeup_cause() == ESP_SLEEP_WAKEUP_EXT0;
85  Serial.println(byMotion ? "Uyanma: hareket / Wake: motion" : "Uyanma: zamanlayici / Wake: timer");
86
87  if (!startCamera()) {
88    Serial.println("Kamera baslatilamadi / Camera init failed");
89    goToSleep();
90  }
91  // İlk kareler karanlık olabilir; pozlama otursun diye 3 kare at / discard 3 frames so exposure settles
92  for (int i = 0; i < 3; i++) {
93    camera_fb_t* warm = esp_camera_fb_get();
94    if (warm) esp_camera_fb_return(warm);
95    delay(100);
96  }
97
98  camera_fb_t* fb = esp_camera_fb_get();
99  if (!fb) {
100    Serial.println("Fotograf alinamadi / Capture failed");
101    goToSleep();
102  }
103
104  // SD kartı 1-bit modda aç: GPIO 4, 12 ve 13 boşalır / 1-bit mode frees GPIO 4, 12 and 13
105  if (SD_MMC.begin("/sdcard", true)) {
106    prefs.begin("cam", false);
107    uint32_t n = prefs.getUInt("n", 0) + 1;   // sayaç elektrik kesilse de kalır / counter survives power loss
108    prefs.putUInt("n", n);
109    prefs.end();
110    char path[32];
111    snprintf(path, sizeof(path), "/%s%05lu.jpg", byMotion ? "pir_" : "tl_", (unsigned long)n);
112    File file = SD_MMC.open(path, FILE_WRITE);
113    if (file) {
114      file.write(fb->buf, fb->len);
115      file.close();
116      Serial.printf("Kaydedildi / Saved: %s (%u bayt / bytes)\n", path, (unsigned)fb->len);
117    }
118    SD_MMC.end();
119  } else {
120    Serial.println("SD kart yok / No SD card");
121  }
122  esp_camera_fb_return(fb);
123  goToSleep();
124}
125
126void loop() {}  // derin uyku nedeniyle hiç çalışmaz / never runs because of deep sleep
The details of the code matter. Because the SD card is opened in 1-bit mode, GPIO 4, 12 and 13 stay free; that lets us connect the PIR to GPIO 13 and stops the flash LED from blinking on every write. The camera's first frames are often dark or greenish because auto exposure and white balance have not settled yet, so the code throws away three frames and saves the fourth. The file number is stored in non-volatile memory with Preferences, so old photos are not overwritten even after a power cut. The rtc_gpio_hold_en line locks GPIO 4 LOW during sleep; otherwise the flash may glow faintly while asleep. Before sleeping, the board waits up to 10 seconds for the PIR output to return LOW; otherwise a sensor that is still HIGH would wake the board straight away.
Project 6, a bird box or wildlife camera, is the same code with a battery and night vision added. The standard OV2640 lens has a filter that blocks infrared light; if you want images at night you need a NoIR lens without the IR filter and 850 nm infrared LEDs, which birds cannot see. The battery maths is surprising: because of its regulator and PSRAM, the AI-Thinker board draws about 6 mA even in deep sleep. A board that stays awake for 3–4 seconds every 10 minutes averages around 7 mA, and almost all of it comes from sleep; a 2600 mAh 18650 cell with a 5 V boost converter lasts about 9–10 days. For a camera that runs for months, either add a small solar panel or use a timer chip such as the TPL5110 to cut the board's power completely during sleep.
Projects that move (7–8): robot car and pan-tilt camera
In Project 7 the ESP32-CAM becomes the eyes of a robot car: you watch the live picture in your phone's browser and drive with buttons on the same page. QVGA keeps the latency low. The motor driver's four input pins go to GPIO 12, 13, 14 and 15, which are free when no SD card is used; power the motors from a separate battery pack, not from the board's 5 V line. Chassis, driver choice and web interface are explained step by step in the ESP32-CAM robot car article. In Project 8 two SG90 servos turn a pan-tilt bracket left, right, up and down; you aim the camera from your phone while watching the baby's room or your pet. The camera uses LEDC timer 0 for its XCLK signal, so give the servo library a different timer; otherwise the picture breaks up or the servos jitter.
Image processing projects (9–10): QR code reading and face detection
In Project 9 the camera delivers grayscale raw pixels instead of JPEG, and a quirc-based library (for example ESP32QRCodeReader) scans each frame for a QR code. At QVGA a few frames per second are processed; that is fast enough to scan a code on a box to unlock a door or to keep an inventory. Hold the code 15–25 cm from the camera in good light; the OV2640's fixed-focus lens sees codes that are too close as a blur. Project 10, face detection, is the most wanted project and the one that disappoints most. The old 2.0.x releases of the Arduino ESP32 core had face detection and recognition buttons in the CameraWebServer example; newer releases removed those options from the example. The classic ESP32 can check only a few faces per second at low resolution, and recognition is not reliable. For a serious face detection project, an ESP32-S3 based board and Espressif's ESP-WHO examples give far better results.
Smart home projects (11–12): video doorbell and meter reading
In Project 11, pressing the bell button sounds a buzzer, the ESP32-CAM takes a picture of your doorstep and the image arrives on your phone. If you run Home Assistant, the cleanest route is ESPHome's esp32_camera component: you describe the board in a few lines of YAML, the camera appears in Home Assistant as an entity, and you build an automation that sends a snapshot as a notification when the button is pressed (ESPHome setup). Project 12 makes an old mechanical water or gas meter smart: the camera is fixed over the meter, the digits in the image lit by the flash LED are read by a small neural network running on the board, and the consumption value is sent to Home Assistant over MQTT. The ready-made, open-source AI-on-the-edge-device firmware is widely used for this; installing and configuring it is much quicker than writing your own code.
Common ESP32-CAM project mistakes and fixes
| Symptom | Likely cause | Fix |
|---|---|---|
| Brownout detector was triggered, the board keeps rebooting | Weak supply or thin, long wires | Use a 5 V / 2 A adapter and add a 470–1000 µF capacitor close to the 5V pin |
| Camera init failed with error 0x105 | Camera not found: ribbon cable not seated or wrong model selected | Reseat the ribbon cable and check the CAMERA_MODEL_AI_THINKER pin definitions |
| SD Card Mount Failed | Card is not FAT32 or is too large | Format the card as FAT32, prefer 32 GB or less, try 1-bit mode |
| Recordings are dark or greenish | First frames were taken before exposure settled | Discard 2–3 frames before saving and switch the flash on before the shot |
| Live stream freezes and drops frames | Weak Wi-Fi or high resolution | Drop to VGA or QVGA, move the board closer to the router, switch to an external antenna |
| Battery runs out in a few days | The board draws about 6 mA even in deep sleep | Lengthen the wake interval, add a solar panel or cut power with a TPL5110 |
Which ESP32-CAM project should you start with?
- Using the board for the first time: start with Project 1. If CameraWebServer runs, your power, upload and Wi-Fi are all fine.
- You want alerts on your phone: move on to Project 3; test the bot first with a camera-less PIR + Telegram alarm, then add the photo.
- You want to record somewhere without internet: use the code above for Projects 4 and 5 and change the interval and file names to suit you.
- You want a camera that runs for months on a battery: plan Project 6 with a solar panel or a timer that cuts power, and account for the board's sleep current.
- You like motion and control: Projects 7 and 8; get a motorless live stream working first, then add the motor driver or the servos.
- You are curious about image processing: start with QR code reading and move to an ESP32-S3 based board for face detection.
The beauty of the ESP32-CAM is that with the same small board you can build a working security camera in a weekend and a device that processes images a month later. Whichever project you pick, a solid 5 V supply and the right resolution are half the job. In the BlueGrays app you will find ESP32 projects such as a motion alarm that sends Telegram alerts, deep sleep battery saving, data logging to microSD, mDNS and over-the-air updates, each with a circuit diagram, parts list and ready code, so you can combine these building blocks into your own camera project.
Frequently asked questions
What can you do with an ESP32-CAM?
You can build a live stream camera for your home network, an alarm that sends a photo to Telegram when it detects motion, a security camera that records to microSD, a time-lapse camera, a robot car with live video, a QR code reader and a video doorbell. Because the board combines Wi-Fi and a 2 MP camera, most projects need no extra modules.
What voltage does the ESP32-CAM need?
The most reliable way is to connect a 5 V supply that can deliver at least 2 A to the board's 5V pin; the onboard regulator brings it down to 3.3 V. It can also be powered from the 3V3 pin, but the voltage drop while Wi-Fi and the camera run together causes brownout errors.
How long does an ESP32-CAM last on a battery?
A board that streams continuously draws about 180 mA on average and runs for about 9 hours on a 2600 mAh 18650 cell with a 5 V boost converter. A board that waits in deep sleep between photos lasts days or weeks, but since the AI-Thinker board draws about 6 mA even while asleep, months of runtime are only possible with a solar panel or a timer that cuts the power.
Can the ESP32-CAM do face recognition?
It can do simple face detection at low resolution, but on the classic ESP32 this is slow and face recognition is not reliable. Newer Arduino core releases removed the face detection options from the CameraWebServer example; for a serious project an ESP32-S3 based camera board and Espressif's ESP-WHO examples are a better fit.
Does the ESP32-CAM work without internet?
Yes. Projects that save photos to a microSD card work without ever joining Wi-Fi, and the board can open its own access point (AP mode) to stream live video directly to your phone. Features such as Telegram alerts or remote viewing do need an internet connection.
What size microSD card does the ESP32-CAM support?
The official documentation lists cards up to 4 GB, but in practice FAT32-formatted 8–32 GB cards usually work fine. If you use the card in 1-bit mode, GPIO 4, 12 and 13 stay free and the flash LED does not blink on every write.
Projects to build after reading this
See all projects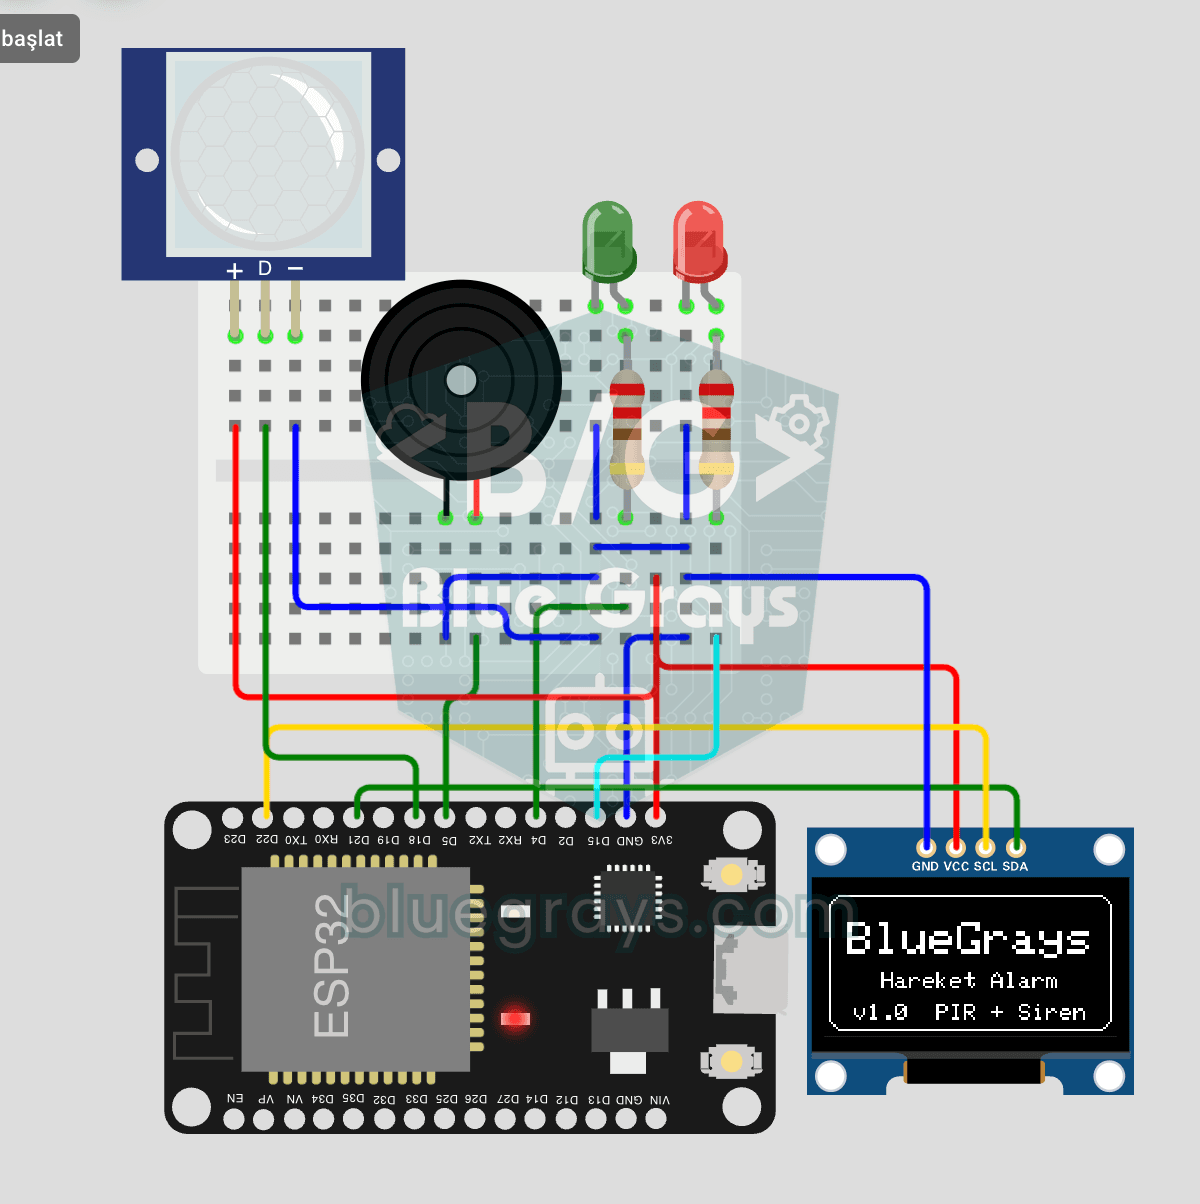
ESP32 Motion Alarm System (PIR + Buzzer + LED + Telegram)
A smart security alarm: when the PIR sensor detects motion, it sounds the buzzer, lights the LED and sends the owner an instant Telegram notification. A 30-second cooldown limits how often the alarm repeats; it does not filter out the PIR sensor's false detections. Use it at home, in a garage, a storeroom or a study.

Automatic Lighting with the ESP32 PIR Motion Sensor
In this project an HC-SR501 PIR motion sensor detects someone entering the room and turns on an LED automatically. millis() tracks how long the LED stays on: each HIGH reading refreshes the last-motion time, and the LED turns off at least 10 seconds after the last HIGH. The code also waits 50 ms with delay(50) in every loop, so the loop is not fully non-blocking. Great for stairs, hallways, bathrooms or closet lighting.

ESP32 Deep Sleep — Battery Saving (OLED + RTC RAM Counter)
The ESP32's Deep Sleep mode shuts down the CPU and most peripherals, cutting current draw to about 10µA, which is vital for battery-powered IoT devices. This project uses three wake-up sources: a timer (15 s), an external pin (EXT0, the button on GPIO 33) and a touch pin (T0/GPIO 4). Counters marked with RTC_DATA_ATTR survive deep sleep.

ESP32 Temperature Data Logger (DHT22 + DS1307 RTC + microSD + OLED)
Build a timed temperature and humidity logger with the ESP32! A DHT22 sensor reads temperature and humidity once a minute, and each reading is saved to a microSD card in CSV format with a real-time stamp from the DS1307 RTC module. The OLED display shows the latest temperature, humidity, timestamp and total number of records live, in large text.

ESP32 Asynchronous Web Server (with IP Display on LCD)
In this project, we’re turning the ESP32 into an asynchronous web server that you can control from your phone or computer on the same Wi-Fi network. Thanks to the ESPAsyncWebServer library, the server can process multiple requests simultaneously (unlike the classic WebServer.h, which blocks on a single request). You’ll be able to open the ESP32’s IP address in a browser and click the ON/OFF buttons (the /on and /off routes) to turn the LED connected to GPIO 5 on and off.

ESP32 mDNS: Accessing the Device via bluegrays-esp.local (with LCD Screen)
In this project we add an mDNS (Multicast DNS) service to the ESP32, so you reach it by a readable host name like bluegrays-esp.local instead of an IP address. Even if the IP assigned by DHCP changes, the device always answers to the same name. A small web server on the board lets you control the LED from your browser at http://bluegrays-esp.local/.

ESP32 OTA Update — Wireless Firmware Installation (With LCD Screen)
In this project you'll learn to upload new firmware to the ESP32 over Wi-Fi, without a USB cable. With the ArduinoOTA library the ESP32 becomes visible on the network and shows up automatically as bluegrays-ota under "Network port" in the Arduino IDE. The first upload goes over USB; after that every update is wireless, a key feature for devices out in the field.