
ESP32-CAM Telegram: Send a Photo When Motion Is Detected
Send photos from an ESP32-CAM to Telegram: PIR wiring and free pins, a /photo command, flash control, deep sleep for batteries, night shots and full code.
When you set up an ESP32-CAM Telegram bot, the board takes a photo the moment it detects motion and sends it to your phone within a few seconds. You don't need to install an app, rent a server or open a port on your router: the board uploads the photo straight to Telegram's servers, and Telegram delivers it to you as an instant notification. Through the same bot you can type /foto to see your front door whenever you like, switch the flash on or off and disarm the alarm.
In this guide you'll learn which of the ESP32-CAM's few free pins to use for a PIR sensor, how the photo is uploaded to Telegram, the complete command-driven code and how to use the flash properly, step by step. After that you'll run the board on batteries for days with deep sleep, take night shots with IR lighting and see where this setup falls short as a security camera. If you haven't set up the board and uploaded your first sketch yet, read How to use the ESP32-CAM first.
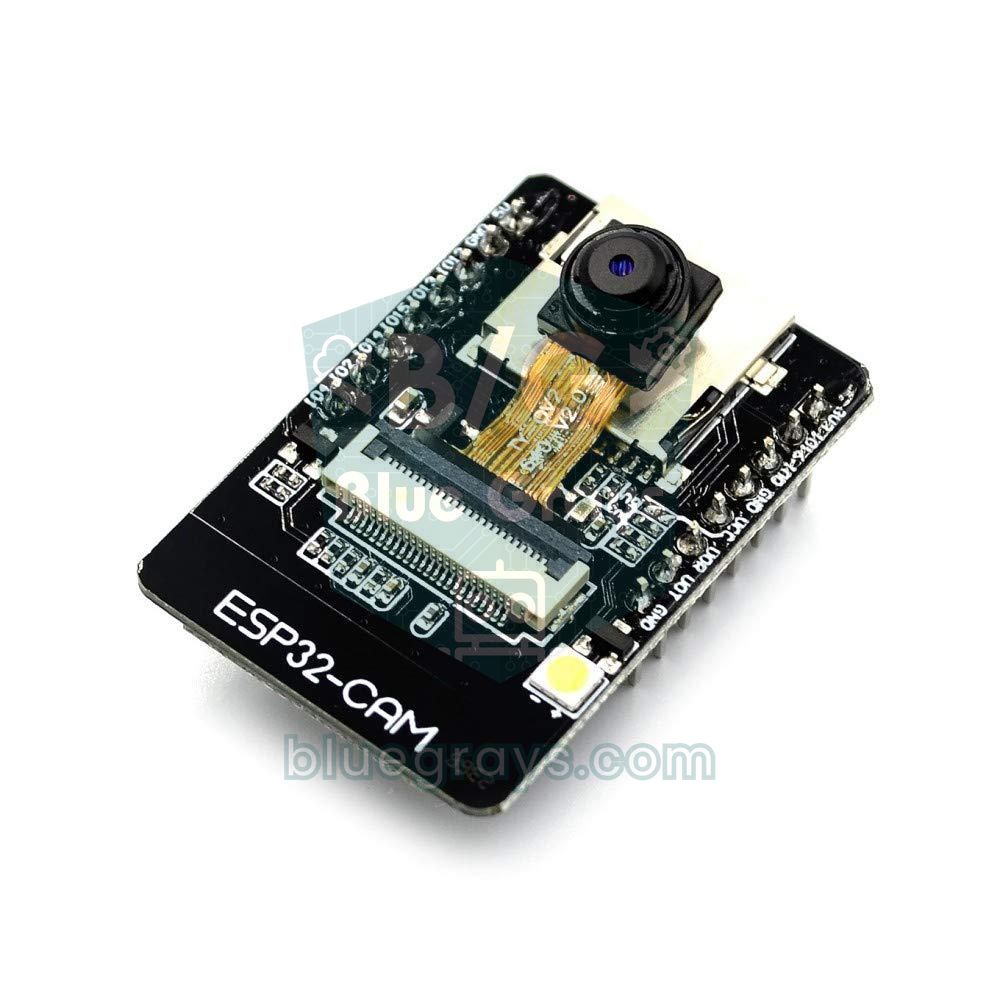
How does an ESP32-CAM Telegram photo system work?
The chain has four steps. The PIR sensor notices a change in the heat given off by a human body and pulls its OUT pin to 3.3 V. When the ESP32 sees this rising edge it asks the OV2640 camera for a JPEG frame, which is written to the board's 4 MB PSRAM. The ESP32 then opens an encrypted HTTPS connection and sends a POST request in multipart/form-data format to the sendPhoto endpoint of the Telegram Bot API; it's the same method a browser uses when you upload a file. Telegram adds the photo to your chat and your phone shows a notification. Commands travel the other way: every second the ESP32 calls getUpdates to ask whether there are new messages, and if /foto has arrived it runs the same upload for your request.
| Part | Spec | Note |
|---|---|---|
| ESP32-CAM (AI-Thinker) | OV2640, 4 MB PSRAM | The PSRAM version easily handles XGA photos |
| ESP32-CAM-MB or a USB-TTL converter | CH340 / CP2102 | For uploading code; the board has no USB |
| PIR sensor | HC-SR501 (5 V) or AM312 (3.3 V) | The OUT signal is 3.3 V and connects straight to the ESP32 |
| Power supply | 5 V, at least 2 A | Wi-Fi and the flash draw high current at the same time |
| Electrolytic capacitor | 470–1000 µF | Between 5V and GND, close to the board |
| Optional | 18650 cell + 5 V boost converter, 850 nm IR illuminator | For battery operation and night shots |
PIR sensor wiring and choosing a free pin
The ESP32-CAM has 16 pins along its edges, but the camera alone uses 15 GPIOs and the microSD slot shares six more. Most of what's left are either boot (strapping) pins or needed for the serial port. Since this project doesn't use an SD card, the SD lines are free, and the safest of them is GPIO 13: it doesn't affect booting, it has an internal pull-down resistor and, because it's an RTC pin, it can wake the board from deep sleep. The table below compares the other candidates too.
| Pin | Without an SD card | Wakes from deep sleep? | Note |
|---|---|---|---|
| GPIO 13 | Free | Yes (ext0) | The best choice for the PIR |
| GPIO 14 | Free | Yes | May show a brief PWM signal at boot; fine as an input |
| GPIO 15 | Free | Yes | Strapping pin; holding it LOW silences the boot messages |
| GPIO 2 | Free | Yes | Strapping pin; must not be HIGH while uploading |
| GPIO 12 | Free | Yes | If it's HIGH at boot the board won't start; don't use it |
| GPIO 4 | Flash LED | Yes | Reserved for the flash; don't use it for anything else |
| GPIO 3 (U0R) | Serial RX | No | Only if you don't need the serial port |
| GPIO 16 | PSRAM | No | Never use it |
| PIR pin | ESP32-CAM pin | Description |
|---|---|---|
| VCC | 5V | The HC-SR501 needs at least 4.5 V; use 3V3 for an AM312 |
| OUT | GPIO 13 | 3.3 V when there's motion, 0 V when there isn't |
| GND | GND | Common ground |
Of the two trimmers on the HC-SR501, turn the time (Tx) one to its shortest setting (fully anticlockwise, about 3 seconds); the code will handle the waiting time. Leave the trigger jumper in the H (repeat trigger) position and set the sensitivity anywhere between 3 and 7 metres as you need. After power-up the sensor spends about a minute getting used to its surroundings and triggers randomly during that time, so the code ignores the first 60 seconds. You'll find the details of how the sensor works in PIR motion sensor.
Setting up the Telegram bot: token and chat ID
- Open @BotFather in Telegram, type /newbot, and give your bot a name and a username that ends in bot.
- Copy the token BotFather gives you, which looks like 1234567890:AAE...; it goes into the BOT_TOKEN line of the code.
- To find your own user number, send /start to @userinfobot; the Id value it returns is your CHAT_ID.
- Open your own bot and send /start once; Telegram doesn't let bots message someone they've never talked to.
- In the Arduino IDE Library Manager, install the UniversalTelegramBot (Brian Lough) and ArduinoJson libraries.
- Choose AI Thinker ESP32-CAM under Tools > Board and make sure the Partition Scheme is Huge APP (3MB No OTA/1MB SPIFFS).
Sending a photo to Telegram: how does sendPhotoByBinary work?
The sendPhotoByBinary() function in the UniversalTelegramBot library uploads the photo just like a file. It first sends the request header and the chat ID field, then asks for the data from three small functions you provide: veriVarMi() says whether there's a piece left to send, sonrakiTampon() gives the data's address in memory and tamponBoyu() says how many bytes it is. Because the camera's frame buffer is already a single JPEG, the code hands over the whole photo in one go and clears the flag. A 1024×768 photo at quality 12 is 50–120 KB depending on the scene and uploads in 1–2 seconds over a good Wi-Fi connection. Telegram accepts photos up to 10 MB, so you'll never get close to the size limit; the real limit is upload time.
Full code: the /foto command, flash control and a motion alarm
1#include <WiFi.h>
2#include <WiFiClientSecure.h>
3#include <UniversalTelegramBot.h>
4#include <ArduinoJson.h>
5#include <time.h>
6#include "esp_camera.h"
7
8const char* WIFI_SSID = "AgAdi";          // Wi-Fi adın (yalnız 2,4 GHz) / your Wi-Fi name (2.4 GHz only)
9const char* WIFI_PASS = "Sifre123";       // Wi-Fi şifren / your Wi-Fi password
10#define BOT_TOKEN "1234567890:AAExxxxxxxxxxxxxxxxxxxxxxxxxxxxxxxx"   // BotFather'ın verdiği token / token from BotFather
11#define CHAT_ID   "123456789"             // yalnız bu ID'ye yanıt verilir / only this ID gets answers
12
13// AI-Thinker ESP32-CAM kamera pinleri / AI-Thinker ESP32-CAM camera pins
14#define PWDN_GPIO_NUM     32
15#define RESET_GPIO_NUM    -1
16#define XCLK_GPIO_NUM      0
17#define SIOD_GPIO_NUM     26
18#define SIOC_GPIO_NUM     27
19#define Y9_GPIO_NUM       35
20#define Y8_GPIO_NUM       34
21#define Y7_GPIO_NUM       39
22#define Y6_GPIO_NUM       36
23#define Y5_GPIO_NUM       21
24#define Y4_GPIO_NUM       19
25#define Y3_GPIO_NUM       18
26#define Y2_GPIO_NUM        5
27#define VSYNC_GPIO_NUM    25
28#define HREF_GPIO_NUM     23
29#define PCLK_GPIO_NUM     22
30
31#define FLAS_LED   4                          // beyaz flaş LED'i / white flash LED
32#define PIR_PIN   13                          // PIR OUT (SD kart kullanılmıyor) / PIR OUT (no SD card)
33
34const unsigned long PIR_ISINMA = 60000;       // PIR ilk 60 sn dengelenir / the PIR settles in the first 60 s
35const unsigned long BEKLEME = 30000;          // iki hareket fotoğrafı arası en az 30 sn / at least 30 s between motion photos
36const unsigned long KONTROL_ARALIGI = 1000;   // Telegram'a saniyede bir sor / poll Telegram once per second
37
38WiFiClientSecure client;
39UniversalTelegramBot bot(BOT_TOKEN, client);
40
41camera_fb_t *fb = nullptr;                    // gönderilecek kare / the frame being sent
42bool veriBekliyor = false;                    // kütüphanenin geri çağırma bayrağı / flag for the library callbacks
43bool alarmKurulu = true;                      // hareket alarmı açık mı / is the motion alarm armed
44bool flasAcik = false;                        // fotoğrafta flaş kullanılsın mı / use the flash for photos
45bool pirOnceki = false;
46unsigned long sonFoto = 0;
47unsigned long sonKontrol = 0;
48
49bool kameraBaslat() {
50  camera_config_t config = {};
51  config.ledc_channel = LEDC_CHANNEL_0;
52  config.ledc_timer   = LEDC_TIMER_0;
53  config.pin_d0 = Y2_GPIO_NUM;
54  config.pin_d1 = Y3_GPIO_NUM;
55  config.pin_d2 = Y4_GPIO_NUM;
56  config.pin_d3 = Y5_GPIO_NUM;
57  config.pin_d4 = Y6_GPIO_NUM;
58  config.pin_d5 = Y7_GPIO_NUM;
59  config.pin_d6 = Y8_GPIO_NUM;
60  config.pin_d7 = Y9_GPIO_NUM;
61  config.pin_xclk     = XCLK_GPIO_NUM;
62  config.pin_pclk     = PCLK_GPIO_NUM;
63  config.pin_vsync    = VSYNC_GPIO_NUM;
64  config.pin_href     = HREF_GPIO_NUM;
65  config.pin_sccb_sda = SIOD_GPIO_NUM;
66  config.pin_sccb_scl = SIOC_GPIO_NUM;
67  config.pin_pwdn     = PWDN_GPIO_NUM;
68  config.pin_reset    = RESET_GPIO_NUM;
69  config.xclk_freq_hz = 20000000;             // 20 MHz kamera saati / 20 MHz camera clock
70  config.pixel_format = PIXFORMAT_JPEG;
71
72  if (psramFound()) {
73    config.frame_size   = FRAMESIZE_XGA;      // 1024x768: net ve hızlı gönderilir / sharp and quick to send
74    config.jpeg_quality = 12;                 // küçük = daha kaliteli / lower = better quality
75    config.fb_count     = 2;
76    config.fb_location  = CAMERA_FB_IN_PSRAM;
77    config.grab_mode    = CAMERA_GRAB_LATEST;
78  } else {
79    config.frame_size   = FRAMESIZE_SVGA;     // PSRAM yoksa 800x600 / 800x600 without PSRAM
80    config.jpeg_quality = 12;
81    config.fb_count     = 1;
82    config.fb_location  = CAMERA_FB_IN_DRAM;
83    config.grab_mode    = CAMERA_GRAB_WHEN_EMPTY;
84  }
85  return esp_camera_init(&config) == ESP_OK;
86}
87
88// sendPhotoByBinary için üç geri çağırma: kareyi tek parça verir
89// Three callbacks for sendPhotoByBinary: they hand over the frame in one piece
90bool veriVarMi() {
91  if (veriBekliyor) {
92    veriBekliyor = false;
93    return true;
94  }
95  return false;
96}
97byte *sonrakiTampon() { return fb ? fb->buf : nullptr; }
98int tamponBoyu() { return fb ? fb->len : 0; }
99
100String saat() {                               // "14:05:31" biçiminde saat / time as "14:05:31"
101  struct tm t;
102  if (!getLocalTime(&t, 100)) return "--:--:--";
103  char buf[9];
104  strftime(buf, sizeof(buf), "%H:%M:%S", &t);
105  return String(buf);
106}
107
108bool fotoGonder(const String& chatId, const String& yazi) {
109  if (flasAcik) {
110    digitalWrite(FLAS_LED, HIGH);             // flaşı yak / flash on
111    delay(150);                               // pozlama yeni ışığa uysun / let exposure adapt
112  }
113  fb = esp_camera_fb_get();                   // tampondaki eski kareyi at / discard the stale frame
114  if (fb) esp_camera_fb_return(fb);
115  fb = esp_camera_fb_get();                   // asıl fotoğraf / the real photo
116  digitalWrite(FLAS_LED, LOW);                // flaşı söndür / flash off
117
118  if (!fb) {
119    bot.sendMessage(chatId, "Kamera hatası / camera error");
120    return false;
121  }
122  bot.sendMessage(chatId, yazi);              // önce kısa bildirim / a quick notification first
123  veriBekliyor = true;
124  String cevap = bot.sendPhotoByBinary(chatId, "image/jpeg", fb->len,
125                                       veriVarMi, nullptr, sonrakiTampon, tamponBoyu);
126  Serial.printf("Foto / photo: %u bayt / bytes\n", fb->len);
127  esp_camera_fb_return(fb);                   // kareyi sürücüye geri ver / give the frame back
128  fb = nullptr;
129  return cevap.indexOf("\"ok\":true") >= 0;  // Telegram başarıyı böyle bildirir / how Telegram reports success
130}
131
132void mesajlariIsle(int adet) {
133  for (int i = 0; i < adet; i++) {
134    String chatId = bot.messages[i].chat_id;
135    String metin  = bot.messages[i].text;
136    if (chatId != CHAT_ID) continue;          // yabancılara yanıt yok / never answer strangers
137
138    int at = metin.indexOf('@');              // gruptaki "/foto@bot_adi" -> "/foto" / "/foto@bot_name" -> "/foto"
139    if (at > 0) metin = metin.substring(0, at);
140
141    if (metin == "/start") {
142      String yardim = "/foto - fotoğraf çek / take a photo\n";
143      yardim += "/flas - flaşı aç ya da kapat / toggle the flash\n";
144      yardim += "/alarm - hareket alarmını aç ya da kapat / arm or disarm\n";
145      yardim += "/durum - son durum / status";
146      bot.sendMessage(chatId, yardim);
147    } else if (metin == "/foto") {
148      if (!fotoGonder(chatId, "Fotoğraf / photo " + saat())) {
149        bot.sendMessage(chatId, "Gönderilemedi / send failed");
150      }
151    } else if (metin == "/flas") {
152      flasAcik = !flasAcik;
153      bot.sendMessage(chatId, flasAcik ? "Flaş AÇIK / flash ON" : "Flaş KAPALI / flash OFF");
154    } else if (metin == "/alarm") {
155      alarmKurulu = !alarmKurulu;
156      bot.sendMessage(chatId, alarmKurulu ? "Alarm KURULU / ARMED" : "Alarm KAPALI / DISARMED");
157    } else if (metin == "/durum") {
158      String s = "Alarm: " + String(alarmKurulu ? "KURULU / ARMED" : "KAPALI / DISARMED");
159      s += "\nFlaş / flash: " + String(flasAcik ? "AÇIK / ON" : "KAPALI / OFF");
160      s += "\nWi-Fi: " + String(WiFi.RSSI()) + " dBm";
161      bot.sendMessage(chatId, s);
162    }
163  }
164}
165
166void setup() {
167  Serial.begin(115200);
168  pinMode(FLAS_LED, OUTPUT);
169  digitalWrite(FLAS_LED, LOW);
170  pinMode(PIR_PIN, INPUT_PULLDOWN);           // PIR bağlı değilken pin boşta kalmasın / keep the pin defined without a PIR
171
172  if (!kameraBaslat()) {
173    Serial.println("Kamera baslatilamadi / camera init failed");
174    delay(3000);
175    ESP.restart();
176  }
177
178  WiFi.mode(WIFI_STA);
179  WiFi.begin(WIFI_SSID, WIFI_PASS);
180  while (WiFi.status() != WL_CONNECTED) delay(500);
181  Serial.println(WiFi.localIP());
182
183  configTzTime("<+03>-3", "pool.ntp.org");    // Türkiye saati (UTC+3) / Turkey time (UTC+3)
184  client.setCACert(TELEGRAM_CERTIFICATE_ROOT); // api.telegram.org kök sertifikası / root certificate
185  bot.sendMessage(CHAT_ID, "Kamera hazır, /start yaz / camera ready, send /start");
186}
187
188void loop() {
189  bool pir = digitalRead(PIR_PIN);
190  // Yalnız yükselen kenarda, ısınmadan sonra ve bekleme süresi dolunca
191  // Only on a rising edge, after warm-up and once the cooldown has passed
192  if (pir && !pirOnceki && alarmKurulu && millis() > PIR_ISINMA && millis() - sonFoto > BEKLEME) {
193    sonFoto = millis();
194    fotoGonder(CHAT_ID, "Hareket algılandı! / Motion detected! " + saat());
195  }
196  pirOnceki = pir;
197
198  if (millis() - sonKontrol > KONTROL_ARALIGI) {
199    int adet = bot.getUpdates(bot.last_message_received + 1);
200    while (adet) {
201      mesajlariIsle(adet);
202      adet = bot.getUpdates(bot.last_message_received + 1);
203    }
204    sonKontrol = millis();
205  }
206}| Part | What it does |
|---|---|
| kameraBaslat() | Starts the camera at XGA (1024×768) with two frame buffers if there's PSRAM, otherwise at SVGA (800×600) |
| fotoGonder() | Turns the flash on if requested, drops the stale frame and grabs a fresh one, sends a short message first and then the photo |
| mesajlariIsle() | Answers only /start, /foto, /flas, /alarm and /durum commands coming from CHAT_ID |
| PIR part of loop() | Checks for the rising edge, the 60 s warm-up and the 30 s cooldown |
| Telegram part of loop() | Asks for new messages once a second and processes any queued messages one after another |
The code watches the PIR's rising edge, not its level: even if the sensor stays HIGH for 3 seconds, only one photo is taken. The 30-second cooldown stops someone walking around the room from flooding your phone with dozens of photos a minute and keeps Telegram from throttling more than one message per second to the same chat. Because each fetch is an HTTPS request, the getUpdates call can hold up the loop for about half a second; since the HC-SR501's output stays HIGH for at least 3 seconds, no motion is missed in the meantime. With the board always on, there are usually 2–4 seconds between the motion and the photo arriving on your phone.
Flash control: when should you use it?
The white LED on the front is driven through a transistor connected to GPIO 4 and draws more than 100 mA from the supply at full brightness. The code lights the flash only at the moment of the photo and waits about 150 ms; since the camera's auto-exposure needs a few frames to adapt to the new light, the first frame in the buffer is thrown away as well. The flash is effective up to 1–2 metres; a door or garden further away won't be lit. If you're shooting through glass, turn the flash off, or all you'll see in the photo is the bright reflection on the glass. If you want a dimmer flash you can apply PWM to GPIO 4; the LED Intensity slider in the CameraWebServer example does exactly that. Remember that a white flash going off at night also gives away where the camera is; for discreet monitoring, the IR section below is a better fit.
Saving battery with deep sleep
An ESP32-CAM with Wi-Fi on draws 150–200 mA all the time, which drains a 2600 mAh 18650 cell in half a day. If you're running on batteries, the board must spend almost all its time in deep sleep and wake only when the PIR triggers. In the code below, GPIO 13 is the ext0 wake-up source: when the PIR output goes HIGH the board boots from scratch, takes the photo first, then connects to Wi-Fi, sends the photo and goes back to sleep. The order matters: the Wi-Fi connection takes a few seconds, and taking the photo before connecting captures the exact moment of the motion.
1#include <WiFi.h>
2#include <WiFiClientSecure.h>
3#include <UniversalTelegramBot.h>
4#include <ArduinoJson.h>
5#include "esp_camera.h"
6#include "driver/rtc_io.h"
7
8const char* WIFI_SSID = "AgAdi";
9const char* WIFI_PASS = "Sifre123";
10#define BOT_TOKEN "1234567890:AAExxxxxxxxxxxxxxxxxxxxxxxxxxxxxxxx"
11#define CHAT_ID   "123456789"
12
13// AI-Thinker ESP32-CAM kamera pinleri / AI-Thinker ESP32-CAM camera pins
14#define PWDN_GPIO_NUM     32
15#define RESET_GPIO_NUM    -1
16#define XCLK_GPIO_NUM      0
17#define SIOD_GPIO_NUM     26
18#define SIOC_GPIO_NUM     27
19#define Y9_GPIO_NUM       35
20#define Y8_GPIO_NUM       34
21#define Y7_GPIO_NUM       39
22#define Y6_GPIO_NUM       36
23#define Y5_GPIO_NUM       21
24#define Y4_GPIO_NUM       19
25#define Y3_GPIO_NUM       18
26#define Y2_GPIO_NUM        5
27#define VSYNC_GPIO_NUM    25
28#define HREF_GPIO_NUM     23
29#define PCLK_GPIO_NUM     22
30
31#define FLAS_LED   4                          // flaş LED'i (RTC pini) / flash LED (RTC pin)
32#define PIR_PIN   13                          // PIR OUT, ext0 ile uyandırır / PIR OUT, wakes via ext0
33
34RTC_DATA_ATTR int hareketSayisi = 0;          // uykuda korunur / survives deep sleep
35
36WiFiClientSecure client;
37UniversalTelegramBot bot(BOT_TOKEN, client);
38camera_fb_t *fb = nullptr;
39bool veriBekliyor = false;
40
41bool veriVarMi() {
42  if (veriBekliyor) {
43    veriBekliyor = false;
44    return true;
45  }
46  return false;
47}
48byte *sonrakiTampon() { return fb ? fb->buf : nullptr; }
49int tamponBoyu() { return fb ? fb->len : 0; }
50
51bool kameraBaslat() {
52  camera_config_t config = {};
53  config.ledc_channel = LEDC_CHANNEL_0;
54  config.ledc_timer   = LEDC_TIMER_0;
55  config.pin_d0 = Y2_GPIO_NUM;
56  config.pin_d1 = Y3_GPIO_NUM;
57  config.pin_d2 = Y4_GPIO_NUM;
58  config.pin_d3 = Y5_GPIO_NUM;
59  config.pin_d4 = Y6_GPIO_NUM;
60  config.pin_d5 = Y7_GPIO_NUM;
61  config.pin_d6 = Y8_GPIO_NUM;
62  config.pin_d7 = Y9_GPIO_NUM;
63  config.pin_xclk     = XCLK_GPIO_NUM;
64  config.pin_pclk     = PCLK_GPIO_NUM;
65  config.pin_vsync    = VSYNC_GPIO_NUM;
66  config.pin_href     = HREF_GPIO_NUM;
67  config.pin_sccb_sda = SIOD_GPIO_NUM;
68  config.pin_sccb_scl = SIOC_GPIO_NUM;
69  config.pin_pwdn     = PWDN_GPIO_NUM;
70  config.pin_reset    = RESET_GPIO_NUM;
71  config.xclk_freq_hz = 20000000;
72  config.pixel_format = PIXFORMAT_JPEG;
73  config.frame_size   = psramFound() ? FRAMESIZE_XGA : FRAMESIZE_SVGA;
74  config.jpeg_quality = 12;
75  config.fb_count     = 1;                    // tek kare yeter / one frame is enough
76  config.fb_location  = psramFound() ? CAMERA_FB_IN_PSRAM : CAMERA_FB_IN_DRAM;
77  config.grab_mode    = CAMERA_GRAB_WHEN_EMPTY;
78  return esp_camera_init(&config) == ESP_OK;
79}
80
81void uyu() {
82  // PIR çıkışı LOW'a dönmeden uyursan kart hemen yeniden uyanır
83  // If you sleep while the PIR output is still HIGH, the board wakes straight away
84  unsigned long t = millis();
85  while (digitalRead(PIR_PIN) == HIGH && millis() - t < 30000) delay(100);
86
87  digitalWrite(FLAS_LED, LOW);
88  rtc_gpio_hold_en(GPIO_NUM_4);               // flaş uykuda sönük kalsın / keep the flash off while asleep
89  esp_sleep_enable_ext0_wakeup(GPIO_NUM_13, 1);   // GPIO 13 HIGH olunca uyan / wake when GPIO 13 goes HIGH
90  Serial.println("Uyku / sleep");
91  Serial.flush();
92  esp_deep_sleep_start();
93}
94
95void setup() {
96  Serial.begin(115200);
97  rtc_gpio_hold_dis(GPIO_NUM_4);              // flaş pinini serbest bırak / release the flash pin
98  rtc_gpio_deinit(GPIO_NUM_13);               // pini yeniden normal GPIO yap / make the pin a normal GPIO again
99  pinMode(FLAS_LED, OUTPUT);
100  digitalWrite(FLAS_LED, LOW);
101  pinMode(PIR_PIN, INPUT);
102
103  if (esp_sleep_get_wakeup_cause() != ESP_SLEEP_WAKEUP_EXT0) {
104    Serial.println("Ilk acilis: PIR 60 sn isiniyor / first boot: PIR warming up 60 s");
105    delay(60000);
106    uyu();
107  }
108  hareketSayisi++;
109
110  // 1) Fotoğrafı hemen çek, Wi-Fi'yi sonra aç: an kaçmasın
111  // 1) Take the photo at once and start Wi-Fi later, so the moment is not lost
112  if (kameraBaslat()) {
113    for (int i = 0; i < 3; i++) {             // ilk kareler karanlık ya da yeşil olur / first frames are dark or green
114      fb = esp_camera_fb_get();
115      if (fb) esp_camera_fb_return(fb);
116    }
117    fb = esp_camera_fb_get();
118  }
119
120  // 2) Wi-Fi'ye bağlan, en fazla 15 sn bekle / connect to Wi-Fi, wait at most 15 s
121  WiFi.mode(WIFI_STA);
122  WiFi.begin(WIFI_SSID, WIFI_PASS);
123  unsigned long t0 = millis();
124  while (WiFi.status() != WL_CONNECTED && millis() - t0 < 15000) delay(100);
125
126  // 3) Gönder ve uyu / send and go back to sleep
127  if (WiFi.status() == WL_CONNECTED) {
128    client.setCACert(TELEGRAM_CERTIFICATE_ROOT);
129    bot.sendMessage(CHAT_ID, "Hareket / motion #" + String(hareketSayisi));
130    if (fb) {
131      veriBekliyor = true;
132      bot.sendPhotoByBinary(CHAT_ID, "image/jpeg", fb->len,
133                            veriVarMi, nullptr, sonrakiTampon, tamponBoyu);
134    } else {
135      bot.sendMessage(CHAT_ID, "Kamera hatası / camera error");
136    }
137  }
138  if (fb) esp_camera_fb_return(fb);
139  Serial.printf("Uyanik kalma / awake: %lu ms\n", millis());
140  uyu();
141}
142
143void loop() {
144}
There are four details in the code that are easy to miss. First, the board waits for the PIR output to return to LOW before sleeping; if you sleep while the signal is still HIGH, the board wakes immediately and gets stuck in a loop. Second, rtc_gpio_hold_en() locks the flash pin LOW during sleep; without this line GPIO 4 floats and the flash glows faintly while asleep, draining the battery and drawing attention. Third, after waking, rtc_gpio_deinit() turns GPIO 13 back into a normal input, otherwise digitalRead() may read it wrongly. Fourth, the counter marked with RTC_DATA_ATTR survives sleep, so every message tells you which motion event it is. All the sleep modes and wake-up sources are covered in ESP32 deep sleep.
| Scenario | Average current (battery side) | With a 2600 mAh 18650 |
|---|---|---|
| Always on, Wi-Fi connected (first sketch) | ≈ 290 mA | ≈ 9 hours |
| Deep sleep + 20 motion events a day | ≈ 11 mA | ≈ 10 days |
| Power latch circuit (board fully off) + 20 motion events a day | ≈ 0.7 mA | ≈ 4–5 months (theoretical) |
The values in the table assume the 5 V boost converter runs at 85% efficiency. Although the ESP32 chip itself uses only about 10 µA in deep sleep, the ESP32-CAM board still draws around 6 mA while asleep because of its regulator, PSRAM and camera, and that's what really sets the battery life. Each wake-up takes 6–10 seconds: boot, camera, Wi-Fi connection and two HTTPS requests. If you want months of runtime you need a power latch circuit that cuts the board's supply completely with a MOSFET, switches the board on when the PIR triggers and lets the board switch itself off when it's done. You can work out your own scenario with the Battery Life Calculator, and for frequent restarts see ESP32 brownout.
Night shots: flash, IR LEDs and camera settings
Standard ESP32-CAM lenses contain a fixed IR-cut filter that blocks infrared light; that's why colours look natural by day, but a scene lit only by IR stays dark. There are two ways to see in the dark: the white flash, or IR lighting with a lens that has no filter. OV2640 modules sold as night vision or 850 nm don't have this filter; colours turn pinkish in daylight, but you'll see a scene lit by 850 nm IR LEDs clearly in black and white. 940 nm LEDs are completely invisible, but the OV2640 is much less sensitive at that wavelength, so the image gets noticeably darker. Power the IR illuminator from a separate 5 V or 12 V supply; ready-made boards with a light sensor switch on by themselves when it gets dark. If you want to control it from a GPIO, use a MOSFET and never connect the LEDs straight to the pin.
1#include "esp_camera.h"
2void setup() {
3// esp_camera_init() başarılı olduktan sonra / after esp_camera_init() succeeds
4sensor_t *s = esp_camera_sensor_get();
5s->set_gainceiling(s, GAINCEILING_32X);   // karanlıkta daha yüksek kazanç / more gain in the dark
6s->set_aec2(s, 1);                        // DSP pozlaması: gece modu / DSP exposure: night mode
7s->set_ae_level(s, 2);                    // pozlamayı artır (-2..2) / raise exposure (-2..2)
8s->set_whitebal(s, 1);                    // otomatik beyaz dengesi / auto white balance
9s->set_special_effect(s, 2);              // 2 = siyah-beyaz: IR'de renk zaten bozulur / 2 = grayscale: IR spoils colour anyway
10}
11void loop() {}
These settings raise the sensor's gain ceiling and exposure time. The price is that the frame rate drops in the dark, a moving person comes out blurred and the high gain adds grain to the image. Light is still the most effective way to improve a night photo; even a weak IR illuminator gives a clearer result than turning up the gain. You can add the code right after the kameraBaslat() call, and if you like, measure ambient light with an LDR and switch automatically between day and night settings.
Its limits as a security camera
- It doesn't record video: This system only sends still photos. For continuous recording or looking back at footage you need a proper security camera.
- There's a delay: 2–4 seconds with the board on, 6–10 seconds when it wakes from deep sleep; someone walking past quickly may already be out of the frame.
- A PIR can't see through glass: Glass doesn't let infrared heat radiation through. A sensor placed behind a window won't detect motion outside, but sunlight and radiators can still trigger it falsely.
- It depends on the internet: If Wi-Fi or the internet goes down, the photo isn't sent. For critical use, also saving the photo to an SD card gives you a backup.
- It has no physical protection: The board is easy to remove or switch off, and outdoors it's affected by moisture and sunlight; if you use it outside you need a sealed box and a power supply that can handle the temperature.
- Image quality is limited: The 2 MP OV2640 isn't good enough to recognise faces or read number plates from a few metres away; wide-angle lenses widen the frame but reduce detail.
- Privacy rules: Point the camera at your own property; before recording a neighbour's garden, shared areas or the street, check the legal rules where you live.
ESP32-CAM Telegram project ideas
- Doorbell camera: Connect the doorbell button to GPIO 13 so that a press photographs your doorstep and sends it to you; see how to connect a button for the wiring.
- Mailbox alert: Fit a reed switch to the lid so that opening it wakes the board and sends a photo of what's inside.
- Bird box or pet camera: Take a photo when there's movement and check in during the day with /foto.
- Eyes for an alarm system: Have an Arduino alarm system signal the ESP32-CAM when it triggers so it photographs the scene.
- Plant and greenhouse monitoring: Wake on a timer once an hour to send a photo, and push your readings to a dashboard with MQTT and Home Assistant.
- Family group: Add the bot to a Telegram group and use the group's ID, so the photo reaches everyone at once.
Common problems and fixes
| Symptom | Likely cause | Fix |
|---|---|---|
| The message arrives but the photo doesn't | The frame is too large, PSRAM is off or the upload was cut off | Select the AI Thinker ESP32-CAM board, drop the resolution to SVGA, improve the Wi-Fi signal |
| The bot doesn't answer any command | Wrong token or CHAT_ID, or you never sent /start to the bot | Copy the token again, check your ID with @userinfobot, send /start to your bot |
| Motion photos arrive for no reason | The PIR is picking up the signal from the Wi-Fi antenna or a heat source | Move the PIR 10–20 cm away from the board, add 100 nF across VCC-GND, don't point the sensor at the sun or radiators |
| The board wakes again right after going to sleep | The PIR output is still HIGH when it sleeps | Wait for the pin to return to LOW before sleeping, set the HC-SR501 time trimmer to minimum |
| The flash glows faintly during sleep | GPIO 4 is left floating | Write LOW and call rtc_gpio_hold_en(GPIO_NUM_4) before sleeping |
| The photo is dark or greenish | The first frames right after the camera starts | Grab and discard 2–3 frames before the real photo |
| The board restarts while sending a photo | Brownout: the supply can't keep up with the Wi-Fi and flash current | Use a 5 V / 2 A adapter, short wires and a 470–1000 µF capacitor across 5V-GND |
Combined with Telegram, the ESP32-CAM turns an inexpensive board into a smart eye that sends photos to your phone. Build the system with the always-on sketch first and tune the PIR, then move to the deep sleep version if you need it. In the BlueGrays app you'll find the Telegram motion alarm with PIR, buzzer and LED, ESP32 deep sleep, and automatic lighting with a PIR, each with step-by-step wiring diagrams and ready-to-use code.
Frequently asked questions
How do I send a photo from an ESP32-CAM to Telegram?
You create a bot with BotFather to get a token, install the UniversalTelegramBot library and upload the camera's frame buffer to Telegram's sendPhoto endpoint with the sendPhotoByBinary() function. The library sends the photo over HTTPS in multipart format, like a file upload in a browser. In the code you only need to change the Wi-Fi details, the token and your own chat ID.
Which pin do I connect a PIR sensor to on the ESP32-CAM?
If you're not using an SD card, GPIO 13 is the safest choice: it doesn't affect booting and, being an RTC pin, it can wake the board from deep sleep. Connect the PIR's VCC to the 5V pin, GND to GND and OUT to GPIO 13. Avoid GPIO 12; if it's HIGH at boot the board won't start.
How long does an ESP32-CAM last on a battery?
With Wi-Fi on all the time, a 2600 mAh 18650 cell lasts about 9 hours. If you use deep sleep and wake only on motion, that rises to around 10 days; even asleep the board draws about 6 mA because of its regulator and PSRAM. For months of runtime you need a power latch circuit that cuts the board's supply completely.
Can the ESP32-CAM see at night?
The IR-cut filter on standard modules blocks infrared light, so in the dark you only get an image up to 1–2 metres with the white flash. With a filterless (night vision) OV2640 module and an 850 nm IR illuminator you can take clear black-and-white photos in the dark. Raising the gain ceiling in the camera settings also helps, but adds grain to the image.
Can the ESP32-CAM send video to Telegram?
In practice, no. The ESP32-CAM produces individual JPEG frames and doesn't have the processing power or memory to turn them into an MP4 video. Sending several photos in a row or watching the live stream on your home network with CameraWebServer are more realistic options.
Can the photo be sent to more than one person?
Yes. If you add the bot to a Telegram group and use the group's ID, which starts with a minus sign, as CHAT_ID, the photo reaches everyone in the group at once. Alternatively, put several chat IDs in an array in the code and send the photo to each in turn; each send is a separate upload, so it takes longer.
Projects to build after reading this
See all projects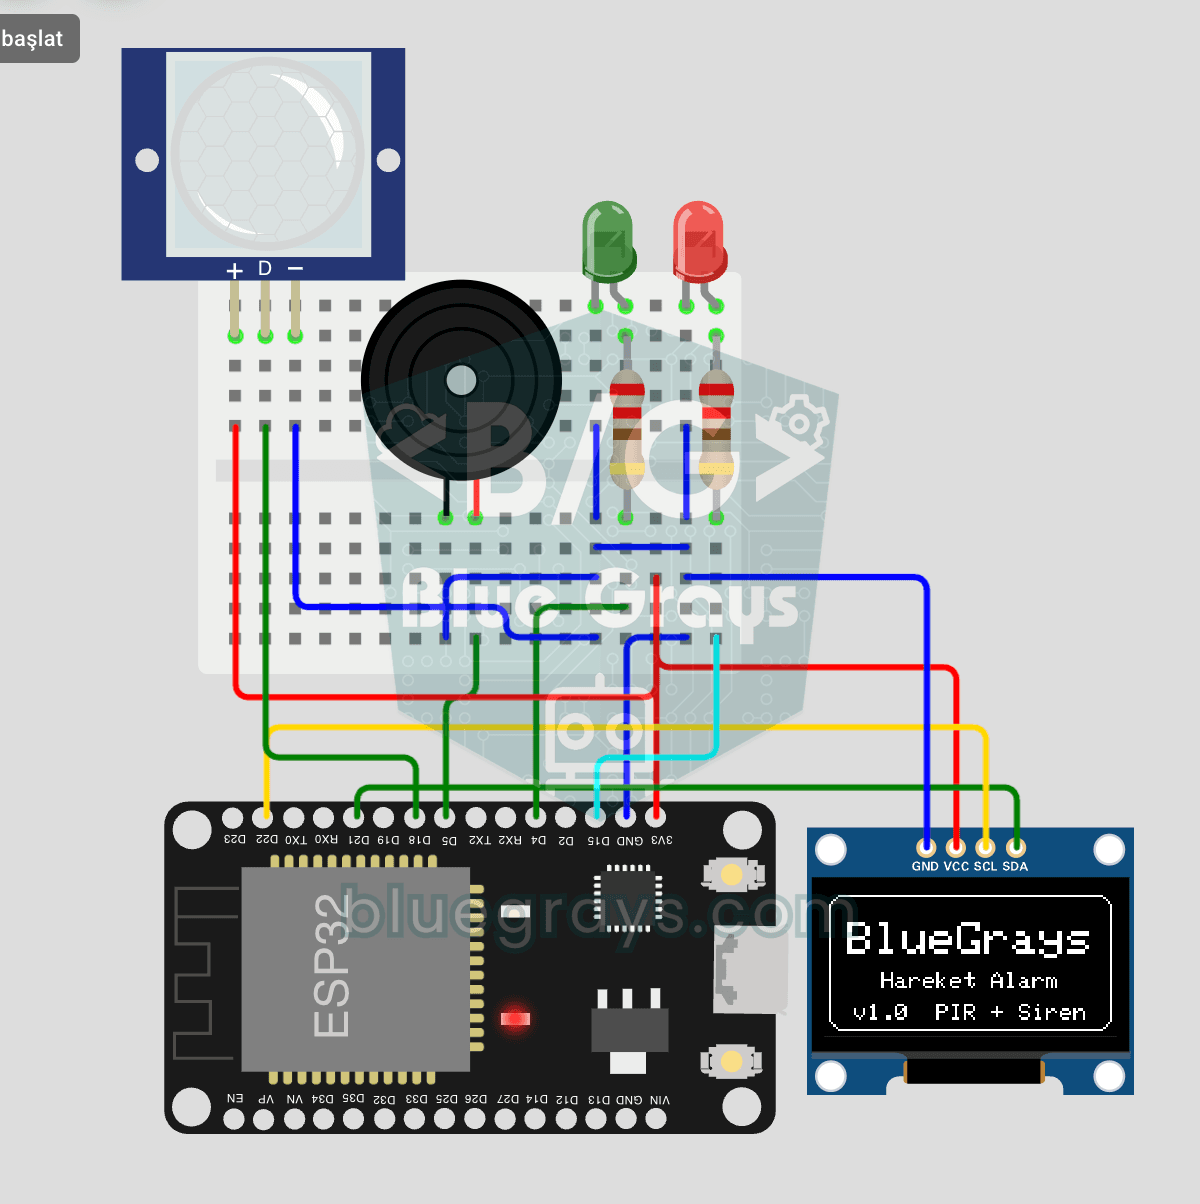
ESP32 Motion Alarm System (PIR + Buzzer + LED + Telegram)
A smart security alarm system that activates the buzzer and LED when the PIR sensor detects motion, while simultaneously sending an instant notification to the owner via Telegram. It includes a 30-second cooldown to limit the frequency of repeated alarms; this mechanism does not validate PIR detections or eliminate false triggers. Suitable for home security, garage monitoring, warehouses, or workrooms. With ESP32-CAM, photo notifications can be added; with the classic ESP32 DevKit V1, text notif

Automatic Lighting with the ESP32 PIR Motion Sensor
In this project, we will use the HC-SR501 PIR motion sensor to detect when someone enters the room and automatically turn on the LED. We will track how long the LED stays on using millis(); each HIGH reading from the sensor will update the last motion time, and the LED will turn off at least 10 seconds after the last HIGH reading. The current code also waits 50 ms in each loop with delay(50), so the application loop is not fully non-blocking. In real-life applications, it can be used for sta

ESP32 Deep Sleep — Battery Saving (OLED + RTC RAM Counter)
The ESP32's Deep Sleep mode reduces current consumption to ~10 µA by shutting down the CPU and most peripherals, making it critical for battery-powered IoT devices. In this project, we use three different wake-up sources: a timer (15 seconds), an external pin (EXT0 — button GPIO 33), and touch (T0/GPIO 4). Variables marked with RTC_DATA_ATTR are preserved during deep sleep—the boot counter, timer wake counter, and button wake counter are continuously tracked. On each wake-up, the SSD1306 OLED

ESP32 Smart Lighting (PIR + LDR + Relay + OLED)
Turn your hallway, bathroom, or pantry into smart lighting with ESP32! Using a PIR motion sensor, LDR light sensor, and a relay module, we build the classic "light turns on when motion is detected in the dark" scenario — if the environment is already bright, motion does NOT trigger the light, saving energy during the day. The light stays on for 30 seconds; if motion continues, the timer resets and the light stays on longer. The SSD1306 OLED shows large-font status (ON / DAYTIME / WAITING), a cou

ESP32 Wi-Fi STA Connection (with LCD Screen)
In this project, we connect the ESP32 to the home Wi-Fi network in Station (STA) mode in a secure, fault-tolerant manner. We store the SSID and password in a separate secrets.h file to prevent leaking to Git, set up an auto-reconnect mechanism, and display the RSSI signal level and IP address on an I2C LCD screen. The internal LED works as a status indicator. It is a production-grade connection manager.

ESP32 mDNS: Accessing the Device via bluegrays-esp.local (with LCD Screen)
In this project, we add an mDNS (Multicast DNS) service to the ESP32, allowing us to access the device using a human-readable hostname like bluegrays-esp.local instead of an IP address. Even if the IP address assigned by DHCP changes, you can always reach the device using the same name. We also run a small web server on the device to send LED control commands via a browser using the address http://bluegrays-esp.local/. The I2C LCD screen displays the hostname, IP address, and LED status in b
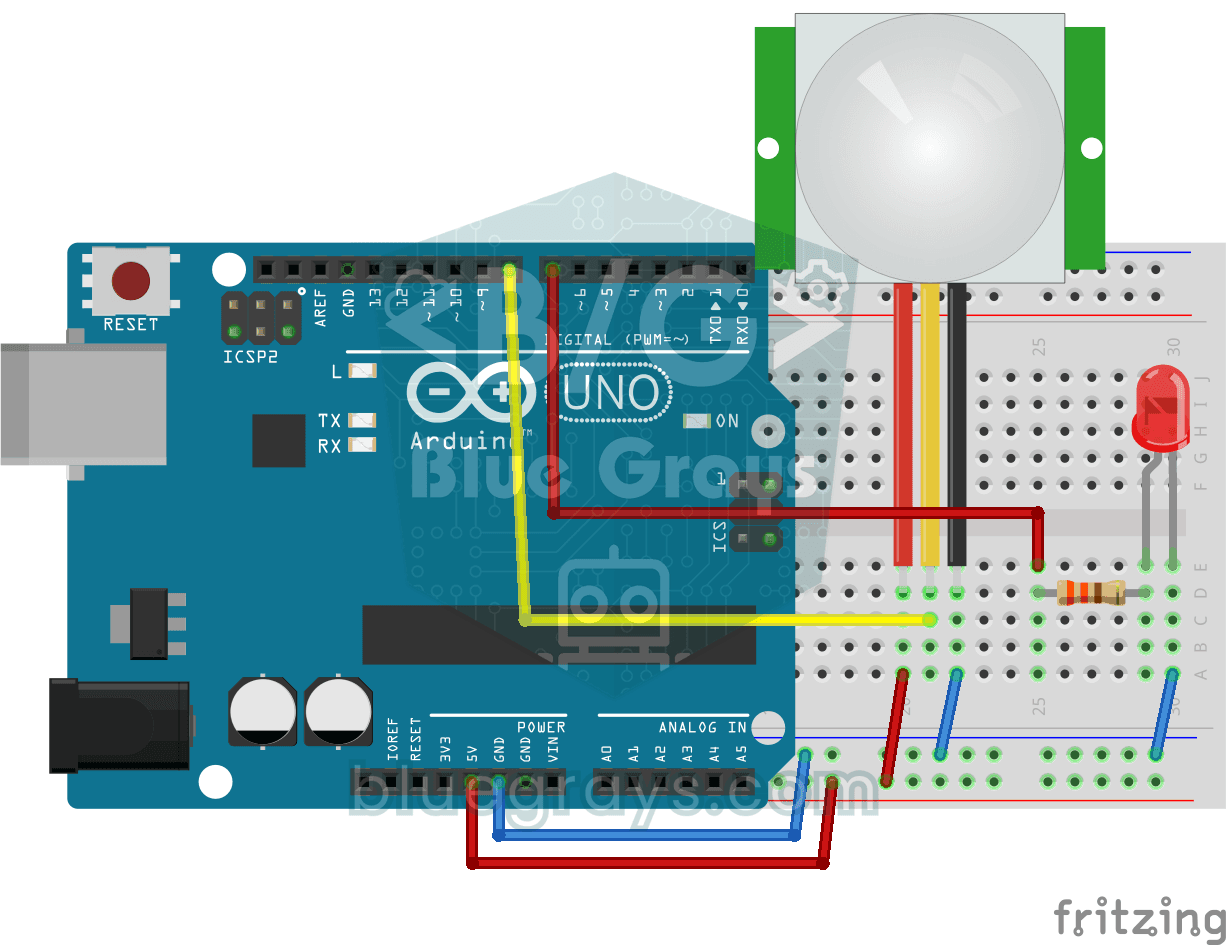
Motion Detector with Motion Sensor
A simple guard that tells you when someone walks into the room. The motion sensor picks up the warmth given off by the human body, and the Arduino keeps the LED on as long as there is movement and tur