
ESPHome ESP32 Tutorial: Add Sensors to Home Assistant, No Code
ESPHome ESP32 tutorial: Device Builder, your first YAML, Wi-Fi and OTA, DHT22, PIR, relay and LED. Plus common YAML errors, offline fixes and Tasmota compared.
This ESPHome ESP32 tutorial shows you the shortest way to get an ESP32 into Home Assistant without writing a single line of C++. In ESPHome you describe your device in a YAML file: which sensor sits on which pin, how often it's read and which output should appear as a switch. ESPHome turns that description into C++ code by itself, compiles it and flashes it to the board. Once powered up, the board joins your home network, Home Assistant discovers it on its own, and the sensors appear on your dashboard within seconds.
We'll start from scratch: you'll install the ESPHome Device Builder, write your first YAML file, flash once over USB and from then on over Wi-Fi (OTA). Then we'll add a DHT22 temperature and humidity sensor, a PIR motion sensor, a relay and an LED to the same ESP32. By the end you'll also know the most common YAML errors, why a device shows up as "offline", and where ESPHome stands compared with Tasmota and your own MQTT code.

What is ESPHome and how does it work?
ESPHome is an open-source firmware generator developed alongside Home Assistant. Your YAML file works like an order form: ESPHome reads it, picks ready-made, tested C++ code for every component in it, compiles everything with PlatformIO and produces a single firmware file. The device talks to Home Assistant through its own encrypted native API on port 6053 and announces itself on the network via mDNS, so you never have to type in an IP address. When you want to change something, you edit the YAML, press Install, and the new firmware reaches the board over Wi-Fi.
| YAML block | What it does | Example line |
|---|---|---|
| esphome: | Network name and friendly name of the device | name: esp32-sensor |
| esp32: / esp8266: / rp2040: | Board family and board model | board: esp32dev |
| wifi: | Home network and fallback access point | ssid: !secret wifi_ssid |
| api: | Encrypted link to Home Assistant | encryption: key |
| ota: | Over-the-air firmware updates | platform: esphome |
| logger: | Logging over USB and Wi-Fi | level: DEBUG |
| sensor: / binary_sensor: | Inputs that measure a value or report on/off | platform: dht |
| switch: / output: / light: | Outputs such as relays and LEDs | platform: gpio |
What you need
- An ESP32 development board (ESP32 DevKit V1 or similar) and a USB cable that carries data, not just power.
- A DHT22 temperature and humidity sensor; if it's the bare sensor rather than a module, add a 10 kΩ pull-up resistor.
- An HC-SR501 PIR motion sensor.
- A single-channel 5 V relay module; pick one with an optocoupler that switches reliably from a 3.3 V signal.
- An LED with a 220 Ω resistor, a breadboard and jumper wires.
- A machine running Home Assistant: a Raspberry Pi 4/5, a mini PC or an old laptop. Without Home Assistant you can also install ESPHome on your own computer.
Wiring table
| Part | Pins | ESP32 pin | Note |
|---|---|---|---|
| DHT22 | VCC / DATA / GND | 3V3 / GPIO 4 / GND | Bare sensor: 10 kΩ between DATA and 3V3 |
| PIR HC-SR501 | VCC / OUT / GND | VIN (5 V) / GPIO 27 / GND | The output is 3.3 V, safe for the ESP32 |
| Relay module | VCC / IN / GND | VIN (5 V) / GPIO 26 / GND | Most modules are active LOW |
| LED | Anode / Cathode | GPIO 18 (through 220 Ω) / GND | Brightness via PWM |
Installing the ESPHome Device Builder
ESPHome's web interface is called the ESPHome Device Builder (formerly the ESPHome Dashboard). This is where you create devices, edit their YAML, compile and flash. On Home Assistant OS it only takes a few clicks:
- In Home Assistant, open Settings > Add-ons (called Apps in newer versions) and click the store button in the bottom-right corner.
- Search for ESPHome, choose ESPHome Device Builder and click Install.
- When it's done, click Start and turn on Show in sidebar.
- Click the ESPHome icon in the sidebar; you'll see an empty device list and a + New Device button at the bottom right.
If you run Home Assistant as a Docker container or a Core install, there's no add-on store. In that case run ESPHome in its own Docker container or install it on your computer with Python: after pip install esphome, running esphome dashboard config/ opens the interface in your browser on port 6052. If you don't need a UI at all, esphome run esp32-sensor.yaml does the whole job from the command line: it compiles, uploads and then streams the logs.
First device: the wizard and your first YAML file
- Click + New Device and choose Continue in the dialog.
- Give the device a name using only lowercase letters, digits and hyphens, e.g. esp32-sensor; on your network it will be esp32-sensor.local.
- Choose ESP32 as the board type. The wizard generates an encryption key and writes it into the YAML.
- Skip the install for now, click Edit on the device card and change the file as shown below.
1esphome:
2  name: esp32-sensor                # küçük harf, rakam, tire / lowercase, digits, hyphens
3  friendly_name: ESP32 Sensor
4
5esp32:
6  board: esp32dev                   # ESP32 DevKit V1 ve benzerleri / and similar boards
7
8logger:                             # günlükler USB ve Wi-Fi'den / logs over USB and Wi-Fi
9
10api:                                # Home Assistant bağlantısı / Home Assistant link
11  encryption:
12    key: !secret api_key
13
14ota:
15  - platform: esphome               # kablosuz güncelleme / over-the-air updates
16    password: !secret ota_password
17
18wifi:
19  ssid: !secret wifi_ssid
20  password: !secret wifi_password
21  ap:                               # bağlanamazsa yedek ağ / fallback hotspot
22    ssid: "ESP32-Sensor"
23    password: !secret ap_password
24
25captive_portal:                     # yedek ağda ayar sayfası / setup page on the hotspot
Each block in this file does one job. esphome: sets the device's network name and esp32: the board model; esp32dev fits the ESP32 DevKit V1 and most similar boards. logger: lets you read logs over both USB and Wi-Fi. api: opens the link to Home Assistant and ota: allows wireless updates. The ap: section under wifi: is your safety net: if the ESP32 can't join your network, it opens its own called "ESP32-Sensor", and captive_portal: shows a page there where you can enter new Wi-Fi details.
Passwords don't sit in plain text inside the YAML; the !secret tag reads each value from the secrets.yaml file in the same folder. In the Device Builder, open it with the Secrets button at the top right and fill it in like this. Move the encryption key the wizard wrote into the YAML here too, so it stays private even if you share your config.
1# secrets.yaml
2wifi_ssid: "EvAgi_2.4GHz"
3wifi_password: "gizli#Sifre2024"     # özel karakter varsa tırnak / quote special characters
4api_key: "SIHIRBAZIN_URETTIGI_44_KARAKTERLIK_ANAHTAR"   # sihirbazın anahtarını koru / keep the wizard's key
5ota_password: "ota-sifresi"
6ap_password: "yedek12345" # en az 8 karakter / at least 8 charactersFirst flash over USB, then over Wi-Fi (OTA)
While there's no ESPHome on the ESP32 yet, you have to flash it once with a cable. Click Install on the device card and you'll get several options. If the ESP32 is plugged into the machine running Home Assistant, "Plug into the computer running ESPHome Device Builder" is easiest. If it's plugged into your own computer, "Plug into this computer" programs the board straight from Chrome or Edge. Browsers only allow USB access over HTTPS, though; if you open Home Assistant over plain http, use "Manual download" to get the file and flash it with the ESPHome Web page.
The first compile takes a few minutes because ESPHome downloads its compiler toolchain; 5–10 minutes on a Raspberry Pi 4 is normal, and later builds are much faster. If the browser can't find the board or says "Failed to connect", hold the BOOT button and start the upload again; there's more in our ESP32 "Failed to connect" error guide. After flashing, the board restarts, joins your Wi-Fi, and the Device Builder shows Online on the device. From now on you choose Install > Wirelessly for every change; the firmware goes over OTA and you won't need the USB cable again.
Now go to Settings > Devices & services in Home Assistant. Under "Discovered" you'll see esp32-sensor; click Configure, confirm, and the device is added. Because the Device Builder runs on the same Home Assistant, the encryption key is usually picked up automatically; if you're asked for it, paste the api_key value from secrets.yaml.
Adding sensors: DHT22, PIR, relay and LED
This is where the fun starts. Add the blocks below to the end of your YAML; each one matches the pins in the wiring table above. If you have several components of the same kind, such as two sensors, list them one after another under a single sensor: heading.
1sensor:
2  - platform: dht
3    pin: GPIO4
4    model: DHT22
5    update_interval: 30s
6    temperature:
7      name: "Temperature"
8      filters:
9        - offset: -0.5              # kalibrasyon farkı / calibration offset
10    humidity:
11      name: "Humidity"
12  - platform: wifi_signal
13    name: "Wi-Fi Signal"
14    update_interval: 60s
15
16binary_sensor:
17  - platform: gpio
18    pin: GPIO27
19    name: "Motion"
20    device_class: motion
21    filters:
22      - delayed_off: 30s            # son hareketten 30 sn sonra temiz / clear 30 s after last motion
23
24switch:
25  - platform: gpio
26    id: relay
27    name: "Relay"
28    pin:
29      number: GPIO26
30      inverted: true                # aktif LOW röle / active-LOW relay
31    restore_mode: ALWAYS_OFF        # elektrik gelince kapalı / off after power-up
32
33output:
34  - platform: ledc                  # ESP32 PWM birimi / ESP32 PWM unit
35    pin: GPIO18
36    id: led_pwm
37
38light:
39  - platform: monochromatic
40    output: led_pwm
41    name: "LED"
42
43button:
44  - platform: restart
45 name: "Restart"| Block | How it shows up in Home Assistant | Key setting |
|---|---|---|
| platform: dht | Temperature (°C) and humidity (%) sensors | update_interval: 30s; don't read a DHT22 more often than every two seconds |
| platform: wifi_signal | Signal strength (dBm) | Weaker than -75 dBm: move the board closer to the router |
| binary_sensor gpio | Motion detected / clear | device_class: motion gives it the right icon |
| switch gpio | On/off switch | inverted: true for an active-LOW relay |
| output ledc + light | Light with a brightness slider | ledc is the ESP32's hardware PWM unit |
| button restart | Restart button | Reboot the board remotely |
A few details: if the DHT22 reads slightly off, correct it with the offset filter; the -0.5 in the example subtracts half a degree from every reading. The PIR output stays HIGH for a few seconds after each movement; the delayed_off: 30s filter waits 30 seconds after the last motion before reporting "clear", so the state doesn't keep flickering in Home Assistant. On the relay, restore_mode: ALWAYS_OFF stops whatever is connected from switching on by itself after a power cut. For the time and sensitivity knobs on the PIR, see our PIR motion sensor guide; for using relays safely, see the relay module guide.
Automation on the device: keeps working even when Home Assistant is down
One of ESPHome's strengths is that simple automations run directly on the ESP32. With the change below, the PIR switches the relay on when it sees motion and off again 60 seconds after the last movement; the light keeps working even if Home Assistant restarts or the Wi-Fi drops. Replace the earlier binary_sensor block with this one:
1binary_sensor:
2  - platform: gpio
3    pin: GPIO27
4    name: "Motion"
5    device_class: motion
6    filters:
7      - delayed_off: 60s            # 60 sn hareketsizlikten sonra kapalı / off after 60 s without motion
8    on_press:                       # hareket başladı / motion started
9      then:
10        - switch.turn_on: relay
11    on_release:                     # 60 sn hareket yok / no motion for 60 s
12      then:
13        - switch.turn_off: relay
This is where the id: relay line pays off: the automation reaches the relay through that ID. If new motion arrives before delayed_off runs out, the timer starts over, so the light stays on while someone is moving around the room. For more complex rules such as "only when it's dark" or "only at night", Home Assistant automations are more convenient; but leaving a basic job like "motion means light" to the device itself is a good habit.
If your device shows as "offline"
The most common complaint: Home Assistant shows the sensor values, but the Device Builder shows the device greyed out as Offline. The Device Builder works out the status from mDNS announcements, while Home Assistant connects straight to the API. When a Docker network, separate VLANs or a guest Wi-Fi network block mDNS, the device looks offline even though it's running fine. The table gives the fix for each symptom:
| Symptom | Likely cause | Fix |
|---|---|---|
| Offline in the Device Builder, values arrive in Home Assistant | mDNS is being blocked | Turn on status_use_ping in the add-on options; in Docker, set ESPHOME_DASHBOARD_USE_PING=true |
| Not visible anywhere, an "ESP32-Sensor" network shows up on your phone | Wrong Wi-Fi password or a 5 GHz network | Join that network, enter your 2.4 GHz network's details on the page that opens, fix secrets.yaml |
| The board reboots every 15 minutes | api: is enabled but Home Assistant never adopted the device | Add the device in Home Assistant or put reboot_timeout: 0s under api: |
| Wireless upload times out | The name can't be resolved, the device is on another subnet | Add use_address: with the board's IP under wifi:, or give it a static IP |
| The board resets when the relay clicks | USB power is too weak and the voltage dips | Use a separate, solid 5 V adapter and connect the grounds |
| A device on the guest network is never found | Guest networks isolate devices from the home network | Move the board to the same network as Home Assistant |
If you see "Brownout detector was triggered" when it resets, the cause is almost always power; our ESP32 brownout and Guru Meditation guide shows how a capacitor and the right adapter fix it. The quickest way to see whether the device is really running is the Logs button: the log shows the Wi-Fi connection, the IP address it got and every single sensor reading.
Common YAML errors and what they mean
| Error message | What it means | Fix |
|---|---|---|
| found character '\t' that cannot start any token | There's a tab character on the line | Replace tabs with spaces |
| mapping values are not allowed here | Indentation is off or there's no space after a colon | Line it up with the line above, write pin: GPIO4 instead of pin:GPIO4 |
| Secret 'wifi_ssid' not defined | That name is missing from secrets.yaml | Spell the name the same in both files; case matters |
| Platform not found: 'sensor.dht22' | Wrong platform name | Use platform: dht with model: DHT22 |
| Duplicate key "sensor" | The same section appears twice | Put all sensors under a single sensor: |
| GPIO12 is a strapping PIN | Warning: the pin affects booting | Move to a safe pin if you can |
| ID relay redefined | Two components use the same id | Give every component a unique id |
ESPHome, Tasmota or your own MQTT code?
There are three common ways to bring an ESP32 into home automation with little or no code. They differ in where you configure things and how the device talks to Home Assistant:
| Feature | ESPHome | Tasmota | Arduino + MQTT (your own code) |
|---|---|---|---|
| How you configure it | YAML file, recompiled on every change | Prebuilt firmware, settings in the web UI | C++ code |
| Home Assistant link | Native API, automatic discovery | MQTT and the Tasmota integration | MQTT, you write the discovery messages |
| Wireless updates | Yes, one click | Yes, from the web UI | You add ArduinoOTA yourself |
| On-device automation | on_press, interval, lambda | Rules commands | Whatever you code |
| Supported boards | ESP32, ESP8266, Pico W and some other Wi-Fi chips | ESP32 and ESP8266 | All of them |
| Learning curve | Low: YAML is easy to read | Very low: you pick from menus | High: you need to program |
| Best for | Sensor devices around Home Assistant | Reflashing an off-the-shelf smart plug | Custom behaviour and full control |
In short, if you use Home Assistant, ESPHome is almost always the option with the least hassle. If you want to reflash a smart plug you bought, Tasmota is handy. When you want to decide every detail yourself, such as a game with a display, a custom protocol or a system without Home Assistant, writing your own code is more flexible, as in our ESP32 MQTT and Home Assistant guide. You can also mix the two: ESPHome lets you write small pieces of C++ in lambda blocks.
ESPHome on the ESP8266 and Raspberry Pi Pico W
To use the same YAML on another board, you only swap the board block and the PWM output platform. Pin names depend on the board: on the ESP8266 you write the silkscreen labels such as D5, on the Pico W the GPIO numbers. The regular Pico without Wi-Fi and the Arduino Uno aren't suitable for ESPHome. The first flash on a Pico W is a little different: hold BOOTSEL while plugging in USB, a drive called RPI-RP2 appears on your computer, and you drag the .uf2 file ESPHome produced onto it.
| Board | Board block | PWM output | First flash |
|---|---|---|---|
| ESP32 DevKit | esp32: board: esp32dev | ledc | USB, from the browser |
| ESP32-C3 SuperMini | esp32: board: esp32-c3-devkitm-1 | ledc | USB, from the browser |
| Wemos D1 mini | esp8266: board: d1_mini | esp8266_pwm | USB, from the browser |
| NodeMCU V3 | esp8266: board: nodemcuv2 | esp8266_pwm | USB, from the browser |
| Raspberry Pi Pico W | rp2040: board: rpipicow | rp2040_pwm | BOOTSEL + .uf2 file |
ESPHome project ideas
- Room climate sensor: add a BH1750 light sensor next to the DHT22 and send the light level in lux to Home Assistant.
- Automatic plant watering: use a soil moisture sensor and the relay to run a pump when the soil dries out.
- Door and window sensor: with a reed switch, get a notification on your phone when the door opens.
- CO2 monitor: watch the air in the room with an MH-Z19 and get a reminder to open a window when it climbs.
- Colour LED strip: drive a WS2812B strip with ESPHome's esp32_rmt_led_strip component; if all you want is light effects, WLED is the more ready-made choice.
- Garage door opener: set up the relay as a button that gives a short pulse and use a reed switch to show whether the door is open or closed.
The first flash is the hardest part of setting up ESPHome; after that it's just a matter of adding a few lines to your YAML. If you'd like to get to know the parts one by one before building these circuits, the BlueGrays app has ESP32 projects for PIR automatic lighting, DHT22 temperature and humidity, and smart lighting with a PIR, LDR and relay, each with a step-by-step circuit diagram and code; you can carry the same wiring over to ESPHome unchanged.
Frequently asked questions
Does ESPHome work without Home Assistant?
Yes. Remove the api: block and add web_server:, and the device serves its own web page; add mqtt: and it talks to systems like Node-RED. On-device automations run independently of Home Assistant anyway. Just note that if api: is present and no client connects, the device reboots every 15 minutes; turn that off with reboot_timeout: 0s.
ESPHome vs Tasmota: which is better?
If you use Home Assistant, ESPHome is usually more convenient: the device is discovered automatically, sensors arrive with the right units and everything lives in one YAML file. Tasmota needs no compiling, so it's more practical when you want to flash an off-the-shelf smart plug once and configure it from a web page.
Why does my ESPHome device show as offline?
The Device Builder checks device status over mDNS; if Docker, VLANs or a guest network block it, the device shows Offline even though it works. Turning on status_use_ping in the add-on options usually fixes it. If the device doesn't show up anywhere, the Wi-Fi details are wrong or the network is 5 GHz; the ESP32 only joins 2.4 GHz networks.
Can I use Arduino code in ESPHome?
Partly. You can write C++ expressions in lambda blocks and add your own components with external_components. But you can't paste a full Arduino sketch with setup and loop as it is; you need to split the logic into ESPHome components and automations.
Which boards does ESPHome support?
Most of the ESP32 family (ESP32, S2, S3, C3, C6), ESP8266 boards, the Wi-Fi-equipped Raspberry Pi Pico W and a few other Wi-Fi chips. The regular Raspberry Pi Pico without Wi-Fi and the Arduino Uno aren't suitable for ESPHome.
ESPHome can't find my ESP32 on the first flash. What should I do?
First make sure the cable carries data and that the driver for the board's USB chip, CP2102 or CH340, is installed. If you're flashing from the browser, use Chrome or Edge and open the page over HTTPS. Holding the BOOT button while it connects fixes most "Failed to connect" errors.
Projects to build after reading this
See all projects
LED Blink with ESP32
Teaches basic GPIO output usage with ESP32. We achieve a blinking effect by turning an LED on and off from a digital pin. ESP32 version of the classic blink project on Arduino UNO; the basic blink commands in the Arduino environment are the same, but the ESP32's pin layout and 3.3 V GPIO levels differ from those of the Arduino UNO.

ESP32 DHT22 Temperature and Humidity (with LCD Display)
This project measures ambient temperature and humidity using a DHT22 sensor and displays the data in real time on a 16x2 I2C LCD. Data is read from the sensor using the one-wire protocol via the Adafruit DHT library. This project serves as the foundation for IoT weather stations, smart home automation, or environmental monitoring systems in greenhouses. Communication with the DHT22 is established via the ESP32's GPIO 4 pin.

Automatic Lighting with the ESP32 PIR Motion Sensor
In this project an HC-SR501 PIR motion sensor detects someone entering the room and turns on an LED automatically. millis() tracks how long the LED stays on: each HIGH reading refreshes the last-motion time, and the LED turns off at least 10 seconds after the last HIGH. The code also waits 50 ms with delay(50) in every loop, so the loop is not fully non-blocking. Great for stairs, hallways, bathrooms or closet lighting.

ESP32 Smart Lighting (PIR + LDR + Relay + OLED)
With an ESP32, a PIR motion sensor, an LDR light sensor and a relay module, we turn your hallway, bathroom or pantry into smart lighting. If the room is already bright, the light stays off even when there is motion, so it never wastes energy during the day. The light stays on for 30 seconds, and the time extends automatically while motion continues.

ESP32 OTA Update — Wireless Firmware Installation (With LCD Screen)
In this project you'll learn to upload new firmware to the ESP32 over Wi-Fi, without a USB cable. With the ArduinoOTA library the ESP32 becomes visible on the network and shows up automatically as bluegrays-ota under "Network port" in the Arduino IDE. The first upload goes over USB; after that every update is wireless, a key feature for devices out in the field.

ESP32 mDNS: Accessing the Device via bluegrays-esp.local (with LCD Screen)
In this project we add an mDNS (Multicast DNS) service to the ESP32, so you reach it by a readable host name like bluegrays-esp.local instead of an IP address. Even if the IP assigned by DHCP changes, the device always answers to the same name. A small web server on the board lets you control the LED from your browser at http://bluegrays-esp.local/.
ESP32 Motion Alarm System (PIR + Buzzer + LED + Telegram)
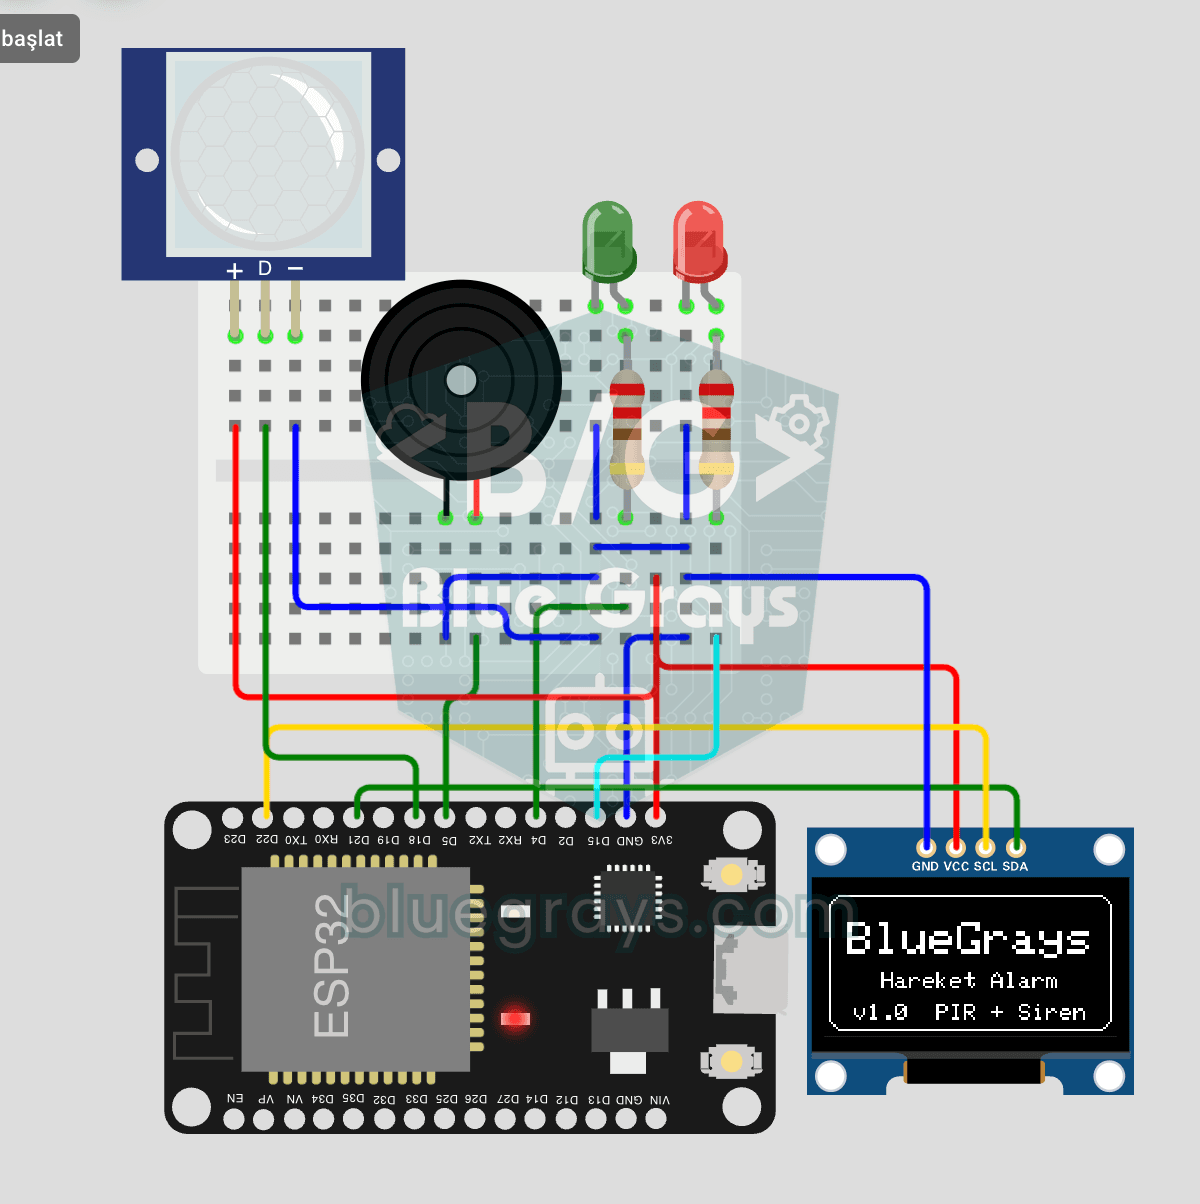
A smart security alarm: when the PIR sensor detects motion, it sounds the buzzer, lights the LED and sends the owner an instant Telegram notification. A 30-second cooldown limits how often the alarm repeats; it does not filter out the PIR sensor's false detections. Use it at home, in a garage, a storeroom or a study.