
ESP32-S3 DevKitC Guide: N16R8, Two USB Ports, PSRAM, Arduino IDE
ESP32-S3 DevKitC guide: what N16R8 and N8R2 mean, UART vs USB port, USB CDC On Boot, OPI PSRAM, the GPIO48 RGB LED, Arduino IDE settings and USB HID.
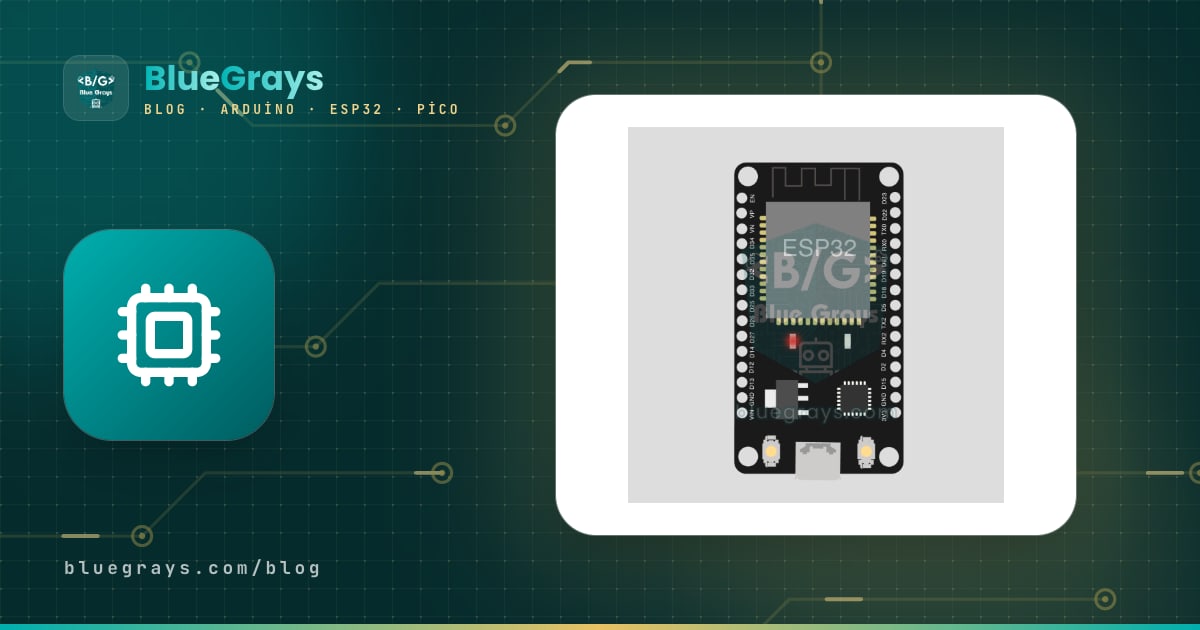
The ESP32-S3 is Espressif's dual-core Wi-Fi and Bluetooth chip, upgraded with native USB, more pins, large PSRAM and vector instructions that speed up AI workloads. The board you'll see most often is the ESP32-S3-DevKitC-1 and its clones: it carries two USB-C ports, a BOOT and an RST button and a single addressable RGB LED. Codes such as N16R8 or N8R2 on the board or module tell you the size of the flash memory and the PSRAM, and they're the key to getting the Arduino IDE settings right.
In this guide you'll learn how the ESP32-S3 differs from the classic ESP32, what the model codes mean, which of the two USB ports to use and when, the USB CDC On Boot setting that fixes an empty Serial Monitor, and how to pick the right PSRAM mode (OPI or QSPI). Then you'll write a test sketch that lights the onboard RGB LED, an example that allocates a 1 MB buffer in PSRAM and a HID project that makes the ESP32-S3 show up on your computer as a USB keyboard.
What is the ESP32-S3? How it differs from the classic ESP32
The ESP32-S3 wasn't designed to replace the classic ESP32 but to fill the gaps it left. The biggest difference is native USB: the chip can connect straight to a computer with no USB-to-serial converter in between and present itself as a serial port, keyboard, mouse or MIDI device. Its Xtensa LX7 cores add vector instructions for signal processing and neural network maths, and dedicated camera (DVP) and parallel LCD interfaces make imaging projects easier. Two things are missing, though: there's no Bluetooth Classic (only Bluetooth 5 LE), and there's no DAC for analog output.
| Feature | ESP32 (classic) | ESP32-S3 |
|---|---|---|
| Processor | Xtensa LX6, dual-core, 240 MHz | Xtensa LX7, dual-core, 240 MHz, vector instructions |
| Internal SRAM | 520 KB | 512 KB |
| PSRAM | Up to 4 MB on WROVER modules | 2 MB Quad or 8 MB Octal, depending on the module |
| Bluetooth | Classic and BLE 4.2 | BLE 5 only (with long range support) |
| USB | None, needs a separate USB-serial chip | Native USB OTG and USB Serial/JTAG |
| Usable GPIO | About 34 | 45 |
| Touch pins | 10 | 14 |
| DAC (analog output) | 2 channels, 8-bit | None |
| Camera and display interface | Camera over I2S (ESP32-CAM) | Dedicated DVP camera and parallel LCD interface |

ESP32-S3 model codes: what does N16R8 mean?
The code on the module's metal shield or in the seller's listing is easy to read: the number after N is the flash size and the number after R is the PSRAM size, both in megabytes. N16R8 means 16 MB of flash and 8 MB of PSRAM; N8R2 means 8 MB of flash and 2 MB of PSRAM. The code also tells you how the PSRAM is connected: on ESP32-S3-WROOM-1 modules, R2 is four-line Quad SPI (QSPI) PSRAM and R8 is eight-line Octal SPI (OPI) PSRAM. A trailing V (as in N32R8V) marks WROOM-2 modules whose flash and PSRAM run at 1.8 V. You choose the PSRAM setting in the Arduino IDE based on this information.
| Code | Flash | PSRAM | Arduino IDE PSRAM setting |
|---|---|---|---|
| N8 | 8 MB | None | Disabled |
| N16 | 16 MB | None | Disabled |
| N4R2 | 4 MB | 2 MB Quad (QSPI) | QSPI PSRAM |
| N8R2 | 8 MB | 2 MB Quad (QSPI) | QSPI PSRAM |
| N8R8 | 8 MB | 8 MB Octal (OPI) | OPI PSRAM |
| N16R8 | 16 MB | 8 MB Octal (OPI) | OPI PSRAM |
| N32R8V (WROOM-2) | 32 MB Octal, 1.8 V | 8 MB Octal (OPI) | OPI PSRAM and Flash Mode: OPI 80MHz |
Two USB ports: UART vs USB
The two USB-C ports on the ESP32-S3-DevKitC-1 don't do the same job. The port marked UART (COM on some clones) goes to a USB-serial chip, a CP2102N or a CH343P depending on the board revision, which in turn connects to the ESP32-S3's UART0 lines (GPIO 43 and 44). It's the same as the single port on classic ESP32 boards and puts the board into download mode automatically during uploads. The port marked USB is wired directly to the chip's GPIO 19 (D-) and GPIO 20 (D+). Plug into it and the computer sees the ESP32-S3's own USB peripheral with no chip in between; Windows 10 and 11, macOS and Linux need no driver.
| Feature | UART (COM) port | USB port (native) |
|---|---|---|
| Connected to | UART0 (GPIO 43 and 44) through a USB-serial chip | Directly to GPIO 19 (D-) and GPIO 20 (D+) |
| Driver | CP210x or CH343, depending on the chip | Not needed |
| Name on the computer | COMx, /dev/cu.usbserial-… or /dev/cu.wchusbserial… | COMx (USB JTAG/serial debug unit), /dev/cu.usbmodem…, /dev/ttyACM0 |
| Serial output goes here | With USB CDC On Boot: Disabled | With USB CDC On Boot: Enabled |
| Uploading code | Always, with automatic reset | Usually; the port can vanish if the sketch crashes or enters deep sleep |
| USB keyboard and mouse (HID) | Not possible | Possible with USB Mode: USB-OTG (TinyUSB) |
The USB CDC On Boot setting: why is the Serial Monitor empty?
This is the problem ESP32-S3 users run into most: the sketch uploads, the board runs, but not a single line reaches the Serial Monitor. The reason is which port your sketch's Serial object writes to. With Tools > USB CDC On Boot set to Disabled, Serial writes to UART0, the UART port; if your cable is in the USB port, the messages never reach you. Set it to Enabled and Serial is routed to the native USB port. The rule is simple: match the setting to the port your cable is in. Enabled for the USB port, Disabled for the UART port. With Enabled, a wait such as while (!Serial) in your code loops forever when the board isn't connected to a computer, so use a few seconds of delay or a timeout instead.
Arduino IDE settings (ESP32S3 Dev Module)
| Menu | For N16R8 | For N8R2 | Note |
|---|---|---|---|
| Board | ESP32S3 Dev Module | ESP32S3 Dev Module | Also the right choice for clone boards |
| USB CDC On Boot | Enabled | Enabled | Disabled if you use the UART port |
| Flash Size | 16MB (128Mb) | 8MB (64Mb) | The N value in the model code |
| Partition Scheme | 16M Flash (3MB APP/9.9MB FATFS) | 8M with spiffs (3MB APP/1.5MB SPIFFS) | For large sketches and a file system |
| PSRAM | OPI PSRAM | QSPI PSRAM | The R value in the model code |
| Flash Mode | QIO 80MHz | QIO 80MHz | OPI 80MHz on V-coded WROOM-2 modules |
| USB Mode | Hardware CDC and JTAG | Hardware CDC and JTAG | USB-OTG (TinyUSB) for a USB keyboard or mouse |
| Upload Mode | UART0 / Hardware CDC | UART0 / Hardware CDC | The default is fine |
ESP32-S3 support is part of Espressif's esp32 package that you install from the Boards Manager; no separate package is needed. You'll find the setup steps in the Arduino IDE installation guide. The menu names are the same in the 2.x and 3.x core. Get the PSRAM setting wrong and you'll see one of two symptoms: with Disabled, the sketch runs but behaves as if there were no PSRAM; with QSPI PSRAM selected on a board with Octal PSRAM, the board prints PSRAM ID read error at boot and can't use the PSRAM.
First test: RGB LED, serial port and PSRAM
The RGB LED on the DevKitC-1 is a WS2812-type addressable LED; it's driven by a single pin and lit with color data rather than with digitalWrite like a normal LED. The ESP32 Arduino core has a ready-made function for it: neopixelWrite in 2.x and rgbLedWrite in 3.x. On revision 1.0 of the board and on most clones the LED is on GPIO 48; on Espressif's revision 1.1 it's on GPIO 38, so check the revision printed on the back of your board. Some clone boards have a small solder jumper marked RGB next to the LED; if the LED never lights up, that jumper may be open. The sketch below lights the LED red, green and blue in turn and prints the flash and PSRAM size to the Serial Monitor at startup.
1// ESP32-S3: dahili RGB LED, seri port, PSRAM ve flaş testi
2// ESP32-S3: onboard RGB LED, serial port, PSRAM and flash test
3const int RGB_PIN = 48;                 // DevKitC-1 v1.0 ve çoğu klon: 48, v1.1: 38 / v1.0 and most clones: 48, v1.1: 38
4
5void setRgb(uint8_t r, uint8_t g, uint8_t b) {
6#if ESP_ARDUINO_VERSION_MAJOR >= 3
7  rgbLedWrite(RGB_PIN, r, g, b);        // çekirdek 3.x / core 3.x
8#else
9  neopixelWrite(RGB_PIN, r, g, b);      // çekirdek 2.x / core 2.x
10#endif
11}
12
13void setup() {
14  Serial.begin(115200);
15  delay(1500);                          // USB'nin açılmasını bekle / give the USB port time to come up
16  Serial.println("ESP32-S3 hazir / ready");
17  Serial.printf("Flash: %lu bayt / bytes\n", (unsigned long)ESP.getFlashChipSize());
18  Serial.printf("PSRAM: %lu bayt / bytes\n", (unsigned long)ESP.getPsramSize());   // 0 ise menüden aç / if 0, enable it in the menu
19}
20
21void loop() {
22  setRgb(40, 0, 0);  delay(500);        // kırmızı / red
23  setRgb(0, 40, 0);  delay(500);        // yeşil / green
24  setRgb(0, 0, 40);  delay(500);        // mavi / blue
25  setRgb(0, 0, 0);   delay(500);        // kapalı / off
26}
On an N16R8 board with the right settings, the Serial Monitor shows 16,777,216 bytes on the Flash line (the value you chose in the Flash Size menu) and a value close to 8 MB on the PSRAM line; the small gap is the space the PSRAM allocator keeps for itself. If the PSRAM line shows 0, check the PSRAM setting in the menu. If nothing arrives at all, set USB CDC On Boot to match the port your cable is in.
Using PSRAM: large buffers
The ESP32-S3's 512 KB of internal memory is shared between the Wi-Fi stack, Bluetooth and your code, and declaring a big array eats it up fast. That's why PSRAM matters: camera frame buffers, a full-screen drawing buffer for a color display, audio recordings or large JSON documents don't fit in internal memory but fit comfortably in 8 MB of PSRAM. In Arduino you allocate memory from PSRAM with ps_malloc; most ESP32 libraries (such as the camera driver) already use PSRAM on their own. PSRAM is slower than internal memory, so keep small, frequently used variables in regular RAM.
1// PSRAM'de 1 MB tampon ayırmak / allocating a 1 MB buffer in PSRAM
2void setup() {
3  Serial.begin(115200);
4  delay(1500);
5  if (!psramFound()) {
6    Serial.println("PSRAM yok: Araçlar > PSRAM ayarını kontrol et / no PSRAM: check Tools > PSRAM");
7    return;
8  }
9  const size_t SIZE = 1024 * 1024;                       // 1 MB, dahili RAM'e sığmaz / does not fit in internal RAM
10  uint8_t* buffer = (uint8_t*)ps_malloc(SIZE);           // PSRAM'den ayır / allocate from PSRAM
11  if (buffer == NULL) {
12    Serial.println("Ayrılamadı / allocation failed");
13    return;
14  }
15  memset(buffer, 0xA5, SIZE);                            // tamponu doldur / fill the buffer
16  Serial.printf("1 MB tampon hazır, boş PSRAM / buffer ready, free PSRAM: %lu\n", (unsigned long)ESP.getFreePsram());
17  free(buffer);
18}
19
20void loop() {
21}
Why the ESP32-S3? Cameras, AI and USB HID
- Camera projects: the dedicated DVP camera interface and 8 MB of PSRAM give higher resolutions and frame rates with OV2640 or OV5640 cameras. To compare with the classic approach, see the ESP32-CAM guide.
- AI and audio: thanks to the vector instructions, Espressif's ESP-DL and ESP-SR libraries run tasks such as face detection and wake word recognition right on the chip.
- USB HID: the board can connect to a computer as a keyboard, mouse, gamepad or MIDI device, which makes it ideal for macro pads and presentation remotes.
- Color displays: the parallel LCD interface and PSRAM make it easier to draw smooth interfaces on large TFT screens.
- More pins: 45 GPIOs and 14 touch pins give you room to breathe in projects with lots of sensors and buttons.
- Bluetooth 5 LE: long range mode and 2 Mbps are supported; using BLE is covered in the ESP32 Bluetooth BLE guide.
USB HID: turning the ESP32-S3 into a keyboard
One of the most fun things the classic ESP32 can't do is make the ESP32-S3 show up on your computer as a real USB keyboard. Set Tools > USB Mode to USB-OTG (TinyUSB) and plug the cable into the port marked USB. The sketch below types Hello and presses Enter every time you press the board's BOOT button (GPIO 0). USB HID sends key positions, not letters, and the computer translates those positions according to its own keyboard layout. On layouts such as German QWERTZ, French AZERTY or Turkish Q, some letters, digits and symbols can come out differently, so the example uses letters that land on the same keys in every layout.
1// ESP32-S3 USB klavye: BOOT düğmesine basınca bilgisayara "Hello" yazar
2// ESP32-S3 USB keyboard: types "Hello" on the computer when you press BOOT
3// Araçlar > USB Mode: "USB-OTG (TinyUSB)" seç, kabloyu "USB" yazan porta tak
4// Tools > USB Mode: select "USB-OTG (TinyUSB)", plug the cable into the port marked "USB"
5#if !(defined(CONFIG_IDF_TARGET_ESP32S3) || defined(CONFIG_IDF_TARGET_ESP32S2)) || ARDUINO_USB_MODE
6// Bu kart ya da bu USB Mode ayarı USB HID desteklemez / no USB HID on this board or USB Mode
7void setup() {
8  Serial.begin(115200);
9}
10
11void loop() {
12  Serial.println("USB Mode: USB-OTG (TinyUSB) gerekli / required");
13  delay(2000);
14}
15#else
16#include "USB.h"
17#include "USBHIDKeyboard.h"
18
19USBHIDKeyboard Keyboard;
20const int BUTTON_PIN = 0;               // BOOT düğmesi / BOOT button
21
22void setup() {
23  pinMode(BUTTON_PIN, INPUT_PULLUP);
24  Keyboard.begin();
25  USB.begin();
26}
27
28void loop() {
29  if (digitalRead(BUTTON_PIN) == LOW) {
30    Keyboard.print("Hello");            // klavye düzeninden bağımsız harfler / layout-safe letters
31    Keyboard.write(KEY_RETURN);
32    while (digitalRead(BUTTON_PIN) == LOW) {
33      delay(10);                        // bırakılana kadar bekle / wait until released
34    }
35    delay(50);                          // titreşim payı / debounce margin
36  }
37}
38#endifESP32-S3 pins: what to watch out for
| Pins | Status | Note |
|---|---|---|
| GPIO 0, 3, 45, 46 | Use with care | Strapping pins; their level at boot matters |
| GPIO 19, 20 | Reserved for USB | The native USB D- and D+ lines |
| GPIO 43, 44 | UART0 | TX and RX of the UART port |
| GPIO 35, 36, 37 | Don't use on R8 modules | Wired to the Octal PSRAM |
| GPIO 26–32 | Not broken out | Wired to the flash and PSRAM inside the module |
| GPIO 1–10 | ADC1 | Reads analog values reliably even with Wi-Fi on |
| GPIO 11–20 | ADC2 | Unreliable when used together with Wi-Fi |
| GPIO 1–14 | Touch | Unlike the classic ESP32, the value rises when touched |
| GPIO 8 and 9 | I2C | Default SDA and SCL in the Arduino core |
| GPIO 47, 48 | 1.8 V on V modules | Run at 1.8 V on WROOM-2 |
Common problems and fixes
| Symptom | Cause | Fix |
|---|---|---|
| Serial Monitor is empty | Cable in the USB port, USB CDC On Boot: Disabled | Set it to Enabled or plug the cable into the UART port |
| The port disappears after uploading | The sketch crashed, went into deep sleep, or USB Mode is USB-OTG | Press RST while holding BOOT, then upload |
| Constant resets or PSRAM ID read error | The PSRAM setting doesn't match the module | Choose OPI PSRAM for R8 and QSPI PSRAM for R2 |
| The RGB LED doesn't light | Revision 1.1 board (GPIO 38) or an open RGB solder jumper | Change RGB_PIN, solder the jumper closed |
| Serial Bluetooth not available or not enabled | The ESP32-S3 has no Bluetooth Classic | Use the BLE library instead of BluetoothSerial |
| 'dacWrite' was not declared in this scope | The ESP32-S3 has no DAC | Use PWM with an RC filter or an I2S audio amplifier |
| Failed to connect to ESP32-S3 | The board didn't enter download mode | Enter download mode with BOOT and RST; details in the ESP32 Failed to Connect guide |
Once you understand its two ports and the PSRAM setting, the ESP32-S3 is as easy to use as the classic ESP32 and far more capable. Since the board's RGB LED is really a single-pixel WS2812, the ESP32 WS2812B NeoPixel Strip Control project in the BlueGrays app makes a good next step; you can also follow the app's other ESP32 projects step by step with their wiring diagrams and ready-made code, and adapt them to this board by moving the pin numbers to pins that exist on the S3.
Frequently asked questions
What does N16R8 mean on an ESP32-S3?
N16 means the module has 16 MB of flash memory and R8 means 8 MB of PSRAM. On ESP32-S3-WROOM-1 modules, R8 PSRAM is connected over Octal SPI (OPI), so in the Arduino IDE you should select OPI PSRAM for PSRAM and 16MB for Flash Size.
Which USB port should I use on the ESP32-S3 DevKitC?
Both ports work for uploading and the Serial Monitor. The UART port behaves like a classic ESP32 and is used with USB CDC On Boot: Disabled; the USB port connects directly to the chip, needs no driver and is used with USB CDC On Boot: Enabled. If you want to build a USB keyboard or mouse, you need the USB port.
Why is my ESP32-S3 not printing to the Serial Monitor?
Most likely the cable is in the USB port while USB CDC On Boot is set to Disabled, so Serial output goes to the UART port. Set it to Enabled and upload again, or plug the cable into the UART port and set the Serial Monitor to the same baud rate as your sketch.
How do I enable PSRAM on the ESP32-S3 in the Arduino IDE?
Under Tools > PSRAM, pick the option that matches your module: OPI PSRAM for R8 modules, QSPI PSRAM for R2 modules. In your code, psramFound() tells you whether PSRAM was detected, and ps_malloc() allocates large buffers from it.
Does the ESP32-S3 support Bluetooth Classic?
No. The ESP32-S3 only supports Bluetooth 5 LE, so the BluetoothSerial library and direct pairing with Classic devices such as the HC-05 don't work. Use the BLE library to talk to a phone; if you need Bluetooth Classic, choose the classic ESP32.
Which pin is the built-in LED on the ESP32-S3 DevKitC-1?
The built-in LED on the ESP32-S3-DevKitC-1 is an addressable RGB LED, on GPIO 48 on board revision 1.0 and most clones, and on GPIO 38 on revision 1.1. It's lit by sending a color with neopixelWrite on core 2.x or rgbLedWrite on core 3.x rather than with digitalWrite.
Projects to build after reading this
See all projects
ESP32 Built-in LED Blink
Blinking the built-in blue LED on the ESP32 DevKit V1. No external components required! The first project you should try when you buy an ESP32. GPIO 2 is connected to the built-in LED.

LED Blink with ESP32
Teaches basic GPIO output usage with ESP32. We achieve a blinking effect by turning an LED on and off from a digital pin. ESP32 version of the classic blink project on Arduino UNO; the basic blink commands in the Arduino environment are the same, but the ESP32's pin layout and 3.3 V GPIO levels differ from those of the Arduino UNO.

ESP32 WS2812B NeoPixel Strip Control
WS2812B (NeoPixel) addressable LEDs are smart RGB LEDs that can be chained and controlled from a single data pin. In this project we drive an 8-LED WS2812B strip with the Adafruit_NeoPixel library and create a smooth rainbow animation. The ESP32's 3.3V logic works with most WS2812B batches; if it gets unstable, we show the fix with a 470Ω series resistor and a 1000µF capacitor. The animation shifts the hue in HSV color space.

ESP32 Wi-Fi STA Connection (with LCD Screen)
In this project, we connect the ESP32 to the home Wi-Fi network in Station (STA) mode in a secure, fault-tolerant manner. We store the SSID and password in a separate secrets.h file to prevent leaking to Git, set up an auto-reconnect mechanism, and display the RSSI signal level and IP address on an I2C LCD screen. The internal LED works as a status indicator. It is a production-grade connection manager.

ESP32 Asynchronous Web Server (with IP Display on LCD)
In this project, we’re turning the ESP32 into an asynchronous web server that you can control from your phone or computer on the same Wi-Fi network. Thanks to the ESPAsyncWebServer library, the server can process multiple requests simultaneously (unlike the classic WebServer.h, which blocks on a single request). You’ll be able to open the ESP32’s IP address in a browser and click the ON/OFF buttons (the /on and /off routes) to turn the LED connected to GPIO 5 on and off.

ESP32 mDNS: Accessing the Device via bluegrays-esp.local (with LCD Screen)
In this project we add an mDNS (Multicast DNS) service to the ESP32, so you reach it by a readable host name like bluegrays-esp.local instead of an IP address. Even if the IP assigned by DHCP changes, the device always answers to the same name. A small web server on the board lets you control the LED from your browser at http://bluegrays-esp.local/.

ESP32 OTA Update — Wireless Firmware Installation (With LCD Screen)
In this project you'll learn to upload new firmware to the ESP32 over Wi-Fi, without a USB cable. With the ArduinoOTA library the ESP32 becomes visible on the network and shows up automatically as bluegrays-ota under "Network port" in the Arduino IDE. The first upload goes over USB; after that every update is wireless, a key feature for devices out in the field.

ESP32 Deep Sleep — Battery Saving (OLED + RTC RAM Counter)
The ESP32's Deep Sleep mode shuts down the CPU and most peripherals, cutting current draw to about 10µA, which is vital for battery-powered IoT devices. This project uses three wake-up sources: a timer (15 s), an external pin (EXT0, the button on GPIO 33) and a touch pin (T0/GPIO 4). Counters marked with RTC_DATA_ATTR survive deep sleep.