
TDS Sensor Arduino: Measure ppm, Calibrate, Monitor Water Quality
How to use a TDS sensor with Arduino: what ppm means, DS18B20 temperature compensation, calibration, drinking water, aquarium and hydroponic values, ESP32 log.
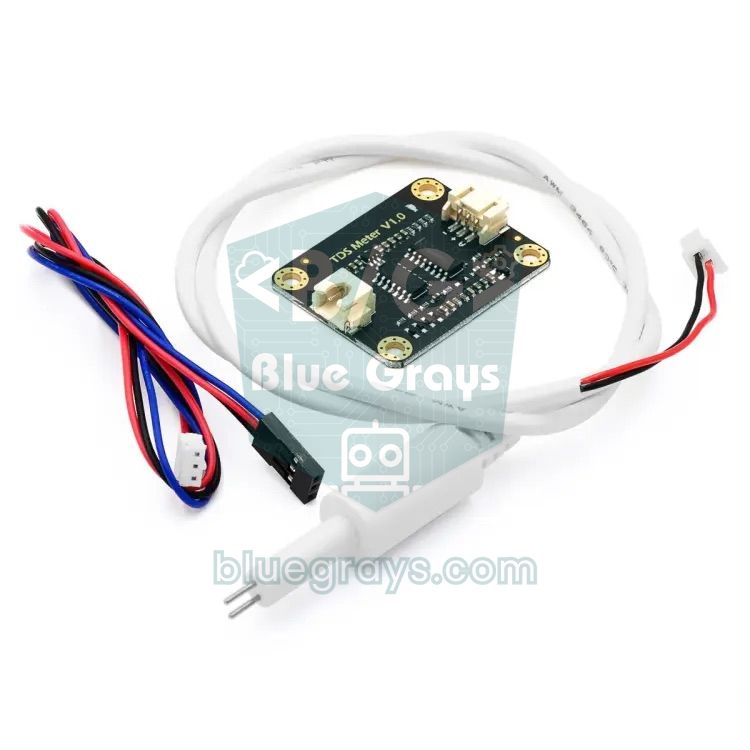
Combine a TDS sensor with Arduino and you get a cheap water quality meter that shows in a few seconds, in ppm (parts per million), how many dissolved minerals, salts and metals are in the water. TDS (Total Dissolved Solids) is the most practical measure for judging tap water hardness, checking whether a water filter still works, knowing when to change aquarium water or gauging the strength of a hydroponic nutrient solution. Pen-style TDS meters work on the same principle; with an Arduino you can log the measurement continuously, show it on a display and raise an alert when a threshold is crossed.
In this post we cover step by step what ppm means, how the sensor actually measures conductivity, how temperature affects the result and how to correct it with a DS18B20, calibration with a reference solution, the Arduino Uno code, value tables for drinking water, aquariums and hydroponics, water filter monitoring, timestamped logging with the ESP32 and Raspberry Pi Pico code. In the last section you'll see how a TDS sensor differs from a pH sensor and the most common mistakes.
What is TDS and what does ppm mean?
TDS is the total amount of all substances dissolved in a litre of water: ions such as calcium, magnesium, sodium, potassium, bicarbonate, chloride, sulphate and nitrate make up most of it. The unit is ppm (parts per million) or its water equivalent mg/L; 1 ppm means 1 milligram of dissolved matter in 1 litre of water. For example, every litre of 250 ppm tap water contains a quarter of a gram of minerals. Pure (distilled) water has a TDS very close to zero, while seawater is around 35,000 ppm.
It's important to know from the start that TDS alone doesn't tell you whether water is "clean or dirty". A mineral-rich spring water can have a high TDS and be perfectly healthy; on the other hand, low-TDS water may contain bacteria, lead or pesticides, because these barely change the water's conductivity. A TDS sensor is perfect for tracking the mineral load of water and changes in that load; for microbiological safety you need a lab analysis.
How does a TDS sensor work? From conductivity to ppm
TDS sensors sold for Arduino are really conductivity (EC) meters. Pure water hardly conducts electricity at all; the more dissolved ions it contains, the higher its conductivity. The board applies a small voltage between the two electrodes at the tip of the probe and measures the current that flows. This voltage is alternating rather than direct current: with DC, gas bubbles would build up on the electrodes (polarisation), the reading would drift and the electrodes would wear quickly. The board turns the result into an analog voltage between 0 and 2.3 V; the Arduino reads it, converts it first to conductivity (µS/cm) and then to TDS with a conversion factor.
Going from conductivity to TDS is an approximation: TDS (ppm) = EC (µS/cm) × k. Most meters, and the code in this post, use k = 0.5 (the sodium chloride or "500" scale). Some hydroponic meters use 0.7, so two meters can show the same water as 500 and 700 ppm and both are "right". Check which factor is used when comparing values, and in hydroponics work directly with EC (mS/cm) where you can.
| Feature | Value (common TDS module) |
|---|---|
| Supply | 3.3–5.5 V |
| Output | 0–2.3 V analog |
| Measuring range | 0–1000 ppm |
| Accuracy | About ±10% (at 25 °C, of full scale) |
| Excitation | Alternating current (prevents polarisation) |
| Probe | Waterproof, two electrodes; up to about 55 °C |
| Board | Not waterproof, keep it dry |
Temperature compensation: why you need a DS18B20
Water conductivity changes noticeably with temperature: ions move faster as they warm up, and the same water appears about 2% more conductive for every 1 °C. Readings of the same water at 15 °C and 30 °C differ by roughly a third; that's a far bigger error than the measurement itself. That's why TDS readings are corrected to 25 °C: corrected voltage = measured voltage / (1 + 0.02 × (T − 25)). The best sensor for water temperature is the waterproof, stainless-steel-sheathed DS18B20; you put it in the same water next to the TDS probe.
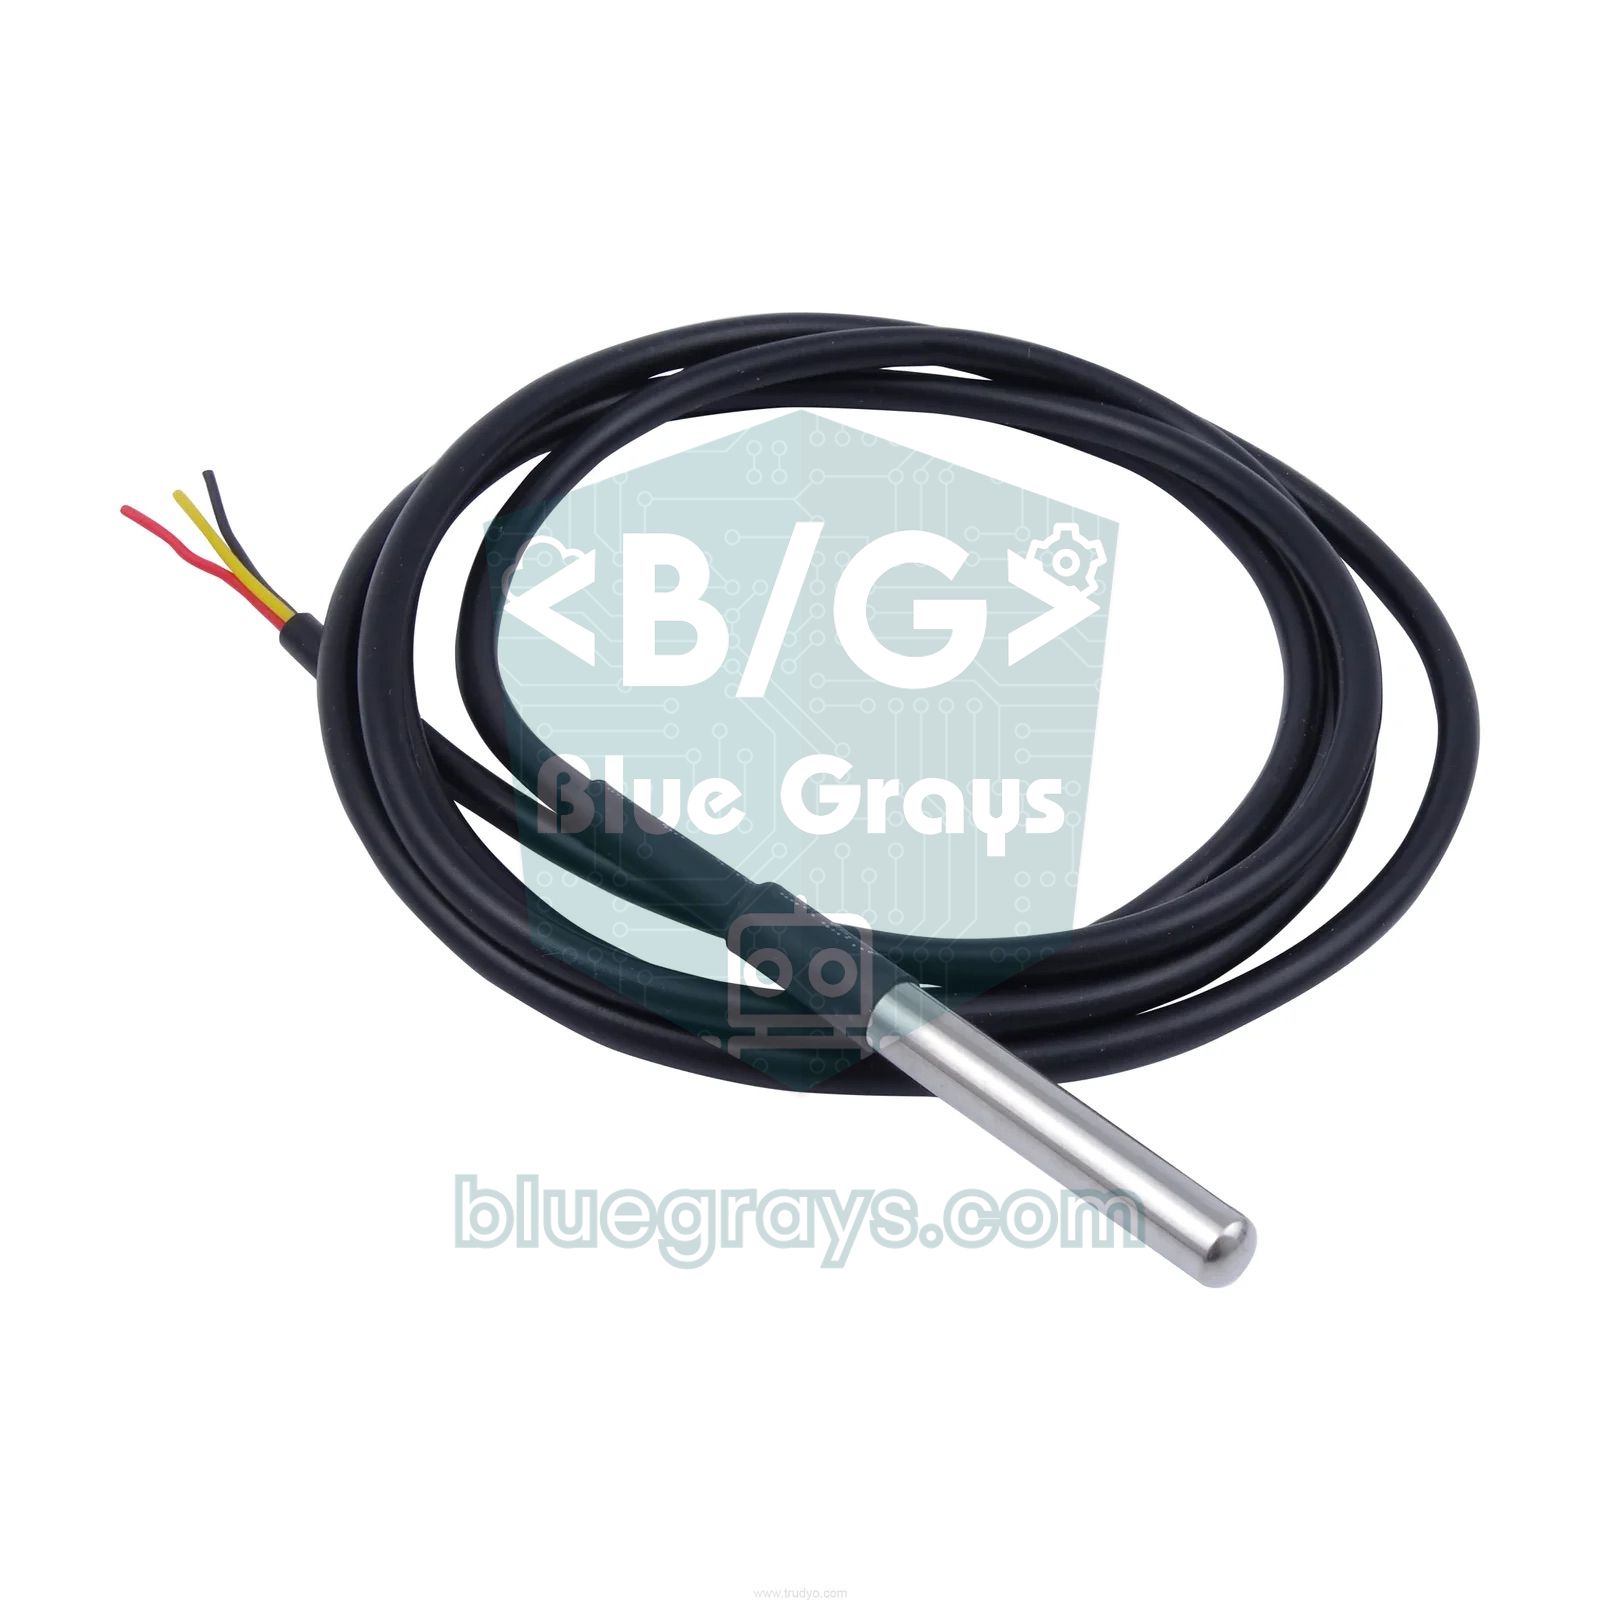
The DS18B20 uses a single-data-wire protocol called OneWire and gives ±0.5 °C accuracy. It needs a 4.7 kΩ pull-up resistor between the data line and VCC; if you don't know the colour code, check the resistor colour code tool. For sensor details and connecting several DS18B20s on the same line, read the DS18B20 temperature sensor post. Without a temperature sensor the code assumes 25 °C, which is fine for simple tests at room temperature.
Wiring: Arduino Uno, ESP32 and Pico
| Part pin | Arduino Uno | ESP32 | Raspberry Pi Pico |
|---|---|---|---|
| TDS VCC (+) | 5V | 3V3 | 3V3 (OUT) |
| TDS GND (−) | GND | GND | GND |
| TDS A (signal) | A0 | GPIO 34 (ADC1) | GP26 (ADC0) |
| DS18B20 VCC (red) | 5V | 3V3 | 3V3 (OUT) |
| DS18B20 GND (black) | GND | GND | GND |
| DS18B20 DATA (yellow) | D2 + 4.7 kΩ to VCC | GPIO 4 + 4.7 kΩ to 3V3 | GP22 + 4.7 kΩ to 3V3 |
Arduino TDS code: median filter and compensation
- Install the OneWire and DallasTemperature libraries from the Library Manager.
- Wire the TDS module and the DS18B20 as in the table; put the probe and the temperature sensor in the same water.
- Upload the code and open the Serial Monitor at 115200 baud.
- Wait 20–30 seconds for the numbers to settle; the first readings fluctuate when the probe has just gone into the water.
- If you have a known calibration solution, put the probe in it and type, for example, cal:707 in the Serial Monitor.
1#include <OneWire.h>
2#include <DallasTemperature.h>
3#include <EEPROM.h>
4
5const int TDS_PIN = A0;          // TDS modülü sinyal (A) / TDS module signal (A)
6const int DS_PIN = 2;            // DS18B20 veri, 4,7 kΩ pull-up / DS18B20 data, 4.7 kΩ pull-up
7const float VREF = 5.0;          // Uno ADC referansı / Uno ADC reference
8const int ORNEK = 30;            // medyan filtresi örnek sayısı / samples for the median filter
9
10OneWire oneWire(DS_PIN);
11DallasTemperature ds(&oneWire);
12
13int ornekler[ORNEK];
14int indeks = 0;
15float kFaktor = 1.0;             // kalibrasyon katsayısı (EEPROM'da) / calibration factor (in EEPROM)
16float sicaklik = 25.0;
17float gerilim = 0;
18unsigned long sonOrnek = 0, sonOlcum = 0;
19
20int medyan() {                   // gürültüye karşı ortanca değer / median against noise
21  int t[ORNEK];
22  memcpy(t, ornekler, sizeof(t));
23  for (int i = 1; i < ORNEK; i++) {          // ekleme sıralaması / insertion sort
24    int x = t[i], j = i - 1;
25    while (j >= 0 && t[j] > x) { t[j + 1] = t[j]; j--; }
26    t[j + 1] = x;
27  }
28  return (t[ORNEK / 2] + t[ORNEK / 2 - 1]) / 2;
29}
30
31float tdsHesapla(float volt, float derece, float k) {
32  float komp = 1.0 + 0.02 * (derece - 25.0); // %2/°C sıcaklık kompanzasyonu / 2 %/°C compensation
33  float v = volt / komp;                     // 25 °C'ye indirgenmiş gerilim / voltage at 25 °C
34  float ec = 133.42 * v * v * v - 255.86 * v * v + 857.39 * v;   // iletkenlik, µS/cm / conductivity
35  return ec * 0.5 * k;                       // TDS (ppm) = EC x 0,5 / TDS (ppm) = EC x 0.5
36}
37
38void setup() {
39  Serial.begin(115200);
40  ds.begin();
41  ds.setWaitForConversion(false);            // 750 ms beklemeden ölç / measure without blocking 750 ms
42  ds.requestTemperatures();
43  EEPROM.get(0, kFaktor);
44  if (isnan(kFaktor) || kFaktor < 0.5 || kFaktor > 2.0) kFaktor = 1.0;   // boş EEPROM / empty EEPROM
45  Serial.println("Kalibrasyon / calibration: cal:707 gibi yaz / type e.g. cal:707");
46}
47
48void loop() {
49  if (millis() - sonOrnek >= 40) {           // 40 ms'de bir örnek / one sample every 40 ms
50    sonOrnek = millis();
51    ornekler[indeks] = analogRead(TDS_PIN);
52    indeks = (indeks + 1) % ORNEK;
53  }
54
55  if (millis() - sonOlcum >= 1000) {         // saniyede bir sonuç / one result per second
56    sonOlcum = millis();
57    float t = ds.getTempCByIndex(0);
58    if (t != DEVICE_DISCONNECTED_C) sicaklik = t;   // sensör yoksa 25 °C / 25 °C if no sensor
59    ds.requestTemperatures();                // bir sonraki okuma için / for the next reading
60    gerilim = medyan() * VREF / 1024.0;
61    float tds = tdsHesapla(gerilim, sicaklik, kFaktor);
62    Serial.print("Sicaklik / temp: ");
63    Serial.print(sicaklik, 1);
64    Serial.print(" C  TDS: ");
65    Serial.print(tds, 0);
66    Serial.println(" ppm");
67  }
68
69  if (Serial.available()) {                  // "cal:707" -> bilinen sıvıya göre K / K from a known solution
70    String s = Serial.readStringUntil('\n');
71    s.trim();
72    if (s.startsWith("cal:")) {
73      float hedef = s.substring(4).toFloat();
74      float ham = tdsHesapla(gerilim, sicaklik, 1.0);
75      if (hedef > 0 && ham > 10) {
76        kFaktor = hedef / ham;
77        EEPROM.put(0, kFaktor);              // kalıcı kaydet / save permanently
78        Serial.print("Yeni K / new K: ");
79        Serial.println(kFaktor, 3);
80      }
81    }
82  }
83}
84| Code part | What does it do? |
|---|---|
| analogRead every 40 ms | Keeps the last 30 readings (1.2 seconds) in a ring buffer |
| medyan() | Unlike an average, completely ignores sudden spikes (noise, bubbles) |
| 1 + 0.02 × (T − 25) | Normalises the voltage to 25 °C; at 30 °C the divisor is 1.10 |
| 133.42 v³ − 255.86 v² + 857.39 v | Empirical voltage-to-conductivity curve for this sensor board |
| × 0.5 | Factor that converts conductivity to TDS (500 scale) |
| setWaitForConversion(false) | Keeps sampling without waiting for the DS18B20's 750 ms conversion |
| cal:707 and EEPROM | Calculates the K factor from a known solution and stores it permanently |
The third-order polynomial in the code is an empirical curve that turns the board's output voltage into conductivity; a simple multiplier isn't enough because the circuit on the board isn't linear. This curve applies to the common Gravity-style TDS board; if you use a different board, use the manufacturer's formula or derive your own curve with a few known solutions. Remember that on a 5 V Uno the analog reading is relative to 5.0 V, and on the ESP32 and Pico to 3.3 V; if you don't set VREF for your board, the results are wrong from the start.
Calibrating the TDS sensor with a reference solution
Every probe and board differs slightly; for the most accurate results, calibrate the sensor with a liquid of known value. The 1413 µS/cm potassium chloride (KCl) standard solution, available from lab and electronics suppliers, is the most common choice; with the 0.5 factor it corresponds to about 707 ppm. The 342 ppm sodium chloride solution that comes with some pen TDS meters works too. To calibrate, rinse the probe with clean water, pat it dry with a paper towel, put it in the solution, wait 1–2 minutes and type cal: followed by the solution's ppm value in the Serial Monitor. The code saves the ratio between the measured and true value as the K factor in EEPROM, so the setting survives power-off.
TDS chart: drinking water, aquarium and hydroponics
Knowing what your number means is as important as the sensor itself. According to the World Health Organization's taste assessment, water below 300 ppm is excellent in taste, 300–600 ppm good, 600–900 ppm fair, 900–1200 ppm poor and above 1200 ppm unacceptable. These are ranges for taste and usability, not health limits. The table below summarises typical values for common uses.
| Type of water | Typical TDS (ppm) | Comment |
|---|---|---|
| Distilled water, reverse osmosis (RO) output | 0–50 | Filter is working well |
| Mountain spring, low-mineral bottled water | 20–150 | Very light, soft |
| Tap water (depends on the city) | 100–500 | Varies by source; a sudden rise needs attention |
| Mineral bottled water | 300–1500+ | Deliberately high in minerals |
| Freshwater aquarium (general) | 150–350 | Measure before and after water changes |
| Shrimp aquarium (Caridina) | 80–150 | Set by adding minerals to RO water |
| African cichlid aquarium | 300–500 | Likes hard, mineral-rich water |
| Seawater | About 35,000 | Far outside this sensor's range |
In hydroponics, nutrient solutions are usually expressed as conductivity (EC) and vary by plant. Watch out, though: this sensor's range ends at 1000 ppm, and the solution for hungry plants like tomatoes and peppers exceeds that. In that case, either dilute a sample with distilled water at a known ratio, measure it and multiply the result, or use an EC sensor with a wider range.
| Plant | Recommended EC (mS/cm) | Approx. TDS (0.5 scale) |
|---|---|---|
| Lettuce, spinach | 0.8–1.2 | 400–600 ppm |
| Basil, mint | 1.0–1.6 | 500–800 ppm |
| Strawberry | 1.0–1.5 | 500–750 ppm |
| Cucumber | 1.7–2.5 | 850–1250 ppm (dilution needed) |
| Tomato, pepper | 2.0–3.5 | 1000–1750 ppm (dilution needed) |
Monitoring a water filter
The most useful job for a TDS sensor at home is monitoring a reverse osmosis (RO) filter. A healthy RO membrane holds back most of the minerals in the incoming water; with 300 ppm going in, the output is usually around 10–30 ppm. You calculate performance with rejection rate = (1 − output / input) × 100: if 300 ppm goes in and 15 ppm comes out, the rate is 95%. As the membrane ages, output TDS slowly rises; when the rate starts dropping below 80–85%, it's nearly time to replace the membrane and pre-filters. An Arduino with two probes and two DS18B20s measuring inlet and outlet at the same time can chart this change over months.
Logging TDS with the ESP32
With the ESP32 you can log TDS readings once a minute with a timestamp and send them to the internet later. The code below gets the time from the internet with NTP, measures water temperature and TDS every minute, and appends "date,temperature,tds" lines to a file called "/tds.csv" on the LittleFS file system in the board's own flash memory. You can later open this file in Excel and draw a chart. The ESP32's ADC isn't linear, so the code uses analogReadMilliVolts(), which uses the calibration data stored on the chip. Connect the TDS signal to one of the ADC1 pins (GPIO 32–39), which work while Wi-Fi is on; ADC2 pins can't be used together with Wi-Fi. NTP time is covered in the ESP32 NTP clock post.
1#include <WiFi.h>
2#include <LittleFS.h>
3#include <OneWire.h>
4#include <DallasTemperature.h>
5#include <time.h>
6
7const char* WIFI_SSID = "AgAdi";
8const char* WIFI_PASS = "Sifre123";
9const int TDS_PIN = 34;                      // ADC1 kanalı, Wi-Fi ile çalışır / ADC1 channel, works with Wi-Fi
10const int DS_PIN = 4;
11const float K_FAKTOR = 1.0;                  // Arduino'daki gibi kalibre et / calibrate as on the Arduino
12const unsigned long ARALIK_MS = 60000;       // dakikada bir kayıt / one log per minute
13
14OneWire oneWire(DS_PIN);
15DallasTemperature ds(&oneWire);
16unsigned long sonKayit = 0;
17
18float gerilimOku() {                         // 30 örneğin ortancası, volt / median of 30 samples, volts
19  int mv[30];
20  for (int i = 0; i < 30; i++) { mv[i] = analogReadMilliVolts(TDS_PIN); delay(5); }
21  for (int i = 1; i < 30; i++) {
22    int x = mv[i], j = i - 1;
23    while (j >= 0 && mv[j] > x) { mv[j + 1] = mv[j]; j--; }
24    mv[j + 1] = x;
25  }
26  return mv[15] / 1000.0;
27}
28
29float tdsHesapla(float v, float derece) {
30  v = v / (1.0 + 0.02 * (derece - 25.0));    // sıcaklık kompanzasyonu / temperature compensation
31  return (133.42 * v * v * v - 255.86 * v * v + 857.39 * v) * 0.5 * K_FAKTOR;
32}
33
34void setup() {
35  Serial.begin(115200);
36  ds.begin();
37  LittleFS.begin(true);                      // ilk açılışta biçimlendir / format on first boot
38  WiFi.begin(WIFI_SSID, WIFI_PASS);
39  while (WiFi.status() != WL_CONNECTED) delay(500);
40  configTzTime("<+03>-3", "pool.ntp.org");   // zaman damgası için NTP / NTP for timestamps
41}
42
43void loop() {
44  if (millis() - sonKayit < ARALIK_MS && sonKayit != 0) return;
45  sonKayit = millis();
46
47  ds.requestTemperatures();                  // ~750 ms bekler / waits ~750 ms
48  float derece = ds.getTempCByIndex(0);
49  if (derece == DEVICE_DISCONNECTED_C) derece = 25.0;
50  float tds = tdsHesapla(gerilimOku(), derece);
51
52  struct tm t;
53  char zaman[20] = "saat-yok";
54  if (getLocalTime(&t, 2000)) strftime(zaman, sizeof(zaman), "%Y-%m-%d %H:%M:%S", &t);
55
56  char satir[64];
57  snprintf(satir, sizeof(satir), "%s,%.1f,%.0f", zaman, derece, tds);
58  File f = LittleFS.open("/tds.csv", FILE_APPEND);   // tarih,sicaklik,tds / date,temp,tds
59  if (f) { f.println(satir); f.close(); }
60  Serial.println(satir);
61}
62
If you want the log online, you can send the same line to a Google Sheets spreadsheet or to Home Assistant over MQTT instead of LittleFS; details in the ESP32 Google Sheets and ESP32 MQTT posts. Flash memory has a limited write life; a short line per minute is no problem, but rather than writing every second it's a good habit to collect readings in RAM and write them in batches.
TDS with the Raspberry Pi Pico (MicroPython)
On the Pico you connect the TDS signal to GP26 (ADC0) and the DS18B20 to GP22. In MicroPython the onewire and ds18x20 modules needed for the DS18B20 are built into the firmware, so nothing extra has to be installed. The Pico's ADC returns a value between 0 and 65535 with read_u16(); we convert it to a voltage relative to 3.3 V. The formula and compensation are the same as in the Arduino code; you can find K_FAKTOR with the Arduino calibration method and write it into the code.
1from machine import ADC, Pin
2import onewire, ds18x20, time
3
4adc = ADC(26)                     # GP26 = ADC0, TDS sinyali / TDS signal
5ds = ds18x20.DS18X20(onewire.OneWire(Pin(22)))   # DS18B20 veri pini / data pin
6roms = ds.scan()
7K_FAKTOR = 1.0                    # kalibrasyon katsayısı / calibration factor
8
9def gerilim_oku(n=31):            # ortanca ile gürültü filtresi / median noise filter
10    olcumler = []
11    for _ in range(n):
12        olcumler.append(adc.read_u16())
13        time.sleep_ms(5)
14    olcumler.sort()
15    return olcumler[n // 2] * 3.3 / 65535
16
17def tds_hesapla(v, derece):
18    v = v / (1.0 + 0.02 * (derece - 25.0))       # 25 °C'ye indir / normalise to 25 °C
19    ec = 133.42 * v ** 3 - 255.86 * v ** 2 + 857.39 * v
20    return ec * 0.5 * K_FAKTOR
21
22while True:
23    derece = 25.0
24    if roms:
25        ds.convert_temp()
26        time.sleep_ms(750)                       # DS18B20 dönüşüm süresi / conversion time
27        derece = ds.read_temp(roms[0])
28    tds = tds_hesapla(gerilim_oku(), derece)
29    print("Sicaklik: {:.1f} C  TDS: {:.0f} ppm".format(derece, tds))
30    time.sleep(1)
31
TDS sensor vs pH sensor
TDS and pH sensors are often confused in water quality projects, yet they measure completely different things. TDS shows the amount of ions in the water, while pH shows how acidic or alkaline it is (hydrogen ion activity). Add a few drops of lemon juice to a glass of water and the pH drops sharply while TDS barely changes; add a pinch of salt and TDS shoots up while pH stays almost the same. In aquariums and hydroponics, both are usually monitored together.
| Feature | TDS sensor | pH sensor |
|---|---|---|
| What it measures | Amount of dissolved ions (conductivity) | Acidity / alkalinity (0–14) |
| Unit | ppm (mg/L) or µS/cm | pH units |
| Probe | Robust pair of metal electrodes | Fragile glass electrode |
| Calibration | Single point (e.g. 1413 µS/cm) | Two or three points (pH 4, 7, 10 buffers) |
| Maintenance | Occasional cleaning | Stored wet, regular calibration, probe replaced every 1–2 years |
| Price | Cheap | More expensive |
| Typical use | Filter monitoring, hardness, nutrient strength | Aquarium, pool, hydroponic pH control |
TDS sensor project ideas
- Filter alarm: sound a buzzer and show "replace filter" on a display when the RO output exceeds 50 ppm.
- Aquarium monitor: show TDS, temperature and water level on one display and remind you when to change the water.
- Hydroponic nutrient control: add nutrients with a peristaltic pump when EC drops; combine it with the smart greenhouse project.
- Tap water log: record your home's water TDS for days and see changes in the supply on a chart.
- Plant watering water: compare rainwater, tap water and filtered water and choose the best for salt-sensitive plants.
- School experiment: dissolve different amounts of salt and sugar to show the link between conductivity and the type of dissolved substance.
Common mistakes and fixes
| Symptom | Likely cause | Fix |
|---|---|---|
| Value keeps fluctuating | Probe just went in or there are bubbles | Wait 20–30 seconds, shake the probe gently, use a median filter |
| Different results in warm and cold water | No temperature compensation | Add a DS18B20 and feed the temperature into the formula |
| All values off by roughly 50% | Wrong VREF (3.3 V instead of 5 V or vice versa) | Set your board's ADC reference correctly |
| Different from a pen meter | Different conversion factor (0.5 / 0.7) or no calibration | Use the same scale and calibrate with a known solution |
| Readings max out at high values | The sensor's range is 1000 ppm | Dilute the sample or use a wide-range EC sensor |
| Nonsense results alongside a pH sensor | The two probes disturb each other in the same water | Measure one at a time or use an isolated module |
| ESP32 readings go wrong when Wi-Fi starts | Signal connected to an ADC2 pin | Use one of the ADC1 pins, GPIO 32–39 |
A TDS sensor is the cheapest and easiest tool for turning water quality into a number: with proper temperature compensation and a simple calibration you can reliably monitor tap water, a filter, an aquarium or your hydroponic solution. When interpreting results, keep in mind that TDS doesn't measure microbiological safety. In the BlueGrays app you'll find step-by-step projects with circuit diagrams and code for a smart watering station and a timestamped temperature logger, and you can add a TDS sensor to them.
Frequently asked questions
What should the TDS level be?
For drinking water, the World Health Organization's taste assessment rates below 300 ppm as excellent and 300–600 ppm as good, while above 1200 ppm is considered unacceptable in taste. Reverse osmosis filter output is usually 10–50 ppm. For aquariums and hydroponics, the ideal value depends on the animals or plants.
What does a TDS meter measure, and does it show water is safe?
A TDS meter estimates the amount of dissolved minerals and salts from the water's conductivity. Contaminants such as bacteria, viruses, lead or pesticides hardly change conductivity, so low TDS doesn't make water safe. TDS should be used to monitor filter performance and changes in mineral load.
How do you calibrate a TDS sensor?
Clean the probe and put it in a calibration solution of known value, such as the 1413 µS/cm KCl standard (about 707 ppm). Once the reading settles, the ratio between the measured and true value is saved as a factor, and all later readings are multiplied by it. Temperature compensation should be active during calibration.
What is the difference between TDS and EC?
EC (electrical conductivity) directly measures how well water conducts electricity, in µS/cm or mS/cm. TDS is an estimated amount of dissolved matter (ppm) calculated from that conductivity with a factor, usually 0.5 or 0.7. EC is more common in hydroponics, TDS for drinking water.
Can a TDS sensor stay in the water permanently?
The probe is waterproof and can stay permanently in an aquarium or hydroponic tank, but it should be cleaned every few weeks; the signal board isn't waterproof and must stay dry. The probe shouldn't be used in water above about 55 °C. With long-term use, repeat calibration now and then to correct drift.
Can an Arduino TDS sensor measure pH?
No. A TDS sensor only measures conductivity and the dissolved solids derived from it; pH, or acidity, needs a separate pH sensor with a glass electrode. The two can be used in the same project, but because they can disturb each other's readings in the same container, measure one at a time or use an isolated module.
Projects to build after reading this
See all projects
Smart Irrigation Station
A gardener that waters your plants on its own, so they don't dry out while you're on vacation. A soil moisture sensor measures how wet the soil is; when it gets dry, the Arduino runs the water pump fo
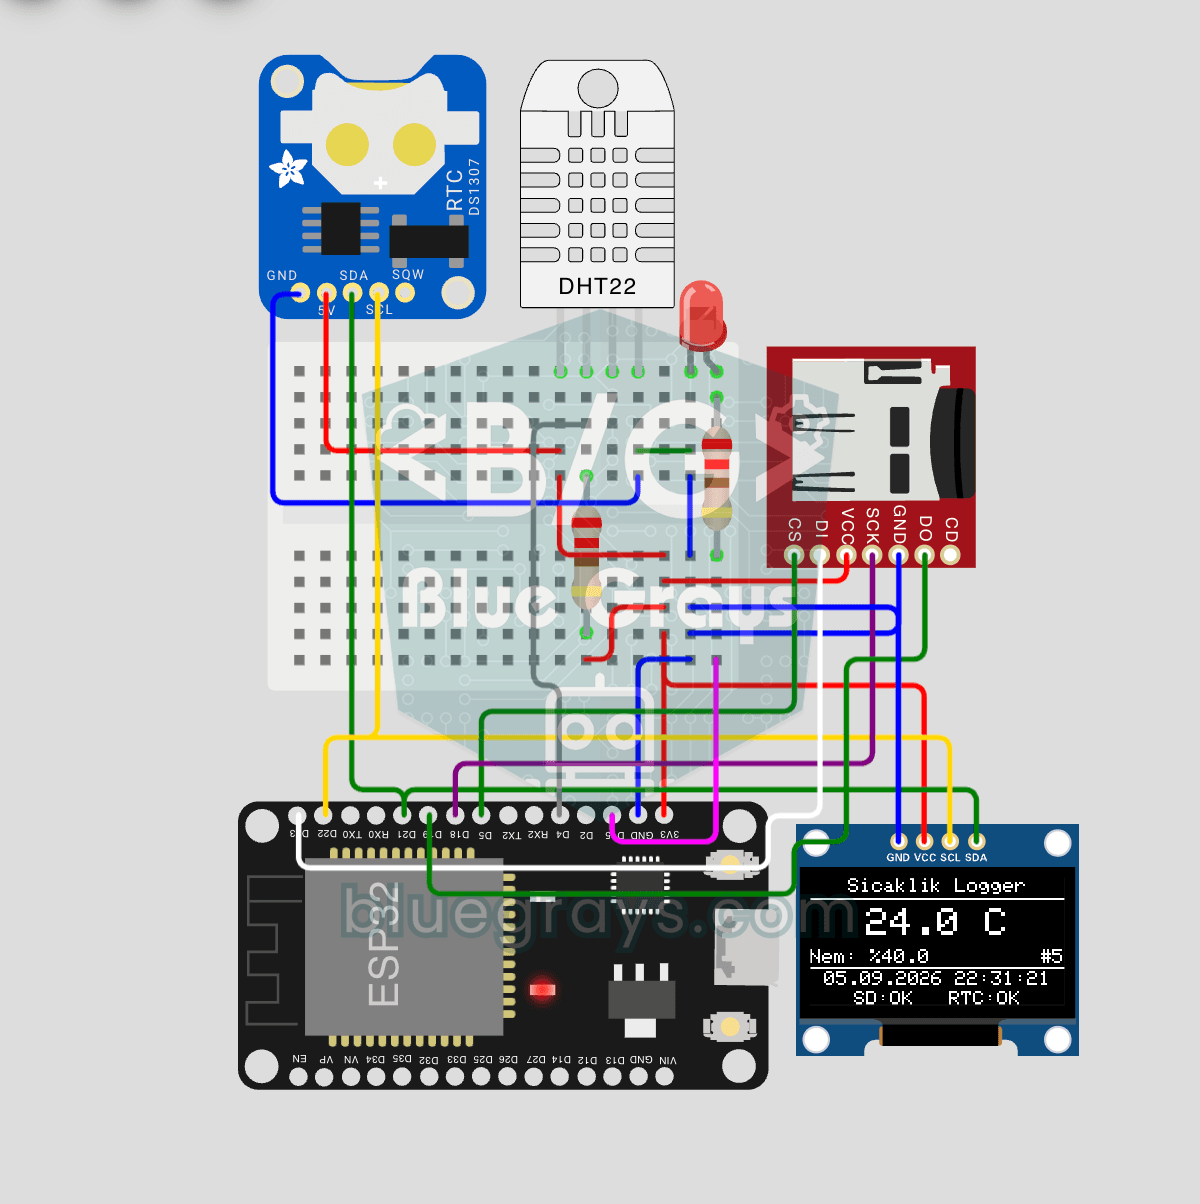
ESP32 Temperature Data Logger (DHT22 + DS1307 RTC + microSD + OLED)
Build a timestamped temperature logger with ESP32! Read DHT22 temperature/humidity every minute, get real-world time from DS1307 RTC, and log to microSD card as CSV. The OLED displays live temperature (large font), humidity percentage, timestamp, and log counter. The /temp_log.csv file on the SD card opens in Excel, Google Sheets, or Python pandas for analysis — perfect for greenhouse monitoring, home/room temperature tracking, laboratory data collection, food storage conditions, or beehiv

ESP32 DHT22 Temperature and Humidity (with LCD Display)
This project measures ambient temperature and humidity using a DHT22 sensor and displays the data in real time on a 16x2 I2C LCD. Data is read from the sensor using the one-wire protocol via the Adafruit DHT library. This project serves as the foundation for IoT weather stations, smart home automation, or environmental monitoring systems in greenhouses. Communication with the DHT22 is established via the ESP32's GPIO 4 pin.

Temperature and Humidity with DHT11
How warm is your room, and is the air humid or dry? The DHT11 sensor measures temperature and humidity, and the Arduino writes the values on a two-line LCD screen, refreshing every couple of seconds.
Temperature Measurement with NTC and 2x16 Lcd Display
Measure the temperature around you with a sensor that looks like a tiny bead. This part, called an NTC, lets electricity through more easily as it warms up; the Arduino reads that change, turns it int
Digital Voltmeter with LCD Display
Find out how much voltage a battery or power adapter gives with a meter you built yourself. A divider made of two resistors brings high voltage down to a level the board can read, and the Arduino calc

Measuring Light Intensity with an LDR
Want to see how bright your room is as a number? The LDR, a small part that reacts to light, measures the light around it, and the Arduino writes the value to your computer screen every half second. C