
Arduino Smart Greenhouse Project: Sensors, Watering, Fan, Code
Build an Arduino smart greenhouse: DHT22, soil moisture and LDR sensing, relay and MOSFET control of fan, heater, pump and LEDs, hysteresis, LCD and ESP32 code.
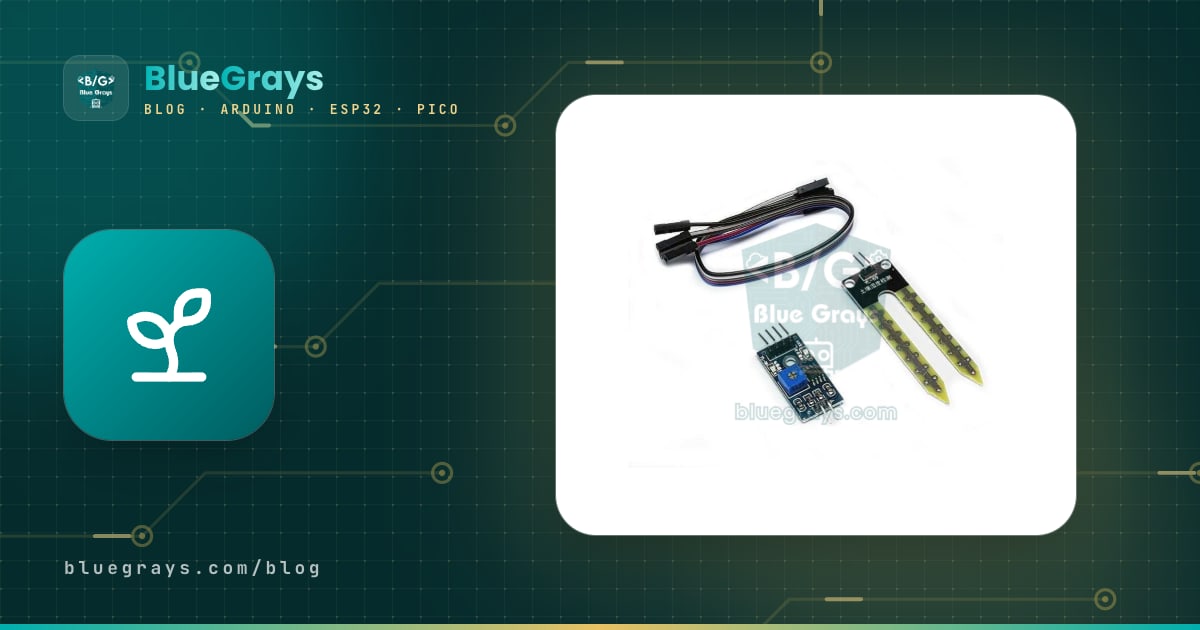
An Arduino smart greenhouse project is an automation system in which an Arduino or ESP32 measures the air temperature, humidity, soil moisture and light in a greenhouse and runs the fan, heater, water pump and grow lights on its own. It's one of the most popular topics for science fairs, school competitions and technology classes because the result is easy to see: the pump starts when the soil dries out, the fan spins when it gets hot inside, and the LEDs come on in the evening. Better still, there's almost no difference in circuit or code between a model greenhouse built from a storage box and a real mini greenhouse on your balcony.
In this guide we start with what plants actually need, then build the model greenhouse step by step: the parts list and rough cost, wiring the sensors (DHT22, capacitive soil moisture sensor, LDR) and the actuators (fan, heater, pump and LEDs via relays and a MOSFET), the power plan and the pin table. Next we explain the threshold and hysteresis logic that stops the relays from clicking constantly, the complete Arduino code without delay(), and the 16x2 LCD. In the final sections you'll find how to monitor the greenhouse from your phone with an ESP32, a MicroPython version for the Raspberry Pi Pico, tips for school and science-fair presentations, and common mistakes.

How does a smart greenhouse work?
Every smart greenhouse runs the same four-step loop: measure, decide, act, display. The sensors measure the environment: how warm is it inside, how humid is the air, has the soil dried out, is there enough light? The Arduino compares these values with the rules you set: “if the temperature goes above 30 °C, run the fan”, “if soil moisture drops below 35%, water”. The actuators carry out the decision: relays switch the fan, heater and pump on and off, and a MOSFET sets the brightness of the LED strip. Finally, the LCD and your phone show you the current state of the greenhouse. The climate computers in real commercial greenhouses work with exactly this loop; they just use more sensors and bigger motors.
| What is measured? | Sensor | Actuator | Rule (example) |
|---|---|---|---|
| Air temperature | DHT22 | Fan and heater | Fan starts at 30 °C, heater switches on at 16 °C |
| Relative humidity | DHT22 | Fan | Fan starts at 85% and stops at 75% |
| Soil moisture | Capacitive soil moisture sensor | Mini submersible pump | Waters in 3-second pulses below 35% |
| Light | LDR | LED strip (MOSFET) | When it gets dark, the LEDs stay on for at most 4 hours |
| Water in the tank | Float level switch | Pump lockout | If the tank is empty, the pump never runs |
What do plants need? Target temperature, humidity and light
Before you write any rules, you need to know what you're aiming for. Most plants want different temperatures by day and by night; cooling down a little at night helps the plant rest. If the humidity stays above 85% for long periods, water condenses on the leaves and fungal diseases such as mould and downy mildew spread quickly; that's why the fan in a greenhouse runs not only to cool things down but also to get rid of humidity. As for light, most vegetable seedlings want 14–16 hours a day, but they also need a dark period of at least 6–8 hours; leaving the LEDs on all night does the plant more harm than good. The values below are a good starting guide; adjust them for whatever you're growing.
| Plant | Day | Night | Relative humidity | Note |
|---|---|---|---|---|
| Tomato | 21–27 °C | 15–18 °C | 60–75% | Flowers may drop above 32 °C |
| Pepper | 21–29 °C | 16–20 °C | 60–75% | More sensitive to cold than tomatoes |
| Lettuce and spinach | 15–20 °C | 10–15 °C | 60–70% | Bolts early in heat and long days |
| Strawberry | 18–24 °C | 10–13 °C | 60–75% | Grey mould risk rises in high humidity |
| Seedlings and germination | 20–25 °C | 18–20 °C | 70–85% | Soil temperature matters more than air temperature |
Building the model greenhouse
The easiest and cheapest enclosure is a clear plastic storage box with a lid: a 40–60 litre box is enough for two or three pots, it's waterproof, and it's easy to drill with a craft knife or a heated tip. If you want a more realistic look, build a frame from wooden strips and clad it with 2–3 mm clear acrylic (Plexiglas) or PETG sheets; a greenhouse with a pitched roof looks much better at a presentation. Around 50×35×40 cm is a good starting size. Whichever enclosure you choose, the lid or one side wall has to open; you'll be reaching inside to water plants, move the sensor and tidy up cables.
- Electronics outside: The inside of a greenhouse is humid, and water condenses on the walls in the morning. Put the Arduino, the relay module and the power supply in a separate box outside the greenhouse; only the sensors, fan, heater, pump hose and LEDs go inside.
- Ventilation: Warm air rises, so mount the fan on the upper part of one of the short walls, blowing air out. Cut an air inlet the size of the fan in the lower part of the opposite wall and cover it with insect mesh; fresh air then comes in at the bottom and warm, humid air leaves at the top.
- Heater: Mount the heater near the floor on an aluminium plate or a ceramic tile, at least 5 cm away from the plastic walls and the plants. The warm air circulates through the whole greenhouse as it rises.
- LED lighting: Stick the LED strip to the inside of the lid, 15–30 cm above the plants. If you mount the strip on a thin aluminium profile, it dissipates heat better and the adhesive won't come loose over time.
- Sensors: Place the DHT22 at plant height where it won't get direct sunlight or LED light. Bury the soil moisture sensor in the root zone, away from the edge of the pot. The LDR must not see the LEDs: put it outside the greenhouse, on the roof, facing the sky.
- Water tank: A 1–2 litre container is enough for the pump and the float switch. Put drip trays under the pots; excess water collects in the tray instead of flooding the bottom of the box.
Parts list and cost
| Part | Qty | Job | Price level |
|---|---|---|---|
| Arduino Uno R3 or ESP32 DevKit | 1 | The greenhouse's brain | Medium |
| DHT22 (AM2302) temperature and humidity module | 1 | Air temperature and humidity | Low |
| Capacitive soil moisture sensor (v1.2) | 1 (one per pot) | Soil moisture | Low |
| LDR (GL5528) and 10 kΩ resistor | 1 + 1 | Ambient light | Very low |
| Float water level switch | 1 | Locks out the pump when the tank is empty | Low |
| 4-channel 5 V relay module (optocoupler, with JD-VCC) | 1 | Fan, heater and pump | Low |
| Logic-level N-channel MOSFET (IRLZ44N), 220 Ω and 100 kΩ resistors | 1 set | LED strip brightness (PWM) | Very low |
| 3–6 V mini submersible pump and 1 m silicone hose | 1 | Watering | Low |
| 12 V 80 mm computer fan | 1–2 | Ventilation and humidity removal | Low |
| 12 V PTC heater (10–30 W) and thermal fuse | 1 + 1 | Heating | Low |
| 12 V LED strip (grow light or cool white), about 1 m | 1 | Supplementary lighting | Low |
| I2C 16x2 LCD | 1 | Status display | Low – medium |
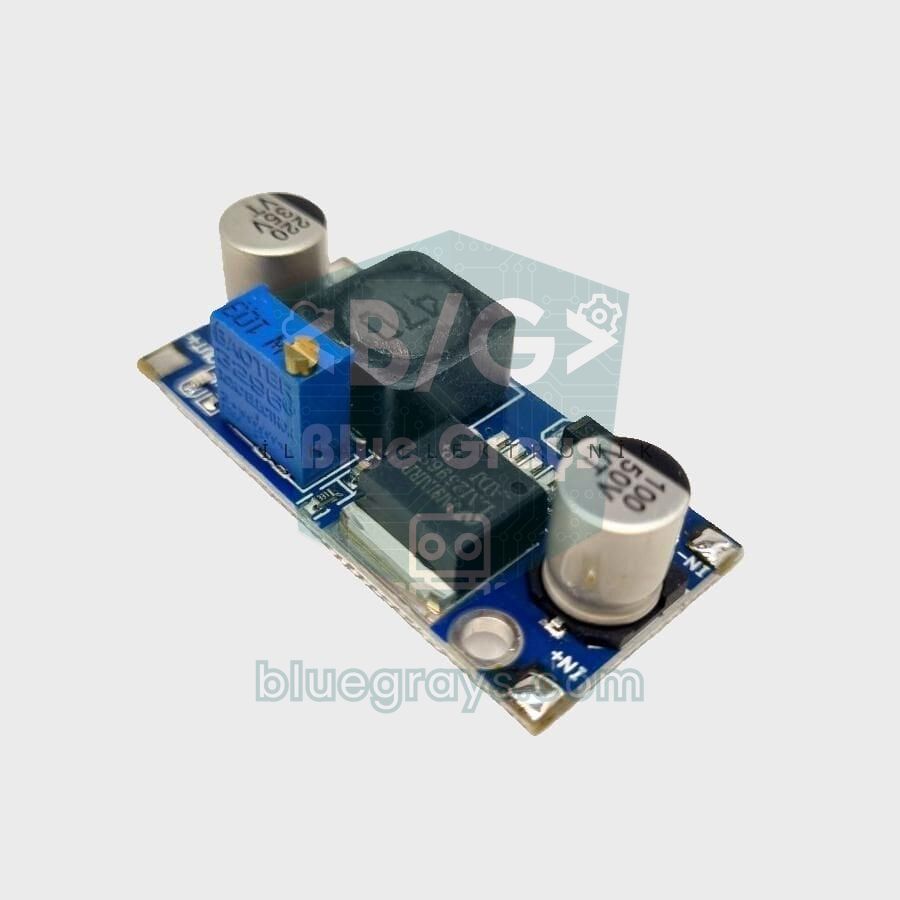
| 12 V 5 A power adapter and LM2596 buck converter | 1 + 1 | Power | Medium |
| 1N5819 or 1N4007 diode, 470 µF capacitor, screw terminals, jumper wires | – | Protection and connections | Very low |
| Clear storage box with lid or acrylic sheet, pots, drip trays | – | Greenhouse body | Medium |
Prices vary a lot between sellers, so here's a rough budget rather than exact figures. Excluding the board, the basic version (DHT22, soil moisture sensor, LDR, 2-channel relay, pump and a 5 V fan) usually costs around 25–40 dollars. The full version with the heater, LED strip, LCD, 12 V adapter, LM2596, float switch and enclosure usually comes to about 70–120 dollars; most of the budget goes on the board, the adapter, the display and the enclosure. If you have an Arduino starter kit, the board, breadboard, wires, LDR, resistors and often the LCD are already covered. On a tight budget, leave the heater and LEDs for a second stage; watering and ventilation on their own already make a meaningful, working project.
Sensors: DHT22, soil moisture sensor and LDR
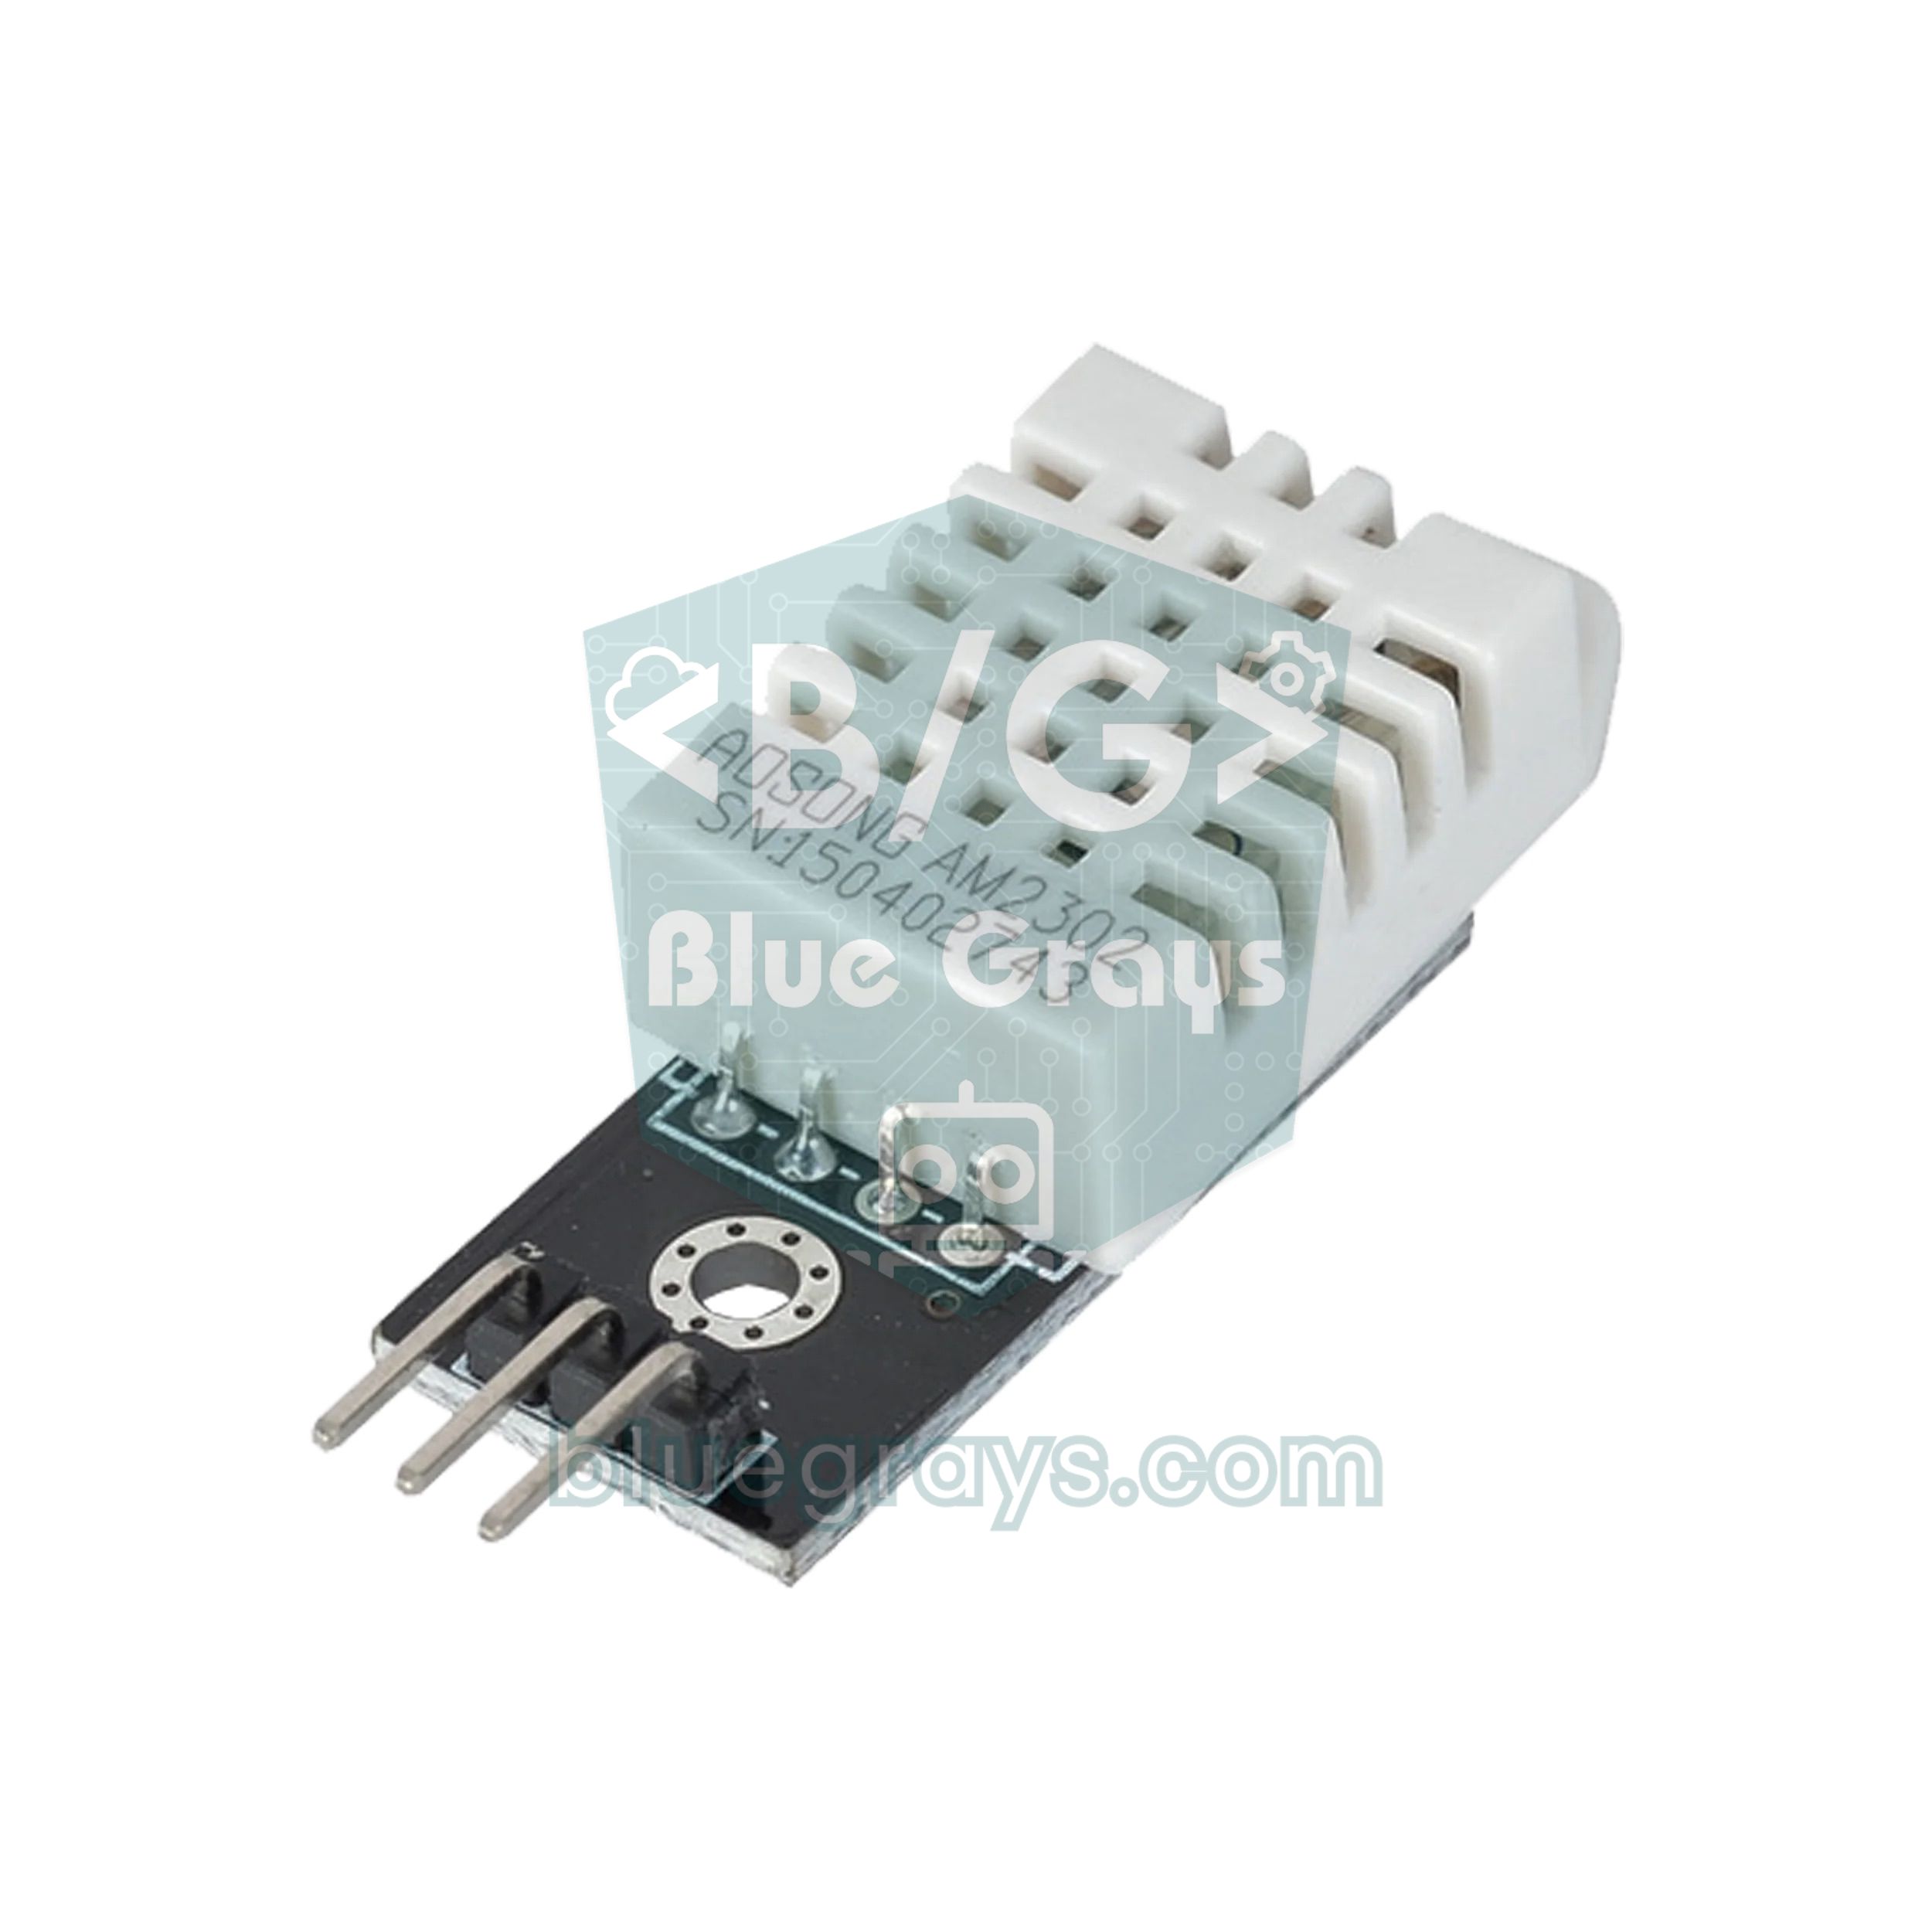
We recommend the DHT22 (AM2302) for a greenhouse. It costs a little more than the DHT11, but it measures temperature from −40 to 80 °C to ±0.5 °C and humidity across 0–100% to about ±2%; the DHT11 is only accurate to ±2 °C between 0 and 50 °C and can't see humidity above 90%. Since a greenhouse can go above 90% humidity in the morning and below freezing in winter, the DHT22 is a much better fit. The sensor can take a reading at most once every 2 seconds, so the code reads it every 2.5 seconds. If you put the sensor where the sun or the LEDs shine directly on it, its body heats up and it reads a few degrees above the air temperature; shading it with a white cover with holes prevents this. Wiring and library details are in the DHT11 and DHT22 temperature and humidity sensor article.
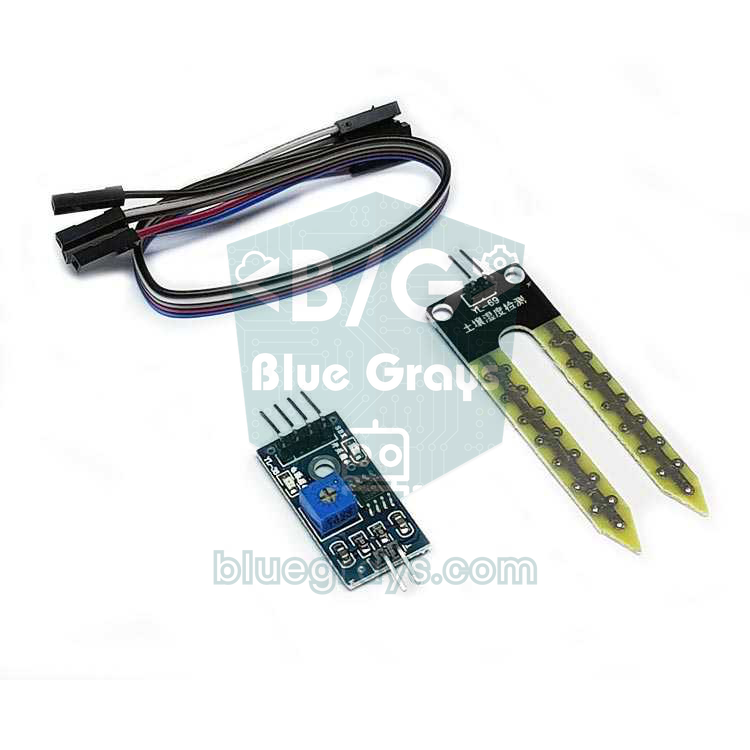
Choose a capacitive sensor for soil moisture. Cheap resistive sensors (YL-69, FC-28) have two metal prongs in direct contact with the soil, and if they're powered all the time they corrode within a few weeks because of electrolysis; they're not suitable for a system that will run for months. A capacitive sensor's electrode is coated, so no metal touches the soil. Its output is analogue and falls as the soil gets wetter: on an Uno, a sensor held in the air reads roughly 500–600, and dipped in water about 250–300. These numbers differ from sensor to sensor, so before uploading the main code, read your own sensor's values in air and in water in the Serial Monitor and write them into the SOIL_DRY_RAW and SOIL_WET_RAW constants. The code converts these two values to 0–100% with map(). More details are in the soil moisture sensor article.
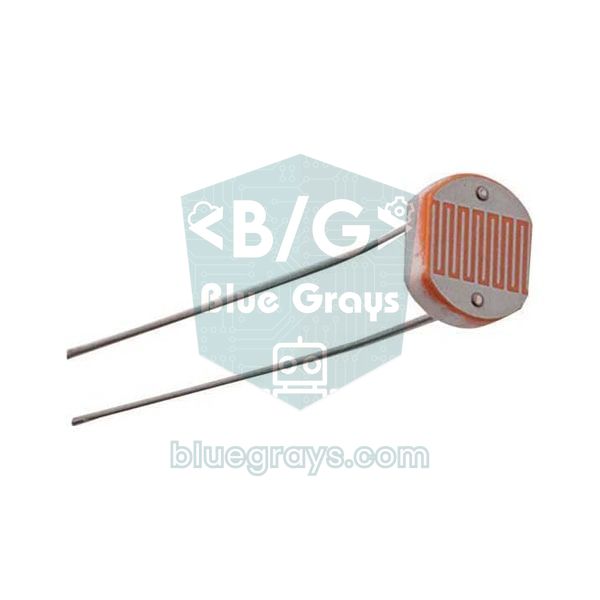
For light, the LDR (GL5528) from your kit is enough. Wire the LDR as a voltage divider with a 10 kΩ resistor: 5V → LDR → A1 → 10 kΩ → GND. As the light increases, the LDR's resistance drops and the value on A1 rises; the code converts this value to 0–100% too, based on two numbers you measure in the dark and in sunlight. An LDR isn't a precise lux meter, but it reliably answers “has it got dark, is it cloudy, is it sunny?”. If you want more accurate light readings, you can move to an I2C light sensor such as the BH1750. Use the Voltage divider tool for the divider maths and the LDR light sensor article for details.
Actuators: relay or MOSFET?
An Arduino pin can supply only about 20 mA, while the fan, heater, pump and LED strip draw hundreds of milliamps or even several amps. That's why every load is driven through either a relay or a MOSFET. A relay is a mechanical switch: it turns a load in a completely separate circuit on and off, AC or DC, but it can only switch on or off, it clicks every time, and its contacts have a limited life. A MOSFET is a silent electronic switch; it only works with DC loads, but because it can switch hundreds of times per second, it can set brightness and speed with PWM. In this project we use a 4-channel relay module for the heater, fan and pump, and a MOSFET for the LED strip's brightness.
| Load | Typical value | Driver | Why? |
|---|---|---|---|
| 12 V PTC heater | 10–30 W, about 1–2.5 A | Relay (IN2) | High current, only on/off needed |
| 12 V 80 mm fan | 0.1–0.2 A | Relay (IN1) or MOSFET | A relay is simple; a MOSFET also allows PWM speed control |
| 3–6 V mini submersible pump | 0.1–0.25 A, more at start-up | Relay (IN3) or MOSFET with a diode | Runs in short pulses; motor noise must be suppressed |
| 12 V LED strip (5050, 60 LEDs/m) | About 1.2 A per metre | Logic-level MOSFET | PWM brightness control and silent operation |
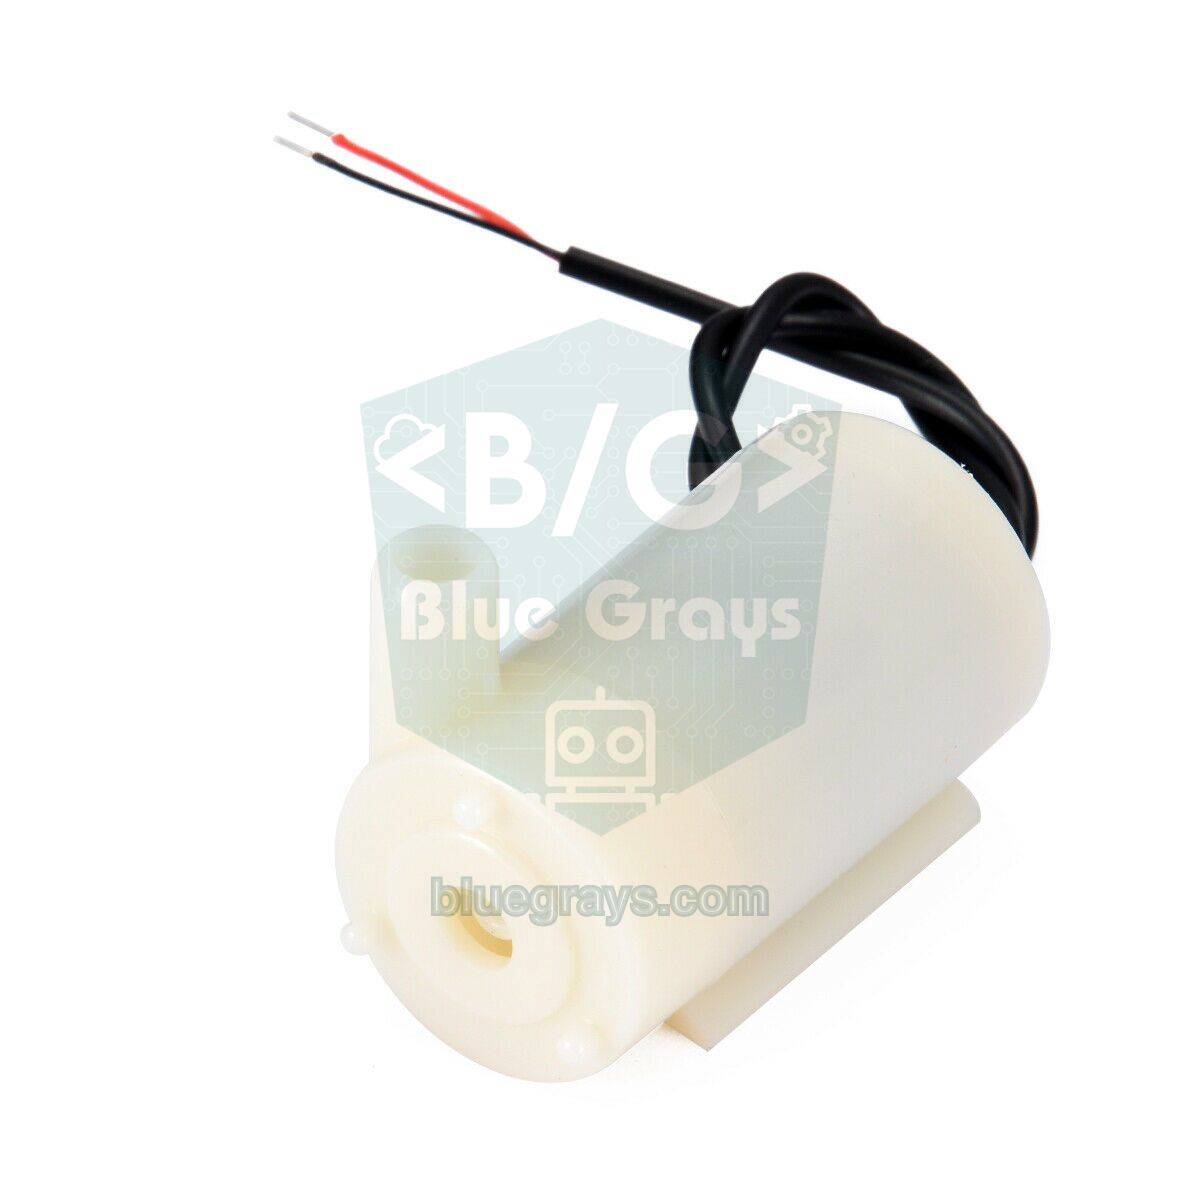
Depending on the hose height, a mini submersible pump delivers roughly 1–1.5 litres per minute, so a 3-second pulse gives the pot 50–75 mL of water. That's why we don't run the pump continuously “until the soil is wet”, but in short pulses instead: water for 3 seconds, wait 60 seconds for the water to soak in, then measure again. If the sensor were read again before the water reached it, the soil would still look dry and the pump would run until the pot overflowed. A pump that runs dry heats up and fails within minutes; the float switch in the tank locks the pump out when the water runs out. Every time the motor stops, its coil produces a reverse voltage spike; a reverse-biased diode across the pump terminals (1N5819 or 1N4007, striped end to the + side) protects both the relay contacts and the Arduino from this noise. Pump selection and driving methods are covered in the mini water pump article.
Use a 12 V PTC heater for heating. The resistance of PTC (positive temperature coefficient) ceramic elements rises as they heat up, so their surface temperature limits itself at a set value; that's much safer than a bare glowing resistance wire. In a plastic enclosure, choose a low-temperature model whose surface is limited to around 80 °C. A 24 W heater draws 2 A at 12 V according to P = V × I; for the first few seconds while it's cold, the current is somewhat higher. For lighting, you can use a red-blue grow-light LED strip or a cool white LED strip; plants use mostly red (around 660 nm) and blue (around 450 nm) light for photosynthesis. Drive the strip with a logic-level MOSFET such as the IRLZ44N: the gate connects to D9 through a 220 Ω resistor and to GND through a 100 kΩ resistor; the strip's + goes to 12 V, its − to the MOSFET's drain, and the source to GND. Standard MOSFET modules such as the IRF520 don't fully turn on with a 5 V gate voltage and heat up with loads of several amps; details are in the using a MOSFET with Arduino article. You can use the Ohm's Law tool to calculate current and power.
Power plan: 12 V and 5 V rails
The most common problems in smart greenhouses (“the Arduino resets when the pump runs”, “strange characters appear on the LCD”) come from the power supply. The cleanest solution is to take two rails from a single 12 V 5 A adapter. The 12 V rail feeds the heater, fans and LED strip directly, and also goes to the Arduino Uno's DC jack. The same 12 V also feeds an LM2596 buck converter set to 5 V; the relay coils, the pump and the LCD run from this 5 V rail. If you remove the JD-VCC jumper on the relay module, the coil current comes entirely from the LM2596 and the Arduino side only lights the optocouplers' LEDs. Power the sensors (DHT22, soil moisture sensor and LDR divider) from the Arduino's own 5V pin: analogRead() measures relative to the board's own 5 V, so powering the analogue sensors from the same voltage keeps the readings stable. Always connect the GNDs of the adapter, the LM2596 and the Arduino together.
| Load | Rail | Approx. current |
|---|---|---|
| PTC heater (24 W) | 12 V | 2 A (more at the first moment when cold) |
| LED strip (1 m) | 12 V | 1–1.2 A |
| Two 80 mm fans | 12 V | 0.2–0.4 A |
| Arduino Uno and sensors (via the DC jack) | 12 V | About 0.06–0.08 A |
| LM2596 input (while the 5 V side draws 1 A) | 12 V | About 0.5 A |
| Relay module (three relays energised) | 5 V | 0.2–0.25 A |
| Mini submersible pump | 5 V | 0.1–0.25 A (more at start-up) |
| I2C LCD (backlight on) | 5 V | 20–30 mA |
Even if everything runs at once, the total current is around 4–4.5 A, so a 12 V 5 A (60 W) adapter leaves enough headroom. In practice the heater and the temperature fan never run at the same time, because there's a wide gap between their thresholds. Before connecting the LM2596 to the circuit, measure its output with a multimeter and set it to 5.0 V with the trimmer on the board; out of the box it may pass almost the full 12 V straight through. You can power the Arduino from USB while uploading code and from the DC jack in the field; having both connected at the same time is fine for the Uno. Details are in the Arduino power supply guide.
Wiring and pin table
The table below shows the pins used by the three programs in this guide. On the Uno we connected the MOSFET that drives the LED strip to D9, which supports PWM; on the Uno, PWM is only available on D3, D5, D6, D9, D10 and D11. The float switch and the relays don't need PWM. Because the LCD uses only the I2C bus (A4 and A5), it takes very few pins; on the Uno, A2, A3 and a few digital pins remain free for a second soil sensor or a button. On the ESP32 we connected the analogue sensors to ADC1 pins (GPIO 34 and 35), which keep working while Wi-Fi is on. You can see your board's pin layout in the Pinout tool.
| Connection | Arduino Uno | ESP32 | Raspberry Pi Pico |
|---|---|---|---|
| DHT22 DATA | D2 | GPIO 4 | GP15 |
| Float switch (other lead to GND) | D3 | GPIO 13 | GP14 |
| Relay IN3: pump | D4 | GPIO 25 | GP18 |
| Relay IN1: fan | D7 | GPIO 26 | GP16 |
| Relay IN2: heater | D8 | GPIO 27 | GP17 |
| MOSFET gate (via 220 Ω): LED | D9 | GPIO 18 | GP19 |
| Soil moisture sensor AOUT | A0 | GPIO 34 | GP26 |
| LDR divider midpoint | A1 | GPIO 35 (divider from 3V3) | GP27 (divider from 3V3) |
| I2C LCD SDA / SCL | A4 / A5 | GPIO 21 / 22 | GP4 / GP5 |
| Sensor supply | 5V | 3V3 | 3V3 |
Thresholds and hysteresis: why do relays chatter?
Imagine controlling the fan with a single threshold: “run it if the temperature is above 30 °C, otherwise stop it”. As the temperature wobbles between 29.9 and 30.1 °C (which happens a lot because of sensor noise), the relay switches on and off with every reading. Both the relay contacts and the fan motor wear out, and with the heater, the wiring and the adapter take an unnecessary hit at every switch-on. The solution is hysteresis: you use two separate thresholds for switching on and off. The fan starts at 30 °C but only stops when the temperature has fallen to 27 °C. In the 3-degree dead band in between, the system keeps its last state. Room thermostats for boilers and fridges work on the same principle.
| Control | Switches on | Switches off | Dead band |
|---|---|---|---|
| Fan (temperature) | ≥ 30 °C | ≤ 27 °C | 3 °C |
| Fan (humidity) | ≥ 85% | ≤ 75% | 10% |
| Heater | ≤ 16 °C | ≥ 19 °C | 3 °C |
| Watering | Soil ≤ 35% | Soil ≥ 50% | 15% |
| LED lighting | Light ≤ 25% | Light ≥ 35% or after 4 hours | 10% |
The width of the dead band is a trade-off: too narrow and the relay still switches often; too wide and the temperature drifts too far from the target. Around 2–3 °C for temperature, 8–10% for humidity and 10–15% for soil moisture is a good start. We also left a wide gap between 19 °C, where the heater switches off, and 30 °C, where the fan starts, so the heater and the temperature fan never work against each other. In the code, hysteresis lives in a small hysteresis() function so you don't have to write it again for every control: if the on threshold is greater than the off threshold it means “switch on when rising” (fan); if it's smaller, “switch on when falling” (heater, watering, LEDs). If you also want to smooth out spikes in the sensor data, have a look at the sensor data filtering article.
Code structure: measure, decide, act, display
The most important rule in the greenhouse code is that no task waits for another. If you waited a whole minute with delay(60000) after the pump, the fan wouldn't run and the display wouldn't update during that time. That's why the code is made of small functions that measure time with millis(), each responsible for a single job; loop() calls them in turn thousands of times per second, and each function only does something when its time has come. Watering is a small three-state state machine: wait (IDLE), water (PUMPING) and let the water soak in (SOAKING). All settings sit as constants at the top of the code, so you don't have to dig through the code to change a threshold. You'll find the reasoning behind this approach in the millis() and delay() and state machines on Arduino articles. The code also includes these safety measures:
- Safe start-up: The “off” value is written to the relay pins before pinMode() is called, so the relays don't click on even for an instant while the Arduino boots.
- Sensor failure: If the DHT22 can't be read three times in a row, the code switches to a safe state: it turns the heater off, runs the fan and shows “Sensor hatasi” (sensor error) on the LCD. A system that doesn't know the temperature must never leave the heater on.
- Tank protection: When the float switch says the tank is empty, the pump doesn't start at all, and if it's running it stops immediately.
- Overflow protection: If soil moisture doesn't reach 50% after six pulses in one watering cycle, the sensor may have come out of the soil or the hose may have come off; the code stops watering and shows “Sulama hatasi” (watering fault). The warning clears by itself once the soil is wet again.
- Data logging: Every 10 seconds the code writes the readings to the Serial Monitor as a comma-separated (CSV) line; you can copy these lines and draw charts in Excel.
Step-by-step assembly and testing
- Prepare the enclosure: cut the holes for the fan, air inlet, hose and cables, and place the electronics box outside the greenhouse.
- Set up the power rails: connect the 12 V adapter to a screw terminal, set the LM2596 to 5.0 V with a multimeter and join all the GNDs.
- Connect the I2C LCD and print some text on it. If the display shows nothing, try the scanner sketch and the contrast trimmer from the I2C LCD article.
- Add the sensors one at a time and test them in the Serial Monitor: note the DHT22 readings, the soil sensor's raw value in air and in water, and the LDR's value in the dark and in sunlight.
- Test the relays first without loads, watching their LEDs and listening for the click. Then connect the fan, the pump (with a full tank) and finally the heater.
- Connect the LED strip through the MOSFET and change the analogWrite() value to see the brightness change.
- Upload the main code, enter your calibration values into the constants and run the system for a few hours under supervision: any wrong watering, a relay that keeps clicking, or a part that gets too hot?
Complete code for the Arduino Uno
To compile the code, install Adafruit's DHT sensor library (together with its dependency, Adafruit Unified Sensor) and Frank de Brabander's LiquidCrystal I2C library from the Library Manager; Wire comes with the Arduino IDE. The LCD's address is usually 0x27, and 0x3F on some modules. Before uploading, write the calibration values you measured into the SOIL_DRY_RAW, SOIL_WET_RAW, LDR_DARK_RAW and LDR_BRIGHT_RAW constants. If your float switch opens rather than closes with water, set TANK_OK to HIGH; if your relay module is active HIGH, swap the RELAY_ON and RELAY_OFF values.
1#include <Wire.h>
2#include <LiquidCrystal_I2C.h>
3#include <DHT.h>
4
5// Pinler / Pins
6const byte DHT_PIN = 2, FLOAT_PIN = 3, PUMP_RELAY = 4, FAN_RELAY = 7, HEATER_RELAY = 8;
7const byte LED_PIN = 9;                          // MOSFET gate (PWM)
8const byte SOIL_PIN = A0, LDR_PIN = A1;
9
10// Kalibrasyon: kendi ölçümlerini yaz / Calibration: write your own readings
11const int SOIL_DRY_RAW = 520, SOIL_WET_RAW = 260;   // havada ve suda / in air and in water
12const int LDR_DARK_RAW = 60, LDR_BRIGHT_RAW = 900;  // karanlık ve güneş / dark and sunlight
13
14// Eşikler (açma, kapama) / Thresholds (on, off)
15const float FAN_ON_C = 30, FAN_OFF_C = 27;       // sıcaklıkta fan / fan on heat
16const float HUM_ON = 85, HUM_OFF = 75;           // nemde fan / fan on humidity
17const float HEAT_ON_C = 16, HEAT_OFF_C = 19;     // ısıtıcı / heater
18const float SOIL_DRY = 35, SOIL_OK = 50;         // sulama başla, dur / start, stop watering
19const float DARK_ON = 25, DARK_OFF = 35;         // ışık % / light %
20
21// Zamanlar / Timing
22const unsigned long READ_MS = 2500;              // DHT22: en az 2 sn / at least 2 s
23const unsigned long PUMP_MS = 3000;              // tek sulama darbesi / one watering pulse
24const unsigned long SOAK_MS = 60000;             // suyun yayılması / let the water soak in
25const byte MAX_PULSES = 6;                       // fazlası arıza / more means a fault
26const unsigned long EXTRA_LIGHT_MS = 4UL * 3600000UL;  // günü 4 saat uzat / extend the day by 4 h
27const byte LED_LEVEL = 200;                      // LED parlaklığı 0-255 / LED brightness 0-255
28const byte RELAY_ON = LOW, RELAY_OFF = HIGH;     // aktif LOW röle / active-LOW relay
29const byte TANK_OK = LOW;                        // şamandıra suyla kapanır / float closes with water
30
31DHT dht(DHT_PIN, DHT22);
32LiquidCrystal_I2C lcd(0x27, 16, 2);
33
34float tempC = NAN, hum = NAN, soil = 0, light = 0;
35byte dhtErrors = 0, pulses = 0, page = 0;
36bool fanByTemp = false, fanByHum = false, fanOn = false, heaterOn = false;
37bool needWater = false, pumpFault = false, isDark = false, ledOn = false, tankOk = true;
38unsigned long lastRead = 0, lastLcd = 0, lastLog = 0, pumpAt = 0, darkSince = 0;
39
40enum PumpState { IDLE, PUMPING, SOAKING };
41PumpState pumpState = IDLE;
42
43// onAt > offAt: yükselince aç (fan) / turn on when rising (fan)
44// onAt < offAt: düşünce aç (ısıtıcı) / turn on when falling (heater)
45bool hysteresis(bool state, float value, float onAt, float offAt) {
46  if (onAt > offAt) {
47    if (value >= onAt) return true;
48    if (value <= offAt) return false;
49  } else {
50    if (value <= onAt) return true;
51    if (value >= offAt) return false;
52  }
53  return state;                                  // ölü bölgede durumu koru / keep state in the dead band
54}
55
56void setRelay(byte pin, bool on) {
57  digitalWrite(pin, on ? RELAY_ON : RELAY_OFF);
58}
59
60float readPercent(byte pin, int raw0, int raw100) {
61  long sum = 0;
62  for (byte i = 0; i < 10; i++) sum += analogRead(pin);   // 10 ölçüm ortalaması / average of 10
63  long pct = map(sum / 10, raw0, raw100, 0, 100);
64  return constrain(pct, 0, 100);
65}
66
67void setup() {
68  Serial.begin(9600);
69  setRelay(PUMP_RELAY, false);   pinMode(PUMP_RELAY, OUTPUT);    // açılışta kapalı / off at boot
70  setRelay(FAN_RELAY, false);    pinMode(FAN_RELAY, OUTPUT);
71  setRelay(HEATER_RELAY, false); pinMode(HEATER_RELAY, OUTPUT);
72  pinMode(LED_PIN, OUTPUT);
73  pinMode(FLOAT_PIN, INPUT_PULLUP);
74  dht.begin();
75  lcd.init();
76  lcd.backlight();
77  lcd.print(F("BlueGrays Sera"));
78  Serial.println(F("sn,sicaklik,nem,toprak,isik,fan,isitici,pompa,led"));  // CSV başlığı / CSV header
79  delay(2000);                                   // DHT22 açılış süresi / DHT22 start-up time
80  readSensors();
81  lastRead = millis();
82}
83
84void loop() {
85  unsigned long now = millis();
86  if (now - lastRead >= READ_MS) {
87    lastRead = now;
88    readSensors();
89  }
90  controlClimate();
91  controlLight(now);
92  controlPump(now);
93  updateLcd(now);
94  logCsv(now);
95}
96
97// 1) Ölç / Measure
98void readSensors() {
99  float t = dht.readTemperature();
100  float h = dht.readHumidity();
101  if (isnan(t) || isnan(h)) {
102    if (dhtErrors < 255) dhtErrors++;            // okuma hatası / read error
103  } else {
104    tempC = t;
105    hum = h;
106    dhtErrors = 0;
107  }
108  soil = readPercent(SOIL_PIN, SOIL_DRY_RAW, SOIL_WET_RAW);
109  light = readPercent(LDR_PIN, LDR_DARK_RAW, LDR_BRIGHT_RAW);
110  tankOk = digitalRead(FLOAT_PIN) == TANK_OK;
111}
112
113// 2) Fan ve ısıtıcı / Fan and heater
114void controlClimate() {
115  if (dhtErrors >= 3) {                          // sensör yok: güvenli durum / no sensor: safe state
116    heaterOn = false;
117    fanByTemp = true;
118  } else {
119    fanByTemp = hysteresis(fanByTemp, tempC, FAN_ON_C, FAN_OFF_C);
120    fanByHum = hysteresis(fanByHum, hum, HUM_ON, HUM_OFF);
121    heaterOn = hysteresis(heaterOn, tempC, HEAT_ON_C, HEAT_OFF_C);
122  }
123  fanOn = fanByTemp || fanByHum;
124  setRelay(FAN_RELAY, fanOn);
125  setRelay(HEATER_RELAY, heaterOn);
126}
127
128// 3) LED aydınlatma / LED grow light
129void controlLight(unsigned long now) {
130  bool wasDark = isDark;
131  isDark = hysteresis(isDark, light, DARK_ON, DARK_OFF);
132  if (isDark && !wasDark) darkSince = now;      // akşam oldu / dusk detected
133  ledOn = isDark && (now - darkSince < EXTRA_LIGHT_MS);
134  analogWrite(LED_PIN, ledOn ? LED_LEVEL : 0);
135}
136
137// 4) Sulama: darbe + bekleme / Watering: pulse + soak
138void controlPump(unsigned long now) {
139  needWater = hysteresis(needWater, soil, SOIL_DRY, SOIL_OK);
140  if (!needWater) {
141    pulses = 0;
142    pumpFault = false;                           // toprak ıslandı / soil is wet again
143  }
144  switch (pumpState) {
145    case IDLE:
146      if (needWater && tankOk && !pumpFault) {
147        if (pulses >= MAX_PULSES) {
148          pumpFault = true;                      // nem yükselmiyor / moisture is not rising
149        } else {
150          pumpState = PUMPING;
151          pumpAt = now;
152          pulses++;
153        }
154      }
155      break;
156    case PUMPING:
157      if (now - pumpAt >= PUMP_MS || !tankOk) {
158        pumpState = SOAKING;
159        pumpAt = now;
160      }
161      break;
162    case SOAKING:
163      if (now - pumpAt >= SOAK_MS) pumpState = IDLE;
164      break;
165  }
166  setRelay(PUMP_RELAY, pumpState == PUMPING);
167}
168
169// 5) LCD: üç sayfa / three pages
170void updateLcd(unsigned long now) {
171  if (now - lastLcd < 3000) return;
172  lastLcd = now;
173  page = (page + 1) % 3;
174  lcd.clear();
175  if (page == 0) {
176    lcd.print(F("Sicaklik: "));
177    if (isnan(tempC)) lcd.print(F("--")); else lcd.print(tempC, 1);
178    lcd.print('C');
179    lcd.setCursor(0, 1);
180    lcd.print(F("Hava nemi: %"));
181    if (isnan(hum)) lcd.print(F("--")); else lcd.print(hum, 0);
182  } else if (page == 1) {
183    lcd.print(F("Toprak: %"));
184    lcd.print(soil, 0);
185    lcd.setCursor(0, 1);
186    lcd.print(F("Isik: %"));
187    lcd.print(light, 0);
188  } else {
189    lcd.print(F("F:"));  lcd.print(fanOn);
190    lcd.print(F(" I:")); lcd.print(heaterOn);
191    lcd.print(F(" P:")); lcd.print(pumpState == PUMPING);
192    lcd.print(F(" L:")); lcd.print(ledOn);
193    lcd.setCursor(0, 1);
194    if (dhtErrors >= 3) lcd.print(F("Sensor hatasi"));
195    else if (!tankOk) lcd.print(F("Depo bos!"));
196    else if (pumpFault) lcd.print(F("Sulama hatasi"));
197    else lcd.print(F("Sistem normal"));
198  }
199}
200
201// 6) Seri port CSV kaydı / Serial CSV log
202void logCsv(unsigned long now) {
203  if (now - lastLog < 10000) return;
204  lastLog = now;
205  Serial.print(now / 1000);  Serial.print(',');
206  Serial.print(tempC, 1);    Serial.print(',');
207  Serial.print(hum, 0);      Serial.print(',');
208  Serial.print(soil, 0);     Serial.print(',');
209  Serial.print(light, 0);    Serial.print(',');
210  Serial.print(fanOn);       Serial.print(',');
211  Serial.print(heaterOn);    Serial.print(',');
212  Serial.print(pumpState == PUMPING); Serial.print(',');
213  Serial.println(ledOn);
214}| Function | Job | How often? |
|---|---|---|
| readSensors() | Reads the DHT22, soil moisture, LDR and float switch; converts analogue values to 0–100% using the average of 10 readings | Every 2.5 seconds |
| controlClimate() | Drives the fan with temperature or humidity hysteresis and the heater with temperature hysteresis; switches to a safe state if the sensor fails | Every loop |
| controlLight() | Turns the LEDs on with PWM when it gets dark and switches them off after at most 4 hours | Every loop |
| controlPump() | Watering state machine: water 3 s, wait 60 s, measure again; with tank and overflow protection | Every loop |
| updateLcd() | Cycles through three pages: air readings, soil moisture and light, device states | Every 3 seconds |
| logCsv() | Writes readings and states to the Serial Monitor as a CSV line | Every 10 seconds |
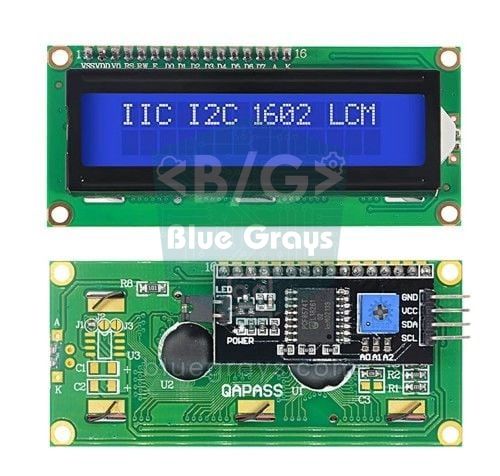
The first LCD page shows temperature and air humidity, the second soil moisture and light level, and the third the state of the devices: “F:1 I:0 P:0 L:1” means the fan is running, the heater (I = ısıtıcı) and pump are off and the LEDs are on. The bottom line shows one of the messages “Sistem normal” (all OK), “Depo bos!” (tank empty), “Sulama hatasi” (watering fault) or “Sensor hatasi” (sensor error); you can easily translate these strings in the code. Compiled, this code uses about 31% of the Uno's program memory and 25% of its RAM, so there's plenty of room to add a second soil sensor, a buzzer or an RTC clock module. Because the Uno has no real clock, the LED rule works as “at most 4 hours after dusk”, which is a good way to extend short winter days. If you want the LEDs to come on at set times each day, add an RTC module or move to the ESP32 version below.
Monitoring and watering from your phone with an ESP32
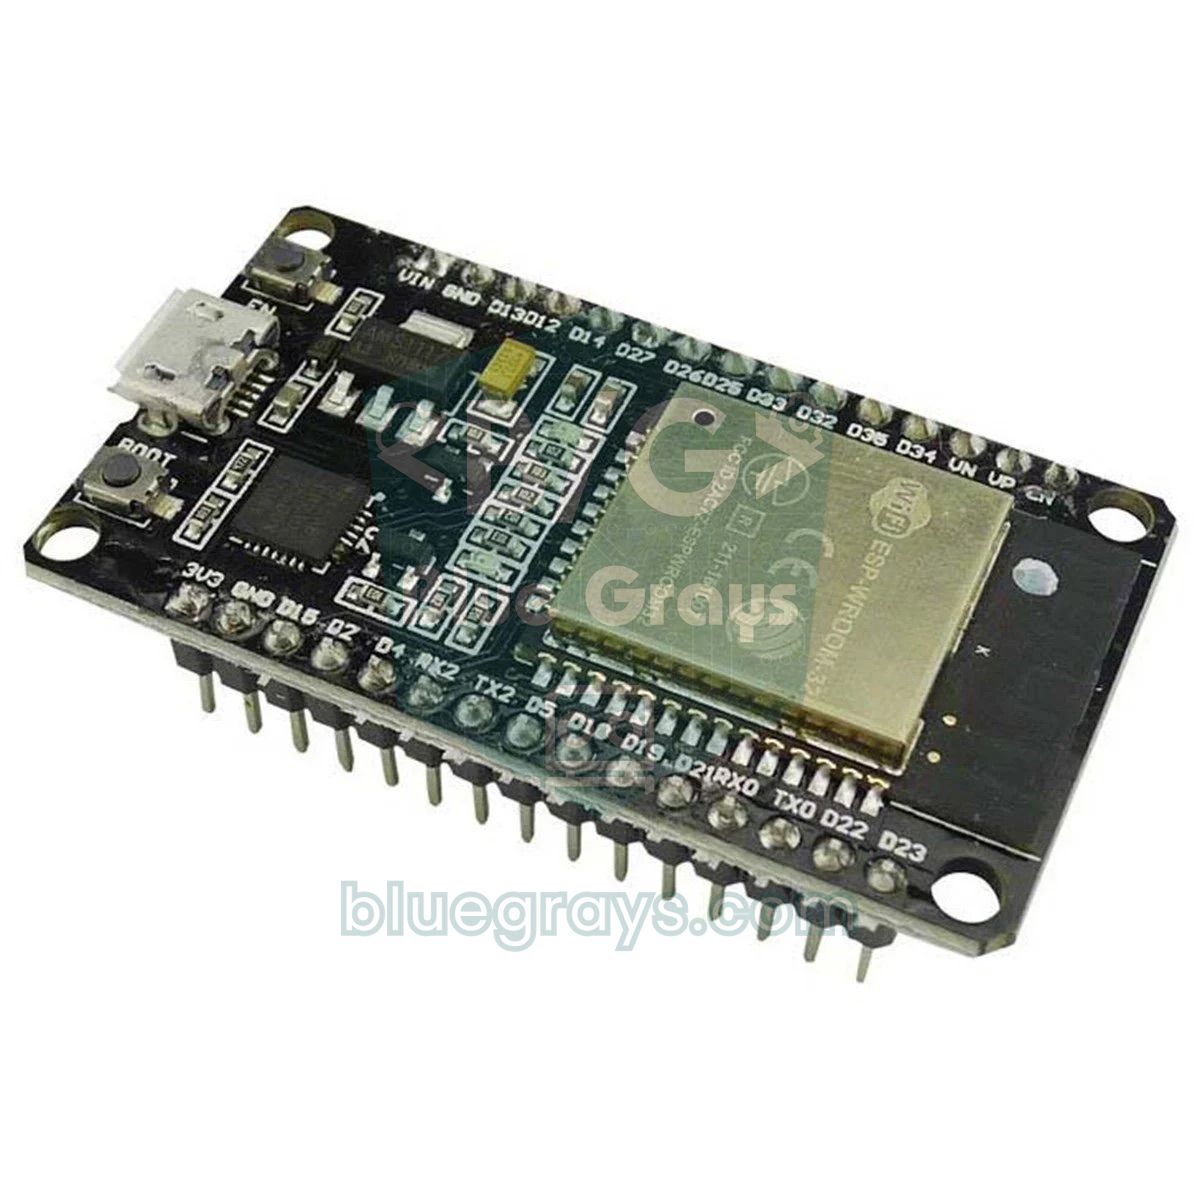
The Uno has no Wi-Fi. If you want to see the greenhouse's status on your phone and water remotely, swap the brain for an ESP32. The code below moves the same control logic to the ESP32 and starts a small web server. With your phone on the same Wi-Fi network, open the IP address shown in the Serial Monitor in your browser and you'll see the temperature, humidity, soil moisture, light, tank status and whether each device is on or off; the page refreshes itself every 10 seconds. The Water now button runs the pump once for 3 seconds if there's water in the tank. At start-up the ESP32 gets the time from the internet (NTP), so the LEDs only come on between 06:00 and 20:00 and only when it's dark outside, and the plants rest at night.
1#include <WiFi.h>
2#include <WebServer.h>
3#include <DHT.h>
4#include <time.h>
5
6const char* ssid = "AgAdi";                      // Wi-Fi adın / your Wi-Fi name
7const char* password = "Sifre123";               // Wi-Fi şifren / your Wi-Fi password
8
9// Pinler / Pins
10const int DHT_PIN = 4, FLOAT_PIN = 13, PUMP_RELAY = 25, FAN_RELAY = 26, HEATER_RELAY = 27;
11const int LED_PIN = 18;                          // MOSFET gate (PWM)
12const int SOIL_PIN = 34, LDR_PIN = 35;           // ADC1: Wi-Fi açıkken çalışır / works with Wi-Fi on
13
14// Kalibrasyon (0-4095): kendin ölç / Calibration (0-4095): measure your own
15const int SOIL_DRY_RAW = 2800, SOIL_WET_RAW = 1200;
16const int LDR_DARK_RAW = 200, LDR_BRIGHT_RAW = 3800;
17
18// Eşikler (açma, kapama) / Thresholds (on, off)
19const float FAN_ON_C = 30, FAN_OFF_C = 27, HUM_ON = 85, HUM_OFF = 75;
20const float HEAT_ON_C = 16, HEAT_OFF_C = 19, SOIL_DRY = 35, SOIL_OK = 50;
21const float DARK_ON = 25, DARK_OFF = 35;
22const int LIGHT_FROM = 6, LIGHT_TO = 20;         // LED yalnız 06:00-20:00 / LEDs only 06:00-20:00
23
24const unsigned long READ_MS = 2500, PUMP_MS = 3000, SOAK_MS = 60000;
25const unsigned long EXTRA_LIGHT_MS = 4UL * 3600000UL;  // saat yoksa yedek kural / fallback without a clock
26const int MAX_PULSES = 6, LED_LEVEL = 200;
27const int RELAY_ON = LOW, RELAY_OFF = HIGH;      // aktif LOW röle / active-LOW relay
28const int TANK_OK = LOW;                         // şamandıra suyla kapanır / float closes with water
29
30DHT dht(DHT_PIN, DHT22);
31WebServer server(80);
32
33float tempC = NAN, hum = NAN, soil = 0, light = 0;
34int dhtErrors = 0, pulses = 0;
35bool fanByTemp = false, fanByHum = false, fanOn = false, heaterOn = false;
36bool needWater = false, pumpFault = false, isDark = false, ledOn = false, tankOk = true;
37unsigned long lastRead = 0, pumpAt = 0, darkSince = 0;
38
39enum PumpState { IDLE, PUMPING, SOAKING };
40PumpState pumpState = IDLE;
41
42bool hysteresis(bool state, float value, float onAt, float offAt) {
43  if (onAt > offAt) {                            // yükselince aç / turn on when rising
44    if (value >= onAt) return true;
45    if (value <= offAt) return false;
46  } else {                                       // düşünce aç / turn on when falling
47    if (value <= onAt) return true;
48    if (value >= offAt) return false;
49  }
50  return state;
51}
52
53void setRelay(int pin, bool on) {
54  digitalWrite(pin, on ? RELAY_ON : RELAY_OFF);
55}
56
57float readPercent(int pin, int raw0, int raw100) {
58  long sum = 0;
59  for (int i = 0; i < 16; i++) sum += analogRead(pin);    // 16 ölçüm ortalaması / average of 16
60  long pct = map(sum / 16, raw0, raw100, 0, 100);
61  return constrain(pct, 0, 100);
62}
63
64int hourNow() {
65  struct tm t;
66  if (!getLocalTime(&t, 0)) return -1;           // saat henüz yok / time not set yet
67  return t.tm_hour;
68}
69
70void readSensors() {
71  float t = dht.readTemperature();
72  float h = dht.readHumidity();
73  if (isnan(t) || isnan(h)) {
74    dhtErrors++;
75  } else {
76    tempC = t;
77    hum = h;
78    dhtErrors = 0;
79  }
80  soil = readPercent(SOIL_PIN, SOIL_DRY_RAW, SOIL_WET_RAW);
81  light = readPercent(LDR_PIN, LDR_DARK_RAW, LDR_BRIGHT_RAW);
82  tankOk = digitalRead(FLOAT_PIN) == TANK_OK;
83}
84
85void controlClimate() {
86  if (dhtErrors >= 3) {                          // sensör yok: güvenli durum / no sensor: safe state
87    heaterOn = false;
88    fanByTemp = true;
89  } else {
90    fanByTemp = hysteresis(fanByTemp, tempC, FAN_ON_C, FAN_OFF_C);
91    fanByHum = hysteresis(fanByHum, hum, HUM_ON, HUM_OFF);
92    heaterOn = hysteresis(heaterOn, tempC, HEAT_ON_C, HEAT_OFF_C);
93  }
94  fanOn = fanByTemp || fanByHum;
95  setRelay(FAN_RELAY, fanOn);
96  setRelay(HEATER_RELAY, heaterOn);
97}
98
99void controlLight(unsigned long now) {
100  bool wasDark = isDark;
101  isDark = hysteresis(isDark, light, DARK_ON, DARK_OFF);
102  if (isDark && !wasDark) darkSince = now;
103  int h = hourNow();
104  if (h >= 0) ledOn = isDark && h >= LIGHT_FROM && h < LIGHT_TO;   // saat kuralı / clock rule
105  else ledOn = isDark && (now - darkSince < EXTRA_LIGHT_MS);       // yedek kural / fallback rule
106  analogWrite(LED_PIN, ledOn ? LED_LEVEL : 0);
107}
108
109void controlPump(unsigned long now) {
110  needWater = hysteresis(needWater, soil, SOIL_DRY, SOIL_OK);
111  if (!needWater) {
112    pulses = 0;
113    pumpFault = false;
114  }
115  if (pumpState == IDLE && needWater && tankOk && !pumpFault) {
116    if (pulses >= MAX_PULSES) {
117      pumpFault = true;                          // nem yükselmiyor / moisture is not rising
118    } else {
119      pumpState = PUMPING;
120      pumpAt = now;
121      pulses++;
122    }
123  } else if (pumpState == PUMPING && (now - pumpAt >= PUMP_MS || !tankOk)) {
124    pumpState = SOAKING;
125    pumpAt = now;
126  } else if (pumpState == SOAKING && now - pumpAt >= SOAK_MS) {
127    pumpState = IDLE;
128  }
129  setRelay(PUMP_RELAY, pumpState == PUMPING);
130}
131
132String row(const char* name, const String& value) {
133  return String("<tr><td>") + name + "</td><td><b>" + value + "</b></td></tr>";
134}
135
136String onOff(bool on) {
137  return on ? "ON" : "OFF";
138}
139
140void handleRoot() {
141  String html = "<!DOCTYPE html><html><head><meta charset='utf-8'>"
142                "<meta name='viewport' content='width=device-width,initial-scale=1'>"
143                "<meta http-equiv='refresh' content='10'><title>BlueGrays Sera</title>"
144                "<style>body{font-family:sans-serif;max-width:420px;margin:auto;padding:12px}"
145                "td{padding:8px;border-bottom:1px solid #ddd}"
146                "a{display:block;margin-top:16px;padding:16px;border-radius:10px;background:#2e7d32;"
147                "color:#fff;text-align:center;text-decoration:none;font-size:18px}</style>"
148                "</head><body><h2>BlueGrays Sera</h2><table>";
149  html += row("Sıcaklık / Temperature", String(tempC, 1) + " °C");
150  html += row("Hava nemi / Humidity", "%" + String(hum, 0));
151  html += row("Toprak nemi / Soil", "%" + String(soil, 0));
152  html += row("Işık / Light", "%" + String(light, 0));
153  html += row("Fan", onOff(fanOn));
154  html += row("Isıtıcı / Heater", onOff(heaterOn));
155  html += row("Pompa / Pump", onOff(pumpState == PUMPING));
156  html += row("LED", onOff(ledOn));
157  html += row("Depo / Tank", tankOk ? "OK" : "BOŞ / EMPTY");
158  if (pumpFault) html += row("Uyarı / Warning", "Sulama hatası / Watering fault");
159  html += "</table><a href='/water'>Şimdi sula / Water now</a></body></html>";
160  server.send(200, "text/html", html);
161}
162
163void handleWater() {                             // elle tek darbe / one manual pulse
164  if (pumpState == IDLE && tankOk) {
165    pumpState = PUMPING;
166    pumpAt = millis();
167  }
168  server.sendHeader("Location", "/");
169  server.send(303);
170}
171
172void setup() {
173  Serial.begin(115200);
174  setRelay(PUMP_RELAY, false);   pinMode(PUMP_RELAY, OUTPUT);
175  setRelay(FAN_RELAY, false);    pinMode(FAN_RELAY, OUTPUT);
176  setRelay(HEATER_RELAY, false); pinMode(HEATER_RELAY, OUTPUT);
177  pinMode(LED_PIN, OUTPUT);
178  pinMode(FLOAT_PIN, INPUT_PULLUP);
179  dht.begin();
180  WiFi.begin(ssid, password);
181  while (WiFi.status() != WL_CONNECTED) {
182    delay(500);
183    Serial.print('.');
184  }
185  Serial.println();
186  Serial.println(WiFi.localIP());                // bu adresi telefonda aç / open this address on your phone
187  configTime(3 * 3600, 0, "pool.ntp.org");       // Türkiye UTC+3; kendi saat dilimini yaz / set your own time zone
188  server.on("/", handleRoot);
189  server.on("/water", handleWater);
190  server.begin();
191  readSensors();
192  lastRead = millis();
193}
194
195void loop() {
196  server.handleClient();
197  unsigned long now = millis();
198  if (now - lastRead >= READ_MS) {
199    lastRead = now;
200    readSensors();
201  }
202  controlClimate();
203  controlLight(now);
204  controlPump(now);
205}
Here's what changes compared with the Uno code: the ESP32's ADC is 12-bit and returns values from 0 to 4095, so you need to redo the calibration; since you power the sensors from 3V3, the raw values will be different too. The time zone is set in the configTime() line; we wrote 3 × 3600 seconds for Turkey (UTC+3). For your own zone with daylight saving, replace that line with configTzTime() and a POSIX time-zone string, for example configTzTime("GMT0BST,M3.5.0/1,M10.5.0", "pool.ntp.org") for the UK. If there's no internet or the time hasn't been fetched yet, the LED rule falls back to the Uno's “at most 4 hours” rule. The page has no password, so anyone on your home network could start the pump; adding a simple password with the WebServer library's authenticate() function is a good habit. If you want an LCD on the ESP32 as well, you can copy the updateLcd() function from the Uno code as it is; SDA is GPIO 21 and SCL is GPIO 22.
| Method | Access from outside the home | Difficulty | Best for |
|---|---|---|---|
| ESP32 web server (the code in this guide) | No, same network only | Medium | School presentations, demos without internet |
| Blynk IoT | Yes | Easy | Ready-made gauges, charts and notifications |
| Telegram bot | Yes | Medium | “Tank empty” and “temperature too high” alerts |
| Google Sheets | Yes | Medium | Weeks of data logging and charts |
| MQTT and Home Assistant | Yes, needs setup | Advanced | Real home and garden automation |
For a school presentation, the ESP32 web server is the safest choice: it doesn't depend on a cloud service and works on its own network even if the hall has no internet. If you also want to check in from outside the home, Blynk IoT with its ready-made gauges and charts is the easiest route. To get a message on your phone when the tank runs dry or the temperature gets dangerous, see the ESP32 Telegram bot guide; to collect weeks of data for your report, ESP32 with Google Sheets; and to connect the greenhouse to real home automation, MQTT and Home Assistant.
MicroPython version for the Raspberry Pi Pico
You can also run the same greenhouse with a Raspberry Pi Pico in MicroPython. The Pico's MicroPython firmware comes with a DHT driver built in, so you don't need to copy any extra files. The analogue inputs are only GP26, GP27 and GP28, and read_u16() returns values from 0 to 65535; measure your calibration numbers accordingly. Because the Pico runs at 3.3 V, power the sensors from 3V3 and the relay module from VBUS (USB's 5 V) or the LM2596 rail. The code below contains all the fan, heater, LED and watering rules and prints the values to Thonny's shell. If you save the file on the Pico as main.py, the board runs even when it's not connected to a computer. If you're using the Wi-Fi-enabled Pico W, you can add the method from the Pico W web server article to monitor the values from your phone.
1from machine import Pin, ADC, PWM
2import dht
3import time
4
5sensor = dht.DHT22(Pin(15))              # GP15: DHT22 DATA
6soil_adc = ADC(26)                       # GP26: toprak nem AOUT / soil moisture AOUT
7ldr_adc = ADC(27)                        # GP27: LDR bölücü (3V3) / LDR divider (3V3)
8tank = Pin(14, Pin.IN, Pin.PULL_UP)      # şamandıra: suyla 0 / float switch: 0 with water
9fan = Pin(16, Pin.OUT, value=1)          # aktif LOW röleler kapalı başlar / active-LOW relays start off
10heater = Pin(17, Pin.OUT, value=1)
11pump = Pin(18, Pin.OUT, value=1)
12led = PWM(Pin(19))                       # MOSFET gate
13led.freq(1000)
14
15SOIL_DRY_RAW, SOIL_WET_RAW = 50000, 22000    # kendin ölç / measure your own
16LDR_DARK_RAW, LDR_BRIGHT_RAW = 2000, 60000
17EXTRA_LIGHT_MS = 4 * 3600 * 1000             # günü 4 saat uzat / extend the day by 4 h
18
19
20def percent(adc, raw0, raw100):
21    raw = sum(adc.read_u16() for _ in range(10)) // 10
22    pct = (raw - raw0) * 100 // (raw100 - raw0)
23    return max(0, min(100, pct))
24
25
26def hysteresis(state, value, on_at, off_at):
27    if on_at > off_at:                   # yükselince aç / turn on when rising
28        if value >= on_at:
29            return True
30        if value <= off_at:
31            return False
32    else:                                # düşünce aç / turn on when falling
33        if value <= on_at:
34            return True
35        if value >= off_at:
36            return False
37    return state                         # ölü bölge / dead band
38
39
40def relay(pin, on):
41    pin.value(0 if on else 1)
42
43
44t = h = None
45errors = pulses = 0
46fan_t = fan_h = heat_on = need_water = dark = led_on = False
47pump_state, pump_at, dark_since = "idle", 0, 0
48soil = light = 0
49tank_ok = True
50time.sleep(2)                            # DHT22 açılış süresi / DHT22 start-up time
51last_read = time.ticks_add(time.ticks_ms(), -2500)
52
53while True:
54    now = time.ticks_ms()
55    if time.ticks_diff(now, last_read) >= 2500:      # 2,5 sn'de bir ölç / measure every 2.5 s
56        last_read = now
57        try:
58            sensor.measure()
59            t, h = sensor.temperature(), sensor.humidity()
60            errors = 0
61        except OSError:
62            errors += 1                  # okuma hatası / read error
63        soil = percent(soil_adc, SOIL_DRY_RAW, SOIL_WET_RAW)
64        light = percent(ldr_adc, LDR_DARK_RAW, LDR_BRIGHT_RAW)
65        tank_ok = tank.value() == 0
66
67        if errors >= 3 or t is None:     # güvenli durum / safe state
68            heat_on, fan_t = False, True
69        else:
70            fan_t = hysteresis(fan_t, t, 30, 27)
71            fan_h = hysteresis(fan_h, h, 85, 75)
72            heat_on = hysteresis(heat_on, t, 16, 19)
73        relay(fan, fan_t or fan_h)
74        relay(heater, heat_on)
75
76        was_dark = dark
77        dark = hysteresis(dark, light, 25, 35)
78        if dark and not was_dark:
79            dark_since = now             # akşam oldu / dusk detected
80        led_on = dark and time.ticks_diff(now, dark_since) < EXTRA_LIGHT_MS
81        led.duty_u16(50000 if led_on else 0)
82
83        need_water = hysteresis(need_water, soil, 35, 50)
84        if not need_water:
85            pulses = 0
86        print("T", t, "N", h, "Toprak", soil, "Isik", light, "Pompa", pump_state,
87              "Depo OK" if tank_ok else "Depo BOS", "HATA" if pulses >= 6 else "")
88
89    # Sulama: 3 sn darbe, 60 sn bekleme / Watering: 3 s pulse, 60 s soak
90    if pump_state == "idle" and need_water and tank_ok and pulses < 6:
91        pump_state, pump_at = "pump", now
92        pulses += 1
93    elif pump_state == "pump" and (time.ticks_diff(now, pump_at) >= 3000 or not tank_ok):
94        pump_state, pump_at = "soak", now
95    elif pump_state == "soak" and time.ticks_diff(now, pump_at) >= 60000:
96        pump_state = "idle"
97    relay(pump, pump_state == "pump")
98    time.sleep_ms(100)
Tips for school and science-fair presentations
Smart greenhouses are such a popular topic that judges see dozens of similar models. What will make you stand out is not just showing that the system works, but answering a question with measurements. At a science fair (such as TÜBİTAK 4006 in Turkey), your aim, method and expected result need to be clear; research competitions (such as TÜBİTAK 2204) expect a comparative experiment with data. A good research question for this greenhouse is: “How much water does watering based on soil moisture save compared with watering at the same time every day, and how does it affect plant growth?”
- Set up two groups: Split seedlings of the same species and the same height into two groups. Water one group with the sensor system and the other by hand with a fixed amount every day; keep light and temperature the same for both groups.
- Measure and record: Keep a table of the weekly amount of water (by measuring the tank, in mL), plant height (cm) and the number of leaves. The CSV output from the code or a Google Sheets log gives you the temperature and humidity chart for free.
- Draw a block diagram: Sensors on the left, the Arduino in the middle, actuators on the right; label the arrows with rule sentences (“soil < 35% → pump”). The judges won't read your code, but they will remember this diagram.
- Explain hysteresis: Two charts showing how many times a single-threshold fan and a hysteresis fan switch on and off in an hour are the best way to show the judges the engineering side of your project.
- Write a live demo script: Warm the DHT22 in your palm to start the fan, move the soil sensor into a dry pot to show the pump pulses, cover the LDR with your hand to show the LEDs coming on. Keep each demo to 10–20 seconds.
- Link it to real life: Talk about real problems such as water and energy use in greenhouses, fungal diseases caused by excess humidity and growers' workload; show with numbers which of them your system addresses.
- Have a backup plan: Film the working system; bring spare wires, a spare pump and an adapter; write your calibration values and Wi-Fi settings on a piece of paper.
- Prepare for the judges' questions: Have short answers ready for “What happens if a sensor fails?”, “What happens to the plants in a power cut?” and “How would you scale this up to a real greenhouse?”. The safe state and overflow protection in the code are the best answers to these questions.
Common mistakes and how to fix them
| Symptom | Likely cause | Fix |
|---|---|---|
| The Arduino resets or the LCD garbles when the pump runs | Pump and relays powered from the Arduino's 5V pin, motor noise | Power the pump and relay coils from the LM2596, join the GNDs, add a reverse diode and a 470 µF capacitor at the pump |
| The relays keep clicking | A single threshold is used or the readings are noisy | Use separate on and off thresholds (hysteresis) and average the analogue readings |
| Water keeps flowing after the pump stops | Siphon effect: the hose end is below the tank's water level | Place the tank lower or make a small air hole at the top of the hose |
| Soil moisture is always 0% or always 100% | Wrong calibration values, or AOUT on the wrong pin | Measure the sensor's raw value in air and in water and write them into the constants |
| The LEDs flash on and off | The LDR can see the LEDs' light | Move the LDR outside the greenhouse, facing the sky |
| The DHT22 returns nan | Wrong pin, no pull-up resistor, or read more often than every 2 seconds | Check the pin, use a module or add 10 kΩ between DATA and VCC |
| The temperature reads higher than it should | Sun or LED light shines directly on the sensor | Shade it with a white cover with holes and move it away from the heater |
| Water droplets and mould on the walls | Humidity too high, ventilation too weak | Lower the humidity threshold, enlarge the air inlet, water less |
| On the ESP32, the soil reading goes wrong when Wi-Fi starts | The sensor is on an ADC2 pin | Move it to an ADC1 pin between GPIO 32 and 39 |
| With an ESP32, the relay never releases | A 3.3 V HIGH can't switch off an active-LOW 5 V module | Separate JD-VCC or use a relay module with 3.3 V triggering |
A smart greenhouse project combines reading sensors, calibration, deciding with hysteresis, driving relays and MOSFETs, power planning and wireless monitoring in a single build, and in the end it grows something truly alive: a plant. Start with watering and ventilation, test each part on its own, then add the heater, the LEDs and the phone. In the BlueGrays app you'll find step-by-step projects with circuit diagrams and code for measuring temperature and humidity with a DHT11, reading light with an LDR, a smart watering station and a temperature logger with a DHT22.
Frequently asked questions
What do I need for a smart greenhouse project?
For a basic smart greenhouse, an Arduino Uno or ESP32, a DHT22 temperature and humidity sensor, a capacitive soil moisture sensor, an LDR and a 10 kΩ resistor, a relay module, a mini submersible pump and a fan are enough. The full version adds a 12 V PTC heater, an LED strip driven by a MOSFET, an I2C LCD, a float level switch, a 12 V 5 A adapter and an LM2596. For the body, a clear storage box with a lid is the easiest and cheapest solution.
How does a smart greenhouse work?
A smart greenhouse works in a measure, decide, act, display loop. Sensors measure temperature, humidity, soil moisture and light; the Arduino compares these values with thresholds and switches the fan, heater, pump and LEDs on and off through relays or a MOSFET. The results are shown on an LCD and, with an ESP32, on your phone.
Should I use a DHT11 or a DHT22 in a greenhouse?
Choose the DHT22. The DHT11 is only accurate to ±2 °C between 0 and 50 °C and can't see humidity above 90%, while a greenhouse can go above 90% humidity in the morning and below freezing in winter. The DHT22 measures from −40 to 80 °C to ±0.5 °C and humidity to about ±2%, and its code is almost identical to the DHT11's.
How much does an Arduino greenhouse project cost?
Prices vary by seller, but excluding the board, the basic version (DHT22, soil moisture sensor, LDR, relay, pump and fan) usually costs around 25–40 dollars. The full version with a heater, LED strip, LCD, 12 V adapter and enclosure comes to about 70–120 dollars. If you already have an Arduino starter kit, the cost drops noticeably.
How can I monitor my greenhouse from my phone?
The easiest way is to swap the brain for an ESP32 and run a web server; you see the values and start the pump from your phone's browser on the same Wi-Fi network. For access from outside the home you can use Blynk IoT, for alert messages a Telegram bot, and for long-term data logging Google Sheets.
How do I present a smart greenhouse at a science fair?
Instead of just showing a working model, set a measurable research question; for example, measure over several weeks with two groups of plants how much water sensor-based watering saves compared with timed watering. Present the water use, plant height and temperature-humidity charts in tables and graphs, explain the system with a block diagram and prepare a short script for the live demo.
Projects to build after reading this
See all projects
Temperature and Humidity with DHT11
How warm is your room, and is the air humid or dry? The DHT11 sensor measures temperature and humidity, and the Arduino writes the values on a two-line LCD screen, refreshing every couple of seconds.

Measuring Light Intensity with an LDR
Want to see how bright your room is as a number? The LDR, a small part that reacts to light, measures the light around it, and the Arduino writes the value to your computer screen every half second. C

Reading Light Intensity with the ESP32 LDR Module
Real-time monitoring of the LDR module's raw ADC value and relative light percentage calculated from dark and light reference values in the Serial Monitor. This percentage is not a lux measurement. Teaches the module’s calibration logic. It is ideal to complete this before Project 10, as it is used to determine the threshold value.

Smart Irrigation Station
A gardener that waters your plants on its own, so they don't dry out while you're on vacation. A soil moisture sensor measures how wet the soil is; when it gets dry, the Arduino runs the water pump fo

ESP32 DHT22 Temperature and Humidity (with LCD Display)
This project measures ambient temperature and humidity using a DHT22 sensor and displays the data in real time on a 16x2 I2C LCD. Data is read from the sensor using the one-wire protocol via the Adafruit DHT library. This project serves as the foundation for IoT weather stations, smart home automation, or environmental monitoring systems in greenhouses. Communication with the DHT22 is established via the ESP32's GPIO 4 pin.
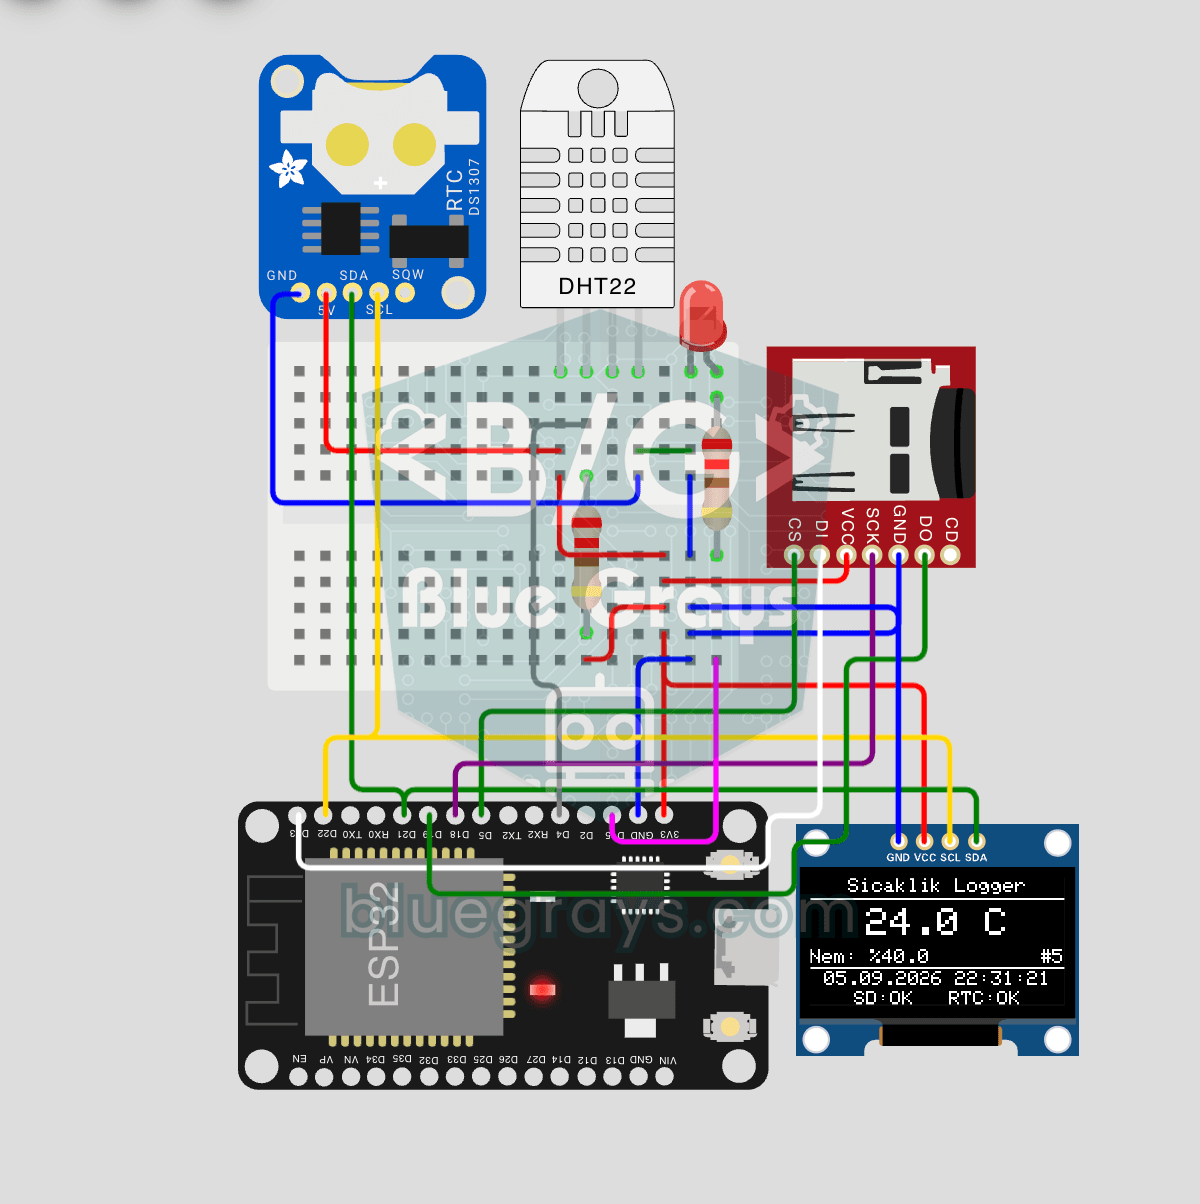
ESP32 Temperature Data Logger (DHT22 + DS1307 RTC + microSD + OLED)
Build a timestamped temperature logger with ESP32! Read DHT22 temperature/humidity every minute, get real-world time from DS1307 RTC, and log to microSD card as CSV. The OLED displays live temperature (large font), humidity percentage, timestamp, and log counter. The /temp_log.csv file on the SD card opens in Excel, Google Sheets, or Python pandas for analysis — perfect for greenhouse monitoring, home/room temperature tracking, laboratory data collection, food storage conditions, or beehiv

ESP32 Smart Lighting (PIR + LDR + Relay + OLED)
Turn your hallway, bathroom, or pantry into smart lighting with ESP32! Using a PIR motion sensor, LDR light sensor, and a relay module, we build the classic "light turns on when motion is detected in the dark" scenario — if the environment is already bright, motion does NOT trigger the light, saving energy during the day. The light stays on for 30 seconds; if motion continues, the timer resets and the light stays on longer. The SSD1306 OLED shows large-font status (ON / DAYTIME / WAITING), a cou