
ESP32 MQTT Tutorial: Mosquitto, Home Assistant and ESPHome
ESP32 MQTT tutorial: install Mosquitto, publish sensor data and control a relay with PubSubClient, Home Assistant discovery, an ESPHome YAML example and QoS.
Pairing the ESP32 with MQTT is the most common way to let the sensors and relays in your home talk to each other and to a smart home system such as Home Assistant. MQTT is a lightweight messaging protocol designed for small devices: the ESP32 drops the temperature it measured into a topic such as "ev/salon/sicaklik", and every program listening to that topic receives the value instantly. The same way, when you tap a button in the Home Assistant app on your phone, the "ON" command reaches the ESP32 in well under a second and switches the relay. Unlike HTTP, it doesn't open a new connection for every request; it works over a single open connection with headers as small as two bytes, so it's fast and easy on both Wi-Fi and the processor.
In this guide you'll build a working smart home node from scratch. First you'll learn the MQTT concepts of broker, topic, publish and subscribe, then you'll install the Mosquitto broker in Home Assistant or on a Raspberry Pi. Next you'll use the PubSubClient library to publish DHT22 temperature and humidity readings from an ESP32, listen for relay commands and add MQTT Discovery so the device shows up in Home Assistant by itself. We'll also cover QoS and retain, the last will (LWT) message that marks the device as "unavailable" when the connection drops, the ESPHome alternative that does the same job without a single line of C++, the differences on the ESP8266 and Raspberry Pi Pico W, and the most common errors one by one.
What is MQTT and how does it work?
MQTT (Message Queuing Telemetry Transport) uses a publish/subscribe model. In the middle sits a server called the broker; the ESP32, Home Assistant, your phone or a program on your computer connect to it as clients. Clients don't know each other or each other's IP addresses: one publishes a message to a topic, and the broker forwards it to everyone subscribed to that topic. Think of it as a post office: the ESP32 drops a letter into the box addressed "ev/salon/sicaklik", and Home Assistant, which watches that box, gets it immediately. Because the client always opens the connection, the ESP32 doesn't need a static IP or an open port on your router; all it needs to know is the broker's address.
| Concept | What it does | Example |
|---|---|---|
| Broker | The server that receives messages and distributes them to subscribers | Mosquitto, the Mosquitto broker in Home Assistant |
| Client | Any device or program that connects to the broker; each has a unique client ID | ESP32, Home Assistant, MQTT Explorer |
| Topic | The address of a message, made of levels separated by slashes | ev/salon/sicaklik |
| Publish | Sending a message to a topic | Sending the value "23.4" to ev/salon/sicaklik |
| Subscribe | Registering to receive the messages on a topic | The ESP32 listening to ev/salon/role/komut |
| Payload | The content of a message; text, a number or JSON | ON, 23.4, {"sicaklik":23.4} |
| Retain | The broker keeps the last message on a topic and hands it to new subscribers right away | Relay state: ON |
| LWT (last will) | A message the broker publishes on a client's behalf if it drops off unexpectedly | ev/salon/baglanti: offline |
| QoS | The delivery guarantee level of a message (0, 1 or 2) | QoS 1 for relay commands |
Why MQTT? Compared with a web server, Blynk and Telegram
| Method | Pros | Cons | Best for |
|---|---|---|---|
| MQTT + Home Assistant | Local and fast, two-way; hundreds of devices on one dashboard, automations | You need to run a broker | Managing the whole house from one place |
| ESP32 web server | No extra server, opens in a browser | Each device has its own page, no automations between devices | A control panel for a single device |
| Blynk IoT | Ready-made phone dashboard, access over the internet | Depends on the cloud, limits on the free plan | Quick mobile prototypes |
| Telegram bot | Free instant notifications, no port forwarding | No charts or dashboard | Alarms and simple commands |
| ESP-NOW | ESP boards talk without a router or broker | Only between ESP boards, doesn't reach Home Assistant directly | Carrying data from a battery sensor to a gateway |
In short, MQTT shines as the number of devices grows: when you add a new sensor, you don't touch any existing code, you simply start publishing to a new topic. If you want to control a single device from a browser, the ESP32 Async Web Server and WebSocket guide gets you there faster; for phone notifications see ESP32 Telegram Bot, and for a ready-made mobile dashboard see Blynk ESP32. For a garden sensor out of your router's reach, using ESP-NOW to carry the data to a gateway ESP32 that's connected to MQTT is a good solution.
MQTT topic structure and wildcards
Topics look like folder paths: "ev/salon/sicaklik" (Turkish for home/living room/temperature) has three levels and is case-sensitive, so "Ev/Salon" and "ev/salon" are two different topics. Don't start with a slash ("/ev/salon" creates an empty first level), and avoid spaces and accented characters; plain letters, digits, hyphens and underscores are enough. When subscribing you can use two wildcards: + replaces exactly one level ("ev/+/sicaklik" returns the temperature of every room), while # covers everything after it and may only appear at the end ("ev/#" returns every message in the house). Wildcards only work when subscribing; a message is always published to one exact topic. Topics starting with $ (such as $SYS) are reserved for the broker's own statistics and aren't matched by a # subscription. For the project in this guide we'll use this layout:
| Topic | Published by | Listened to by | Retain |
|---|---|---|---|
| ev/salon/sicaklik | ESP32 (every 30 seconds) | Home Assistant | Yes |
| ev/salon/nem | ESP32 (every 30 seconds) | Home Assistant | Yes |
| ev/salon/role/komut | Home Assistant, phone, automations | ESP32 | No |
| ev/salon/role/durum | ESP32 (on every change) | Home Assistant | Yes |
| ev/salon/baglanti | ESP32 (online), broker (offline) | Home Assistant | Yes |
| homeassistant/status | Home Assistant (online at startup) | ESP32 | No |
Installing an MQTT broker: Mosquitto
The most popular free MQTT broker is Eclipse Mosquitto; even on a Raspberry Pi it easily handles hundreds of messages per second. There are three easy ways to install it: the official Mosquitto broker app if you run Home Assistant OS, the apt package on a separate Raspberry Pi or Linux computer, or the Mosquitto installer on Windows. Whichever you pick, the broker uses port 1883 for unencrypted MQTT and 8883 for TLS-encrypted MQTT, and it only needs to be on the same home network as the ESP32. In Home Assistant, the setup goes like this:
- In Home Assistant, open Settings > Apps (called Add-ons in older versions), click Install app and choose Mosquitto broker from the list.
- Click Install; when it's done, click Start and leave the start-on-boot option enabled.
- Create a separate user for the ESP32: under Settings > People > Users, add a user called "esp32" with a strong password. If you don't see this tab, turn on Advanced mode in your profile. The names "homeassistant" and "addons" are reserved for the broker, so don't use them.
- On the Settings > Devices & services page the MQTT integration usually appears as "Discovered"; click Configure and confirm. If it doesn't, use Add integration, search for MQTT and choose the option that configures Mosquitto automatically.
- In the ESP32 code you'll enter Home Assistant's IP address as the broker address (for example 192.168.1.10), 1883 as the port and the user you just created.
On a Linux machine such as a Raspberry Pi or Ubuntu, setup takes a few commands. Install the broker and the test tools with sudo apt install mosquitto mosquitto-clients. Create the "esp32" user with sudo mosquitto_passwd -c /etc/mosquitto/passwd esp32 and type the password twice; the -c option creates the file from scratch, so leave it out when you add a second user, or the existing users will be wiped. Then create a file called local.conf in the /etc/mosquitto/conf.d/ folder, put the three lines below in it and restart the service with sudo systemctl restart mosquitto. On Windows, add the same lines to the mosquitto.conf file in Mosquitto's install folder and restart the Mosquitto Broker service.
| Line | Meaning |
|---|---|
| listener 1883 | Listens on port 1883 on all network interfaces; without this line, Mosquitto 2.x only accepts connections from the same computer |
| allow_anonymous false | Rejects connections without a username and password; it's already the default in 2.x, but writing it out is a good habit |
| password_file /etc/mosquitto/passwd | Uses the password file you created with mosquitto_passwd; passwords are stored in it as hashes |
Before moving on to the ESP32, test the broker from your computer; separating broker problems from code problems right away saves a lot of time. In one terminal, start listening to every topic in the house with mosquitto_sub -h 192.168.1.10 -u esp32 -P yourpassword -t "ev/#" -v. In a second terminal, type mosquitto_pub -h 192.168.1.10 -u esp32 -P yourpassword -t ev/salon/test -m hello. If the line "ev/salon/test hello" appears in the first terminal, the broker is running and the password is correct. The -v option prints each message's topic in front of it, and the -r option sends the message as retained.
Parts list and wiring diagram
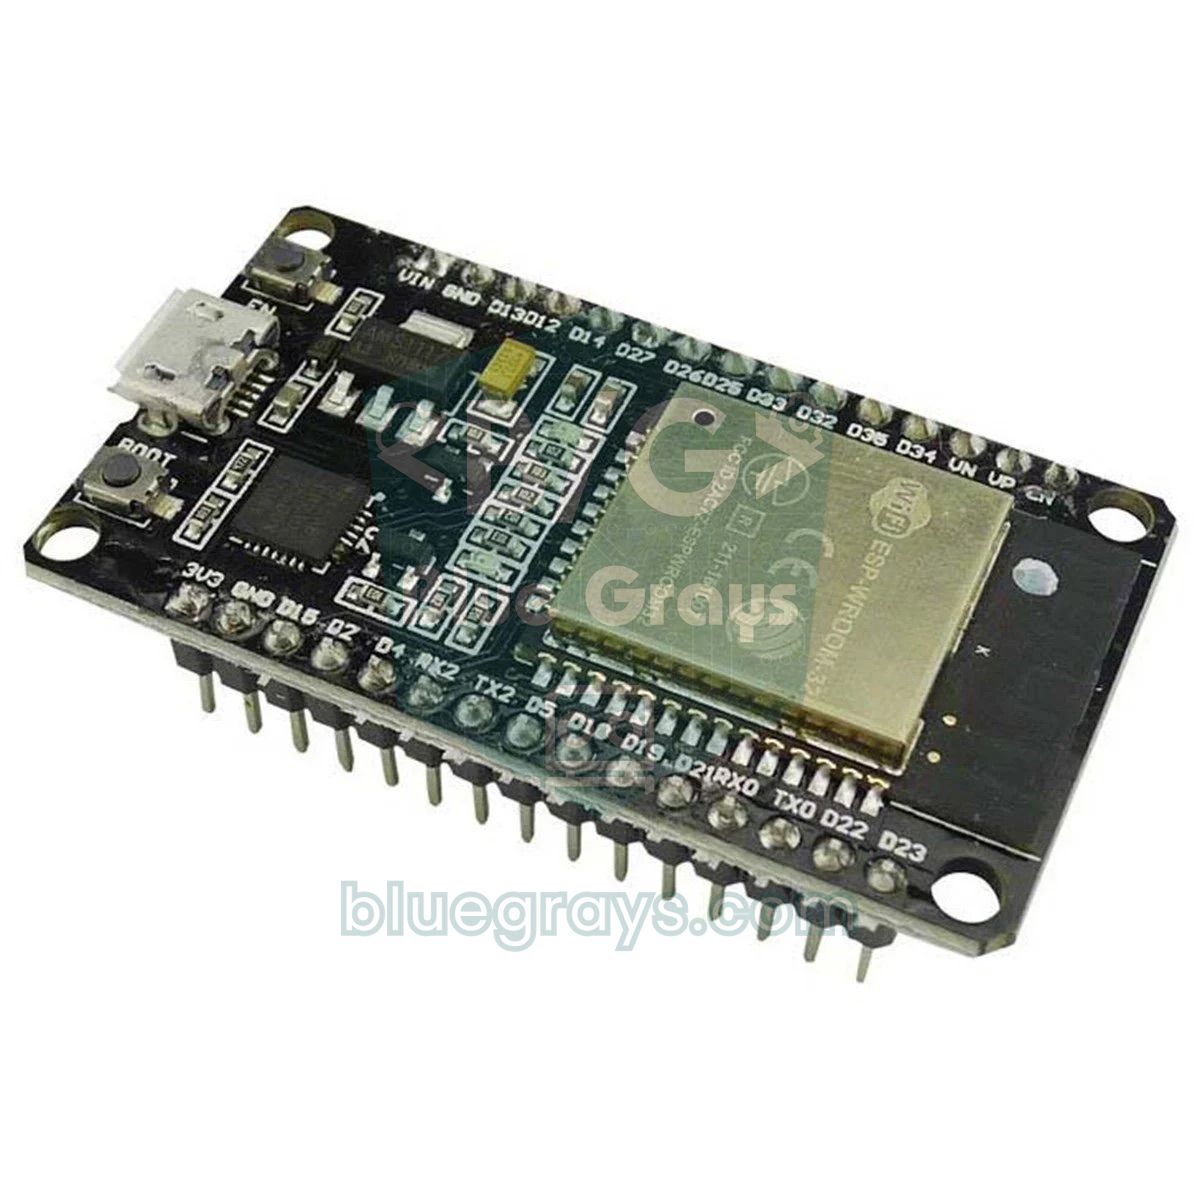
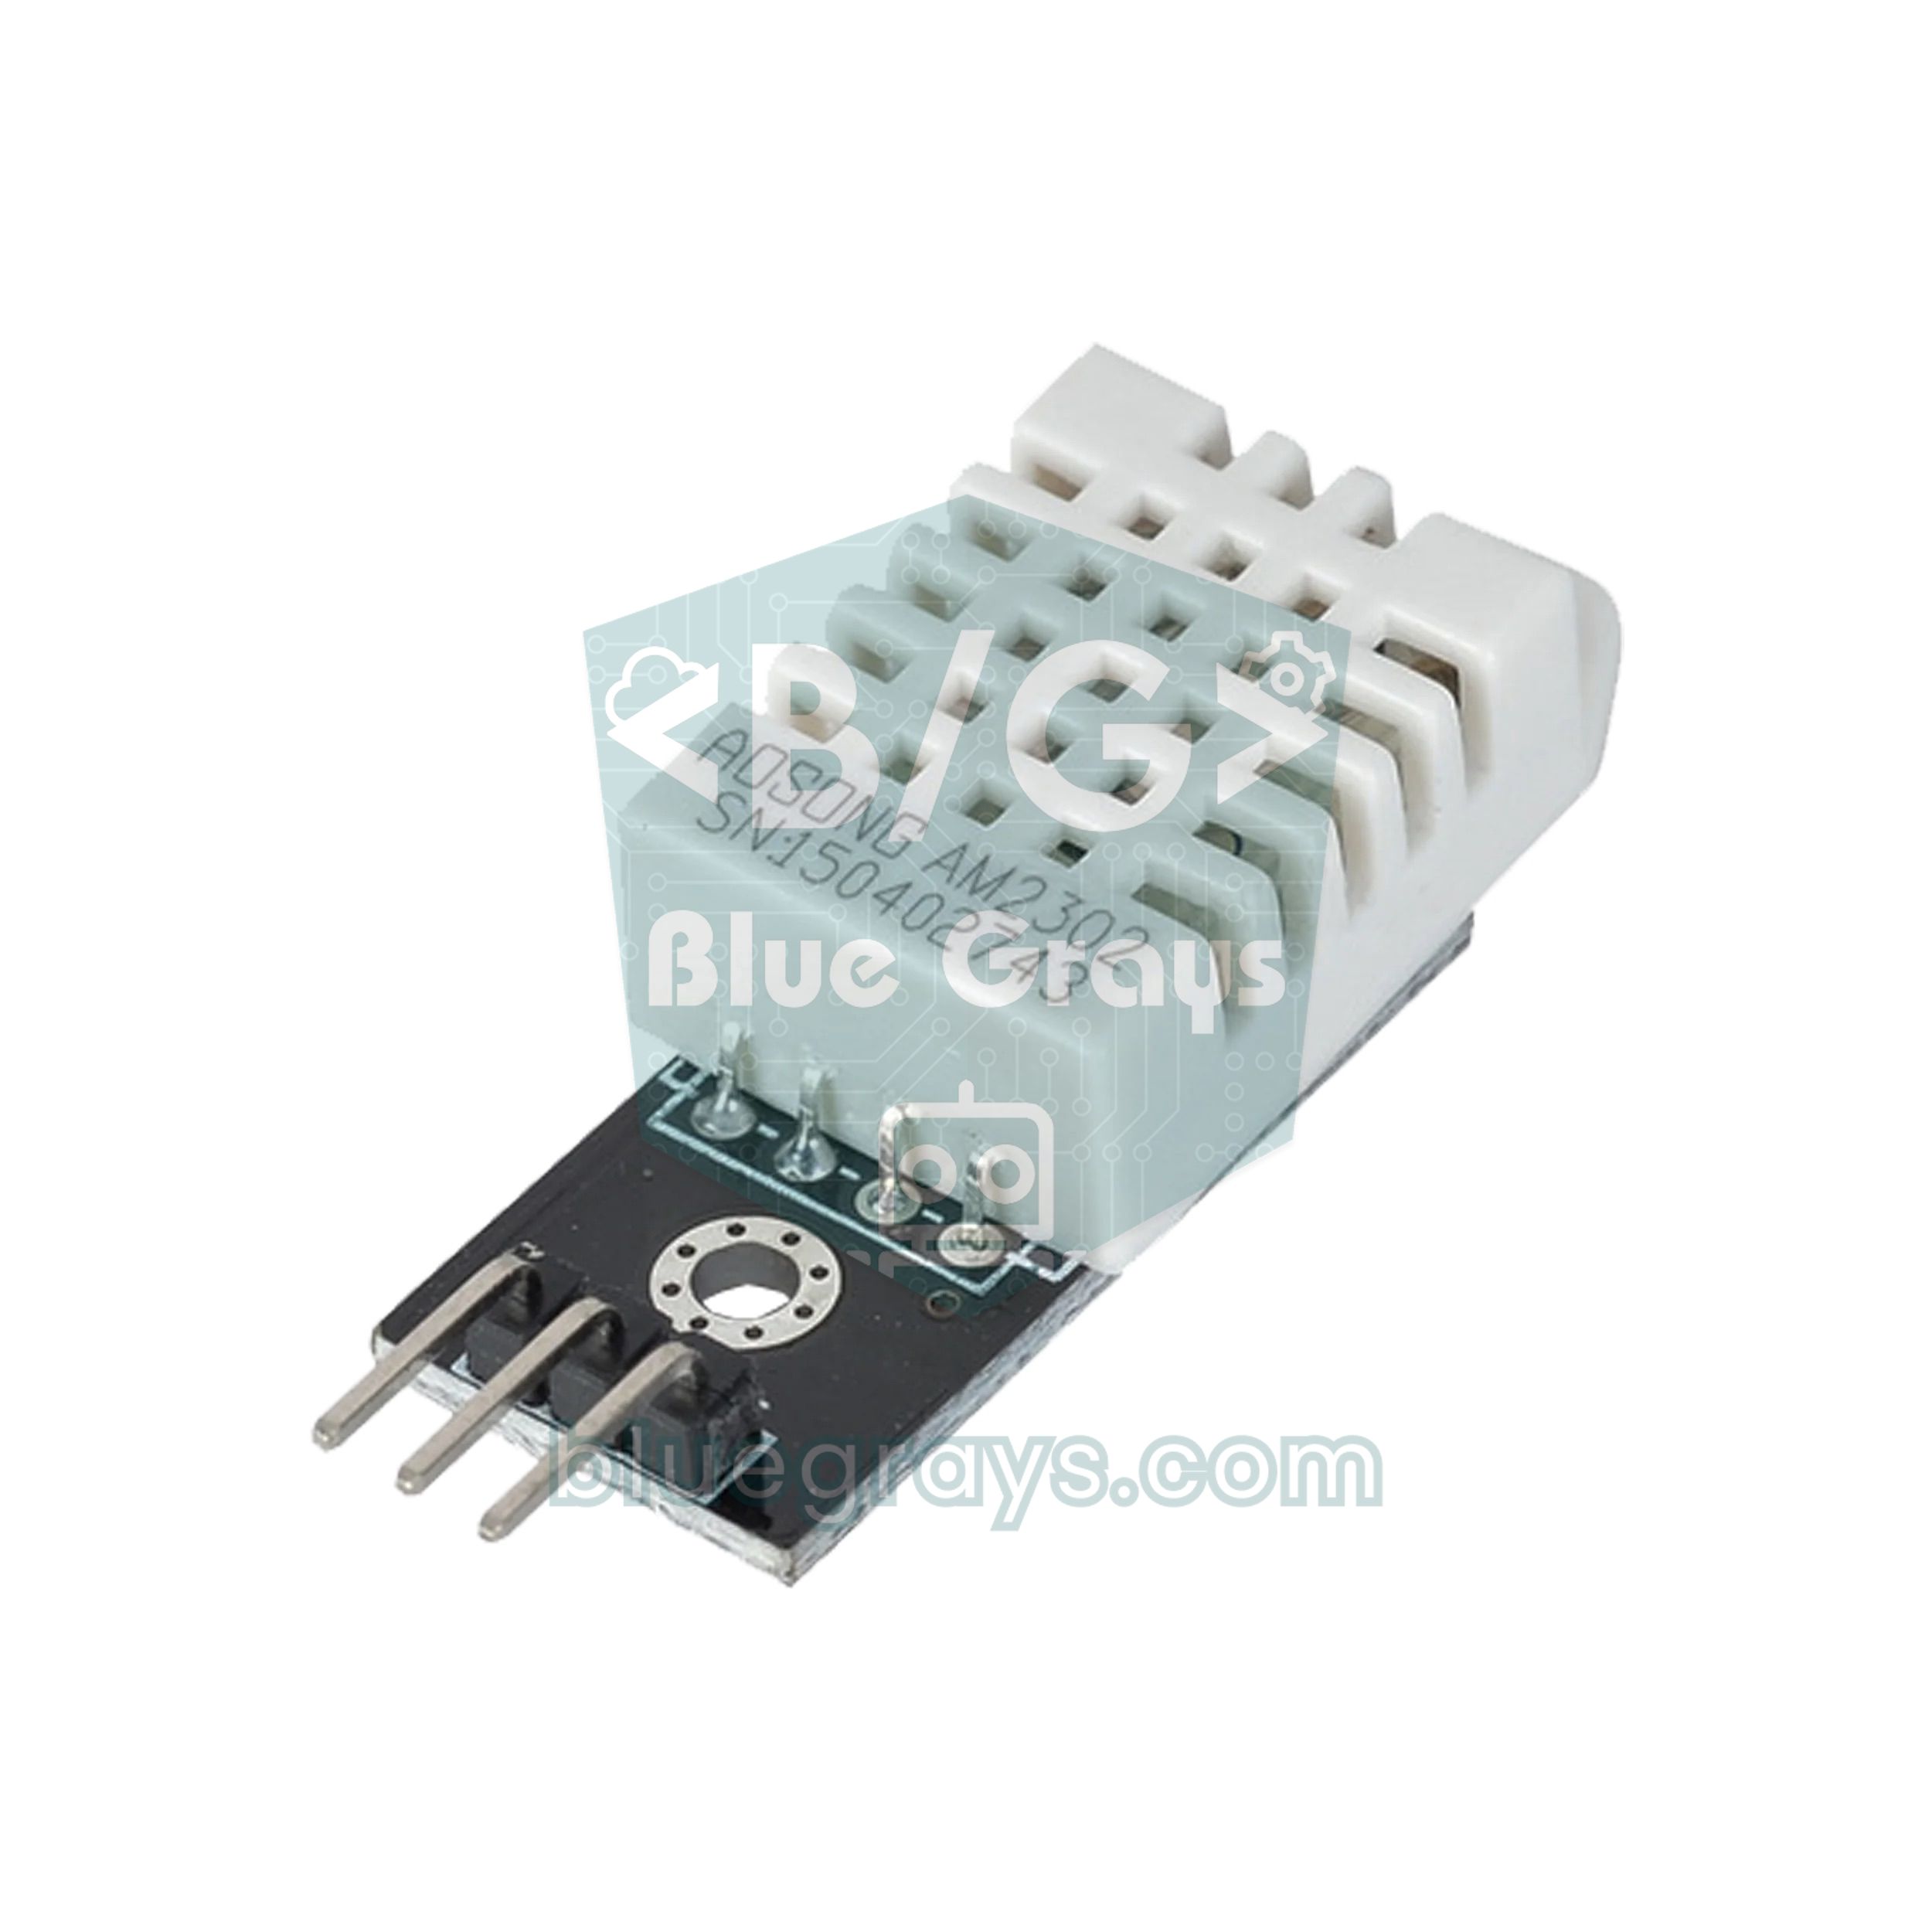
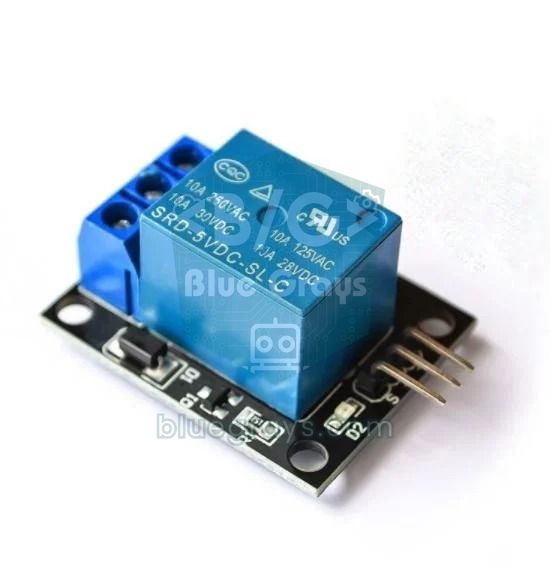
For this project you need an ESP32 development board, a DHT22 temperature and humidity sensor, a relay module that can be triggered at 3.3 V, a breadboard and jumper wires. The DHT22 is more precise than the DHT11: it measures temperature to ±0.5 °C and humidity to roughly ±2–5% and works from -40 to 80 °C; we cover the sensor family in detail in DHT11 Temperature and Humidity Sensor. If you have a DHT11, simply change DHT22 to DHT11 in the code. For the first connection test, an ESP32 and a USB cable are all you need; you can add the sensor and relay later.
| Connection | ESP32 | ESP8266 (NodeMCU) | Raspberry Pi Pico W |
|---|---|---|---|
| DHT22 VCC | 3V3 | 3V3 | 3V3(OUT) |
| DHT22 DATA | GPIO 4 | D2 (GPIO 4) | GP15 |
| DHT22 GND | GND | GND | GND |
| Relay VCC | VIN (5V) | VIN (5V) | VBUS (5V) |
| Relay IN | GPIO 26 | D1 (GPIO 5) | GP14 |
| Relay GND | GND | GND | GND |
Installing PubSubClient in the Arduino IDE
- If the ESP32 board package isn't installed in the Arduino IDE yet, install it first; the steps are in What Is the ESP32?.
- Open Tools > Manage Libraries, type PubSubClient into the search box and install the library by Nick O'Leary. The code in this guide was compiled with version 2.8.
- In the same window, search for DHT sensor library and install the Adafruit library; when it asks about dependencies, choose Install all so Adafruit Unified Sensor gets installed too.
- If you run into trouble installing libraries, see the How to Add Libraries in Arduino guide.
First test: connecting the ESP32 to the MQTT broker
Before adding sensors, let's confirm with the simplest possible code that the Wi-Fi details, broker address and password are right. The code below connects to the broker, publishes "merhaba" (hello) to the "test/esp32/durum" topic and prints every message that arrives on "test/esp32/komut" to the Serial Monitor. Replace the Wi-Fi name, password, broker IP and MQTT user with your own, upload the code and open the Serial Monitor at 115200 baud:
1#include <WiFi.h>
2#include <PubSubClient.h>
3
4const char* WIFI_SSID = "AgAdi";              // Wi-Fi adın (yalnız 2,4 GHz) / your Wi-Fi name (2.4 GHz only)
5const char* WIFI_PASS = "Sifre123";           // Wi-Fi şifren / your Wi-Fi password
6const char* MQTT_SUNUCU = "192.168.1.10";     // broker'ın IP adresi / broker IP address
7const int   MQTT_PORT = 1883;                 // şifresiz MQTT portu / unencrypted MQTT port
8const char* MQTT_KULLANICI = "esp32";         // broker kullanıcı adı / broker username
9const char* MQTT_SIFRE = "mqttSifre";         // broker şifresi / broker password
10
11WiFiClient wifiIstemci;                       // TCP bağlantısı / TCP connection
12PubSubClient mqtt(wifiIstemci);               // MQTT istemcisi / MQTT client
13
14// Abone olunan konuya mesaj gelince çalışır / runs when a subscribed topic receives a message
15void mesajGeldi(char* topic, byte* payload, unsigned int length) {
16  Serial.print("Mesaj [");
17  Serial.print(topic);
18  Serial.print("] ");
19  for (unsigned int i = 0; i < length; i++) {
20    Serial.print((char)payload[i]);           // payload sonunda \0 yoktur / payload is not null-terminated
21  }
22  Serial.println();
23}
24
25void setup() {
26  Serial.begin(115200);
27  WiFi.mode(WIFI_STA);
28  WiFi.begin(WIFI_SSID, WIFI_PASS);
29  while (WiFi.status() != WL_CONNECTED) {
30    delay(500);
31    Serial.print(".");
32  }
33  Serial.print("\nIP: ");
34  Serial.println(WiFi.localIP());
35
36  mqtt.setServer(MQTT_SUNUCU, MQTT_PORT);     // broker adresi / broker address
37  mqtt.setCallback(mesajGeldi);               // gelen mesaj fonksiyonu / incoming message handler
38}
39
40void loop() {
41  if (!mqtt.connected()) {
42    Serial.print("MQTT baglaniyor... ");
43    if (mqtt.connect("esp32-test", MQTT_KULLANICI, MQTT_SIFRE)) {   // istemci kimliği benzersiz olmalı / client ID must be unique
44      Serial.println("baglandi");
45      mqtt.subscribe("test/esp32/komut");                  // bu konuyu dinle / listen to this topic
46      mqtt.publish("test/esp32/durum", "merhaba");         // ilk mesaj / first message
47    } else {
48      Serial.print("hata, rc=");
49      Serial.println(mqtt.state());                        // hata kodu / error code
50      delay(5000);
51      return;
52    }
53  }
54  mqtt.loop();                                             // mesajları işle, bağlantıyı canlı tut / process messages, keep the connection alive
55}
Once you see "baglandi" (connected) in the Serial Monitor, send mosquitto_pub -h 192.168.1.10 -u esp32 -P yourpassword -t test/esp32/komut -m hi from a terminal on your computer; within a few milliseconds the line "Mesaj [test/esp32/komut] hi" appears in the Serial Monitor. If the connection fails, the code prints an error code with mqtt.state() and tries again after 5 seconds. These codes tell you exactly where the problem is:
| rc | PubSubClient name | Meaning and fix |
|---|---|---|
| -4 | MQTT_CONNECTION_TIMEOUT | The broker didn't answer in time; weak network or an overloaded broker |
| -3 | MQTT_CONNECTION_LOST | An established connection dropped; usually because loop() wasn't called for a long time or Wi-Fi went away |
| -2 | MQTT_CONNECT_FAILED | The TCP connection never opened: wrong IP or port, broker not running, Mosquitto in local-only mode or a firewall blocking 1883 |
| -1 | MQTT_DISCONNECTED | The connection was closed cleanly (disconnect was called) or it was never connected |
| 2 | MQTT_CONNECT_BAD_CLIENT_ID | The client ID was rejected; an empty or invalid client ID was used |
| 4 | MQTT_CONNECT_BAD_CREDENTIALS | Wrong username or password (some brokers return this code) |
| 5 | MQTT_CONNECT_UNAUTHORIZED | Not authorized; Mosquitto returns this code both for a wrong password and for an attempt to connect without credentials |
Publishing sensor data and listening for relay commands with the ESP32
Now let's build the real project. The code below reads the DHT22 every 30 seconds and publishes temperature and humidity with the retain flag, controls the relay with the ON, OFF and TOGGLE commands arriving on "ev/salon/role/komut", and reports the relay's new state to "ev/salon/role/durum". When it connects, it leaves a last will with the broker, introduces itself to Home Assistant through MQTT Discovery, and if the connection drops it retries every 5 seconds without blocking loop(). Thanks to the #if defined(ESP8266) block at the top, the same code also compiles on a NodeMCU without any changes.
1#if defined(ESP8266)
2#include <ESP8266WiFi.h>
3#else
4#include <WiFi.h>
5#endif
6#include <PubSubClient.h>
7#include <DHT.h>
8
9// ---- Ayarlar / Settings ----
10const char* WIFI_SSID = "AgAdi";
11const char* WIFI_PASS = "Sifre123";
12const char* MQTT_SUNUCU = "192.168.1.10";        // broker IP (Home Assistant ya da Raspberry Pi) / broker IP (Home Assistant or Raspberry Pi)
13const int   MQTT_PORT = 1883;
14const char* MQTT_KULLANICI = "esp32";
15const char* MQTT_SIFRE = "mqttSifre";
16const char* ISTEMCI_ID = "esp32-salon";          // her cihazda farklı olmalı / must be different on every device
17
18#if defined(ESP8266)
19const int DHT_PIN = 4;                           // NodeMCU D2
20const int ROLE_PIN = 5;                          // NodeMCU D1
21#else
22const int DHT_PIN = 4;                           // ESP32 GPIO 4
23const int ROLE_PIN = 26;                         // ESP32 GPIO 26
24#endif
25const bool ROLE_AKTIF_LOW = true;                // çoğu röle modülü LOW ile çeker / most relay modules switch on LOW
26const unsigned long OLCUM_ARALIGI = 30000;       // 30 saniyede bir ölçüm / one reading every 30 s
27
28// ---- Konular (topic) / Topics ----
29const char* T_SICAKLIK = "ev/salon/sicaklik";
30const char* T_NEM      = "ev/salon/nem";
31const char* T_KOMUT    = "ev/salon/role/komut";  // ON, OFF ya da TOGGLE / ON, OFF or TOGGLE
32const char* T_DURUM    = "ev/salon/role/durum";
33const char* T_BAGLANTI = "ev/salon/baglanti";    // online / offline (son vasiyet / last will)
34const char* T_HA_DURUM = "homeassistant/status"; // HA açılınca "online" yayınlar / HA publishes "online" when it starts
35
36WiFiClient wifiIstemci;
37PubSubClient mqtt(wifiIstemci);
38DHT dht(DHT_PIN, DHT22);
39
40bool roleAcik = false;
41unsigned long sonOlcum = 0;
42unsigned long sonDeneme = 0;
43
44// Röleyi sür ve yeni durumu kalıcı (retain) yayınla / drive the relay and publish the new state as retained
45void roleAyarla(bool acik) {
46  roleAcik = acik;
47  bool seviye = ROLE_AKTIF_LOW ? !acik : acik;
48  digitalWrite(ROLE_PIN, seviye ? HIGH : LOW);
49  mqtt.publish(T_DURUM, acik ? "ON" : "OFF", true);
50  Serial.println(acik ? "Role: ON" : "Role: OFF");
51}
52
53// Tek bir Home Assistant keşif mesajı gönder / send one Home Assistant discovery message
54void kesifYayinla(const char* tur, const char* nesne, const char* ad, const char* ekAlanlar) {
55  char konu[96];
56  snprintf(konu, sizeof(konu), "homeassistant/%s/%s/%s/config", tur, ISTEMCI_ID, nesne);
57  char json[600];
58  snprintf(json, sizeof(json),
59           "{\"name\":\"%s\",\"unique_id\":\"%s_%s\",%s,\"availability_topic\":\"%s\","
60           "\"device\":{\"identifiers\":[\"%s\"],\"name\":\"Salon ESP32\",\"model\":\"ESP32 + DHT22\"}}",
61           ad, ISTEMCI_ID, nesne, ekAlanlar, T_BAGLANTI, ISTEMCI_ID);
62  if (!mqtt.publish(konu, json, true)) {         // false: tampon küçük ya da bağlantı yok / false: buffer too small or not connected
63    Serial.println("Kesif mesaji gonderilemedi");
64  }
65}
66
67// Sıcaklık, nem ve röleyi Home Assistant'a tanıt / announce temperature, humidity and relay to Home Assistant
68void haKesifGonder() {
69  char ek[200];
70  snprintf(ek, sizeof(ek), "\"state_topic\":\"%s\",\"device_class\":\"temperature\",\"unit_of_measurement\":\"°C\",\"state_class\":\"measurement\"", T_SICAKLIK);
71  kesifYayinla("sensor", "sicaklik", "Sıcaklık", ek);
72  snprintf(ek, sizeof(ek), "\"state_topic\":\"%s\",\"device_class\":\"humidity\",\"unit_of_measurement\":\"%%\",\"state_class\":\"measurement\"", T_NEM);
73  kesifYayinla("sensor", "nem", "Nem", ek);
74  snprintf(ek, sizeof(ek), "\"state_topic\":\"%s\",\"command_topic\":\"%s\"", T_DURUM, T_KOMUT);
75  kesifYayinla("switch", "role", "Röle", ek);
76}
77
78// DHT22'yi oku ve değerleri yayınla / read the DHT22 and publish the values
79void olcumGonder() {
80  float t = dht.readTemperature();
81  float h = dht.readHumidity();
82  if (isnan(t) || isnan(h)) {
83    Serial.println("DHT22 okunamadi");
84    return;
85  }
86  char deger[12];
87  snprintf(deger, sizeof(deger), "%.1f", t);     // 23.4 gibi / like 23.4
88  mqtt.publish(T_SICAKLIK, deger, true);
89  snprintf(deger, sizeof(deger), "%.0f", h);     // 45 gibi / like 45
90  mqtt.publish(T_NEM, deger, true);
91  Serial.printf("Sicaklik %.1f C, nem %.0f %%\n", t, h);
92}
93
94// Abone olunan konulara mesaj gelince çalışır / runs when a subscribed topic receives a message
95void mesajGeldi(char* topic, byte* payload, unsigned int length) {
96  // Önce kopyala: yayın yapınca kütüphane aynı tamponu kullanır / copy first: publishing reuses the same buffer
97  String konu = topic;
98  String mesaj;
99  for (unsigned int i = 0; i < length; i++) mesaj += (char)payload[i];
100  mesaj.trim();
101
102  if (konu == T_KOMUT) {
103    if (mesaj == "ON") roleAyarla(true);
104    else if (mesaj == "OFF") roleAyarla(false);
105    else if (mesaj == "TOGGLE") roleAyarla(!roleAcik);
106  } else if (konu == T_HA_DURUM && mesaj == "online") {
107    haKesifGonder();                             // HA yeniden başladı, tanıtımı yenile / HA restarted, announce again
108    mqtt.publish(T_DURUM, roleAcik ? "ON" : "OFF", true);
109  }
110}
111
112bool mqttBaglan() {
113  Serial.print("MQTT baglaniyor... ");
114  // Bağlantı koparsa broker T_BAGLANTI'ya "offline" yazar / if we drop, the broker publishes "offline" to T_BAGLANTI
115  if (!mqtt.connect(ISTEMCI_ID, MQTT_KULLANICI, MQTT_SIFRE, T_BAGLANTI, 1, true, "offline")) {
116    Serial.print("hata, rc=");
117    Serial.println(mqtt.state());
118    return false;
119  }
120  Serial.println("baglandi");
121  mqtt.publish(T_BAGLANTI, "online", true);
122  mqtt.subscribe(T_KOMUT, 1);                    // komutları QoS 1 ile dinle / listen to commands with QoS 1
123  mqtt.subscribe(T_HA_DURUM);
124  haKesifGonder();
125  mqtt.publish(T_DURUM, roleAcik ? "ON" : "OFF", true);
126  return true;
127}
128
129void setup() {
130  Serial.begin(115200);
131  pinMode(ROLE_PIN, OUTPUT);
132  roleAyarla(false);                             // güvenli başlangıç: röle kapalı / safe start: relay off
133  dht.begin();
134
135  WiFi.mode(WIFI_STA);
136  WiFi.begin(WIFI_SSID, WIFI_PASS);
137  Serial.print("Wi-Fi");
138  while (WiFi.status() != WL_CONNECTED) {
139    delay(500);
140    Serial.print(".");
141  }
142  Serial.print(" IP: ");
143  Serial.println(WiFi.localIP());
144
145  mqtt.setServer(MQTT_SUNUCU, MQTT_PORT);
146  mqtt.setCallback(mesajGeldi);
147  mqtt.setBufferSize(1024);                      // keşif JSON'u varsayılan 256 bayta sığmaz / discovery JSON doesn't fit the default 256 bytes
148}
149
150void loop() {
151  if (!mqtt.connected()) {
152    unsigned long simdi = millis();
153    if (sonDeneme == 0 || simdi - sonDeneme >= 5000) {   // 5 sn'de bir dene, loop'u kilitleme / retry every 5 s without blocking
154      sonDeneme = simdi;
155      if (mqttBaglan()) sonOlcum = simdi - OLCUM_ARALIGI;  // bağlanınca hemen ölç / measure right after connecting
156    }
157    return;
158  }
159  mqtt.loop();                                   // gelen komutlar ve keep-alive / incoming commands and keep-alive
160
161  if (millis() - sonOlcum >= OLCUM_ARALIGI) {
162    sonOlcum = millis();
163    olcumGonder();
164  }
165}| Line | What it does |
|---|---|
| mqtt.connect(ISTEMCI_ID, ..., T_BAGLANTI, 1, true, "offline") | Registers the last will while connecting: if the ESP32 drops off unexpectedly, the broker writes a retained "offline" to ev/salon/baglanti |
| mqtt.publish(T_BAGLANTI, "online", true) | Sets the status to "online" right after connecting; Home Assistant shows the device as available again |
| mqtt.subscribe(T_KOMUT, 1) | Listens for relay commands with QoS 1; PubSubClient supports only QoS 0 and 1 for subscriptions |
| mqtt.setBufferSize(1024) | Enlarges the packet buffer from the default 256 bytes; the largest discovery packet is about 355 bytes |
| mqtt.loop() | Reads incoming messages and sends keep-alive (PINGREQ) packets; it must be called on every pass of loop |
| ROLE_AKTIF_LOW | Most relay modules switch on a LOW signal; set it to false if yours switches on HIGH |
| OLCUM_ARALIGI | How often to measure; the DHT22 can be read at most every 2 seconds, and 30–60 seconds is ideal for room temperature |
A few details in the code are deliberate. The mesajGeldi() function copies the topic and payload into Strings first, because PubSubClient uses one buffer for both incoming and outgoing messages: the moment you call publish() inside the callback, the data the topic and payload pointers point to is overwritten. The payload also has no terminating \0 like a C string, so we read exactly length characters. We use retain for the readings and the relay state so Home Assistant sees the last value right after a restart instead of waiting 30 seconds. Timing is done with millis() too: a long delay() inside loop() would hold up the keep-alive packets and the broker would drop the connection. We explain this technique in detail in Arduino millis() vs delay().
How it looks in Home Assistant: MQTT Discovery
Home Assistant constantly listens to topics that start with the homeassistant/ prefix. When a device publishes a JSON configuration to a topic in the form homeassistant/[component]/[node]/[object]/config, Home Assistant creates that entity automatically; this is called MQTT Discovery. Our code sends three messages: two for the sensors (temperature and humidity) under homeassistant/sensor/esp32-salon/... and one for the relay at homeassistant/switch/esp32-salon/role/config. Because they're retained, they survive a Home Assistant restart. The code is also subscribed to homeassistant/status: Home Assistant writes "online" there when it starts, and the ESP32 announces itself again. If you have many devices, the Home Assistant documentation recommends adding a small random delay before this re-announcement.
| JSON field | Meaning | Our value |
|---|---|---|
| name | The entity's display name; the device name is added in front of it | Sıcaklık (shown as Salon ESP32 Sıcaklık) |
| unique_id | The entity's permanent ID; without it, the entity's name and area can't be edited in the UI | esp32-salon_sicaklik |
| state_topic | The topic the value is read from | ev/salon/sicaklik |
| command_topic | The topic switch commands are sent to | ev/salon/role/komut |
| device_class | Sets the icon, unit options and chart type | temperature, humidity |
| unit_of_measurement | Unit of measurement | °C and % |
| state_class | The value measurement enables long-term statistics and charts | measurement |
| availability_topic | The topic the online/offline status is read from; the default payloads are online and offline | ev/salon/baglanti |
| device | Groups the entities into a single device card | identifiers, name, model |
A few seconds after uploading the code, a device called "Salon ESP32" appears under Settings > Devices & services > MQTT. Its device card holds the temperature and humidity sensors and a relay switch; click the temperature to open its history chart, flip the switch and the relay clicks. You can add these entities to a dashboard, expose them to voice assistants or use them in automations: for example, a rule like "if the living room goes above 27 °C, turn on the relay the fan is plugged into, and turn it off below 25 °C" takes just a few clicks. If you unplug the ESP32, the entities switch to "Unavailable" after about 22 seconds at most, which shows the last will message is working. If you'd rather not use discovery, you can also define the same entities by hand in configuration.yaml as sensor and switch entries under mqtt:.
QoS and retain: which one, and when?
QoS (Quality of Service) sets how sure you want to be that a message reaches the other side. One important detail: QoS applies separately on two legs. Between the publisher and the broker the publisher's QoS applies, and between the broker and a subscriber the subscription's QoS applies; the guarantee the subscriber gets is the lower of the two. PubSubClient supports only QoS 0 for publishing and QoS 0 and 1 for subscriptions. On home Wi-Fi a message lost with QoS 0 is very rare, but making the command subscription QoS 1 is still cheap insurance.
| QoS | Guarantee | How it works | When to use it |
|---|---|---|---|
| 0 | At most once | The message is sent once with no acknowledgement; it can be lost if the connection drops at that moment | Frequent sensor readings |
| 1 | At least once | The receiver acknowledges with PUBACK, and the message is resent if no acknowledgement arrives; it may arrive twice | Relay commands, alarms |
| 2 | Exactly once | A four-step handshake with PUBREC, PUBREL and PUBCOMP; the slowest level | Things like counters where duplicates do harm; not supported by PubSubClient |
The retain flag is about memory rather than delivery: the broker keeps only the last retained message of each topic and sends it straight away to anyone who subscribes. It's ideal for "current state" messages such as sensor values, the relay state and online status, but dangerous for commands and one-off events. The last will (LWT) complements it: if the broker receives no packet from a client for 1.5 times the keep-alive period, it decides the connection is lost and publishes the will message. PubSubClient's default keep-alive is 15 seconds, so an unplugged ESP32 shows up as "offline" after about 22 seconds at most. You can change this with a line such as mqtt.setKeepAlive(30), but the longer it is, the later you'll notice a drop.
The code-free alternative: ESPHome
ESPHome is a free tool that turns a device you describe in a YAML file into ready-to-flash ESP32 firmware; you don't write a single line of C++. In Home Assistant, install ESPHome Device Builder from Settings > Apps, open its interface and create a configuration with the New device wizard. The first upload is done once over USB: Chrome or Edge can program the board directly, and if that doesn't work you can flash the file the wizard downloads with the ESPHome Web page. All later updates go over Wi-Fi (OTA). The configuration below is the same as the Arduino project above: it reads the DHT22 on GPIO 4 every 30 seconds and exposes the active-LOW relay on GPIO 26 as a switch. The Wi-Fi details and passwords are read from a separate secrets.yaml file with !secret:
1esphome:
2  name: salon-sensor               # küçük harf, rakam ve tire / lowercase, digits and hyphens
3  friendly_name: Salon Sensör
4
5esp32:
6  board: esp32dev
7
8logger:
9
10api:                               # Home Assistant ile doğrudan bağlantı / direct link to Home Assistant
11  encryption:
12    key: !secret api_anahtari
13
14ota:
15  - platform: esphome
16    password: !secret ota_sifresi
17
18wifi:
19  ssid: !secret wifi_ssid
20  password: !secret wifi_sifresi
21  ap:                              # Wi-Fi yoksa kendi ağını açar / opens its own network if Wi-Fi fails
22    ssid: "Salon-Sensor"
23    password: "yedek1234"
24
25captive_portal:
26
27sensor:
28  - platform: dht
29    pin: GPIO4
30    model: DHT22
31    update_interval: 30s
32    temperature:
33      name: "Sıcaklık"
34    humidity:
35      name: "Nem"
36
37switch:
38  - platform: gpio
39    name: "Röle"
40    pin:
41      number: GPIO26
42      inverted: true               # aktif LOW röle / active-LOW relay
43    restore_mode: ALWAYS_OFF       # açılışta kapalı / off at boot
44
45# MQTT ile kullanmak için api: bloğunu sil, bunu aç / to use MQTT, delete api: and uncomment this
46# mqtt:
47#   broker: 192.168.1.10
48#   username: esp32
49#   password: !secret mqtt_sifresi
There's one difference to keep in mind: by default ESPHome doesn't use MQTT but its own encrypted native API. Home Assistant finds the device on the network by itself and doesn't need a broker at all. Choose MQTT only if you want other systems such as Node-RED to read the same data, or if you don't use Home Assistant. To do that, uncomment the mqtt: lines at the end of the file and delete the api: block; if you don't, the device reboots itself whenever nobody has connected to the native API for 15 minutes (that's the reboot_timeout setting). In MQTT mode, ESPHome sends the Home Assistant discovery messages and the online/offline messages on salon-sensor/status by itself, so it automatically does everything we did by hand in the Arduino code.
| Feature | PubSubClient (Arduino code) | ESPHome (YAML) |
|---|---|---|
| Writing code | You write everything in C++ | YAML only; the firmware is compiled automatically |
| Adding to Home Assistant | You send the discovery JSON yourself | Discovered automatically |
| Flexibility | Unlimited; any library and logic can be used | Limited to ready-made components, but hundreds of sensors are supported; C++ can be added with lambdas |
| Over-the-air updates | You add ArduinoOTA to the code yourself | Built in |
| Broker required | Yes | Not with the native API |
| Learning value | Teaches the MQTT protocol and programming | Quick results, hides what happens underneath |
MQTT with the ESP8266 and Raspberry Pi Pico W
The full code above runs unchanged on ESP8266 NodeMCU and Wemos D1 Mini boards: when you select NodeMCU 1.0 under Tools > Board, the #if defined(ESP8266) block automatically picks ESP8266WiFi.h instead of WiFi.h, along with pins D2 and D1. On the Raspberry Pi Pico W side we use MicroPython's umqtt.simple module. It isn't included in the Pico W's MicroPython firmware; install it in Thonny by searching for umqtt.simple under Tools > Manage packages, or type import mip; mip.install("umqtt.simple") in the REPL while connected to Wi-Fi. The dht module needed for the DHT22, on the other hand, comes with the firmware. The code below makes a Pico W in the kitchen do the same measuring and relay job. To keep it short we left out the discovery messages; to see the Pico W in Home Assistant, publish the same discovery JSON as in the ESP32 code with the ev/mutfak topics, or define the entities by hand under mqtt: in configuration.yaml. Save the file as main.py and it runs every time the board powers up:
1import network, time, dht
2from machine import Pin
3from umqtt.simple import MQTTClient    # önce mip ile kur / install with mip first
4
5WIFI_SSID = "AgAdi"                    # Wi-Fi adın / your Wi-Fi name
6WIFI_PASS = "Sifre123"                 # Wi-Fi şifren / your Wi-Fi password
7MQTT_SUNUCU = "192.168.1.10"           # broker IP / broker IP
8ISTEMCI_ID = "pico-mutfak"             # benzersiz olmalı / must be unique
9
10T_SICAKLIK = b"ev/mutfak/sicaklik"
11T_NEM = b"ev/mutfak/nem"
12T_KOMUT = b"ev/mutfak/role/komut"
13T_DURUM = b"ev/mutfak/role/durum"
14T_BAGLANTI = b"ev/mutfak/baglanti"
15
16sensor = dht.DHT22(Pin(15))            # DHT22 DATA -> GP15
17role = Pin(14, Pin.OUT, value=1)       # aktif LOW röle kapalı başlar / active-LOW relay starts off
18led = Pin("LED", Pin.OUT)              # Pico W dahili LED / Pico W onboard LED
19
20wlan = network.WLAN(network.STA_IF)
21wlan.active(True)
22wlan.connect(WIFI_SSID, WIFI_PASS)
23while not wlan.isconnected():
24    time.sleep(0.5)
25print("IP:", wlan.ifconfig()[0])
26
27def mesaj_geldi(konu, mesaj):          # ikisi de bytes gelir / both arrive as bytes
28    if konu == T_KOMUT and mesaj in (b"ON", b"OFF"):
29        acik = mesaj == b"ON"
30        role.value(0 if acik else 1)
31        led.value(1 if acik else 0)
32        istemci.publish(T_DURUM, mesaj, retain=True)
33
34istemci = MQTTClient(ISTEMCI_ID, MQTT_SUNUCU, user="esp32", password="mqttSifre", keepalive=60)   # Mosquitto kullanıcısı / Mosquitto user
35istemci.set_callback(mesaj_geldi)
36istemci.set_last_will(T_BAGLANTI, b"offline", retain=True)   # son vasiyet / last will
37
38def baglan():
39    while True:
40        try:
41            if not wlan.isconnected():         # Wi-Fi koptuysa yeniden bağlan / reconnect Wi-Fi if it dropped
42                wlan.connect(WIFI_SSID, WIFI_PASS)
43                time.sleep(5)
44            istemci.connect()
45            istemci.publish(T_BAGLANTI, b"online", retain=True)
46            istemci.publish(T_DURUM, b"OFF" if role.value() else b"ON", retain=True)
47            istemci.subscribe(T_KOMUT)
48            print("MQTT baglandi")
49            return
50        except Exception as e:         # MQTTException(5): yetki yok / not authorized
51            print("MQTT hatasi:", e)
52            time.sleep(5)
53
54baglan()
55son = time.ticks_add(time.ticks_ms(), -30000)   # ilk ölçüm hemen / first reading right away
56while True:
57    try:
58        istemci.check_msg()            # bekleyen komut var mı? / any pending command?
59        if time.ticks_diff(time.ticks_ms(), son) >= 30000:
60            son = time.ticks_ms()
61            try:
62                sensor.measure()
63            except OSError:
64                print("DHT22 okunamadi")
65                istemci.ping()         # veri yoksa da bağlantıyı canlı tut / keep the link alive without data
66            else:
67                istemci.publish(T_SICAKLIK, "{:.1f}".format(sensor.temperature()).encode(), retain=True)
68                istemci.publish(T_NEM, "{:.0f}".format(sensor.humidity()).encode(), retain=True)
69    except OSError:
70        print("Baglanti koptu, yeniden baglaniliyor")
71        time.sleep(5)
72        baglan()
73    time.sleep_ms(100)
ESP32 MQTT project ideas
- Room-by-room temperature map: Put an ESP32 with a DHT22 or BME280 in every room and follow the whole house on one chart with an ev/+/sicaklik subscription.
- Smart lamp and socket: Hook the relay up to a Home Assistant automation that turns it on at sunset and off at midnight.
- Door and window sensor: Use a reed switch to send an MQTT message when a door opens and get a phone notification while nobody's home.
- Motion-activated hallway light: Let a PIR sensor publish motion and a Home Assistant automation switch the light on.
- Plant watering station: Publish the soil moisture sensor value and run the pump with an MQTT command when the soil gets dry.
- Energy monitoring: Measure the current an appliance draws with an ACS712 current sensor and chart its daily consumption.
- Battery-powered sensor: Build a node that takes a reading, sends it over MQTT and goes back to sleep; details in ESP32 Deep Sleep.
Common ESP32 MQTT errors and fixes
| Symptom or message | Cause | Fix |
|---|---|---|
| Constant rc=-2 | Wrong broker IP or port, broker not running, or Mosquitto in local-only mode | Check the IP, add listener 1883 to the configuration, allow port 1883 in the firewall |
| rc=5 | Wrong username or password, or an attempt to connect without credentials | Test the password from your computer with mosquitto_sub; recreate the user if needed |
| Connects, drops after a few seconds, keeps looping | Two devices use the same client ID; Mosquitto logs "Client esp32-salon already connected, closing old connection." | Give every device a unique ISTEMCI_ID |
| Discovery messages don't arrive, publish() returns false | The PubSubClient buffer is 256 bytes by default and the JSON doesn't fit | Call mqtt.setBufferSize(1024) in setup() |
| Frequent rc=-3 | A long delay() inside loop() stops keep-alive packets, or the Wi-Fi signal is weak | Time things with millis() and move the board closer to the router |
| Commands never reach the ESP32 | The topic name differs in case or spelling, or subscribe() isn't repeated after reconnecting | Check the topic with mosquitto_sub; put the subscribe() lines inside the connect function |
| The relay turns on by itself at startup | An old retained message is sitting on the command topic | Clear it with mosquitto_pub -r -n -t ev/salon/role/komut |
| Entities show "Unavailable" in Home Assistant | The availability topic says offline or online is spelled differently | Watch ev/salon/baglanti and make sure the code publishes online after connecting |
| Garbage characters instead of a value | The payload isn't \0-terminated and was read without using length | Copy the payload in a loop up to length |
| The ESPHome device reboots every 15 minutes | In MQTT mode the api: block is still there but Home Assistant never connects | Delete the api: block or add reboot_timeout: 0s |
With a broker, a few topics and PubSubClient, your ESP32 has become a smart home device that speaks the same language as the rest of the house. You can add new sensors, other rooms and different boards such as the Pico W to the same setup and manage them all from one Home Assistant dashboard. In the BlueGrays app you'll find projects like ESP32 Wi-Fi connection, DHT22 temperature and humidity measurement, smart lighting with PIR and a relay, real-time control with WebSocket and smart plant watering, step by step with circuit diagrams and code.
Frequently asked questions
What is MQTT used for?
MQTT is a lightweight messaging protocol in which devices send and receive messages through a broker using topic names. Because it uses little bandwidth and power, it's ideal for small devices like the ESP32 to send sensor data and receive commands. Home Assistant, Node-RED and most industrial IoT systems speak MQTT.
What port does MQTT use?
Unencrypted MQTT uses port 1883 by default and TLS-encrypted MQTT uses port 8883. The WebSocket port used for browser connections depends on the broker; on the Mosquitto broker in Home Assistant it's 1884. On a home network the ESP32 usually connects to 1883.
Does MQTT need an internet connection?
No. If the broker runs on a Raspberry Pi or in Home Assistant at home, the traffic between the ESP32 and the broker stays entirely on your local network; sensors and relays keep working even if the internet goes down. You only need the internet to reach the system from outside or to use a cloud broker.
Why doesn't my ESP32 show up in Home Assistant?
The most common causes are a discovery message that doesn't fit into PubSubClient's 256-byte buffer, a misspelled config topic or a quote error in the JSON. Listen to homeassistant/# with mosquitto_sub to check whether the message reaches the broker, and make sure the code contains the line mqtt.setBufferSize(1024). Home Assistant's MQTT integration also has to be connected to the same broker.
Should I use ESPHome or MQTT with Arduino?
If your goal is to get a working smart home device up quickly, ESPHome is less effort: you write YAML, the device appears in Home Assistant by itself and updates over the air. If you want to learn the MQTT protocol, write your own logic or work with systems other than Home Assistant, Arduino with PubSubClient is more flexible. The two can happily coexist in the same house.
What is the difference between MQTT QoS 0, 1 and 2?
QoS 0 sends a message once without waiting for an acknowledgement, QoS 1 resends it until it's acknowledged but it may arrive twice, and QoS 2 uses a four-step handshake to guarantee it arrives exactly once. QoS 0 is enough for sensor readings and QoS 1 for commands. PubSubClient can only publish with QoS 0 and subscribe with QoS 0 or 1.
Projects to build after reading this
See all projects
LED Blink with ESP32
Teaches basic GPIO output usage with ESP32. We achieve a blinking effect by turning an LED on and off from a digital pin. ESP32 version of the classic blink project on Arduino UNO; the basic blink commands in the Arduino environment are the same, but the ESP32's pin layout and 3.3 V GPIO levels differ from those of the Arduino UNO.

ESP32 Wi-Fi STA Connection (with LCD Screen)
In this project, we connect the ESP32 to the home Wi-Fi network in Station (STA) mode in a secure, fault-tolerant manner. We store the SSID and password in a separate secrets.h file to prevent leaking to Git, set up an auto-reconnect mechanism, and display the RSSI signal level and IP address on an I2C LCD screen. The internal LED works as a status indicator. It is a production-grade connection manager.

ESP32 DHT22 Temperature and Humidity (with LCD Display)
This project measures ambient temperature and humidity using a DHT22 sensor and displays the data in real time on a 16x2 I2C LCD. Data is read from the sensor using the one-wire protocol via the Adafruit DHT library. This project serves as the foundation for IoT weather stations, smart home automation, or environmental monitoring systems in greenhouses. Communication with the DHT22 is established via the ESP32's GPIO 4 pin.

ESP32 Smart Lighting (PIR + LDR + Relay + OLED)
Turn your hallway, bathroom, or pantry into smart lighting with ESP32! Using a PIR motion sensor, LDR light sensor, and a relay module, we build the classic "light turns on when motion is detected in the dark" scenario — if the environment is already bright, motion does NOT trigger the light, saving energy during the day. The light stays on for 30 seconds; if motion continues, the timer resets and the light stays on longer. The SSD1306 OLED shows large-font status (ON / DAYTIME / WAITING), a cou

ESP32 WebSocket Counter (2 Buttons + LCD + Real-Time Web)
In this project, two buttons wired to the ESP32 (GPIO 5 counts up, GPIO 4 counts down) change a counter. The value updates instantly both on a 16x2 I2C LCD and, through the WebSocket support of ESPAsyncWebServer, in every connected browser without reloading the page. Instead of HTTP polling a single persistent connection is used, and the ESP32 sends the new value to everyone with ws.textAll().

ESP32 mDNS: Accessing the Device via bluegrays-esp.local (with LCD Screen)
In this project, we add an mDNS (Multicast DNS) service to the ESP32, allowing us to access the device using a human-readable hostname like bluegrays-esp.local instead of an IP address. Even if the IP address assigned by DHCP changes, you can always reach the device using the same name. We also run a small web server on the device to send LED control commands via a browser using the address http://bluegrays-esp.local/. The I2C LCD screen displays the hostname, IP address, and LED status in b
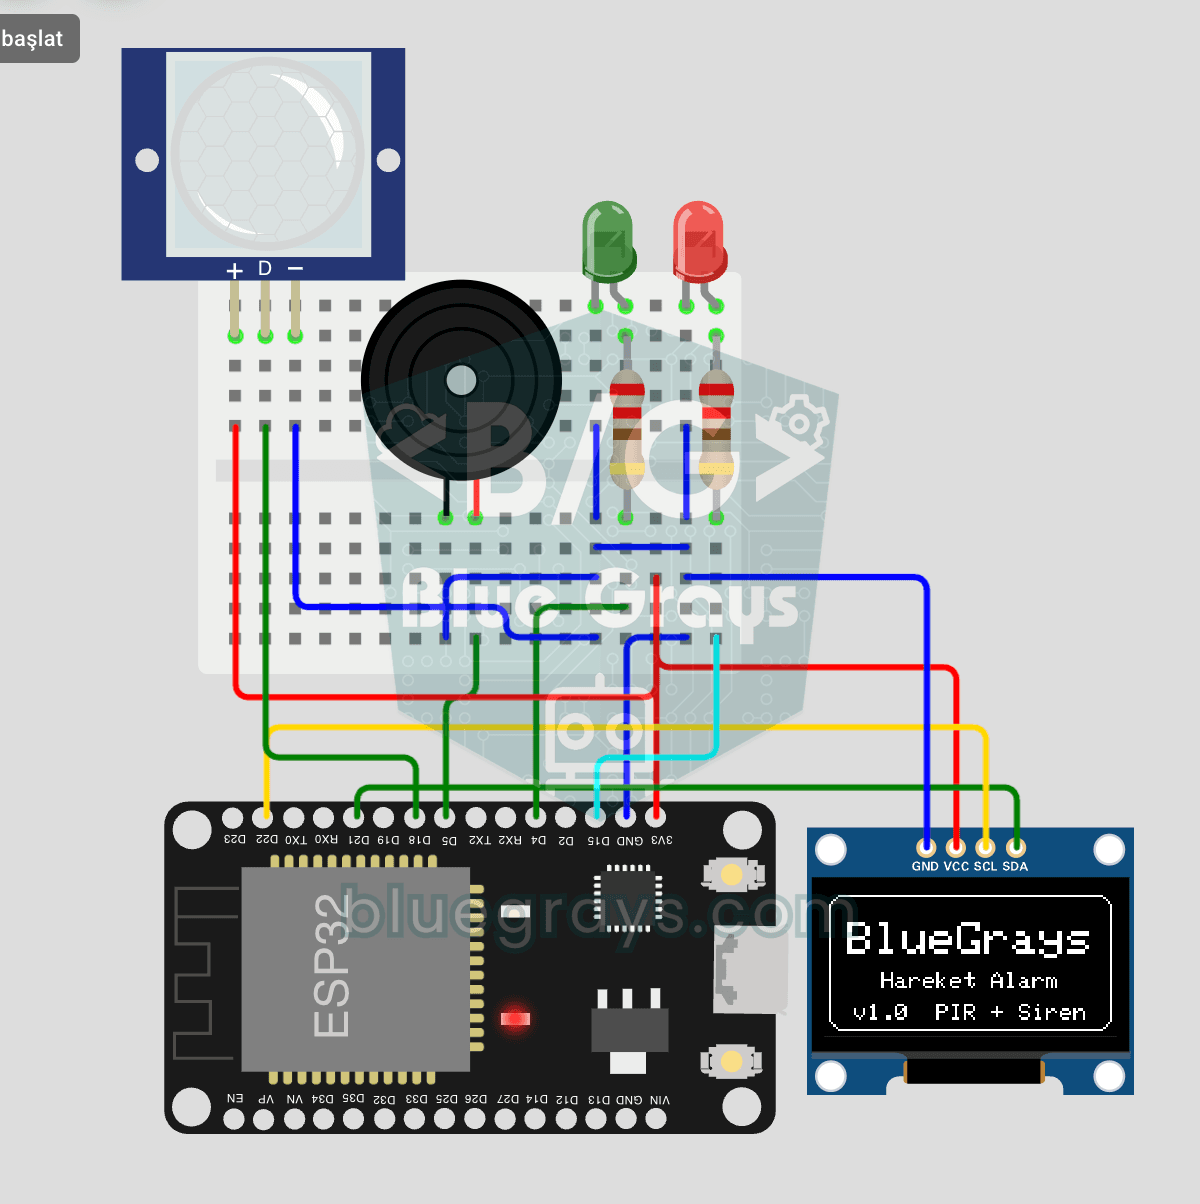
ESP32 Motion Alarm System (PIR + Buzzer + LED + Telegram)
A smart security alarm system that activates the buzzer and LED when the PIR sensor detects motion, while simultaneously sending an instant notification to the owner via Telegram. It includes a 30-second cooldown to limit the frequency of repeated alarms; this mechanism does not validate PIR detections or eliminate false triggers. Suitable for home security, garage monitoring, warehouses, or workrooms. With ESP32-CAM, photo notifications can be added; with the classic ESP32 DevKit V1, text notif