
Teaching Arduino to a Large Class: 30 Students and 10 Kits
Teaching Arduino to a large class: roles for groups of three, numbered kit boxes, a help queue, a 40-minute lesson frame and fixes for 10 common issues.
Teaching Arduino to a large class works without chaos as long as everything has a number and every student has a job. With 30 students, 10 kits and no assistant, split the class into groups of three, give every group the roles of circuit builder, coder and reader/checker, and rotate those roles every lesson. Put the kits in boxes numbered 1 to 10, and make the board, cable and computer of box 7 number 7 as well. Set up fixed stations where groups start every lesson at the same table in the same way. Finally, make one rule everyone knows by heart: before coming to you, check 3 sources first: the help sections on the project page, your group mate and the neighbouring group. Once these five pieces are in place, even with 30 students you stop being the person hunting for LEDs and actually get time to teach.
This is not a lesson plan but a classroom management and logistics guide. Which project to do in which week is covered in the 8-week robotics coding plan, and how to hand out Premium codes to students is covered in the post on bulk codes for a class. Here the topic is the everyday problems that show up when you run that plan with 30 students: who touches what, how parts are counted, how computers and USB cables stay untangled, what to do when five groups raise their hands at once, and how to clear the tables in five minutes at the end. The examples all rest on the same assumption: 30 students, 10 Arduino Uno kits, a 40-minute lesson and a teacher with no helper.
First the maths: why groups of three and 10 stations?
With 30 students and 10 kits, the natural split is 10 groups × 3 students, and that is more than an arithmetic coincidence. With pairs you would need 15 kits; in groups of four or five at least one student ends up on the sidelines and leaves without ever touching the breadboard. Three people match the three jobs a circuit needs: one plugs in the parts, one gets the code onto the computer and uploads it, and one reads the project page and checks every step. Each group sits at a fixed station, and the station carries the same number as the group's box and computer. When students are absent, groups are not rebuilt: in a group of two, the reader/checker job moves to the coder; in a group of four, the fourth person becomes the parts manager and takes over the box count. That way every lesson starts from the same map, and nobody asks "where do I sit, what do I look at?"
Group roles: circuit builder, coder, reader/checker
The point of roles is not to separate students but to keep everyone's hands busy. The most common picture in a large class is this: the keenest student takes over both the wires and the keyboard, and the other two drift off to their phones. Roles break that pattern, because each role has a task only it can do and a task it must not do. You can print the table below large and put it at every station, or turn the role cards into lanyard badges.
| Role | What they do | What they hold | What they don't do |
|---|---|---|---|
| Circuit builder | Takes the parts out of the box, plugs them into the breadboard and board, says "wiring ready" before the USB goes in. | Box, breadboard, board | Doesn't touch the keyboard; doesn't change the code. |
| Coder | Gets the code onto the computer, selects board and port, uploads, reads any error message out loud. | Computer, USB cable | Doesn't pull wires off the breadboard; doesn't take parts. |
| Reader/checker | Opens the project page, reads the steps in order, compares every connection with the circuit diagram, does the box count at the start and end, manages the help cup. | Phone (project page), contents card, pen | Doesn't plug in parts; never says "I'll do it", says what to do. |
Rotate the roles every lesson; after three lessons every student has done each role once. You don't have to remember the rotation yourself: write the students' names on the station card as A, B and C, and write the lesson number on the board. Each student finds their role from their letter and the lesson number. In two-stage projects (first an LED, then a button, for example) you can also rotate once in the middle of a lesson; the coder then builds the circuit in the second stage and makes the connections they watched in the first stage with their own hands.
| Lesson | Student A | Student B | Student C |
|---|---|---|---|
| Lessons 1, 4, 7 | Circuit builder | Coder | Reader/checker |
| Lessons 2, 5, 8 | Reader/checker | Circuit builder | Coder |
| Lessons 3, 6, 9 | Coder | Reader/checker | Circuit builder |
Kit management: numbered boxes, contents card and counting
In a large class, a lost part is a lost minute. When a group can't find its LED it borrows one from the next box, the next group fills its gap from another box in the following lesson, and three weeks later no box is complete and you can't tell where anything went missing. The cure is simple: every kit has its own box, a big number on the lid and a contents card inside it. The contents card lists the part name, the quantity and two empty check boxes (in and out). If you laminate the card, the checker ticks it with a dry-erase marker every lesson and wipes it at the end. The list below is an example of a basic box that covers the first free projects with LEDs, buttons, an LDR and a buzzer; add or remove rows to fit your own curriculum.
| Part | Per box | Total for 10 boxes | Spare box |
|---|---|---|---|
| Arduino Uno (numbered label) | 1 | 10 | 1 if possible |
| USB cable (data cable, numbered label) | 1 | 10 | 2 |
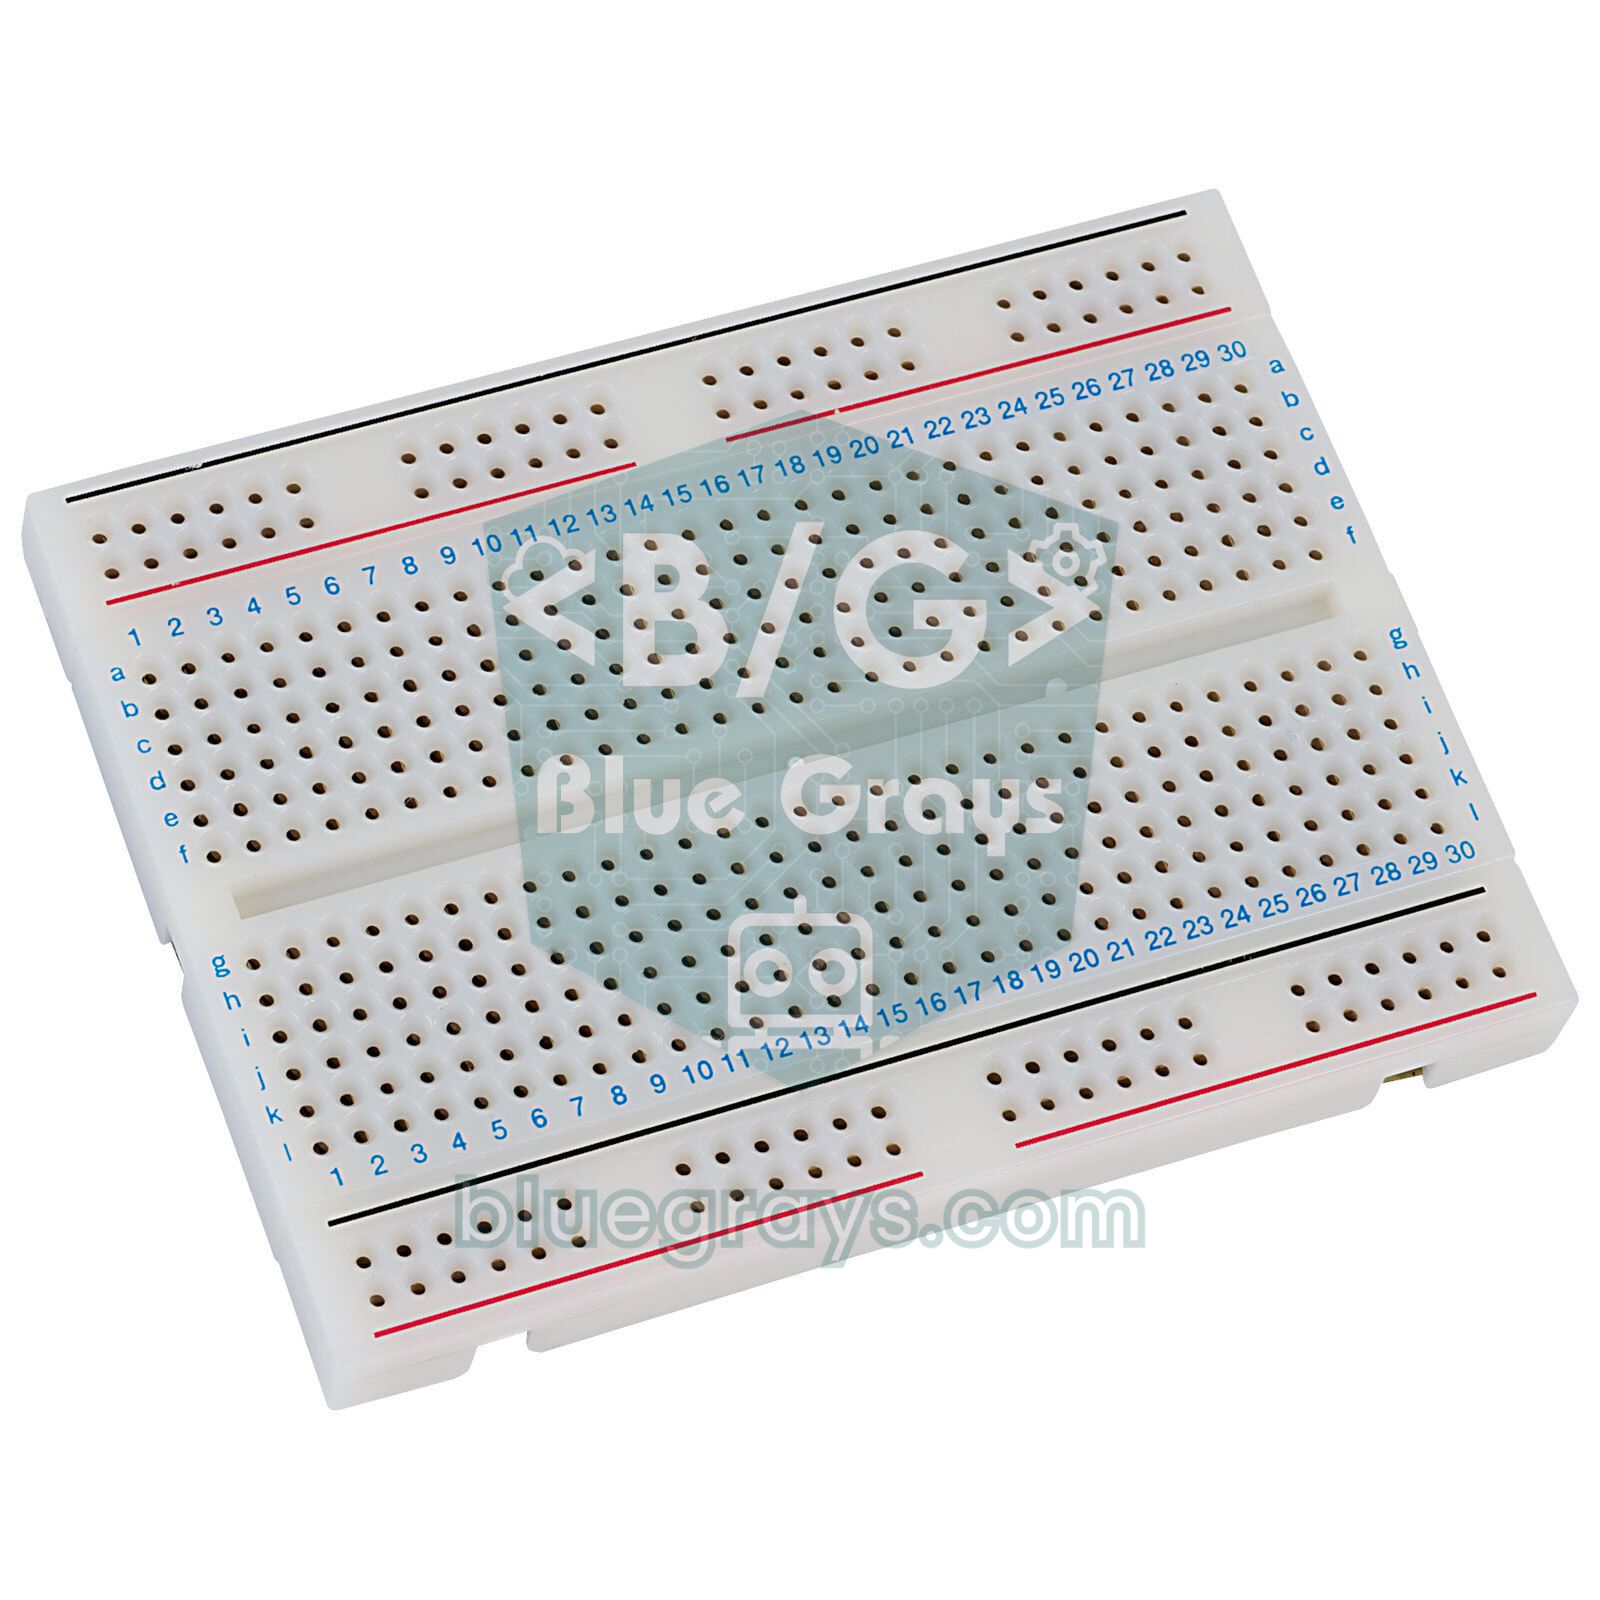
| Breadboard (830 holes) | 1 | 10 | 1 |
| Male-to-male jumper wire | 20 | 200 | 30 |
| LED (red, yellow, green; 2 each) | 6 | 60 | 15 |
| 220 Ω resistor | 6 | 60 | 20 |
| 10 kΩ resistor | 3 | 30 | 10 |
| Push button | 2 | 20 | 5 |
| LDR | 1 | 10 | 3 |
| Buzzer | 1 | 10 | 2 |
| Potentiometer (10 kΩ) | 1 | 10 | 2 |
| Laminated contents card + dry-erase marker | 1 | 10 | - |
Count twice: in at the start, out at the end. The in-count is the checker's job and should take no longer than a minute; they lay the parts out in card order, read the quantities from the card and tick the box if everything is there. The out-count follows the same order, but the checker counts while the circuit builder takes the circuit apart. Resistors are the parts that get mixed up most; put the 220 Ω and 10 kΩ ones in separate small bags or add a divider inside the box. If students aren't sure of a resistor's value, they can read the bands with the Color code tool in the app, and when you add a new LED colour you can work out the right resistor with the LED resistor tool. When something is missing, follow this protocol without blaming anyone:
- Missing at the start: The checker writes the missing part on the card and, without raising a hand, walks to the materials table where the spare box is; they take one part and note "taken from spare" on the edge of the card.
- Missing at the end: The group spends two minutes checking under the table, behind the breadboard and in bags. If it doesn't turn up, the checker writes the date and part name on the card; the part is not replaced from the spare box that day, you add it after the lesson.
- Broken part: An LED with a broken leg, a wire with a snapped end or a part that got hot does not go back in the box. It goes into the container labelled "broken" on the materials table; you check that container once a week and top up the boxes.
- Repeated gaps: If the same box comes up short two lessons in a row, do the end-of-lesson count together with that group; most of the time the problem is not theft but parts drifting into other boxes.
Classroom layout and computer/USB logistics
Arrange the tables as 10 islands and put a large station number on each one. Computers go on the side near the power sockets, and the box sits in front of the students; the USB cable should come in from the edge of the table, not across the middle, so the circuit builder's arm doesn't catch it and pull the board off the table. Leave yourself a walking lane: you should be able to reach any station in a few steps. The materials table (spare box, broken-parts container, blank contents cards) goes by the door, and the help board goes where everyone can see it. If you have a projector, show the circuit diagram large during the mini-lesson; if not, students open the same diagram on their own phones. On the computer side, almost all the confusion comes from one thing: nobody knows which board is on which port. Solve that before the lesson with this setup:
- One-number rule: Box 7, board 7, USB cable 7 and computer 7. Stick masking tape on the board and on both ends of the cable and write the number; the board always goes into the same computer and, if possible, the same USB socket, so on Windows the port number usually stays the same too.
- Unplug-replug method: If the port list shows more than one option, the student unplugs the board, looks at the Tools > Port list in the Arduino IDE and plugs the board back in; the port that appears is their board. Have everyone do this once in the first lesson.
- Pre-lesson setup test: Before the lesson, check that the Arduino IDE is installed on every computer, that the driver needed for clone boards is installed and that every board has uploaded Blink once to its own computer. For the installation steps, see the Arduino IDE installation post.
- Libraries in advance: If the lesson's project needs a library, install it on every computer beforehand, not during the lesson. The methods are in the post on installing Arduino libraries.
- Ready folder: Create a folder named after the lesson number on every computer's desktop and put the week's code in it. Students still read and change the code, but you save the five minutes lost when 30 people try to transfer code at the same time.
If there isn't one computer per group, set up an upload station. Say the classroom has 5 laptops: two groups share one computer; groups build and check the circuit at their table, then carry the board and USB cable to the station, upload and go back. To keep the queue clear, put a card next to the computer that says "group uploading now", and don't let a group stay at the station longer than two minutes. If an upload error appears, the group leaves the station, investigates at its own table and rejoins the queue; that way one stuck group never holds up the other nine.
Start-of-lesson routine: 10 minutes at first, then 5
- At the door (minute 0–1): As students come in, they find their role from the lesson number on the board and go straight to their station.
- Box handout (minute 1–3): Checkers collect their numbered box from the materials shelf; boxes stand in number order and nobody reaches for another box.
- In-count (minute 3–5): The checker ticks the contents card, the circuit builder lays out the parts, the coder turns on the computer and starts the Arduino IDE.
- Connection check (minute 5–7): The coder plugs in the USB and checks that the board and port are selected correctly; if the port doesn't show up, the help cup goes to yellow straight away.
- Project page (minute 7–9): The checker opens the week's project on their phone and compares the Required Components list with the parts in the box.
- Ready signal (minute 9–10): A group that is ready puts the green cup on top. You only go to tables that aren't green. After the third lesson this routine usually drops to 5–6 minutes.
A help queue for a teacher on their own
What wears a teacher out in a large class isn't hard questions but hands going up at the same time and calls of "Can you come here?". Instead of hand raising, give every station three stacked plastic cups (green, yellow, red) or three coloured cards standing on the table. The group puts the colour that matches its situation on top. The cup system does two things: you see at a glance which groups are stuck, and students keep working while they wait instead of holding a hand in the air. A group that shows red also writes its station number on the help board; you go in board order, and a group that shouts or leaves its seat doesn't jump the queue.
| Colour | Group status | Your response |
|---|---|---|
| Green | We're on track or we've finished. | On your round you only ask a check question and give finishers an extension task. |
| Yellow | We have a question but can carry on with another step. | You go after the reds; often the group solves it before you arrive. |
| Red | We've stopped; we checked 3 sources but can't move on. | You go in board order, stay at the table no more than 2 minutes and hand the group to a student assistant if needed. |
The only condition for a red cup is the 3 before me rule: the group must have checked three sources before calling you. The first is the project page. In BlueGrays, every project's Understand the code tab has an If you get stuck section after the step-by-step explanation of the code, listing the snags that commonly come up in that project; in free projects this tab is open to everyone. The Troubleshooting section on the project page lists the checks to make "if your project doesn't work" and unlocks with Premium. The second source is the group mate: the checker rereads the diagram connection by connection while the circuit builder traces every wire with a finger. The third source is the neighbouring group: looking at the working circuit of a group that is doing the same project and has passed the same step often reveals a reversed LED within seconds. When a red cup goes up, your first question should be "Which three sources did you check?"; if there is no answer, the cup goes back to yellow.
Student assistants are a lone teacher's best help. In every lesson, make the first two or three students who finish assistants and give them a visible sign (a badge or an armband). An assistant has one rule, hands behind your back: they explain, show and ask questions, but they never touch another group's breadboard or type its code. If you send assistants to yellow cups and yourself to red ones, the queue melts fast. Don't always pick the same students; making sure everyone is an assistant at least once during the term keeps fast students from getting bored and stops the others from saying "they'll do it anyway".
A 40-minute lesson frame
| Minutes | Stage | Teacher | Groups |
|---|---|---|---|
| 0–6 | Setup | Points to the role board at the door, goes to any cup that isn't green. | Box handout, in-count, IDE and port check, project page opened. |
| 6–12 | Mini-lesson | Explains one concept (e.g. a pull-down resistor or analog reading) on the circuit diagram and asks a prediction question. | The checker zooms into the diagram on the phone, the group writes its prediction on paper. |
| 12–30 | Build | Manages the help queue, sends assistants to yellow cups. | Circuit built, code uploaded, 3 before me rule if it doesn't work. |
| 30–35 | Check | Walks from table to table and asks each group one why question. | Working circuit shown, project marked with I made it, exit question answered. |
| 35–40 | Pack-up | Stands at the shelf and takes the boxes back in number order. | USB unplugged, circuit taken apart or labelled, out-count, box back on the shelf. |
The most fragile point in this frame is minute 30: the build never seems to end, and the pack-up stage disappears. To prevent that, give a loud "two minutes" warning at minute 28 and stop at minute 30 even for circuits that don't work yet. A group whose circuit doesn't work answers "what have we tried, where are we stuck now?" during the check stage, and that is part of learning too. If your lesson is 80 minutes, don't run the frame twice; do setup and pack-up once and split the build section in the middle into a two-stage project, or into a build and an extension task.
The 10 most common classroom problems and 1-minute fixes
| Symptom | Likely cause | 1-minute fix |
|---|---|---|
| Board not in the port list | Charge-only USB cable (no data lines) or a missing driver for a clone board | Swap in a spare data cable; if it still doesn't show, note that computer and install the driver after the lesson. |
| Port shows but is "busy" or access is denied | The Serial Monitor or another IDE window is holding the port | Close the other windows, unplug the board and plug it back in. |
| Code uploaded to another group's board | Two boards on one computer or the wrong port selected | One-number rule and unplug-replug method; one board per computer. |
| Compiles fine, upload fails | Wrong board selected in Tools > Board | Compare the menu with what's printed on the board; on Nano clones also check the processor option. |
| Upload hangs with "not in sync" | Wrong port, or wires connected to pins 0 and 1 | Select the port again; unplug wires from pins 0 and 1 during the upload. |
| Code uploaded, LED stays off | LED inserted the wrong way round | Long leg (anode) on the resistor and pin side, short leg to GND; just flip the LED. |
| No part reacts at all | GND connection forgotten | A black wire from the board's GND to the breadboard's minus rail; black wire = GND rule. |
| Wiring looks right, circuit doesn't work | Part in the wrong breadboard row, or the power rail is split in the middle on some long breadboards | Match the row numbers with the diagram one by one; join the two halves of the rail with a short wire. |
| "No such file or directory" error | The library the code needs isn't installed on that computer | Install it from the Library Manager; before the next lesson, install it on all computers. |
| Garbled characters in the Serial Monitor | The Serial Monitor baud rate doesn't match the Serial.begin value in the code | Set the baud rate option in the Serial Monitor to the value in the code (9600 in most projects). |
Fast finishers and stuck groups: two speeds in one room
- Try it yourself tasks: In BlueGrays, the Understand the code tab ends with a Try it yourself section; every task comes with Hint and Show solution options. A finished group writes down its prediction on paper before solving the task, then changes the code, uploads it and compares the result with the prediction. We explained how to tackle these tasks in detail in the Understand the code post.
- One step further: A group that finishes LED Blink can move on to Traffic Light with the same box, and a group that finishes Toggle an LED with a Button (On/Off) can move on to Using a Buzzer. The box has enough parts for these projects, so nobody needs to go to the materials table.
- Next project with Project Finder: Students can answer 3 questions in the app's Project Finder to find a next project that matches their interests. How it works is in the post on which Arduino project to do.
- Assisting: One member of a finished group becomes a student assistant for that lesson; explaining is the best test of really understanding a circuit.
Keep a ready-made half circuit for stuck groups. Before the lesson, build the breadboard part of the week's project (for example, the LED and resistor) on the breadboard from the spare box. A group that is still red at minute 20 and can't find the error in its own circuit sets its breadboard aside, connects the ready breadboard to its board with two wires and uploads its code. When the circuit works, the group's job isn't over: they put the two breadboards side by side and find the difference. That way the stuck group ends the lesson with a working circuit and discovers the mistake on its own. In sensor projects like Night Light with Ldr you can use the same method for the part of the circuit with the sensor.
Using the app in a large class: everyone on their own screen
In a large class it's hard for 30 people to see one diagram drawn on the board at the same time. This is where BlueGrays helps: every student, or at least every group's checker, opens the project on their own phone. The Circuit Diagram can be zoomed, so even a student in the back row can read the pin numbers up close; with Save to Gallery the diagram is saved to the phone and can be opened even when the internet is weak. Let's build it together mode splits the project into steps (prepare the parts, build the circuit, upload the code, run and test), and in this mode the screen stays on, so a phone left on the table doesn't go dark. At the end of the lesson, every student who shows a working circuit marks the project with I made it, and you see that mark on the phone screen during your round. It's worth being honest here: BlueGrays has no class dashboard; you can't see in a remote list which projects your students finished, so you do the check at the table. Since circuit diagrams, code, blocks and Understand the code are open in 60 free projects (20 per platform), nobody needs Premium for the first weeks; if you continue with Premium projects, Educator Packages let the whole class open the same projects.
Safety and pack-up rules
- Unplug USB while wiring: The USB stays unplugged while the circuit builder makes connections; the coder doesn't plug it in until they hear "wiring ready".
- USB 5 V only: In the first lessons no batteries, adapters or anything that goes into a wall socket; the 5V pin is never connected straight to GND.
- Hot part = stop: If a part gets hot or there's a smell, unplug the USB first, then turn the cup to red. The hot part goes into the broken-parts container.
- Tidy tables: No food or drink at the stations, bags stay under the tables, and the USB cable never hangs into the walking lane.
- No new wiring in the last 5 minutes: Once pack-up starts, nobody plugs in a new wire; a circuit that will continue next time isn't taken apart, the breadboard goes in the box and the card gets a note: "Box 7, circuit continues".
- Return order: Unplug the USB, coil the cable, count the parts, tick the card, close the box and put it on the shelf in number order. Nobody leaves until the last box is on the shelf.
This setup may feel heavy for the first two lessons; after the third it turns into routine and frees most of the lesson for real teaching. You don't need to set up everything at once: start with numbered boxes and roles, and add the cups in the second week. If you want students to open the week's project on their own phones and zoom into the diagram, download BlueGrays and try a few free projects yourself once before the lesson; knowing where each section is when you walk into the room is the first five minutes you win in a busy lesson.
Frequently asked questions
How do you manage a large class in an Arduino lesson?
Split the class into groups of three, give each group the roles of circuit builder, coder and reader/checker, and rotate the roles every lesson. Put the kits in numbered boxes and match box, board, cable and computer with the same number. For help, use a coloured cup system and a rule that groups check 3 sources before coming to you.
How many Arduino kits do I need for 30 students?
With groups of three, 10 kits are enough. Rather than adding a full eleventh kit, it is more efficient to prepare a spare box with extra LEDs, resistors, jumper wires, a few USB cables and a breadboard. If the budget allows, a spare board in that box keeps one broken board from stopping the lesson.
How many students should be in an Arduino group?
Three is the most effective group size, because a circuit has three separate jobs: plugging in parts, uploading code and checking the steps. In groups of four or more, at least one student ends up on the sidelines. Pairs also work if you have enough kits; then the checker job moves to the coder.
What should I do in class if the Arduino port doesn't show up?
First swap the USB cable for a spare data cable; the most common cause in class is a charge-only cable. If the port still doesn't appear, the clone board's driver may be missing; note that computer and install the driver after the lesson. If several ports are listed, unplug and replug the board to find which one is yours.
How can one teacher keep up with questions from 10 groups?
Instead of hand raising, use green, yellow and red cups to see at a glance which groups are stuck, and go only to the red ones in the order on the board. Require groups to check the help sections on the project page, their group mate and the neighbouring group before calling you. Turn the first students who finish into assistants and send them to the yellow cups.
Can I see my students' progress in BlueGrays?
No, BlueGrays has no class dashboard or student progress tracking. Students mark the projects they finish with I made it in their own accounts, and you check at the table at the end of the lesson by looking at their screens. If you buy an educator package, you can only see which student redeemed which code.
Projects to build after reading this
See all projects
LED Blink
The very first hello of electronics: switching a single LED on and off. The Arduino turns the LED on and off at short intervals, so the light blinks quickly. You see in the simplest way how the board

Traffic Light
A tiny copy of the traffic light you see on the road every day. Red stays on for two seconds, yellow flashes for a moment, green stays on for two seconds, then it goes back to red through yellow again

LED Control with a Push Button (Push)
Just like a doorbell: the light stays on as long as you press, and goes off when you let go. The Arduino keeps listening to the button; while it's pressed the LED is on, and the moment you lift your f

Toggle an LED with a Button (On/Off)
Press the button once and the light comes on, press it again and it goes off, just like the light switch in your room. The Arduino notices every press and flips the LED to the opposite state, waiting

Night Light with Ldr
A little night light that turns on by itself when it gets dark and goes off when morning comes. A light sensor measures how bright the room is, and the Arduino switches the LED on when it is dark enou
Using a Buzzer
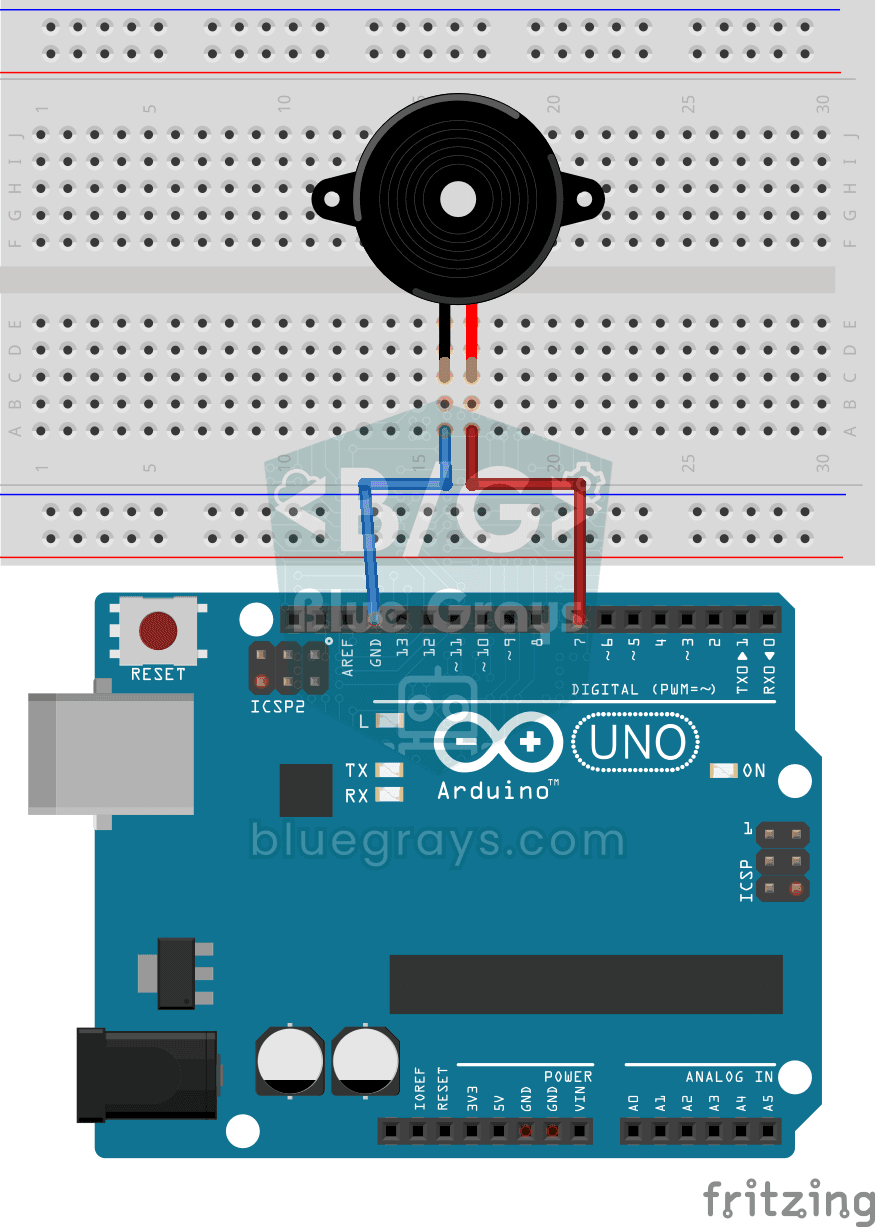
Ever wondered how a doorbell or an alarm makes its sound? The Arduino makes a small buzzer beep at short intervals: beep, pause, beep, pause. You see how sound is made with electricity and take the fi

Two LEDs Blinking Alternately
Two LEDs blink quickly in turn: when one lights up the other goes off, as if they were tossing a ball back and forth. The Arduino keeps each light on for a fifth of a second and then hands over to the

HC-SR04 Distance Measurement (Serial Display)
The HC-SR04 sensor works just like a bat finding its way in the dark: it sends out a sound you cannot hear, listens for the echo and measures how far away the object in front of it is. The Arduino wri