
Which Arduino Project Should I Do Next? Pick in 3 Questions
Which Arduino project should I do next? A way to choose by interest, board and experience: the Project Finder's 3 questions, example projects and a checklist.
The answer to which Arduino project should I do comes down to three things: what you want to build (your interest), the board you have and your experience. Pick a topic that genuinely makes you curious and you won't abandon the project halfway; pick a project that fits your board and you won't fight pin and code mismatches; pick one at the right difficulty and you'll both finish it and learn something new. The Project Finder in the BlueGrays app asks exactly these three questions and sorts the matching projects out of 200+.
In the Arduino project ideas post we listed 30 ideas by level. This post isn't a list but a method: what each Project Finder question changes, how to read the cards on the results screen, real example projects by interest and board, when to move up a level, what to do if you can't find the project you want, and a 6-question checklist that works even without the Project Finder.
Why these three questions?
Most unfinished Arduino projects get stuck for one of three reasons. The first is interest: blinking an LED is exciting on day one, but someone who wants to make games gets bored by the fifth blinking LED and puts the board in a drawer. The second is the board: a Wi-Fi project written for the ESP32 won't run on an Arduino Uno, and Raspberry Pi Pico projects are written in MicroPython and uploaded from Thonny, not the Arduino IDE. The third is level: someone setting up a library, an I2C display and a motor driver at once in their first project can't tell whether a fault is in the wiring or the code. The table below sums up what each question prevents and what it maps to in the Project Finder.
| Question | What it prevents | Typical result of a wrong choice | In the Project Finder |
|---|---|---|---|
| Interest: what do I want to build? | Getting bored and giving up | Even if you finish, you don't feel like starting the next one | Question 1: What would you like to build? (up to 2 choices) |
| Board: what do I have? | Incompatible code and pin errors | The code won't compile or the pin numbers don't match | Question 2: Which board do you have? (filters the list) |
| Experience: how much do I know? | Wrestling with too many new things at once | Hours go into debugging and the project ends up on a shelf | Question 3: How much experience do you have? (changes the order) |
The Project Finder step by step: 3 questions
The Project Finder is the PROJECT FINDER card in the Discover section at the top of the app's Discover tab. The card's title is What shall we build today?, with a line underneath offering to find the right project for you in 3 questions. Tap Find a project and the questions begin; a counter such as "Question 1 / 3" moves along at the top, and every question has a Skip option. The Project Finder is free and needs no Premium. Your answers are saved, and the For you list in Discover is filled based on them.
Question 1: What would you like to build? The first screen has 8 interests, each with a note on the kind of projects it covers: Light show (LEDs, colors, animation), Sound and music (melodies, piano, alarms), Games (T-Rex, Pong, Snake), Motion and robots (motors, cars, servos), Measure and sense (temperature, distance, gas), Control from your phone (Wi-Fi, Bluetooth, remote), Smart home (alarms, locks, watering) and Displays and clocks (LCD, OLED, counters). You can choose up to 2; tap a third and your first choice is dropped. The live counter at the bottom updates with every tap and shows how many projects fit your choice ("Right now … projects match"). If none of them appeals to you in particular, the Anything, surprise me button leaves the interest empty and jumps straight to the board question; every project then stays in the pool.
Question 2: Which board do you have? There are four options: Arduino Uno / Nano (the widest choice), ESP32 (Wi-Fi and Bluetooth built in), Raspberry Pi Pico (small and affordable) and I don't have a board yet. Next to each board you see how many projects there are for it within the interest you chose. Unlike the interest, the board is a strict filter: choose ESP32 and only ESP32 projects come up. The reason is simple; code written for one board has pins, libraries and sometimes even a language that don't carry over to another. No board yet? No problem: the app suggests starting with Arduino, and the I don't have a board yet option brings up Arduino projects. If a board has no projects at all in your chosen interest, it says "no projects yet, we can notify you" under that board.
Question 3: How much experience do you have? Here the screen tells you something important: "We'll sort by this; no project is hidden." In other words, your experience answer doesn't shrink the list, it only decides which projects appear first. Even if you say it'll be your first project, advanced projects stay further down the list; even if you say you're comfortable, easy projects don't vanish. Experience isn't the only factor in the order, either. Matching your interests weighs more; a project that fits both of your interests can rise to the top even if its level is a little different. Among projects at the same level, those finished by many people and rated highly sit slightly higher.
| Option | Description on screen | What comes first | Who it suits |
|---|---|---|---|
| This will be my first project | Let's start by lighting an LED, we'll show every step | Beginner projects | People who haven't uploaded code to a board yet or have tried one or two examples |
| I've built a few projects | Buttons, buzzers and LCDs sound familiar | Intermediate projects, then Beginner right after | People who can build a circuit from a diagram and have finished a few projects |
| I'm comfortable, challenge me | Show advanced projects first | Intermediate and Advanced projects, Beginner at the end | People who can install a library and track down bugs in the Serial Monitor |
The results screen: best match, warm-up project and Premium note
Tap Show my projects and the results screen opens. At the top it says "We found … projects for you", and the Change link next to it takes you back to your answers. Below that come these sections:
- WARM UP FIRST · FREE: If there's a Premium project in the results, you get a free project that shares the most parts with the top Premium project. The card says "Start with the same parts:" followed by the shared parts, and the Start for free button opens the project.
- BEST MATCH: The first project in the ranking gets a large card. Where it applies, it shows a Premium or Video badge, how many people finished it and its rating; View project opens the project page.
- Other matches: The rest of the ranking. Each card shows the difficulty, platform, number of people who finished it and the rating; the further you scroll, the weaker the match.
- Premium note: If you're not Premium and the results include Premium projects, a note at the bottom says "… projects are in Premium" with a See Premium link. You can see the overview page and parts list of these projects; the circuit diagram, code and steps unlock with Premium.
The warm-up card is the part of the results screen most worth using well. Say the best match is a Premium project whose parts list has a buzzer and two buttons. The warm-up project will be a free project on the same board that uses as many of those parts as possible. You build that first: you see that the parts work, that you wired them correctly and that you can upload code to the board. When you move on to the bigger project you're already halfway there, because you know part of the circuit. Even without Premium, the warm-up project is open from start to finish: circuit diagram, parts list, code and Understand the code included.
Let's take an example. Say you have an Arduino Uno starter kit: a breadboard, about 10 LEDs, 330 ohm resistors, two buttons, a buzzer and an LDR. You've finished LED Blink and Traffic Light, and now you want to build something that makes sound. You choose Sound and music for question 1, Arduino Uno / Nano for question 2 and I've built a few projects for question 3. Intermediate buzzer projects usually come out on top, with beginner projects right behind them. Using a Buzzer and Frequency Setting with Buzzer are free, so you can start right away without Premium; if a Premium project lands at the top, the warm-up card shows a free project you can build with the same buzzer. The Project Finder doesn't know which parts are in your kit; to choose by parts, see the Workshop section below.
Example projects by interest
The table below shows a few real BlueGrays projects for each interest; for the ones marked "free", the circuit diagram, code and Understand the code section are open without Premium. The busiest interests are Light show, Displays and clocks, Measure and sense and Smart home. Motion and robots has no free projects right now and Control from your phone has only a few; for these, the warm-up card may suggest a free project on the same board with the most overlapping parts. Tap a project name to go to its page.
Choosing a board: Arduino Uno / Nano, ESP32 or Raspberry Pi Pico?
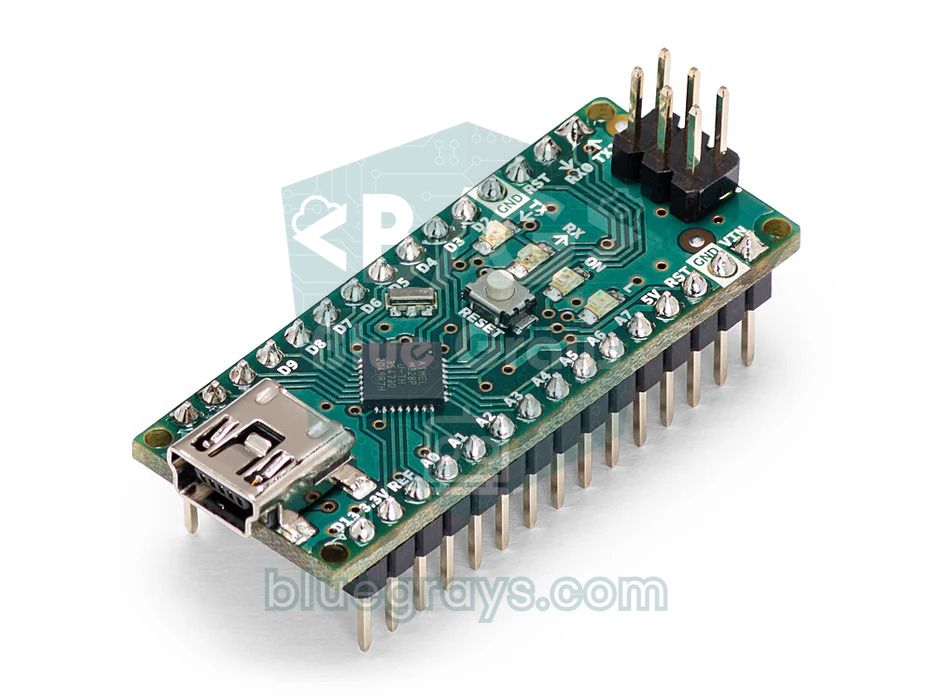
If you're unsure about the board question, pick whichever one you have; if you're buying a new board, the table below helps. Project counts are rounded and grow as new projects are added. We covered the differences between board models in which Arduino should I buy, the comparison with the ESP32 in Arduino vs ESP32 and the Pico in what is the Raspberry Pi Pico.
| Board | When to choose it | Language and tools | Projects in the app |
|---|---|---|---|
| Arduino Uno / Nano | If it's your first board and you want to cover all the basics: LEDs, buttons, sensors, displays and motors | C++, Arduino IDE | More than 110 projects; 20 are free |
| ESP32 | If you need Wi-Fi or Bluetooth: a web server, time or weather from the internet, control from your phone | C++, Arduino IDE + ESP32 board package | About 50 projects; 20 are free |
| Raspberry Pi Pico | If you want to learn Python, or work with LEDs, buttons and sensors on a small, affordable board | MicroPython, Thonny | More than 30 projects; 20 are free |
| I don't have a board yet | If you want to see what you can build first | Starting with Arduino is suggested | Arduino projects are listed |
Experience level: when should you move up?
The experience question in the Project Finder isn't a fixed label but a setting you should change as you progress. There's a simple rule that works: once you've finished three projects at one level together with the Try it yourself tasks in Understand the code, move up a level. A Try it yourself task asks you to change a value or a behavior in the code on your own; if you can do it without looking at the hint or the solution, it shows you understood the code rather than just copying it. We explained how this section works in the Understand the code and Try it yourself post and what the difficulty labels mean in the project page guide. These are the signs you're ready:
- You can build the circuit from the diagram without a single mistake.
- You can say what will happen when you change a number in the code (a delay, a pin number, a threshold) before uploading it.
- When something doesn't work, you know whether to check the wiring or the code first, and you debug by printing values to the Serial Monitor.
- When you finish a project, you have your own idea of how you could have done it differently.
Once you see these signs, reopen the Project Finder with Change my answers in Discover and move your experience answer from "This will be my first project" to "I've built a few projects", and later to "I'm comfortable, challenge me". The rule works in reverse too: if you get stuck twice on a project and can't find the problem, doing a similar project one level down isn't a step back, it's often the fastest way forward. Make sure at least one of the three projects you finish at a level introduces a new part or concept; otherwise you'll level up having repeated the same thing.
Can't find the project you want? Get notified
At the very bottom of the results screen is the Can't find the project you want? card: "Tell us what you'd like to build; we'll let you know when a matching project is added." You type a short note in the What do you want to build? field (the app's own example is "plant watering with ESP32") and tap Notify me. Your request is saved together with your current interest and board answers. Later, when a new project matching that interest and board is published, you get a notification titled "A new project you asked for" with the name of the new project. You're notified once per request.
The Discover tab: a new starting point every day
Once you've answered the Project Finder, the Discover section of the Discover tab shapes itself around you. At the top there's a greeting with your name and a line saying the list is sorted for the interests you chose. Then come these sections:
- PICK UP WHERE YOU LEFT OFF: Projects you left unfinished in the Build it step by step guide, with the step you stopped at (for example "Step 2 / 4 · Build the circuit"). Continue takes you straight to that step.
- What shall we build today?: The Project Finder card. Find a project starts the questions again, while Surprise me opens a random project from the For you and Most built lists. A good shortcut for days when you can't decide.
- For you: The top 10 projects sorted by your latest Project Finder answers. The Change my answers link next to it opens the Project Finder with your previous interests.
- What would you like to build?: The 8 interests appear as category cards, each showing how many projects there are for your saved board. Tapping a category searches that interest with your board and experience; you don't need to answer the questions again.
- Most built: The 10 projects finished by the most people. This list doesn't depend on your board choice; even if you chose ESP32, you can see Arduino projects here. At the very bottom, the All projects button takes you to the full project list.
Three more ways to choose a project
- Workshop > Parts > Projects You Can Build: The Project Finder looks at interest, board and experience but doesn't know which parts you have. If you save your parts with quantities in the Workshop, the projects whose parts are all in your workshop are collected in this list, while Projects with Missing Components shows, with a note such as "2 Missing", the projects you can build by buying a few parts. The Parts section is a Premium feature. We'll cover this feature in detail in a separate post.
- Discover > Projects > Filter: You can combine the Difficulty Level (Beginner, Intermediate, Advanced), Platform, Price and Projects with blocks filters. For example, choose Beginner, Arduino, free and blocks together and you're left with projects you can start without Premium and also read as blocks. Only Buildable in the Workshop filter narrows the list to projects whose parts you have in full.
- Sort > Most Completed: Puts the projects finished by the most people first. The same menu also has Highest Rated; look at both and you'll find projects that are built often and liked. The "… finished" line on project cards serves the same purpose.
Common mistakes when choosing a project
| Mistake | Why it's a problem | What to do |
|---|---|---|
| Starting with the flashiest project | Many parts and many new concepts arrive at once, and debugging gets hard | Note down the target project and get the same parts working with the warm-up project first |
| Thinking about the board afterwards | An ESP32 project's Wi-Fi code won't run on an Uno, and Pico projects are MicroPython | Choose the board you have in the Project Finder; if you're buying one, check the board table first |
| Starting without checking the parts list | A missing sensor or module turns up halfway | Check the Required Components list on the project page, quantities included |
| Staying at the same level forever | The project count grows but nothing new is learned | Apply the three-project rule and update your experience answer |
| Moving on without understanding the code | You'll get stuck at the same spot in the next project | Finish the Step by step and Try it yourself sections in Understand the code |
Your own checklist: 6 questions before you start
After you get the Project Finder's suggestion, or when you pick a project from the list yourself, ask these 6 questions before you start. If you can answer "yes" to all six, the project is right for you. If there are two or more "no" answers, look at the warm-up project or a similar project one level down first. You can copy the list into your notebook or the notes on your phone.
- Budget: Is the total price of the missing parts within what you're willing to spend right now? If more than two parts are missing, pick a project you can build with what you have first.
- Time: Do building the circuit, uploading the code and testing fit into one or two sessions? In your first projects, ones that take 1–2 hours keep you motivated.
- Parts: Have you seen every part in the Required Components list in your hands, in the right quantity, resistor values and number of wires included?
- Number of new concepts: Is the number of concepts you'll meet for the first time in this project one or two at most (only an I2C display, or only a servo, for example)? If it's three or more, the project is too big.
- Board and language: Is the project for your board's platform, and have you installed the tool you'll upload the code with (Arduino IDE or Thonny)?
- If you get stuck: Does the project have Understand the code and Troubleshooting sections, and do you have somewhere to ask questions (the forum, a teacher, a friend)?
Choosing a project is as much a part of learning as the project itself. Answer the three questions, get to know the parts with the warm-up project, update your level every three projects and ask to be notified when you can't find what you want. Open the BlueGrays app, start with the What shall we build today? card in Discover, and you'll see your first suggestion within a minute.
Frequently asked questions
Which Arduino project should I do?
Choose based on your interest, the board you have and your experience. A topic that makes you curious keeps you going until the end, a project that fits your board avoids compatibility problems, and one at your level teaches you something new. The Project Finder in BlueGrays asks these three questions and sorts the projects for you.
What is the easiest Arduino project for beginners?
Projects with one or a few LEDs, such as LED Blink, Traffic Light and LED Control with a Push Button, are the easiest. They're free in BlueGrays, with the circuit diagram, code, blocks and Understand the code section all open. If you answer "This will be my first project" to the experience question in the Project Finder, beginner projects like these come first.
Is the Project Finder free?
Yes, you don't need Premium to use the Project Finder. The results include both free and Premium projects, and if there are Premium projects, a separate note on the screen says so. The suggested warm-up project is always free.
When should I move from Arduino to ESP32?
It makes sense once your project needs Wi-Fi or Bluetooth, such as a web server, time from the internet or control from your phone. Getting the basics down on the Arduino first, like digital and analog input and output, reading buttons and sensors, and LCD or OLED displays, makes the switch easier. The ESP32 is also programmed with the Arduino IDE and C++, so most of what you've learned carries over.
How do I choose my next project after finishing one?
If you've finished three projects at one level along with their Try it yourself tasks, move up a level; if not, pick a project at the same level that adds a new part or concept. Update your Project Finder answers with Change my answers in Discover and the For you list changes too. To choose by the parts you have, check Projects You Can Build in the Workshop.
Can I choose an Arduino project if I don't have a board?
Yes. The "I don't have a board yet" option in the Project Finder brings up Arduino projects, because the app suggests starting with Arduino. The Required Components list of the project you pick becomes your shopping list, and once you have the board and parts you can start with that same project.
Projects to build after reading this
See all projects
LED Blink
The very first hello of electronics: switching a single LED on and off. The Arduino turns the LED on and off at short intervals, so the light blinks quickly. You see in the simplest way how the board

Traffic Light
A tiny copy of the traffic light you see on the road every day. Red stays on for two seconds, yellow flashes for a moment, green stays on for two seconds, then it goes back to red through yellow again
Using a Buzzer
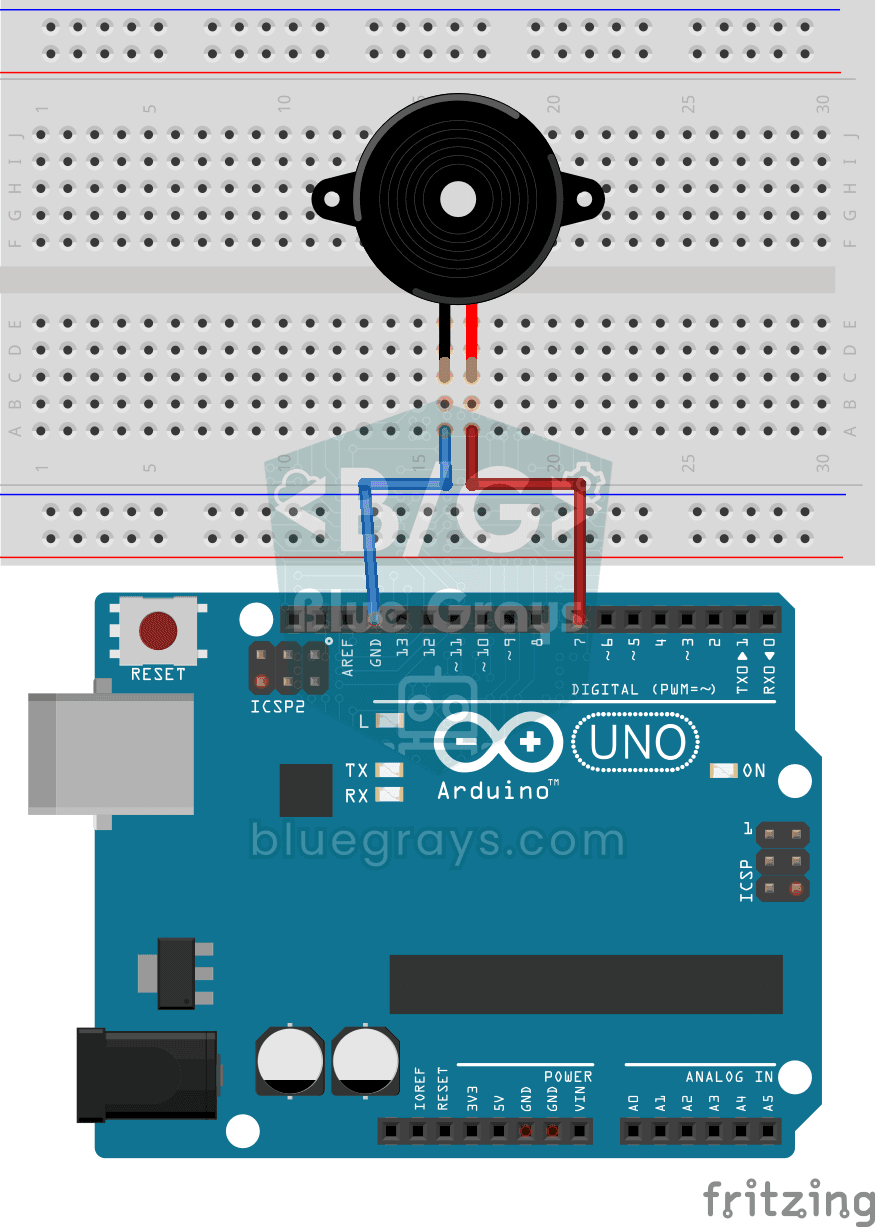
Ever wondered how a doorbell or an alarm makes its sound? The Arduino makes a small buzzer beep at short intervals: beep, pause, beep, pause. You see how sound is made with electricity and take the fi

HC-SR04 Distance Measurement (Serial Display)
The HC-SR04 sensor works just like a bat finding its way in the dark: it sends out a sound you cannot hear, listens for the echo and measures how far away the object in front of it is. The Arduino wri

Temperature and Humidity with DHT11
How warm is your room, and is the air humid or dry? The DHT11 sensor measures temperature and humidity, and the Arduino writes the values on a two-line LCD screen, refreshing every couple of seconds.

LED Blink with ESP32
Teaches basic GPIO output usage with ESP32. We achieve a blinking effect by turning an LED on and off from a digital pin. ESP32 version of the classic blink project on Arduino UNO; the basic blink commands in the Arduino environment are the same, but the ESP32's pin layout and 3.3 V GPIO levels differ from those of the Arduino UNO.
Raspberry Pi Pico: Controlling an External LED (Breadboard)
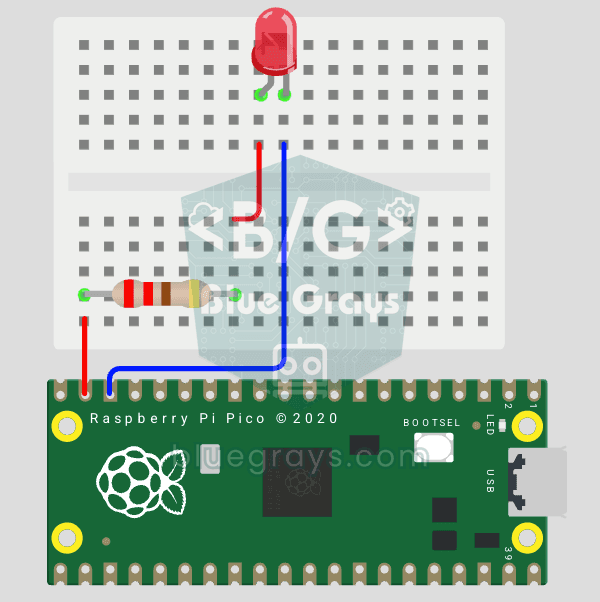
The next step after Pico’s built-in LED: connecting an external LED to the breadboard and controlling it via the GP14 pin. In this project, you’ll learn how to use any of the Pico’s general-purpose GPIO pins as an output, the LED’s polarity (long leg = anode/+, short leg = cathode/–), and why a current-limiting resistor (220Ω) is required. If you don’t include the resistor, excessive current will flow through the LED and it may burn out. The circuit is very simple: Pico GP14 → 220Ω resistor → LE
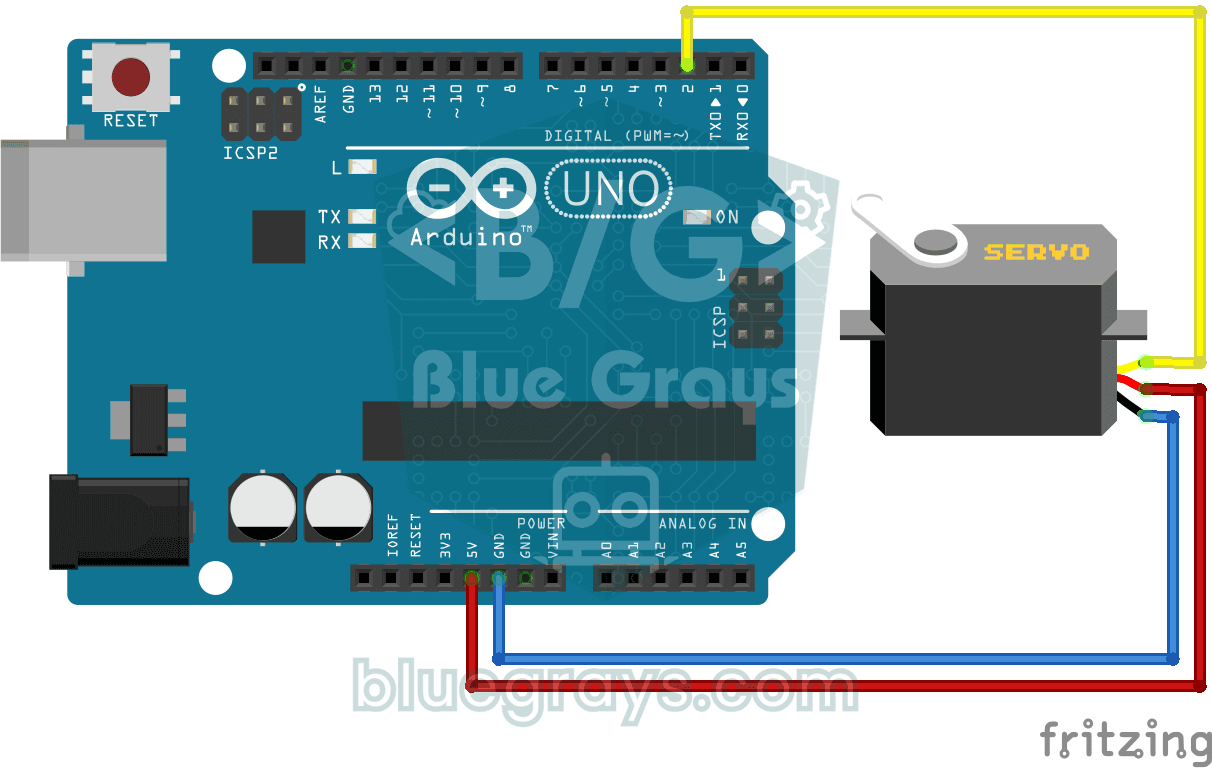
Using a Servo Motor
The arm of a small servo motor turns to three positions in turn: all the way to the start, right to the middle and all the way to the end, waiting two seconds at each stop. The Arduino tells the motor