
Arduino Christmas Projects: 12 LED, Sound and Light Ideas
Arduino Christmas projects: an LED tree, buzzer carols, a Santa detector, lights that switch on at sunset and an LED candle, with parts, time and cost tables.
Arduino Christmas projects are the most enjoyable excuse to learn electronics: with a few LEDs, a buzzer or a sensor you can decorate your tree, window and front door with code you wrote yourself. This list has 12 Christmas and New Year projects for Arduino, ESP32 and Raspberry Pi Pico, from a flickering LED candle to a music box that plays carols, from a Santa detector by the fireplace to outdoor lights that switch on by themselves at sunset. All of them rely on real, proven techniques, and most can be finished in a single evening.
First we compare all twelve projects in one table: which board, which parts, how long it takes and what it costs. Then we describe each project briefly and give you code you can upload straight away for three of them. Projects that need a detailed build link to the step-by-step guides published this month. At the end you'll find how to power your decorations safely and the most common mistakes.
The 12 projects at a glance
| # | Project | Board | Main parts | Time | Cost |
|---|---|---|---|---|---|
| 1 | WS2812B Christmas tree | Uno / ESP32 | WS2812B strip, 5 V adapter, 1000 µF capacitor | 2–3 hours | High |
| 2 | Christmas songs on a buzzer | Uno | Passive buzzer, 2 LEDs, button | 30 min | Low |
| 3 | Flickering LED candle | Uno / Nano | 3 yellow LEDs, 3 × 220 Ω | 20 min | Low |
| 4 | Santa detector | Uno | HC-SR501 PIR, passive buzzer, LED | 1 hour | Low |
| 5 | Outdoor lights that turn on at sunset | ESP32 | Relay module, 5 V adapter, sealed box | 2 hours | Medium |
| 6 | NeoPixel Christmas star | Pico / Uno | 24-LED WS2812B ring, 330 Ω, 1000 µF | 1 hour | Medium |
| 7 | Colour-changing bauble | Uno / ESP32 | RGB LED, 3 × 220 Ω, frosted bauble | 30 min | Low |
| 8 | Running-light garland | Uno | 8 LEDs, 8 × 220 Ω, potentiometer | 45 min | Low |
| 9 | New Year countdown timer | ESP32 | MAX7219 4-in-1 matrix, buzzer | 2 hours | Medium |
| 10 | Window decoration that lights up in the dark | Uno / ESP32 | LDR, 10 kΩ, LEDs or a short strip | 30 min | Low |
| 11 | Light modes from a remote | Uno | IR receiver, remote, RGB LED | 1 hour | Low |
| 12 | Gift box alarm | Uno / Nano | Reed switch, magnet, buzzer | 30 min | Low |
The cost column shows a level, not a price, because prices vary a lot by country and month. Low means projects you can build with parts already in a starter kit. Medium means you'll need one extra module (a relay, an LED ring, a matrix display). High is for the tree project, which needs metres of LED strip and a powerful 5 V adapter. If you don't have a kit yet, start with the Arduino starter kit guide.
1. Christmas tree with WS2812B LEDs
The showiest project on the list: an addressable WS2812B strip wrapped around the tree plays rainbow, snowfall and twinkle effects over a single data wire. For a 1.5–1.8 m tree, 150 LEDs, i.e. 5 m of 30 LED/m strip, is a good starting point. Each LED draws about 60 mA at full white, so on paper 150 LEDs need 9 A; with real effects the current stays around 3 A and a 5 V 6 A adapter is enough. A 1000 µF capacitor at the strip input and a 330 Ω resistor on the data line protect the first LED. The full build, FastLED code and button-controlled modes are in Christmas tree LEDs. The WS2812B usage and WS2812B animation projects in BlueGrays also teach the basics step by step.
2. Christmas songs on a buzzer
With a passive buzzer and the tone() function you can play Jingle Bells, We Wish You a Merry Christmas, Silent Night and Deck the Halls. The secret is the right frequencies and lengths: C5 is 523 Hz, E5 659 Hz, G5 784 Hz, and at 120 BPM an eighth note lasts 250 ms. An active buzzer only beeps at one pitch, so it's no use here; always choose a passive buzzer. Complete note arrays for all four songs, two LEDs that follow the notes and a millis-based player with a song button are ready in Jingle Bells Arduino code. If you're new, warm up with the free buzzer project.
3. Flickering LED candle
A safe LED candle instead of a real one: three yellow or orange LEDs driven with random brightness on PWM pins flicker like a flame. The trick lies in two kinds of randomness: brightness is picked between 120 and 255 so the flame never goes out completely, and the delay varies between 30 and 120 ms so the flicker never looks machine-regular. Put the LEDs inside a paper lantern, a jar or frosted glass and the light spreads out for a far more realistic effect. For a battery-powered version and more natural flame algorithms, see LED candle effect.
1// Titreyen LED mum: 3 sarı/turuncu LED, PWM pinleri 9, 10, 11
2// Flickering LED candle: 3 yellow/orange LEDs on PWM pins 9, 10, 11
3const int CANDLE_PINS[3] = {9, 10, 11};   // her LED'e 220 ohm direnç / 220 ohm resistor per LED
4
5void setup() {
6  for (int i = 0; i < 3; i++) {
7    pinMode(CANDLE_PINS[i], OUTPUT);
8  }
9  randomSeed(analogRead(A0));             // boş pinden rastgele tohum / random seed from a floating pin
10}
11
12void loop() {
13  for (int i = 0; i < 3; i++) {
14    int brightness = random(120, 256);    // 120-255: hiç sönmeyen alev / a flame that never goes dark
15    analogWrite(CANDLE_PINS[i], brightness);
16  }
17  delay(random(30, 120));                 // düzensiz aralık = doğal titreme / irregular timing = natural flicker
18}
4. Santa detector
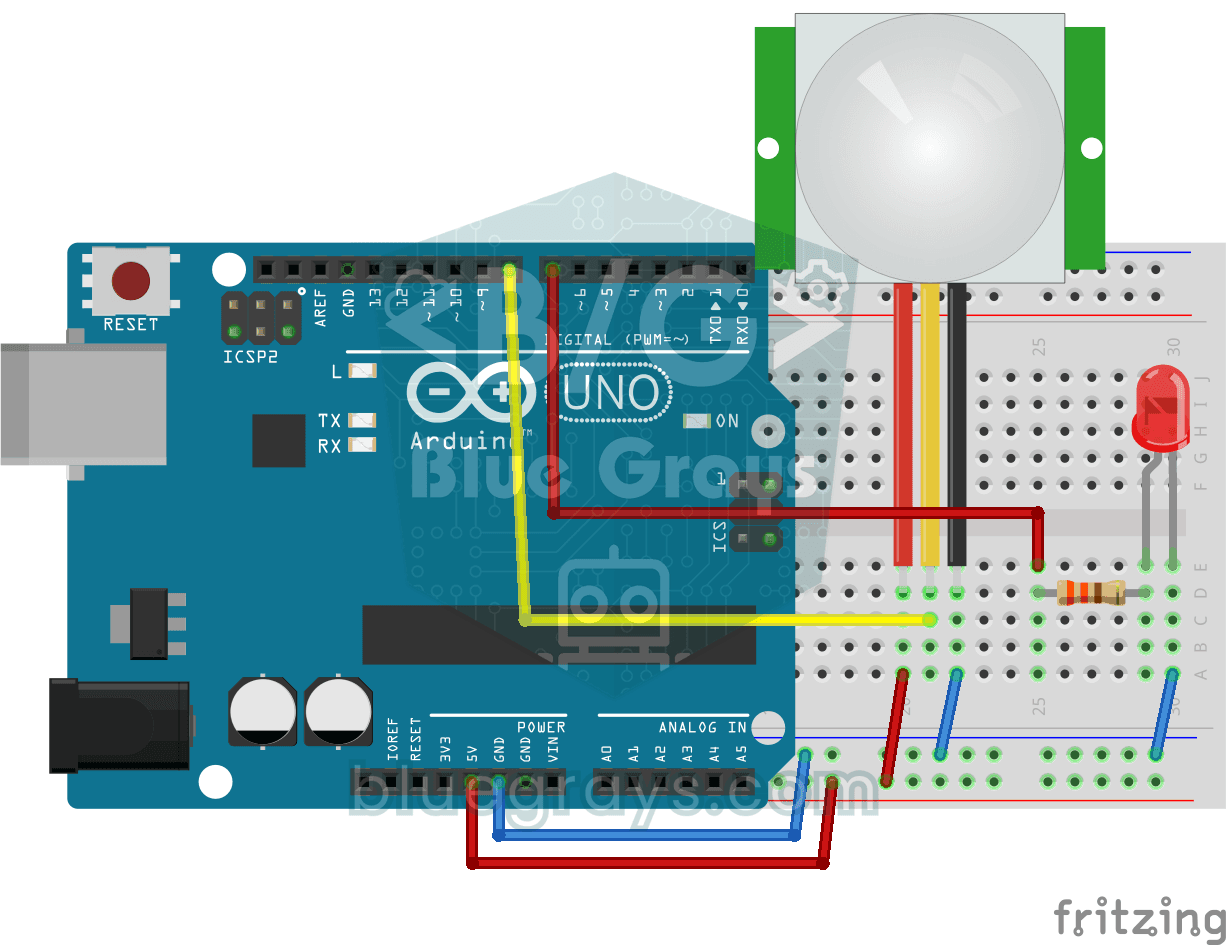
Place an HC-SR501 PIR sensor in front of the fireplace or tree; when someone approaches at night, the LED lights up, the buzzer goes "ho ho ho" and the Serial Monitor prints the visit count. After power-up a PIR sensor spends its first 30–60 seconds learning the room and may false-trigger in that time, which is why the code waits a minute at the start. The two trimpots on the sensor set the sensitivity (about 3–7 m) and how long the output stays HIGH. The code below is the simplest version; the full version that plays MP3 sounds, only arms itself in the dark and sends a phone notification from an ESP32 is in Santa detector.
1// Noel Baba dedektörü: PIR hareket görünce LED yanar, buzzer "ho ho ho" çalar
2// Santa detector: when the PIR sees motion, the LED lights and the buzzer plays "ho ho ho"
3const int PIR_PIN = 2;          // HC-SR501 OUT
4const int BUZZER_PIN = 8;       // pasif buzzer / passive buzzer
5const int LED_PIN = 13;         // kırmızı LED (220 ohm) / red LED (220 ohm)
6const unsigned long COOLDOWN_MS = 10000;   // 10 sn içinde tekrar ötme / don't retrigger within 10 s
7
8unsigned long lastAlarm = 0;
9int visits = 0;
10
11void hoHoHo() {
12  for (int i = 0; i < 3; i++) {
13    digitalWrite(LED_PIN, HIGH);
14    tone(BUZZER_PIN, 392, 250);   // G4
15    delay(300);
16    digitalWrite(LED_PIN, LOW);
17    tone(BUZZER_PIN, 330, 250);   // E4
18    delay(400);
19  }
20}
21
22void setup() {
23  Serial.begin(9600);
24  pinMode(PIR_PIN, INPUT);
25  pinMode(LED_PIN, OUTPUT);
26  Serial.println(F("PIR isiniyor (60 sn) / PIR warming up (60 s)"));
27  delay(60000);                   // PIR ilk dakikada yanlış tetikler / PIR false-triggers in the first minute
28}
29
30void loop() {
31  if (digitalRead(PIR_PIN) == HIGH && millis() - lastAlarm > COOLDOWN_MS) {
32    lastAlarm = millis();
33    visits++;
34    Serial.print(F("Noel Baba gorundu! Ziyaret / Santa spotted! Visit: "));
35    Serial.println(visits);
36    hoHoHo();
37  }
38}
5. Outdoor lights that turn on at sunset (ESP32)
An ordinary timer that switches the balcony or garden lights on at the same time every evening ignores how sunset drifts through the season: in Berlin the sun sets at 16:38 on 1 November, 15:57 on 1 December and 16:47 on 31 January. An ESP32, on the other hand, gets the time over Wi-Fi via NTP, calculates that day's sunset from your latitude and longitude, switches the lights on with a relay just as it gets dark and turns them off by itself at midnight. On 21 December the sun sets at 17:38 in Istanbul and 15:53 in Berlin; the code works out that difference on its own. A small web page you open on your phone lets you switch the lights manually too. The code, a sunset table by city and outdoor safety tips are in ESP32 Christmas lights timer.
6. NeoPixel Christmas star
A 24-LED WS2812B ring is practically a ready-made star for the top of the tree. On a Raspberry Pi Pico it runs in a few lines with MicroPython's built-in neopixel module, and powered from a power bank it becomes a cordless decoration. We cover the Pico version, five effects and switching modes with a touch button in Pico Christmas decoration. If you have an Uno, the code below creates random twinkles over a warm white base. Brightness is capped at 60, so the 24 LEDs draw at most about 350 mA; that's fine on USB for short tests, but for permanent use power the ring from a separate 5 V supply.
1// Ağaç tepesi yıldızı: 24'lü WS2812B halka, sıcak beyaz zemin üstünde rastgele parıltı
2// Tree-top star: 24-LED WS2812B ring, random twinkles over a warm white base
3#include <Adafruit_NeoPixel.h>
4
5const int RING_PIN = 6;          // DIN, araya 330 ohm direnç / DIN through a 330 ohm resistor
6const int LED_COUNT = 24;
7Adafruit_NeoPixel ring(LED_COUNT, RING_PIN, NEO_GRB + NEO_KHZ800);
8
9uint8_t level[LED_COUNT];        // her LED'in parıltı seviyesi / twinkle level per LED
10
11void setup() {
12  ring.begin();
13  ring.setBrightness(60);        // 0-255; 60 ile 24 LED en fazla ~350 mA / at 60, 24 LEDs draw at most ~350 mA
14  randomSeed(analogRead(A0));
15}
16
17void loop() {
18  if (random(10) < 3) {
19    level[random(LED_COUNT)] = 255;            // yeni parıltı / new twinkle
20  }
21  for (int i = 0; i < LED_COUNT; i++) {
22    uint16_t w = level[i];
23    // sıcak beyaz zemin + beyaza çeken parıltı / warm white base + twinkle toward white
24    uint8_t r = 90 + w * 165 / 255;    // 90-255
25    uint8_t g = 40 + w * 215 / 255;    // 40-255
26    uint8_t b = 10 + w * 245 / 255;    // 10-255
27    ring.setPixelColor(i, ring.Color(r, g, b));
28    if (level[i] > 8) level[i] -= 8; else level[i] = 0;    // yavaşça sön / fade out slowly
29  }
30  ring.show();
31  delay(30);
32}
7. Colour-changing bauble
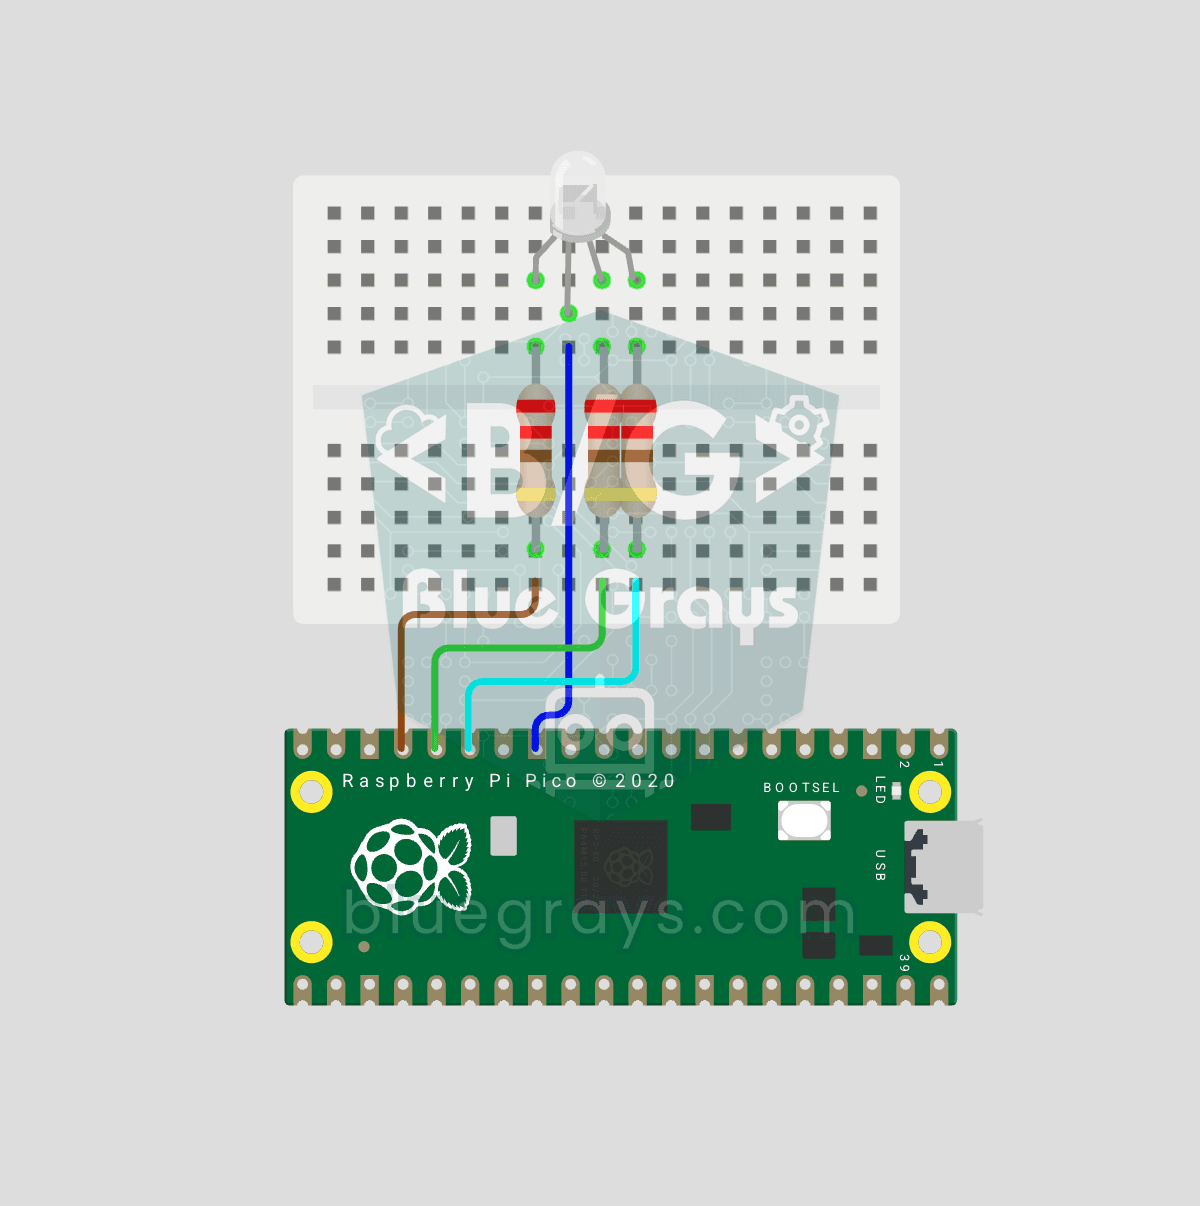
A single RGB LED placed inside a frosted plastic bauble adds a lively spot to the tree as it fades smoothly from red to green and on to gold. The three colour channels connect to three PWM pins, each through a 220 Ω resistor, and the analogWrite() values change step by step. On a common-cathode LED the shared leg goes to GND, on a common-anode LED to 5 V, and the brightness logic is inverted; we explain the difference in How to use an RGB LED. The smooth RGB colour-fade project in BlueGrays gives you the ready circuit and code for this effect; for an ESP32 version, see the ESP32 RGB LED control project.
8. Running-light garland
Line up eight coloured LEDs and build a classic running light, where the light races from one end to the other, or a Knight Rider effect that sweeps back and forth. Add a potentiometer and turn its analogRead() value into a 30–300 ms delay, and you can set the speed by hand. Alternating red, green and yellow LEDs completes the Christmas colours. Don't forget a 220 Ω resistor for each LED; you can find the right value with the LED resistor calculator. How the effects work is explained in Knight Rider and running LEDs, and the ready circuits are in the free running-LED and Knight Rider projects.
9. New Year countdown timer
A 32×8 LED matrix made of four MAX7219 modules shows the days, hours and minutes left until New Year as scrolling text. Because the ESP32 gets the time from the internet via NTP, there's nothing to set; at midnight a Happy New Year message scrolls across and the buzzer plays a melody. Without internet, an Arduino Uno with an RTC clock module does the same job. The wiring diagram, libraries and code for both versions are in New Year countdown timer. For matrix display basics, the 4x 32x8 matrix animation and text project in BlueGrays is a good start.
10. Window decoration that lights up by itself in the dark
A voltage divider built from an LDR and a 10 kΩ resistor turns the ambient light into a number between 0 and 1023 with analogRead(). When the value drops below the threshold you set, the window decoration's LEDs come on, and they go off when it gets light in the morning. So that passing clouds at dusk don't make the decoration blink, use two thresholds: for example switch on below 300 and off above 400. This small gap is called hysteresis and it ends the flicker completely. Sensor details are in LDR light sensor; the circuit and code are ready in the free LDR night-light project.
11. Light modes from a remote
With a spare TV remote and a 3-pin IR receiver module you can control the decorations from the sofa: button 1 for red, button 2 for green, button 3 for a blinking mode and the power button to switch everything off. First you read the remote's button codes in the Serial Monitor and note them down, then you map each code to a mode. Keep in mind that the IRremote library's commands changed with version 3.0; old examples written for 2.x may not compile with the new version. Details are in IR receiver and remote, and the ready circuit is in the BlueGrays IR receiver and remote LED on/off project.
12. Gift box alarm
A fun way to protect the presents under the tree from curious hands: stick a small magnet to the box lid and a reed switch to the edge. With the lid closed, the magnet closes the reed switch contacts; when the lid lifts, the contact opens, the Arduino sees HIGH on a pin read with INPUT_PULLUP and the buzzer sounds. A reed switch senses the magnet from about 1–2 cm away, so even lifting the lid slightly triggers the alarm. Glass-bodied reed switches break easily, so don't bend the leads too close to the body. The working principle is in reed switch, and a door-sensor version is in the BlueGrays reed switch door sensor project.
Power and safety: how to supply your decorations
| Load | Approx. current | Recommended supply |
|---|---|---|
| 3-LED candle or 8-LED garland | 20–60 mA | USB or 4 × AA batteries |
| Buzzer + 2 LEDs | 30–50 mA | USB or a 9 V battery |
| 24-LED ring, brightness 60 | Up to ~350 mA | USB 5 V 1 A or a power bank |
| 60-LED strip | Typical 1.2 A, worst case 3.6 A | 5 V 3 A adapter |
| 150-LED strip | Typical 3 A, worst case 9 A | 5 V 6 A adapter + power injection |
| Mains light string | Depends on the string | Relay module + sealed box, mains side insulated |
Common mistakes and fixes
- LED strip flickers in random colours: The board's GND isn't joined to the adapter's GND. Always connect the two grounds.
- Arduino resets when the strip goes white: The strip is powered from the board's 5V pin. Power the strip straight from the adapter and use the board only for the data signal.
- Buzzer plays one tone instead of a melody: It's an active buzzer. Melodies need a passive buzzer.
- PIR keeps triggering: The warm-up time after power-on wasn't respected, or the sensor faces a radiator or warm air. Wait a minute and move the sensor away from heat sources.
- LED candle blinks regularly: The delay is fixed. Make the value inside delay() random too.
- LDR decoration blinks at dusk: A single threshold is used. Add hysteresis with separate on and off thresholds.
The basic circuits for most projects on this list are ready in the BlueGrays app: the LDR night light and buzzer projects are free, and the WS2812B, motion sensor, NTP and Pico RGB projects also come with a circuit diagram, wiring list and code for every step. Build a project there, add the Christmas touch from this post, and you can fill your home with decorations you made yourself before the holidays.
Frequently asked questions
What can I make with an Arduino for Christmas?
The most popular Arduino Christmas projects are a WS2812B LED Christmas tree, carols on a buzzer, a flickering LED candle, a PIR-based Santa detector and a New Year countdown timer. Most can be built in one evening with parts from a starter kit. For outdoor lights and the countdown, a Wi-Fi-enabled ESP32 is the better choice.
What is the easiest Christmas project for a beginner?
The flickering LED candle is the easiest: three LEDs, three resistors and fifteen lines of code, done in twenty minutes. Right after that you can try playing Jingle Bells on a buzzer. Both use only parts from a starter kit.
How many LEDs can an Arduino drive?
With ordinary LEDs, each Uno pin drives one LED at the recommended maximum of 20 mA, and the total for all pins should stay under 200 mA. With addressable LEDs like the WS2812B, one pin controls hundreds of LEDs; the limit is set by the board's RAM (3 bytes per LED) and the adapter's current. For 150 LEDs a 5 V 6 A adapter is recommended.
Can an LED strip be powered from the Arduino's 5V pin?
Only for testing a few LEDs at low brightness. The 5V pin of a USB-powered Uno can supply about 400–500 mA; each WS2812B draws 60 mA at full white, so 8–10 LEDs reach that limit. Power longer strips directly from a 5 V adapter and join the grounds.
How do you turn Christmas lights on automatically with Arduino?
The simplest way is to detect darkness with an LDR and switch the lights with a relay or transistor. For more accurate results, an ESP32 gets the time from the internet via NTP, calculates the sunset for your location and switches the lights on at exactly that time and off at the time you choose.
Should I use an ESP32 or an Arduino Uno for a Christmas project?
If you don't need Wi-Fi, a clock or phone control, an Uno or Nano is enough and simpler. Choose an ESP32 for projects that need the internet, such as a sunset timer, a countdown clock or picking colours from the web. For small battery-powered decorations, the Raspberry Pi Pico is also a good option.
Projects to build after reading this
See all projects
Night Light with Ldr
A little night light that turns on by itself when it gets dark and goes off when morning comes. A light sensor measures how bright the room is, and the Arduino switches the LED on when it is dark enou
Using a Buzzer
Ever wondered how a doorbell or an alarm makes its sound? The Arduino makes a small buzzer beep at short intervals: beep, pause, beep, pause. You see how sound is made with electricity and take the fi
Using a WS2812B LED Strip
Meet a smart LED strip where you can colour every single light on its own. The Arduino first lights the first five LEDs red, a second later turns the other five blue, then switches them all off and st

WS2812B Animation 1
On a strip of 56 LEDs, all the colours of the rainbow line up side by side and flow without ever stopping, as if a river of light were gliding along the strip. Each LED glows in a slightly different c
Motion Detector with Motion Sensor
A simple guard that tells you when someone walks into the room. The motion sensor picks up the warmth given off by the human body, and the Arduino keeps the LED on as long as there is movement and tur

ESP32 WS2812B NeoPixel Strip Control
WS2812B (NeoPixel) addressable LEDs are smart RGB LEDs that can be controlled in a daisy-chain configuration via a single data pin. In this project, we will control an 8-LED WS2812B strip using the Adafruit_NeoPixel library to create a smooth rainbow animation. While the ESP32’s 3.3V logic level works seamlessly with most WS2812B components, we’ll demonstrate a solution using a 470Ω series resistor and a 1000µF capacitor in case of instability. The animation is achieved by shifting the hue value

Real-Time Clock from the Internet via ESP32 NTP
The ESP32 connects to Wi-Fi and retrieves real time with millisecond precision from NTP (Network Time Protocol) servers. Thanks to the configTzTime() function, the Turkey time zone (TRT, UTC+3) is automatically applied, and DST transitions in countries that observe daylight saving time are automatically managed using a POSIX TZ string. The time is displayed both on the Serial Monitor and on an optional I2C LCD. configTzTime() starts the SNTP service; periodic resynchronization takes place wh
Raspberry Pi Pico RGB LED Color Cycle (3-Channel PWM)
One LED, millions of colors! An RGB LED actually contains 3 LEDs: red, green and blue. Driving each with its own Pico PWM channel mixes the colors: red + green = yellow, green + blue = cyan, all three = white. Here the LED cycles through 8 colors. Learn multiple PWM channels, defining functions (def set_color(...)), RGB color mixing (how screens and smart bulbs work), 8-bit → 16-bit conversion (x257 maps 0–255 to 0–65535), common cathode vs common anode LEDs