
ESP32 Telegram Bot Tutorial: Alerts, LED and Relay Control
Build an ESP32 Telegram bot: BotFather token, chat ID, UniversalTelegramBot setup, motion and gas alerts, relay control by command and replies only to you.
An ESP32 Telegram bot lets the ESP32 board in your home send messages to your phone and carry out the commands you send back. When there's movement at the door or gas in the kitchen, a notification lands in your pocket instantly; type "/ac" and a relay switches a lamp on, type "/kapat" and it switches off. You don't need to write your own phone app, open a port on your router or pay for a cloud service: Telegram's free Bot API and the ESP32's built-in Wi-Fi are all it takes.
In this guide you'll build a working system from scratch: you'll create a bot with BotFather and get its token, find your own chat ID, install the UniversalTelegramBot and ArduinoJson libraries and send your first message from the ESP32. Then you'll add motion and gas alerts with a PIR sensor and an MQ-2 gas sensor, and LED and relay control through Telegram commands. We'll also cover how to make the bot answer only your ID, the certificate setting, the differences on the ESP8266 and Raspberry Pi Pico W, and the most common errors one by one.
What is an ESP32 Telegram bot and how does it work?
On Telegram, a bot is a special account run by a program instead of a person; in our project the ESP32 runs that program. The ESP32 and your phone never connect to each other directly; both talk to the Telegram server. When you type "/ac" to the bot on your phone, the message waits on the server. Every second the ESP32 sends an encrypted HTTPS request (getUpdates) to api.telegram.org asking "any new messages for me?", fetches the message and acts on it. To send an alert it makes a sendMessage request in the other direction. Because the ESP32 always opens the connection, you don't need port forwarding or a static IP on your router; the board works on any 2.4 GHz Wi-Fi network with internet access.
| Term | What it does | Example |
|---|---|---|
| BotFather | Telegram's bot for creating and managing bots | /newbot, /setcommands, /revoke |
| Bot token | The bot's password; your code connects to Telegram with it | 1234567890:AAE... (number, colon, long string) |
| Chat ID | The number of the person or group a message goes to | Person: 123456789, group: -1001234567890 |
| getUpdates | Fetches new messages sent to the bot from the server | bot.getUpdates(...) |
| sendMessage | Sends a message to the given chat ID | bot.sendMessage(CHAT_ID, "Hello") |
| Command | A short message starting with / that the bot understands | /ac, /kapat, /durum |
Why Telegram? Compared with other ways to get notifications
| Method | Pros | Cons | Best for |
|---|---|---|---|
| Telegram bot | Free, instant alerts, two-way commands, no open ports needed | No charts or ready-made dashboard | Alarms and simple remote control |
| Blynk IoT | Ready-made buttons, gauges and chart dashboard | Message and device limits on the free plan | Sensor monitoring dashboards |
| Email (SMTP) | Works on every phone, can carry long reports | Delayed, hard to receive commands | Daily reports |
| SMS (SIM800L) | No Wi-Fi or internet needed | SIM card and SMS costs, extra module | Cabins or sheds without internet |
| ESP32 web server | Fully local and free | Usually reachable only from the same network, no alerts | In-home control panel |
In short, Telegram is the easiest and cheapest option for projects along the lines of "tell me when something happens, and do this when I send a command". If you want to watch sensor data on charts, the Blynk ESP32 tutorial may suit you better; if you need alerts from a place without Wi-Fi, have a look at the SIM800L GSM module guide.
Step 1: Create a bot with BotFather and get the token
- Open Telegram on your phone or computer, type BotFather in the search box and pick the official account with the blue check mark next to its name. Watch out for fake accounts with similar names.
- Tap Start and send the /newbot command.
- BotFather first asks for the bot's display name; type any name you like, such as "Home Alarm".
- Next it asks for a username. The username must be unique, use only Latin letters, digits and underscores, and end in bot, for example my_home_alarm_bot. If it's taken, add a number to the end and try again.
- BotFather replies with "Done! Congratulations on your new bot." plus the link to your bot and its token. The token looks like 1234567890:AAE...: a number, a colon and a long string of characters. Copy all of it and keep it somewhere safe.
- Tap the link BotFather sent to open your bot and press Start. This step is essential: on Telegram, bots can't send the first message to a user, so you always have to start the conversation.
Step 2: How to find your Telegram chat ID
The bot token answers "which bot?", while the chat ID answers "who gets the message?". Every Telegram user, group and channel has a permanent numeric ID, which is not the same as your username starting with @. There are three easy ways to find your own chat ID:
- With an ID bot: Find an ID bot on Telegram such as @userinfobot and press Start; it sends you your number on the Id line. These bots aren't yours, they only show your ID.
- With your browser: First send any message to your own bot. Then open api.telegram.org/botTOKEN/getUpdates in your computer's browser (paste your own token in place of TOKEN and keep the word "bot" in front of it). In the text that appears, the number in "chat":{"id":123456789 is your chat ID. If the page shows an empty result list, message the bot again and reload the page.
- With the ESP32: Once you upload the command code below, the ID of anyone who isn't authorised is printed to the Serial Monitor on an "unauthorized ID" line. When you want to add a family member, ask them to message the bot and read their number there.
Step 3: Install UniversalTelegramBot and ArduinoJson
- If the ESP32 board package isn't installed in the Arduino IDE yet, install it first; the steps are in What Is the ESP32?.
- Open Tools > Manage Libraries, type UniversalTelegramBot in the search box and install the library by Brian Lough. The code in this guide was compiled with UniversalTelegramBot 1.3.0, ArduinoJson 7 and version 2.0.11 of the ESP32 board package.
- If the installer asks about dependencies, choose Install all; if it doesn't, search for ArduinoJson in the same window and install Benoit Blanchon's library separately.
- Under File > Examples > UniversalTelegramBot > ESP32 you'll find ready-made examples such as FlashLED; the code in this guide is a simplified version of them with security added.
UniversalTelegramBot is written in the ArduinoJson version 6 style, but it compiles fine with ArduinoJson 7 too. If you've turned on compiler warnings in the Arduino IDE you'll see lines like "'DynamicJsonDocument' is deprecated: use JsonDocument instead"; these are warnings, not errors, and the program runs normally. If you run into trouble installing libraries, check the How to Add an Arduino Library guide.
Parts and wiring
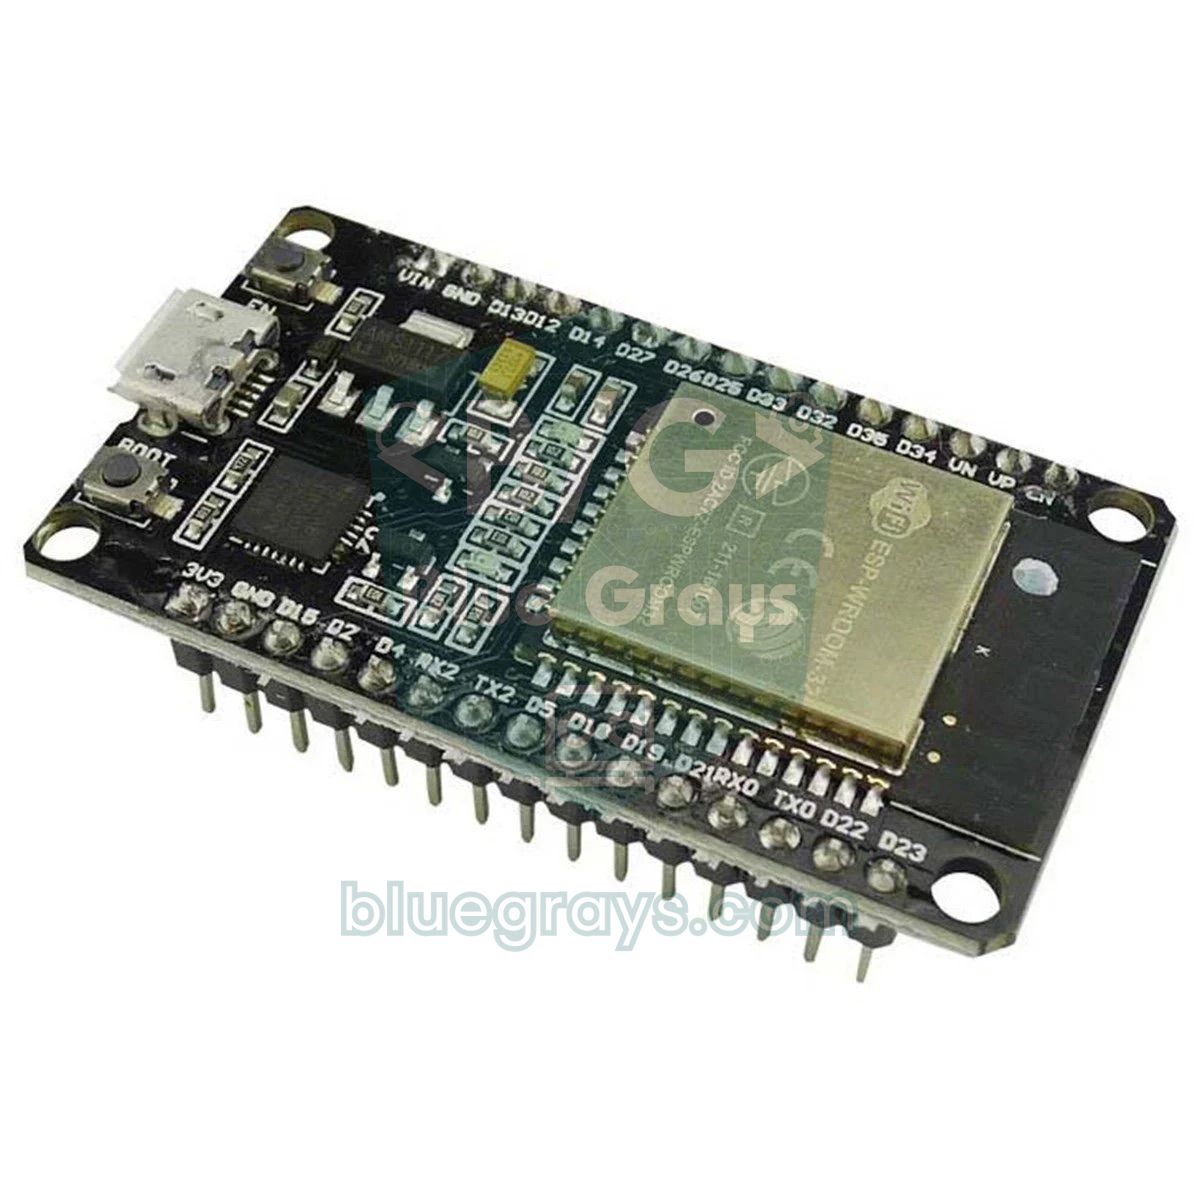
For the full project you'll need an ESP32 development board, an HC-SR501 PIR motion sensor, an MQ-2 gas sensor module, a 5 V relay module, one 10 kΩ and one 20 kΩ resistor, a breadboard and jumper wires. For the LED we'll use the ESP32's built-in blue LED on GPIO 2. To try the first two steps you only need the ESP32 and a USB cable; you can add the sensors later.


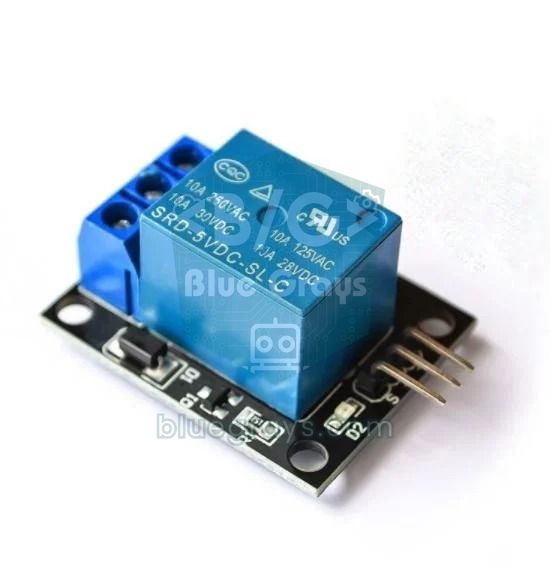
| Connection | ESP32 | ESP8266 (NodeMCU) | Raspberry Pi Pico W |
|---|---|---|---|
| PIR VCC | VIN (5V) | VIN (5V) | VBUS (5V) |
| PIR OUT | GPIO 27 | D5 (GPIO 14) | GP16 |
| MQ-2 VCC | VIN (5V) | VIN (5V) | VBUS (5V) |
| MQ-2 AO (through a 10 kΩ / 20 kΩ divider) | GPIO 34 | A0 | GP26 (ADC0) |
| Relay VCC | VIN (5V) | VIN (5V) | VBUS (5V) |
| Relay IN | GPIO 26 | D1 (GPIO 5) | GP15 |
| LED | GPIO 2 (built-in) | D4 (built-in, lights on LOW) | "LED" (built-in) |
| All GNDs | GND | GND | GND |
Pay attention to the power supply as well: the MQ-2 heater alone draws about 150 mA and the relay coil around 70 mA, while the ESP32 can briefly peak at up to 250 mA when it transmits over Wi-Fi. A computer's USB port can't always supply that total, and the board may reboot right as it sends a message. Use a 5 V adapter rated for at least 1 A and a good cable; if the problem persists, read ESP32 Brownout and Guru Meditation. You can see all the pins of your board in the Pinout tool.
First test: send a message from the ESP32 to Telegram
Before moving on to the sensors, let's confirm the token and chat ID with the simplest possible sketch. In the code below, replace the Wi-Fi name, password, BOT_TOKEN and CHAT_ID lines with your own details and upload it to the board. Then open the Serial Monitor at 115200 baud:
1#include <WiFi.h>
2#include <WiFiClientSecure.h>
3#include <UniversalTelegramBot.h>
4#include <ArduinoJson.h>
5
6const char* WIFI_SSID = "AgAdi";          // Wi-Fi adın (yalnız 2,4 GHz) / your Wi-Fi name (2.4 GHz only)
7const char* WIFI_PASS = "Sifre123";       // Wi-Fi şifren / your Wi-Fi password
8#define BOT_TOKEN "1234567890:AAExxxxxxxxxxxxxxxxxxxxxxxxxxxxxxxx"   // BotFather'ın verdiği token / token from BotFather
9#define CHAT_ID   "123456789"             // kendi Telegram ID'n / your own Telegram ID
10
11WiFiClientSecure client;                  // şifreli (HTTPS) bağlantı / encrypted (HTTPS) connection
12UniversalTelegramBot bot(BOT_TOKEN, client);
13
14void setup() {
15  Serial.begin(115200);
16  WiFi.mode(WIFI_STA);
17  WiFi.begin(WIFI_SSID, WIFI_PASS);
18  Serial.print("Wi-Fi'ye baglaniyor / connecting to Wi-Fi");
19  while (WiFi.status() != WL_CONNECTED) {
20    delay(500);
21    Serial.print(".");
22  }
23  Serial.println();
24  Serial.println(WiFi.localIP());
25
26  client.setCACert(TELEGRAM_CERTIFICATE_ROOT);   // api.telegram.org kök sertifikası / root certificate of api.telegram.org
27
28  if (bot.sendMessage(CHAT_ID, "Merhaba! ESP32 çevrimiçi / Hello! ESP32 is online")) {
29    Serial.println("Mesaj gonderildi / message sent");
30  } else {
31    Serial.println("Mesaj gonderilemedi / message failed");
32  }
33}
34
35void loop() {
36}
Within a few seconds your bot should send you "Hello! ESP32 is online" on Telegram, and the Serial Monitor should show "Mesaj gonderildi / message sent". sendMessage() returns true when the message is delivered; if you see "message failed", the problem is the Wi-Fi connection, the token, the chat ID or the certificate setting. Before blaming the code, open api.telegram.org/botTOKEN/getMe in your browser: with a valid token you'll see "ok":true and your bot's name, with a wrong one you'll see "Unauthorized".
Certificate setting: setCACert or setInsecure?
Telegram only accepts HTTPS, which is why the code uses WiFiClientSecure instead of a plain WiFiClient. Over an encrypted connection the ESP32 must make sure the server it's talking to really is api.telegram.org; it does so by verifying the server certificate against the root certificate at the top of the chain. UniversalTelegramBot ships this root certificate ready to use as TELEGRAM_CERTIFICATE_ROOT. Telegram's certificate chain goes up to Go Daddy Root Certificate Authority - G2, which is valid until the end of 2037; if Telegram ever switches certificate providers, the library will need an update too.
| Setting | What it does | Security | When to use it |
|---|---|---|---|
| client.setCACert(TELEGRAM_CERTIFICATE_ROOT) | Encrypts the connection and verifies the server's identity | High | The recommended setting, always |
| client.setInsecure() | Encrypts the connection but doesn't check the server's identity | Medium: won't notice a fake server in the middle | A quick test to rule out certificate problems |
| Neither | On current ESP32 cores the connection is never made | Doesn't work | Never: no message is sent and no error appears in the Serial Monitor |
| ESP8266: setTrustAnchors(&cert) | The ESP8266 equivalent; the certificate is passed as an X509List | High | NodeMCU and Wemos D1 Mini; needs the correct time |
Control an LED and a relay with Telegram commands (/ac, /kapat)
Now let's make the bot two-way. The code below asks Telegram for new messages once a second; if the text is /ac (Turkish for "on") it switches the relay and LED on, /kapat ("off") switches them off, /durum ("status") reports the current state and /start sends the list of commands. You can rename the commands to /on and /off, but keep in mind that Telegram commands may contain only lowercase Latin letters, digits and underscores and be at most 32 characters long. A command with accented letters such as "/aç" isn't recognised as a tappable command.
1#include <WiFi.h>
2#include <WiFiClientSecure.h>
3#include <UniversalTelegramBot.h>
4#include <ArduinoJson.h>
5
6const char* WIFI_SSID = "AgAdi";
7const char* WIFI_PASS = "Sifre123";
8#define BOT_TOKEN "1234567890:AAExxxxxxxxxxxxxxxxxxxxxxxxxxxxxxxx"
9#define CHAT_ID   "123456789"                 // yalnız bu ID'ye yanıt verilir / only this ID gets answers
10
11const int LED_PIN  = 2;                       // çoğu DevKit'te dahili LED / onboard LED on most DevKits
12const int ROLE_PIN = 26;                      // röle modülünün IN pini / relay module IN pin
13const bool ROLE_AKTIF_LOW = true;             // çoğu modül LOW'da çeker / most modules switch on with LOW
14
15const unsigned long KONTROL_ARALIGI = 1000;   // Telegram'a saniyede bir sor / ask Telegram once per second
16unsigned long sonKontrol = 0;
17bool roleAcik = false;
18
19WiFiClientSecure client;
20UniversalTelegramBot bot(BOT_TOKEN, client);
21
22void roleYaz(bool acik) {
23  roleAcik = acik;
24  if (ROLE_AKTIF_LOW) digitalWrite(ROLE_PIN, acik ? LOW : HIGH);
25  else                digitalWrite(ROLE_PIN, acik ? HIGH : LOW);
26  digitalWrite(LED_PIN, acik ? HIGH : LOW);   // LED röle durumunu gösterir / LED mirrors the relay
27}
28
29void mesajlariIsle(int adet) {
30  for (int i = 0; i < adet; i++) {
31    String chatId = bot.messages[i].chat_id;
32    String metin  = bot.messages[i].text;
33
34    // Güvenlik: tanımadığın kişiye cevap verme / security: never answer strangers
35    if (chatId != CHAT_ID) {
36      Serial.println("Yetkisiz ID / unauthorized ID: " + chatId);
37      continue;
38    }
39
40    int at = metin.indexOf('@');              // gruptaki "/ac@bot_adi" -> "/ac" / "/ac@bot_name" in groups -> "/ac"
41    if (at > 0) metin = metin.substring(0, at);
42
43    if (metin == "/start") {
44      String yardim = "Merhaba " + bot.messages[i].from_name + "!\n";
45      yardim += "/ac - röleyi aç / relay ON\n";
46      yardim += "/kapat - röleyi kapat / relay OFF\n";
47      yardim += "/durum - son durum / status";
48      bot.sendMessage(chatId, yardim);
49    } else if (metin == "/ac") {
50      roleYaz(true);
51      bot.sendMessage(chatId, "Röle AÇIK / relay ON");
52    } else if (metin == "/kapat") {
53      roleYaz(false);
54      bot.sendMessage(chatId, "Röle KAPALI / relay OFF");
55    } else if (metin == "/durum") {
56      bot.sendMessage(chatId, roleAcik ? "Röle AÇIK / relay ON" : "Röle KAPALI / relay OFF");
57    } else {
58      bot.sendMessage(chatId, "Bilinmeyen komut, /start yaz / unknown command, send /start");
59    }
60  }
61}
62
63void setup() {
64  Serial.begin(115200);
65  pinMode(LED_PIN, OUTPUT);
66  pinMode(ROLE_PIN, OUTPUT);
67  roleYaz(false);                             // açılışta röle kapalı / relay off at boot
68
69  WiFi.mode(WIFI_STA);
70  WiFi.begin(WIFI_SSID, WIFI_PASS);
71  while (WiFi.status() != WL_CONNECTED) delay(500);
72  Serial.println(WiFi.localIP());
73
74  client.setCACert(TELEGRAM_CERTIFICATE_ROOT);
75  bot.sendMessage(CHAT_ID, "Bot hazır, /start yaz / bot ready, send /start");
76}
77
78void loop() {
79  if (millis() - sonKontrol > KONTROL_ARALIGI) {
80    int adet = bot.getUpdates(bot.last_message_received + 1);   // yeni mesaj var mı? / any new messages?
81    while (adet) {
82      mesajlariIsle(adet);
83      adet = bot.getUpdates(bot.last_message_received + 1);
84    }
85    sonKontrol = millis();
86  }
87}| Line | What it does |
|---|---|
| bot.getUpdates(bot.last_message_received + 1) | Requests the messages after the last one handled and returns how many arrived; the +1 stops the same message coming back |
| bot.messages[i].chat_id | The ID of the chat the message came from; the reply goes there and the security check uses it |
| bot.messages[i].text | The incoming text; we compare the command against it |
| metin.indexOf('@') | Cuts off the @bot_name part Telegram adds to commands in groups |
| ROLE_AKTIF_LOW | Most relay modules switch on with a LOW signal; set it to false if yours switches on with HIGH |
| KONTROL_ARALIGI | How often to poll; 1000 ms reacts quickly, 3000–5000 ms puts less load on the network |
Security: make the bot answer only your ID
Bot usernames on Telegram are public and searchable. If someone guesses my_home_alarm_bot or spots it in a screenshot and sends it /ac, an ESP32 without a check will obey that command too. That's why the most important line in the code is the chatId != CHAT_ID check. Your chat ID doesn't have to be secret; the protection comes from Telegram itself verifying who sent each message, and nobody can fake someone else's ID. Not answering strangers at all is a deliberate choice as well: as long as the bot stays silent, nobody can even tell it's running.
- Use an allowlist: keep the authorised IDs in an array, ignore every other message and add family members one by one.
- Check the person in groups: in a group the chat ID is the group's ID; if only certain people should send commands, compare from_id instead of chat_id.
- Keep the token in a separate file: put the token and Wi-Fi password in a file such as secrets.h and leave that file out when you share your code.
- Skip old commands: a /ac sent during a power cut shouldn't fire at some unexpected moment when the board comes back; the start-up cleanup in the full code takes care of that.
- Safe start-up state: start with the relay off every time the board boots; this matters a lot for loads such as heaters or pumps.
- Don't leave critical jobs to the bot alone: for things like a door lock or a boiler, think about what a wrong command could do and add a confirmation message or a time limit.
Motion and gas alarm: a full project that sends Telegram alerts
Now let's put the pieces together. The code below sends you a time-stamped Telegram alert when the PIR sensor detects motion and when the MQ-2 gas reading crosses the threshold. At the same time it listens for the /ac, /kapat, /alarm_ac, /alarm_kapat and /durum commands, shows a tap-to-send button menu at the bottom of the screen when you type /start, and adds the commands to Telegram's Menu button. For the details of each sensor, see the PIR motion sensor and MQ-2 gas sensor guides.
1#include <WiFi.h>
2#include <WiFiClientSecure.h>
3#include <UniversalTelegramBot.h>
4#include <ArduinoJson.h>
5#include <time.h>
6
7const char* WIFI_SSID = "AgAdi";
8const char* WIFI_PASS = "Sifre123";
9#define BOT_TOKEN "1234567890:AAExxxxxxxxxxxxxxxxxxxxxxxxxxxxxxxx"
10#define CHAT_ID   "123456789"                  // bildirimlerin gideceği ID / the ID that receives alerts
11
12// Komut verebilecek kişiler; aile üyesi eklemek için: { CHAT_ID, "222222222" }
13// People allowed to send commands; to add a family member: { CHAT_ID, "222222222" }
14const char* YETKILI[] = { CHAT_ID };
15const int YETKILI_SAYISI = sizeof(YETKILI) / sizeof(YETKILI[0]);
16
17const int LED_PIN  = 2;                        // dahili LED / onboard LED
18const int ROLE_PIN = 26;                       // röle modülü IN / relay module IN
19const int PIR_PIN  = 27;                       // PIR sensörü OUT / PIR sensor OUT
20const int GAZ_PIN  = 34;                       // MQ-2 AO, gerilim bölücü üzerinden / MQ-2 AO through a voltage divider
21const bool ROLE_AKTIF_LOW = true;              // çoğu modül LOW'da çeker / most modules switch on with LOW
22
23const int GAZ_ESIK = 1800;                     // temiz havadaki değere göre ayarla / tune it from your clean-air reading
24const int GAZ_FARK = 200;                      // histerezis payı / hysteresis margin
25const unsigned long HAREKET_BEKLEME = 60000;   // iki hareket bildirimi arası en az 60 sn / at least 60 s between motion alerts
26const unsigned long GAZ_ISINMA = 120000;       // MQ-2 ilk 2 dakika ısınır / MQ-2 warms up for the first 2 minutes
27const unsigned long KONTROL_ARALIGI = 1000;    // Telegram'a saniyede bir sor / poll Telegram once per second
28
29WiFiClientSecure client;
30UniversalTelegramBot bot(BOT_TOKEN, client);
31
32bool alarmKurulu = true;                       // hareket alarmı açık mı / is the motion alarm armed
33bool roleAcik = false;
34bool gazVar = false;
35unsigned long sonKontrol = 0;
36unsigned long sonHareket = 0;
37
38String saat() {                                // "14:05:31" biçiminde saat / time as "14:05:31"
39  struct tm t;
40  if (!getLocalTime(&t, 100)) return "--:--:--";
41  char buf[9];
42  strftime(buf, sizeof(buf), "%H:%M:%S", &t);
43  return String(buf);
44}
45
46bool yetkiliMi(const String& id) {
47  for (int i = 0; i < YETKILI_SAYISI; i++) {
48    if (id == YETKILI[i]) return true;
49  }
50  return false;
51}
52
53void roleYaz(bool acik) {
54  roleAcik = acik;
55  if (ROLE_AKTIF_LOW) digitalWrite(ROLE_PIN, acik ? LOW : HIGH);
56  else                digitalWrite(ROLE_PIN, acik ? HIGH : LOW);
57}
58
59String durumMetni() {
60  String s = "Röle / relay: ";
61  s += roleAcik ? "AÇIK / ON" : "KAPALI / OFF";
62  s += "\nAlarm: ";
63  s += alarmKurulu ? "KURULU / ARMED" : "KAPALI / DISARMED";
64  s += "\nGaz / gas: " + String(analogRead(GAZ_PIN));
65  s += "\nWi-Fi: " + String(WiFi.RSSI()) + " dBm";
66  return s;
67}
68
69void mesajlariIsle(int adet) {
70  for (int i = 0; i < adet; i++) {
71    String chatId = bot.messages[i].chat_id;
72    String metin  = bot.messages[i].text;
73
74    if (!yetkiliMi(chatId)) {                  // yabancıya sessiz kal / stay silent to strangers
75      Serial.println("Yetkisiz ID / unauthorized ID: " + chatId);
76      continue;
77    }
78    int at = metin.indexOf('@');               // "/ac@bot_adi" -> "/ac"
79    if (at > 0) metin = metin.substring(0, at);
80
81    if (metin == "/ac") {
82      roleYaz(true);
83      bot.sendMessage(chatId, "Röle AÇIK / relay ON");
84    } else if (metin == "/kapat") {
85      roleYaz(false);
86      bot.sendMessage(chatId, "Röle KAPALI / relay OFF");
87    } else if (metin == "/alarm_ac") {
88      alarmKurulu = true;
89      bot.sendMessage(chatId, "Hareket alarmı kuruldu / motion alarm armed");
90    } else if (metin == "/alarm_kapat") {
91      alarmKurulu = false;
92      bot.sendMessage(chatId, "Hareket alarmı kapatıldı / motion alarm disarmed");
93    } else if (metin == "/durum") {
94      bot.sendMessage(chatId, durumMetni());
95    } else {                                   // /start ve diğer her şey: tuş menüsü / /start and anything else: button menu
96      String klavye = "[[\"/ac\",\"/kapat\"],[\"/alarm_ac\",\"/alarm_kapat\"],[\"/durum\"]]";
97      bot.sendMessageWithReplyKeyboard(chatId, "Komut seç / choose a command", "", klavye, true);
98    }
99  }
100}
101
102void setup() {
103  Serial.begin(115200);
104  pinMode(LED_PIN, OUTPUT);
105  pinMode(ROLE_PIN, OUTPUT);
106  pinMode(PIR_PIN, INPUT);
107  roleYaz(false);                              // açılışta röle kapalı / relay off at boot
108
109  WiFi.mode(WIFI_STA);
110  WiFi.begin(WIFI_SSID, WIFI_PASS);
111  while (WiFi.status() != WL_CONNECTED) {
112    delay(500);
113    Serial.print(".");
114  }
115  Serial.println(WiFi.localIP());
116
117  client.setCACert(TELEGRAM_CERTIFICATE_ROOT); // api.telegram.org kök sertifikası / root certificate of api.telegram.org
118  bot.maxMessageLength = 4000;                 // büyük mesajlarda takılmayı önler / prevents hanging on big messages
119  configTime(3 * 3600, 0, "pool.ntp.org");     // Türkiye UTC+3; kendi saat dilimini yaz / Turkey is UTC+3, set your own zone
120
121  // Telegram'daki Menü düğmesi; komutlar küçük harf, Türkçe karakter yok
122  // The Menu button in Telegram; commands are lowercase with no special letters
123  bot.setMyCommands("[{\"command\":\"ac\",\"description\":\"Röleyi aç\"},"
124                    "{\"command\":\"kapat\",\"description\":\"Röleyi kapat\"},"
125                    "{\"command\":\"alarm_ac\",\"description\":\"Hareket alarmını kur\"},"
126                    "{\"command\":\"alarm_kapat\",\"description\":\"Hareket alarmını kapat\"},"
127                    "{\"command\":\"durum\",\"description\":\"Durumu göster\"}]");
128
129  // Kart kapalıyken gelen eski komutları atla / skip old commands sent while the board was off
130  while (bot.getUpdates(bot.last_message_received + 1)) { }
131
132  bot.sendMessage(CHAT_ID, "Sistem açıldı / system started " + saat());
133}
134
135void loop() {
136  unsigned long simdi = millis();
137
138  // 1) Hareket alarmı / motion alarm
139  if (alarmKurulu && digitalRead(PIR_PIN) == HIGH && simdi - sonHareket > HAREKET_BEKLEME) {
140    sonHareket = simdi;
141    digitalWrite(LED_PIN, HIGH);
142    bot.sendMessage(CHAT_ID, "Hareket algılandı! / motion detected! " + saat());
143    digitalWrite(LED_PIN, LOW);
144  }
145
146  // 2) Gaz alarmı: ısınmadan sonra, susturulamaz / gas alarm: after warm-up, cannot be muted
147  if (simdi > GAZ_ISINMA) {
148    int gaz = analogRead(GAZ_PIN);             // 0-4095
149    if (!gazVar && gaz > GAZ_ESIK) {
150      gazVar = true;
151      bot.sendMessage(CHAT_ID, "GAZ ALARMI! / GAS ALARM! " + String(gaz) + " " + saat());
152    } else if (gazVar && gaz < GAZ_ESIK - GAZ_FARK) {
153      gazVar = false;
154      bot.sendMessage(CHAT_ID, "Gaz normale döndü / gas back to normal: " + String(gaz));
155    }
156  }
157
158  // 3) Telegram komutları / Telegram commands
159  if (simdi - sonKontrol > KONTROL_ARALIGI && WiFi.status() == WL_CONNECTED) {
160    int adet = bot.getUpdates(bot.last_message_received + 1);
161    while (adet) {
162      mesajlariIsle(adet);
163      adet = bot.getUpdates(bot.last_message_received + 1);
164    }
165    sonKontrol = millis();
166  }
167}| Setting | Value | Explanation |
|---|---|---|
| GAZ_ESIK | 1800 | Raw ADC value from 0 to 4095; set it from your clean-air reading |
| GAZ_FARK | 200 | The reading must drop this far below the threshold before "back to normal" is sent; stops alerts flapping at the limit |
| HAREKET_BEKLEME | 60000 ms | Leaves at least 60 seconds between two motion alerts |
| GAZ_ISINMA | 120000 ms | The MQ-2 reads high while warming up; gas isn't checked for the first 2 minutes |
| KONTROL_ARALIGI | 1000 ms | How often Telegram is polled for new messages |
| bot.maxMessageLength | 4000 | The longest response the library reads; the default is 1500 |
The two alarms in the code work differently on purpose. The motion alarm is protected by a cooldown: a PIR sensor fires again and again while someone walks around the room, and without the cooldown your phone would fill up with dozens of messages a minute. Because the cooldown timer starts from zero, the first alert can arrive no earlier than 60 seconds after the board starts, which also matches the roughly one minute a PIR sensor needs to settle after power-up. The gas alarm uses hysteresis instead: it warns once when the reading crosses the threshold, only says "back to normal" once it drops 200 units below it, and for safety it can't be muted with /alarm_kapat. Telegram doesn't allow very frequent messages either: if you try to send more than one message per second to the same chat, or more than 20 per minute to a group, you'll get a "Too Many Requests: retry after" error.
Telegram bot on the ESP8266 (NodeMCU)
The same library also works on ESP8266 NodeMCU and Wemos D1 Mini boards; the command and alarm logic is exactly the same and only the connection part changes. You use ESP8266WiFi.h instead of WiFi.h, pass the root certificate as an X509List to setTrustAnchors(), and because the ESP8266 checks the certificate's validity dates, the time must be fetched over NTP before connecting. Without the time, every connection fails silently. The NodeMCU's built-in LED is on pin D4 and lights on LOW, and there's only one analog input, A0.
1#include <ESP8266WiFi.h>
2#include <WiFiClientSecure.h>
3#include <UniversalTelegramBot.h>
4#include <ArduinoJson.h>
5#include <time.h>
6
7const char* WIFI_SSID = "AgAdi";
8const char* WIFI_PASS = "Sifre123";
9#define BOT_TOKEN "1234567890:AAExxxxxxxxxxxxxxxxxxxxxxxxxxxxxxxx"
10#define CHAT_ID   "123456789"
11
12X509List cert(TELEGRAM_CERTIFICATE_ROOT);      // ESP8266'da kök sertifika böyle verilir / how ESP8266 takes the root certificate
13WiFiClientSecure client;
14UniversalTelegramBot bot(BOT_TOKEN, client);
15
16void setup() {
17  Serial.begin(115200);
18  configTime(0, 0, "pool.ntp.org");            // sertifika kontrolü için saat şart / the clock is needed to check the certificate
19  client.setTrustAnchors(&cert);
20
21  WiFi.mode(WIFI_STA);
22  WiFi.begin(WIFI_SSID, WIFI_PASS);
23  while (WiFi.status() != WL_CONNECTED) delay(500);
24
25  time_t simdi = time(nullptr);                // NTP saatini bekle / wait for the NTP time
26  while (simdi < 24 * 3600) {
27    delay(100);
28    simdi = time(nullptr);
29  }
30  bot.sendMessage(CHAT_ID, "ESP8266 çevrimiçi / ESP8266 is online");
31}
32
33void loop() {
34}
Telegram bot with the Raspberry Pi Pico W and MicroPython
The Raspberry Pi Pico W doesn't need a separate library; you can send requests straight to the Telegram Bot API with MicroPython's requests module. The code below sends an alert when motion is detected, switches the relay on GP15 and the board's built-in LED with the /ac and /kapat commands, and only answers your chat ID. Flash an up-to-date MicroPython to the Pico W with Thonny and save the code as main.py. MicroPython's requests module encrypts the connection but doesn't verify the server certificate, so its security level is the same as setInsecure() on the ESP32.
1import network, time
2import requests
3from machine import Pin
4
5WIFI_SSID = "AgAdi"                    # Wi-Fi adın / your Wi-Fi name
6WIFI_PASS = "Sifre123"                 # Wi-Fi şifren / your Wi-Fi password
7TOKEN = "1234567890:AAExxxxxxxxxxxxxxxxxxxxxxxxxxxxxxxx"
8CHAT_ID = 123456789                    # sayı olarak yaz / write it as a number
9API = "https://api.telegram.org/bot" + TOKEN
10
11led = Pin("LED", Pin.OUT)              # Pico W dahili LED / Pico W onboard LED
12role = Pin(15, Pin.OUT, value=1)       # aktif LOW röle kapalı başlar / active-LOW relay starts off
13pir = Pin(16, Pin.IN)                  # PIR OUT
14
15wlan = network.WLAN(network.STA_IF)
16wlan.active(True)
17wlan.connect(WIFI_SSID, WIFI_PASS)
18while not wlan.isconnected():
19    time.sleep(0.5)
20print("IP:", wlan.ifconfig()[0])
21
22def gonder(metin):
23    try:
24        r = requests.post(API + "/sendMessage", json={"chat_id": CHAT_ID, "text": metin})
25        r.close()
26    except Exception as e:
27        print("Gonderilemedi / send failed:", e)
28
29def yeni_mesajlar(offset):
30    try:
31        r = requests.get(API + "/getUpdates?timeout=0&limit=5&offset=%d" % offset)
32        sonuc = r.json().get("result", [])
33        r.close()
34        return sonuc
35    except Exception as e:
36        print("Okunamadi / read failed:", e)
37        return []
38
39# Kart kapalıyken gelen eski komutları atla / skip old commands sent while the board was off
40offset = 0
41eski = yeni_mesajlar(offset)
42while eski:
43    offset = eski[-1]["update_id"] + 1
44    eski = yeni_mesajlar(offset)
45
46gonder("Pico W çevrimiçi / Pico W is online")
47son_hareket = time.ticks_ms()          # ilk 60 sn PIR dengelenir / the PIR settles in the first 60 s
48
49while True:
50    if pir.value() and time.ticks_diff(time.ticks_ms(), son_hareket) > 60000:
51        son_hareket = time.ticks_ms()
52        gonder("Hareket algılandı! / motion detected!")
53
54    for u in yeni_mesajlar(offset):
55        offset = u["update_id"] + 1
56        mesaj = u.get("message", {})
57        if mesaj.get("chat", {}).get("id") != CHAT_ID:     # yalnız sana yanıt ver / answer only you
58            continue
59        komut = mesaj.get("text", "").split("@")[0]
60        if komut == "/ac":
61            role.value(0)              # aktif LOW: 0 = açık / active LOW: 0 = on
62            led.on()
63            gonder("Röle AÇIK / relay ON")
64        elif komut == "/kapat":
65            role.value(1)
66            led.off()
67            gonder("Röle KAPALI / relay OFF")
68        elif komut == "/durum":
69            gonder("Röle / relay: " + ("AÇIK / ON" if role.value() == 0 else "KAPALI / OFF"))
70    time.sleep(1)
ESP32 Telegram bot project ideas
- Door and window alarm: use a reed switch or a PIR sensor to message your phone when there's movement while nobody's home.
- Security camera with photos: take a picture with an ESP32-CAM when motion is detected and send it to Telegram; the steps are in the ESP32-CAM Telegram guide.
- Room and greenhouse monitor: get a warning when the temperature measured by a DHT11 crosses a limit, and ask for the current reading with /durum.
- Plant watering reminder: get an alert when a soil moisture sensor reads dry, and run the pump for a few seconds with a command such as /sula ("water").
- Fire warning: combine a flame sensor with the MQ-2 to watch for both hazards at once.
- Battery-powered mailbox sensor: keep the ESP32 in deep sleep, wake it when the lid opens, send a single message and go back to sleep.
- Remote socket: switch a desk lamp or a fan from anywhere in the world with /ac and /kapat through a relay.
Common ESP32 Telegram bot errors and fixes
| Symptom or message | Cause | Fix |
|---|---|---|
| sendMessage returns false, no error in the Serial Monitor | The setCACert or setInsecure line is missing, the token contains a space or Wi-Fi isn't connected | Add the certificate line, copy the token again, check the Wi-Fi connection first |
| "Forbidden: bot can't initiate conversation with a user" in a browser test | You never pressed Start in the bot or you blocked it | Open the bot in Telegram and press Start; unblock it if you blocked it |
| "Bad Request: chat not found" | Wrong chat ID, missing minus sign in a group ID, or the bot was removed from the group | Read the ID again with getUpdates and write group IDs with the minus sign |
| "Unauthorized" | The token is wrong or was replaced with /revoke | Copy the current token from BotFather and upload the code again |
| Sends messages but ignores commands | A long delay() in loop(), a wrong chat ID or @bot_name added to the command in a group | Use millis() for waiting, cut off the @ part, check the "unauthorized ID" line in the Serial Monitor |
| The bot went completely silent after a photo or sticker | The library reads only the first 1500 characters of a response; a long response can't be parsed and the same message keeps coming back | Add the line bot.maxMessageLength = 4000; in setup() |
| The board runs old commands when it starts | Telegram keeps unread messages for up to 24 hours | Read and discard pending messages at start-up |
| "Conflict: terminated by other getUpdates request" | The same token is running on two devices at once, or in a script on your computer | Create a separate bot in BotFather for each device |
| "Too Many Requests: retry after 30" | Messages are being sent too close together | Add a cooldown; send at most one message per second to the same chat |
| "ArduinoJson.h: No such file or directory" when compiling | The ArduinoJson library isn't installed | Install ArduinoJson from the Library Manager |
| The board reboots while sending a message | The power supply can't handle the current spike during Wi-Fi transmission (brownout) | A 1 A adapter, a short good-quality cable and a 100–470 µF capacitor between 3V3 and GND |
With a token, a chat ID and a few lines of code, your ESP32 has become a small assistant that reports on your home and takes your commands. You can extend the same setup with temperature, water level or door sensors and route the alerts to a family group. In the BlueGrays app you'll find the ESP32 motion alarm system that sends Telegram alerts with a PIR, buzzer and LED, the MQ-2 gas and smoke detector alarm and the ESP32 Wi-Fi projects step by step, with circuit diagrams and code.
Frequently asked questions
Is an ESP32 Telegram bot free?
Yes. Creating a bot on Telegram, using the Bot API and sending messages are completely free, and there's no monthly message quota. There are only rate limits: about one message per second to the same chat and 20 messages per minute to a group. For home projects these limits are more than enough.
How do I find my Telegram chat ID?
The easiest way is to press Start in an ID bot such as @userinfobot on Telegram; it sends you your ID number. Alternatively, message your own bot, open api.telegram.org/botTOKEN/getUpdates in your browser and read the id value in the "chat" section. Group IDs start with a minus sign.
Why is my ESP32 not sending messages to Telegram?
The most common causes are never pressing Start in the bot, a wrong chat ID, a space in the token, or a missing setCACert or setInsecure line in the code. You can test the token and chat ID independently of your code by opening the getMe and sendMessage addresses in a browser. Also make sure the board is connected to a 2.4 GHz Wi-Fi network.
Can someone else control my Telegram bot?
Bot usernames are public, so if you don't add an ID check to your code, yes, anyone who finds the bot can send it commands. Comparing each incoming chat ID with your own and ignoring the rest prevents this, because Telegram verifies who the sender is. Never share the token either; if it leaks, replace it with /revoke in BotFather.
Can I make a Telegram bot with the ESP8266?
Yes. The UniversalTelegramBot library also works on ESP8266 boards such as the NodeMCU and Wemos D1 Mini. The root certificate is passed as an X509List to setTrustAnchors(), and the time must be fetched over NTP before connecting. The ESP8266 has less memory, so the ESP32 copes better with long messages.
Can the ESP32 send photos to Telegram?
Yes. With the library's sendPhotoByBinary() function you can send a frame captured by an ESP32-CAM straight to Telegram. An ESP32 without a camera can send an image stored on an SD card the same way, or the address of an online image with sendPhoto(). Systems that send a photo when motion is detected are among the most popular security projects.
Projects to build after reading this
See all projects
LED Blink with ESP32
Teaches basic GPIO output usage with ESP32. We achieve a blinking effect by turning an LED on and off from a digital pin. ESP32 version of the classic blink project on Arduino UNO; the basic blink commands in the Arduino environment are the same, but the ESP32's pin layout and 3.3 V GPIO levels differ from those of the Arduino UNO.

ESP32 Built-in LED Blink
Blinking the built-in blue LED on the ESP32 DevKit V1. No external components required! The first project you should try when you buy an ESP32. GPIO 2 is connected to the built-in LED.
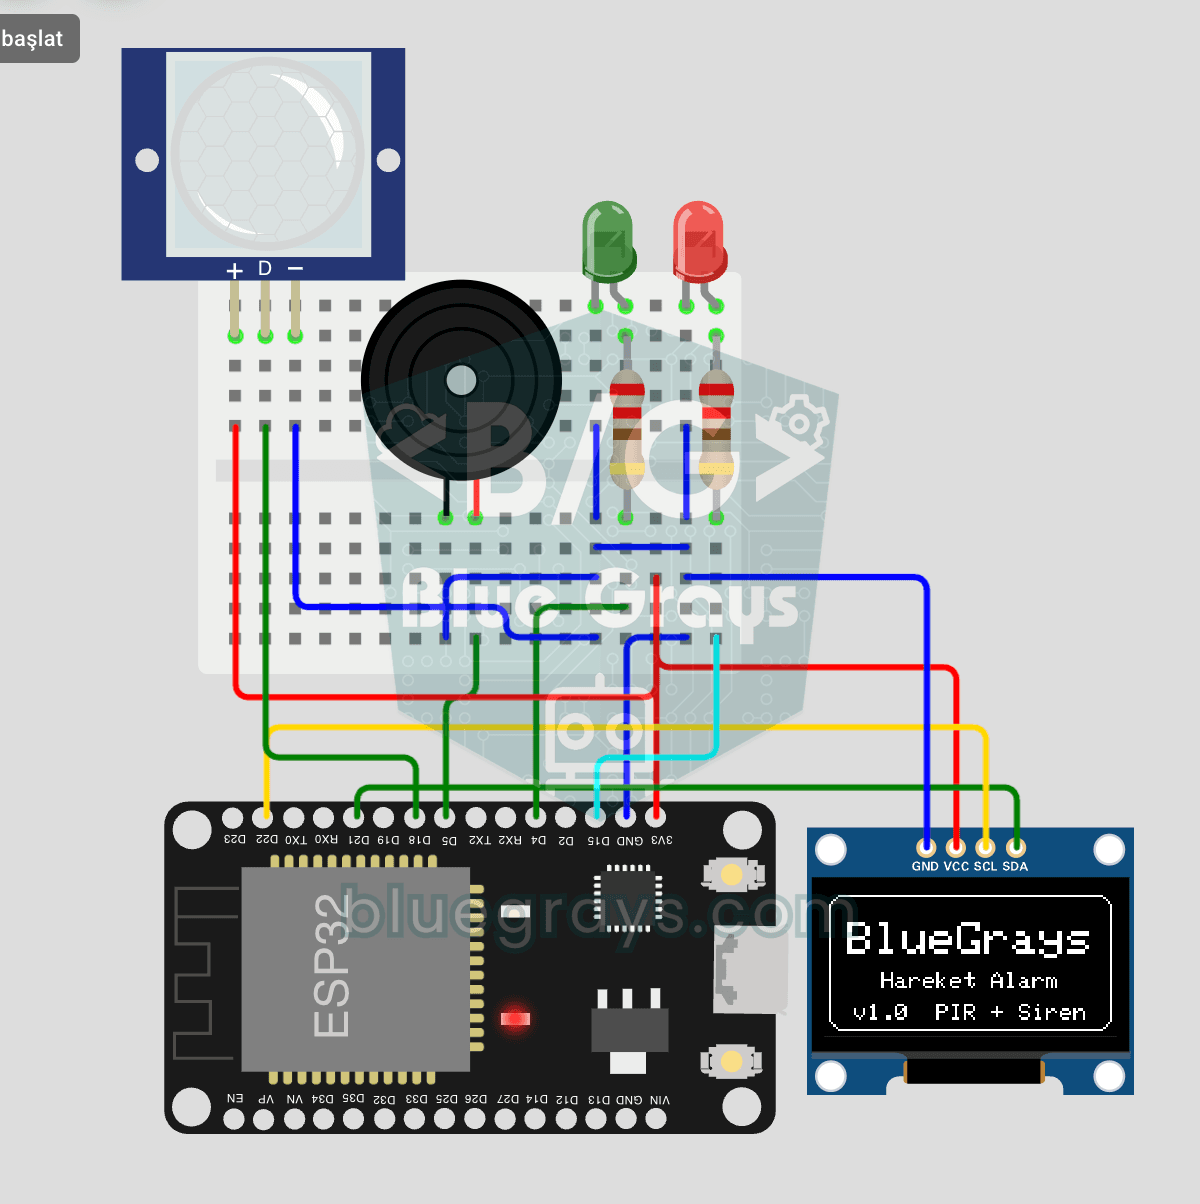
ESP32 Motion Alarm System (PIR + Buzzer + LED + Telegram)
A smart security alarm system that activates the buzzer and LED when the PIR sensor detects motion, while simultaneously sending an instant notification to the owner via Telegram. It includes a 30-second cooldown to limit the frequency of repeated alarms; this mechanism does not validate PIR detections or eliminate false triggers. Suitable for home security, garage monitoring, warehouses, or workrooms. With ESP32-CAM, photo notifications can be added; with the classic ESP32 DevKit V1, text notif

ESP32 MQ-2 Gas/Smoke Detector Alarm
In this project, combustible gas (LPG, methane, propane) and smoke detection is performed using an MQ-2 gas sensor module, and a siren-like alarm is played through a passive buzzer upon detection. The sensor's digital threshold output (DO) is connected to GPIO 4 on the ESP32; when gas or smoke exceeds the threshold, DO goes LOW and the alarm is triggered. Sensitivity is adjusted via the module's potentiometer. The passive buzzer is driven using tone() to produce a two-frequency siren effect.

ESP32 Smart Lighting (PIR + LDR + Relay + OLED)
Turn your hallway, bathroom, or pantry into smart lighting with ESP32! Using a PIR motion sensor, LDR light sensor, and a relay module, we build the classic "light turns on when motion is detected in the dark" scenario — if the environment is already bright, motion does NOT trigger the light, saving energy during the day. The light stays on for 30 seconds; if motion continues, the timer resets and the light stays on longer. The SSD1306 OLED shows large-font status (ON / DAYTIME / WAITING), a cou

Automatic Lighting with the ESP32 PIR Motion Sensor
In this project, we will use the HC-SR501 PIR motion sensor to detect when someone enters the room and automatically turn on the LED. We will track how long the LED stays on using millis(); each HIGH reading from the sensor will update the last motion time, and the LED will turn off at least 10 seconds after the last HIGH reading. The current code also waits 50 ms in each loop with delay(50), so the application loop is not fully non-blocking. In real-life applications, it can be used for sta

ESP32 Wi-Fi STA Connection (with LCD Screen)
In this project, we connect the ESP32 to the home Wi-Fi network in Station (STA) mode in a secure, fault-tolerant manner. We store the SSID and password in a separate secrets.h file to prevent leaking to Git, set up an auto-reconnect mechanism, and display the RSSI signal level and IP address on an I2C LCD screen. The internal LED works as a status indicator. It is a production-grade connection manager.