
Arduino Alarm System: PIR, Door Sensor, Keypad and Siren Guide
Build an Arduino alarm system with PIR, reed door sensor, vibration and laser zones, keypad code, entry and exit delay, siren relay and ESP32 Telegram alerts.
An Arduino alarm system is a security device you can build yourself: it sounds a siren when someone enters your home or room without permission, gives you a few seconds to type your code when the door opens and, if you like, sends an instant notification to your phone. In this guide you'll build a four-zone alarm with a PIR motion sensor, a reed contact on the door, a vibration sensor that catches knocks on a window pane and a laser tripwire across the hallway. You'll arm and disarm it with a code on a 4x4 keypad, drive a 12 V siren through a relay and run the whole thing from a single Arduino Uno.
Step by step we'll build a small copy of what commercial alarm panels do: entry and exit delays, stay mode (night mode), a lockout after wrong codes, a siren time limit and alarm memory. Instead of nested if blocks we'll write the code as a state machine, so it's always clear what the alarm is doing at any moment. Then you'll move the same logic to an ESP32 to arm, disarm and get alarm alerts over Telegram, write a MicroPython version for the Raspberry Pi Pico and learn how to cut down the most annoying problem of all: false alarms.
How does an Arduino alarm system work?
Every alarm system has three parts: inputs (sensors), a brain that makes decisions (the Arduino) and outputs (siren, buzzer, notification). Each sensor guards a zone. Professional panels classify zones by how they behave when triggered, and that distinction is what separates a good alarm from an annoying gadget that goes off every time a door opens. Our system will have four zones:
| Zone | Sensor | Zone type | If triggered while armed |
|---|---|---|---|
| Front door | Reed contact (MC-38) | Delayed | Starts a 20 s entry delay; alarm if no code is entered |
| Living room, interior | PIR (HC-SR501) | Interior (follower) | Instant alarm; waits if the entry delay is running; off in stay mode |
| Window | Vibration (SW-420) | Instant | Instant alarm after 3 hits within 3 s |
| Hallway, stairs | Laser + LDR (KY-008) | Interior (follower) | Instant alarm; waits if the entry delay is running |
| Gas, fire, tamper | MQ-2, flame sensor, box switch | 24-hour | Alarm even when disarmed (upgrade idea) |
Thanks to the delayed zone, the siren doesn't go off the moment you come home: the door opens, the buzzer beeps to warn you and you have 20 seconds to type your code. An interior follower zone is patient while the entry delay is running, so walking past the PIR on your way from the door to the keypad doesn't trigger the alarm. But if someone gets in without opening the door, for example through a window, and steps in front of the PIR, no entry delay has started and the alarm sounds immediately. An instant zone always triggers right away; there's no point giving someone forcing a window 20 seconds. Leaving works in a similar way: when you arm the system a 30-second exit delay starts, and walking out of the door during that time doesn't trigger anything.
Arduino alarm system parts list
| Part | Qty | Job |
|---|---|---|
| Arduino Uno (or Nano) | 1 | The brain of the system; the pins in this guide are the same on the Uno and Nano |
| HC-SR501 PIR motion sensor | 1 | Indoor motion detection, 3–7 m, about 110° |
| MC-38 reed door contact (or reed switch + magnet) | 1 | Opens the circuit when a door or window opens |
| SW-420 vibration sensor module | 1 | Detects hits on the glass or the frame |
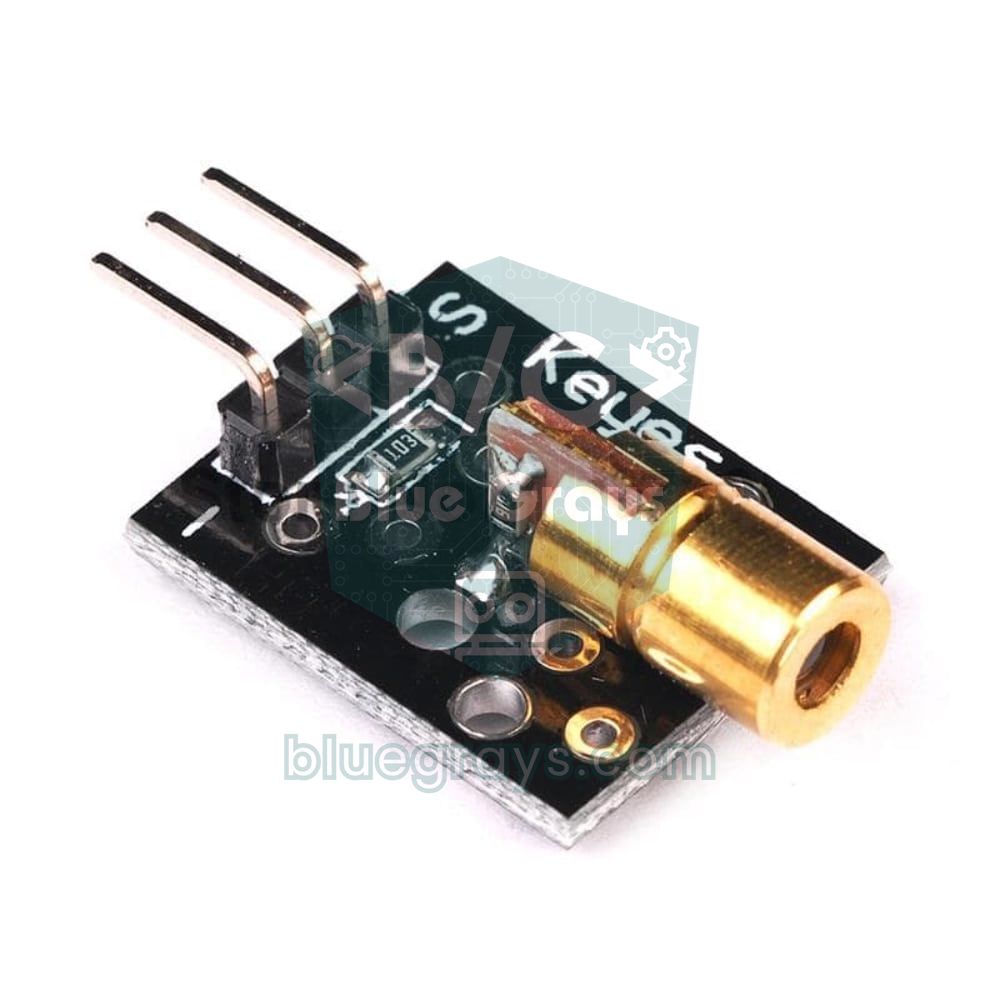
| KY-008 laser module + LDR + 10 kΩ resistor | 1 set | Light barrier across the hallway |
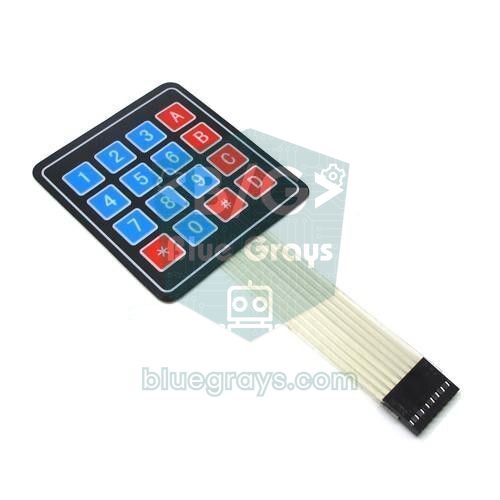
| 4x4 membrane keypad | 1 | Arming and disarming with a code |
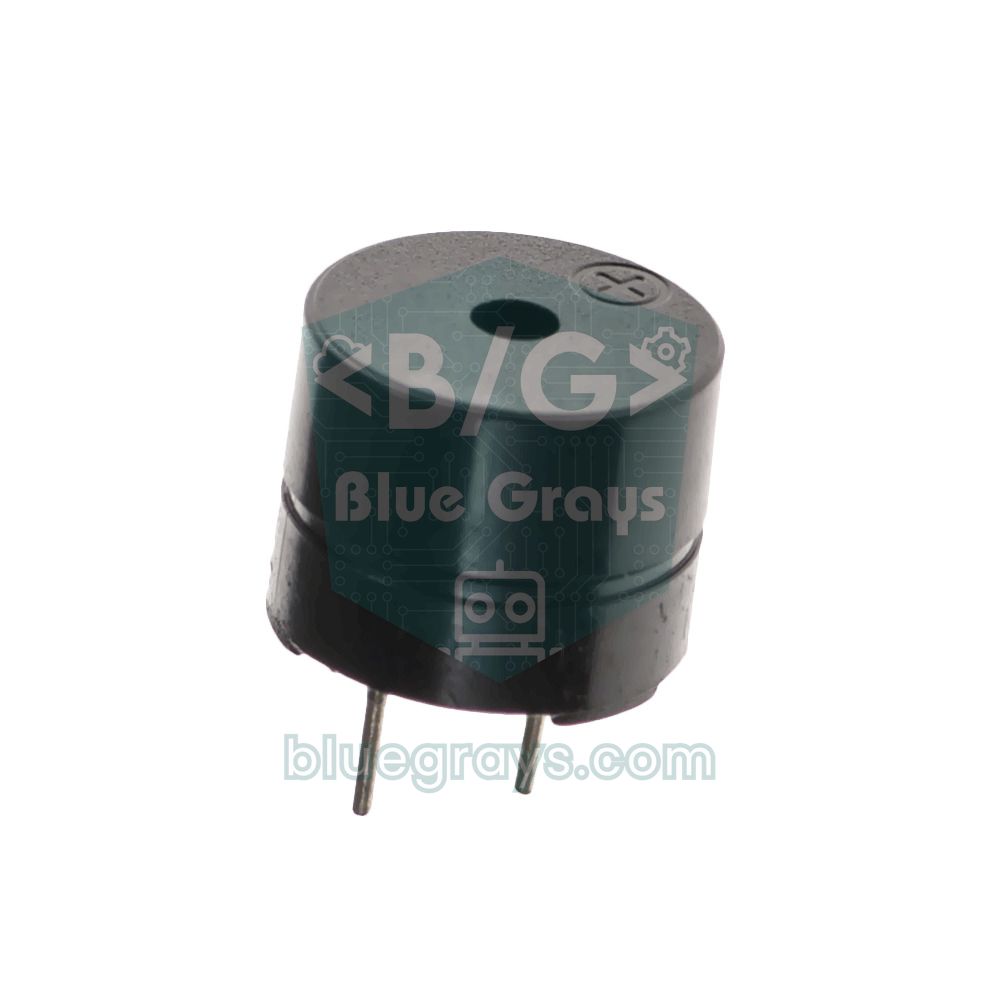
| Active buzzer (5 V) | 1 | Key clicks, entry and exit warning, indoor siren |
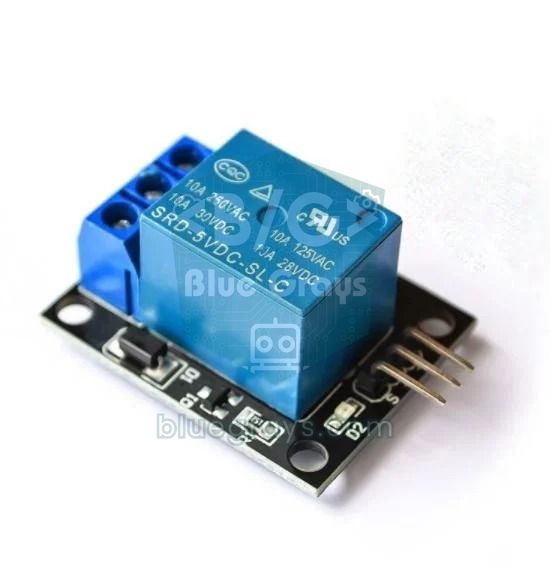
| 1-channel 5 V relay module | 1 | Switches the 12 V siren, isolated from the Arduino |
| 12 V siren (ideally with strobe) | 1 | The main alarm sound, usually 100–120 dB |
| Red and green LED + 2 × 220 Ω resistors | 1 set | Armed and ready indicators |
| 12 V supply, LM2596 module, 12 V battery (optional) | 1 set | Power and backup during outages |
| Breadboard, jumper wires, 4-core alarm cable | - | Connections and remote sensors |

Sensors: what does each zone catch?
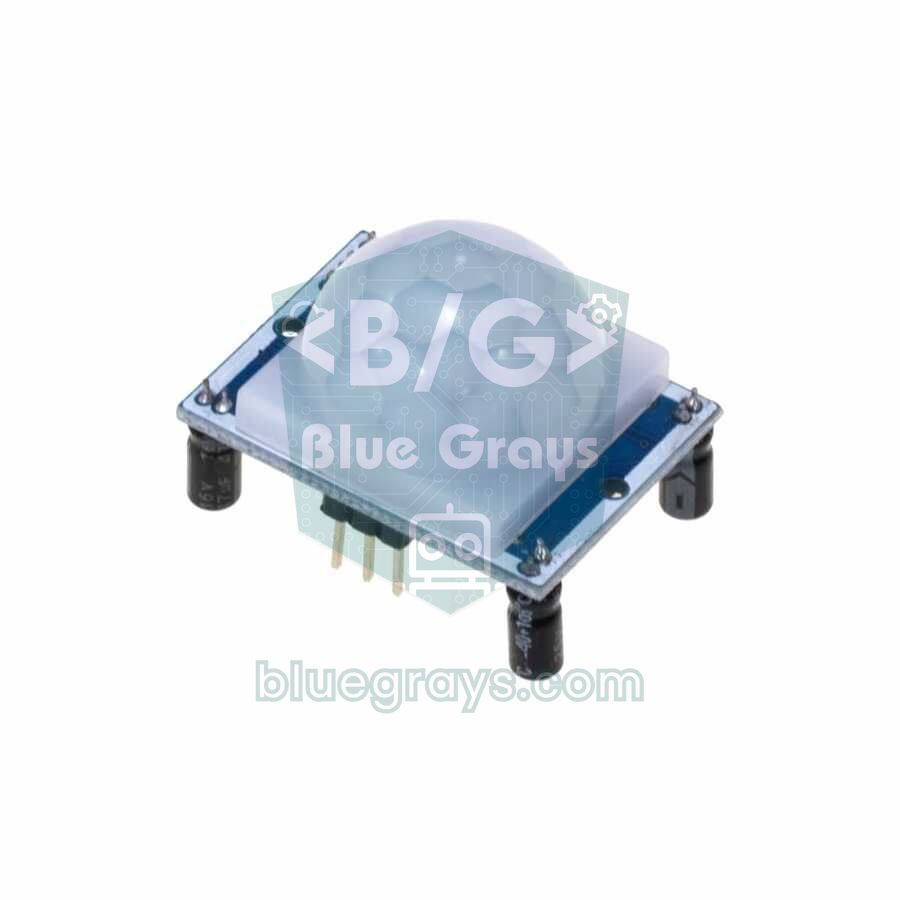
- PIR (HC-SR501): Detects changes in the infrared radiation emitted by the human body and sees movement at 3–7 metres over an angle of about 110 degrees. Its output is 3.3 V, but it needs a 5 V supply. For 30–60 seconds after power-up it learns the room and may trigger on its own, which is why the code ignores the first 60 seconds. See the PIR motion sensor article for details.
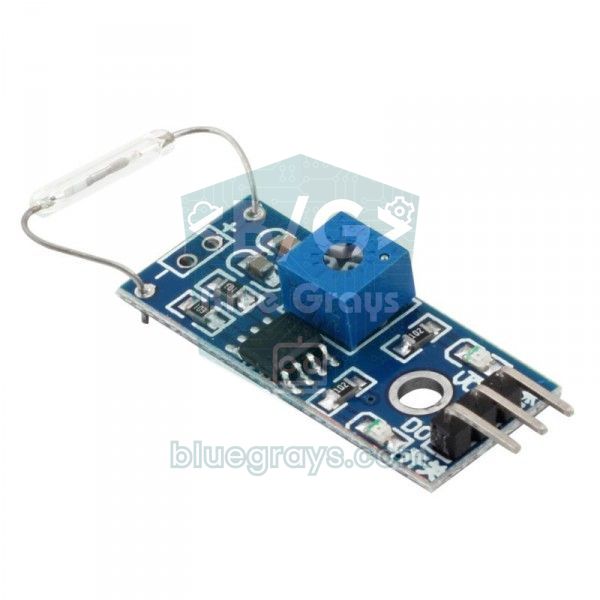
- Reed door contact (MC-38): Two plastic housings, one screwed to the frame and one to the door leaf. With the door closed the magnet is close and the contact is closed; once the door opens more than 15–25 mm the contact opens. It's read with a single pin and the internal pull-up; we covered what's inside in the reed switch article.
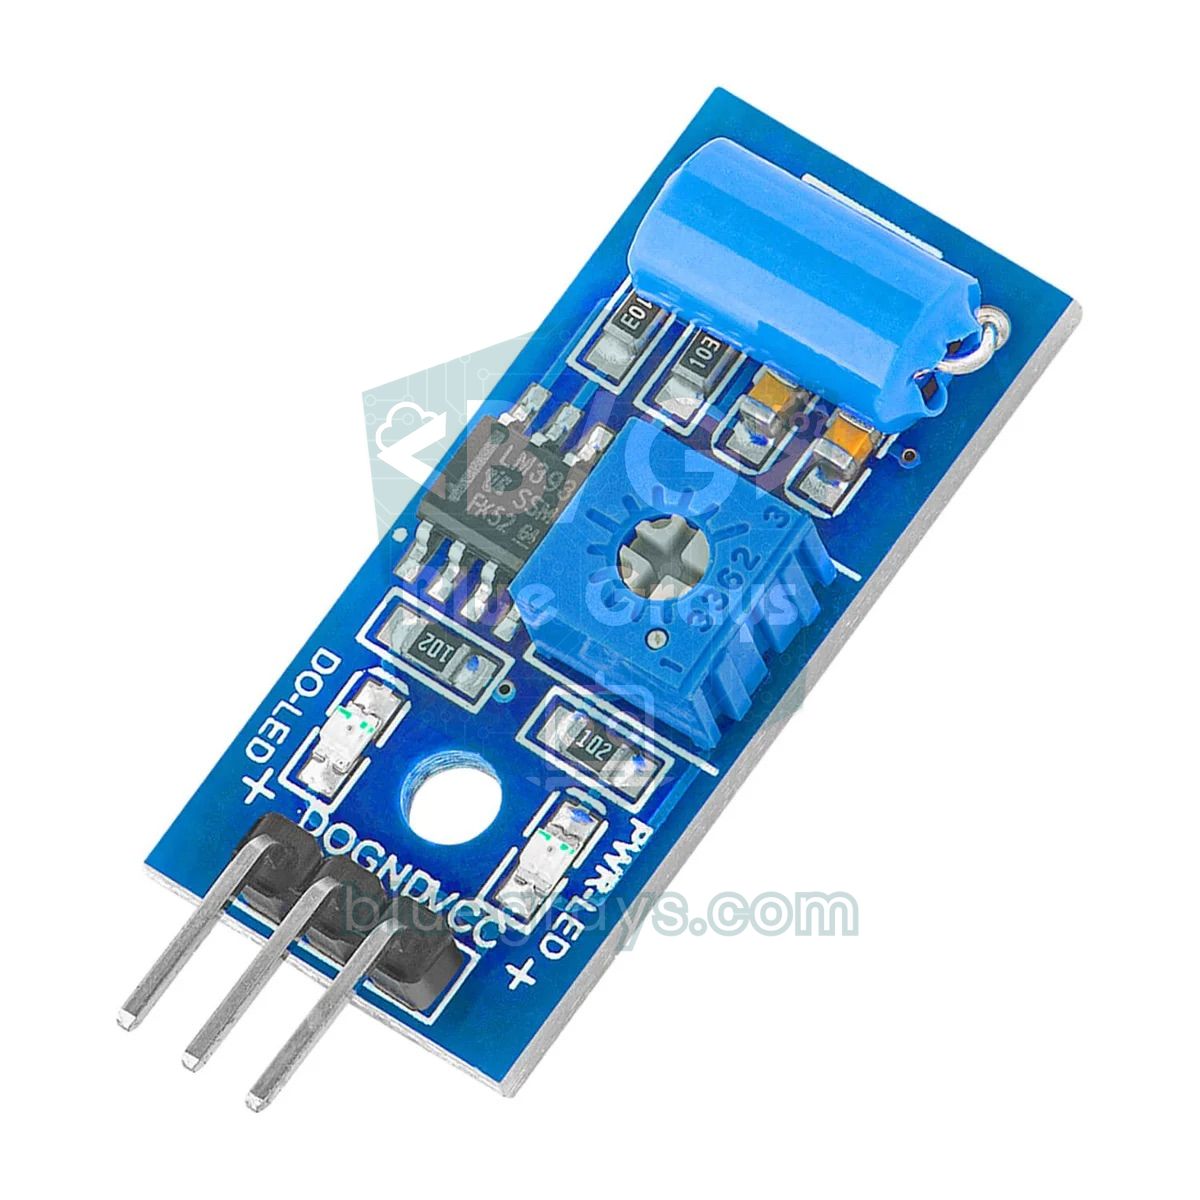
- Vibration sensor (SW-420): A normally closed switch with a metal rod surrounded by a spring. When the glass or frame takes a hit, the contact opens for an instant and the LM393 comparator on the board turns that into a digital pulse. On most modules the output is LOW at rest and goes HIGH briefly on a hit; check your own module with the sensor test. Sensitivity is set with the trimmer on the board; details in the SW-420 vibration sensor article.
- Laser tripwire (KY-008 + LDR): A 650 nm laser of about 5 mW shines continuously on an LDR on the other side of the hallway. When the beam is broken, the LDR's resistance jumps from a few hundred ohms to tens of kilohms and the analog reading drops sharply. Setup and alignment tips are in the laser module article.
- 4x4 keypad: A 16-key matrix made of 4 row lines and 4 column lines; it uses 8 pins and is read in one line with the Keypad library. You'll find how row-column scanning works in the keypad guide.
- Siren and buzzer: An active buzzer has its own oscillator, so it beeps as soon as you set the pin HIGH; it's ideal for key clicks and entry and exit warnings. The real deterrent sound comes from the 12 V siren, which you switch through a relay module. For the difference between active and passive buzzers, see what is a buzzer.
Wiring diagram and pin table
The table below gives the wiring for all three boards. The Arduino Uno version uses all four zones and the keypad. Because the ESP32 version is armed and disarmed with Telegram commands instead of a keypad, and the Pico version is kept short, the laser tripwire is only on the Uno. To see the pin numbers of your own board use the Pinout tool, and to work out LED resistors use the LED resistor calculator.
| Connection | Arduino Uno | ESP32 | Raspberry Pi Pico |
|---|---|---|---|
| Keypad R1–R4 (rows) | D9, D8, D7, D6 | – (Telegram) | GP2, GP3, GP4, GP5 |
| Keypad C1–C4 (columns) | D5, D4, D3, D2 | – (Telegram) | GP6, GP7, GP8, GP9 |
| PIR VCC / OUT / GND | 5V / D10 / GND | VIN (5V) / GPIO 27 / GND | VBUS / GP16 / GND |
| Reed contact (2 wires) | D11 and GND | GPIO 33 and GND | GP15 and GND |
| SW-420 VCC / DO / GND | 5V / D12 / GND | 3V3 / GPIO 32 / GND | 3V3(OUT) / GP17 / GND |
| KY-008 S / − (laser always on) | 5V / GND | – | – |
| LDR between 5V and A0, 10 kΩ between A0 and GND | A0 | – | – |
| Active buzzer + (− to GND) | A1 | GPIO 25 | GP14 |
| Relay module IN | A2 | GPIO 26 | GP13 |
| Green LED (with 220 Ω): ready | A3 | – | – |
| Red LED (with 220 Ω): armed | D13 | GPIO 2 (onboard LED) | Onboard LED |
An alarm matters most when the power goes out, so think about the supply from the start. A practical setup: just like professional panels, a 13.8 V alarm power supply with a battery connection feeds the siren and, stepped down to 5 V with an LM2596 buck converter, the Arduino's 5V pin. When the mains fails, a 12 V 7 Ah sealed lead-acid battery takes over. The maths is simple: the Uno, PIR, laser, LEDs and SW-420 draw about 100 mA at 5 V in standby; that's 0.5 W, which with an 85 % efficient converter is roughly 50 mA on the battery side. Even if you only use 80 % of its capacity, a 7 Ah battery keeps the system running for 4–5 days; the 0.2–0.5 A the siren draws while sounding shortens that a little. Try your own numbers with the battery life calculator, and see how to power an Arduino for supply options.
Step-by-step build
- In the Arduino IDE open the Library Manager, type Keypad and install the library by Mark Stanley and Alexander Brevig. Without it you'll get the Keypad.h: No such file or directory error when compiling.
- Hold the keypad with the keys facing you; connect the first four wires from the left (R1–R4) to D9, D8, D7, D6 and the next four (C1–C4) to D5, D4, D3, D2.
- Connect the PIR to 5V, D10 and GND; turn both trimmers fully anticlockwise and set the trigger jumper to H.
- Connect the two wires of the reed contact to D11 and GND, and the SW-420 to 5V, D12 and GND.
- Put the LDR between 5V and A0 and the 10 kΩ resistor between A0 and GND; place the LDR at the bottom of a black tube and aim the laser at the centre of the tube.
- Connect the buzzer to A1, the relay module's IN to A2 and its VCC and GND to the Arduino's 5V and GND; wire the LEDs to A3 and D13 through 220 Ω resistors.
- First upload the sensor test below, open the Serial Monitor at 9600 baud and trigger each sensor one by one.
- Then upload the full alarm sketch, change the code and test the system with only the buzzer for a few days before connecting the siren.
First test: seeing every sensor in the Serial Monitor
Before moving to the alarm code, make sure each sensor behaves as you expect. This small sketch prints the PIR state, whether the door is open or closed, the number of vibration pulses in the last half second and the LDR's analog value twice a second. The vibration pin is read constantly because SW-420 pulses can last only a few milliseconds and code that uses delay() in between would miss them.
1// Alarm sensör testi: tüm girişleri saniyede iki kez yazdırır / Alarm sensor test: prints every input twice a second
2const int PIR_PIN = 10;        // HC-SR501 OUT
3const int KAPI_PIN = 11;       // reed kapı kontağı, diğer ucu GND / reed door contact, other leg to GND
4const int TITRESIM_PIN = 12;   // SW-420 DO
5const int LAZER_PIN = A0;      // LDR bölücünün orta noktası / LDR divider midpoint
6
7int titresimSayisi = 0;        // yarım saniyedeki darbe sayısı / pulses in the last half second
8int oncekiTitresim = LOW;
9unsigned long sonYazma = 0;
10
11void setup() {
12  Serial.begin(9600);
13  pinMode(PIR_PIN, INPUT);
14  pinMode(KAPI_PIN, INPUT_PULLUP);   // kapı kapalı = LOW, açık = HIGH / door closed = LOW, open = HIGH
15  pinMode(TITRESIM_PIN, INPUT);
16}
17
18void loop() {
19  int t = digitalRead(TITRESIM_PIN);  // kısa darbeleri kaçırmamak için sürekli oku / read constantly so short pulses are not missed
20  if (t == HIGH && oncekiTitresim == LOW) titresimSayisi++;
21  oncekiTitresim = t;
22
23  if (millis() - sonYazma >= 500) {
24    sonYazma = millis();
25    Serial.print(F("PIR: "));
26    Serial.print(digitalRead(PIR_PIN));
27    Serial.print(F("  Kapi / door: "));
28    Serial.print(digitalRead(KAPI_PIN) == HIGH ? F("ACIK / open") : F("kapali / closed"));
29    Serial.print(F("  Titresim / vibration: "));
30    Serial.print(titresimSayisi);
31    Serial.print(F("  Lazer / laser: "));
32    Serial.println(analogRead(LAZER_PIN));
33    titresimSayisi = 0;
34  }
35}State machine: the brain of the alarm
If you try to write an alarm with if blocks and delay(), it quickly turns into a tangle: the keypad isn't read while the entry delay is waiting, and you can't type a code while the siren is sounding. The solution is a state machine, where the system is in exactly one state at any moment and moves between states on specific events. In the code the states are defined with an enum, loop() applies only the rules of the current state on each pass, and waiting is measured with millis() instead of delay(). That way the loop runs thousands of times a second and no key press or sensor event is missed.
| State | Entered when | What it does | Leaves when |
|---|---|---|---|
| DISARMED | At power-up and after code + # | Watches the sensors but never alarms; the green LED is on when everything is ready | Code + A or code + B |
| EXIT DELAY | Code + A (away) or B (stay) | Counts down 30 s; the buzzer beeps once a second and speeds up in the last 10 s | ARMED when time is up; DISARMED with code + # |
| ARMED | When the exit delay ends | Watches all zones; the red LED stays on | ENTRY if the door opens; ALARM on an instant or interior zone |
| ENTRY DELAY | Door opened while armed | Buzzer beeps for 20 s; PIR and laser are put on hold | DISARMED with code + #; ALARM when time is up |
| ALARM | A zone is triggered | Siren and buzzer sound; the siren stops after 3 min, the red LED blinks fast | DISARMED only with code + # |
Arming, disarming and the code on the keypad
| Keys | Function |
|---|---|
| 2580 + A | Away mode: all four zones active, 30 s exit delay |
| 2580 + B | Stay (night) mode: PIR off; door, window and laser active |
| 2580 + # | Disarm; if there was an alarm, prints the triggered zone to the Serial Monitor |
| * or C | Clear a code you mistyped |
| D | Zone test: prints the door, PIR and laser values to the Serial Monitor |
| 3 wrong codes | The keypad locks for 60 s; even the right code is rejected during that time |
Asking for the code when arming too stops children or guests from arming the system by accident. The code also performs a not ready check: if you try to arm with the door open or the laser beam broken, you hear a long beep and the system doesn't arm, just like on commercial panels. Don't leave the code at the default 2580, and avoid guessable codes such as 1234, 0000 or your birth year. If you want to change the code without re-uploading the sketch, store it in EEPROM and add a menu that lets you enter a new code from the keypad. Add an I2C LCD display next to the keypad and you'll see the countdown and status messages on screen as well; that's why pins A4 and A5 were left free.
Arduino alarm system code
The code below is the heart of this guide. In the settings section at the top you can change the code, the delays, the siren time, the laser threshold and the relay type; you don't need to touch the rest. On an Arduino Uno it uses about 6 KB of program memory and 620 bytes of RAM, so there's plenty of room left for an LCD or RFID reader.
1// Arduino ev alarm sistemi: 4 bölge, keypad, giriş/çıkış gecikmesi, siren / Arduino home alarm: 4 zones, keypad, entry/exit delay, siren
2#include <Keypad.h>
3
4// ---- Ayarlar / Settings ----
5const char SIFRE[] = "2580";                 // kendi şifreni yaz / set your own code
6const unsigned long CIKIS_SURE = 30000;      // çıkış gecikmesi 30 sn / exit delay 30 s
7const unsigned long GIRIS_SURE = 20000;      // giriş gecikmesi 20 sn / entry delay 20 s
8const unsigned long SIREN_SURE = 180000;     // siren en fazla 3 dk çalar / siren sounds for at most 3 min
9const unsigned long PIR_ISINMA = 60000;      // PIR ilk 60 sn yok sayılır / PIR is ignored for the first 60 s
10const unsigned long KILIT_SURE = 60000;      // 3 yanlış şifrede 60 sn kilit / 60 s lockout after 3 wrong codes
11const int LAZER_ESIK = 600;                  // ışınlı ve ışınsız değerin ortası / midpoint of beam and no-beam readings
12const bool LAZER_VAR = true;                 // lazer bariyerin yoksa false yap / set to false without a laser barrier
13const bool ROLE_AKTIF_LOW = true;            // çoğu röle modülü LOW'da çeker / most relay modules switch on with LOW
14
15// ---- Pinler / Pins ----
16const int PIR_PIN = 10;        // HC-SR501 OUT
17const int KAPI_PIN = 11;       // reed, diğer ucu GND / reed, other leg to GND
18const int TITRESIM_PIN = 12;   // SW-420 DO
19const int LAZER_PIN = A0;      // LDR bölücü / LDR divider
20const int BUZZER_PIN = A1;     // aktif buzzer / active buzzer
21const int ROLE_PIN = A2;       // siren rölesi / siren relay
22const int YESIL_LED = A3;      // hazır / ready
23const int KIRMIZI_LED = 13;    // kurulu / armed
24
25const byte SATIR = 4, SUTUN = 4;
26char tuslar[SATIR][SUTUN] = {
27  {'1', '2', '3', 'A'},
28  {'4', '5', '6', 'B'},
29  {'7', '8', '9', 'C'},
30  {'*', '0', '#', 'D'}
31};
32byte satirPinleri[SATIR] = {9, 8, 7, 6};     // R1–R4
33byte sutunPinleri[SUTUN] = {5, 4, 3, 2};     // C1–C4
34Keypad keypad = Keypad(makeKeymap(tuslar), satirPinleri, sutunPinleri, SATIR, SUTUN);
35
36enum Durum { COZULU, CIKIS_GECIKMESI, KURULU, GIRIS_GECIKMESI, ALARM };
37const char* const DURUM_ADI[] = { "COZULU / DISARMED", "CIKIS / EXIT DELAY", "KURULU / ARMED", "GIRIS / ENTRY DELAY", "ALARM" };
38
39struct Giris {                 // gürültü süzgeçli giriş / debounced input
40  bool ham;
41  bool kararli;
42  unsigned long degisim;
43};
44Giris gKapi = {false, false, 0};
45Giris gPir = {false, false, 0};
46Giris gLazer = {false, false, 0};
47
48Durum durum = COZULU;
49unsigned long durumZamani = 0;     // duruma giriş anı / when the state began
50bool evdeModu = false;             // true: PIR devre dışı / true: PIR bypassed
51bool sirenAcik = false;
52bool pirHazir = false;
53const char* tetikleyen = "";       // alarmı başlatan bölge / zone that caused the alarm
54char girilen[9] = "";              // girilen şifre, en fazla 8 hane / typed code, max 8 digits
55byte haneSayisi = 0;
56byte yanlisSayisi = 0;
57bool kilitli = false;
58unsigned long kilitZamani = 0;
59unsigned long bipZamani = 0, bipSuresi = 0;
60unsigned long darbe[3] = {0, 0, 0};          // son 3 titreşim olayı / last 3 vibration events
61int oncekiTitresim = LOW;
62
63// Okuma "sure" ms boyunca aynı kalırsa kabul edilir / a reading is accepted once it stays the same for "sure" ms
64bool suz(Giris &g, bool okuma, unsigned long sure) {
65  unsigned long simdi = millis();
66  if (okuma != g.ham) {
67    g.ham = okuma;
68    g.degisim = simdi;
69  }
70  if (simdi - g.degisim >= sure) g.kararli = g.ham;
71  return g.kararli;
72}
73
74// 3 sn içinde 3 ayrı darbe = zorlama; tek vuruş alarm vermez / 3 separate hits within 3 s = forcing; a single knock is ignored
75bool titresimVar(unsigned long simdi) {
76  int okuma = digitalRead(TITRESIM_PIN);
77  bool sonuc = false;
78  if (okuma == HIGH && oncekiTitresim == LOW && simdi - darbe[2] > 150) {   // 150 ms içindeki sekmeler tek olay / bounces within 150 ms count once
79    darbe[0] = darbe[1];
80    darbe[1] = darbe[2];
81    darbe[2] = simdi;
82    if (darbe[0] != 0 && simdi - darbe[0] <= 3000) sonuc = true;
83  }
84  oncekiTitresim = okuma;
85  return sonuc;
86}
87
88void bip(unsigned long ms) {       // kısa = tuş sesi, uzun = hata / short = key click, long = error
89  bipZamani = millis();
90  bipSuresi = ms;
91}
92
93void sirenYaz(bool acik) {
94  sirenAcik = acik;
95  if (ROLE_AKTIF_LOW) digitalWrite(ROLE_PIN, acik ? LOW : HIGH);
96  else                digitalWrite(ROLE_PIN, acik ? HIGH : LOW);
97}
98
99void durumDegis(Durum yeni) {
100  durum = yeni;
101  durumZamani = millis();
102  Serial.print(F("Durum / state: "));
103  Serial.println(DURUM_ADI[yeni]);
104}
105
106void alarmVer(const char* bolge) {
107  tetikleyen = bolge;
108  sirenYaz(true);
109  durumDegis(ALARM);
110  Serial.print(F("ALARM! Bolge / zone: "));
111  Serial.println(bolge);
112}
113
114bool kurulabilirMi() {             // açık kapı ya da kesik ışınla kurulmaz / never arm with an open door or a broken beam
115  if (gKapi.kararli) {
116    Serial.println(F("Kapi acik, kurulamaz / door open, cannot arm"));
117    return false;
118  }
119  if (LAZER_VAR && gLazer.kararli) {
120    Serial.println(F("Lazer kesik, kurulamaz / beam broken, cannot arm"));
121    return false;
122  }
123  return true;
124}
125
126void kur(bool evde) {
127  if (!kurulabilirMi()) {
128    bip(800);
129    return;
130  }
131  evdeModu = evde;
132  for (int i = 0; i < 3; i++) darbe[i] = 0;
133  tetikleyen = "";
134  durumDegis(CIKIS_GECIKMESI);
135  Serial.println(evde ? F("Evde modu: PIR devre disi / stay mode: PIR bypassed") : F("Tam kurulum / away mode"));
136}
137
138void coz() {
139  sirenYaz(false);
140  if (tetikleyen[0] != '\0') {     // alarm hafızası / alarm memory
141    Serial.print(F("Alarm hafizasi / alarm memory: "));
142    Serial.println(tetikleyen);
143  }
144  durumDegis(COZULU);
145  bip(150);
146}
147
148void sensorRaporu() {
149  Serial.print(F("Kapi / door: "));
150  Serial.print(gKapi.kararli ? F("ACIK / open") : F("kapali / closed"));
151  Serial.print(F("  PIR: "));
152  Serial.print(digitalRead(PIR_PIN));
153  Serial.print(F("  Lazer / laser: "));
154  Serial.println(analogRead(LAZER_PIN));
155}
156
157void tusIsle(char t) {
158  if (t >= '0' && t <= '9') {
159    if (haneSayisi < 8) {
160      girilen[haneSayisi++] = t;
161      girilen[haneSayisi] = '\0';
162    }
163    bip(30);
164    return;
165  }
166  if (t == '*' || t == 'C') {      // girilen kodu sil / clear the typed code
167    haneSayisi = 0;
168    girilen[0] = '\0';
169    bip(30);
170    return;
171  }
172  if (t == 'D') {                  // bölge testi / zone test
173    sensorRaporu();
174    return;
175  }
176
177  // A, B ve # önce şifre ister / A, B and # need the code first
178  bool dogru = strcmp(girilen, SIFRE) == 0;
179  haneSayisi = 0;
180  girilen[0] = '\0';
181  if (kilitli) {
182    Serial.println(F("Tus takimi kilitli / keypad locked"));
183    bip(800);
184    return;
185  }
186  if (!dogru) {
187    Serial.println(F("Yanlis sifre / wrong code"));
188    if (++yanlisSayisi >= 3) {
189      kilitli = true;
190      kilitZamani = millis();
191      yanlisSayisi = 0;
192    }
193    bip(800);
194    return;
195  }
196  yanlisSayisi = 0;
197  if (durum == COZULU && t == 'A')      kur(false);   // tam kurulum / away
198  else if (durum == COZULU && t == 'B') kur(true);    // evde modu / stay
199  else if (durum != COZULU && t == '#') coz();        // çöz / disarm
200  else bip(800);
201}
202
203void cikislariGuncelle() {
204  unsigned long simdi = millis();
205  unsigned long gecen = simdi - durumZamani;
206  bool buzzer = simdi - bipZamani < bipSuresi;   // tuş sesi / key click
207  bool kirmizi = false;
208
209  switch (durum) {
210    case CIKIS_GECIKMESI: {
211      unsigned long periyot = (gecen > CIKIS_SURE - 10000) ? 250 : 1000;   // son 10 sn hızlanır / faster in the last 10 s
212      buzzer = buzzer || (gecen % periyot) < 60;
213      kirmizi = (gecen % 1000) < 500;
214      break;
215    }
216    case KURULU:
217      kirmizi = true;
218      break;
219    case GIRIS_GECIKMESI:
220      buzzer = buzzer || (gecen % 400) < 200;    // "şifreni gir" uyarısı / "enter your code" warning
221      kirmizi = (gecen % 400) < 200;
222      break;
223    case ALARM:
224      buzzer = buzzer || sirenAcik;
225      kirmizi = (gecen % 200) < 100;             // hızlı yanıp sönme = alarm hafızası / fast blink = alarm memory
226      break;
227    default:
228      break;
229  }
230  bool hazir = !gKapi.kararli && !(LAZER_VAR && gLazer.kararli);
231  digitalWrite(BUZZER_PIN, buzzer ? HIGH : LOW);
232  digitalWrite(KIRMIZI_LED, kirmizi ? HIGH : LOW);
233  digitalWrite(YESIL_LED, (durum == COZULU && hazir) ? HIGH : LOW);
234}
235
236void setup() {
237  Serial.begin(9600);
238  sirenYaz(false);                   // pin çıkış olmadan önce "kapalı" yaz, açılışta röle çekmez / write "off" first so the relay doesn't click at boot
239  pinMode(ROLE_PIN, OUTPUT);
240  pinMode(BUZZER_PIN, OUTPUT);
241  pinMode(KIRMIZI_LED, OUTPUT);
242  pinMode(YESIL_LED, OUTPUT);
243  pinMode(PIR_PIN, INPUT);
244  pinMode(KAPI_PIN, INPUT_PULLUP);   // kapı kapalı = LOW; kablo kesilirse HIGH / door closed = LOW; a cut wire reads HIGH
245  pinMode(TITRESIM_PIN, INPUT);
246  keypad.setDebounceTime(20);
247  durumDegis(COZULU);
248  Serial.println(F("PIR 60 sn isiniyor / PIR warming up for 60 s"));
249}
250
251void loop() {
252  char t = keypad.getKey();
253  if (t) tusIsle(t);
254
255  unsigned long simdi = millis();
256  if (kilitli && simdi - kilitZamani >= KILIT_SURE) kilitli = false;
257  if (!pirHazir && simdi >= PIR_ISINMA) pirHazir = true;
258
259  bool kapiAcik = suz(gKapi, digitalRead(KAPI_PIN) == HIGH, 50);
260  bool hareket = suz(gPir, digitalRead(PIR_PIN) == HIGH, 200) && pirHazir;
261  bool isinKesik = LAZER_VAR && suz(gLazer, analogRead(LAZER_PIN) < LAZER_ESIK, 30);
262  bool titresim = titresimVar(simdi);
263
264  switch (durum) {
265    case CIKIS_GECIKMESI:
266      if (simdi - durumZamani >= CIKIS_SURE) durumDegis(KURULU);
267      break;
268    case KURULU:                                   // anlık bölgeler önce / instant zones first
269      if (titresim)                  alarmVer("Pencere (titresim) / window (vibration)");
270      else if (isinKesik)            alarmVer("Lazer bariyeri / laser beam");
271      else if (hareket && !evdeModu) alarmVer("Ic mekan (PIR) / interior (PIR)");
272      else if (kapiAcik)             durumDegis(GIRIS_GECIKMESI);
273      break;
274    case GIRIS_GECIKMESI:                          // PIR ve lazer giriş süresince bekler / PIR and laser wait during the entry delay
275      if (titresim)                                 alarmVer("Pencere (titresim) / window (vibration)");
276      else if (simdi - durumZamani >= GIRIS_SURE)   alarmVer("Giris kapisi / entry door");
277      break;
278    case ALARM:
279      if (sirenAcik && simdi - durumZamani >= SIREN_SURE) {
280        sirenYaz(false);                           // siren susar, hafıza kalır / siren stops, memory stays
281        Serial.println(F("Siren sustu, sifre bekleniyor / siren off, waiting for the code"));
282      }
283      break;
284    default:
285      break;
286  }
287  cikislariGuncelle();
288}
The backbone of the code is the suz() function. Whenever an input's raw value changes, a timestamp is taken, and the stable state doesn't change until the value has stayed the same for a set time (50 ms for the door, 200 ms for the PIR, 30 ms for the laser). This simple filter stops short glitches on long cables and contact bounce from setting off the alarm. Reading the door pin with INPUT_PULLUP is a deliberate choice too: with the door closed the reed connects the pin to GND and it reads LOW; when the door opens or someone cuts the cable, the pin goes HIGH. This closed-loop logic, used in real alarm systems, treats a cut wire exactly like an open door.
Vibration is handled differently. Even a single knock makes the SW-420 bounce several times within a few milliseconds; titresimVar() first counts bounces within 150 ms as one event, then stores the times of the last three events. If three events fit inside 3 seconds, it counts as a real attempt to force the window; wind rattling the door or a single ball hitting the glass won't set it off. The siren stops by itself after 3 minutes, but the system stays in the ALARM state and the red LED blinks fast to tell whoever comes home that there was an alarm. When you enter the right code, the zone name stored in the tetikleyen variable is printed to the Serial Monitor; it's a small version of the alarm memory found on commercial panels.
How to set the entry and exit delays
If the delays are too short you'll set off your own alarm; too long and you give a burglar time. Make the exit delay twice the time it takes you to walk from the keypad to the door and lock it, and the entry delay roughly twice the time it takes to open the door, walk to the keypad and type your code. Commercial panels typically use 30–60 seconds for exit and 15–30 seconds for entry. Mounting the keypad right next to the door, but out of sight from outside, lets you keep the entry delay short. The buzzer's behaviour matters too: on exit, a short beep every second speeds up in the last 10 seconds so you can feel time running out; on entry, a 200 ms on-off beep reminds you to type your code.
Siren and relay wiring
In the siren circuit the Arduino only drives the relay coil; the 12 V siren current flows through the relay contacts. Most relay modules are active LOW, which means they switch on when the IN pin is LOW; that's why the code has the ROLE_AKTIF_LOW constant. The code writes the off level before making the pin an output, so the relay doesn't click on for an instant and chirp the siren while the Arduino boots. When choosing a siren, check its current: small 110 dB 12 V sirens usually draw 0.1–0.3 A, a tiny load for a 10 A relay contact. An outdoor siren with a strobe deters with both sound and light and shows the neighbours where the alarm is coming from. Professional panels usually silence the siren after 3 minutes, and some countries even set a legal limit for this, so keep SIREN_SURE reasonable. If you'd rather use a solid-state switch than a relay, you can use a logic-level MOSFET and, for coil-based (electromagnetic) sirens, add a diode across the terminals in reverse.
Telegram alerts with the ESP32
A siren that nobody hears is useless; the easiest way to know your alarm went off while you're away is an ESP32 and Telegram. The ESP32 joins your Wi-Fi and sends messages to the Telegram server over an encrypted connection, and you can send it commands too. We explained step by step how to create a bot with BotFather, get the token and your chat ID and install the UniversalTelegramBot and ArduinoJson libraries in the ESP32 Telegram bot article. This version has no keypad; you control the system from your phone with the /kur (away), /evde (stay mode), /coz (disarm) and /durum (status) commands. The bot only answers your chat ID and silently ignores commands from anyone else.
1// ESP32 alarm sistemi + Telegram: kurma/çözme komutları ve anlık bildirim / ESP32 alarm + Telegram: arm/disarm commands and instant alerts
2#include <WiFi.h>
3#include <WiFiClientSecure.h>
4#include <UniversalTelegramBot.h>        // ArduinoJson kütüphanesi de gerekir / also needs ArduinoJson
5#include <Preferences.h>                 // kurulu durumu elektrik kesintisinde unutmamak için / remembers the armed state across power cuts
6
7const char* WIFI_SSID = "AgAdi";         // Wi-Fi adın (yalnız 2,4 GHz) / your Wi-Fi name (2.4 GHz only)
8const char* WIFI_PASS = "Sifre123";      // Wi-Fi şifren / your Wi-Fi password
9#define BOT_TOKEN "1234567890:AAExxxxxxxxxxxxxxxxxxxxxxxxxxxxxxxx"   // BotFather'dan / from BotFather
10#define CHAT_ID   "123456789"            // yalnız bu ID komut verebilir / only this ID may send commands
11
12const int PIR_PIN = 27;                  // HC-SR501 OUT
13const int KAPI_PIN = 33;                 // reed, diğer ucu GND / reed, other leg to GND
14const int TITRESIM_PIN = 32;             // SW-420 DO
15const int BUZZER_PIN = 25;               // aktif buzzer / active buzzer
16const int ROLE_PIN = 26;                 // siren rölesi / siren relay
17const int LED_PIN = 2;                   // dahili LED: kurulu / onboard LED: armed
18const bool ROLE_AKTIF_LOW = true;        // çoğu röle modülü LOW'da çeker / most relay modules switch on with LOW
19
20const unsigned long CIKIS_SURE = 30000;       // çıkış gecikmesi / exit delay
21const unsigned long GIRIS_SURE = 20000;       // giriş gecikmesi / entry delay
22const unsigned long SIREN_SURE = 180000;      // siren en fazla 3 dk / siren for at most 3 min
23const unsigned long PIR_ISINMA = 60000;       // PIR ısınma süresi / PIR warm-up time
24const unsigned long KONTROL_ARALIGI = 2000;   // Telegram'a 2 sn'de bir sor / poll Telegram every 2 s
25
26WiFiClientSecure client;
27UniversalTelegramBot bot(BOT_TOKEN, client);
28Preferences ayar;
29
30enum Durum { COZULU, CIKIS_GECIKMESI, KURULU, GIRIS_GECIKMESI, ALARM };
31const char* const DURUM_ADI[] = { "ÇÖZÜLÜ / DISARMED", "ÇIKIŞ GECİKMESİ / EXIT DELAY", "KURULU / ARMED", "GİRİŞ GECİKMESİ / ENTRY DELAY", "ALARM" };
32
33struct Giris {                           // gürültü süzgeçli giriş / debounced input
34  bool ham;
35  bool kararli;
36  unsigned long degisim;
37};
38Giris gKapi = {false, false, 0};
39Giris gPir = {false, false, 0};
40
41Durum durum = COZULU;
42unsigned long durumZamani = 0;
43bool evdeModu = false;
44bool sirenAcik = false;
45bool pirHazir = false;
46String tetikleyen = "";
47String bekleyen = "";                    // gönderilemeyen bildirimler / notifications not sent yet
48unsigned long sonDeneme = 0;
49unsigned long sonKontrol = 0;
50
51volatile unsigned long darbe[3] = {0, 0, 0};   // son 3 titreşim olayı / last 3 vibration events
52volatile bool zorlama = false;                 // 3 sn'de 3 darbe oldu / 3 hits within 3 s
53
54// Kesme: Telegram beklerken de kısa darbeler kaçmaz / interrupt: short pulses are caught even while Telegram blocks
55void IRAM_ATTR titresimKesmesi() {
56  unsigned long simdi = millis();
57  if (simdi - darbe[2] > 150) {          // 150 ms içindeki sekmeler tek olay / bounces within 150 ms count once
58    darbe[0] = darbe[1];
59    darbe[1] = darbe[2];
60    darbe[2] = simdi;
61    if (darbe[0] != 0 && simdi - darbe[0] <= 3000) zorlama = true;
62  }
63}
64
65bool suz(Giris &g, bool okuma, unsigned long sure) {
66  unsigned long simdi = millis();
67  if (okuma != g.ham) {
68    g.ham = okuma;
69    g.degisim = simdi;
70  }
71  if (simdi - g.degisim >= sure) g.kararli = g.ham;
72  return g.kararli;
73}
74
75void sirenYaz(bool acik) {
76  sirenAcik = acik;
77  if (ROLE_AKTIF_LOW) digitalWrite(ROLE_PIN, acik ? LOW : HIGH);
78  else                digitalWrite(ROLE_PIN, acik ? HIGH : LOW);
79}
80
81void bekleyeniGonder() {
82  sonDeneme = millis();
83  if (WiFi.status() != WL_CONNECTED) {
84    WiFi.reconnect();                    // bağlantı koptuysa yeniden dene / reconnect if the link dropped
85    return;
86  }
87  if (bot.sendMessage(CHAT_ID, bekleyen, "")) bekleyen = "";
88}
89
90void bildir(const String& metin) {       // gönderemezse 15 sn sonra yeniden dener / retries after 15 s if sending fails
91  Serial.println(metin);
92  bekleyen += metin + "\n";
93  if (bekleyen.length() > 1200) bekleyen = bekleyen.substring(bekleyen.length() - 1200);
94  bekleyeniGonder();
95}
96
97void durumDegis(Durum yeni) {
98  durum = yeni;
99  durumZamani = millis();
100  if (yeni == KURULU || yeni == COZULU) {   // yalnız kurma ve çözmede yazılır / written only on arm and disarm
101    ayar.putBool("kurulu", yeni == KURULU);
102    ayar.putBool("evde", evdeModu);
103  }
104}
105
106void alarmVer(const String& bolge) {
107  tetikleyen = bolge;
108  sirenYaz(true);                        // önce siren, sonra mesaj / siren first, message second
109  durumDegis(ALARM);
110  bildir("ALARM! " + bolge);
111}
112
113void kur(bool evde) {
114  if (gKapi.kararli) {
115    bildir("Kapı açık, kurulamadı / door open, not armed");
116    return;
117  }
118  evdeModu = evde;
119  for (int i = 0; i < 3; i++) darbe[i] = 0;
120  zorlama = false;
121  tetikleyen = "";
122  durumDegis(CIKIS_GECIKMESI);
123  bildir(evde ? "Evde modu, 30 sn sonra kurulu (PIR kapalı) / stay mode, armed in 30 s (PIR off)"
124              : "Tam kurulum, 30 sn içinde çık / away mode, leave within 30 s");
125}
126
127void coz() {
128  sirenYaz(false);
129  String m = "Alarm çözüldü / disarmed";
130  if (tetikleyen.length()) m += "\nAlarm hafızası / memory: " + tetikleyen;
131  tetikleyen = "";
132  durumDegis(COZULU);
133  bildir(m);
134}
135
136String durumMetni() {
137  String s = String("Durum / state: ") + DURUM_ADI[durum];
138  if (evdeModu && durum != COZULU) s += " (evde / stay)";
139  s += "\nKapı / door: ";
140  s += gKapi.kararli ? "AÇIK / open" : "kapalı / closed";
141  s += "\nWi-Fi: " + String(WiFi.RSSI()) + " dBm";
142  return s;
143}
144
145void mesajlariIsle(int adet) {
146  for (int i = 0; i < adet; i++) {
147    String chatId = bot.messages[i].chat_id;
148    String metin = bot.messages[i].text;
149    if (chatId != CHAT_ID) continue;     // yabancıya yanıt yok / strangers get no answer
150
151    int at = metin.indexOf('@');         // "/kur@bot_adi" -> "/kur"
152    if (at > 0) metin = metin.substring(0, at);
153
154    if (metin == "/kur" && durum == COZULU)        kur(false);
155    else if (metin == "/evde" && durum == COZULU)  kur(true);
156    else if (metin == "/coz" && durum != COZULU)   coz();
157    else if (metin == "/durum")                    bildir(durumMetni());
158    else bot.sendMessage(chatId, "/kur  /evde  /coz  /durum\n" + durumMetni(), "");
159  }
160}
161
162void setup() {
163  Serial.begin(115200);
164  pinMode(ROLE_PIN, OUTPUT);
165  sirenYaz(false);                       // açılışta siren kapalı / siren off at boot
166  pinMode(BUZZER_PIN, OUTPUT);
167  pinMode(LED_PIN, OUTPUT);
168  pinMode(PIR_PIN, INPUT);
169  pinMode(KAPI_PIN, INPUT_PULLUP);       // kapı kapalı = LOW, açık ya da kablo kesik = HIGH / closed = LOW, open or cut = HIGH
170  pinMode(TITRESIM_PIN, INPUT);
171  attachInterrupt(digitalPinToInterrupt(TITRESIM_PIN), titresimKesmesi, RISING);
172
173  ayar.begin("alarm", false);
174  if (ayar.getBool("kurulu", false)) {   // kesintiden önce kuruluysa kurulu başla / start armed if it was armed before the outage
175    evdeModu = ayar.getBool("evde", false);
176    durumDegis(KURULU);
177  }
178
179  WiFi.mode(WIFI_STA);
180  WiFi.begin(WIFI_SSID, WIFI_PASS);
181  unsigned long bas = millis();
182  while (WiFi.status() != WL_CONNECTED && millis() - bas < 20000) delay(500);   // Wi-Fi yoksa alarm yine çalışır / the alarm works without Wi-Fi too
183  client.setCACert(TELEGRAM_CERTIFICATE_ROOT);   // api.telegram.org kök sertifikası / root certificate of api.telegram.org
184  if (WiFi.status() == WL_CONNECTED) {
185    while (bot.getUpdates(bot.last_message_received + 1)) { }   // kapalıyken gelen eski komutları atla / skip commands sent while off
186  }
187  bildir(String("Sistem açıldı (elektrik geldi mi?) / system started (power restored?)\n") + durumMetni());
188}
189
190void loop() {
191  unsigned long simdi = millis();
192  if (!pirHazir && simdi >= PIR_ISINMA) pirHazir = true;
193  bool kapiAcik = suz(gKapi, digitalRead(KAPI_PIN) == HIGH, 50);
194  bool hareket = suz(gPir, digitalRead(PIR_PIN) == HIGH, 200) && pirHazir;
195  bool titresim = zorlama;
196  zorlama = false;
197
198  switch (durum) {
199    case CIKIS_GECIKMESI:
200      if (simdi - durumZamani >= CIKIS_SURE) {
201        durumDegis(KURULU);
202        bildir("Sistem kuruldu / system armed");
203      }
204      break;
205    case KURULU:
206      if (titresim)                  alarmVer("Pencere (titreşim) / window (vibration)");
207      else if (hareket && !evdeModu) alarmVer("İç mekân (PIR) / interior (PIR)");
208      else if (kapiAcik) {
209        durumDegis(GIRIS_GECIKMESI);
210        bildir("Kapı açıldı, 20 sn giriş süresi / door opened, 20 s entry delay");
211      }
212      break;
213    case GIRIS_GECIKMESI:
214      if (titresim)                                alarmVer("Pencere (titreşim) / window (vibration)");
215      else if (simdi - durumZamani >= GIRIS_SURE)  alarmVer("Giriş kapısı / entry door");
216      break;
217    case ALARM:
218      if (sirenAcik && simdi - durumZamani >= SIREN_SURE) {
219        sirenYaz(false);
220        bildir("Siren sustu, alarm hafızada / siren stopped, alarm kept in memory");
221      }
222      break;
223    default:
224      break;
225  }
226
227  unsigned long gecen = millis() - durumZamani;
228  bool buzzer = false;
229  if (durum == CIKIS_GECIKMESI)      buzzer = (gecen % 1000) < 60;
230  else if (durum == GIRIS_GECIKMESI) buzzer = (gecen % 400) < 200;
231  else if (durum == ALARM)           buzzer = sirenAcik;
232  digitalWrite(BUZZER_PIN, buzzer ? HIGH : LOW);
233  digitalWrite(LED_PIN, (durum == KURULU || durum == ALARM) ? HIGH : LOW);
234
235  if (millis() - sonKontrol > KONTROL_ARALIGI && WiFi.status() == WL_CONNECTED) {
236    int adet = bot.getUpdates(bot.last_message_received + 1);
237    while (adet) {
238      mesajlariIsle(adet);
239      adet = bot.getUpdates(bot.last_message_received + 1);
240    }
241    sonKontrol = millis();
242  }
243  if (bekleyen.length() && millis() - sonDeneme > 15000) bekleyeniGonder();
244}
The ESP32 code differs in three important ways. First, sending a message to Telegram or polling for new commands can take 1–2 seconds, and loop() waits during that time. A door that stays open and a PIR that stays HIGH for at least a few seconds aren't affected, but the millisecond pulses of the SW-420 could be missed, so vibration is caught with an interrupt (attachInterrupt). Second, alarmVer() switches the siren on first and sends the message afterwards, so however slow the internet is, the siren is never delayed. Notifications that fail are queued and retried every 15 seconds. Third, the Preferences library stores whether the system is armed in flash memory: if the power goes off and comes back while armed, the ESP32 boots armed and tells you the power is back. If the relay and siren share the same weak supply as the ESP32, the board may restart with the Brownout detector was triggered error; you'll find the fix in the ESP32 keeps restarting article.
Alarm with the Raspberry Pi Pico and MicroPython
You can build the same state machine on a Raspberry Pi Pico in a short MicroPython program. The keypad is read with the row-column scanning function from the keypad guide; the rows are on GP2–GP5 and the columns on GP6–GP9 with internal pull-ups. Power the PIR from VBUS (5 V); its output is already 3.3 V, so it connects straight to GP16. Always power the SW-420 from the 3V3(OUT) pin, because the output of a module fed with 5 V can damage the Pico's input. Vibration pulses are caught with Pin.irq and their times kept in a list, while the states are tracked as simple strings. Time is measured with time.ticks_diff(), because it gives the right difference even when the timer wraps around.
1# Raspberry Pi Pico alarm: keypad + PIR + kapı + titreşim, durum makinesi / Pico alarm: keypad + PIR + door + vibration, state machine
2from machine import Pin
3import time
4
5SIFRE = "2580"                            # kendi şifreni yaz / set your own code
6CIKIS_MS, GIRIS_MS, SIREN_MS = 30000, 20000, 180000
7
8KEYS = ["123A", "456B", "789C", "*0#D"]
9rows = [Pin(n, Pin.OUT, value=1) for n in (2, 3, 4, 5)]       # R1–R4
10cols = [Pin(n, Pin.IN, Pin.PULL_UP) for n in (6, 7, 8, 9)]    # C1–C4
11pir = Pin(16, Pin.IN)                     # HC-SR501 OUT (3,3 V)
12kapi = Pin(15, Pin.IN, Pin.PULL_UP)       # reed, diğer ucu GND / reed, other leg to GND
13titresim = Pin(17, Pin.IN)                # SW-420 DO, modül 3V3'ten / module powered from 3V3
14buzzer = Pin(14, Pin.OUT, value=0)        # aktif buzzer / active buzzer
15role = Pin(13, Pin.OUT, value=1)          # aktif LOW röle: 1 = kapalı / active-LOW relay: 1 = off
16led = Pin("LED", Pin.OUT)                 # dahili LED: kurulu / onboard LED: armed
17
18darbeler = []                             # son titreşim zamanları / recent vibration times
19son_darbe = 0
20
21
22def titresim_irq(p):
23    global son_darbe
24    simdi = time.ticks_ms()
25    if time.ticks_diff(simdi, son_darbe) > 150:     # sekmeler tek olay / bounces count once
26        son_darbe = simdi
27        darbeler.append(simdi)
28
29
30titresim.irq(trigger=Pin.IRQ_RISING, handler=titresim_irq)
31
32
33def tus_oku():
34    for r, row in enumerate(rows):
35        row.value(0)                      # bu satırı etkinleştir / activate this row
36        for c, col in enumerate(cols):
37            if col.value() == 0:
38                row.value(1)
39                return KEYS[r][c]
40        row.value(1)
41    return None
42
43
44durum = "COZULU"
45zaman = time.ticks_ms()
46acilis = time.ticks_ms()
47pir_hazir = False
48evde = False
49girilen = ""
50son_tus = None
51
52
53def degis(yeni):
54    global durum, zaman
55    durum, zaman = yeni, time.ticks_ms()
56    print("Durum / state:", yeni)
57
58
59def alarm(bolge):
60    role.value(0)                         # siren açık / siren on
61    degis("ALARM")
62    print("ALARM! Bolge / zone:", bolge)
63
64
65while True:
66    tus = tus_oku()
67    if tus != son_tus:                    # değişimi 20 ms sonra doğrula / confirm the change after 20 ms
68        time.sleep_ms(20)
69        if tus_oku() != tus:
70            tus = son_tus                 # sekme, yok say / contact bounce, ignore it
71    if tus and tus != son_tus:            # her basış bir kez / each press once
72        if tus in "0123456789":
73            girilen = (girilen + tus)[-8:]
74        elif tus in "*C":
75            girilen = ""
76        else:
77            dogru = girilen == SIFRE
78            girilen = ""
79            if not dogru:
80                print("Yanlis sifre / wrong code")
81            elif durum == "COZULU" and tus in "AB":
82                if kapi.value():
83                    print("Kapi acik, kurulamaz / door open, cannot arm")
84                else:
85                    evde = tus == "B"     # B = evde modu, PIR kapalı / B = stay mode, PIR off
86                    darbeler.clear()
87                    degis("CIKIS")
88            elif durum != "COZULU" and tus == "#":
89                role.value(1)
90                degis("COZULU")
91    son_tus = tus
92
93    simdi = time.ticks_ms()
94    gecen = time.ticks_diff(simdi, zaman)
95    if not pir_hazir and time.ticks_diff(simdi, acilis) > 60000:
96        pir_hazir = True                  # PIR ısındı / PIR warmed up
97    kapi_acik = kapi.value() == 1
98    hareket = pir_hazir and pir.value() == 1 and not evde
99    darbeler[:] = [t for t in darbeler if time.ticks_diff(simdi, t) < 3000]
100    zorlama = len(darbeler) >= 3          # 3 sn'de 3 darbe / 3 hits in 3 s
101
102    if durum == "CIKIS" and gecen >= CIKIS_MS:
103        degis("KURULU")
104    elif durum == "KURULU":
105        if zorlama:
106            alarm("Pencere / window")
107        elif hareket:
108            alarm("PIR")
109        elif kapi_acik:
110            degis("GIRIS")
111    elif durum == "GIRIS":
112        if zorlama:
113            alarm("Pencere / window")
114        elif gecen >= GIRIS_MS:
115            alarm("Kapi / door")
116    elif durum == "ALARM" and role.value() == 0 and gecen >= SIREN_MS:
117        role.value(1)                     # siren susar, hafıza kalır / siren stops, memory stays
118
119    gecen = time.ticks_diff(time.ticks_ms(), zaman)
120    if durum == "CIKIS":
121        buzzer.value(1 if gecen % 1000 < 60 else 0)
122    elif durum == "GIRIS":
123        buzzer.value(1 if gecen % 400 < 200 else 0)
124    else:
125        buzzer.value(1 if durum == "ALARM" and role.value() == 0 else 0)
126    led.value(1 if durum in ("KURULU", "ALARM") else 0)
127    time.sleep_ms(10)
Ways to reduce false alarms
An alarm system's worst enemy isn't the burglar but the false alarm: neither you nor your neighbours will take a siren seriously after it has gone off for nothing three times. Some of the measures below are already in the code; the rest are about mounting and wiring:
- Wait for the warm-up: The PIR may trigger on its own in the first 30–60 seconds after power-up; the code ignores the first 60 seconds.
- Use a filter: Waiting for each input to stay stable for a set time (debounce) weeds out short glitches on the cables.
- Count hits: Looking for 3 hits in 3 seconds instead of a single knock filters out wind, passing lorries and slamming doors. If needed, raise the count to 4–5 or lower the sensitivity with the trimmer on the board.
- Place the PIR carefully: Don't point it at radiators, air conditioners, sunny windows or curtains; it detects best when movement crosses its field of view from side to side. If you have pets, mount the sensor high, tilt it slightly down and lower the sensitivity.
- Require two sensors: In critical areas, demanding that the PIR and the laser, or the PIR and the door, trigger within a few seconds of each other (cross-zoning) stops a single faulty sensor from causing an alarm.
- Clean up the supply: The dip in the supply when the relay switches on can trigger the PIR. Put a 100 µF and a 100 nF capacitor between each sensor's VCC and GND, and run the relay and siren wires separately from the sensor wires.
- Use external pull-ups on long cables: The Arduino's internal pull-up is 20–50 kΩ and picks up noise on a 10-metre cable; a 4.7 kΩ external resistor plus a 100 nF capacitor on the pin make the line much more robust.
- Shield the laser from ambient light: Put the LDR inside a black tube and test the threshold separately in daylight and at night.
Common mistakes and fixes
- The alarm goes off as soon as it's armed: The PIR is still warming up or the door contact is wired wrongly. In the sensor test the door should read LOW when closed; if it reads HIGH, the magnet is too far away or a wire is broken.
- The keypad doesn't respond or reads the wrong key: The row and column wires are swapped. Instead of rewiring, change the order of the satirPinleri and sutunPinleri arrays in the code.
- You hear a long beep when you try to arm: That's not a fault but the not-ready warning: the door is open or the laser beam isn't reaching the LDR. Press D to check the zones.
- The relay clicks for a moment at power-up: The off level wasn't written before the pin was made an output, or ROLE_AKTIF_LOW was left true on an active-HIGH relay.
- The Arduino resets when the siren sounds: The siren and the Arduino share a weak adapter and the voltage drop reboots the board. Use a stronger adapter, a separate converter and thicker wire; details in Arduino keeps resetting.
- The vibration sensor never triggers or triggers all the time: Slowly turn the trimmer on the board to set the threshold and stick the sensor firmly to the glass or frame; a loose sensor doesn't pass on the hit.
- The ESP32 doesn't send messages: The token or chat ID is wrong, the network is 5 GHz, or you never started the bot in Telegram. A bot can't message you until you've sent it /start once.
- The laser works fine by day but gives false alarms at night (or the other way round): The threshold is too close to the ambient light level. Measure the beam and no-beam values in both conditions and pick a new LAZER_ESIK in the middle.
Ideas to upgrade your alarm system
- Arm and disarm with a card: Add an RFID RC522 reader next to the keypad and disarm with a key fob.
- 24-hour zones: Add an MQ-2 gas sensor or a flame sensor to create a gas and fire zone that alarms even when the system is disarmed.
- Wireless door sensors: Build battery-powered door contacts for distant windows with 433 MHz RF modules.
- Panel with a display: Show the countdown, status and alarm memory on an I2C LCD.
- Smart home integration: Connect the ESP32 to MQTT and Home Assistant and manage the alarm together with your lights and cameras.
- Tamper contact: Put a micro switch on the lid of the enclosure so the buzzer sounds when the box is opened, even when disarmed.
- Model house project: Bring all these zones together in a model house as the security layer of a smart home project.
Because it combines reading sensors, timing, a state machine and power design in one project, an Arduino alarm system is also a great way to learn. Run the sensor test first, then try the alarm with only the buzzer for a few days and connect the siren last. In the BlueGrays app you'll find projects such as the Reed Switch Door Sensor, the Laser Security System, the 4x4 Keypad LCD Password Lock and the ESP32 Motion Alarm System with Telegram alerts, each with step-by-step circuit diagrams and code.
Frequently asked questions
How do you make an alarm system with Arduino?
You connect a PIR motion sensor, a reed contact for the door, a keypad, an active buzzer and a relay module that drives a siren to an Arduino Uno. The code is written as a state machine that moves the system between disarmed, exit delay, armed, entry delay and alarm states. You arm and disarm it with a code on the keypad, and if a sensor triggers while it's armed, the siren sounds.
Which sensors are used in an Arduino alarm system?
The most common are a PIR motion sensor (HC-SR501) for indoor areas, reed contacts (MC-38) for doors and windows, an SW-420 vibration sensor for knocks on glass and a laser tripwire for hallways. You can add an MQ-2 for gas and a flame sensor for fire. Each sensor is defined as a separate zone with its own behaviour.
Does an Arduino alarm work during a power cut?
Not if it's only powered by an adapter. With a 13.8 V alarm power supply that charges a 12 V 7 Ah battery, a Uno system drawing about 100 mA runs for 4–5 days. In the ESP32 version the armed state is saved in flash, so the system comes back armed when the power returns; the router also needs a UPS for alerts to get out.
Can an Arduino alarm send notifications to my phone?
An Arduino Uno can't do it on its own, but an ESP32 can send instant Telegram messages over Wi-Fi and receive commands such as /kur and /coz from your phone. Where there's no internet, a SIM800L GSM module can send SMS or make a call. Using both methods together is the most reliable option.
Why does my PIR sensor give false alarms?
The usual causes are the 30–60 second warm-up after power-up, heat sources such as radiators and air conditioners, curtains swaying in warm sunlight and supply noise when a relay switches. Ignoring the warm-up in code, keeping the sensor away from heat sources and adding a capacitor between VCC and GND solve most of these problems.
Can an Arduino alarm system be used in a real home?
It works well for learning and for watching a room, garage or storeroom, but it doesn't replace a certified alarm system. Commercial systems are tested to standards such as EN 50131 for tamper protection, backup power, encrypted wireless links and connection to a monitoring centre. If you use an Arduino system at home, we recommend adding a backup battery, a tamper contact and a second notification channel.
Projects to build after reading this
See all projects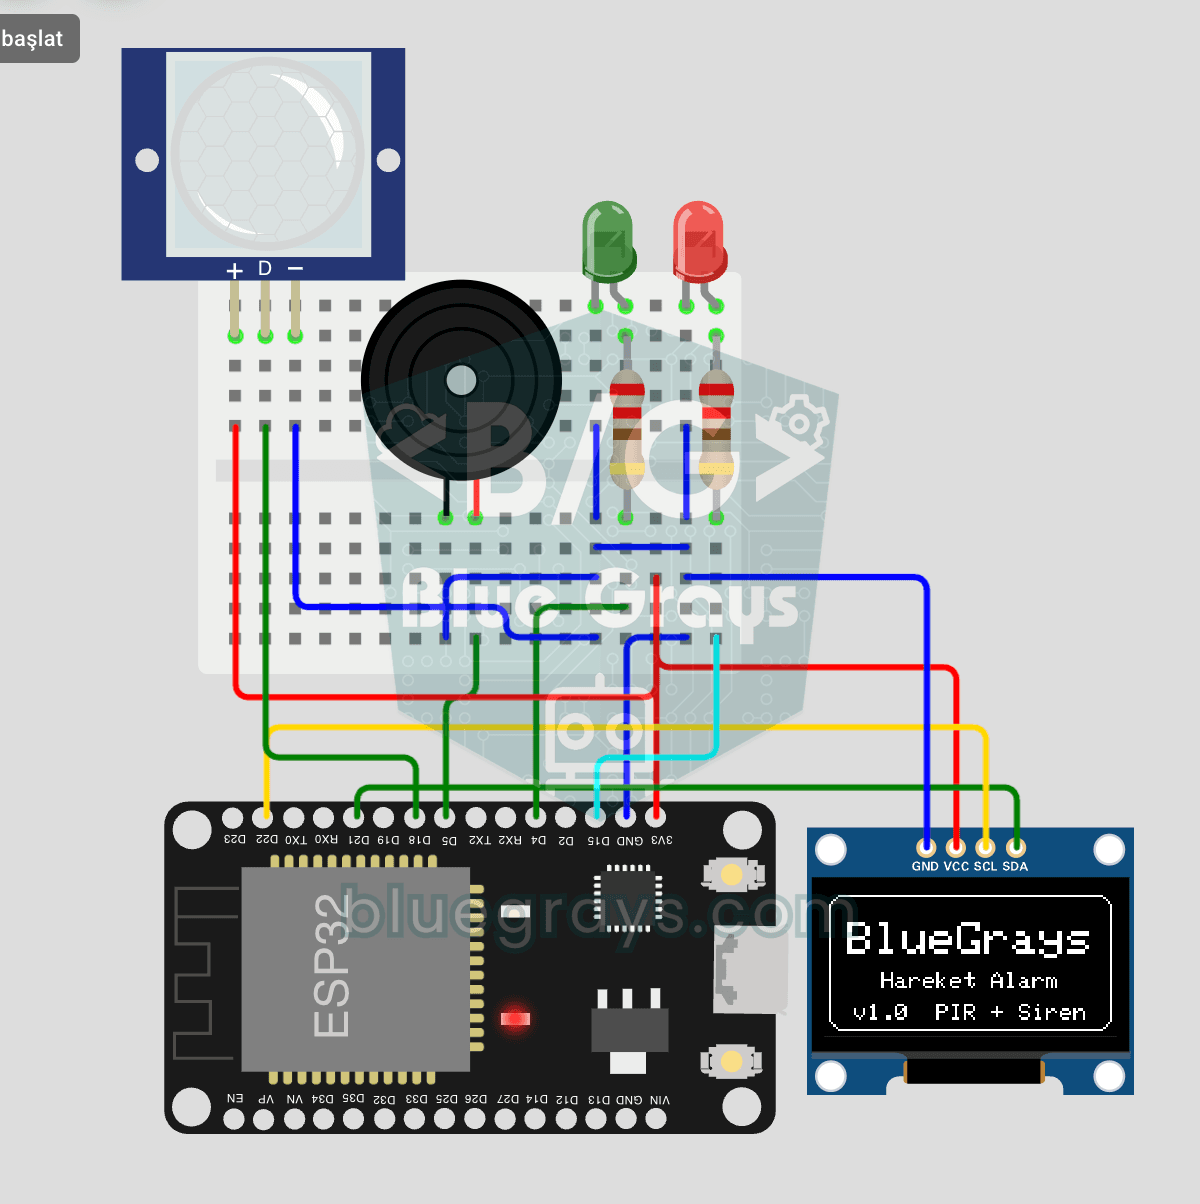
ESP32 Motion Alarm System (PIR + Buzzer + LED + Telegram)
A smart security alarm system that activates the buzzer and LED when the PIR sensor detects motion, while simultaneously sending an instant notification to the owner via Telegram. It includes a 30-second cooldown to limit the frequency of repeated alarms; this mechanism does not validate PIR detections or eliminate false triggers. Suitable for home security, garage monitoring, warehouses, or workrooms. With ESP32-CAM, photo notifications can be added; with the classic ESP32 DevKit V1, text notif
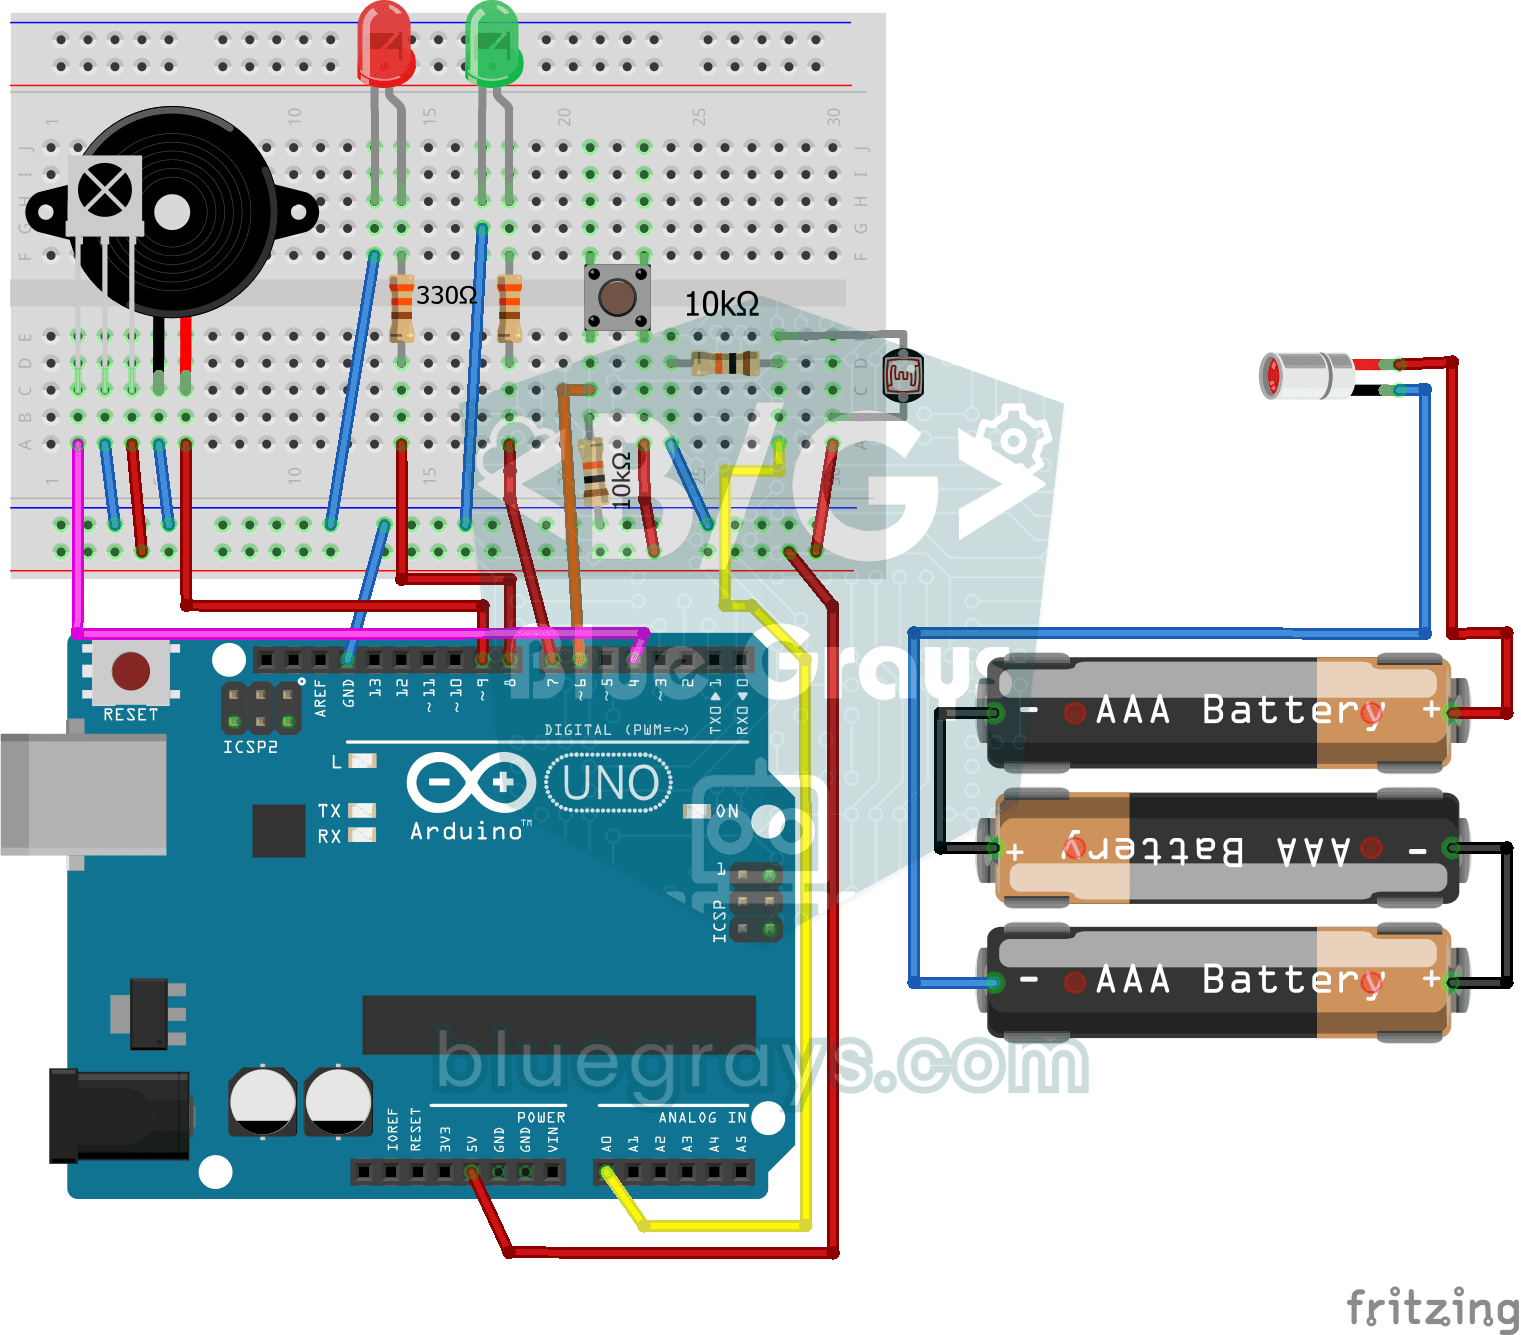
Laser Security System
Just like the laser heist scenes in films: a laser beam shines on a light sensor, and the moment someone steps in and breaks the beam, the red LED lights up and the buzzer starts sounding. The alarm d
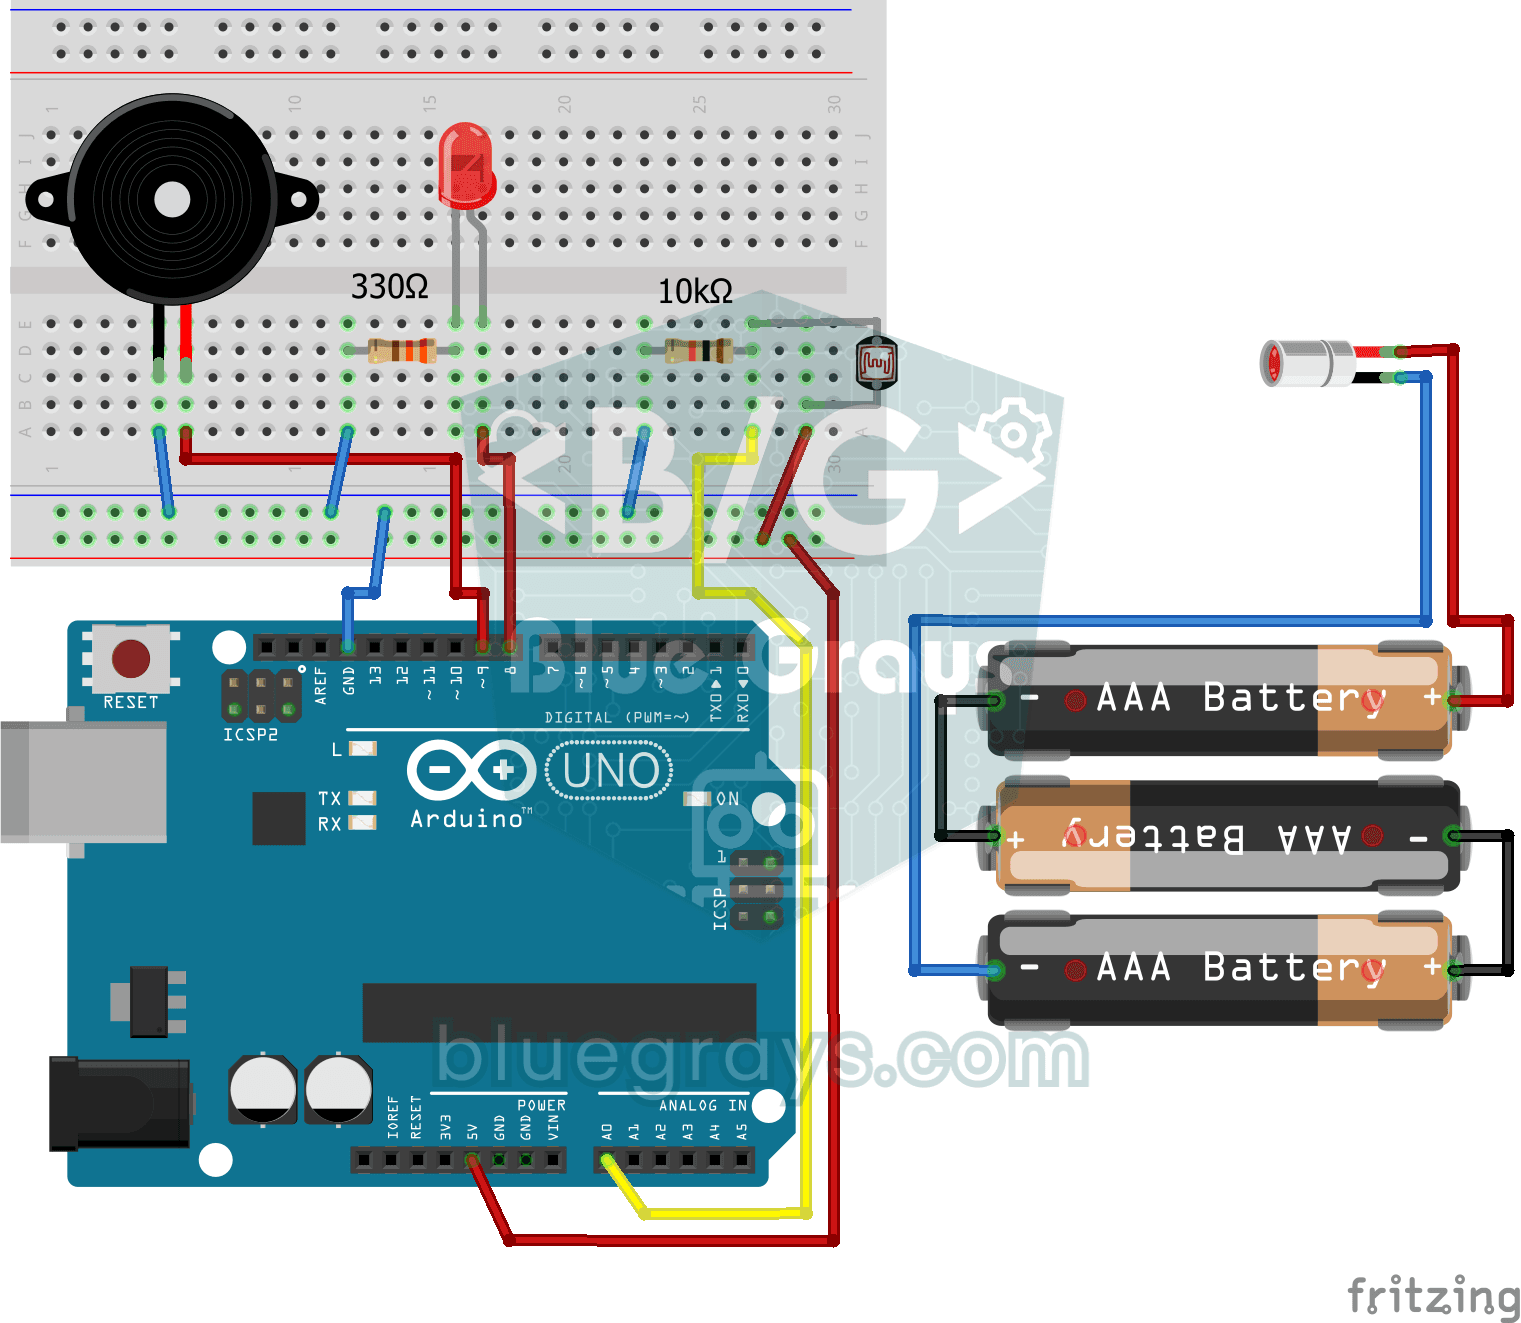
Laser Warning System
You set up an invisible beam fence, just like in the movies. A laser shines onto a light sensor on the other side; the moment someone walks through and breaks the beam, the LED lights up and the buzze
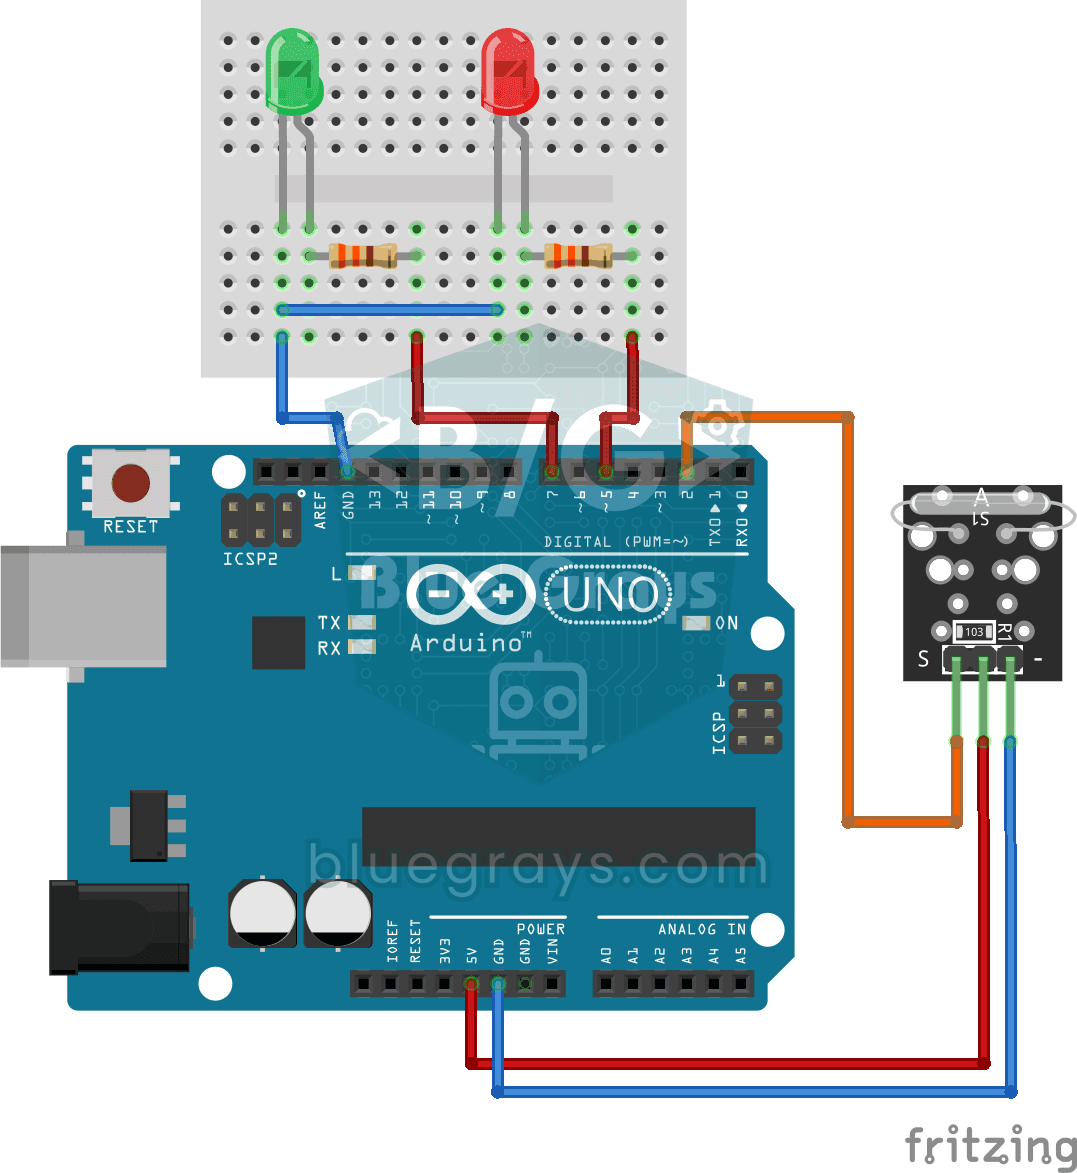
Reed Switch Door Sensor
Tell whether your door is open or closed just by looking at a light. You attach a small magnet to the door and a magnet-sensing switch to the frame; when the door is closed they sit side by side and t
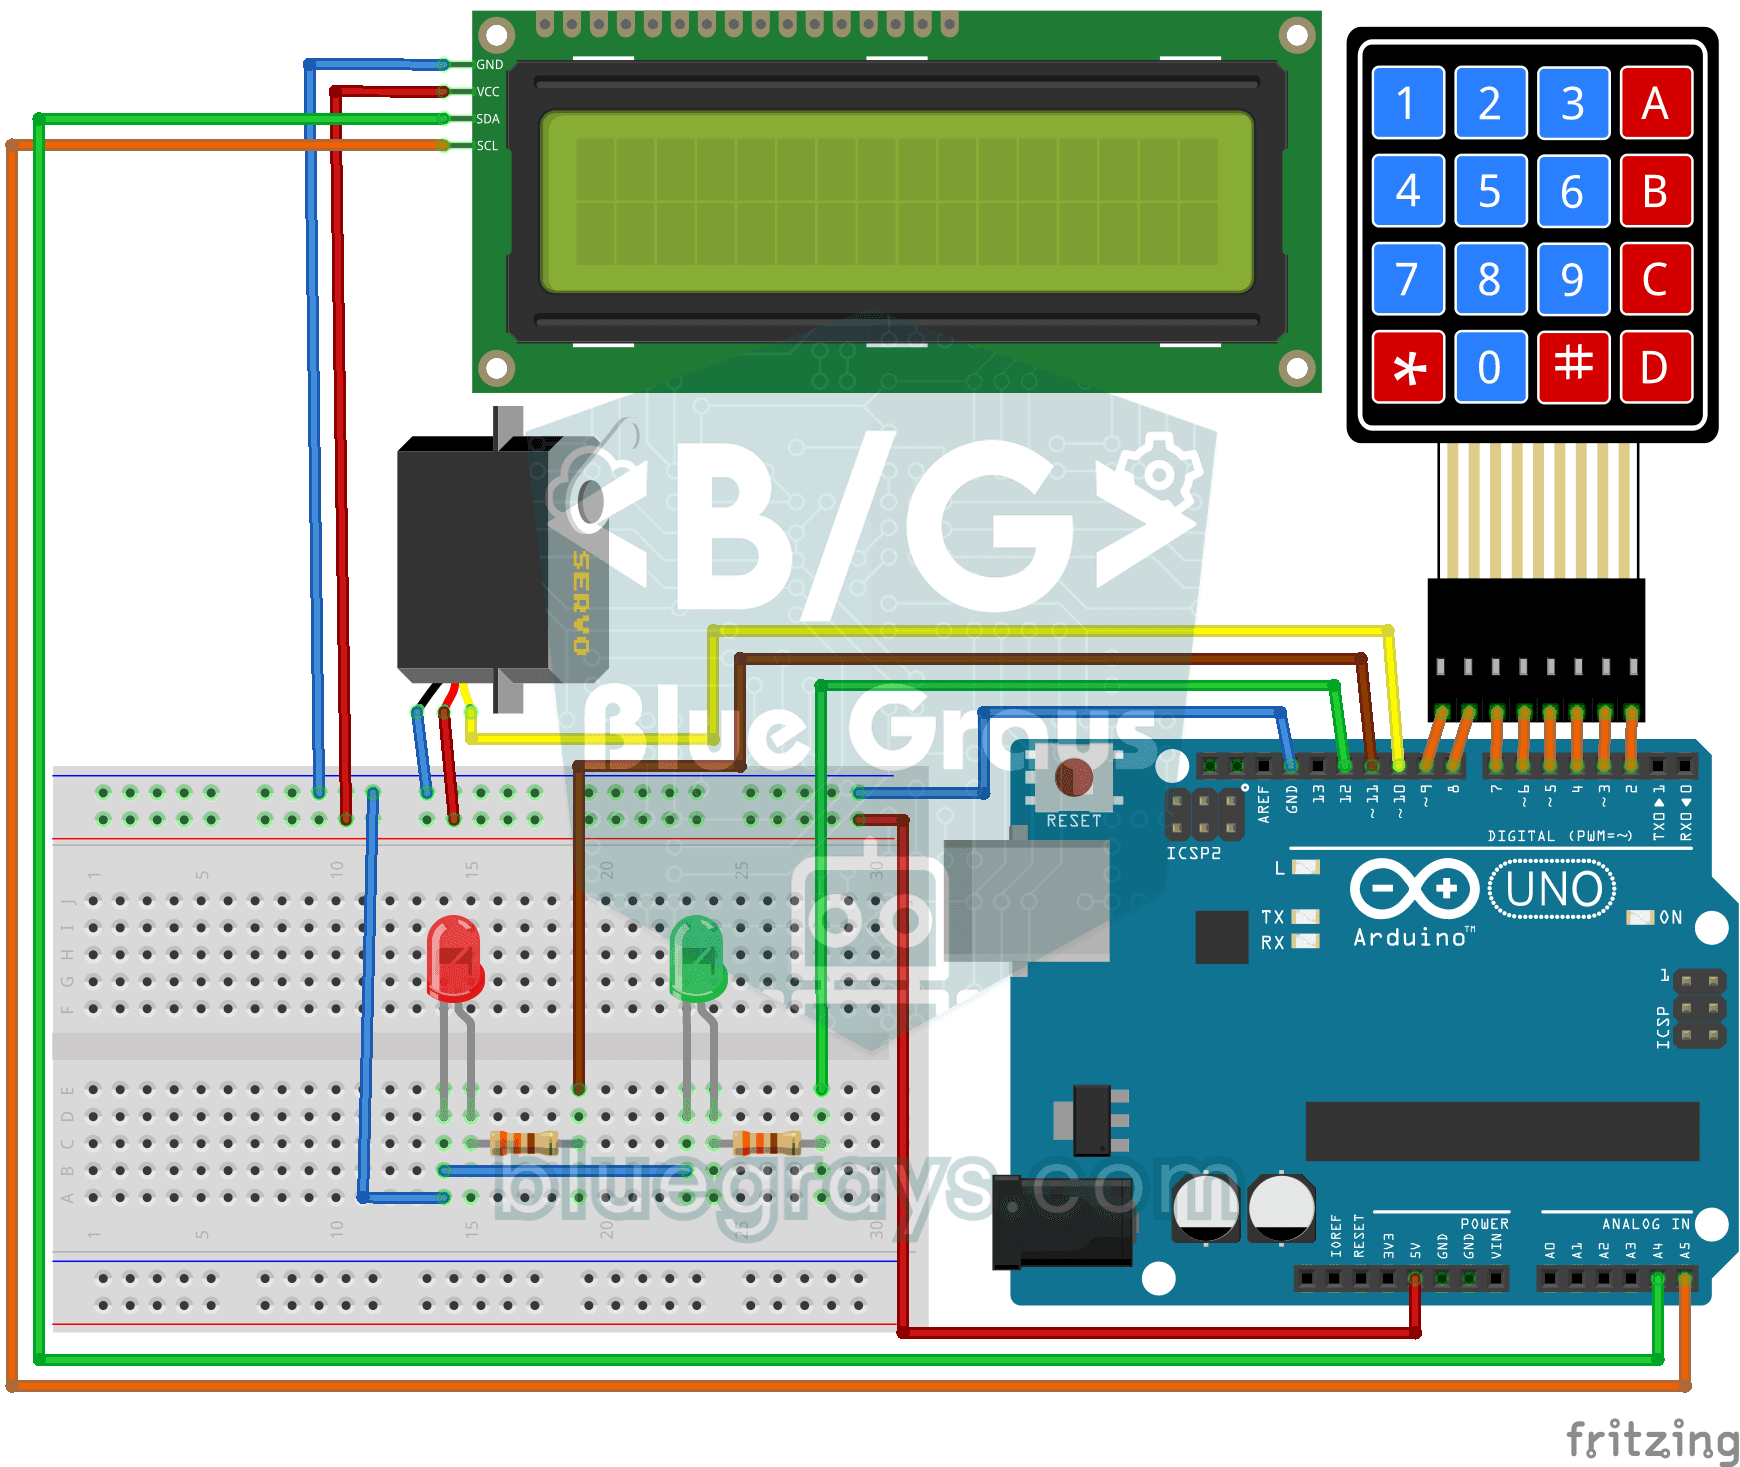
Password Lock with 4x4 Keypad and LCD
A small electronic door lock that keeps out anyone who doesn't know the code. You press the hash key and type the code on the keypad; if it is right, the screen says access granted, the green LED ligh
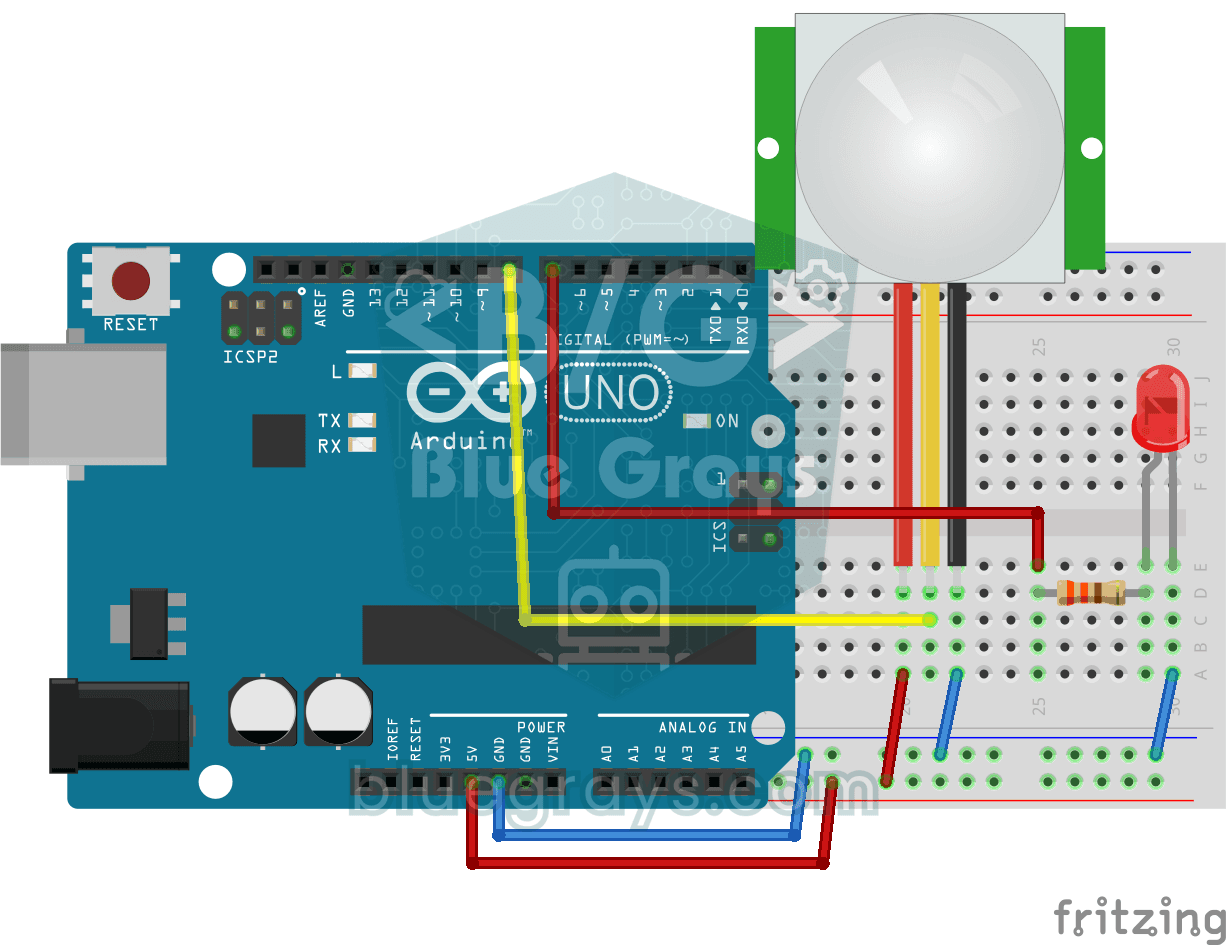
Motion Detector with Motion Sensor
A simple guard that tells you when someone walks into the room. The motion sensor picks up the warmth given off by the human body, and the Arduino keeps the LED on as long as there is movement and tur

Smart Electronic Safe
A small safe for your valuables that opens with a code. You type your four-digit code on the keypad; if it is right, the servo motor opens the lock, the green light comes on and the screen shows the s