
How to Ask an Arduino Question: 7 Rules for Fast Forum Answers
How to ask an Arduino question on a forum: 7 rules for board, code, wiring, error message and photos, a copy-ready template and a bad vs good example.
How do you ask an Arduino question that gets a fast, correct answer on a forum? Short answer: describe the problem so that someone who isn't sitting at your desk can see it. Write which board you use, the full code, which pin goes where, what you expected and what actually happens, the exact text of any error message and what you've already tried, and add a clear photo of the circuit. A question with all of this is often solved in the first reply. A question without it turns into a long back-and-forth that starts with "which board?" and "can you post the code?".
The people answering can't see your circuit, can't pick up your board and can't read your Serial Monitor; all they have is what you write and the photos you attach. Behind "the sensor doesn't work" there could be a wrong pin, a reversed wire, a missing library, the wrong baud rate, a weak power supply or a single typo in the code. Narrowing it down takes information. In this post you'll first get to know the Forum section of the BlueGrays app, then 7 rules, each with bad and good examples, a question template you can copy and fill in, a bad and a good version of the same question, what to do once answers come in, and the community rules.
What is the BlueGrays Forum and where is it?
In the BlueGrays app, Forum is a section of the Learn tab at the bottom. It's where people working with Arduino, ESP32 and Raspberry Pi Pico ask questions, share ideas and help each other. The forum is free; you don't need Premium to post, comment or read. Every post goes into one of five categories, and the right category puts your question in front of the right people. If you're stuck on a project, the right place is almost always Question; the other four are in the table below.
| Category | When to choose it | Example title |
|---|---|---|
| Question | A project doesn't work, you don't understand an error or you're stuck on something | Uno + DHT11: Serial Monitor shows nan |
| Idea | You want to share a project idea and get feedback | Adding an empty-tank warning to a plant watering project |
| Tutorial | You want to explain something you learned step by step | Installing the CH340 driver on Windows, step by step |
| Discussion | You want to talk about a topic with no single right answer | First board: Uno or Nano? |
| Bug Report | You noticed a mistake in the app or in a project's content | A resistor value is missing from a project's parts list |
Posts are separated by language. A new post is published in the language you're using the app in; a note at the bottom of the New Post screen reminds you of this. The forum list also opens with posts in the app's language. With the Topic language selector next to the search bar you can switch to Turkish, English, German, Spanish, French, Italian, Japanese, Portuguese, Indonesian or Russian posts, or pick All to see all ten together. Someone may have asked and solved the same problem in another language; error messages and code look the same in every language, so those posts help too. Type part of an error message or a part name ("HC-SR04", "avrdude") into Search posts to find older posts. Posts at the very top marked Pinned are highlighted posts, worth a look the first time you visit.
Creating a new post and following the answers
- In Learn › Forum, tap New Post.
- Choose Question as the Category; it's already selected for a new post.
- In the Title field, write the board, the part and the symptom on one line (rule 1 below).
- Fill in the template from this post in the Description field: wiring, expected and actual behavior, error text, what you tried.
- Add up to 5 photos under Images: a top view of the circuit and close-ups of the connections.
- Tap Add code and paste your full code into the field that opens.
- Publish the post with Publish. If you need to add something later, update it with the edit icon on the post page (Edit Post).
Replies to your post are listed in the Comments section below it. When someone comments on your post or replies to your comment, you get a notification on your phone, so you don't have to keep checking the forum. To answer a comment directly, use Reply under it. You can add up to 4 photos and code to comments too, so when you say "now this happens" you can show the new output or the fixed code. When a comment solves your problem, tap Accept under it: that comment gets the Accepted Answer label and your post is automatically marked Solved. Only the person who started the post, meaning you, sees Accept. If the problem was solved by your own experiments rather than one comment, use the Mark as Solved button on the post page.
7 rules for getting a fast answer
Each rule below removes a question the person answering would otherwise ask in their first message. Following all of them makes your question a bit longer, but whoever reads it can narrow down the problem on the first read. Under each rule you'll find bad and good examples; most of them are built on the free HC-SR04 Distance Measurement (Serial Display) project. In this project an HC-SR04 sensor is connected to an Arduino Uno (Trig D7, Echo D6) and the measured distance is printed to the Serial Monitor.
1. Put the board, the part and the symptom in the title. In the forum list people see the title first and decide from it whether they can help. Titles like "Help!!!", "Urgent" or "Arduino problem" don't say what's wrong; someone who works with ESP32 can't tell an Uno question apart, someone who knows servos can't spot a sensor question. A good title has three parts: the board, the part or task involved, and the symptom you observe. The title also matters for search: when someone later has the same problem and types "HC-SR04" or "avrdude" into Search posts, they find your post.
| Bad title | Good title |
|---|---|
| Help, it doesn't work!!! | Uno + HC-SR04: no lines at all in Serial Monitor |
| Arduino problem | Nano (CH340 clone): avrdude: stk500_recv(): programmer is not responding |
| Is my ESP32 broken? | ESP32 DevKit: WiFi.status() always returns 6, won't join the network |
2. Name the board and the versions. "Arduino" isn't one board. Uno R3 and Uno R4, an original Nano and a CH340 clone Nano, an ESP32 DevKit and an ESP32-C3 have different pins, different drivers and sometimes different code commands. On ESP32 the major version of the board package matters too: some commands that work in 2.x don't compile in 3.x. You can read the Arduino IDE version in the About window, the ESP32 board package version in the Boards Manager, and on the Pico the MicroPython version from the first line the Thonny shell prints when it connects. Add your operating system as well; upload and port problems in particular have different fixes on Windows, macOS and Linux.
| Bad | Good |
|---|---|
| I'm using an Arduino | Arduino Nano, CH340 clone, Arduino IDE 2.3, Windows 11 |
| I'm doing it with an ESP32 | ESP32 DevKit V1 (30 pins), esp32 board package 3.x, macOS |
| It doesn't work on the Pico | Raspberry Pi Pico W, MicroPython version line from the Thonny shell included |
3. Share the full code with Add code. The bug is usually not on the line you suspect but somewhere else: a forgotten pinMode in setup(), a wrongly defined pin variable, the wrong baud rate. So don't post only loop(); post everything from the #include lines at the top to the last closing brace. Paste the code as text, not as a screenshot or a photo of the screen; code as text can be compiled and tested by the person answering. If the code comes from a BlueGrays project, name the project and say exactly what you changed. If the code contains a Wi-Fi password, a bot token or an API key, replace them with "xxxxxxxx" before you share it.
| Bad | Good |
|---|---|
| A crooked photo of the code taken off the screen | Full code as text, pasted into the Add code field |
| "Here's the loop part:" and 6 lines | The whole sketch from the #include lines to the last closing brace |
| "I used the code from BlueGrays" (but a pin was changed) | "Code from the HC-SR04 project, I only moved trigPin from 7 to 9" |
| const char* password = "home1234wifi"; | const char* password = "xxxxxxxx"; |
4. Add a clear photo of the circuit. Most Arduino problems are not in the code but in the wires: a jumper shifted by one row, an LED plugged in backwards, a leg on the wrong side of the breadboard's center gap. Only a photo shows that. Take it in daylight or on a well-lit desk, straight from above; the pin labels on the board and the holes the wires go into should be readable. You can add up to 5 images to a post: one overall view, a close-up of the board's pins and a close-up of the sensor or module connections are enough for most questions. Write down the wire colors too ("orange wire from Trig to D7"), because two wires can overlap in a photo.
| Bad | Good |
|---|---|
| Dark, taken at an angle, washed out by the flash | In daylight, straight from above, pin labels readable |
| Only a drawing: "I built it like the diagram" | The real photo of the circuit you built, next to the diagram |
| One photo, wire ends out of frame | 3 photos: overall view, board pins, sensor connections |
5. Paste the Serial Monitor output and the error message as text. "It gives an error" isn't enough; you need the message that appears in the bottom panel of the Arduino IDE. With compile errors the "exit status 1" line at the bottom says nothing on its own; the real information is in the first error line, which tells you which line and which name are involved (we explain these messages one by one in Arduino compile errors). For upload errors add the avrdude or port line; for problems while the sketch runs, add what the Serial Monitor shows and which baud rate it's set to. If the Serial Monitor shows nothing, that's information too; even better, change the code slightly so it prints raw values and share that output. The code below does the same measurement as the HC-SR04 project, but without the distance filter: it prints the raw time and the distance every half second. If you see "sure(us): 0", no echo is coming back from the sensor, and the problem is most likely the wiring or the power supply.
1int echoPin = 6;   // Echo girişi / Echo input
2int trigPin = 7;   // Trig çıkışı / Trigger output
3
4void setup() {
5  pinMode(trigPin, OUTPUT);
6  pinMode(echoPin, INPUT);
7  Serial.begin(9600);          // Seri monitör de 9600 baud olmalı / Serial Monitor must be 9600 baud too
8  Serial.println("Basladi");   // Kart açıldı mı? / Did the board start?
9}
10
11void loop() {
12  // 10 us tetik darbesi / 10 us trigger pulse
13  digitalWrite(trigPin, LOW);
14  delayMicroseconds(2);
15  digitalWrite(trigPin, HIGH);
16  delayMicroseconds(10);
17  digitalWrite(trigPin, LOW);
18
19  // Yankı süresi, 30 ms zaman aşımı (yankı yoksa 0) / Echo time, 30 ms timeout (0 if no echo)
20  unsigned long duration = pulseIn(echoPin, HIGH, 30000UL);
21  int distance = duration * 0.034 / 2;
22
23  // Filtre yok: ham değerleri her seferinde yaz / No filter: print raw values every time
24  Serial.print("sure(us): ");
25  Serial.print(duration);
26  Serial.print("  mesafe(cm): ");
27  Serial.println(distance);
28
29  delay(500);   // 0,5 s bekle / Wait 0.5 s
30}| Bad | Good |
|---|---|
| "It gives an error" | "'trigPin' was not declared in this scope" (while compiling, line 12) |
| "exit status 1" | The complete first error line before exit status 1 |
| "The Serial Monitor shows weird characters" | "Serial Monitor is at 115200 baud and shows garbled characters; the code has Serial.begin(9600)" |
| "The distance is wrong" | "The Serial Monitor keeps showing sure(us): 0 mesafe(cm): 0" |
6. Say what you tried and what happened. Listing what you tried does two things: the person answering won't repeat the same suggestions, and the possibilities you've ruled out narrow the problem down. "I tried everything" tells nobody anything; write what you did and what happened, one by one. A short list is enough: a different USB cable, a different port, trying the sensor on another board, swapping wires, going back to the project's original code. If you have a multimeter, add the voltages you measured; seeing 3 V instead of 5 V between the sensor's VCC and GND pins tells the person answering a lot.
| Bad | Good |
|---|---|
| "I tried everything, nothing works" | "I replaced the Trig and Echo wires with new ones, same result" |
| "I think the sensor is broken" | "I tried the sensor on my friend's Uno and it works there" |
| "The wiring is correct" | "I measured 4.9 V between the sensor's VCC and GND pins with a multimeter" |
7. Ask one question per post. If you write three questions in one post, "the sensor doesn't work, my display stays dark too, and which driver should I buy for the motor?", the answers get mixed up: one person answers about the sensor, another about the motor, and it's unclear which comment solved what. Since Accept marks a single answer, a separate post per question also keeps things tidy. End the description with one clear question, so the person answering knows exactly what you're asking.
| Bad | Good |
|---|---|
| "I have sensor, display and motor problems, and I need a project idea" | Three separate posts: sensor (Question), display (Question), project idea (Idea) |
| "What should I do?" | "Is the missing echo caused by the wiring or by the power supply?" |
| "Can you rewrite the code for me?" | "Why does the LED in this code turn on once and stay on when I press the button?" |
A copy-ready Arduino question template
Copy the template below into the Description field and fill in the square brackets. If you don't know an item, don't delete it; write "I don't know" or ask where to find it. A deleted item just means the person answering will ask for it again. The first item is for the Title field and the last one is the final line of your description. Filling it in takes a few minutes, and many people find half the problem on their own while doing it: writing the connections out one by one is often when a reversed wire or wrong pin shows up.
- Title: [Board] + [part or task]: [symptom]. Example: Uno + HC-SR04: no lines at all in Serial Monitor
- Board and setup: [board model, original or clone], [Arduino IDE version / board package version / MicroPython version], [operating system]
- Project: [name of the BlueGrays project or your own project], [changes you made to the code and the circuit]
- Wiring: [part pin → board pin, with wire color], [power source: USB, battery, adapter]
- Expected: [what you expected to happen, with numbers if possible]
- What actually happens: [what happens, when, and whether it happens every time]
- Error message or Serial Monitor output: [as text], [Serial Monitor baud rate]
- What I tried: [what you tried → what happened, one per line]
- Attachments: [full code via Add code], [1–5 photos: overall view, board pins, module connections]
- My question: [one clear question]
Same problem, two questions: a bad and a good example
Say you've built the HC-SR04 Distance Measurement (Serial Display) project. The code should print the distance the sensor measures to the Serial Monitor every half second, but nothing shows up. The first question that comes to mind usually looks like this. Title: "Sensor not working help!!!" Description: "I built the distance sensor project but it doesn't work. I checked the code, it's correct. What should I do? It's urgent." Attached is one photo, taken from the side in dim light. The first replies to this question will most likely be questions: which board, which pins, what baud rate is the Serial Monitor at, what does it show? Each round can take a few hours, and a day can pass before anyone even starts talking about the actual problem.
Here's the same problem, well written. Title: "Uno + HC-SR04: no lines at all in Serial Monitor (Trig D7, Echo D6)". Description: "Board: Arduino Uno R3, Arduino IDE 2.3, Windows 11. Project: HC-SR04 Distance Measurement (Serial Display) from BlueGrays, uploaded without changing the code. Wiring: VCC → 5V (red), GND → GND (black), Trig → D7 (orange), Echo → D6 (yellow). Expected: one distance line in centimeters every half second. What actually happens: Serial Monitor is at 9600 baud, no lines at all. What I tried: I uploaded a test sketch that prints raw values and it keeps showing sure(us): 0; I covered and uncovered the sensor with my hand, nothing changes; I swapped the USB cable, same. My question: does the time always being 0 mean a wiring mistake or a faulty sensor?" Attached are the test sketch via Add code and three photos taken from above.
Someone reading the second question doesn't have to guess. If the time is zero, no signal is coming from the sensor's Echo pin; that usually means Trig and Echo are swapped, VCC is on 3.3V instead of 5V, or a wire is shifted by one row on the breadboard. If the top-down photo shows the orange wire actually going into D6 and the yellow one into D7, the answer is a single message: "Trig and Echo are swapped, switch the two wires." It also explains why the Serial Monitor is completely empty: the project's code only prints measurements between 3 and 100 cm, so 0 cm never shows up. Only someone who can see the code would spot that detail.
What to do once answers arrive
- Read the comment from the notification and try the suggestions in order, one at a time. If you change three things at once, you won't know which one worked.
- Write the result as a Reply to the person who suggested it: what did you do, what changed, what's the new Serial Monitor output? Add a photo or your corrected code to your reply if needed.
- When you find the comment that solves the problem, tap Accept. The comment is marked Accepted Answer and the post gets the Solved label; anyone searching for the same problem sees the solution right away in the list.
- If you found the solution yourself, or it came from several comments combined, write what you did in a short comment and use Mark as Solved. Saying "sorted it" and leaving leaves the next person with the same problem without an answer.
- Don't delete the post. A solved post is a ready answer for whoever uses Search posts later. Saying thanks and liking the comment that helped also shows the people answering that their effort counted.
Places to check before you ask
- The project's Troubleshooting section: Most BlueGrays project pages have a Troubleshooting section that walks through the most common issues in that project and the checks to make. This section is unlocked with Premium. We cover the other sections of the project page in the project page guide.
- If you get stuck, inside Understand the code: In every project's Understand the code tab, the step-by-step explanations are followed by an If you get stuck section covering the points where people most often get stuck with that code (in Premium projects it's unlocked with Premium). Details in the Understand the code post.
- Forum search: Type the distinctive part of the error message or the part name into Search posts, set the topic language to All and look at posts marked Solved.
- If the code won't upload to the board: for port, driver and avrdude errors, see Arduino code not uploading.
- If you get a compile error: for messages like "was not declared" or "expected ';'", see Arduino compile errors.
- If you see nothing in the Serial Monitor: for baud rate and line ending settings, see how to use the Serial Monitor.
- If the board keeps resetting or the ESP32 keeps rebooting: see Arduino keeps resetting and ESP32 brownout and Guru Meditation; if the ESP32 won't join the network, see ESP32 WiFi not connecting.
- If you're unsure about a resistor value: check the color bands with the Color code tool and the resistor an LED needs with the LED resistor tool; both are free.
Community rules: asking safely and respectfully
- Don't share personal information: Keep phone numbers, home or school addresses, email addresses, your full name or anyone else's name out of your question. Make sure your face, your student ID or an envelope with an address isn't visible in your photos. Before pasting code, remove the Wi-Fi password, bot token and any other secrets.
- Use respectful language: Everyone started somewhere; a question that looks basic today may be someone's first project. People answer as volunteers, and a harsh tone or a "don't you know this?" attitude helps nobody. Writing in capitals and stacking exclamation marks has the same effect.
- Don't post the same question again and again: If no answer has come, edit your existing post and add the missing information instead of starting a new one. Three copies of the same question spread the answers across three places.
- Get help, not someone to do your homework: "Can you write my traffic light assignment?" usually goes unanswered. "Why doesn't the yellow light turn on in my traffic light code? I tried these lines" gets an answer and teaches you something. Ask about the step where you're stuck and do the rest yourself.
In short: board, part and symptom in the title; wiring, expected and actual behavior, error text and what you tried in the description; the full code via Add code and a clear top-down photo as attachments. A question written this way is often solved in the first reply, and once it's solved it guides others too. Next time you're stuck on a project, open Forum in the Learn tab of the BlueGrays app and ask with New Post using this template.
Frequently asked questions
Where can I ask Arduino questions?
You can start a new post in the Question category in Forum, under the Learn tab of the BlueGrays app. People ask about Arduino, ESP32 and Raspberry Pi Pico there; other users and Ohmi, the BlueGrays mascot, answer. Your post is published in the language you use the app in.
Is the BlueGrays Forum free?
Yes, the forum is free. You don't need Premium to post, comment, or add photos and code. Premium unlocks content such as every project's full steps, code and Troubleshooting section.
How do I add Arduino code to a forum post?
On the New Post screen, tap Add code and paste your full code into the field that opens. Share the code as text, not as a screenshot, so the person answering can compile and test it. Remove secrets such as your Wi-Fi password before sharing.
What should I do if nobody answers my forum question?
Instead of starting a new post, edit your post and add what's missing: board and version, wiring, the exact error message and a clear photo. Make sure the title names the board, the part and the symptom. You'll get a notification when a new comment arrives.
What is an accepted answer on the forum?
When the person who started the post taps Accept under the comment that solved their problem, that comment gets the Accepted Answer label and the post is marked Solved. Only the post's author sees Accept. That way anyone searching for the same problem finds the solution quickly.
Can I get help with my homework on the forum?
Yes, but ask about the part where you're stuck instead of asking someone to do it for you. Share your code, a photo of the circuit and what you tried, and ask a specific question: you'll get an answer and learn the topic. Mentioning the help you received in your work is a good habit too.
Projects to build after reading this
See all projects
HC-SR04 Distance Measurement (Serial Display)
The HC-SR04 sensor works just like a bat finding its way in the dark: it sends out a sound you cannot hear, listens for the echo and measures how far away the object in front of it is. The Arduino wri

LED Blink
The very first hello of electronics: switching a single LED on and off. The Arduino turns the LED on and off at short intervals, so the light blinks quickly. You see in the simplest way how the board

LED Control with a Push Button (Push)
Just like a doorbell: the light stays on as long as you press, and goes off when you let go. The Arduino keeps listening to the button; while it's pressed the LED is on, and the moment you lift your f

Toggle an LED with a Button (On/Off)
Press the button once and the light comes on, press it again and it goes off, just like the light switch in your room. The Arduino notices every press and flips the LED to the opposite state, waiting

Measuring Light Intensity with an LDR
Want to see how bright your room is as a number? The LDR, a small part that reacts to light, measures the light around it, and the Arduino writes the value to your computer screen every half second. C

Temperature and Humidity with DHT11
How warm is your room, and is the air humid or dry? The DHT11 sensor measures temperature and humidity, and the Arduino writes the values on a two-line LCD screen, refreshing every couple of seconds.

LED Blink with ESP32
Teaches basic GPIO output usage with ESP32. We achieve a blinking effect by turning an LED on and off from a digital pin. ESP32 version of the classic blink project on Arduino UNO; the basic blink commands in the Arduino environment are the same, but the ESP32's pin layout and 3.3 V GPIO levels differ from those of the Arduino UNO.
Raspberry Pi Pico: Controlling an External LED (Breadboard)
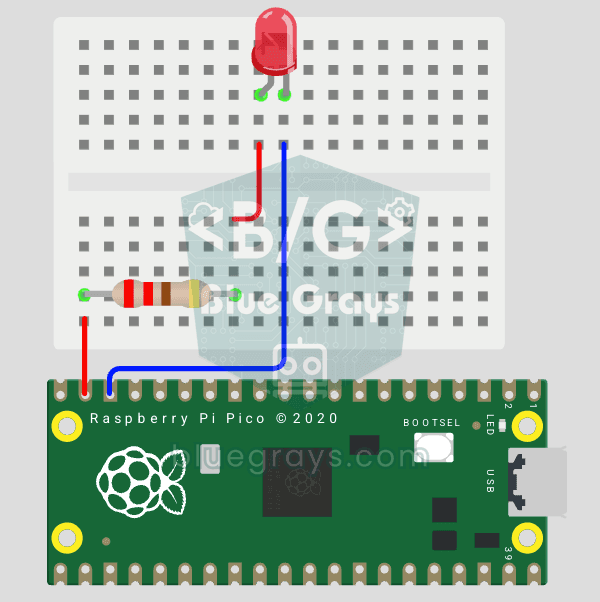
The next step after Pico’s built-in LED: connecting an external LED to the breadboard and controlling it via the GP14 pin. In this project, you’ll learn how to use any of the Pico’s general-purpose GPIO pins as an output, the LED’s polarity (long leg = anode/+, short leg = cathode/–), and why a current-limiting resistor (220Ω) is required. If you don’t include the resistor, excessive current will flow through the LED and it may burn out. The circuit is very simple: Pico GP14 → 220Ω resistor → LE