
Raspberry Pi Pico W Projects: 15 Wi-Fi and Bluetooth Ideas
15 Raspberry Pi Pico W projects: web server, MQTT, NTP clock, weather, Telegram and BLE. MicroPython code, memory limits and a Pico W vs ESP32 table.

If you're looking for Raspberry Pi Pico W projects, this list has 15 realistic projects that take you through the board's Wi-Fi and Bluetooth features from easy to hard: a web server that switches an LED from your phone, an NTP clock that gets its time from the internet, a station that publishes sensor data over MQTT, an alarm that sends a Telegram message when a door opens and a BLE temperature sensor you read with your phone are just a few of them. All the projects run with the same code on the Pico W and the new Pico 2 W.
We've collected the parts, connection type and difficulty of each project in one table and included complete MicroPython code for the five most important ones. After that you'll find the Pico W's memory limits in MicroPython, common errors, and a comparison table showing which projects are better on a Pico W and which on an ESP32. If this is your first time with the board, have a look at what is a Raspberry Pi Pico first.
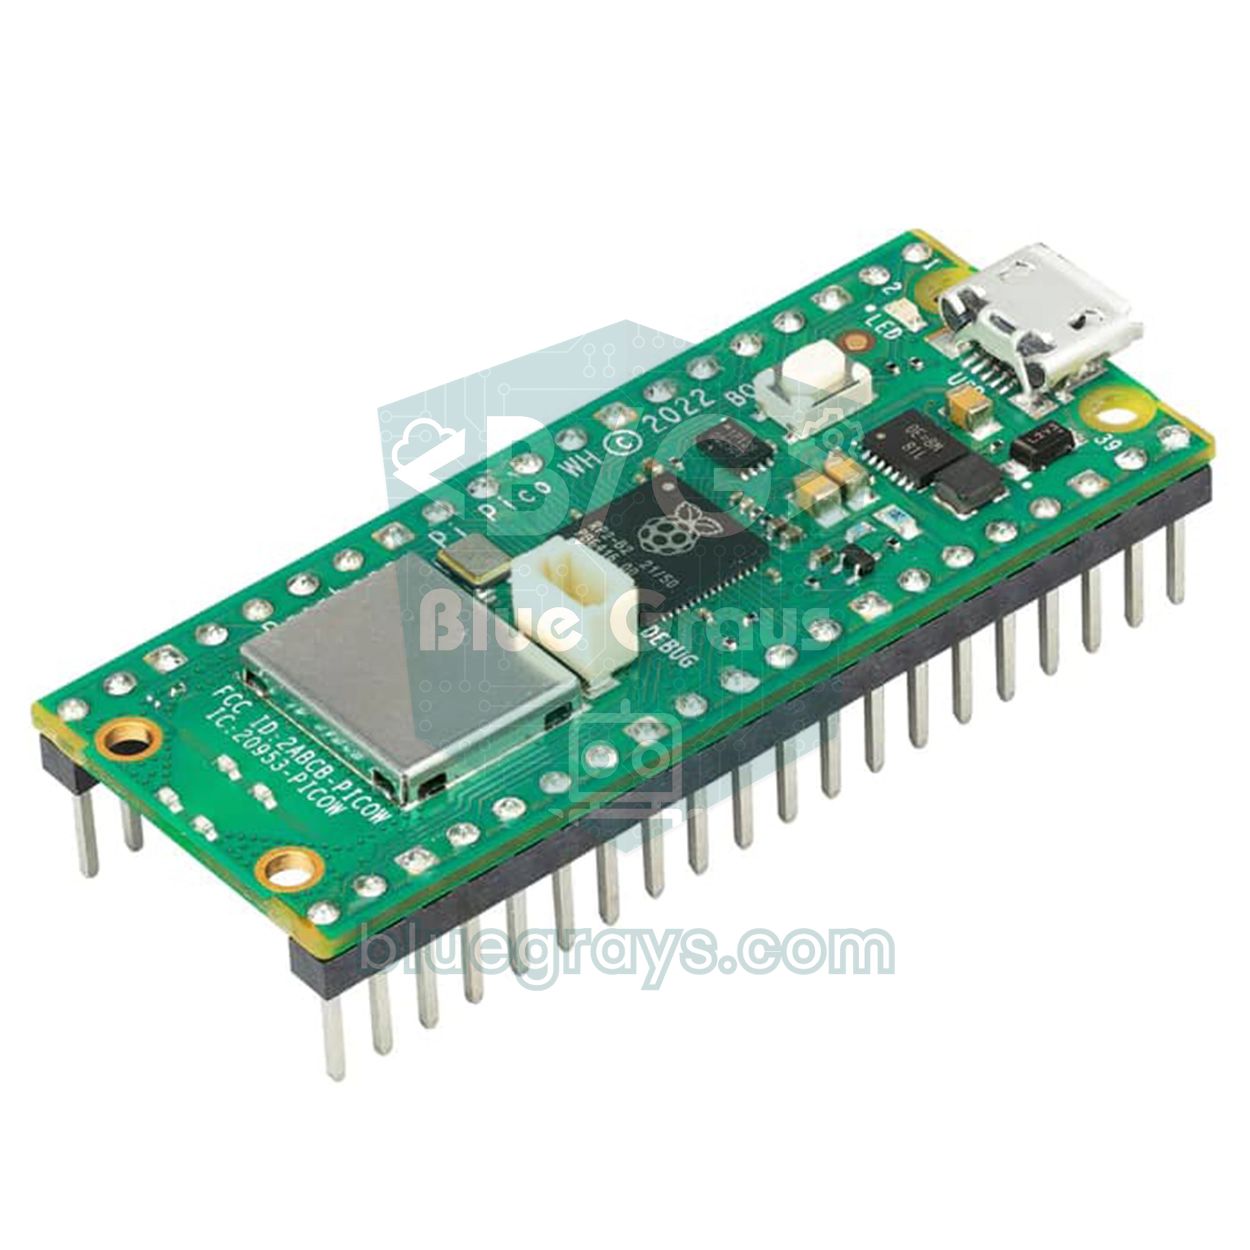
Pico W and Pico 2 W: what's the difference?
The Pico W is the classic Pico with an Infineon CYW43439 wireless chip added: it offers 2.4 GHz Wi-Fi (802.11n) and Bluetooth 5.2 (Classic and BLE). The Pico 2 W combines the same wireless chip with the more powerful RP2350 processor; RAM doubles and flash grows to 4 MB. The pinout, size and most MicroPython code are the same on both boards. Because the wireless chip uses some internal pins, the onboard LED is no longer on GP25 but on the wireless chip, and you control it with Pin("LED").
| Feature | Pico W | Pico 2 W |
|---|---|---|
| Processor | RP2040, 2 × Cortex-M0+, 133 MHz | RP2350, 2 × Cortex-M33 (or RISC-V), 150 MHz |
| RAM | 264 KB | 520 KB |
| Flash | 2 MB | 4 MB |
| Wireless | CYW43439: 2.4 GHz Wi-Fi 4, Bluetooth 5.2 | CYW43439: 2.4 GHz Wi-Fi 4, Bluetooth 5.2 |
| GPIO / ADC | 26 GPIO, 3 analog inputs (12-bit) | 26 GPIO, 3 analog inputs (12-bit) |
| Onboard LED | Pin("LED") | Pin("LED") |
| MicroPython firmware | RPI_PICO_W | RPI_PICO2_W |
Before you start: MicroPython and libraries
- Flash the right firmware: Use the MicroPython UF2 file called RPI_PICO_W for the Pico W and RPI_PICO2_W for the Pico 2 W. The plain Pico firmware has no network module, and Wi-Fi code fails with "no module named network".
- Use Thonny: In Thonny choose "MicroPython (Raspberry Pi Pico)" in the bottom right; it runs code, copies files to the board and syncs the board's clock with your computer. For MicroPython's basic commands, see the MicroPython basics guide.
- Install extra packages with mip: Once connected to Wi-Fi, type import mip; mip.install("umqtt.simple") or mip.install("aioble") in the Shell to download the package straight to the board. Thonny's Tools > Manage packages menu does the same job.
- 2.4 GHz only: The Pico W can't join 5 GHz networks; if your router broadcasts both bands under the same name, connecting can be unreliable.
- Power: While Wi-Fi transmits, peak current can exceed 100 mA. Use a good USB cable and an adapter that delivers at least 500 mA.
| Module | What it does | Built in? |
|---|---|---|
| network | Wi-Fi connection, access point, network scan | Yes (in the W firmware) |
| socket / asyncio | Web server, UDP, concurrent tasks | Yes |
| requests | HTTP and HTTPS requests, JSON | Yes |
| ntptime | Getting the time from the internet | Yes |
| bluetooth | Low-level BLE | Yes |
| aioble | Easy BLE: services, characteristics, advertising | Depends on version; otherwise mip.install("aioble") |
| umqtt.simple | MQTT client | Depends on version; otherwise mip.install("umqtt.simple") |
The Wi-Fi connection code you'll use in every project
Save the file below to the Pico W in Thonny as wifi.py. Then in every other project you only need to write import wifi and wifi.connect(). The onboard LED blinks while connecting and stays on once connected; that's the easiest way to see the connection state when the board isn't attached to a computer.
1# wifi.py: Pico W'ye bu adla kaydet / save it to the Pico W with this name
2import network, time
3from machine import Pin
4
5SSID = "AgAdi"                    # Wi-Fi adın (2,4 GHz) / your Wi-Fi name (2.4 GHz)
6PASSWORD = "Sifre123"             # Wi-Fi şifren / your Wi-Fi password
7led = Pin("LED", Pin.OUT)         # Pico W ve Pico 2 W dahili LED / onboard LED
8
9
10def connect(timeout=20):
11    network.country("TR")         # ülke kodu: kanal ve güç sınırları / country code
12    wlan = network.WLAN(network.STA_IF)
13    wlan.active(True)
14    if not wlan.isconnected():
15        wlan.connect(SSID, PASSWORD)
16        for _ in range(timeout * 2):
17            if wlan.status() < 0 or wlan.status() == 3:
18                break
19            led.toggle()          # bağlanırken yanıp söner / blinks while connecting
20            time.sleep(0.5)
21    if wlan.status() != 3:
22        led.off()
23        raise RuntimeError("Wi-Fi hatasi / error: %d" % wlan.status())
24    led.on()                      # bağlandı / connected
25    print("IP:", wlan.ifconfig()[0], "RSSI:", wlan.status("rssi"), "dBm")
26    return wlan
wlan.status() tells you which stage the connection is at: 3 means connected with an IP address, 1 connecting, −2 network not found, −3 wrong password and −1 failed for another reason. As soon as the code sees a value below 0 it stops waiting and reports the error clearly. RSSI is the signal strength: −50 dBm is very good, −70 dBm acceptable, and −80 dBm or lower is a connection prone to dropouts. The network.country("TR") line sets the wireless chip's channels and power to the rules of the country; if you're elsewhere, use your own two-letter code.
15 Raspberry Pi Pico W projects: table
| # | Project | Connection | Extra parts | Difficulty |
|---|---|---|---|---|
| 1 | Connect to Wi-Fi and show the status on the onboard LED | Wi-Fi | None | Easy |
| 2 | Web server that controls an LED and a relay from your phone | Wi-Fi, HTTP | LED, relay module | Easy |
| 3 | Temperature dashboard that updates live in the browser | Wi-Fi, HTTP + JSON | Internal sensor or DHT22 | Medium |
| 4 | NTP clock that gets its time from the internet (with OLED) | Wi-Fi, NTP | 0.96" OLED | Easy |
| 5 | Access point (AP) mode for control without a router | Wi-Fi AP | None | Medium |
| 6 | Wi-Fi network scanner and signal meter | Wi-Fi | OLED (optional) | Easy |
| 7 | Publish sensor data over MQTT | Wi-Fi, MQTT | Internal sensor | Medium |
| 8 | Sensor that joins Home Assistant over MQTT | Wi-Fi, MQTT | DHT22 | Medium |
| 9 | Weather display | Wi-Fi, HTTPS + JSON | OLED | Medium |
| 10 | Telegram alert when a door opens | Wi-Fi, HTTPS | Reed switch or PIR | Medium |
| 11 | Messaging between two Pico W boards over UDP | Wi-Fi, UDP | Second Pico W, button, LED | Medium |
| 12 | Data logging and charts on ThingSpeak | Wi-Fi, HTTP | Any sensor | Easy |
| 13 | BLE temperature sensor read by your phone | BLE | None | Medium |
| 14 | BLE remote for an LED or servo from your phone | BLE (UART service) | LED or servo | Hard |
| 15 | Bluetooth keyboard and presentation remote | BLE HID (Arduino IDE) | 2 buttons | Hard |
Level 1: Wi-Fi and web projects (1–6)
The first project is the wifi.py above itself; the LED blinking while connecting and staying on once connected is a small but very handy indicator. In the second project the Pico W becomes a web server: when you open the board's IP address on your phone, the ON and OFF buttons on the page send /on or /off in the address; the code reads it and switches the LED or relay. A complete socket-based example and the relay wiring are in the Pico W web server guide. In the third project the page doesn't reload itself; a small piece of JavaScript in the browser fetches JSON from /data every two seconds, and the Pico W reads the internal temperature sensor (ADC4) or a DHT22 and serves it there. That way the page updates live without flickering.
The fourth project is a desk clock that gets its time from the internet. ntptime.settime() sets the board's internal clock to UTC; for Turkey adding three hours is enough, while in countries with daylight saving time you'll need to work out the rule in code. In the fifth project the Pico W creates its own network instead of joining a router: you connect your phone to the "PicoW" network created with network.WLAN(network.AP_IF) and open the control page at 192.168.4.1; it's very useful in the garden or at school, wherever there's no router. The sixth project uses wlan.scan() to list nearby networks with their channels and signal strengths; carry the Pico W to different corners of the house and check the RSSI to decide where a sensor should go.
1import time, ntptime
2import wifi
3
4UTC_OFFSET = 3 * 3600             # Türkiye UTC+3; kendi saat dilimin / your own time zone
5wifi.connect()
6ntptime.settime()                 # dahili saati UTC'ye ayarla / set the internal clock to UTC
7
8while True:
9    t = time.localtime(time.time() + UTC_OFFSET)
10    print("%02d:%02d:%02d  %02d.%02d.%04d" % (t[3], t[4], t[5], t[2], t[1], t[0]))
11    if t[4] == 0 and t[5] == 0:   # her saat başı yeniden eşitle / resync every hour
12        try:
13            ntptime.settime()
14        except OSError:
15            pass
16    time.sleep(1)
Level 2: Internet services: MQTT, weather, Telegram (7–12)
MQTT is the most common way for IoT devices to communicate: the Pico W sends its reading to a topic on a broker server, and the phone, computer or Home Assistant subscribed to that topic receives the message instantly. You don't need to know the board's IP address or open ports on your router. In the seventh project we publish the internal temperature sensor every ten seconds; in the eighth, a DHT22 sensor that sends an MQTT Discovery message with the same logic shows up in Home Assistant by itself. The Home Assistant side of the setup is explained in the ESP32 MQTT and Home Assistant guide and applies to the Pico W just the same.
1import time
2from machine import ADC
3from umqtt.simple import MQTTClient
4import wifi
5
6BROKER = "test.mosquitto.org"     # kendi broker'ın / your own broker
7TOPIC = b"bluegrays/picow/sicaklik"
8sensor = ADC(4)                   # dahili sıcaklık sensörü / internal temperature sensor
9
10
11def read_temp():
12    volts = sensor.read_u16() * 3.3 / 65535
13    return 27 - (volts - 0.706) / 0.001721
14
15
16wifi.connect()
17client = MQTTClient("picow-bluegrays", BROKER, keepalive=60)
18client.connect()
19
20while True:
21    msg = "%.1f" % read_temp()
22    client.publish(TOPIC, msg.encode())   # her 10 sn yayınla / publish every 10 s
23    print("gonderildi / sent:", msg)
24    time.sleep(10)
The ninth project is a weather display: the Pico W uses requests to send an HTTPS request to a free weather service that needs no API key, then takes the temperature and weather code from the JSON reply and writes them to the OLED. Memory matters here: to keep the reply small, request only the fields you need. The tenth project is one of the most useful at home: when a reed switch on the door opens, the Pico W sends a message to your phone straight away through a Telegram bot. The steps for creating the bot and getting the token and chat ID are in the ESP32 Telegram Bot guide; at the end of the same guide there's also a more advanced Pico W version that accepts commands.
1import time, requests
2from machine import Pin
3import wifi
4
5TOKEN = "1234567890:AAExxxxxxxxxxxxxxxxxxxxxxxxxxxxxxxx"   # BotFather token'ı / token from BotFather
6CHAT_ID = 123456789               # kendi Telegram ID'n / your Telegram ID
7URL = "https://api.telegram.org/bot%s/sendMessage" % TOKEN
8door = Pin(15, Pin.IN, Pin.PULL_UP)   # reed röle -> GND; kapı açılınca 1 / reed switch, 1 when open
9
10
11def send(text):
12    try:
13        r = requests.post(URL, json={"chat_id": CHAT_ID, "text": text})
14        r.close()                 # belleği geri ver / free the memory
15    except OSError as e:
16        print("gonderilemedi / failed:", e)
17
18
19wifi.connect()
20last = door.value()
21while True:
22    now = door.value()
23    if now != last:
24        send("Kapi acildi / door opened" if now else "Kapi kapandi / door closed")
25        last = now
26    time.sleep_ms(100)
In the eleventh project two Pico W boards on the same network send each other UDP packets: press a button on one and the other's LED lights up. UDP works without setting up a connection, so it's very fast and takes only a few lines, but it doesn't guarantee delivery; for important commands it's a good habit to wait for a short "got it" reply from the other side. In the twelfth project readings are sent every 20 seconds with an HTTP request to a free IoT service such as ThingSpeak; the service stores the data and draws ready-made charts in the browser. Remember that free plans limit how often you can send.
Level 3: Bluetooth projects (13–15)
In MicroPython the Pico W's Bluetooth is used as BLE (Bluetooth Low Energy). A BLE device offers one or more services, and each service contains characteristics that can be read or send notifications. In the thirteenth project we use the standard Environmental Sensing service (0x181A) and Temperature characteristic (0x2A6E), so general BLE apps such as nRF Connect show the value directly in °C. The code relies on the aioble package; if your board doesn't have it, install it with mip first. BLE concepts are covered in detail in the ESP32 Bluetooth and BLE guide.
1import asyncio, struct, bluetooth, aioble
2from machine import ADC
3
4ENV_SENSE = bluetooth.UUID(0x181A)        # Environmental Sensing servisi / service
5TEMP_CHAR = bluetooth.UUID(0x2A6E)        # Temperature karakteristiği / characteristic
6sensor = ADC(4)
7
8service = aioble.Service(ENV_SENSE)
9temp_char = aioble.Characteristic(service, TEMP_CHAR, read=True, notify=True)
10aioble.register_services(service)
11
12
13def read_temp():
14    volts = sensor.read_u16() * 3.3 / 65535
15    return 27 - (volts - 0.706) / 0.001721
16
17
18async def measure():
19    while True:
20        t = int(read_temp() * 100)                 # 0,01 °C birimi / unit of 0.01 °C
21        temp_char.write(struct.pack("<h", t), send_update=True)
22        await asyncio.sleep(2)
23
24
25async def advertise():
26    while True:
27        async with await aioble.advertise(
28            250_000, name="PicoW-Temp", services=[ENV_SENSE], appearance=768
29        ) as connection:
30            print("baglandi / connected:", connection.device)
31            await connection.disconnected(timeout_ms=None)
32
33
34async def main():
35    await asyncio.gather(measure(), advertise())
36
37
38asyncio.run(main())
In the fourteenth project the Pico W imitates a common BLE layout called the Nordic UART Service (NUS); text such as "on", "off" or "90" sent from a BLE terminal app on your phone lights the LED or turns the servo on the Pico W. The fifteenth project is written in the Arduino IDE: the KeyboardBLE library in Earle Philhower's Raspberry Pi Pico/RP2040 core makes the Pico W appear to computers and phones as a Bluetooth keyboard. After enabling the Bluetooth stack in the Tools menu, you can build a remote with two buttons that moves to the next and previous slide in presentations.
Memory limits and stability
The memory MicroPython can use on a Pico W is only part of the board's 264 KB of RAM; the firmware, the Wi-Fi driver and the network buffers use the rest. That's plenty for simple projects, but when HTTPS requests, large JSON replies and long HTML pages come together you may see a MemoryError. Each HTTPS connection temporarily reserves 30–50 KB for encryption, and a 20 KB JSON reply takes up memory twice, first as text and then as a dictionary. The Pico 2 W's doubled RAM eases this limit a lot.
| Resource | Pico W | Pico 2 W | Note |
|---|---|---|---|
| Total RAM | 264 KB | 520 KB | Part of it is used by the firmware and Wi-Fi |
| Free memory at start-up (gc.mem_free) | About 150–190 KB | About 400 KB or more | Varies by version; measure on your own board |
| Flash / file system | 2 MB / about 850 KB | 4 MB / over 2 MB | Code, HTML and log files live here |
| One HTTPS connection | 30–50 KB temporarily | 30–50 KB temporarily | Release it with r.close() when done |
| Wi-Fi and BLE together | Works, memory gets even tighter | Runs comfortably | Test each on its own first, then combine |
Pico W or ESP32? Which project suits which board?
| Project type | Pico W | ESP32 | Recommendation |
|---|---|---|---|
| Simple web server, LED and relay control | Handles it easily | Handles it easily | Either; Pico W if you're learning MicroPython |
| MQTT sensor and Home Assistant | Works well | Very good, code-free with ESPHome | ESP32 |
| Camera and video streaming | Not available | Available with the ESP32-CAM | ESP32 |
| Sensor that runs for months on batteries | Sleep current stays high in MicroPython | Microamp level with deep sleep | ESP32 |
| Bluetooth Classic audio (A2DP speaker) | Limited support | Supported on the classic ESP32 | ESP32 |
| BLE keyboard, remote control | Easy with arduino-pico | Easy with libraries | Either |
| WS2812B, precise timing, custom protocols | Very powerful with PIO | Good with RMT | Pico W |
| Analog measurement | 3 channels, linear 12-bit ADC | Many channels but non-linear; ADC2 unusable while Wi-Fi is on | Pico W if a few channels are enough |
In short, the Pico W is excellent for learning MicroPython, hardware jobs that need precise timing and simple network projects; it's well documented, stable and very easy to program with Thonny. If you need a camera, long battery life, Bluetooth audio or a ready-made ecosystem like ESPHome, the ESP32 is the better choice. If you'd like to compare the ESP32 versions of projects such as an internet clock, a web server and a weather display, the ESP32 NTP clock guide is a good starting point.
Common mistakes and fixes
- ImportError: no module named 'network': The plain Pico firmware is on the board. Flash the RPI_PICO_W or RPI_PICO2_W UF2 file.
- The onboard LED doesn't light: Pin(25) was used. On the Pico W and Pico 2 W the right form is Pin("LED", Pin.OUT).
- wlan.status() returns −2: Network not found; check the network name including upper and lower case, and make sure the 2.4 GHz band is on.
- OSError: [Errno 98] EADDRINUSE: Port 80 is still busy after restarting the web server. Do a soft reboot with Ctrl+D or use SO_REUSEADDR on the socket.
- MemoryError: Large JSON or HTML filled the memory. Make replies smaller, use r.close() and gc.collect(), and switch to a Pico 2 W if needed.
- The code runs from the computer but not from an adapter: The file wasn't saved as main.py, or the code relies on the clock Thonny set. Name the file main.py and set the clock yourself with ntptime.
Once you've worked through these 15 projects, you'll have used Wi-Fi, HTTP, NTP, MQTT, UDP and BLE with the Pico W and built the foundation for designing your own IoT devices. In the BlueGrays app you can look at step-by-step circuit diagrams and code for basic Pico projects such as blinking an LED, a traffic light, PWM LED dimming and an RGB colour cycle, plus ESP32 projects such as a Wi-Fi connection, an NTP clock and a web server, to complete each project on the hardware side too.
Frequently asked questions
What can you do with a Raspberry Pi Pico W?
With a Pico W you can build web servers controlled from your phone, NTP clocks that take their time from the internet, sensors that send data over MQTT, alarms with Telegram alerts and devices that talk to your phone over BLE. Thanks to its 26 GPIO pins, adding sensors, relays, displays and LEDs is easy. The code is written in MicroPython or the Arduino IDE.
What's the difference between the Pico W and the Pico 2 W?
Both use the same CYW43439 Wi-Fi and Bluetooth chip. The Pico 2 W has the faster RP2350 processor, twice the RAM (520 KB) and 4 MB of flash. The pinout is identical and most MicroPython code runs without changes.
Can the Pico W connect to a 5 GHz Wi-Fi network?
No, the Pico W and Pico 2 W only connect to 2.4 GHz networks. If your router broadcasts both bands under the same name, connecting can be unreliable; giving the 2.4 GHz band its own name or testing with your phone's 2.4 GHz hotspot usually helps.
Why doesn't the Pico W onboard LED work with Pin(25)?
On the Pico W, GP25 is used as the wireless chip's select line and the onboard LED has moved onto the wireless chip. The correct form is Pin("LED", Pin.OUT). This works the same way on the classic Pico, the Pico W and the Pico 2 W.
Is Pico W Bluetooth supported in MicroPython?
Yes, MicroPython supports BLE on the Pico W. The low-level bluetooth module ships with the firmware, and for easier use the aioble package can be installed with mip. Features such as Bluetooth Classic audio, however, aren't supported in MicroPython.
Is a Pico W or an ESP32 better for an IoT project?
For learning MicroPython, simple network projects and jobs that need precise timing, the Pico W is a very good choice. If you need a camera, months of battery life, Bluetooth audio or a ready-made ecosystem like ESPHome, the ESP32 suits better. Both handle simple web server and MQTT projects comfortably.
Projects to build after reading this
See all projects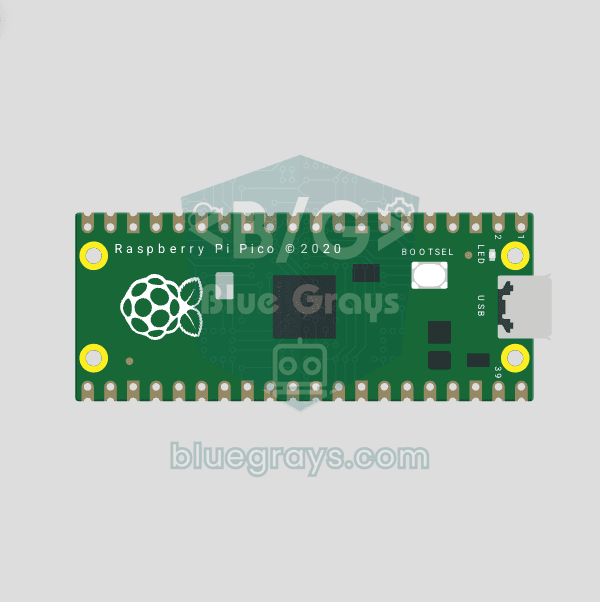
Raspberry Pi Pico Onboard LED Blink (Pico and Pico W)
The opening project of the Raspberry Pi Pico series! We blink the Pico's green built-in LED to confirm the board works, the classic "Hello World" first experiment. No external parts needed, just the Pico and a USB cable. The code is written in MicroPython, the language officially supported by the Raspberry Pi Foundation.
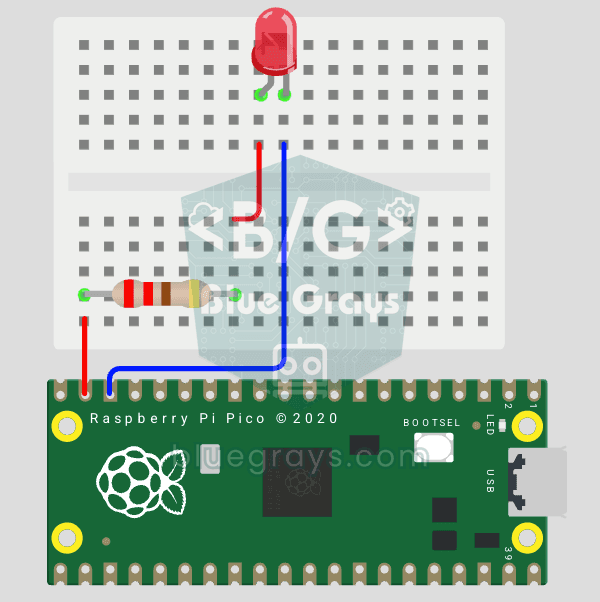
Raspberry Pi Pico: Controlling an External LED (Breadboard)
The next step after the Pico's built-in LED: connect an external LED on a breadboard and control it through pin GP14. You'll learn how to use any of the Pico's GPIO pins as an output, the LED's polarity (long leg = anode/+, short leg = cathode/–) and why a current-limiting resistor (220Ω) is a must. Without the resistor, too much current flows through the LED and it can burn out.
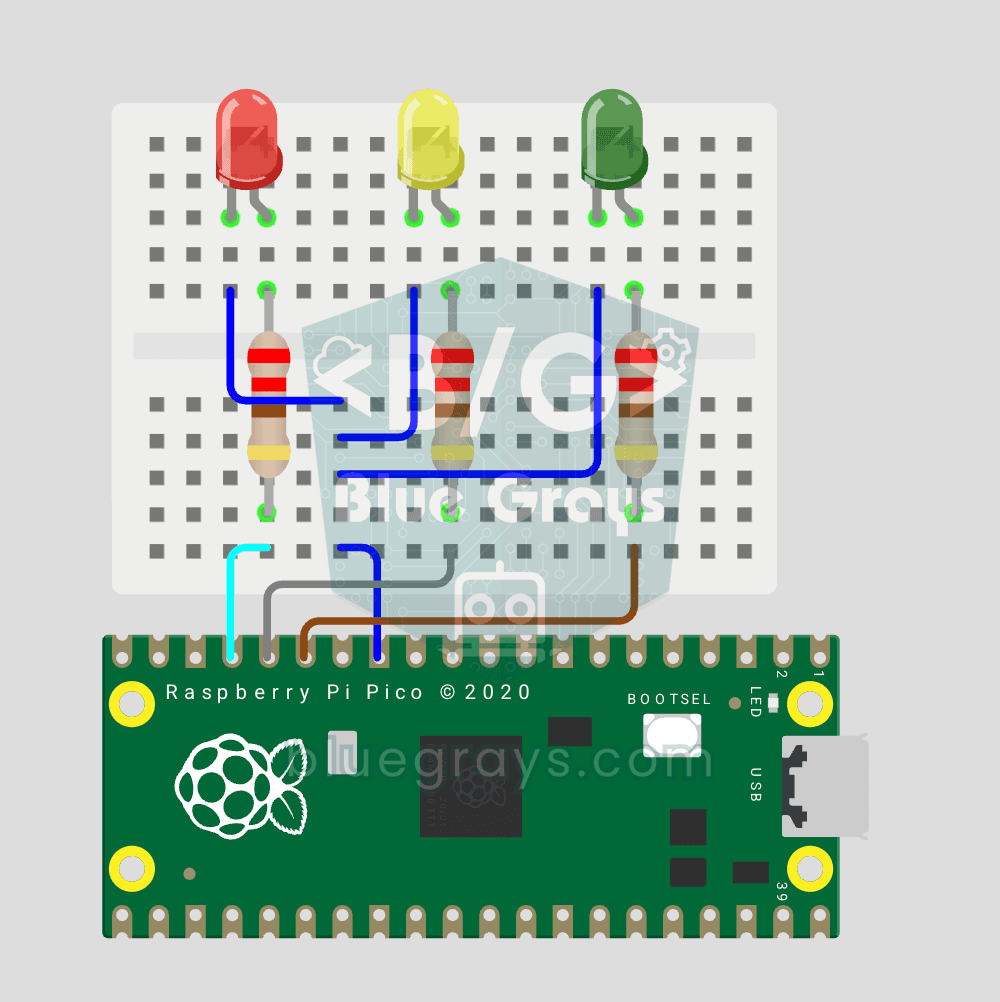
Raspberry Pi Pico Traffic Light Simulator (3 LEDs Sequential)
We recreate real traffic light logic with red, yellow and green LEDs, the first Pico project to move up to 3 LEDs! Green says "go" for 4 seconds, yellow "get ready" for 1.5 seconds, red "stop" for 3 seconds, and red+yellow "set off" for 1 second (the European traffic light pattern). You'll learn to define functions (def all_off()), state machine logic and multi-GPIO synchronization.
Raspberry Pi Pico PWM LED Fade (Breathing Effect)
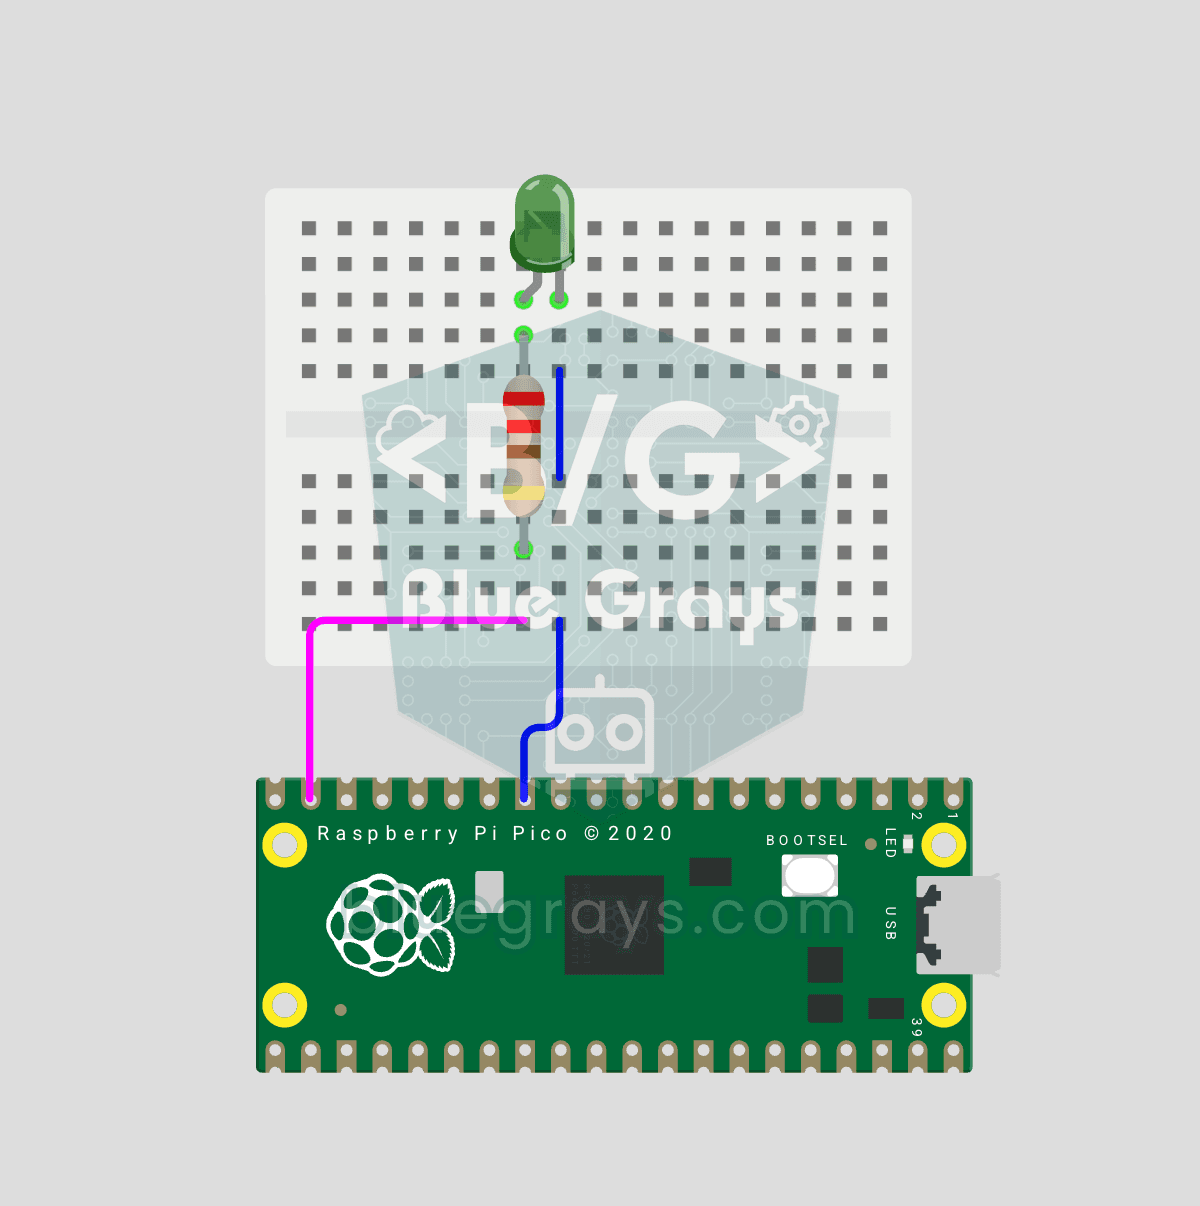
The LED doesn't just blink anymore, it breathes! With the Raspberry Pi Pico's PWM (Pulse Width Modulation), the LED's brightness slowly rises and then slowly fades, a calm "breathing" effect like a sleeping laptop's light. You'll learn the machine.PWM class, the 16-bit brightness value from 0–65535 with duty_u16() and the PWM frequency.
Raspberry Pi Pico RGB LED Color Cycle (3-Channel PWM)
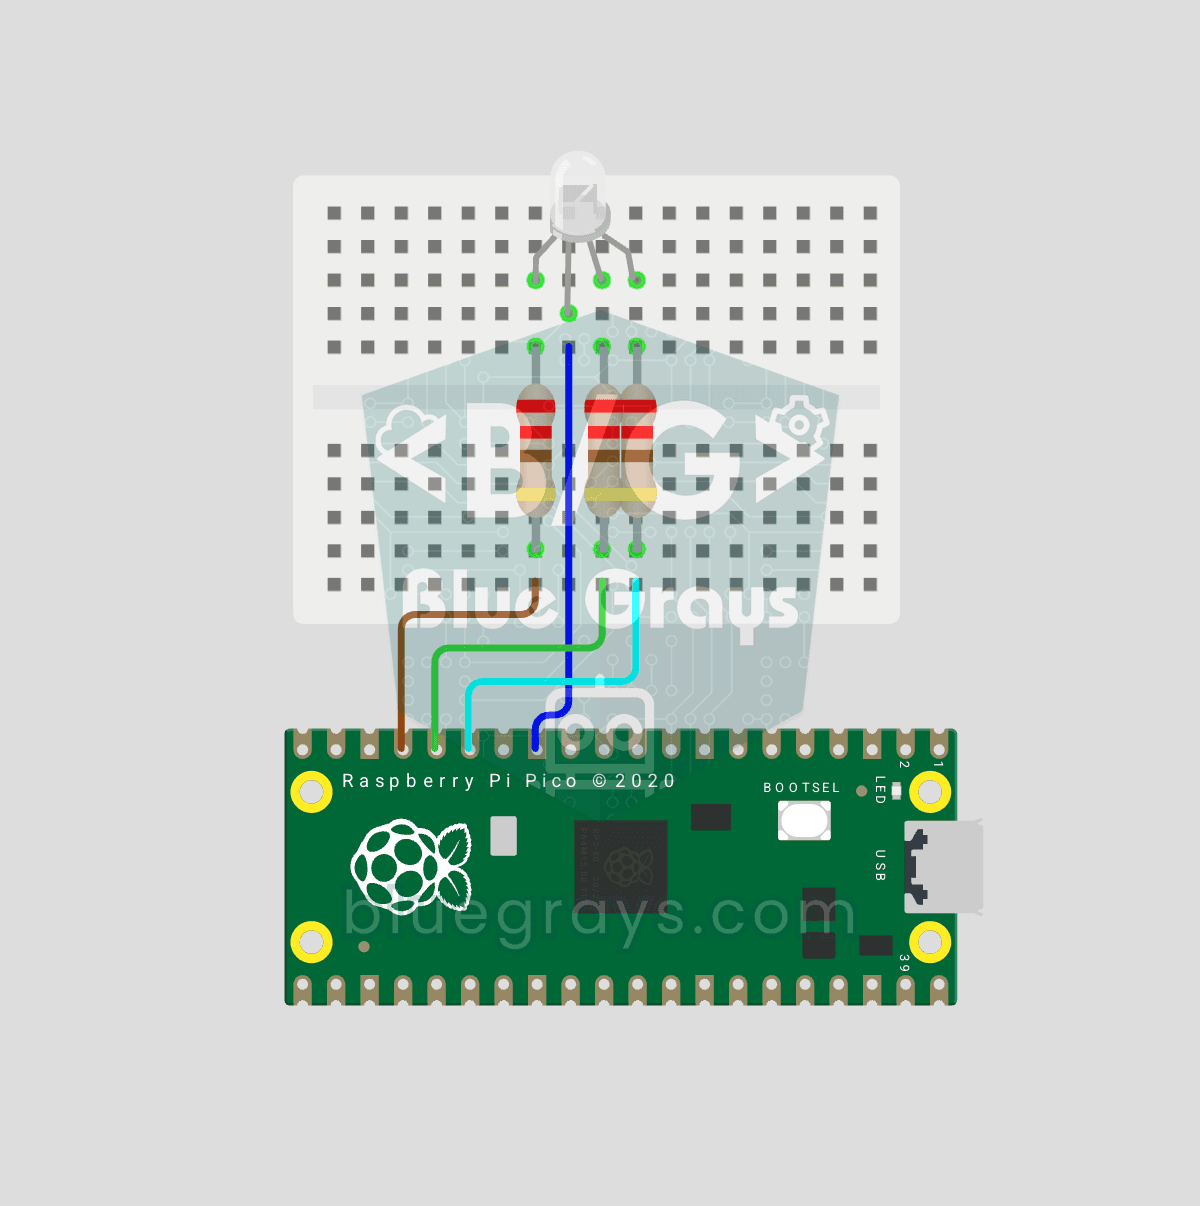
One LED, millions of colors! An RGB LED actually holds 3 separate LEDs: red, green and blue. Set the brightness of each one separately with the Pico's 3 PWM channels and the colors mix: red + green = yellow, green + blue = cyan, all three = white. In this project the LED cycles through 8 colors.

ESP32 Wi-Fi STA Connection (with LCD Screen)
In this project, we connect the ESP32 to the home Wi-Fi network in Station (STA) mode in a secure, fault-tolerant manner. We store the SSID and password in a separate secrets.h file to prevent leaking to Git, set up an auto-reconnect mechanism, and display the RSSI signal level and IP address on an I2C LCD screen. The internal LED works as a status indicator. It is a production-grade connection manager.

Real-Time Clock from the Internet via ESP32 NTP
The ESP32 connects to Wi-Fi and fetches the real time from NTP (Network Time Protocol) servers with millisecond precision. configTzTime() applies the Turkey time zone (TRT, UTC+3) automatically, and in countries with daylight saving time the DST switch is handled by a POSIX TZ string. The time is printed both to the Serial Monitor and to an optional I2C LCD.

ESP32 Asynchronous Web Server (with IP Display on LCD)
In this project, we’re turning the ESP32 into an asynchronous web server that you can control from your phone or computer on the same Wi-Fi network. Thanks to the ESPAsyncWebServer library, the server can process multiple requests simultaneously (unlike the classic WebServer.h, which blocks on a single request). You’ll be able to open the ESP32’s IP address in a browser and click the ON/OFF buttons (the /on and /off routes) to turn the LED connected to GPIO 5 on and off.