
Raspberry Pi Pico W Wi-Fi: MicroPython Web Server Tutorial
Raspberry Pi Pico W Wi-Fi guide: the right UF2, network.WLAN and status codes, an LED web server, a live sensor page, API calls with urequests and NTP time.
Using Wi-Fi on the Raspberry Pi Pico W is one of the cheapest and easiest ways to build a small device you can control from your phone. The Pico W is the version of the familiar Raspberry Pi Pico that adds 2.4 GHz Wi-Fi and Bluetooth: with a few lines of MicroPython it joins your home network, serves its own web page and fetches the weather and the time from the internet. In this guide you'll connect a Pico W to Wi-Fi from scratch, build a web server that turns an LED on from your phone, and then make a page that shows sensor data live.
By the end you'll know how to pick the right UF2 file, connect with network.WLAN and read its status codes, get data from an API with urequests, set the clock with NTP, and do the same job in the Arduino IDE. If you're new to the Pico, reading What Is the Raspberry Pi Pico? first will make things easier, and the What Is MicroPython? guide covers the basic commands.
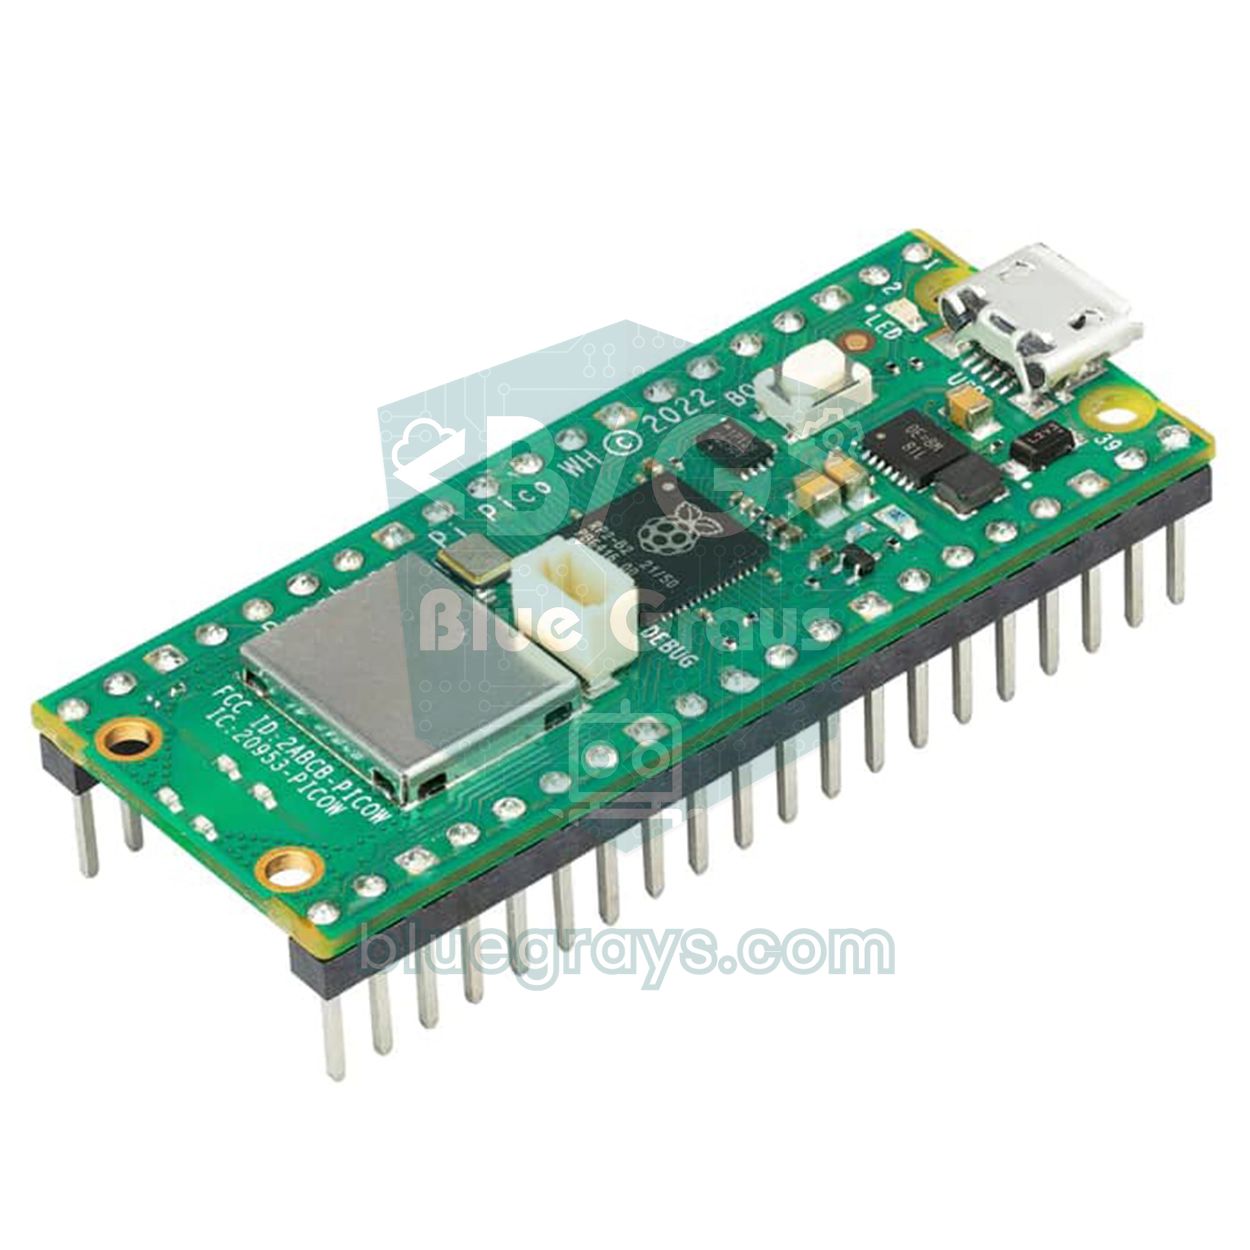
What is the Raspberry Pi Pico W and how is it different from the Pico?
The Pico W uses the same RP2040 processor, the same size and the same 40-pin layout as the Pico. The difference is the Infineon CYW43439 wireless chip added to the board: it provides 2.4 GHz 802.11n Wi-Fi and Bluetooth 5.2. The processor talks to this chip over an SPI link inside the board; all you use is the network module in MicroPython. Raspberry Pi later released the Pico 2 W with the RP2350 processor; since the wireless chip is the same, every piece of code in this article runs there too.
| Feature | Pico W | Pico 2 W | ESP32 (WROOM-32) |
|---|---|---|---|
| Processor | RP2040, dual-core Cortex-M0+, 133 MHz | RP2350, dual-core Cortex-M33 (or RISC-V), 150 MHz | Xtensa LX6, dual-core, 240 MHz |
| RAM | 264 KB | 520 KB | 520 KB |
| Flash memory | 2 MB | 4 MB | Usually 4 MB |
| Wi-Fi | 2.4 GHz, 802.11n (CYW43439) | 2.4 GHz, 802.11n (CYW43439) | 2.4 GHz, 802.11 b/g/n (on-chip) |
| Bluetooth | 5.2 (Classic and BLE) | 5.2 (Classic and BLE) | 4.2 (Classic and BLE) |
| Analog inputs | 3 channels, 12-bit | 3 channels, 12-bit | 18 channels, 12-bit |
| MicroPython file | RPI_PICO_W (.uf2) | RPI_PICO2_W (.uf2) | ESP32_GENERIC (.bin) |
On paper the ESP32 is faster and has more examples in the Arduino world. The Pico W's strengths are official, mature MicroPython support, tidy documentation and pins without traps like "must be at this level at boot". If you like learning with Python, the Pico W is a great choice; if Arduino code and ready-made libraries matter most to you, the ESP32 may feel more comfortable. If you can't decide between the two, the Arduino or ESP32? comparison will help.
The Pico W's wireless chip and pin differences
The pins broken out on the Pico W are exactly the same as on the Pico: GP0–GP22 and GP26–GP28 are free to use, and the analog inputs are still on GP26, GP27 and GP28. What changes are the four pins that stay inside the board. On the Pico they handle the onboard LED, the power mode and USB detection; on the Pico W they are reserved for talking to the wireless chip, and the LED itself is wired straight to the wireless chip. You can see the board's full pin map in the Pinout tool.
| Internal pin | Role on the Pico | Role on the Pico W |
|---|---|---|
| GP23 | Power supply mode (SMPS) | Wireless chip enable (WL_ON) |
| GP24 | USB voltage detection (VBUS) | Wireless data and interrupt line (WL_D) |
| GP25 | Onboard LED | Wireless chip select (WL_CS) |
| GP29 | VSYS voltage measurement (ADC3) | Wireless clock line (WL_CLK) and VSYS measurement |
| Onboard LED | GP25: Pin(25) | WL_GPIO0 of the wireless chip: Pin("LED") |
Step 1: Flash the right UF2 file for the Pico W
The most common mistake is flashing the plain Pico's MicroPython file onto a Pico W. The board still works and you see the prompt in Thonny's Shell, but as soon as you type import network you get "ImportError: no module named 'network'", because the plain Pico build has no wireless driver. Each board has its own UF2 file:
| Board | MicroPython UF2 file | Drive shown in BOOTSEL mode |
|---|---|---|
| Raspberry Pi Pico | RPI_PICO-….uf2 | RPI-RP2 |
| Raspberry Pi Pico W / WH | RPI_PICO_W-….uf2 | RPI-RP2 |
| Raspberry Pi Pico 2 | RPI_PICO2-….uf2 | RP2350 |
| Raspberry Pi Pico 2 W | RPI_PICO2_W-….uf2 | RP2350 |
- On the download page of micropython.org, find the RPI_PICO_W board (RPI_PICO2_W for the Pico 2 W) and download the latest stable .uf2 file, the one not marked "preview".
- Hold down the BOOTSEL button on the Pico W while you plug the USB data cable into your computer, then release the button.
- A drive called RPI-RP2 appears on your computer. Drag the downloaded file onto it; when the copy finishes, the drive disappears by itself and the board restarts with MicroPython.
- Open Thonny and choose MicroPython (Raspberry Pi Pico) from the interpreter menu at the bottom right. If you prefer, Thonny's "Install or update MicroPython" window can do the same installation in one click when you pick the Pico W / Pico WH variant.
- Type import network in the Shell. If there's no error, the correct firmware with wireless support is installed.
Step 2: Connect to Wi-Fi with network.WLAN
The Pico W has two wireless interfaces: in WLAN.IF_STA (station) mode it joins your home router like a phone, and in WLAN.IF_AP (access point) mode it creates its own Wi-Fi network. Let's start with station mode. Paste the code below into a new file in Thonny, enter your network name and password, and save it to the Pico as wifi.py. All the following examples use this file with import wifi, so your password lives in just one place. If you're on a MicroPython version older than 1.24, write these constants as network.STA_IF and network.AP_IF; the old names still work on newer versions too.
1# wifi.py: Pico W'ye bu adla kaydet / save it to the Pico W with this name
2import network
3import time
4
5SSID = "AgAdi"            # Wi-Fi adın / your Wi-Fi name
6PASSWORD = "Sifre123"     # Wi-Fi şifren / your Wi-Fi password
7HOSTNAME = "picow"        # http://picow.local adresi için / for http://picow.local
8
9STATUS = {
10    0: "Boşta / idle",
11    1: "Ağa katılıyor / joining",
12    2: "IP bekleniyor / waiting for IP",
13    3: "Bağlandı / connected",
14    -1: "Bağlantı başarısız / connection failed",
15    -2: "Ağ bulunamadı / network not found",
16    -3: "Şifre hatalı / wrong password",
17}
18
19
20def connect(timeout=20):
21    network.country("TR")             # ülke kodu / country code
22    network.hostname(HOSTNAME)        # ağdaki adı / name on the network
23    wlan = network.WLAN(network.WLAN.IF_STA)
24    wlan.active(True)
25    wlan.config(pm=network.WLAN.PM_NONE)   # güç tasarrufunu kapat / disable power saving
26    if not wlan.isconnected():
27        wlan.connect(SSID, PASSWORD)
28        for _ in range(timeout):
29            code = wlan.status()
30            print(code, STATUS.get(code, "?"))
31            if code < 0 or code == 3:
32                break
33            time.sleep(1)
34    if wlan.status() != 3:
35        raise RuntimeError("Wi-Fi: " + STATUS.get(wlan.status(), "?"))
36    print("IP:", wlan.ifconfig()[0])
37    return wlan
38
39
40if __name__ == "__main__":
41    connect()
Let's look at the key lines. network.country("TR") tells the wireless chip which country's channel rules to follow; replace TR with your own two-letter country code, such as GB or US. If you skip it, you may struggle to see networks on channels 12 and 13, which some routers use (older firmware does the same with rp2.country()). wlan.config(pm=network.WLAN.PM_NONE) turns power saving off (older examples write the same setting as pm=0xa11140): by default the Pico W saves energy, which can make the web server answer late or drop the connection after a few hours. The loop prints the status code every second and stops when it reaches 3 or gets a negative error code. That way the board never waits forever, and you see on screen what went wrong.
What do the wlan.status() codes mean?
Most connection problems are solved in seconds by looking at the number returned by wlan.status(). MicroPython also provides ready-made constants for these numbers in the network module; you'll find both in the table below:
| Code | Constant | Meaning | What to do |
|---|---|---|---|
| 0 | STAT_IDLE | No connection, nothing started | Make sure wlan.active(True) and wlan.connect() were called |
| 1 | STAT_CONNECTING | Joining the network | Wait a few seconds |
| 2 | (no constant) | Joined, waiting for an IP address from the router | If it takes long, check the router's DHCP settings |
| 3 | STAT_GOT_IP | Connected with an IP address | You're ready |
| -1 | STAT_CONNECT_FAIL | Connection failed | Check the signal and power supply, then retry |
| -2 | STAT_NO_AP_FOUND | Network not found | Check the network name, the 2.4 GHz band and the distance |
| -3 | STAT_WRONG_PASSWORD | Authentication failed | Retype the password, minding upper and lower case |
If you get code -2, the Pico W can't see your network. Listing the networks around you reveals the problem right away: if yours isn't on the list, it's either broadcasting on 5 GHz or the signal is too weak. An RSSI better than -70 dBm (for example -55 dBm) is comfortable; around -80 dBm the connection starts to drop.
1import network
2
3wlan = network.WLAN(network.WLAN.IF_STA)
4wlan.active(True)
5for ssid, bssid, channel, rssi, security, hidden in wlan.scan():
6 print(ssid.decode(), "| kanal / channel:", channel, "| RSSI:", rssi, "dBm")Step 3: A simple MicroPython web server (LED on/off page)
Now let's turn the Pico W into a small web server you can open from your phone. No extra library is needed; MicroPython's socket module is enough. Save the code below as main.py and run it. Type the address shown in the Shell (for example http://192.168.1.42) into the browser of a phone on the same Wi-Fi network; the ON and OFF buttons on the page switch the LED on the board.
1import socket
2from machine import Pin
3import wifi
4
5wlan = wifi.connect()
6led = Pin("LED", Pin.OUT)              # Pico W dahili LED / Pico W onboard LED
7led_on = False
8
9
10def page(on):
11    state = "AÇIK / ON" if on else "KAPALI / OFF"
12    return """<!DOCTYPE html>
13<html><head><meta charset="utf-8">
14<meta name="viewport" content="width=device-width, initial-scale=1">
15<title>Pico W LED</title></head>
16<body style="font-family:sans-serif;text-align:center">
17<h1>Pico W LED</h1>
18<p>Durum / State: <b>""" + state + """</b></p>
19<p><a href="/on"><button style="font-size:24px">AÇ / ON</button></a>
20<a href="/off"><button style="font-size:24px">KAPAT / OFF</button></a></p>
21</body></html>"""
22
23
24addr = socket.getaddrinfo("0.0.0.0", 80)[0][-1]
25server = socket.socket()
26server.setsockopt(socket.SOL_SOCKET, socket.SO_REUSEADDR, 1)   # EADDRINUSE hatasını önler / prevents EADDRINUSE
27server.bind(addr)
28server.listen(2)
29print("Tarayıcıda aç / open in browser: http://" + wlan.ifconfig()[0])
30
31while True:
32    client, remote = server.accept()           # bir tarayıcı bekle / wait for a browser
33    try:
34        request = client.recv(1024)            # b"GET /on HTTP/1.1 ..."
35        parts = request.split(b" ")
36        path = parts[1] if len(parts) > 1 else b"/"
37        if path == b"/on":
38            led.on()
39            led_on = True
40        elif path == b"/off":
41            led.off()
42            led_on = False
43        if path in (b"/", b"/on", b"/off"):
44            client.sendall("HTTP/1.0 200 OK\r\nContent-Type: text/html; charset=utf-8\r\n\r\n")
45            client.sendall(page(led_on))
46        else:
47            client.sendall("HTTP/1.0 404 Not Found\r\n\r\n")   # ör. /favicon.ico / e.g. /favicon.ico
48    except OSError as e:
49        print("Bağlantı hatası / connection error:", e)
50    finally:
51        client.close()
Here's how it works. With bind and listen, the Pico W starts listening on port 80 (HTTP), and accept() waits until a browser connects. The first line of the browser's request looks like "GET /on HTTP/1.1"; the code splits that line at the spaces to find the requested path (/on) and sets the LED accordingly. It then sends the HTTP header ("HTTP/1.0 200 OK" and the content type), a blank line and finally the HTML page, and closes the connection. The meta viewport line makes the page scale properly on a phone, and charset=utf-8 makes special characters display correctly.
| Path | What it does |
|---|---|
| / | Shows the page and the LED's current state |
| /on | Turns the LED on and sends the page again |
| /off | Turns the LED off and sends the page again |
| /favicon.ico and others | Returns 404; browsers request this path on their own for the tab icon |
Connecting a relay or an external LED instead
Once it works with the onboard LED, controlling a real device from the same page takes just one changed line: replace Pin("LED", Pin.OUT) with, for example, Pin(16, Pin.OUT). You can work out the right resistor for an external LED with the LED resistor tool; 220–330 Ω is enough for a 3.3 V pin. If you use a relay module, power it from the 5 V VBUS pin and connect its IN pin to the GPIO. Many relay modules switch on with a LOW signal; in that case swap the led.on() and led.off() lines. For relay wiring details, see What Is a Relay Module?
| Part | Part pin | Pico W pin (physical pin no.) |
|---|---|---|
| External LED | Anode (+), through a 220 Ω resistor | GP14 (19) |
| External LED | Cathode (−) | GND (18) |
| DHT22 | VCC / DATA / GND | 3V3(OUT) (36) / GP15 (20) / GND (38) |
| Relay module | VCC | VBUS, 5 V from USB (40) |
| Relay module | IN | GP16 (21) |
| Relay module | GND | GND (23) |
Step 4: Show sensor data live on a web page
The LED page reloaded completely every time you pressed a button. On a page that shows measurements, it's much nicer when the values update without reloading. For that we'll use two paths: / sends the page itself and /data sends only the measurements in JSON format. A small piece of JavaScript on the page reads /data every two seconds and updates the numbers. The example shows the internal temperature sensor, which needs no extra parts, and the Wi-Fi signal strength (RSSI); it also builds the server with MicroPython's asyncio module, so the Pico W keeps measuring while it waits for requests.
1import asyncio
2import json
3import time
4from machine import ADC, Pin
5import wifi
6
7wlan = wifi.connect()
8sensor = ADC(4)                        # dahili sıcaklık sensörü / internal temperature sensor
9led = Pin("LED", Pin.OUT)
10start = time.time()
11readings = {"temp": 0, "rssi": 0, "uptime": 0}
12
13HTML = """<!DOCTYPE html>
14<html><head><meta charset="utf-8">
15<meta name="viewport" content="width=device-width, initial-scale=1">
16<title>Pico W</title></head>
17<body style="font-family:sans-serif;text-align:center">
18<h1>Pico W</h1>
19<p>Sıcaklık / Temperature: <b id="t">-</b> °C</p>
20<p>Wi-Fi sinyali / signal: <b id="r">-</b> dBm</p>
21<p>Çalışma süresi / uptime: <b id="u">-</b> s</p>
22<script>
23async function update() {
24  try {
25    const d = await (await fetch("/data")).json();
26    document.getElementById("t").textContent = d.temp;
27    document.getElementById("r").textContent = d.rssi;
28    document.getElementById("u").textContent = d.uptime;
29  } catch (e) {}
30}
31update();
32setInterval(update, 2000);
33</script>
34</body></html>"""
35
36
37def read_temp():
38    volts = sensor.read_u16() * 3.3 / 65535
39    return round(27 - (volts - 0.706) / 0.001721, 1)
40
41
42async def measure():
43    while True:
44        readings["temp"] = read_temp()
45        readings["rssi"] = wlan.status("rssi")      # yalnız STA modunda / STA mode only
46        readings["uptime"] = time.time() - start
47        led.toggle()                                # kalp atışı / heartbeat
48        await asyncio.sleep(2)
49
50
51async def handle(reader, writer):
52    try:
53        line = await reader.readline()              # b"GET /data HTTP/1.1"
54        while True:                                 # başlıkları atla / skip the headers
55            header = await reader.readline()
56            if header in (b"\r\n", b""):
57                break
58        parts = line.split(b" ")
59        path = parts[1] if len(parts) > 1 else b"/"
60        if path == b"/":
61            writer.write(b"HTTP/1.0 200 OK\r\nContent-Type: text/html; charset=utf-8\r\n\r\n")
62            writer.write(HTML.encode())
63        elif path == b"/data":
64            writer.write(b"HTTP/1.0 200 OK\r\nContent-Type: application/json\r\n\r\n")
65            writer.write(json.dumps(readings).encode())
66        else:
67            writer.write(b"HTTP/1.0 404 Not Found\r\n\r\n")
68        await writer.drain()
69    except OSError as e:
70        print("Bağlantı hatası / connection error:", e)
71    finally:
72        writer.close()
73        await writer.wait_closed()
74
75
76async def main():
77    await asyncio.start_server(handle, "0.0.0.0", 80)
78    print("Tarayıcıda aç / open in browser: http://" + wlan.ifconfig()[0])
79    await measure()
80
81
82asyncio.run(main())
asyncio.start_server() runs the handle function as a separate task for every new browser connection, while the measure() task takes a reading every two seconds in the background and toggles the onboard LED. The blinking LED also tells you the board hasn't frozen. Note: when you write with asyncio, convert text to bytes with .encode() before sending it, otherwise pages with special characters will throw an error. The internal temperature sensor measures the chip's own temperature, so its readings are noisy and a few degrees off room temperature; the formula 27 − (V − 0.706) / 0.001721 in the code comes from the RP2040 datasheet. For real room temperature, use an external sensor.
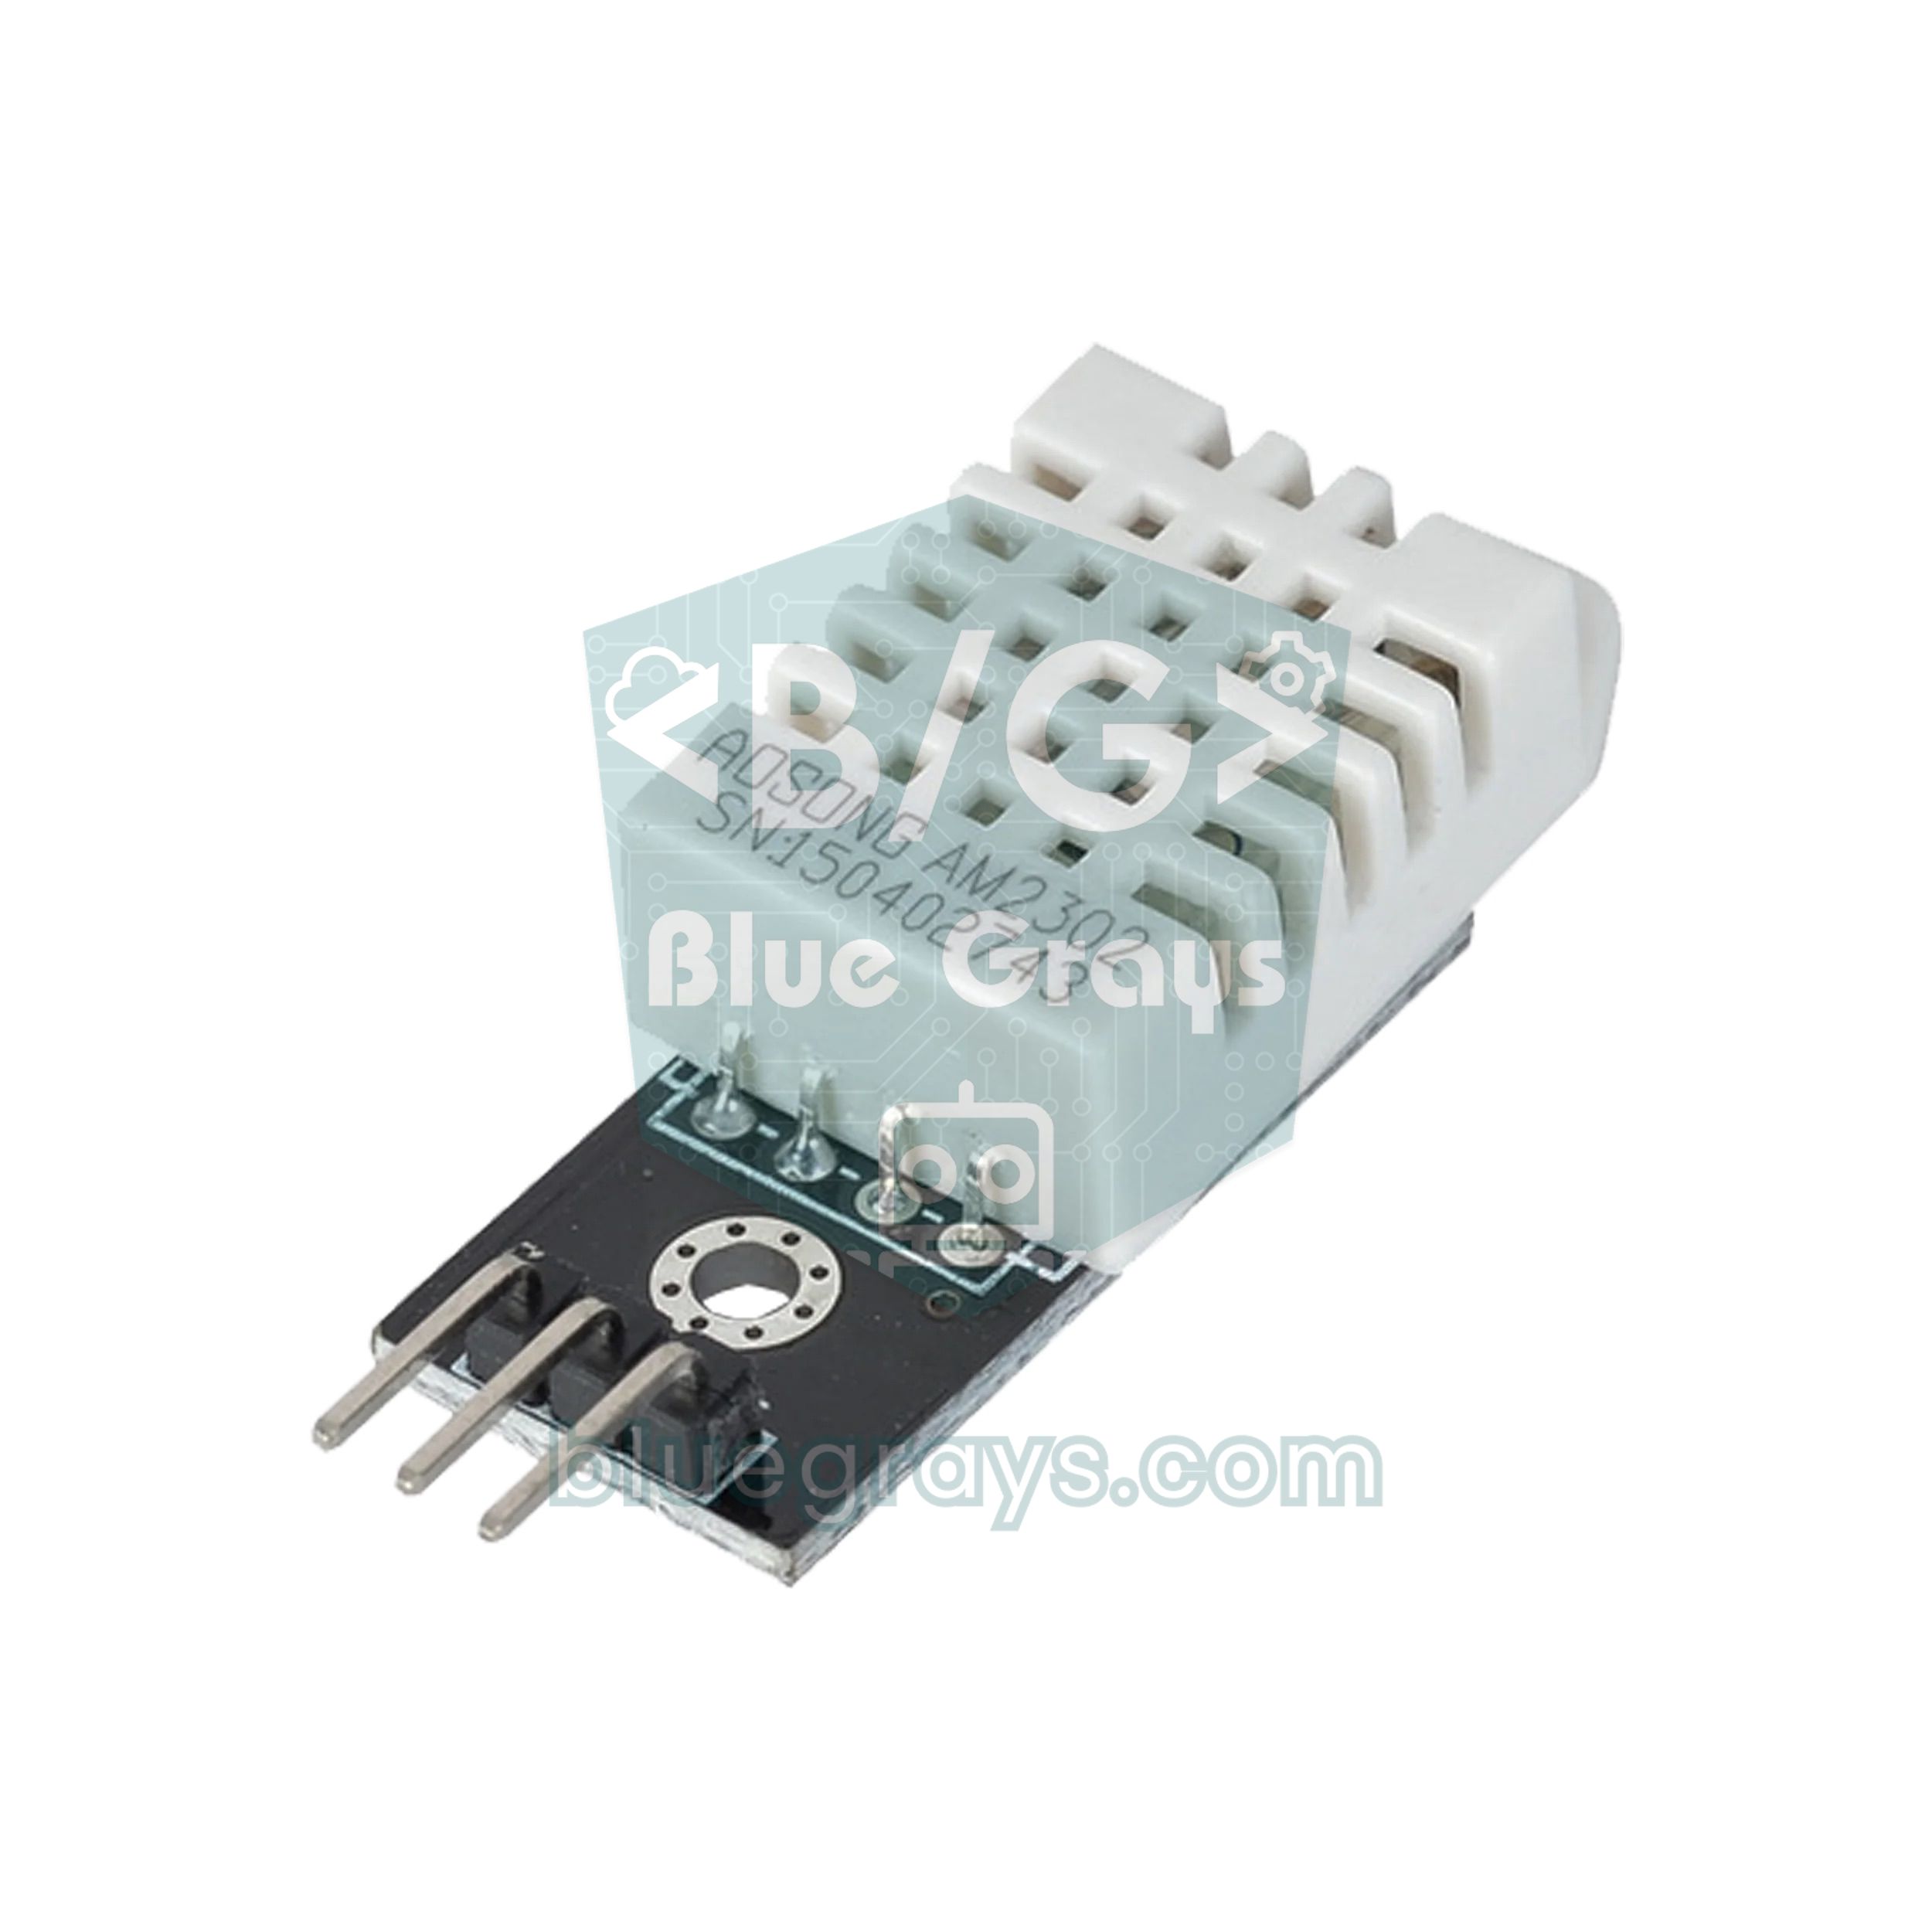
For real temperature and humidity, connect a DHT22 (DATA pin to GP15). The DHT sensor driver is built into the Pico W firmware, so there's nothing extra to upload. In the sensor code's measure() function, replace the line readings["temp"] = read_temp() with a call to read_sensor() below, and add one more line to the HTML for humidity. The DHT22 shouldn't be read more often than every two seconds, which is exactly the loop's pace. For more on the sensor, see DHT11 Temperature and Humidity Sensor.
1import dht
2from machine import Pin
3
4dht_sensor = dht.DHT22(Pin(15))        # DATA ucu GP15'te / DATA pin on GP15
5
6
7def read_sensor():
8    try:
9        dht_sensor.measure()            # ölçümü başlat / trigger a reading
10        readings["temp"] = dht_sensor.temperature()   # °C
11        readings["hum"] = dht_sensor.humidity()       # % bağıl nem / % relative humidity
12    except OSError as e:
13        print("DHT22 okunamadı / read failed:", e)
Step 5: Call an API with urequests (get data from the internet)
The Pico W can be a client as well as a server: it can send a request to an online service and read the reply. The requests module comes built into the Pico W firmware; the urequests name you see in older examples points to the same module, so both spellings work. The example below gets the current temperature, humidity and wind speed for Istanbul from the free Open-Meteo weather service, which needs no API key. Just change LAT and LON for your own city, for example 51.51 and -0.13 for London.
1import requests
2import wifi
3
4wifi.connect()
5
6# İstanbul; kendi konumunu yaz / Istanbul; put your own location
7LAT, LON = 41.01, 28.98
8URL = ("https://api.open-meteo.com/v1/forecast?latitude={}&longitude={}"
9 "¤t=temperature_2m,relative_humidity_2m,wind_speed_10m").format(LAT, LON)
10
11response = requests.get(URL)
12try:
13 if response.status_code == 200:
14 current = response.json()["current"]
15 print("Sıcaklık / temperature:", current["temperature_2m"], "°C")
16 print("Nem / humidity:", current["relative_humidity_2m"], "%")
17 print("Rüzgâr / wind:", current["wind_speed_10m"], "km/h")
18 else:
19 print("HTTP hatası / HTTP error:", response.status_code)
20finally:
21 response.close() # soketi ve belleği serbest bırak / free the socket and memoryThere are three things to watch in this code. First, call response.close() after every response; unclosed responses eat sockets and memory, and after a few requests you'll hit "OSError: [Errno 12] ENOMEM". Second, response.json() loads the whole reply into memory; the Pico W has 264 KB of RAM in total, so with APIs that return large JSON, use URLs that ask only for the fields you need (like the current parameter here). Third, an HTTPS connection needs extra memory for encryption; if you send requests regularly in a loop, adding gc.collect() between them reduces memory fragmentation. The same method lets you send Telegram messages, write data to a spreadsheet or fetch exchange rates; the Telegram bot setup is the same as in ESP32 Telegram Bot.
Step 6: Accurate time from the internet with NTP
The Pico W has a real-time clock (RTC) inside, but no battery backup: every time the board powers up, the clock goes back to 1 January 2021. While you're on Wi-Fi, getting the right time from internet NTP servers is easy: the settime() function of the built-in ntptime module sets the internal clock to UTC. The code adds a fixed offset to get local time; the example uses 3 hours (10,800 seconds) for Turkey, so set UTC_OFFSET to your own time zone, for example 0 for London in winter or -5 * 3600 for New York.
1import time
2import ntptime
3import wifi
4
5wifi.connect()
6ntptime.host = "pool.ntp.org"          # varsayılan sunucu / default server
7UTC_OFFSET = 3 * 3600                  # Türkiye UTC+3; kendi saat dilimini yaz / set your own time zone
8
9for attempt in range(5):
10    try:
11        ntptime.settime()              # dahili saati UTC'ye ayarlar / sets the internal clock to UTC
12        print("Saat ayarlandı / time set")
13        break
14    except OSError as e:
15        print("NTP hatası / NTP error:", e)
16        time.sleep(2)
17
18DAYS = ("Pzt/Mon", "Sal/Tue", "Çar/Wed", "Per/Thu", "Cum/Fri", "Cmt/Sat", "Paz/Sun")
19
20while True:
21    y, mo, d, h, mi, s, wd, yd = time.localtime(time.time() + UTC_OFFSET)
22    print("%02d.%02d.%d %s %02d:%02d:%02d" % (d, mo, y, DAYS[wd], h, mi, s))
23    time.sleep(1)
By default ntptime uses the pool.ntp.org server and waits one second for an answer; if none comes, it raises "OSError: [Errno 110] ETIMEDOUT", which is why the code tries five times. The internal clock can drift by a few seconds over time, so in long-running projects call settime() again once a day. In countries with daylight saving time, the offset changes twice a year; you'll need to handle that in code with a date check. If you want to show the time on a display, combine this code with the MicroPython examples in the OLED display or I2C LCD articles; the ESP32 version is in ESP32 NTP.
Creating your own network (AP mode) and the picow.local address
Where there's no router, say at a science fair stand or in the garden, the Pico W can broadcast its own Wi-Fi network. In access point mode you connect your phone straight to the "PicoW-BlueGrays" network and open the page at http://192.168.4.1. The web server code runs unchanged; just write the lines below instead of wlan = wifi.connect() and add wlan = ap. The password must be at least 8 characters. The RSSI line in the sensor example only works in station mode, so delete it in AP mode. In this mode the Pico W has no internet access, so the NTP and API examples won't work.
1import network
2
3ap = network.WLAN(network.WLAN.IF_AP)
4ap.config(ssid="PicoW-BlueGrays", password="bluegrays123")   # şifre en az 8 karakter / at least 8 characters
5ap.active(True)
6while not ap.active():
7    pass
8print("Ağ hazır / network ready:", ap.ifconfig()[0])          # genellikle 192.168.4.1 / usually 192.168.4.1
If reading the IP address from the Shell every time is a chore, you can use a name instead. Recent MicroPython versions support mDNS on the Pico W: thanks to the network.hostname("picow") line in wifi.py, the board can also be reached at http://picow.local. This address usually works on Windows, macOS, Linux and iPhones; some Android phones can't open .local addresses, so use the IP address there. If you want the IP address never to change, the most reliable way is to assign a fixed IP to the Pico W's MAC address in your router's settings (a DHCP reservation).
Pico 2 W note: what changes?
The Pico 2 W has the same size and pin layout as the Pico W and uses the same CYW43439 wireless chip, while its processor is the faster RP2350. On the software side, the only difference is the firmware: download the RPI_PICO2_W file from micropython.org, and when you plug it in with BOOTSEL, the drive shows up as RP2350. All the MicroPython code in this article runs unchanged. With 520 KB of RAM, HTTPS requests, large JSON replies and long HTML pages fit much more comfortably on the Pico 2 W. In the Arduino IDE, choose Raspberry Pi Pico 2W as the board. One note: early versions of the RP2350 have a known chip erratum (E9) affecting the internal pull-down resistors; for buttons, wiring to GND and using PULL_UP is the most trouble-free option. For advanced features like the two cores and PIO, see Pico PIO and dual core.
Alternative: programming the Pico W in the Arduino IDE (arduino-pico)
If C++ and Arduino libraries feel more familiar, you can program the Pico W from the Arduino IDE with Earle Philhower's arduino-pico core. It comes with WiFi and WebServer libraries compatible with the ESP32 ones, so web server code written for the ESP32 runs on the Pico W with small changes.
- In the Arduino IDE open File > Preferences and add https://github.com/earlephilhower/arduino-pico/releases/download/global/package_rp2040_index.json to the "Additional boards manager URLs" field.
- Search for pico in the Boards Manager and install Earle F. Philhower's Raspberry Pi Pico/RP2040/RP2350 package.
- Choose Raspberry Pi Pico W from Tools > Board (Raspberry Pi Pico 2W for the Pico 2 W).
- For the first upload, plug the board in while holding BOOTSEL; the Arduino IDE finds it as a UF2 drive. For later uploads, just pick the serial port shown under Tools > Port.
- After uploading, open the Serial Monitor at 115200 baud and read the IP address.
1#include <WiFi.h>
2#include <WebServer.h>
3#include <LEAmDNS.h>
4
5const char* ssid = "AgAdi";          // Wi-Fi adın / your Wi-Fi name
6const char* password = "Sifre123";   // Wi-Fi şifren / your Wi-Fi password
7
8WebServer server(80);
9bool ledOn = false;
10
11void sendPage() {
12  String html = "<!DOCTYPE html><html><head><meta charset='utf-8'>"
13                "<meta name='viewport' content='width=device-width, initial-scale=1'>"
14                "<title>Pico W</title></head>"
15                "<body style='font-family:sans-serif;text-align:center'><h1>Pico W LED</h1>";
16  html += "<p>Durum / State: <b>";
17  html += ledOn ? "AÇIK / ON" : "KAPALI / OFF";
18  html += "</b></p><p><a href='/on'><button>AÇ / ON</button></a> ";
19  html += "<a href='/off'><button>KAPAT / OFF</button></a></p>";
20  html += "<p>Sıcaklık / Temp: ";
21  html += String(analogReadTemp(), 1);   // dahili sensör / internal sensor
22  html += " °C</p></body></html>";
23  server.send(200, "text/html", html);
24}
25
26void setup() {
27  Serial.begin(115200);
28  pinMode(LED_BUILTIN, OUTPUT);          // Pico W'de kablosuz yongadaki LED / the LED on the wireless chip
29  WiFi.mode(WIFI_STA);
30  WiFi.begin(ssid, password);
31  while (WiFi.status() != WL_CONNECTED) {
32    delay(500);
33    Serial.print(".");
34  }
35  Serial.println();
36  Serial.print("IP: ");
37  Serial.println(WiFi.localIP());        // bu adresi telefonda aç / open this address on your phone
38
39  MDNS.begin("picow");                   // http://picow.local
40  server.on("/", sendPage);
41  server.on("/on", []() { ledOn = true;  digitalWrite(LED_BUILTIN, HIGH); sendPage(); });
42  server.on("/off", []() { ledOn = false; digitalWrite(LED_BUILTIN, LOW);  sendPage(); });
43  server.onNotFound([]() { server.send(404, "text/plain", "404"); });
44  server.begin();
45}
46
47void loop() {
48  server.handleClient();
49  MDNS.update();
50}
This sketch does the same as the MicroPython LED page and adds the internal temperature read with analogReadTemp(). On the Pico W, LED_BUILTIN automatically drives the LED on the wireless chip, and the MDNS.begin("picow") line makes the page reachable at http://picow.local too. The Wi-Fi driver adds about 220 KB to the compiled program, so the first build may take a while. When choosing between MicroPython and Arduino, keep this in mind: with MicroPython you save the code and try it instantly; with Arduino you wait for compilation but get faster code and broad library support.
Raspberry Pi Pico W project ideas
- Wi-Fi thermometer: watch the temperature and humidity measured by a DHT11 or DHT22 from your phone.
- Phone-controlled lamp: add a relay module to the LED page in this article and switch your desk lamp on and off.
- Plant moisture monitor: show the soil moisture sensor reading on the page and warn you when the soil dries out.
- Motion alert: when a PIR sensor detects someone, send a Telegram message to your phone with urequests.
- Internet clock: show the NTP time with the date and weekday on an OLED display.
- Home automation: install the umqtt.simple library with mip and send your readings to Home Assistant over MQTT; the idea is explained in ESP32 MQTT.
- Real-time dashboard: for pages that update faster, adapt the ideas from the WebSocket-based ESP32 async web server article to the Pico W.
Common mistakes and fixes
| Symptom or error | Cause | Fix |
|---|---|---|
| ImportError: no module named 'network' | Plain Pico firmware flashed onto a Pico W | Flash the RPI_PICO_W UF2 file (RPI_PICO2_W for the Pico 2 W) |
| wlan.status() stays at -2 | Network not visible: 5 GHz, wrong network name or weak signal | Turn on the 2.4 GHz band, look for the network with wlan.scan(), move the board closer to the router |
| wlan.status() returns -3 | Wrong password | Retype the password, minding case and spaces |
| OSError: [Errno 98] EADDRINUSE | The previous server socket is still holding port 80 | Use SO_REUSEADDR, restart with Ctrl+D |
| The page won't open on the phone | The phone is on mobile data, on a guest network, or the router has client isolation on | Connect the phone to the same Wi-Fi and type the address with http, not https |
| OSError: -2 (urequests) | The host name couldn't be resolved: no Wi-Fi or a DNS problem | Call wifi.connect() first and check the URL |
| OSError: [Errno 12] ENOMEM | Out of memory | Use response.close() and gc.collect(), request smaller replies |
| Connection drops after hours | Power saving or the router restarting | Use pm=network.WLAN.PM_NONE, check wlan.isconnected() in the loop and reconnect |
| Doesn't run when unplugged from the computer | The code isn't saved as main.py, or wifi.py isn't on the Pico | Save both files to the Pico |
As you've seen, connecting the Raspberry Pi Pico W to Wi-Fi, serving a web page and pulling data from the internet takes just a couple of files: wifi.py handles the connection and main.py runs the project itself. To strengthen your Pico basics, the BlueGrays app has Raspberry Pi Pico projects for blinking LEDs, a traffic light, PWM and RGB LEDs, and on the ESP32 side Wi-Fi connection, async web server, NTP clock and weather API projects, each with step-by-step circuit diagrams and code.
Frequently asked questions
Does the Raspberry Pi Pico W support 5 GHz Wi-Fi?
No. The CYW43439 chip on the Pico W and Pico 2 W only works on the 2.4 GHz band and can't see 5 GHz networks. Make sure your router's 2.4 GHz band is on; if both bands share one name and you have trouble, giving the 2.4 GHz band its own name helps.
How do I install MicroPython on the Pico W?
Download the .uf2 file for the RPI_PICO_W board from micropython.org. Hold the BOOTSEL button while plugging the Pico W into your computer, then drag the file onto the RPI-RP2 drive that appears. The board restarts and is ready to use with Thonny; Thonny's "Install or update MicroPython" window does the same job.
How do I find the Pico W's IP address?
Once connected, wlan.ifconfig()[0] gives you the IP address, and the wifi.py file in this article prints it to the Shell. When the board isn't connected to a computer, check the connected devices list in your router's settings, or try http://picow.local on devices that support mDNS.
Why doesn't the Pico W's onboard LED light with Pin(25)?
On the Pico W, the onboard LED is connected to the wireless chip, not the processor, and GP25 is used as that chip's select line. Use Pin("LED", Pin.OUT) in MicroPython or LED_BUILTIN in the Arduino IDE and the LED lights correctly. This form also works on the plain Pico, so you can always use it.
Can I access the Pico W web server from the internet?
Technically yes, with port forwarding on your router, but it isn't recommended because a simple MicroPython server has no encryption or authentication. For remote control, an intermediary such as MQTT, a Telegram bot or a cloud IoT service is much safer.
Pico W or ESP32: which is better for Wi-Fi projects?
Both offer 2.4 GHz Wi-Fi and Bluetooth. If you want to work in MicroPython with tidy documentation and surprise-free pins, choose the Pico W; if you want more speed, many analog inputs and broad Arduino library support, the ESP32 is the better fit. For simple web server, sensor and API projects, both do the job comfortably.
Projects to build after reading this
See all projects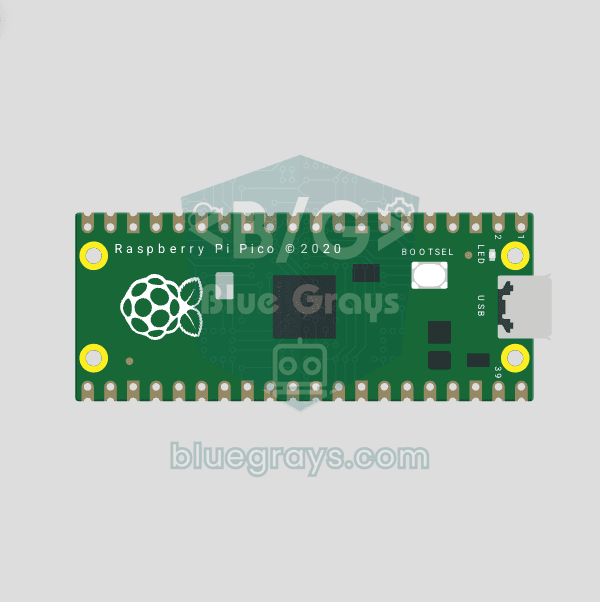
Raspberry Pi Pico Onboard LED Blink (Pico and Pico W)
The opening project of the Raspberry Pi Pico series! We blink the green onboard LED to verify the board works — a classic "Hello World" first experiment. NO external components, just Pico and USB cable. Code is written in MicroPython (the official language backed by Raspberry Pi Foundation). Learn machine.Pin class, Pin.OUT mode, led.on()/off() methods, and time.sleep() in Thonny IDE. Follow every toggle live in the Serial (REPL) output. Also perfect to verify
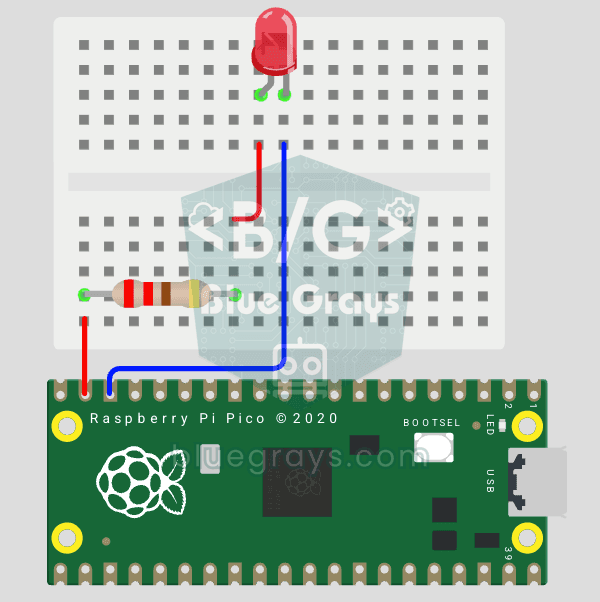
Raspberry Pi Pico: Controlling an External LED (Breadboard)
The next step after Pico’s built-in LED: connecting an external LED to the breadboard and controlling it via the GP14 pin. In this project, you’ll learn how to use any of the Pico’s general-purpose GPIO pins as an output, the LED’s polarity (long leg = anode/+, short leg = cathode/–), and why a current-limiting resistor (220Ω) is required. If you don’t include the resistor, excessive current will flow through the LED and it may burn out. The circuit is very simple: Pico GP14 → 220Ω resistor → LE
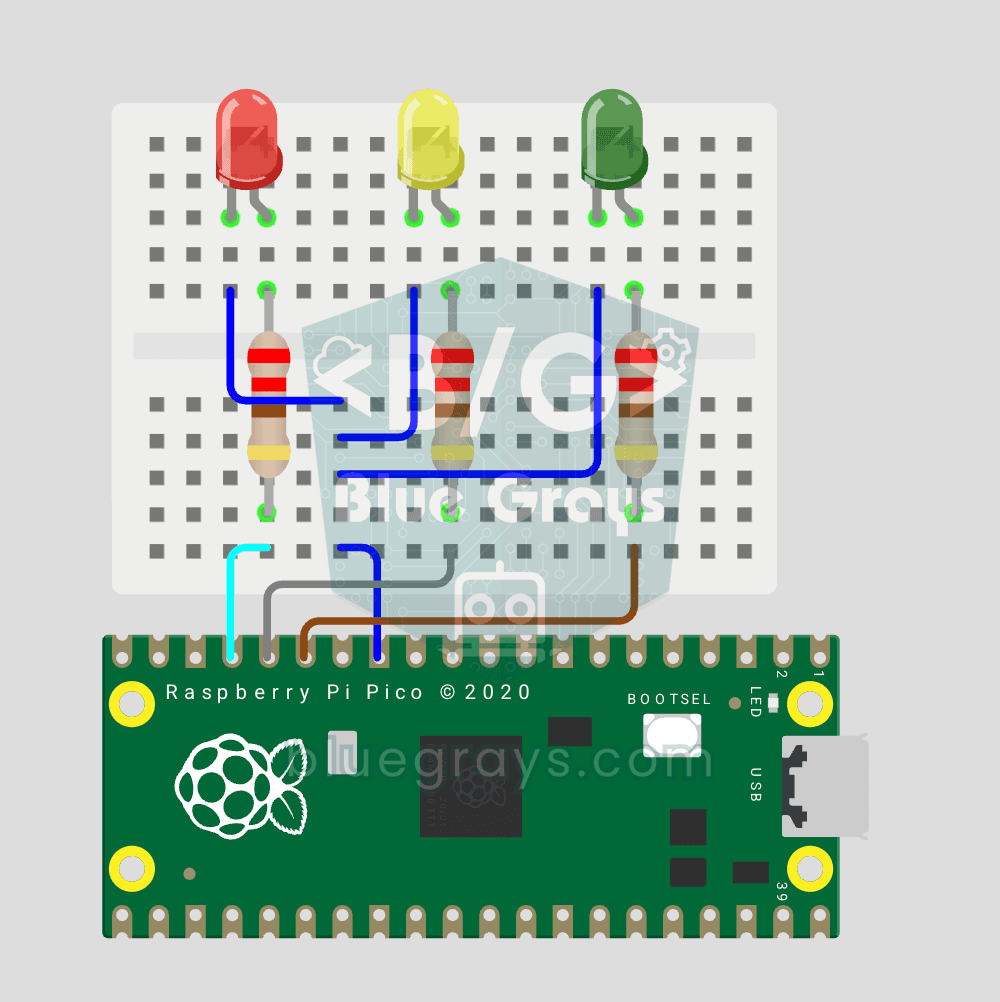
Raspberry Pi Pico Traffic Light Simulator (3 LEDs Sequential)
We simulate a real traffic light with red, yellow and green LEDs — the first 3-LED project of the Pico series! Green 4 sec "go", yellow 1.5 sec "ready", red 3 sec "stop" and red+yellow 1 sec "starting" (European traffic light pattern). Learn function definition (def all_off()), state machine logic (sequence) and multi-GPIO synchronization. Very simple circuit: 3 LEDs on GP11 (Green), GP12 (Yellow), GP13 (Red), each with a 220Ω current-limiting resistor. GP11-GP12-GP13 are ad
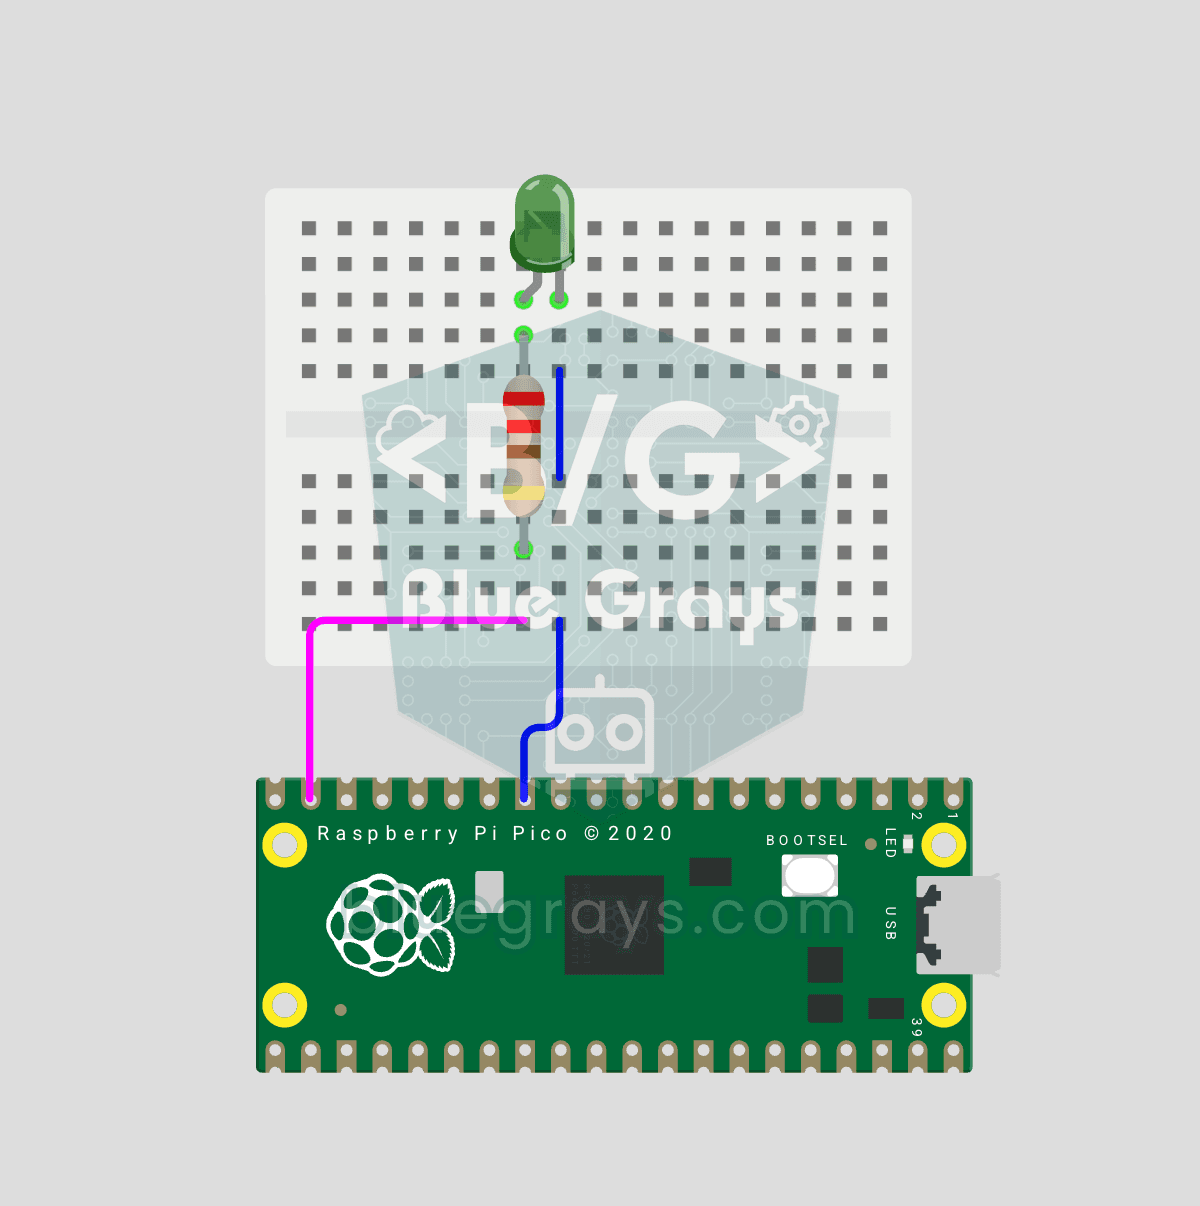
Raspberry Pi Pico PWM LED Fade (Breathing Effect)
The LED no longer just blinks — it breathes! Using the Raspberry Pi Pico's PWM (Pulse Width Modulation), the LED brightness slowly rises and then slowly falls, like a sleeping MacBook's light. Learn the machine.PWM class, duty_u16() (16-bit brightness 0–65535), PWM frequency (freq(1000) — 1000 on/off cycles per second, no visible flicker), range() step loops (up and down) and analog-like output from a digital pin. PWM is a core embedded tool — RGB color mixing, motor

ESP32 Asynchronous Web Server (with IP Display on LCD)
In this project, we’re turning the ESP32 into an asynchronous web server that you can control from your phone or computer on the same Wi-Fi network. Thanks to the ESPAsyncWebServer library, the server can process multiple requests simultaneously (unlike the classic WebServer.h, which blocks on a single request). You’ll be able to open the ESP32’s IP address in a browser and click the ON/OFF buttons (the /on and /off routes) to turn the LED connected to GPIO 5 on and off.

ESP32 Wi-Fi STA Connection (with LCD Screen)
In this project, we connect the ESP32 to the home Wi-Fi network in Station (STA) mode in a secure, fault-tolerant manner. We store the SSID and password in a separate secrets.h file to prevent leaking to Git, set up an auto-reconnect mechanism, and display the RSSI signal level and IP address on an I2C LCD screen. The internal LED works as a status indicator. It is a production-grade connection manager.

Real-Time Clock from the Internet via ESP32 NTP
The ESP32 connects to Wi-Fi and retrieves real time with millisecond precision from NTP (Network Time Protocol) servers. Thanks to the configTzTime() function, the Turkey time zone (TRT, UTC+3) is automatically applied, and DST transitions in countries that observe daylight saving time are automatically managed using a POSIX TZ string. The time is displayed both on the Serial Monitor and on an optional I2C LCD. configTzTime() starts the SNTP service; periodic resynchronization takes place wh

ESP32 HTTPClient + Weather API (with LCD Screen)
In this project, we use the ESP32 to make a REST API call to a weather API (wttr.in) over the internet using HTTPClient.h. We parse the returned JSON response using ArduinoJson v7 and display the city, temperature, humidity, weather, and wind information on an I2C LCD screen in both Turkish and English. wttr.in is free and does not require an API key—you can simply enter any city name to retrieve that city’s current weather conditions. It automatically updates every 30 minutes, provides differ