
Arduino Watchdog Timer: Auto-Reset a Frozen Board
What is an Arduino watchdog timer? Use avr/wdt.h on Uno, Task WDT on ESP32 and machine.WDT on Pico to auto-reset a frozen board, with correct placement.
An Arduino watchdog is a hardware safety timer that notices when your program has hung and restarts the board on its own. The program regularly sends an "I'm still running" signal; if that signal doesn't arrive within the set time, the watchdog resets the board as if the reset button had been pressed. So a project stuck in an infinite loop, waiting for a sensor or frozen inside a Wi-Fi library recovers within a few seconds, without you walking over to pull the plug.
Resetting a frozen board by hand is easy on your desk, but it isn't possible for an irrigation system in the garden, a weather station on the roof or a smart home device that runs for weeks. In this post you'll learn how a watchdog works, how to use avr/wdt.h on the Arduino Uno, the Task WDT on the ESP32 and machine.WDT on the Raspberry Pi Pico, the right place for the feed command, and the classic mistakes that trap a board in an endless reset loop, all with example code.
What is a watchdog timer and how does it work?
A watchdog is a small counter inside the microcontroller that counts independently of the main program. You start it with a set time, for example 2 seconds, and it begins counting. The feed command you call on every pass of the program (also called "kicking the dog") resets the counter. As long as the program runs healthily, the counter never reaches the end. If the program gets stuck somewhere, the feed never comes, the counter runs out and the watchdog applies a hardware reset to the microcontroller. After the reset the board starts from setup() just as if it had been freshly powered on.
The secret of a watchdog's reliability is that it runs from a clock source separate from the main clock. On the ATmega328P in the Arduino Uno this source is an internal 128 kHz oscillator; even if the program's 16 MHz crystal or the code flow breaks down, the watchdog keeps counting. Typical causes of a hang are: a while loop whose exit condition never happens, a library waiting forever for an unresponsive I2C sensor, RAM fragmented over time by String concatenations, memory corrupted by an overflowing array, or electrical noise making the program jump to a random address.
| Feature | Arduino Uno (ATmega328P) | ESP32 | Raspberry Pi Pico (RP2040) |
|---|---|---|---|
| Library / module | avr/wdt.h | esp_task_wdt.h | machine.WDT (MicroPython) |
| Start | wdt_enable(WDTO_2S) | esp_task_wdt_init / reconfigure + esp_task_wdt_add(NULL) | WDT(timeout=5000) |
| Feed | wdt_reset() | esp_task_wdt_reset() | wdt.feed() |
| Longest timeout | 8 s | Configurable (Arduino default 5 s) | 8388 ms (about 8.3 s) |
| Stop | wdt_disable() | Remove the task with esp_task_wdt_delete() | Can't be stopped (only a reset turns it off) |
| Clock source | Internal 128 kHz oscillator | Hardware timer group (MWDT) | Internal 1 µs tick generator |
What does a watchdog solve, and what doesn't it?
- Infinite loops: A while loop waiting for a value that never arrives, or a state machine stuck because of a logic error, is cleared in a few seconds by the watchdog.
- Hung libraries: If a network library freezes on a Wi-Fi, MQTT or HTTP connection, or an unresponsive sensor driver freezes the board, the reset returns it to a clean state.
- Memory corruption: If RAM fragmentation or a stack overflow makes the program misbehave and crash, the watchdog brings the board back up.
- Electrical noise: If interference from relays, motors or long wires makes the program jump to a random point, the cut-off feed is what rescues it.
- What it doesn't solve: Low supply voltage (brownout), a locked-up external sensor or a wrongly calculated value. The watchdog only resets the microcontroller; a sensor that holds the I2C line low often doesn't recover until its own power is cut. If the program runs wrongly but regularly, the watchdog can't notice.
Watchdog on the Arduino Uno: avr/wdt.h
On AVR-based boards (Uno, Nano, Mega, Pro Mini) you don't need to install an extra library for the watchdog; the avr/wdt.h header that comes with the compiler is enough. There are three basic functions: wdt_enable(timeout) starts the watchdog, wdt_reset() resets (feeds) the counter and wdt_disable() turns it off. The timeout is given with one of the ready-made constants below; there are ten options from about 15 ms to 8 seconds. You can't directly choose a time longer than 8 seconds, but with the conditional feeding method you'll see shortly, you can set up longer limits.
| Constant | Approx. time | Typical use |
|---|---|---|
| WDTO_15MS | 15 ms | Instant software reset |
| WDTO_30MS | 30 ms | Rarely used |
| WDTO_60MS | 60 ms | Rarely used |
| WDTO_120MS | 120 ms | Very short control loops |
| WDTO_250MS | 250 ms | Loops that need a fast response |
| WDTO_500MS | 500 ms | Button and LED control |
| WDTO_1S | 1 s | Simple control loops |
| WDTO_2S | 2 s | Sensor reading and display updates |
| WDTO_4S | 4 s | Slow sensors, communication |
| WDTO_8S | 8 s | Network operations, long calculations |
Step by step: your first watchdog test
- Connect the Arduino Uno to your computer with USB; apart from the onboard LED (pin 13), no extra circuit is needed.
- Upload the code below and open the Serial Monitor at 9600 baud.
- You'll see "Basladi" on the screen and the LED blinking every half second.
- Send the letter k from the Serial Monitor; the program deliberately enters an infinite loop and the LED freezes where it is.
- After about 2 seconds the board resets itself, "Basladi" appears again and the LED starts blinking once more.
1#include <avr/wdt.h>
2
3const int LED_PIN = 13;            // dahili LED / onboard LED
4unsigned long sonYanip = 0;
5bool ledDurum = false;
6
7void setup() {
8  MCUSR = 0;                       // reset bayraklarını temizle / clear reset flags
9  wdt_disable();                   // kurulum sırasında kapalı tut / keep off during setup
10  pinMode(LED_PIN, OUTPUT);
11  Serial.begin(9600);
12  Serial.println(F("Basladi / Started"));
13  wdt_enable(WDTO_2S);             // 2 saniyelik watchdog / 2 second watchdog
14}
15
16void loop() {
17  wdt_reset();                     // köpeği besle / feed the dog
18
19  if (millis() - sonYanip >= 500) {
20    sonYanip = millis();
21    ledDurum = !ledDurum;
22    digitalWrite(LED_PIN, ledDurum);
23  }
24
25  if (Serial.available() && Serial.read() == 'k') {
26    Serial.println(F("Kilitlendi / Hanging..."));
27    while (true) { }               // besleme yok: 2 s sonra reset / no feed: reset after 2 s
28  }
29}
The MCUSR = 0 line at the very start of setup() clears the reset flags; on the ATmega328P the watchdog can't be turned off until the watchdog reset flag (WDRF) is cleared, so wdt_disable() comes after it. We enable the watchdog at the end of setup(), after the initialisation is done, so that a long sensor start-up doesn't trigger a reset by accident. The wdt_reset() on the first line of loop() resets the counter on every pass. Blinking the LED with millis() instead of delay() is also deliberate: loop() returns without waiting and feeds the watchdog again and again within milliseconds.
Old bootloader and the endless reset loop
When the watchdog causes a reset, the ATmega328P doesn't turn the watchdog off; on the contrary, it leaves it enabled with the shortest timeout (about 16 ms). If the bootloader, the first program the board runs at start-up, doesn't handle this, the watchdog expires while it's still waiting for code to upload, and the board resets again. The result is an endless reset loop where the LED blinks rapidly, the code never starts and new code can't be uploaded. The Optiboot bootloader on the original Arduino Uno turns the watchdog off at start-up, so it doesn't have this problem. The problem is mostly seen on Nano clones with an old bootloader and some older Mega 2560 boards.
Where should you put the feed command?
- Pick a single, central spot: Put wdt_reset() inside loop(), at the one point all the work passes through. If you sprinkle feeds all over the code, a stuck sub-loop keeps feeding itself and the watchdog becomes pointless.
- Don't feed inside an interrupt: A timer interrupt keeps running even if the main program is frozen. If you put the feed there, the watchdog can't catch any hang. You can find how interrupts work in the Arduino Interrupt post.
- Choose the timeout based on the longest operation: The watchdog timeout should be at least twice the worst-case duration of one pass of loop(). If you use WDTO_2S in a loop containing delay(3000), the board resets constantly.
- Add timeouts to wait loops: Instead of feeding inside a loop like while (!Serial.available()), make the loop exit after a certain time. That way the board doesn't freeze and the watchdog stays alert for real hangs.
- Enable the watchdog after setup: Enable it once long operations such as the Wi-Fi connection, SD card initialisation or sensor calibration have finished in setup().
A smarter approach is to make feeding conditional: you feed the watchdog only if the system is really healthy. In the example below, a sensor connected to A0 is read every 5 seconds; if the reading is in a meaningful range, the time of the last successful measurement is updated. If there's no successful measurement for 60 seconds, feeding stops and the board resets 4 seconds later. With this method you set up a supervision on the scale of minutes that goes beyond the AVR's 8-second limit, and you catch not just freezes but also silent faults such as a broken sensor wire.
1#include <avr/wdt.h>
2
3const unsigned long OLCUM_ARALIK = 5000UL;     // 5 s'de bir ölç / measure every 5 s
4const unsigned long MAKS_SESSIZLIK = 60000UL;  // 60 s başarısızlık sınırı / 60 s failure limit
5unsigned long sonOlcum = 0;
6unsigned long sonBasari = 0;
7
8bool olcumYap() {
9  int deger = analogRead(A0);                  // örnek sensör / sample sensor
10  Serial.println(deger);
11  return deger > 10 && deger < 1013;           // uç değer = kopuk kablo / extreme value = broken wire
12}
13
14void setup() {
15  MCUSR = 0;                                   // reset bayraklarını temizle / clear reset flags
16  wdt_disable();
17  Serial.begin(9600);
18  sonBasari = millis();
19  wdt_enable(WDTO_4S);                         // 4 saniyelik watchdog / 4 second watchdog
20}
21
22void loop() {
23  unsigned long simdi = millis();
24
25  if (simdi - sonOlcum >= OLCUM_ARALIK) {
26    sonOlcum = simdi;
27    if (olcumYap()) {
28      sonBasari = simdi;                       // sağlıklı ölçüm / healthy reading
29    }
30  }
31
32  if (simdi - sonBasari < MAKS_SESSIZLIK) {
33    wdt_reset();                               // yalnız sistem sağlıklıysa besle / feed only if healthy
34  }
35}
Watchdog on the ESP32: Task WDT and Interrupt WDT
On the ESP32 a watchdog already runs by default; most people notice it for the first time when an unexpected "Task watchdog got triggered" message appears in the serial monitor. Because the ESP32 runs several tasks at once under the FreeRTOS operating system, it uses a layered structure instead of a single counter. The Task WDT (TWDT) checks whether the tasks subscribed to it are fed within a set time; the Interrupt WDT (IWDT) catches interrupts and the task scheduler being blocked for a long time. In the Arduino core the TWDT is usually enabled with a 5-second timeout and monitors the idle tasks; the task that runs loop() isn't monitored unless you add it. The default behaviour can vary with the core version, and in some configurations the TWDT only prints a warning and doesn't reset the board, so setting the timeout and reset behaviour explicitly in code is the safest option.
| Type | What it monitors | Typical time | Message you see when it triggers |
|---|---|---|---|
| Task WDT (TWDT) | Regular running of subscribed tasks and idle tasks | 5 s (configurable) | task_wdt: Task watchdog got triggered |
| Interrupt WDT (IWDT) | Interrupts and the task scheduler being blocked | About 300 ms | Guru Meditation Error ... Interrupt wdt timeout on CPU1 |
| RTC WDT | The boot process getting stuck | Short time during boot | rst:0x10 (RTCWDT_RTC_RESET) |
1#include <esp_task_wdt.h>
2#include <esp_system.h>
3
4#define WDT_SURE_S 10                         // watchdog süresi (s) / watchdog timeout (s)
5
6void wdtKur() {
7#if ESP_ARDUINO_VERSION_MAJOR >= 3
8  esp_task_wdt_config_t cfg = {
9    .timeout_ms = WDT_SURE_S * 1000,
10    .idle_core_mask = 0,                       // idle görevlerini izleme / do not watch idle tasks
11    .trigger_panic = true                      // süre dolunca resetle / reset on timeout
12  };
13  if (esp_task_wdt_reconfigure(&cfg) == ESP_ERR_INVALID_STATE) {
14    esp_task_wdt_init(&cfg);                   // TWDT kapalıysa başlat / start TWDT if not running
15  }
16#else
17  esp_task_wdt_init(WDT_SURE_S, true);         // 2.x: süre (s), panik / 2.x: timeout (s), panic
18#endif
19  esp_task_wdt_add(NULL);                      // bu görevi (loop) izle / watch this task (loop)
20}
21
22void setup() {
23  Serial.begin(115200);
24  esp_reset_reason_t neden = esp_reset_reason();
25  Serial.print("Reset nedeni / Reset reason: ");
26  Serial.println((int)neden);
27  if (neden == ESP_RST_TASK_WDT || neden == ESP_RST_INT_WDT || neden == ESP_RST_WDT) {
28    Serial.println("Watchdog reseti / Watchdog reset");
29  }
30  wdtKur();
31  Serial.println("Hazir / Ready");
32}
33
34void loop() {
35  esp_task_wdt_reset();                        // besle / feed
36
37  // sensör, Wi-Fi ve ekran işleri burada / sensor, Wi-Fi and display work here
38
39  if (Serial.available() && Serial.read() == 'k') {
40    Serial.println("Kilitlendi / Hanging...");
41    while (true) { delay(10); }                // besleme yok: 10 s sonra reset / no feed: reset after 10 s
42  }
43  delay(10);
44}
The code checks the core version with ESP_ARDUINO_VERSION_MAJOR: in version 3.x (ESP-IDF 5) the settings are passed with the esp_task_wdt_config_t structure and a TWDT that's already running is updated with esp_task_wdt_reconfigure(); in version 2.x, esp_task_wdt_init() takes the timeout in seconds and the panic flag directly. When trigger_panic is true, the ESP32 prints the error dump to the serial port and resets itself when the time is up. esp_task_wdt_add(NULL) starts monitoring the currently running task, that is, the one that runs setup() and loop(). Reading and logging the cause of the previous reset with esp_reset_reason() at start-up is the easiest way to understand why a device in the field restarted. If you just want to monitor loop() without any configuration, you can call the Arduino core's enableLoopWDT() function in setup(); in that case the feed is done automatically at the start of every loop() pass.
Watchdog on the Raspberry Pi Pico (MicroPython)
The RP2040's hardware watchdog is used in MicroPython with the machine.WDT class. The timeout is given in milliseconds and can be at most 8388 ms on the RP2040. There's an important difference: on the Pico, once the watchdog has started it can't be stopped from code, only a reset turns it off. That's why leaving a small recovery path during development is a lifesaver. In the code below, if pin GP15 is connected to GND at start-up, the watchdog is never started and the program drops to the REPL. With machine.reset_cause() you can also find out whether the board started because of the watchdog or with a normal power-up. If you program the Pico with the Arduino IDE (arduino-pico core) instead of MicroPython, the same job is done with the rp2040.wdt_begin(5000) and rp2040.wdt_reset() functions.
1import machine
2from machine import Pin, WDT
3import time
4
5led = Pin(25, Pin.OUT)                     # dahili LED (Pico W'da "LED") / onboard LED ("LED" on Pico W)
6kurtarma = Pin(15, Pin.IN, Pin.PULL_UP)   # GND'ye bağlıysa WDT başlamaz / tied to GND = WDT skipped
7
8if machine.reset_cause() == machine.WDT_RESET:
9    print("Watchdog reseti / Watchdog reset")
10
11if kurtarma.value() == 0:
12    print("Kurtarma modu / Recovery mode")
13    raise SystemExit
14
15wdt = WDT(timeout=5000)                    # 5 s, RP2040'ta en fazla 8388 ms / max 8388 ms on RP2040
16son = time.ticks_ms()
17
18while True:
19    wdt.feed()                             # besle / feed
20    if time.ticks_diff(time.ticks_ms(), son) >= 500:
21        son = time.ticks_ms()
22        led.toggle()
23 time.sleep_ms(10)Watchdog strategy for long-running IoT projects
- Log the start-ups: At every start-up, write a counter to EEPROM on the Uno or to Preferences (NVS) on the ESP32; on the ESP32 also store the cause with esp_reset_reason(). One reset a week is acceptable, one reset an hour is a bug that needs fixing. Because Optiboot clears the reset flags on the Uno, reading the cause from MCUSR is often not possible; the start-up counter still shows how often the device restarts.
- Put timeouts on network operations: Don't wait forever for the Wi-Fi connection; for example, if it can't connect within 15 seconds, leave the loop and try again after a while. Settings like setTimeout() in HTTPClient and Wire.setWireTimeout() on AVR keep a stuck operation from exceeding the watchdog time. For connection problems see ESP32 Won't Connect to Wi-Fi.
- Account for OTA updates: A wireless upload takes seconds and loop() may be left waiting during that time. By calling esp_task_wdt_reset() in ArduinoOTA's onProgress callback you can prevent the update from being cut off midway; this is a rare but justified exception to the rule.
- Think about sleep modes: On the Uno the watchdog can be used in interrupt mode as a wake-up timer and you can sleep in 8-second intervals. On the ESP32 the processor is off during deep sleep and the code starts from the beginning on wake-up. See ESP32 Deep Sleep for details.
- Manage the power of external sensors: The watchdog doesn't reset the sensor. If you power a frequently stuck I2C sensor through a transistor or MOSFET and cut and restore its power for a few hundred milliseconds at start-up, the sensor starts clean along with the microcontroller. You can read how the I2C line gets locked up in the What Is I2C post.
- External watchdog for critical systems: The internal watchdog only catches the microcontroller's own faults. If you need to supervise the whole circuit, use an external watchdog chip that expects regular pulses from a GPIO, or a second small microcontroller.
Common mistakes and fixes
| Symptom | Likely cause | Fix |
|---|---|---|
| Board resets every few seconds | Watchdog timeout is shorter than the longest pass of loop() (e.g. WDTO_2S with delay(3000)) | Lengthen the timeout, use millis() instead of delay() |
| LED blinks rapidly, code won't upload | Old bootloader doesn't turn off the watchdog after a watchdog reset | Burn Optiboot with ISP, program the board with the current bootloader option |
| Board freezes but never resets | Feed is inside a timer interrupt or a stuck sub-loop | Move wdt_reset() to a single point in loop() |
| ESP32 repeats "Task watchdog got triggered", no reset | TWDT isn't in panic mode | Set trigger_panic to true (second parameter in 2.x) |
| ESP32 "IDLE (CPU 0)" warning | A task on core 0 loops without ever waiting | Add vTaskDelay(1) to the loop |
| esp_task_wdt_reset() gives a "task not found" error | The task hasn't been added to the TWDT | Call esp_task_wdt_add(NULL) first |
| Pico disconnects when stopped in Thonny | machine.WDT can't be stopped once started | Use a recovery pin, run the code under a name other than main.py when testing |
| A relay or motor briefly switches on by mistake during reset | Pins go back to inputs during reset and the driver input floats | Add pull-down resistors to the outputs, set a safe state at the start of setup() |
With just a few lines of code, a watchdog timer turns your project from a bench experiment into a device that can run on its own for days. First remove the real causes of the freezes, then add the watchdog as the last safety layer and put the feed at a single, meaningful point. In the BlueGrays app you can go step by step through long-running projects such as ESP32 Wi-Fi connection, web server, OTA update, weather and smart irrigation, with circuit diagrams and code, and add the watchdog to them yourself.
Frequently asked questions
What is an Arduino watchdog timer used for?
A watchdog is a built-in timer that automatically resets the board if the program doesn't send an "I'm still running" signal within the set time. It brings projects that enter an infinite loop, get stuck waiting for a sensor or freeze in a network library back to life within seconds. It's essential especially for irrigation, alarm and IoT devices that run unattended for a long time.
How do I reset an Arduino from code?
On AVR boards the cleanest way is to enable the watchdog with the shortest timeout and wait: when you write wdt_enable(WDTO_15MS); while (true) {}, the board gets a real hardware reset almost immediately. On the ESP32 ESP.restart() does the same job, and on the Raspberry Pi Pico with MicroPython machine.reset() does. On Nano clones with an old bootloader this method can lead to an endless reset loop.
What's the longest watchdog timeout?
On the Arduino Uno and other AVR boards the longest time is 8 seconds (WDTO_8S). On the Raspberry Pi Pico the limit is 8388 ms, while on the ESP32's Task WDT the time can be set freely. If you need a longer supervision, you can set limits on the scale of minutes with the conditional feeding method, which feeds the watchdog only while the system is healthy.
How do I fix the ESP32 "Task watchdog got triggered" error?
This message shows that a monitored task wasn't fed within the set time; the cause is usually a while loop that returns without waiting, or a FreeRTOS task that starves the idle task. Add vTaskDelay(1) or delay(1) to your loops, split long operations into pieces, and if you added your own task to the TWDT, call esp_task_wdt_reset() regularly. The task named in the message, for example IDLE (CPU 0), tells you which core the problem is on.
I added a watchdog and my Arduino keeps resetting. Why?
The most common cause is a watchdog timeout shorter than the longest pass of loop(); for example choosing WDTO_2S when the loop contains delay(3000). Make the timeout at least twice the worst-case pass time and use millis() instead of long delay() calls. If the LED blinks rapidly and code can't be uploaded, the problem is an old bootloader; you need to burn Optiboot to the board with an ISP.
Are variables preserved after a watchdog reset?
No, a watchdog reset restarts the board and setup() runs from the beginning; global variables return to their initial values. Information that must survive a reset, such as counters, settings or the last state, should be written to EEPROM on the Uno, to Preferences (NVS) on the ESP32, and to a file in flash on the Pico.
Projects to build after reading this
See all projects
LED Blink with ESP32
Teaches basic GPIO output usage with ESP32. We achieve a blinking effect by turning an LED on and off from a digital pin. ESP32 version of the classic blink project on Arduino UNO; the basic blink commands in the Arduino environment are the same, but the ESP32's pin layout and 3.3 V GPIO levels differ from those of the Arduino UNO.
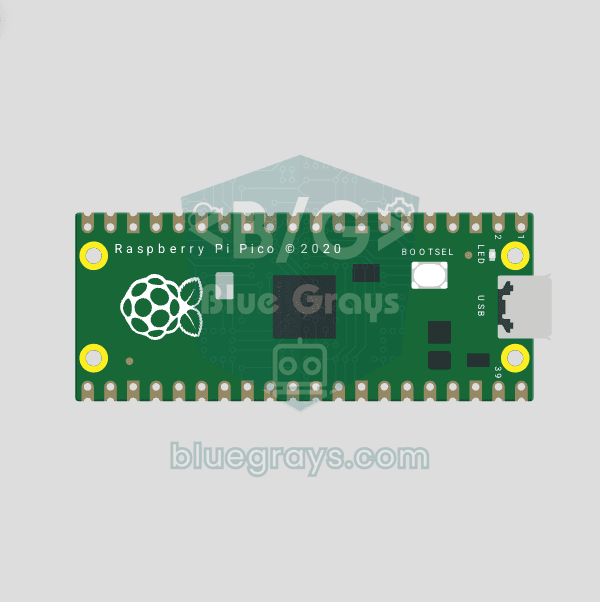
Raspberry Pi Pico Onboard LED Blink (Pico and Pico W)
The opening project of the Raspberry Pi Pico series! We blink the Pico's green built-in LED to confirm the board works, the classic "Hello World" first experiment. No external parts needed, just the Pico and a USB cable. The code is written in MicroPython, the language officially supported by the Raspberry Pi Foundation.

ESP32 Wi-Fi STA Connection (with LCD Screen)
In this project, we connect the ESP32 to the home Wi-Fi network in Station (STA) mode in a secure, fault-tolerant manner. We store the SSID and password in a separate secrets.h file to prevent leaking to Git, set up an auto-reconnect mechanism, and display the RSSI signal level and IP address on an I2C LCD screen. The internal LED works as a status indicator. It is a production-grade connection manager.

ESP32 Asynchronous Web Server (with IP Display on LCD)
In this project, we’re turning the ESP32 into an asynchronous web server that you can control from your phone or computer on the same Wi-Fi network. Thanks to the ESPAsyncWebServer library, the server can process multiple requests simultaneously (unlike the classic WebServer.h, which blocks on a single request). You’ll be able to open the ESP32’s IP address in a browser and click the ON/OFF buttons (the /on and /off routes) to turn the LED connected to GPIO 5 on and off.

ESP32 OTA Update — Wireless Firmware Installation (With LCD Screen)
In this project you'll learn to upload new firmware to the ESP32 over Wi-Fi, without a USB cable. With the ArduinoOTA library the ESP32 becomes visible on the network and shows up automatically as bluegrays-ota under "Network port" in the Arduino IDE. The first upload goes over USB; after that every update is wireless, a key feature for devices out in the field.

ESP32 HTTPClient + Weather API (with LCD Screen)
In this project the ESP32 makes a REST API call over the internet to a weather API (wttr.in) using HTTPClient.h. The JSON response is parsed with ArduinoJson v7, and the city, temperature, humidity, weather and wind are shown on an I2C LCD. wttr.in needs no API key; just type the name of any city.
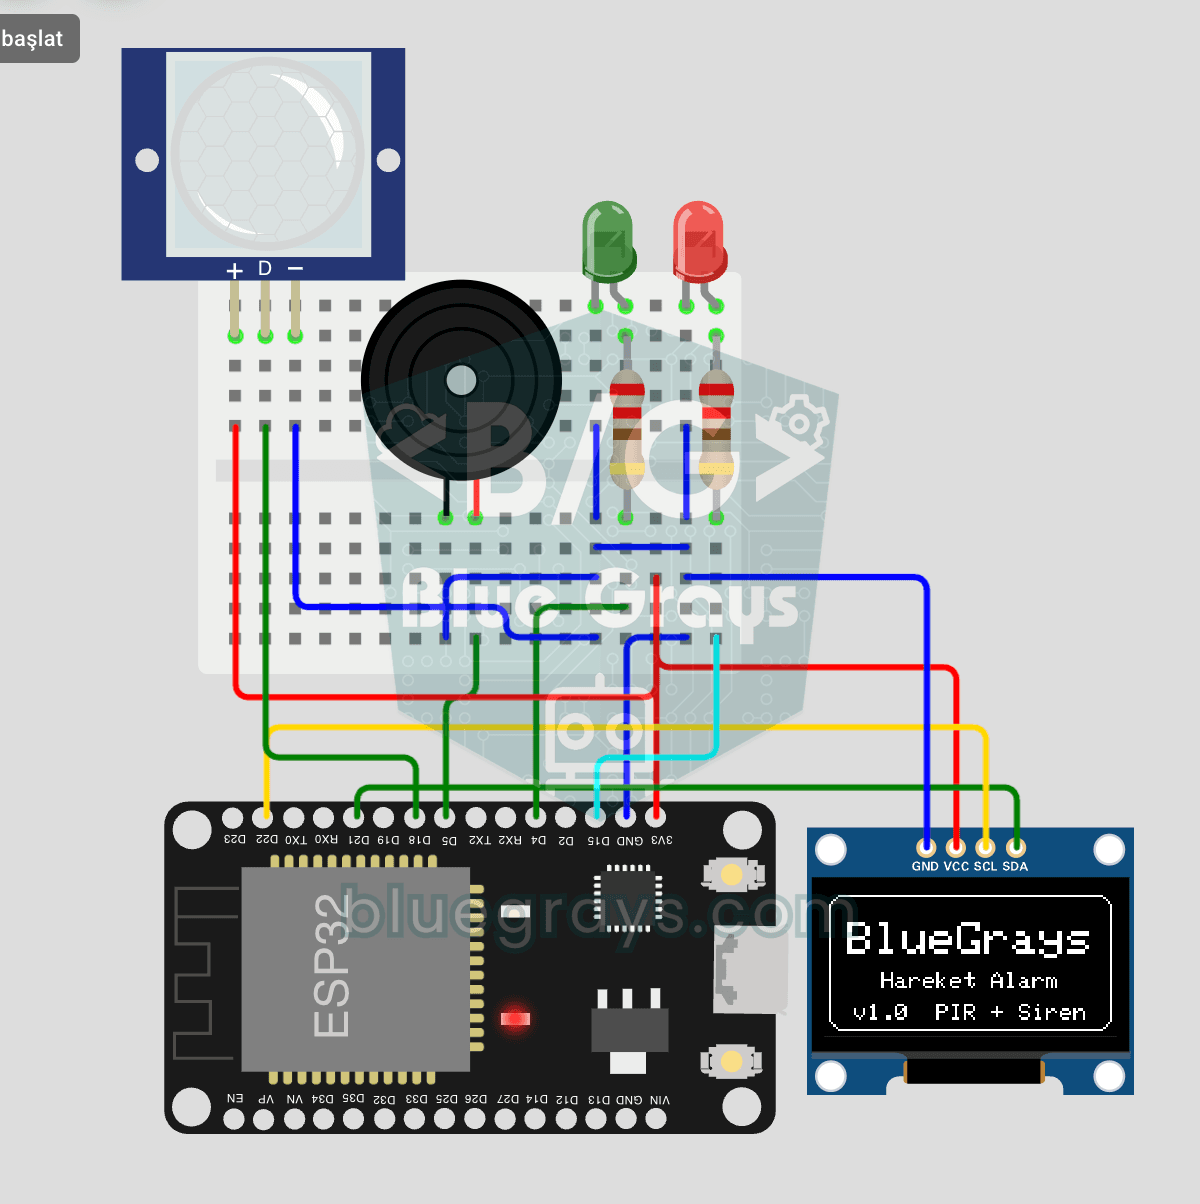
ESP32 Motion Alarm System (PIR + Buzzer + LED + Telegram)
A smart security alarm: when the PIR sensor detects motion, it sounds the buzzer, lights the LED and sends the owner an instant Telegram notification. A 30-second cooldown limits how often the alarm repeats; it does not filter out the PIR sensor's false detections. Use it at home, in a garage, a storeroom or a study.