
Home Assistant ESP32 Projects: 12 Smart Home Ideas With ESPHome
12 Home Assistant ESP32 projects: temperature, mmWave presence, energy meter, garage door, water leak, doorbell; ESPHome or MQTT, with a parts and cost table.
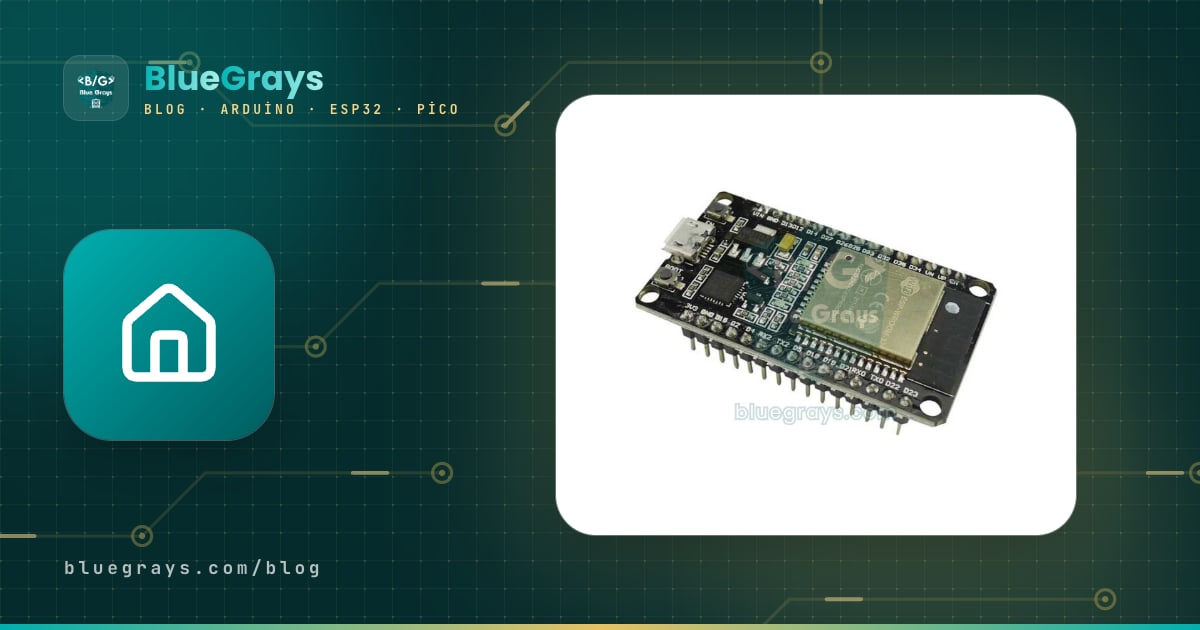
Home Assistant ESP32 projects combine an ESP32 board costing a few dollars with sensors and relays and connect it to the Home Assistant server in your home, so you can watch lights, temperature, doors and energy use on one dashboard and turn them into automations. Most off-the-shelf smart home devices depend on a cloud, their app changes or the manufacturer drops support; an ESP32 device you build yourself runs fully locally, keeps working when the internet is down, and takes any sensor you want. On top of that, a temperature sensor or a water leak alarm costs far less than its commercial equivalent.
In this guide we collect 12 projects in one table with their parts list, approximate cost and recommended connection route (ESPHome or MQTT?). Then we explain each project briefly and give you three ready examples: a water leak alarm that works without code, an ESPHome configuration that shows a single-button garage door opener as a cover that opens and closes in Home Assistant, and an Arduino-coded doorbell that announces itself through MQTT Discovery. If you have never installed ESPHome, start with the ESPHome setup article; all the details on the MQTT side are in the ESP32 MQTT and Home Assistant guide.

ESPHome or MQTT? How the two routes differ
There are two main ways to connect an ESP32 to Home Assistant. With ESPHome you write no code: you describe sensors and relays in a few lines of YAML, ESPHome compiles it and flashes the board, and the device appears in Home Assistant on its own. Hundreds of sensors are supported out of the box, updates happen over the air, and the link between the device and Home Assistant is encrypted. With MQTT you write the code yourself in the Arduino IDE: the ESP32 sends its readings to a broker (usually the Mosquitto add-on in Home Assistant), and Home Assistant reads those messages. It takes more effort, but you can use any library and any logic, and the same device can also talk to other systems such as Node-RED. The rule of thumb: if a ready ESPHome component exists, use ESPHome; for unusual hardware or complex logic, use MQTT.
| Feature | ESPHome | MQTT (Arduino code) |
|---|---|---|
| Code | YAML; short C++ lambdas when needed | All C++, you write everything |
| Adding to Home Assistant | Discovered automatically, added with one click | You send the Discovery messages |
| Infrastructure needed | ESPHome add-on or ESPHome Builder | Mosquitto broker |
| Updates | Over the air (OTA), from the dashboard | You add the OTA code yourself |
| Use with other systems | Limited (MQTT can also be enabled) | Works with any MQTT client |
| Best for | Standard devices such as sensors, relays, lights | Custom protocols, complex logic, existing Arduino code |
12 Home Assistant ESP32 projects: parts, route and cost table
| # | Project | Parts | Recommended route | Approx. cost | Level |
|---|---|---|---|---|---|
| 1 | Temperature and humidity sensor | ESP32, BME280 or SHT31 | ESPHome | $8–12 | Easy |
| 2 | CO2 and air quality | ESP32, SCD40 or MH-Z19 | ESPHome | $20–35 | Easy |
| 3 | Motion-activated light | ESP32, HC-SR501 PIR, relay | ESPHome | $7–10 | Easy |
| 4 | mmWave presence sensor | ESP32, LD2410 | ESPHome | $8–12 | Medium |
| 5 | Door and window sensor | ESP32, reed switch, magnet | ESPHome | $6–8 | Easy |
| 6 | Water leak alarm | ESP32, rain sensor module, buzzer | ESPHome | $6–8 | Easy |
| 7 | Garage door control | ESP32, relay, reed switch | ESPHome | $8–12 | Medium |
| 8 | Doorbell notification | ESP32, button, buzzer | MQTT or ESPHome | $6–8 | Easy |
| 9 | Relay smart plug | ESP32, relay module, enclosure, fuse | ESPHome | $10–15 | Medium |
| 10 | Energy meter | ESP32, PZEM-004T v3 + current transformer | ESPHome or MQTT | $12–18 | Medium |
| 11 | LED strip control | ESP32, WS2812B strip, 5 V adapter | WLED or ESPHome | $15–30 | Easy |
| 12 | Bluetooth proxy | ESP32 only | ESPHome | $4–6 | Easy |
The costs are approximate and vary with the seller, the country and extra parts such as an enclosure or an adapter; $4–6 is assumed for the ESP32 DevKit board. These 12 items are project ideas commonly built for Home Assistant. The BlueGrays app has ESP32 projects that teach the hardware side of them: ESP32 DHT22 Temperature and Humidity, ESP32 Automatic Lighting with PIR Motion Sensor, ESP32 Smart Lighting (PIR + LDR + Relay + OLED), ESP32 MQ-2 Gas/Smoke Detector and ESP32 WS2812B NeoPixel Strip Control. Build the circuit from the diagram there and connect the software to Home Assistant with ESPHome or MQTT.
Measurement projects (1–2): temperature, humidity and CO2
Project 1 is most people's first ESPHome device. A DHT22 does the job, but I2C sensors such as the BME280 or SHT31 are both more accurate and more stable; on the ESP32, GPIO 21 is used for SDA and GPIO 22 for SCL. Do not put the sensor right next to the board: the ESP32 warms up while Wi-Fi runs and pushes the reading up by 1–2 °C, so move the sensor outside or to the bottom of the enclosure on a few centimetres of cable (BME280 sensor). Project 2 adds a sensor that measures CO2. The SCD40 and MH-Z19 are real CO2 sensors using NDIR or photoacoustic measurement; the cheap MQ-135 only gives a general air quality trend. When CO2 goes above 1000 ppm, Home Assistant can send a notification or switch on ventilation; in a room where someone studies, the difference is really noticeable (MH-Z19 CO2 sensor).
Presence and motion projects (3–5): PIR, mmWave and door sensor
In Project 3 the light turns on when the HC-SR501 detects motion. If you define the automation inside ESPHome, on the device itself, the light works even when Home Assistant is down; this local operation is the biggest advantage of DIY devices (PIR motion sensor). The weak point of a PIR is that it does not see a person sitting still: the light goes off while you read on the sofa. Project 4 solves this with the LD2410 mmWave radar. The radar detects even tiny movements such as breathing, has a built-in ESPHome component, and its sensitivity can be tuned per distance gate; the best results come from combining it with a PIR (LD2410 presence sensor). In Project 5 a reed switch and a magnet report whether a door or window is open; since the ESP32 stays on Wi-Fi all the time, plan to power this sensor from an adapter rather than a battery (reed switch).
Water leak alarm (6): a code-free ESPHome example
Project 6 is the cheapest project on the list but maybe the most valuable: a sensor placed under your washing machine, dishwasher or boiler sounds a buzzer and sends a notification to your phone the moment water leaks. Here the sensing plate of a rain sensor module is laid on the floor; the module's LM393 comparator pulls the digital output (DO) LOW when the plate gets wet, and the sensitivity is set with the potentiometer on the module (rain sensor). In the configuration below the buzzer automation runs inside the device: the alarm sounds even if Wi-Fi or Home Assistant happens to be down.
1# ESPHome: ESP32 su kaçağı alarmı / ESP32 water leak alarm
2esphome:
3  name: su-kacagi                   # küçük harf ve tire / lowercase and hyphens
4  friendly_name: Su Kacagi
5
6esp32:
7  board: esp32dev
8
9logger:
10api:                                # Home Assistant bağlantısı / Home Assistant link
11  encryption:
12    key: !secret api_key
13ota:
14  - platform: esphome
15    password: !secret ota_password
16wifi:
17  ssid: !secret wifi_ssid
18  password: !secret wifi_password
19
20binary_sensor:
21  - platform: gpio
22    name: "Water Leak"
23    device_class: moisture          # HA'da "Islak / Kuru" görünür / shows as Wet / Dry
24    pin:
25      number: GPIO25
26      inverted: true                # modül ıslakken DO = LOW / module DO goes LOW when wet
27    filters:
28      - delayed_on: 2s              # tek damlayı yok say / ignore a single splash
29      - delayed_off: 30s
30    on_press:                       # Wi-Fi kopsa da yerel alarm çalar / local alarm works without Wi-Fi
31      - switch.turn_on: buzzer
32    on_release:
33      - switch.turn_off: buzzer
34
35switch:
36  - platform: gpio
37    id: buzzer
38    name: "Leak Buzzer"
39    pin: GPIO23
40    restore_mode: ALWAYS_OFF        # elektrik gelince sessiz / silent after power-up
The device_class: moisture line makes Home Assistant show the sensor as "Wet / Dry" and pick the right icon. The delayed_on: 2s filter stops a single splash from triggering the alarm, and delayed_off: 30s keeps the alarm from flickering on and off while the water dries and wets the plate again. Put your Wi-Fi details and passwords in ESPHome's secrets.yaml file, not directly in the file; the !secret lines take the values from there. You set up the phone notification with an automation in Home Assistant: as the trigger choose this sensor changing to Wet, and as the action send a notification to the mobile app.
Garage door (7): cover control with a relay and a reed switch
Project 7 relies on wiring a relay across the contacts of the wall button found on most garage door openers: when the relay closes for half a second, the motor opens, stops or closes the door as if someone had pressed the button. To know the door's real state, a reed switch and a magnet are placed so they meet when the door is closed. ESPHome's template cover turns these two parts into a single garage door with up and down arrows in Home Assistant; the "Open" command only pulses the relay when the door is closed and "Close" only when it is open, so the door never accidentally starts moving the wrong way.
| Connection | ESP32 pin | Note |
|---|---|---|
| Reed switch (one end) | GPIO 27 | Other end to GND; internal pull-up enabled |
| Relay module IN | GPIO 26 | Relay COM and NO wired in parallel with the opener's button input |
| Relay module VCC / GND | VIN (5 V) / GND | The coil needs 5 V; prefer a module with a 3.3 V trigger |
| ESP32 power | USB or a 5 V adapter | Do not use the opener's own 24 V output directly |
1# ESPHome: tek butonlu garaj kapısı motoru için kapak (cover)
2# ESPHome: cover for a single-button garage door opener
3binary_sensor:
4  - platform: gpio
5    id: garage_closed
6    name: "Garage Closed"
7    pin:
8      number: GPIO27
9      mode:
10        input: true
11        pullup: true                # reed röle GND'ye / reed switch to GND
12      inverted: true                # mıknatıs yakın = kapalı / magnet near = closed
13    filters:
14      - delayed_on_off: 100ms       # kontak sıçramasını süz / debounce
15
16switch:
17  - platform: gpio
18    id: garage_relay
19    pin: GPIO26
20    internal: true                  # HA'da ayrı anahtar görünmesin / hide from HA
21    restore_mode: ALWAYS_OFF
22    on_turn_on:                     # motor butonuna 0,5 sn bas / press the opener button for 0.5 s
23      - delay: 500ms
24      - switch.turn_off: garage_relay
25
26cover:
27  - platform: template
28    name: "Garage Door"
29    device_class: garage
30    lambda: |-
31      if (id(garage_closed).state) {
32        return COVER_CLOSED;
33      } else {
34        return COVER_OPEN;
35      }
36    open_action:                    # yalnız kapalıysa bas / press only if closed
37      - if:
38          condition:
39            binary_sensor.is_on: garage_closed
40          then:
41            - switch.turn_on: garage_relay
42    close_action:                   # yalnız açıksa bas / press only if open
43      - if:
44          condition:
45            binary_sensor.is_off: garage_closed
46          then:
47            - switch.turn_on: garage_relay
48    stop_action:
49 - switch.turn_on: garage_relayDoorbell (8): Arduino code with MQTT Discovery
You could build Project 8 in a few lines of ESPHome too, but it is a nice example for seeing the MQTT route. The code below sends an event entity to Home Assistant when the bell button is pressed. When it connects, the code writes a retained discovery message to a homeassistant/event/... topic; when Home Assistant sees it, it creates a device called "ESP32 Kapi Zili" and a doorbell-type event entity by itself. Thanks to the Last Will message, if the board loses power or drops off Wi-Fi, Home Assistant shows the device as unavailable. Link the event that arrives on every press to an automation and send a phone notification, a chime to a speaker or a snapshot from a camera at the door.
1// ESP32 kapı zili: MQTT Discovery ile Home Assistant'ta "event" varlığı
2// ESP32 doorbell: an "event" entity in Home Assistant via MQTT Discovery
3#include <WiFi.h>
4#include <PubSubClient.h>
5
6const char* WIFI_SSID = "WIFI_ADIN";
7const char* WIFI_PASS = "WIFI_SIFRESI";
8const char* MQTT_HOST = "192.168.1.50";      // Home Assistant / Mosquitto IP'si / broker IP
9const char* MQTT_USER = "mqtt_kullanici";
10const char* MQTT_PASS = "mqtt_sifresi";
11
12#define BUTTON_PIN 27        // zil butonu GND'ye / bell button to GND
13const char* CLIENT_ID  = "esp32-kapi-zili";
14const char* T_CONFIG   = "homeassistant/event/esp32_kapi_zili/config";
15const char* T_EVENT    = "bluegrays/kapi_zili/event";
16const char* T_AVAIL    = "bluegrays/kapi_zili/status";
17
18WiFiClient net;
19PubSubClient mqtt(net);
20unsigned long lastTry = 0, lastRing = 0;
21bool lastLevel = HIGH;
22
23void announce() {
24  // Keşif mesajı: Home Assistant cihazı kendiliğinden ekler / discovery: HA adds the device by itself
25  const char* cfg =
26    "{\"name\":\"Kapi Zili\",\"unique_id\":\"esp32_kapi_zili\",\"device_class\":\"doorbell\","
27    "\"event_types\":[\"press\"],\"state_topic\":\"bluegrays/kapi_zili/event\","
28    "\"availability_topic\":\"bluegrays/kapi_zili/status\","
29    "\"device\":{\"identifiers\":[\"esp32_kapi_zili\"],\"name\":\"ESP32 Kapi Zili\",\"manufacturer\":\"BlueGrays\"}}";
30  mqtt.publish(T_CONFIG, cfg, true);          // retain: HA yeniden başlasa da bulur / retained for HA restarts
31  mqtt.publish(T_AVAIL, "online", true);
32}
33
34void ensureMqtt() {
35  if (mqtt.connected() || millis() - lastTry < 5000) return;   // beklemeden 5 sn'de bir dene / retry every 5 s, never block
36  lastTry = millis();
37  // Son vasiyet: koparsa broker "offline" yazar / last will: broker writes "offline" if we drop
38  if (mqtt.connect(CLIENT_ID, MQTT_USER, MQTT_PASS, T_AVAIL, 1, true, "offline")) {
39    announce();
40    Serial.println("MQTT bagli / connected");
41  } else {
42    Serial.printf("MQTT hata / error rc=%d\n", mqtt.state());
43  }
44}
45
46void setup() {
47  Serial.begin(115200);
48  pinMode(BUTTON_PIN, INPUT_PULLUP);
49  WiFi.mode(WIFI_STA);
50  WiFi.setAutoReconnect(true);
51  WiFi.begin(WIFI_SSID, WIFI_PASS);
52  mqtt.setServer(MQTT_HOST, 1883);
53  mqtt.setBufferSize(512);                     // keşif JSON'u 256 baytı aşar / discovery JSON exceeds 256 bytes
54}
55
56void loop() {
57  if (WiFi.status() == WL_CONNECTED) {
58    ensureMqtt();
59    mqtt.loop();
60  }
61  bool level = digitalRead(BUTTON_PIN);
62  // Düşen kenar + 3 sn kilit: tek basış tek bildirim / falling edge + 3 s lockout: one press, one event
63  if (lastLevel == HIGH && level == LOW && millis() - lastRing > 3000) {
64    delay(30);                                 // kısa debounce / short debounce
65    if (digitalRead(BUTTON_PIN) == LOW) {
66      lastRing = millis();
67      bool ok = mqtt.connected() && mqtt.publish(T_EVENT, "{\"event_type\":\"press\"}");
68      Serial.println(ok ? "Zil! / Ding!" : "Gonderilemedi / Not sent");
69    }
70  }
71  lastLevel = level;
72}
Watch three details in the code. Without the setBufferSize(512) line, PubSubClient's default 256-byte buffer cannot carry the discovery message and publish() fails silently. Connection attempts happen every five seconds and loop() never blocks anywhere, so the button is still read while the broker is down. The three-second lockout stops dozens of notifications reaching your phone when someone presses the button repeatedly. Wire the button between GPIO 27 and GND; thanks to INPUT_PULLUP no extra resistor is needed. Do not connect the 8–24 V AC line of an existing bell transformer directly to the ESP32; read the bell button over a separate wire or use an optocoupler.
Energy and lighting (9–11): plug, energy meter and LED strip
In Project 9 a relay module lets the ESP32 switch a socket on and off; defined as a switch in ESPHome, it can use Home Assistant's schedules and automations. In this mains project a fused, closed and ventilated enclosure is a must; if you lack experience, ready-made smart plugs that can be flashed with ESPHome or Tasmota are a safer choice (relay module). In Project 10 the PZEM-004T v3 module measures voltage, current, power, total energy (kWh), frequency and power factor and connects to the ESP32 over UART. ESPHome's pzemac component carries these values straight into Home Assistant's energy dashboard; because the current transformer clips on without cutting the cable, only the voltage sensing leads connect to the mains (PZEM-004T energy meter). In Project 11 the quickest route for a WS2812B strip is WLED: Home Assistant discovers WLED devices on its own and lets you pick effects right from the dashboard (WLED setup). If you prefer to drive the strip with ESPHome's light component inside your automations, that works too.
Bluetooth proxy (12): extend Home Assistant's reach
Project 12 needs no sensor at all: an ESP32 with ESPHome's bluetooth_proxy component enabled listens to the BLE devices around it and forwards them to Home Assistant. This makes Xiaomi thermometers, plant sensors, smart scales and other BLE devices in rooms far from the server visible in Home Assistant. One per floor is usually enough. Because Wi-Fi and Bluetooth share the same antenna, do not load other heavy jobs onto the proxy device; if possible use an ESP32 board with wired Ethernet or a board dedicated to this task.
Common mistakes in Home Assistant ESP32 projects
| Symptom | Likely cause | Fix |
|---|---|---|
| The device does not appear in Home Assistant | The ESP32 and the server are on different networks or mDNS is blocked | Put them on the same network and add the ESPHome integration by IP under Settings > Devices |
| The device often becomes unavailable | Weak Wi-Fi signal or insufficient power | Check RSSI with the wifi_signal sensor; if weaker than -75 dBm move the board closer, use a 1 A adapter |
| Temperature reads higher than reality | The sensor is warmed by the ESP32 | Move the sensor away from the board on a cable and add a small offset with filters |
| The MQTT device is never created | The discovery message does not fit the buffer or the broker is unreachable | Add setBufferSize(512) and check the rc code in Serial |
| Analog sensor goes haywire with Wi-Fi on | The sensor is on an ADC2 pin | Use the ADC1 pins between GPIO 32 and 39 |
| Relay switches on by itself at power-up | No restore_mode set or a boot pin used | Add restore_mode: ALWAYS_OFF and move the relay to a safe pin such as GPIO 26 |
Which project should you start with?
- You have just installed Home Assistant: get to know ESPHome with the temperature sensor in Project 1; once the device shows up on the dashboard, you have learned the basic flow.
- You want something useful right away: the water leak alarm in Project 6 is done in an evening and pays for itself many times over when it catches a single leak.
- You want to automate your lights: start with Project 3, then detect people sitting still with the mmWave radar in Project 4.
- You like writing Arduino code: use the MQTT example in Project 8 as a base and announce your own sensors the same way.
- You are curious about your electricity bill: track consumption day by day in Home Assistant's energy dashboard with Project 10.
A smart home built with your own ESP32 devices is far more flexible and cheaper than one built from off-the-shelf gadgets; every new need is just a new project of a few parts. Start with a single sensor, enjoy seeing it in Home Assistant, then grow your automations. In the BlueGrays app you will find ESP32 projects such as DHT22 temperature and humidity measurement, automatic lighting with a PIR, smart lighting, a gas detector and WS2812B strip control, each with a circuit diagram, parts list and ready code, and you can connect these circuits to Home Assistant with ESPHome or MQTT.
Frequently asked questions
How do you connect an ESP32 to Home Assistant?
The easiest way is ESPHome: you describe the sensors in a YAML file, ESPHome compiles it and flashes the board, and the device appears in Home Assistant by itself. If you prefer writing Arduino code, install the Mosquitto broker, send MQTT messages from the ESP32 with PubSubClient and announce the device with MQTT Discovery.
ESPHome or Tasmota?
If you use Home Assistant, ESPHome is usually the better choice: devices are added automatically, sensor support is very broad and automations can run on the device itself. Tasmota suits ready-made smart plugs and stand-alone devices that should connect to different systems over MQTT.
ESP32 or ESP8266 for Home Assistant?
New projects should use the ESP32: it offers more memory, more analog inputs and Bluetooth, and features such as the Bluetooth proxy only work on the ESP32. The ESP8266 can still be used with ESPHome for simple devices with one sensor or one relay.
Does an ESPHome device work without internet?
Yes. ESPHome devices talk to Home Assistant over the local network and need no cloud. Automations defined on the device, such as sounding a buzzer when a leak is detected, keep working even when Wi-Fi or Home Assistant is down.
Can an ESP32 smart home sensor run on batteries?
An ESP32 that stays on Wi-Fi all the time lasts only a few days on batteries. Sensors that use deep sleep and wake every few minutes to send a reading can run for weeks or months; devices that must react instantly, such as a door sensor, are better powered from an adapter.
Why is an mmWave sensor better than a PIR in Home Assistant?
A PIR only detects a moving heat source and does not see someone sitting still, so the lights go off while you read or watch TV. mmWave radars such as the LD2410 also detect tiny movements like breathing and report presence as long as someone is in the room; the best results come from using both together.
Projects to build after reading this
See all projects
ESP32 DHT22 Temperature and Humidity (with LCD Display)
This project measures ambient temperature and humidity using a DHT22 sensor and displays the data in real time on a 16x2 I2C LCD. Data is read from the sensor using the one-wire protocol via the Adafruit DHT library. This project serves as the foundation for IoT weather stations, smart home automation, or environmental monitoring systems in greenhouses. Communication with the DHT22 is established via the ESP32's GPIO 4 pin.

Automatic Lighting with the ESP32 PIR Motion Sensor
In this project an HC-SR501 PIR motion sensor detects someone entering the room and turns on an LED automatically. millis() tracks how long the LED stays on: each HIGH reading refreshes the last-motion time, and the LED turns off at least 10 seconds after the last HIGH. The code also waits 50 ms with delay(50) in every loop, so the loop is not fully non-blocking. Great for stairs, hallways, bathrooms or closet lighting.

ESP32 Smart Lighting (PIR + LDR + Relay + OLED)
With an ESP32, a PIR motion sensor, an LDR light sensor and a relay module, we turn your hallway, bathroom or pantry into smart lighting. If the room is already bright, the light stays off even when there is motion, so it never wastes energy during the day. The light stays on for 30 seconds, and the time extends automatically while motion continues.

ESP32 MQ-2 Gas/Smoke Detector Alarm
In this project, combustible gas (LPG, methane, propane) and smoke detection is performed using an MQ-2 gas sensor module, and a siren-like alarm is played through a passive buzzer upon detection. The sensor's digital threshold output (DO) is connected to GPIO 4 on the ESP32; when gas or smoke exceeds the threshold, DO goes LOW and the alarm is triggered. Sensitivity is adjusted via the module's potentiometer. The passive buzzer is driven using tone() to produce a two-frequency siren effect.

ESP32 WS2812B NeoPixel Strip Control
WS2812B (NeoPixel) addressable LEDs are smart RGB LEDs that can be chained and controlled from a single data pin. In this project we drive an 8-LED WS2812B strip with the Adafruit_NeoPixel library and create a smooth rainbow animation. The ESP32's 3.3V logic works with most WS2812B batches; if it gets unstable, we show the fix with a 470Ω series resistor and a 1000µF capacitor. The animation shifts the hue in HSV color space.

ESP32 OTA Update — Wireless Firmware Installation (With LCD Screen)
In this project you'll learn to upload new firmware to the ESP32 over Wi-Fi, without a USB cable. With the ArduinoOTA library the ESP32 becomes visible on the network and shows up automatically as bluegrays-ota under "Network port" in the Arduino IDE. The first upload goes over USB; after that every update is wireless, a key feature for devices out in the field.