
Arduino Display Types Compared: LCD, OLED, TFT, E-Paper, 7-Seg
Arduino display types compared: 16x2 LCD, OLED, TFT, e-paper, TM1637, MAX7219 and Nextion; resolution, pins, memory, power and which one suits each project.
Arduino display types are confusing at first: the same word "display" covers a 16-character LCD, an OLED the size of a fingertip, a colourful TFT like a phone screen and an e-paper panel that keeps its image even when the power is cut. Each one differs hugely in resolution, colour, connection method, memory use and energy draw. The wrong choice turns into an Uno that runs out of RAM, a readout you can't read in sunlight or a sensor that drains its battery in a day.
In this guide we'll go through the seven display families used most in Arduino projects one by one: character LCDs (16x2 and 20x4), OLEDs (SSD1306 and SH1106), colour TFTs (ILI9341 and ST7789), e-paper, 7-segment and TM1637, MAX7219 LED matrices and Nextion touch displays. First comes a big comparison table, then a short introduction and working example code for each display, and finally a "which display for which project" table and the most common mistakes.
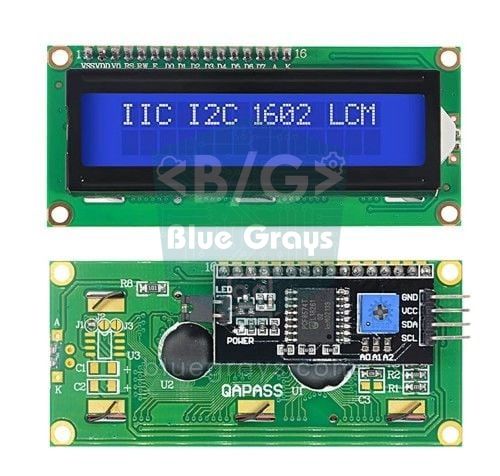
Arduino display types: quick comparison table
| Display | Resolution | Colour | Interface | Data pins | Typical current | Price |
|---|---|---|---|---|---|---|
| 16x2 / 20x4 character LCD | 16×2 or 20×4 characters | Monochrome, backlit | Parallel or I2C backpack | 6 (parallel) / 2 (I2C) | 20–40 mA | Very cheap |
| OLED SSD1306 / SH1106 | 128×64 (0.96" and 1.3") | Monochrome (white, blue, yellow-blue) | I2C or SPI | 2 (I2C) / 5 (SPI) | 10–25 mA | Cheap |
| TFT ILI9341 | 240×320 (2.4–3.2") | 65K colours | SPI or 8-bit parallel | 5 (SPI) | 50–100 mA | Medium |
| TFT ST7789 | 240×240, 240×320, 135×240 | 65K colours | SPI | 4–5 | 30–80 mA | Medium |
| E-paper (e-ink) | 200×200, 296×128, 250×122 | Black and white (some red/yellow) | SPI | 6 (incl. BUSY) | 5–20 mA only while refreshing | Medium to high |
| 7-segment / TM1637 | 1–8 digits | Single-colour LED | Direct or 2 wires (TM1637) | 8–12 / 2 | 20–80 mA | Very cheap |
| MAX7219 LED matrix | 8×8, chained to 32×8 and beyond | Single-colour LED | 3 wires (SPI-like) | 3 | 20–300 mA depending on brightness | Cheap |
| Nextion HMI | 320×240 up to 800×480 | 65K colours, touch | UART (TX/RX) | 2 | 90–500 mA | Expensive |
The "data pins" count in the table doesn't include power (VCC and GND). Current figures vary a lot with backlight and brightness settings; e-paper only draws current while the image changes and then uses almost nothing. Prices are ranked relative to each other: for the price of one Nextion you can buy roughly ten 16x2 LCDs.
What to look for when choosing a display
- What will you show? Numbers only call for a 7-segment display, a few lines of text for a character LCD, graphics and icons for an OLED, and a colour interface or photos for a TFT.
- Where will it be read? E-paper and LCDs read well in sunlight; OLEDs and TFTs struggle in bright light. In the dark, on the other hand, an OLED's black is truly black and easy on the eyes.
- How many pins are free? I2C displays get by with two wires; a parallel LCD needs six, an SPI TFT five and e-paper six. For the pin maths, see the I2C and SPI posts.
- Does your board have enough memory? The Uno's 2 KB of RAM barely holds an OLED buffer and can never hold a colour TFT buffer. On the ESP32 and Pico this is hardly a problem.
- Will it run on batteries? E-paper, which holds its image without using energy, is unbeatable for sensors that run for months.
- Voltage level: most TFT and e-paper modules use 3.3 V logic; with an Uno you may need a level shifter.
- Library support: displays that work with popular libraries such as Adafruit GFX, U8g2, TFT_eSPI and LiquidCrystal_I2C make finding examples and fixing problems much easier.
Character LCD: 16x2 and 20x4
Character LCDs with the HD44780 controller are the classic Arduino display. Each character is made of 5×8 dots; the 16x2 model fits 16 characters on each of 2 lines and the 20x4 model 20 characters on each of 4 lines. Because the display's own controller holds the image, it uses almost no RAM on the Arduino. Direct wiring needs 6 pins (RS, E and D4–D7) plus a potentiometer for contrast; we covered this method in the 16x2 LCD parallel wiring post. With a PCF8574-based I2C backpack soldered to the back, SDA and SCL are all you need. You can define up to 8 custom characters, so you can draw a degree sign, a battery icon or accented letters. Detailed usage is in the I2C LCD display post.
1// I2C 16x2 LCD: sıcaklık gibi bir değeri göstermek / I2C 16x2 LCD: showing a value such as temperature
2// SDA -> A4, SCL -> A5, VCC -> 5V, GND -> GND
3#include <Wire.h>
4#include <LiquidCrystal_I2C.h>
5
6LiquidCrystal_I2C lcd(0x27, 16, 2);    // adres 0x27 ya da 0x3F / address 0x27 or 0x3F
7
8byte degree[8] = {                      // kendi karakterin: derece işareti / custom character: degree sign
9  0b00110, 0b01001, 0b01001, 0b00110,
10  0b00000, 0b00000, 0b00000, 0b00000
11};
12
13void setup() {
14  lcd.init();
15  lcd.backlight();
16  lcd.createChar(0, degree);            // 8 özel karakterden ilki / first of 8 custom characters
17  lcd.setCursor(0, 0);
18  lcd.print("BlueGrays LCD");
19}
20
21void loop() {
22  int raw = analogRead(A0);             // A0'a bağlı bir sensör / a sensor on A0
23  float value = raw * 100.0 / 1023.0;
24  lcd.setCursor(0, 1);
25  lcd.print("Deger: ");
26  lcd.print(value, 1);
27  lcd.write(byte(0));                   // derece işaretini yaz / print the degree sign
28  lcd.print("   ");                     // eski karakterleri sil / clear leftover characters
29  delay(500);
30}OLED: SSD1306 and SH1106
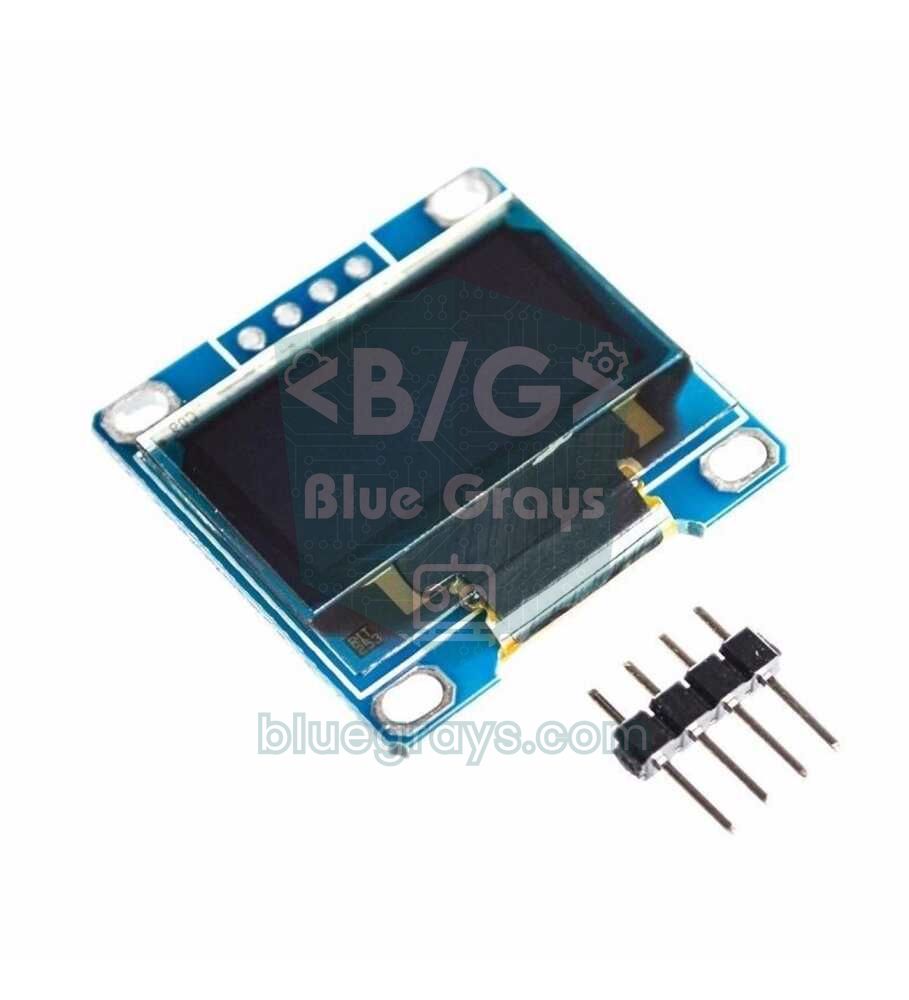
In OLED displays every pixel produces its own light; there's no backlight, the contrast is very high and the image is sharp from every angle. The 0.96 inch models usually have an SSD1306 driver, while the 1.3 inch models mostly have an SH1106. The two look the same from outside, but the SH1106's internal memory has 132 columns; on an SH1106 driven with an SSD1306 library the image shifts by two pixels and a noisy strip appears at the edge. The solution is to pick a library or constructor that matches the driver. The U8g2 library supports both and, thanks to page mode, can run on the Uno with a buffer of only 128 bytes. You'll find the basics of the SSD1306 in the OLED display (SSD1306) post.
1// U8g2 ile 1,3" SH1106 OLED (sayfa modu, Uno'da az RAM) / 1.3" SH1106 OLED with U8g2 (page mode, low RAM on the Uno)
2// SDA -> A4, SCL -> A5. 0,96" SSD1306 için yorumdaki satırı kullan / for a 0.96" SSD1306 use the commented line
3#include <U8g2lib.h>
4#include <Wire.h>
5
6U8G2_SH1106_128X64_NONAME_1_HW_I2C oled(U8G2_R0, U8X8_PIN_NONE);
7// U8G2_SSD1306_128X64_NONAME_1_HW_I2C oled(U8G2_R0, U8X8_PIN_NONE);
8
9void setup() {
10  oled.begin();
11}
12
13void loop() {
14  int level = map(analogRead(A0), 0, 1023, 0, 120);   // A0'daki potansiyometre / potentiometer on A0
15  oled.firstPage();
16  do {                                                 // her sayfa için aynı çizim tekrarlanır / the same drawing repeats per page
17    oled.setFont(u8g2_font_ncenB08_tr);
18    oled.drawStr(0, 12, "BlueGrays OLED");
19    oled.drawFrame(0, 40, 124, 14);                    // çubuk çerçevesi / bar frame
20    oled.drawBox(2, 42, level, 10);                    // dolu çubuk / filled bar
21  } while (oled.nextPage());
22  delay(100);
23}
The _1_ in the constructor name means the screen is drawn in pages of 8 rows: the firstPage() and nextPage() loop repeats the same drawing eight times and sends one strip of the screen each time. It's a little slower, but uses 128 bytes of RAM instead of 1 KB. On the ESP32 and Pico, where memory is plentiful, you can choose the full-buffer _F_ version and get smoother animations.
Colour TFT: ILI9341 and ST7789
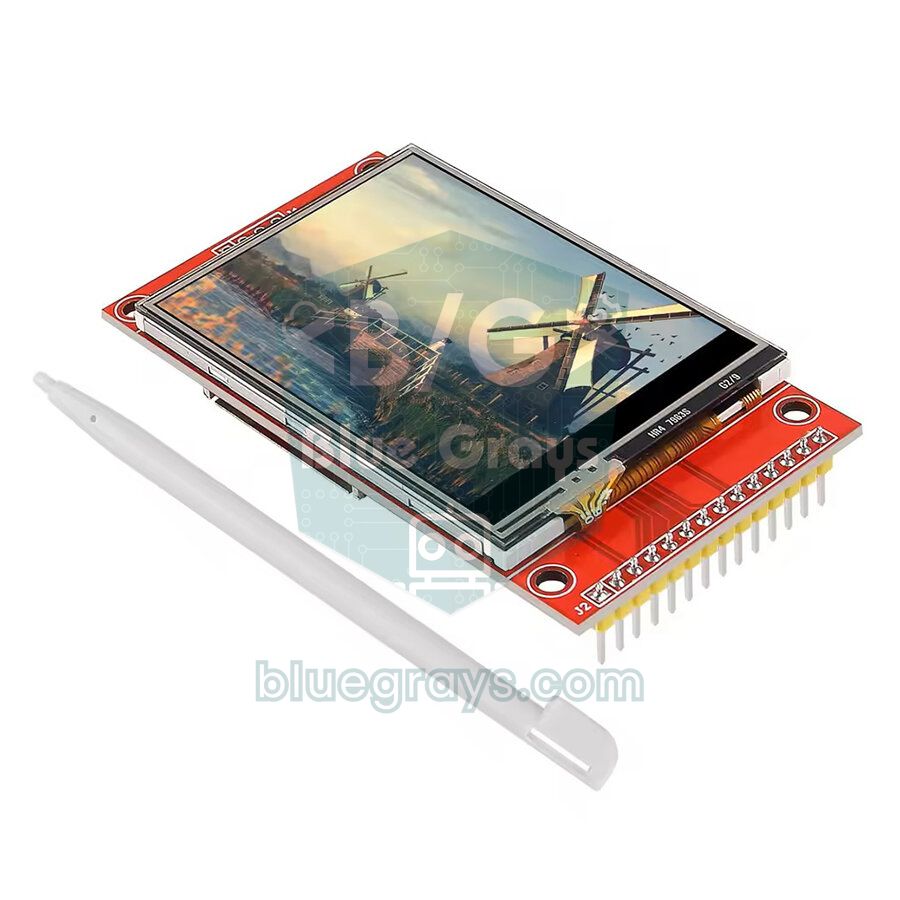
If you want graphics, menus, icons and colour gauges, you move on to TFT displays. Each pixel carries 16-bit (RGB565) colour, so about 65 thousand colours can be shown. The two most common drivers are the ILI9341 and the ST7789. The ILI9341 is used on 240×320 screens from 2.4 to 3.2 inches and often comes with an XPT2046 touch controller. The ST7789 shows up on 1.3 and 1.54 inch square (240×240) screens and on 135×240 screens on boards like the TTGO T-Display. They work on the Uno, but slowly: even painting the whole screen once takes visible time. On the ESP32, smooth interfaces are possible with 40 MHz SPI and optimised libraries like TFT_eSPI. For details see the ILI9341 TFT display and ST7789 TFT display posts.
| Feature | ILI9341 | ST7789 |
|---|---|---|
| Common sizes | 2.4", 2.8", 3.2" | 1.14", 1.3", 1.54", 2.0" |
| Resolution | 240×320 | 135×240, 240×240, 240×320 |
| Interface | SPI (Uno shield versions use 8-bit parallel) | SPI (some models have no CS pin) |
| Touch | XPT2046 resistive touch on most models | Usually none |
| Library | Adafruit_ILI9341, TFT_eSPI | Adafruit_ST7789, TFT_eSPI |
| Full-screen buffer size | 153,600 bytes | 115,200 bytes (240×240) |
1// ESP32 + 2,8" ILI9341 TFT: renkli sıcaklık göstergesi / colour temperature gauge
2// SCK 18, MOSI 23, MISO 19 (isteğe bağlı / optional), CS 5, DC 16, RST 17, VCC 3V3, LED 3V3
3#include <SPI.h>
4#include <Adafruit_GFX.h>
5#include <Adafruit_ILI9341.h>
6
7const int TFT_CS = 5;
8const int TFT_DC = 16;
9const int TFT_RST = 17;
10
11Adafruit_ILI9341 tft(TFT_CS, TFT_DC, TFT_RST);    // donanım SPI (VSPI) / hardware SPI (VSPI)
12
13void setup() {
14  tft.begin(40000000);                 // 40 MHz SPI
15  tft.setRotation(1);                  // yatay 320x240 / landscape 320x240
16  tft.fillScreen(ILI9341_BLACK);
17  tft.setTextColor(ILI9341_WHITE);
18  tft.setTextSize(2);
19  tft.setCursor(10, 10);
20  tft.print("BlueGrays TFT");
21  tft.drawRect(10, 180, 300, 30, ILI9341_WHITE);  // çubuk çerçevesi / bar frame
22}
23
24void loop() {
25  float temp = 20.0 + (analogReadMilliVolts(34) / 3300.0) * 20.0;   // örnek değer / example value
26  uint16_t color = temp < 26 ? ILI9341_GREEN : (temp < 33 ? ILI9341_YELLOW : ILI9341_RED);
27
28  tft.fillRect(10, 60, 300, 80, ILI9341_BLACK);   // yalnız değişen alanı sil / clear only the changing area
29  tft.setTextSize(6);
30  tft.setTextColor(color);
31  tft.setCursor(20, 70);
32  tft.print(temp, 1);
33  tft.print(" C");
34
35  int w = (int)((temp - 20.0) / 20.0 * 296);
36  tft.fillRect(12, 182, w, 26, color);
37  tft.fillRect(12 + w, 182, 296 - w, 26, ILI9341_BLACK);
38  delay(500);
39}E-paper (e-ink) displays
E-paper is the display technology used in e-book readers. It forms the image by moving tiny black and white pigment capsules with an electric field; once the image is drawn it stays on the screen even when the power is cut. That makes it ideal, together with the ESP32's deep sleep mode, for stations that wake once an hour to update the weather and run on batteries for months. Because it looks like paper, it reads perfectly in sunlight. The downside is speed: a full refresh takes around 2 seconds and the screen flashes a few times; on models that support partial refresh this drops below half a second, but frequent partial refreshes can leave faint ghosting. It connects over SPI and needs MOSI, SCK, CS, DC, RST and a BUSY pin that signals the display is busy. The most common library is GxEPD2.
| Feature | Value |
|---|---|
| Common sizes | 1.54" (200×200), 2.13" (250×122), 2.9" (296×128), 4.2" (400×300) |
| Colour | Black and white; three-colour models add red or yellow (10–15 second refresh) |
| Full refresh time | About 1–3 seconds |
| Partial refresh | 0.3–0.5 seconds on models that support it |
| Standby current | Close to zero while holding the image |
| Supply | 3.3 V (most modules accept 5 V through a regulator) |
7-segment and TM1637 displays
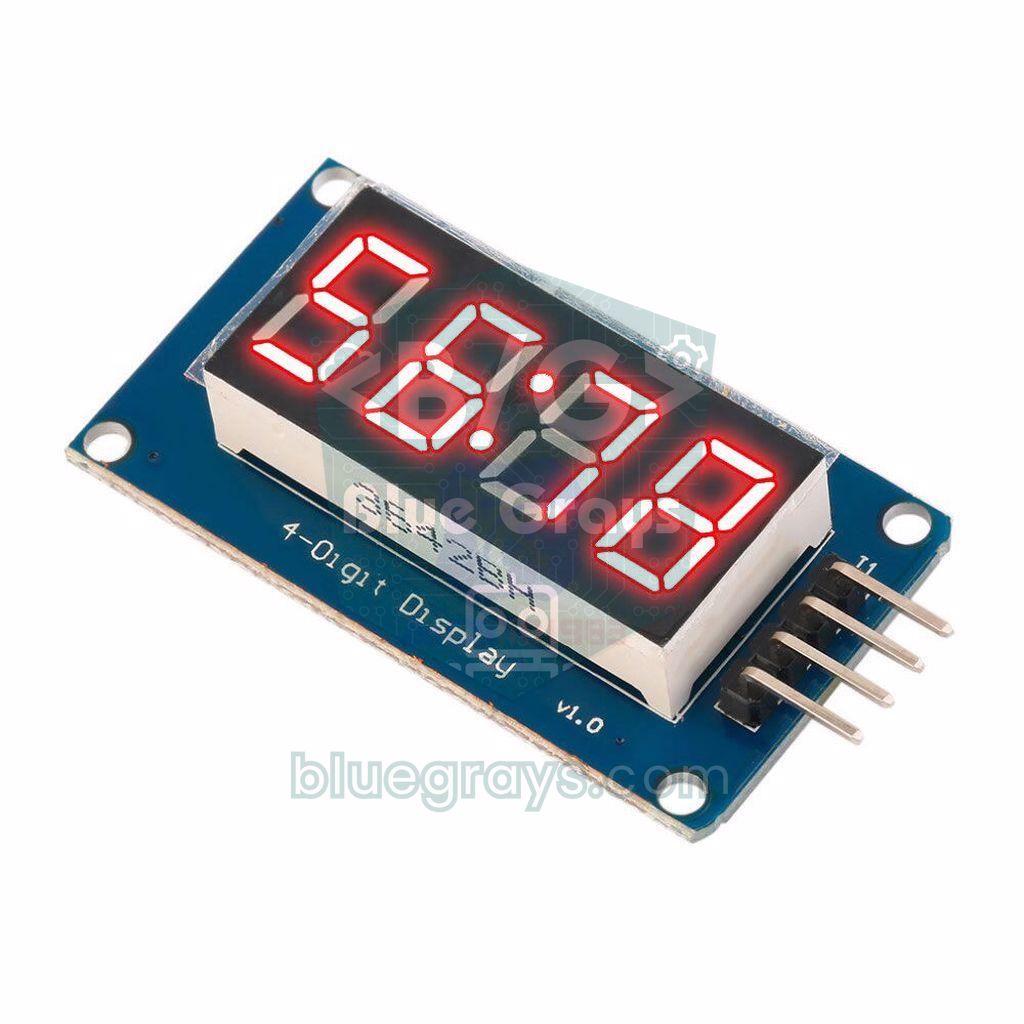
If you only need to show numbers, 7-segment displays are still the most readable option: big, bright and visible from metres away. A single-digit display needs 8 pins for the 7 segments and the decimal point, plus a resistor for each segment; a multiplexed 4-digit display uses 12 pins. We covered this wiring and the difference between common anode and common cathode in the 7-segment display post. The easiest way out of the pin trouble is the TM1637 module: you connect the 4-digit display, which has its own driver, with just CLK and DIO and set the brightness in 8 steps from software. Although the TM1637 protocol resembles I2C, it doesn't use addresses; that's why it can go on any two digital pins and each module needs its own pair of pins.
1// TM1637 4 haneli gösterge ile sayaç ve saat / Counter and clock with a TM1637 4-digit display
2// CLK -> D2, DIO -> D3, VCC -> 5V, GND -> GND
3#include <TM1637Display.h>
4
5TM1637Display display(2, 3);           // CLK, DIO
6unsigned long lastTick = 0;
7int seconds = 0;
8
9void setup() {
10  display.setBrightness(4);            // 0 (sönük) - 7 (en parlak) / 0 (dim) - 7 (brightest)
11  display.clear();
12}
13
14void loop() {
15  if (millis() - lastTick >= 1000) {
16    lastTick = millis();
17    seconds++;
18    int mm = (seconds / 60) % 100;
19    int ss = seconds % 60;
20    // 0b01000000: ortadaki iki nokta / the colon in the middle
21    display.showNumberDecEx(mm * 100 + ss, 0b01000000, true);
22  }
23}
MAX7219 LED matrix
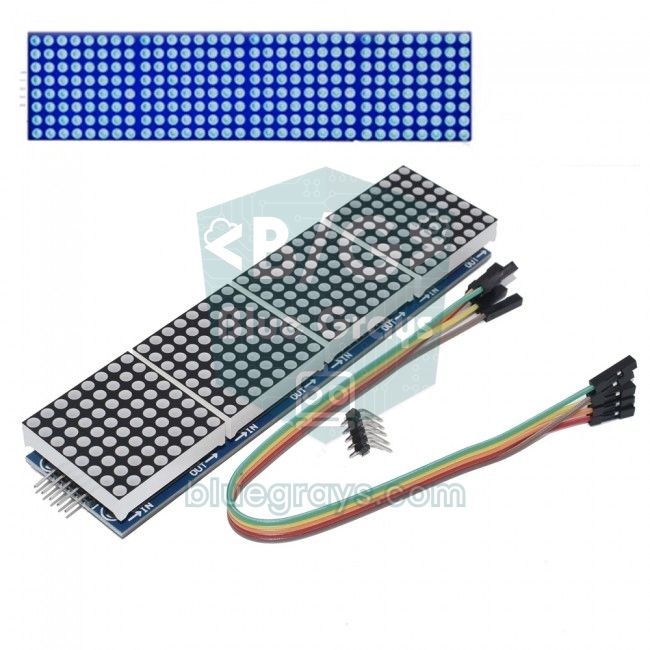
The MAX7219 is a chip that drives 64 LEDs (an 8×8 matrix or an 8-digit 7-segment display) on its own and talks over three wires, DIN, CLK and CS, using an SPI-like protocol. Modules can be chained; with the common 4-in-1 modules you build 32×8 scrolling text boards, and with two rows 32×16. Its brightness and readability from a distance make it ideal for message boards, scoreboards and clocks. On the Arduino the MD_Parola and MD_MAX72XX libraries are used most; details are in the MAX7219 LED matrix post. Below we drive a single 8×8 matrix with a Raspberry Pi Pico without a library, writing directly to the registers:
1# Raspberry Pi Pico: kütüphanesiz MAX7219 8x8 matris / MAX7219 8x8 matrix without a library
2# GP18 -> CLK, GP19 -> DIN, GP17 -> CS, VCC -> VBUS (5 V), GND -> GND
3from machine import Pin, SPI
4import time
5
6spi = SPI(0, baudrate=1_000_000, polarity=0, phase=0, sck=Pin(18), mosi=Pin(19))
7cs = Pin(17, Pin.OUT, value=1)
8
9def write_reg(reg, value):
10    cs.value(0)
11    spi.write(bytearray([reg, value]))     # önce yazmaç, sonra değer / register first, then value
12    cs.value(1)
13
14def init():
15    write_reg(0x0F, 0x00)    # test modu kapalı / display test off
16    write_reg(0x09, 0x00)    # kod çözme yok (matris) / no decode (matrix)
17    write_reg(0x0B, 0x07)    # 8 satırın hepsi / scan all 8 rows
18    write_reg(0x0A, 0x03)    # parlaklık 0-15 / brightness 0-15
19    write_reg(0x0C, 0x01)    # uyku modundan çık / leave shutdown mode
20
21SMILE = [0x3C, 0x42, 0xA5, 0x81, 0xA5, 0x99, 0x42, 0x3C]
22HEART = [0x00, 0x66, 0xFF, 0xFF, 0xFF, 0x7E, 0x3C, 0x18]
23
24def show(image):
25    for row in range(8):
26        write_reg(row + 1, image[row])     # satır yazmaçları 1-8 / row registers 1-8
27
28init()
29while True:
30    show(SMILE)
31    time.sleep(1)
32    show(HEART)
33    time.sleep(1)
The MAX7219's LEDs need a 5 V supply to light brightly, which is why the module's VCC goes to the Pico's VBUS pin. According to the datasheet, with a 5 V supply the inputs need at least 3.5 V to count as HIGH; the Pico's 3.3 V signals work fine on most modules, but if you see instability, add a level shifter on the DIN, CLK and CS lines. Current rises with brightness and the number of LEDs lit: with all four modules fully lit at full brightness, hundreds of milliamps can be drawn.
Nextion touch HMI displays
Nextion is a smart touch display with its own processor and memory. You design the interface with buttons, sliders and gauges on your computer in Nextion Editor by drag and drop and load it onto the display; the Arduino only sends short commands such as t0.txt="25" over the serial port (UART) and reads the touch events. That way the whole drawing load sits on the display, and even a small board like the Uno can run a 7 inch colour interface. The default speed is 9600 baud. The drawbacks are the price, a current of 90 mA even on the 2.4 inch model and up to 500 mA on the 7 inch, and the fact that the design is done in a separate program. On the Uno the hardware serial port is shared with USB, so using SoftwareSerial or choosing boards with several serial ports, like the Mega and ESP32, makes life easier.
Memory needs: which display fits on an Uno?
Most graphics display libraries first draw the image into a buffer in RAM and then send the whole thing to the screen. Buffer size = width × height × bits per pixel / 8. When you remember that the Arduino Uno has only 2 KB of RAM, part of which goes to variables, the serial port and libraries, the limit becomes obvious straight away. We've collected general fixes for memory problems in the Arduino out of memory post.
| Display | Full buffer | Arduino Uno (2 KB) | ESP32 (520 KB) / Pico (264 KB) |
|---|---|---|---|
| 16x2 LCD | Not needed (the display holds it) | Easy | Easy |
| OLED 128×64 | 1,024 bytes | Borderline; page mode (128 bytes) recommended | Easy |
| OLED 128×32 | 512 bytes | Easy | Easy |
| E-paper 296×128 | 4,736 bytes | Only with page-by-page drawing | Easy |
| TFT ST7789 240×240 | 115,200 bytes | Impossible; drawn directly to the screen | Possible on the ESP32, half the RAM on the Pico |
| TFT ILI9341 240×320 | 153,600 bytes | Impossible; drawn directly to the screen | Possible, but small sprites are usually preferred |
Power consumption and battery use
In a battery-powered project the display often uses more energy than the microcontroller. A 16x2 LCD's backlight alone can draw more than 20 mA; if you switch it off (lcd.noBacklight()), the display is still readable in sunlight but not in the dark. An OLED's current is proportional to the number of lit pixels: thin white text on a black background uses several times less than a white background. On TFTs the backlight LEDs are always on; controlling the backlight pin with a transistor or PWM saves a lot. E-paper draws almost no current as long as you don't change the image. To work out battery life you can use the method in the mAh post.
Which display for which project?
| Project | Recommended display | Why? |
|---|---|---|
| Temperature and humidity readout | 16x2 I2C LCD or 0.96" OLED | Cheap, two wires, a few lines of text are enough |
| Digital clock and countdown | TM1637 or MAX7219 | Big, bright digits; readable from a distance |
| Pocket game (Pong, snake, T-Rex) | 128×64 OLED or 8×8 matrix | Fast refresh, pixel-level drawing |
| Weather station (battery) | E-paper + ESP32 deep sleep | The image stays without using energy, readable in sunlight |
| Colour control panel and menu | ILI9341 + touch, or Nextion | Colour, icons and touch input |
| Scrolling text and message board | Chained MAX7219 modules | Visible from metres away, grows on a single CS |
| Compact ESP32 device | ST7789 1.14" or 1.3" | Small, colourful and fast over SPI |
Common mistakes and how to fix them
| Symptom | Likely cause | Fix |
|---|---|---|
| The LCD shows only solid blocks | Contrast not set or display not initialised | Turn the contrast potentiometer, check the address and the lcd.init() call |
| Image shifted with noise at the edge on a 1.3" OLED | An SH1106 display driven with an SSD1306 library | Use the SH1106 constructor in U8g2 or the Adafruit SH110X library |
| The OLED sketch uploads but the Uno freezes | The display buffer used up the RAM | Use U8g2 page mode, wrap strings in F() |
| The TFT stays plain white | Wrong driver, wrong pins or a 5 V signal | Confirm the driver (ILI9341, ST7789), check the DC and CS pins, mind the 3.3 V level |
| The e-paper never changes | BUSY pin not connected or wrong model selected | Connect BUSY, choose the exact model class for your panel in GxEPD2 |
| Some segments are dim on a 7-segment display | Common anode and cathode mixed up or a resistor missing | Check the display type, put a resistor on every segment |
| The MAX7219 lights random LEDs | Loose wire, weak supply or a 3.3 V signal at the limit | Shorten the wires, strengthen the 5 V supply, add a level shifter if needed |
The right display depends on what your project shows, where it's read and what powers it: an LCD for text, an OLED for small graphics, a TFT or Nextion for colour interfaces, e-paper for battery devices, and 7-segment and MAX7219 for big digits. In the BlueGrays app you'll find I2C LCD, OLED games and weather display, TM1637 clock and MAX7219 dot matrix projects, step by step with circuit diagrams and code.
Frequently asked questions
Which is the best display for Arduino?
There's no single best display; the choice depends on the project. A 16x2 I2C LCD suits a few lines of text, a 0.96 inch OLED small graphics, an ILI9341 TFT a colour interface, and e-paper battery-powered devices.
Is OLED or LCD better?
An OLED is sharper, has high contrast, can draw graphics and reads perfectly in the dark. A character LCD is cheaper, reads better in sunlight and uses almost no RAM on the Arduino.
Can an Arduino Uno run a colour TFT display?
Yes, SPI TFT displays like the ILI9341 or ST7789 work with the Uno, but since there isn't enough RAM for a full-screen buffer, drawing goes directly to the screen and is slow. For smooth colour interfaces the ESP32 or Raspberry Pi Pico is a better choice.
What is the difference between the SSD1306 and the SH1106?
Both are 128×64 OLED drivers; the SSD1306 is usually found on 0.96 inch screens and the SH1106 on 1.3 inch screens. Because the SH1106's memory has 132 columns, the image shifts when it's used with an SSD1306 library; you need a suitable library such as U8g2 or Adafruit SH110X.
Does an e-paper display keep its image when the power is off?
Yes. E-paper forms the image by moving pigment capsules, and once drawn the image stays on the screen without any power. That makes it ideal for battery-powered devices that update once an hour.
Is the TM1637 I2C?
No. The TM1637's two-wire protocol looks like I2C but uses no addresses and doesn't go on an I2C bus. It connects to any two digital pins and is driven with its own library (e.g. TM1637Display); several modules each need their own pair of pins.
Projects to build after reading this
See all projects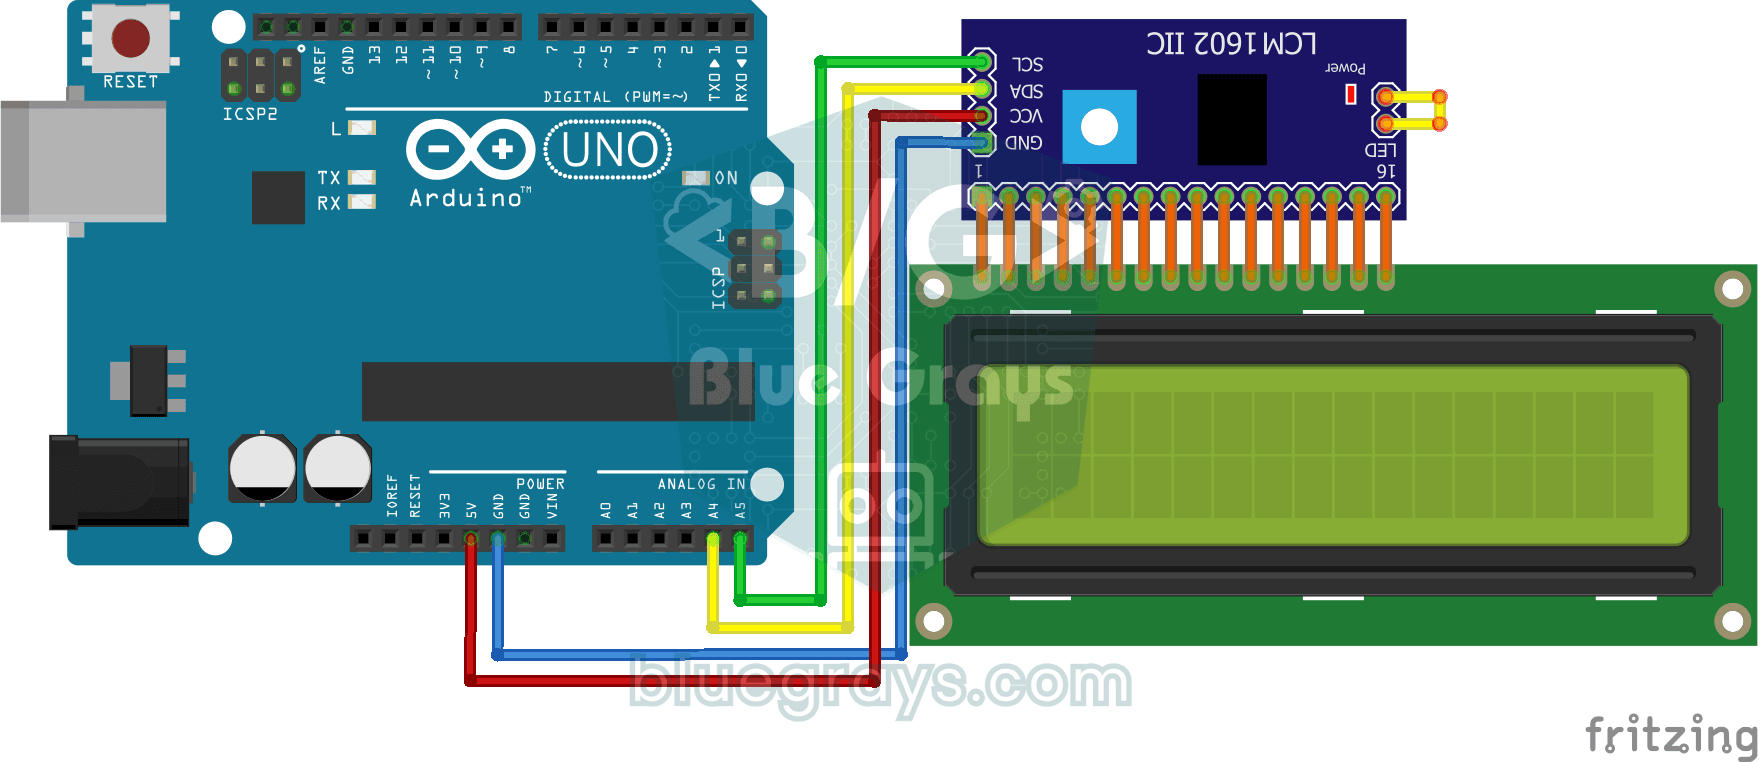
Using LCD Screen with I2C
Give your Arduino its own screen and make it write its first message. The two-line LCD screen hooks up with just a few wires; a greeting appears on the top line, then a second message on the bottom…
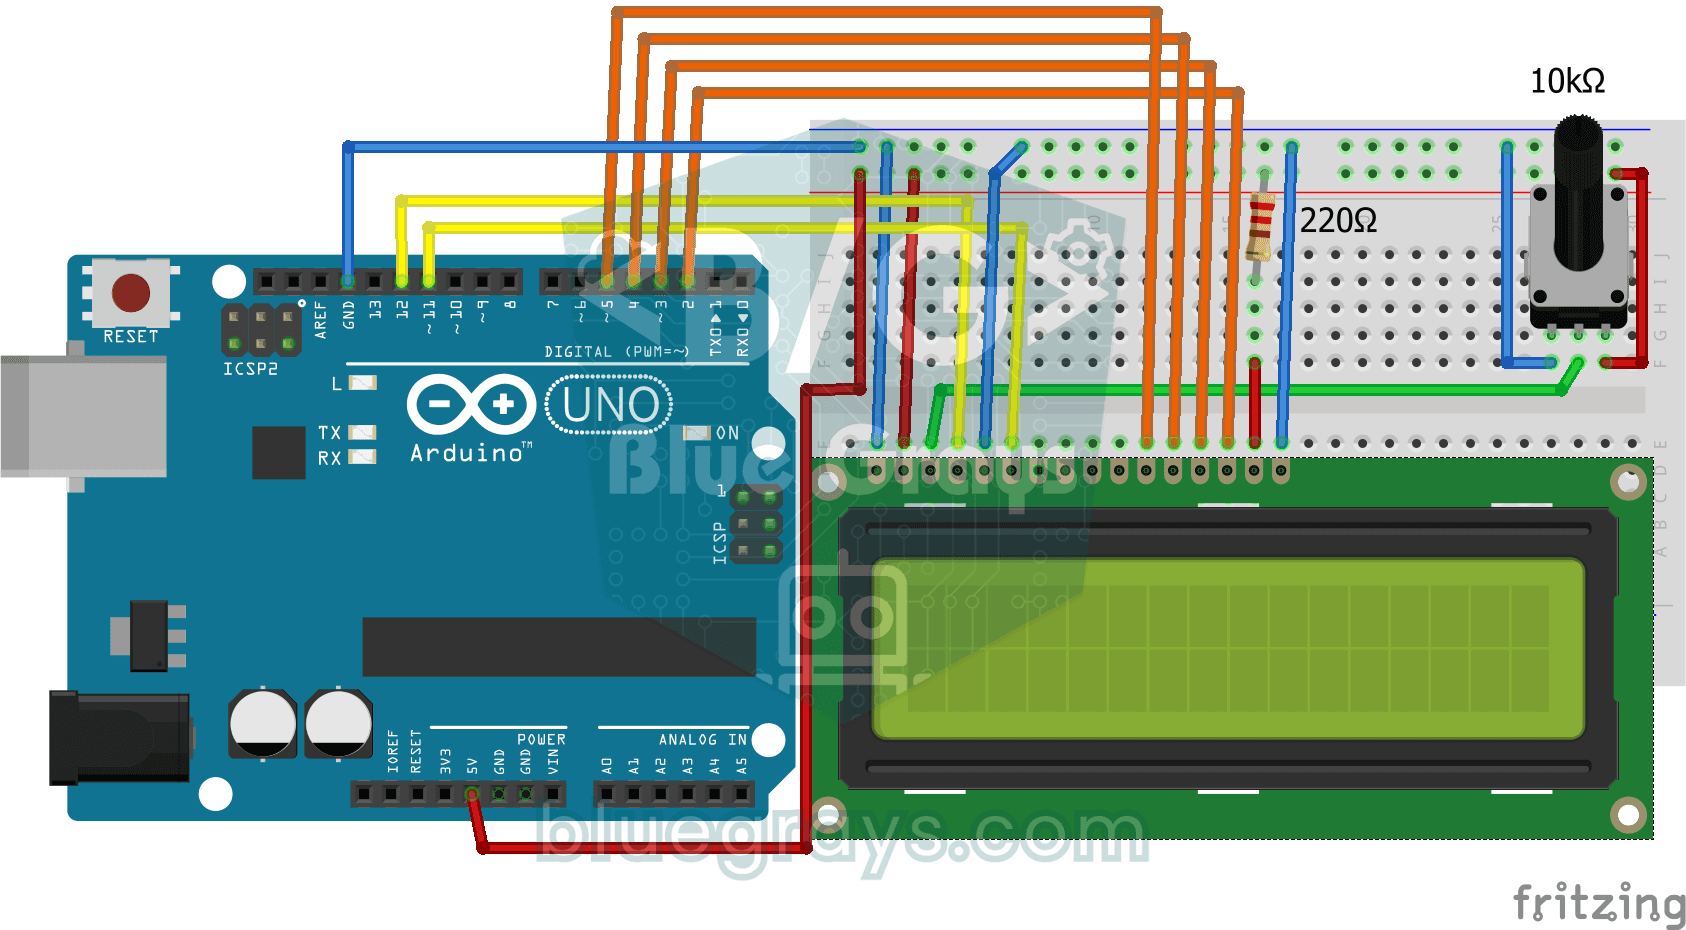
Print Message on 2x16 LCD Screen
Your first step to writing text on a screen. The two-line LCD screen first shows a waiting message, then writes a greeting on the top line and types a word letter by letter on the bottom line like a…

Paddle Ball Game - SSD1306
A ball, two paddles and you: you play table tennis, one of the very first video games, on a small OLED screen.

OLED T-Rex Run: Arduino Dinosaur Game
The dinosaur game that pops up when your internet goes down, now on your desk: the dinosaur runs across the small OLED screen, cacti come at you, and you jump with a single button.

ESP32 HTTPClient + Weather API (with SSD1306 OLED Display)
In this project the ESP32 makes a REST API call over the internet to a weather API (wttr.in) using HTTPClient.h. Unlike the I2C LCD version, it uses an SSD1306 OLED (128×64) display, with large text and vector icons for a richer look. Seven weather icons (sunny, rainy, snowy and more) are drawn on the fly, with no bitmap files.

ESP32 TM1637 4-Digit 7-Segment Display
We are controlling a 4-digit 7-segment display module with a TM1637 driver using an ESP32. Using just 2 GPIO pins (CLK and DIO), we run a counter from 0 to 9999, adjust the brightness level, and display the colon (:) character in clock format. Thanks to the TM1637Display library, controlling numbers, hex values, segments, and strings is very easy.

Dot Matrix Clock and Calendar (MAX7219, DS1307)
A glowing board for your desk or wall that shows the time and date in scrolling text.
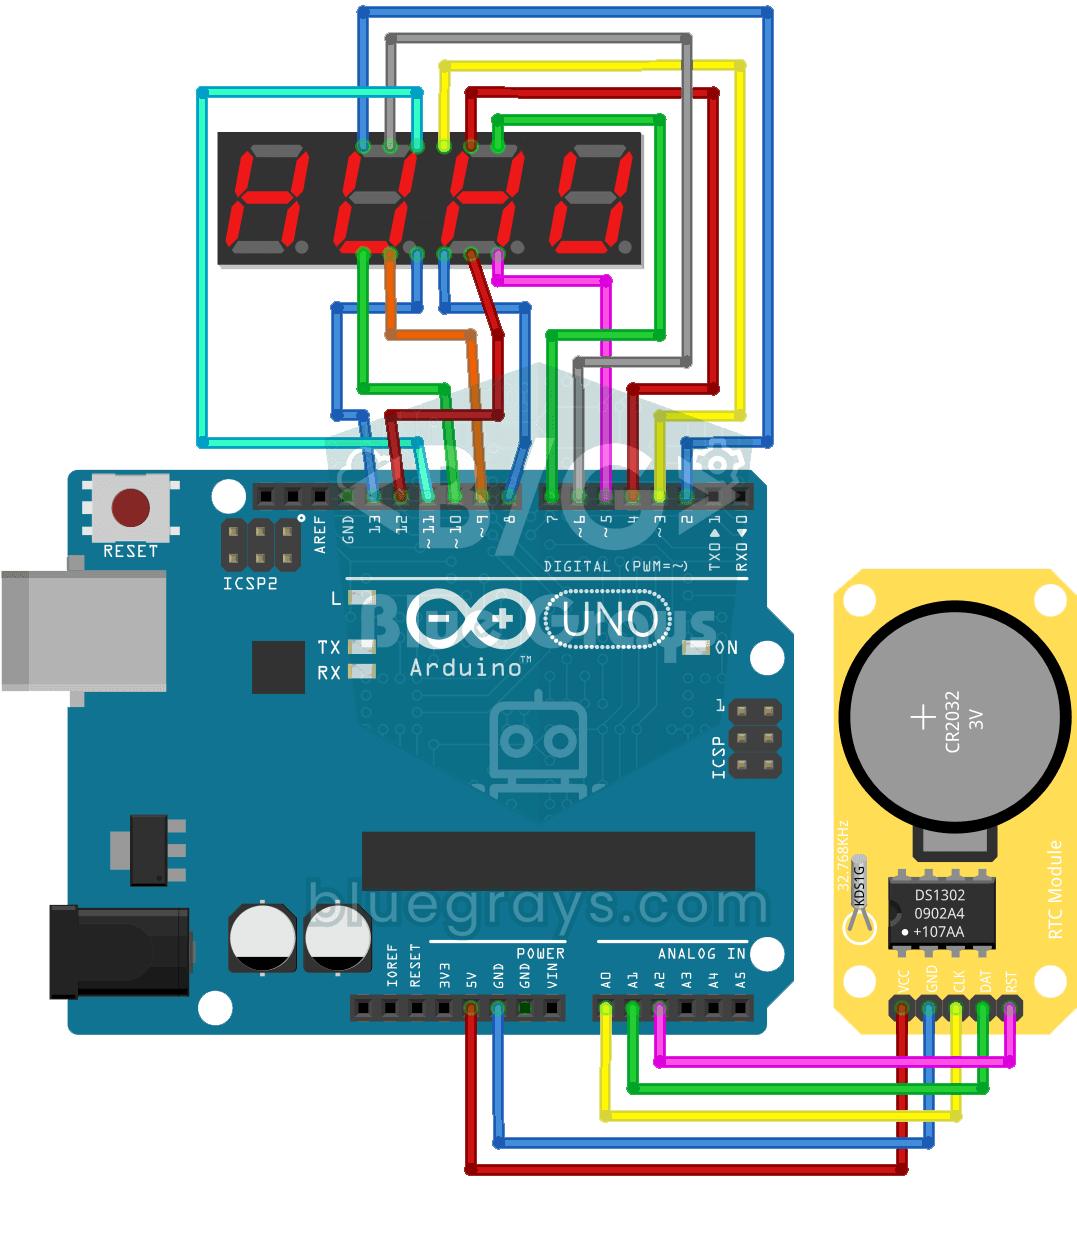
Digital Clock with 4-Digit 7-Segment Display
A four-digit glowing digital clock, much like the one on a kitchen oven. The DS1302 clock module keeps the time, and every second the Arduino reads the hours and minutes and shows them on the…