
What Does mAh Mean? Battery Capacity, Wh and Runtime Explained
What does mAh mean and how is it different from Wh? Measure your Arduino project's current, work out battery life, and compare AA, 9V, 18650 and LiPo cells.
What does mAh mean? In short, mAh (milliampere-hour) is the unit of capacity that tells you how much electric charge a battery stores. 1 mAh means a current of 1 milliampere flowing for 1 hour, so a battery rated at 2000 mAh can, in theory, power a circuit drawing 20 mA for 100 hours, or one drawing 200 mA for 10 hours. That number alone isn't enough, though: the battery's voltage, the current you draw, the temperature and the regulator between the battery and your circuit all change the real runtime dramatically.
When you build a battery-powered project with an Arduino, ESP32 or Raspberry Pi Pico, the first question is always the same: how many hours or days will this battery last? In this guide you'll learn what mAh and Wh mean, the real capacities of AA, 9V, 18650 and LiPo batteries, how to measure your project's current draw with a multimeter and an INA219, how to calculate runtime with a formula, how to connect batteries in series and parallel, what the C rating is, and why a 9V battery is a poor choice, all with real numbers.
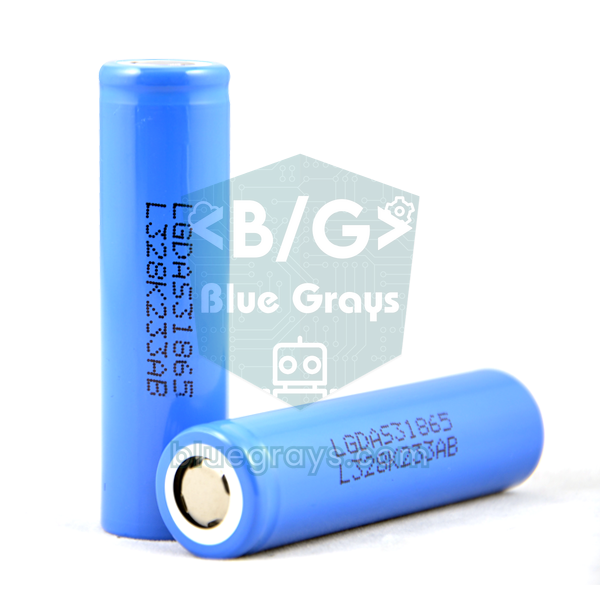
What does mAh mean? Battery capacity explained
Current is measured in amperes (A), and capacity in ampere-hours (Ah). For small batteries we use the milliampere-hour, a thousandth of that: 1 Ah = 1000 mAh. In physics terms it's electric charge; 1 mAh equals 3.6 coulombs. Manufacturers measure capacity at a specific discharge current down to a specific cut-off voltage. As the current rises, more voltage is lost across the battery's internal resistance, the chemical reaction can't keep up, and the cut-off voltage is reached sooner, so the same battery delivers fewer mAh at high current. Cold weather lowers capacity too; alkaline batteries get noticeably weaker below 0 °C. The table below shows how the current you draw changes the capacity of an AA alkaline battery, based on Energizer's data (down to 0.8 V, at 21 °C).
| Continuous current | Approx. capacity | Approx. runtime |
|---|---|---|
| 25 mA | 3000 mAh | 120 hours |
| 100 mA | 2500 mAh | 25 hours |
| 250 mA | 2000 mAh | 8 hours |
| 500 mA | 1500 mAh | 3 hours |
The difference is striking: when you increase the current 20 times, the runtime doesn't drop 20 times but 40 times. So treat the mAh on the label as the best case. In real projects there's one more loss: the circuit stops before the battery is completely empty. The Arduino Uno's regulator can no longer hold 5 V once its input falls below 7 V, and a single lithium cell should be cut off at around 3.0–3.3 V so its lifespan isn't shortened. The energy left in the battery at that point is never used.
What does Wh mean? mAh vs Wh
mAh only tells you the amount of charge; to find the battery's energy you have to multiply by the voltage. The unit of energy is the watt-hour (Wh), and the formula is: Wh = mAh × V / 1000. For example, a 3.7 V, 3000 mAh 18650 cell holds 3.7 × 3 = 11.1 Wh. A 2500 mAh AA battery works out to 1.5 × 2.5 = 3.75 Wh on paper, but since an alkaline cell's average voltage drops to 1.2–1.3 V during discharge, the real figure is around 3 Wh. That's why comparing batteries of different voltages by mAh alone is misleading: a 550 mAh 9V battery looks much smaller than a 2500 mAh AA, yet at about 4 Wh it holds slightly more energy. Which one lasts longer in your project depends on the type of regulator in between; you'll see that in the runtime section. To quickly work out the relationship between power and current (P = V × I), you can use the Ohm's law calculator.
AA, 9V, 18650 and LiPo battery comparison chart
| Battery | Nominal voltage | Typical capacity | Energy | Comfortable current | Rechargeable? |
|---|---|---|---|---|---|
| AAA alkaline | 1.5 V | 1000–1200 mAh | ≈1.3 Wh | Low (≈100 mA) | No |
| AA alkaline | 1.5 V | 2000–3000 mAh (depends on current) | ≈3 Wh | Medium (efficient up to ≈250 mA) | No |
| AA NiMH | 1.2 V | 1900–2500 mAh | ≈2.5 Wh | High (several A) | Yes |
| 9V alkaline | 9 V | 400–600 mAh | ≈4 Wh | Low (≈50 mA) | No |
| CR2032 coin cell | 3 V | ≈235 mAh | ≈0.7 Wh | Very low (µA to a few mA) | No |
| 18650 Li-ion | 3.6–3.7 V | 2000–3500 mAh | 7–13 Wh | High (5–30 A depending on cell) | Yes |
| 1S LiPo (e.g. 1000 mAh) | 3.7 V | Models from 100 to 5000 mAh | ≈3.7 Wh | Per the C rating on the label | Yes |
| 10000 mAh power bank | 5 V (USB) | ≈6000 mAh (at 5 V) | ≈37 Wh | 1–3 A | Yes |
When reading the table, remember: lithium cells such as 18650s and LiPos store the most energy for their weight; a single 18650 holds close to the total energy of four AA alkaline batteries at about half the weight. Alkaline batteries are good for low-current devices that sit on the shelf for a long time, because they lose only a few percent of their capacity per year; under high-current loads such as motors or servos, however, their voltage collapses quickly. Rechargeable NiMH cells deliver high current easily despite their low 1.2 V, and the low self-discharge (LSD) type stays charged for months. A CR2032 coin cell is only for clock modules and sleeping sensors that run at the microampere level; it can never power an ESP32 connecting to Wi-Fi.
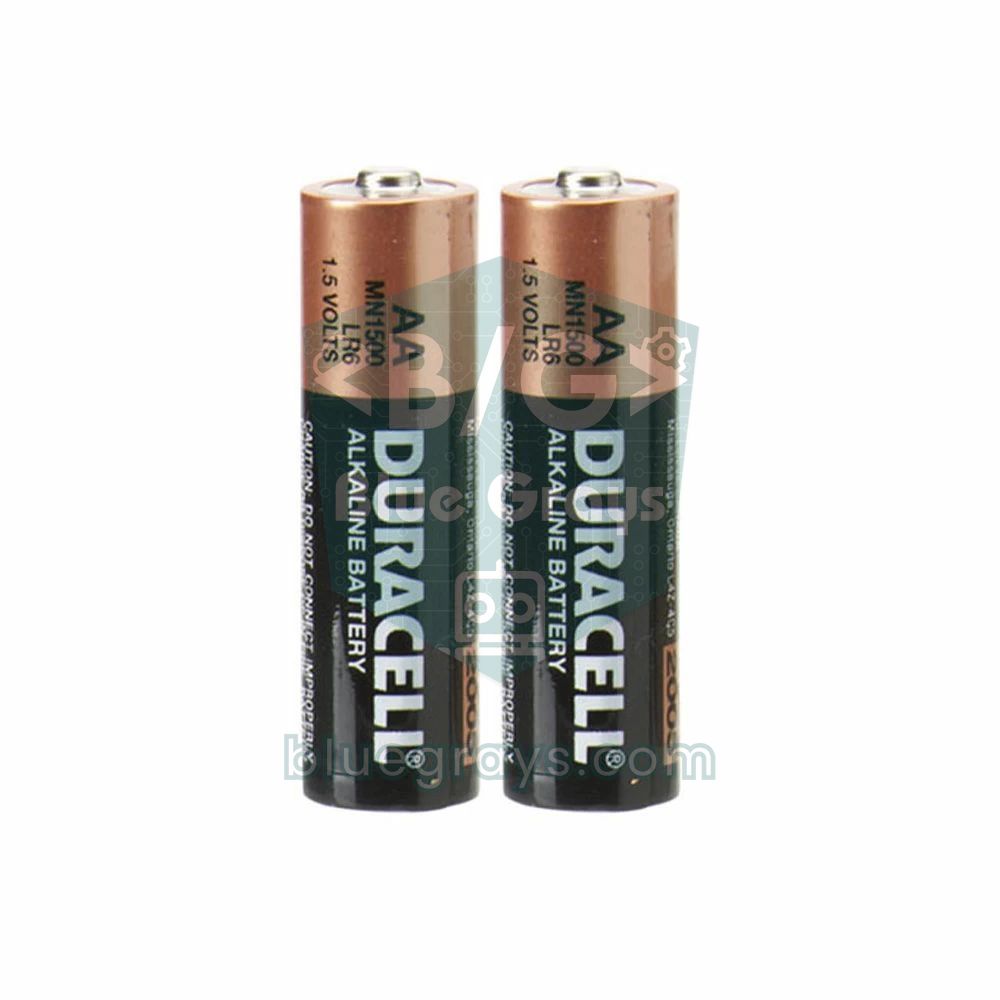
Why is a 9V battery a bad choice?
The rectangular 9V battery is common in starter kits because its snap connector plugs straight into the Arduino's DC jack, but it's one of the worst options for a battery-powered Arduino project. It contains six small cells in series, so its capacity is only 400–600 mAh. According to Energizer's data, a 9V alkaline battery discharged down to 4.8 V delivers about 600 mAh at 10 mA, 570 mAh at 25 mA and only 450 mAh at 50 mA. The Arduino Uno's regulator, on the other hand, needs at least 7 V at the DC jack; under load the battery voltage falls below that within a few hours and the remaining energy can't be used. That's why an Uno drawing about 50 mA usually runs for only a few hours on a 9V battery, often 4–8 hours.
- Low capacity: only 400–600 mAh versus 2000–2500 mAh for a 6×AA pack, which means more than four times less runtime at the same 9 V.
- High internal resistance: when a servo starts moving or a relay switches, the voltage collapses instantly and the Arduino resets.
- Regulator loss: the Uno's linear regulator turns the 4 V difference between 9 V and 5 V into heat; at 50 mA, about 0.2 W of the 0.45 W drawn from the battery is wasted.
- Expensive energy: its cost per Wh is clearly higher than AA batteries, and rechargeable NiMH 9V batteries drop to just 170–300 mAh.
- Where it works well: a 9V battery is perfectly fine in smoke detectors, multimeters or devices that draw a few mA and sit idle for long periods. For an Arduino, choose a 6×AA pack, a 2S 18650 pack or a power bank; the details are in How to power an Arduino with a battery.
Measuring your Arduino project's current draw
To calculate battery life, you first need to know how much current your project draws. Measuring beats guessing, because the board's own consumption, power LEDs and regulators often draw more current than the sensors. The easiest way is to connect a multimeter in series between the battery and the circuit. For projects with a sleep/wake cycle, a current sensor such as the INA219 gives better results, because it catches short current peaks and the true average. For details on the multimeter's ranges and sockets, see How to use a multimeter.
- Switch off the circuit; plug the red probe into the multimeter's mA socket and the black probe into COM. If you think the current might exceed 200 mA, start with the 10A socket.
- Turn the dial to DC current (A⎓), and to the 200 mA range if it isn't auto-ranging.
- Disconnect the battery's positive lead from the circuit; touch the red probe to the battery's positive terminal and the black probe to the circuit's positive input. This way all the current flows through the multimeter.
- Run the circuit and read the value. Measure separately while a servo is moving, while Wi-Fi is connecting or while a relay is energised, and note the current for each state.
- If the sleep current is in the microampere range, switch to the µA range. In this range the board may not get enough current to boot; bridge the probes with a jumper wire during start-up and remove it once the board goes to sleep.
- Plug the currents you measured, together with the time spent in each state, into the average current formula below.
| Board or module | Typical current | Note |
|---|---|---|
| Arduino Uno R3 | 45–50 mA | Around 30 mA even in sleep mode (USB chip, regulator, LED) |
| Arduino Nano (CH340) | ≈20 mA | The power LED uses a few mA |
| Arduino Pro Mini 3.3 V / 8 MHz | A few mA | µA level in sleep once the LED and regulator are removed |
| ESP32 DevKit, Wi-Fi off | 40–70 mA | Depends on CPU frequency |
| ESP32 DevKit, Wi-Fi connected | 80–130 mA average | Peaks of 240 mA and more while transmitting |
| ESP32 deep sleep (bare module) | ≈10 µA | Often several mA on a development board |
| Raspberry Pi Pico (MicroPython) | 20–25 mA | Noticeably higher on the Pico W with Wi-Fi on |
| LED (220 Ω, 5 V) | 10–15 mA | Depends on brightness |
| 16x2 I2C LCD | 20–30 mA | Mostly the backlight |
| 0.96" OLED (SSD1306) | 10–25 mA | Depends on how many pixels are lit |
| SG90 servo | 5–10 mA idle, 100–250 mA while moving | 0.5 A or more when stalled |
| HC-SR04 distance sensor | ≈15 mA | While measuring |
| 5 V relay module (energised) | 70–80 mA | As long as the coil is energised |
| NEO-6M GPS | 40–50 mA | While searching for satellites |
Measuring current and used mAh with an INA219
The INA219 is a small I2C current and voltage sensor module. It measures the voltage across the 0.1 Ω shunt resistor on the board with 12-bit resolution, and reads currents up to about ±3.2 A in circuits up to 26 V with a resolution of roughly 0.1 mA. Its default I2C address is 0x40. You connect the module in series in the positive line of the circuit being measured: the battery's positive goes to Vin+, and Vin− goes to the circuit's positive input. The Arduino doing the measuring is powered from USB, and its GND is connected to the GND of the circuit under test. All you need is the Adafruit INA219 library from the Library Manager in the Arduino IDE. The INA219 can't resolve microampere-level sleep currents; measure those with the µA range of a multimeter.
| INA219 pin | Arduino Uno | ESP32 | Raspberry Pi Pico |
|---|---|---|---|
| VCC | 5V | 3V3 | 3V3(OUT) |
| GND | GND | GND | GND |
| SDA | A4 | GPIO 21 | GP4 |
| SCL | A5 | GPIO 22 | GP5 |
| Vin+ | Battery positive (+) | Battery positive (+) | Battery positive (+) |
| Vin− | Positive input of the circuit under test | Positive input of the circuit under test | Positive input of the circuit under test |
| Battery negative (−) | GND (common) | GND (common) | GND (common) |
1// INA219 ile akım, harcanan mAh ve pil ömrü / current, used mAh and battery life with INA219
2#include <Wire.h>
3#include <Adafruit_INA219.h>
4
5Adafruit_INA219 ina219;                    // varsayılan adres 0x40 / default address 0x40
6
7const float CAPACITY_MAH = 2500.0;         // pilin etiket kapasitesi / rated battery capacity
8const float USABLE = 0.85;                 // kullanılabilir oran / usable share
9
10float usedMah = 0;                         // toplam harcanan yük / total charge used
11float secMaMs = 0;                         // son saniyenin mA x ms toplamı / mA x ms of the last second
12unsigned long startMs, lastSample, lastPrint;
13
14void setup() {
15  Serial.begin(9600);
16  if (!ina219.begin()) {
17    Serial.println(F("INA219 bulunamadi / INA219 not found"));
18    while (true) {}
19  }
20  ina219.setCalibration_32V_1A();          // 1 A'e kadar ince ölçüm / finer steps up to 1 A
21  startMs = lastSample = lastPrint = millis();
22}
23
24void loop() {
25  unsigned long now = millis();
26
27  if (now - lastSample >= 10) {            // 10 ms'de bir örnek / one sample every 10 ms
28    float mA = ina219.getCurrent_mA();
29    secMaMs += mA * (now - lastSample);    // akım x süre / current x time
30    lastSample = now;
31  }
32
33  if (now - lastPrint >= 1000) {           // saniyede bir rapor / report once a second
34    lastPrint = now;
35    usedMah += secMaMs / 3600000.0;        // mA x ms -> mAh
36    secMaMs = 0;
37    float avgMa = usedMah / ((now - startMs) / 3600000.0);   // ortalama akım / average current
38    float volts = ina219.getBusVoltage_V() + ina219.getShuntVoltage_mV() / 1000.0;   // pil gerilimi / battery voltage
39
40    Serial.print(F("Pil / Battery: "));
41    Serial.print(volts, 2);
42    Serial.print(F(" V | Ort / Avg: "));
43    Serial.print(avgMa, 1);
44    Serial.print(F(" mA | Harcanan / Used: "));
45    Serial.print(usedMah, 2);
46    Serial.print(F(" mAh"));
47    if (avgMa > 0.5) {
48      Serial.print(F(" | Sure / Runtime: "));
49      Serial.print(CAPACITY_MAH * USABLE / avgMa, 1);   // saat / hours
50      Serial.print(F(" h"));
51    }
52    Serial.println();
53  }
54}
The code reads the current every 10 milliseconds and adds up the current × time products to get the mAh used; this way short current pulses such as a Wi-Fi transmission or a servo movement are included in the average. Once a second it prints the battery voltage, the average current so far, the capacity used and the estimated runtime based on 85% of the rated capacity to the Serial Monitor. Leave it running for at least one full operating cycle, for example long enough to cover a complete sleep and wake cycle. For loads above 1 A, use setCalibration_32V_2A(). The same code runs unchanged on the ESP32 with GPIO 21 and 22; for help with the Serial Monitor, see Arduino Serial Monitor.
Calculating runtime: capacity / current × efficiency
Once you know the average current, the basic formula is simple: Runtime (hours) = Capacity (mAh) / Average current (mA) × Efficiency. An efficiency factor of 0.85 is a good starting point; it accounts for capacity lost at high current and in the cold, for the circuit stopping before the battery is fully empty, and for battery ageing. This formula applies when there's no regulator between the battery and the circuit, or a linear one (the Uno's 5 V regulator, AMS1117, 7805), because in a linear regulator the input current equals the output current and the voltage difference becomes heat. If you're using a switching converter such as a boost or buck module, calculate with energy instead: Runtime (hours) = Battery energy (Wh) × Efficiency / Load power (W). Here the efficiency is the converter's 85–90% efficiency multiplied by the usable share of the battery; 0.75–0.8 is realistic.
| Scenario | Average current or power | Battery | Calculation | Approx. runtime |
|---|---|---|---|---|
| Uno + sensor, 6×AA pack on the DC jack | 55 mA | AA alkaline, 2500 mAh | 2500 / 55 × 0.85 | ≈39 hours |
| Same Uno on a 9V alkaline battery | 55 mA | 9V, ≈450 mAh | 450 / 55 × 0.85 | ≈7 hours (less in practice) |
| Nano + DHT11 + OLED, 3×AA into the 5V pin | 35 mA | AA alkaline, 2500 mAh | 2500 / 35 × 0.85 | ≈61 hours |
| ESP32 DevKit always on Wi-Fi, 18650 + 5 V boost | 5 V × 110 mA = 0.55 W | 18650, 3000 mAh (11.1 Wh) | 11.1 × 0.8 / 0.55 | ≈16 hours |
| Pico on VSYS with 3×AA NiMH | ≈0.1 W | 3 × 1.2 V × 2000 mAh = 7.2 Wh | 7.2 × 0.8 / 0.1 | ≈58 hours |
For projects that sleep and wake, you first need the average current: Average current = (Awake current × Awake time + Sleep current × Sleep time) / Total time. For example, a bare ESP32 module that wakes for 5 seconds every 10 minutes drawing 120 mA, and sleeps at 10 µA (0.01 mA) for the remaining 595 seconds, averages (120 × 5 + 0.01 × 595) / 600 ≈ 1.01 mA. With a 3000 mAh 18650, that's 3000 / 1.01 × 0.85 ≈ 2520 hours, or about 3.5 months. If the same code runs on a development board that draws 5 mA in sleep, the average rises to 5.96 mA and the runtime drops to about 18 days. Instead of doing this by hand, you can use the battery life calculator; just enter the capacity, the awake and sleep currents and the wake-up interval. Once the average current falls below 0.1 mA, the battery's self-discharge becomes a deciding factor too: a Li-ion cell loses about 2–3% of its capacity per month.
ESP32: measuring awake time to estimate battery life
The ESP32's consumption varies by a factor of thousands depending on its operating mode. According to Espressif's datasheet, the chip draws up to 240 mA while transmitting over Wi-Fi, about 100 mA while receiving, 20–68 mA with Wi-Fi off (modem sleep), about 0.8 mA in light sleep and only 10 µA in deep sleep. That's why what really sets battery life is the time spent awake: connecting to Wi-Fi often takes 1–3 seconds, and the energy used in those few seconds is more than in hours of sleep. The code below stores how long the board stayed awake in RTC memory on each wake-up and, using the currents you measured, calculates the average current and the estimated battery life.
1// ESP32 derin uyku ve pil ömrü tahmini / ESP32 deep sleep and battery life estimate
2RTC_DATA_ATTR int bootCount = 0;               // derin uykuda silinmez / survives deep sleep
3RTC_DATA_ATTR unsigned long lastAwakeMs = 0;   // önceki uyanık süre / previous awake time
4
5const float ACTIVE_MA = 120.0;      // ölçtüğün uyanık akım / measured awake current
6const float SLEEP_MA = 0.01;        // ölçtüğün uyku akımı (10 µA) / measured sleep current (10 µA)
7const int SLEEP_S = 600;            // 10 dakika uyku / 10 minutes of sleep
8const float CAPACITY_MAH = 3000.0;  // 18650 kapasitesi / 18650 capacity
9const float USABLE = 0.85;          // kullanılabilir oran / usable share
10
11void setup() {
12  Serial.begin(115200);
13  bootCount++;
14
15  // Burada sensörü oku ve veriyi gönder / read the sensor and send the data here
16  delay(500);                       // örnek iş yükü / sample workload
17
18  if (lastAwakeMs > 0) {
19    float awakeS = lastAwakeMs / 1000.0;
20    float avgMa = (ACTIVE_MA * awakeS + SLEEP_MA * SLEEP_S) / (awakeS + SLEEP_S);
21    float days = CAPACITY_MAH * USABLE / avgMa / 24.0;
22    Serial.printf("Uyanis / Wake #%d, uyanik / awake: %.2f s\n", bootCount, awakeS);
23    Serial.printf("Ortalama / Average: %.3f mA, pil omru / battery life: %.0f gun / days\n", avgMa, days);
24  }
25
26  lastAwakeMs = millis();           // bu uyanışın süresi / duration of this wake
27  Serial.flush();
28  esp_sleep_enable_timer_wakeup((uint64_t)SLEEP_S * 1000000ULL);   // mikrosaniye / microseconds
29  esp_deep_sleep_start();           // loop() hiç çalışmaz / loop() never runs
30}
31
32void loop() {
33}
On the first wake-up it only stores the time; on every wake-up after that it calculates and prints the average current and the battery life in days using the previous awake time. Measure ACTIVE_MA and SLEEP_MA on your own board with a multimeter and enter them. millis() doesn't count the bootloader time at start-up, so adding a margin of 0.1–0.3 seconds to the awake time gives a more realistic result. For details on sleep modes and wake-up sources, see ESP32 deep sleep, and for restart problems you might run into on battery power, see ESP32 brownout error.
Connecting batteries in series and parallel
When you connect batteries in series (the positive of one to the negative of the next), the voltages add up and the capacity (mAh) stays the same: four 1.5 V, 2500 mAh AA batteries in series give 6 V, 2500 mAh. When you connect them in parallel (positives together, negatives together), the voltage stays the same and the capacities add up: two 3000 mAh 18650s in parallel give 3.7 V, 6000 mAh. In both cases the total energy (Wh) grows with the number of cells. For lithium packs this layout is written with the letters S (series) and P (parallel); for example, 2S2P means a four-cell pack made of two parallel pairs connected in series.
| Configuration (3000 mAh 18650) | Voltage (nominal / full) | Capacity | Energy | Typical use |
|---|---|---|---|---|
| 1S1P | 3.7 V / 4.2 V | 3000 mAh | 11.1 Wh | ESP32, Pico, Arduino via boost |
| 1S2P | 3.7 V / 4.2 V | 6000 mAh | 22.2 Wh | Long-running ESP32 sensor station |
| 2S1P | 7.4 V / 8.4 V | 3000 mAh | 22.2 Wh | Arduino DC jack, robot car |
| 2S2P | 7.4 V / 8.4 V | 6000 mAh | 44.4 Wh | Motorised robots |
| 3S1P | 11.1 V / 12.6 V | 3000 mAh | 33.3 Wh | 12 V LED strip, 5 V via buck |
- Use identical cells: in a series or parallel pack, use batteries of the same brand, capacity, age and state of charge; a weaker cell runs out before the others and gets stressed.
- Match voltages before going parallel: before connecting Li-ion cells in parallel, the voltage difference between them should not exceed 0.1 V; otherwise the full cell pushes a large, uncontrolled current into the empty one.
- Series lithium packs need protection: for 2S and larger packs, use a BMS board with balancing that monitors each cell. A series pack can't be charged with a single-cell TP4056 module.
- Don't mix rechargeable and disposable cells: don't put alkaline and NiMH batteries in the same pack; their voltages and internal resistances differ.
- Parallel connection shares the load: in a 1S2P pack each cell carries half the current, so a parallel pack both lasts longer and runs cooler at high current.
What is the C rating?
The C rating tells you how fast a battery is discharged or charged relative to its capacity. 1C is the current that empties the battery in 1 hour and is numerically equal to its capacity: for a 2000 mAh battery, 1C = 2 A, 0.5C = 1 A and 20C = 40 A. Working out the time is easy too: at 2C the battery is empty in about 30 minutes, at 0.2C in 5 hours. Values such as 25C or 50C printed on drone and RC LiPos show the maximum continuous discharge current; a 1000 mAh 25C LiPo can deliver 25 A. On 18650 cells this is usually given directly in amps: high-capacity 3500 mAh cells deliver 8–10 A, while high-drain 2500–3000 mAh cells deliver 15–30 A continuously. The rule is stricter for charging: the standard charge current for lithium cells is around 0.5C, and 1C at most. A TP4056 module charging at 1 A is fine for a 2000 mAh 18650, but it pushes a small 300 mAh LiPo at about 3C; in that case you need to change the module's Rprog resistor to lower the charge current.
| C rating | 1000 mAh LiPo | 3000 mAh 18650 | Approx. time |
|---|---|---|---|
| 0.2C | 200 mA | 600 mA | 5 hours |
| 0.5C | 500 mA | 1.5 A | 2 hours |
| 1C | 1 A | 3 A | 1 hour |
| 2C | 2 A | 6 A | 30 minutes |
| 10C | 10 A | 30 A (high-drain cells only) | 6 minutes |
Measuring battery capacity with a Raspberry Pi Pico (MicroPython)
18650 cells labelled 9900 mAh are almost always fake; the highest-capacity genuine 18650s on the market are around 3500–3600 mAh. The only way to find a battery's real capacity is to discharge it through a known load and add up the current over time. With a Raspberry Pi Pico, a load resistor and a MOSFET you can build a simple capacity tester that does exactly that: the Pico switches the load in with the MOSFET, measures the battery voltage through a voltage divider, calculates the current with I = V / R and disconnects the load once the voltage reaches the cut-off value. You can check the divider values with the voltage divider calculator, and for MOSFET wiring details see Using a MOSFET.
| Part | Connection | Purpose |
|---|---|---|
| Battery positive (+) | To one end of the load resistor and to the top resistor of the divider | The battery under test |
| 10 Ω, 5 W load resistor | Other end to the MOSFET's drain | Draws about 420 mA at 4.2 V |
| Logic-level N-channel MOSFET (e.g. IRLZ44N) | Source → GND, gate → 220 Ω → GP15, 100 kΩ between gate and GND | Switches the load on and off |
| 100 kΩ + 100 kΩ voltage divider | Battery positive → 100 kΩ → GP26 → 100 kΩ → GND | Scales 4.2 V down to 2.1 V for the ADC |
| Battery negative (−) | Pico GND | Common ground |
| Raspberry Pi Pico | To the computer via USB | Measuring, logging and Thonny output |
1from machine import ADC, Pin
2import time
3
4adc = ADC(26)                      # GP26: bölücünün orta noktası / divider midpoint
5load = Pin(15, Pin.OUT, value=0)   # GP15: MOSFET kapısı / MOSFET gate
6R_LOAD = 10.0                      # yük direnci, ohm (ölçüp yaz) / load resistor in ohms (measure it)
7DIV = 2.0                          # 100k + 100k bölücü / 100k + 100k divider
8CUTOFF = 3.0                       # Li-ion bitiş gerilimi / Li-ion end voltage
9CONV = 3.3 / 65535                 # ham değeri volta çevir / raw value to volts
10
11def battery_v():
12    total = 0
13    for _ in range(32):            # 32 ölçümün ortalaması / average of 32 readings
14        total += adc.read_u16()
15    return total / 32 * CONV * DIV
16
17mah = 0.0
18mwh = 0.0
19log = open("desarj.csv", "w")      # Pico'nun belleğine kaydedilir / saved to the Pico's flash
20log.write("dakika,volt,mA,mAh\n")
21load.value(1)                      # deşarjı başlat / start the discharge
22start = last = time.ticks_ms()
23
24while True:
25    time.sleep(30)
26    now = time.ticks_ms()
27    hours = time.ticks_diff(now, last) / 3600000
28    last = now
29    v = battery_v()                # yük altındaki gerilim / voltage under load
30    ma = v / R_LOAD * 1000         # I = V / R
31    mah += ma * hours
32    mwh += v * ma * hours
33    minutes = time.ticks_diff(now, start) / 60000
34    print("{:.0f} dk/min  {:.3f} V  {:.0f} mA  {:.0f} mAh  {:.2f} Wh".format(minutes, v, ma, mah, mwh / 1000))
35    log.write("{:.1f},{:.3f},{:.0f},{:.1f}\n".format(minutes, v, ma, mah))
36    log.flush()
37    if v <= CUTOFF:
38        load.value(0)              # yükü ayır, pili koru / disconnect the load, protect the cell
39        log.close()
40        print("Kapasite / Capacity: {:.0f} mAh, {:.2f} Wh".format(mah, mwh / 1000))
41        break
Every 30 seconds the code measures the battery voltage under load, calculates the current and adds up the mAh and Wh used; it prints the results to the Thonny console and also saves them to the desarj.csv file in the Pico's flash. You can later open that file in Excel and plot the discharge curve (Sending Arduino data to Excel). With the 10 Ω load, testing a 3000 mAh 18650 takes about 8–9 hours. For accurate results, measure the load resistor with a multimeter and enter it as R_LOAD, then compare the battery voltage with a multimeter reading and adjust the DIV factor. To test an AA NiMH, lower CUTOFF to 1.0 V and the load resistor to 4.7 Ω. At 4.2 V the load resistor dissipates about 1.8 W; choose a resistor rated at least 5 W, keep it away from flammable surfaces and don't leave the test unattended. If you don't know how to install MicroPython on the Pico yet, start with What is the Raspberry Pi Pico?.
Project ideas using battery calculations
- Garden sensor that runs for months: keep an ESP32 in deep sleep, measure soil moisture once an hour and bring the average current below 1 mA.
- Voltmeter with a battery gauge: measure the battery voltage and show it as a percentage on an LCD (Building an Arduino voltmeter).
- The right pack for a robot car: measure the motor current and calculate how many minutes a 2S 18650 pack will last (Building an Arduino robot car).
- Power consumption logger: write INA219 readings to an SD card to build a device's daily energy profile (SD card module).
- 18650 capacity test station: add an OLED display to the Pico tester and show the mAh live.
- Battery-powered weather station: run an ESP32 that sends DHT11 data every 10 minutes for months on a single 18650.
Common mistakes and how to fix them
| Mistake | Result | Fix |
|---|---|---|
| Comparing batteries of different voltages by mAh alone | Wrong battery choice | Convert to Wh: mAh × V / 1000 |
| Counting on the full rated capacity | Runtime 15–40% shorter than expected | Use the 0.85 factor, lower it further at high current |
| Forgetting the board's own consumption | An Uno draws around 30 mA even asleep; the battery lasts hours instead of days | Use a Pro Mini or a bare module, remove the power LED |
| Not measuring current peaks | Reset (brownout) on Wi-Fi connection or servo movement | Measure with an INA219, add a 470 µF capacitor on the supply |
| Using the mAh formula with a switching converter | The estimate is off by 30–50% | Calculate with energy (Wh) and power (W) |
| Powering an Arduino from a 9V battery | A battery that dies in a few hours, plus resets | Use 6×AA, a 2S 18650 pack or a power bank |
| Discharging a Li-ion cell below 3.0 V | Permanent capacity loss and risk of swelling | Protected cell or BMS, cut-off voltage in software |
| Buying 18650s with unrealistic mAh ratings | About a third of the labelled capacity | Run a capacity test, choose known brands |
You now know the difference between mAh and Wh, how to measure your project's current and how to work out how many hours or days a battery will last. As a next step, take a look at Powering an Arduino with a battery and Charging an 18650 with a TP4056. In the BlueGrays app you'll find battery-powered projects such as ESP32 deep sleep power saving, a digital voltmeter with an LCD, a Bluetooth-controlled robot car and an obstacle-avoiding robot, each with step-by-step circuit diagrams and code.
Frequently asked questions
What does mAh mean on a battery?
mAh (milliampere-hour) is the unit of capacity that shows how much electric charge a battery stores. A 1000 mAh battery can, in theory, supply 1000 mA for 1 hour or 100 mA for 10 hours. The real runtime depends on the current drawn, the temperature and the voltage at which your circuit stops.
What is the difference between mAh and Wh?
mAh measures charge, while Wh measures energy. Wh is calculated as mAh × V / 1000, so a 3.7 V, 3000 mAh battery holds 11.1 Wh. When comparing batteries of different voltages, Wh gives a much more accurate picture.
Is a higher mAh battery better?
Between batteries of the same voltage and type, a higher mAh means a longer runtime. For high-current devices, however, internal resistance and the C rating matter too. 18650 cells with unrealistic ratings such as 9900 mAh are almost always fake.
How do I calculate how long a battery will last?
Use Runtime (hours) = Capacity (mAh) / Average current (mA) × 0.85. For example, a 2500 mAh battery powers a circuit drawing 50 mA for about 42 hours. If there's a boost or buck converter in between, calculate with Wh and W instead.
Can I power an Arduino with a 9V battery?
It works for short tests, but it isn't recommended for permanent projects. A 9V alkaline battery holds only 400–600 mAh and usually powers an Arduino Uno for just a few hours; with loads such as servos the voltage drops and the board resets. A 6×AA pack, a 2S 18650 pack or a power bank lasts far longer.
What does the C rating of a battery mean?
The C rating expresses the discharge or charge current relative to the battery's capacity; 1C is the current that empties the battery in 1 hour. For a 2000 mAh battery, 1C = 2 A and 0.5C = 1 A. Values such as 25C on LiPo batteries indicate the maximum continuous discharge current.
Projects to build after reading this
See all projects
Temperature and Humidity with DHT11
How warm is your room, and is the air humid or dry? The DHT11 sensor measures temperature and humidity, and the Arduino writes the values on a two-line LCD screen, refreshing every couple of seconds.

LED Blink with ESP32
Teaches basic GPIO output usage with ESP32. We achieve a blinking effect by turning an LED on and off from a digital pin. ESP32 version of the classic blink project on Arduino UNO; the basic blink commands in the Arduino environment are the same, but the ESP32's pin layout and 3.3 V GPIO levels differ from those of the Arduino UNO.

ESP32 Deep Sleep — Battery Saving (OLED + RTC RAM Counter)
The ESP32's Deep Sleep mode reduces current consumption to ~10 µA by shutting down the CPU and most peripherals, making it critical for battery-powered IoT devices. In this project, we use three different wake-up sources: a timer (15 seconds), an external pin (EXT0 — button GPIO 33), and touch (T0/GPIO 4). Variables marked with RTC_DATA_ATTR are preserved during deep sleep—the boot counter, timer wake counter, and button wake counter are continuously tracked. On each wake-up, the SSD1306 OLED
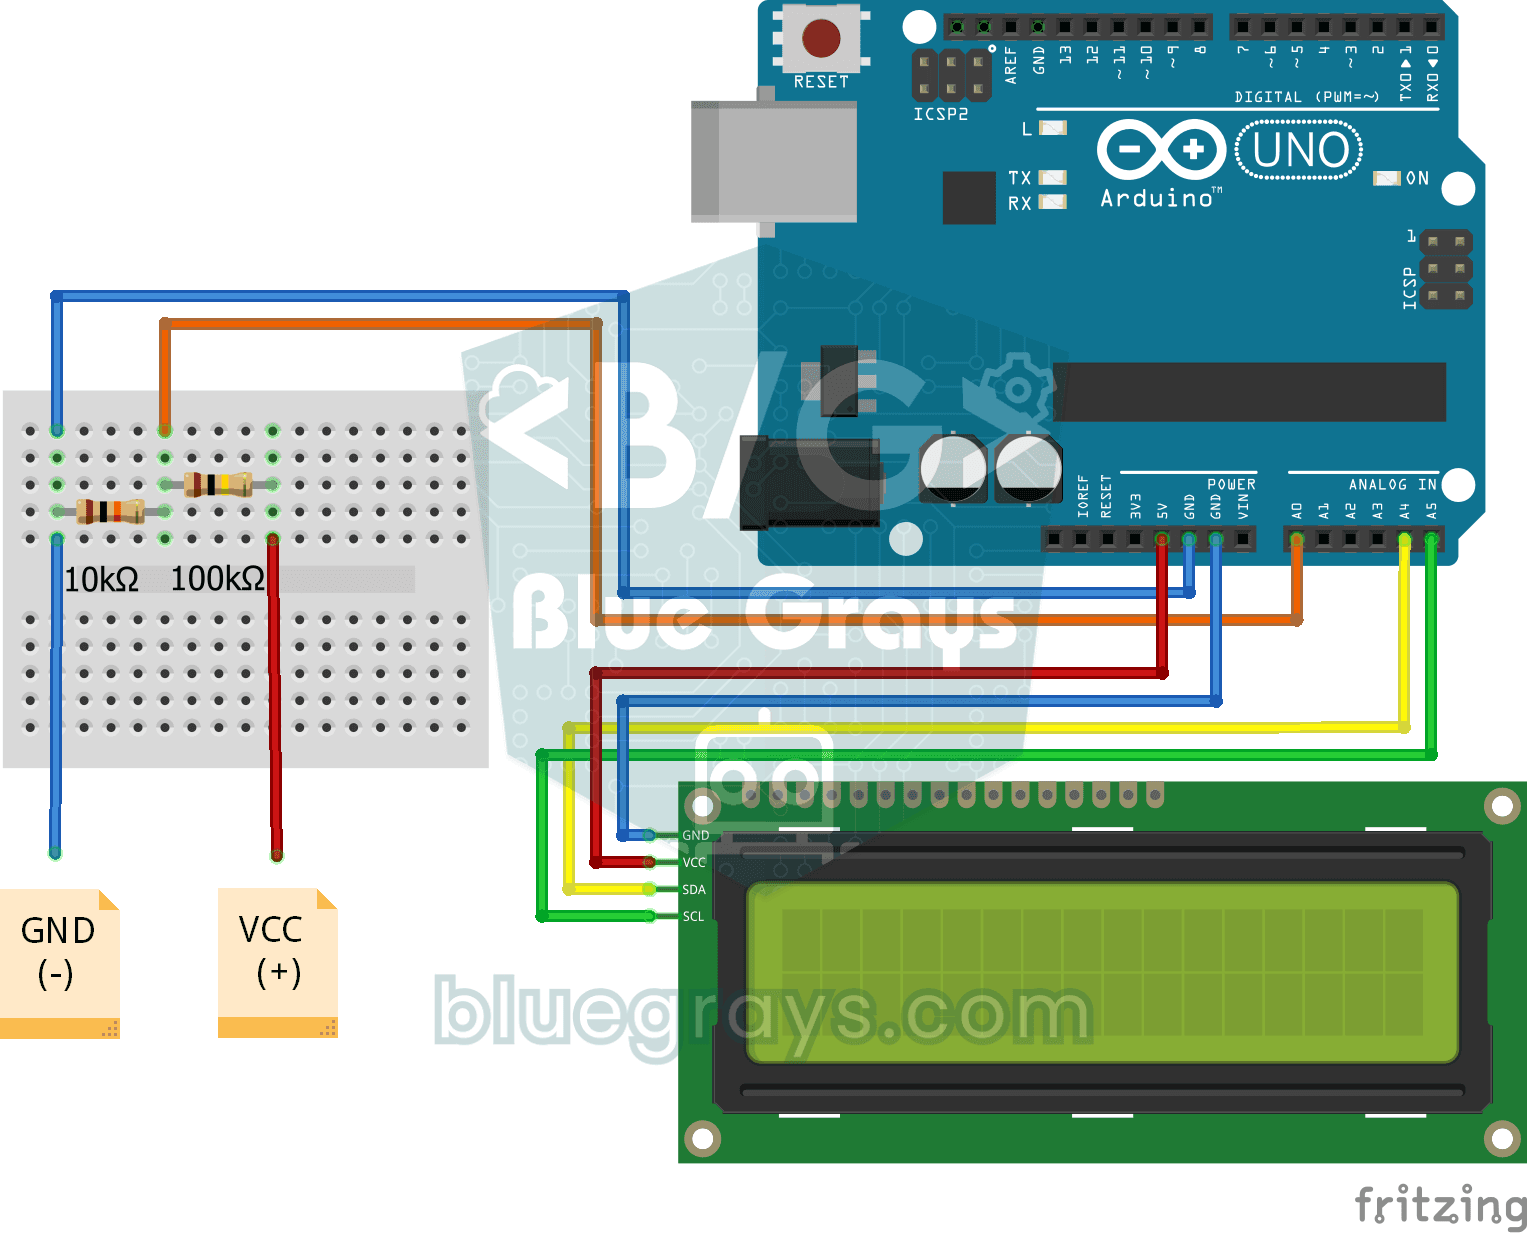
Digital Voltmeter with LCD Display
Find out how much voltage a battery or power adapter gives with a meter you built yourself. A divider made of two resistors brings high voltage down to a level the board can read, and the Arduino calc

Bluetooth Controlled Car with L298N
Turn your phone into a remote and drive your own robot car. The Arduino receives commands from a remote-control app on your phone through a Bluetooth module and spins the wheels with a motor driver; t

Obstacle Avoidance Robot
How about building a smart vehicle that finds its own way? The Obstacle Avoidance Robot constantly scans its surroundings thanks to the ultrasonic sensor in front of it. When it encounters an obstacle
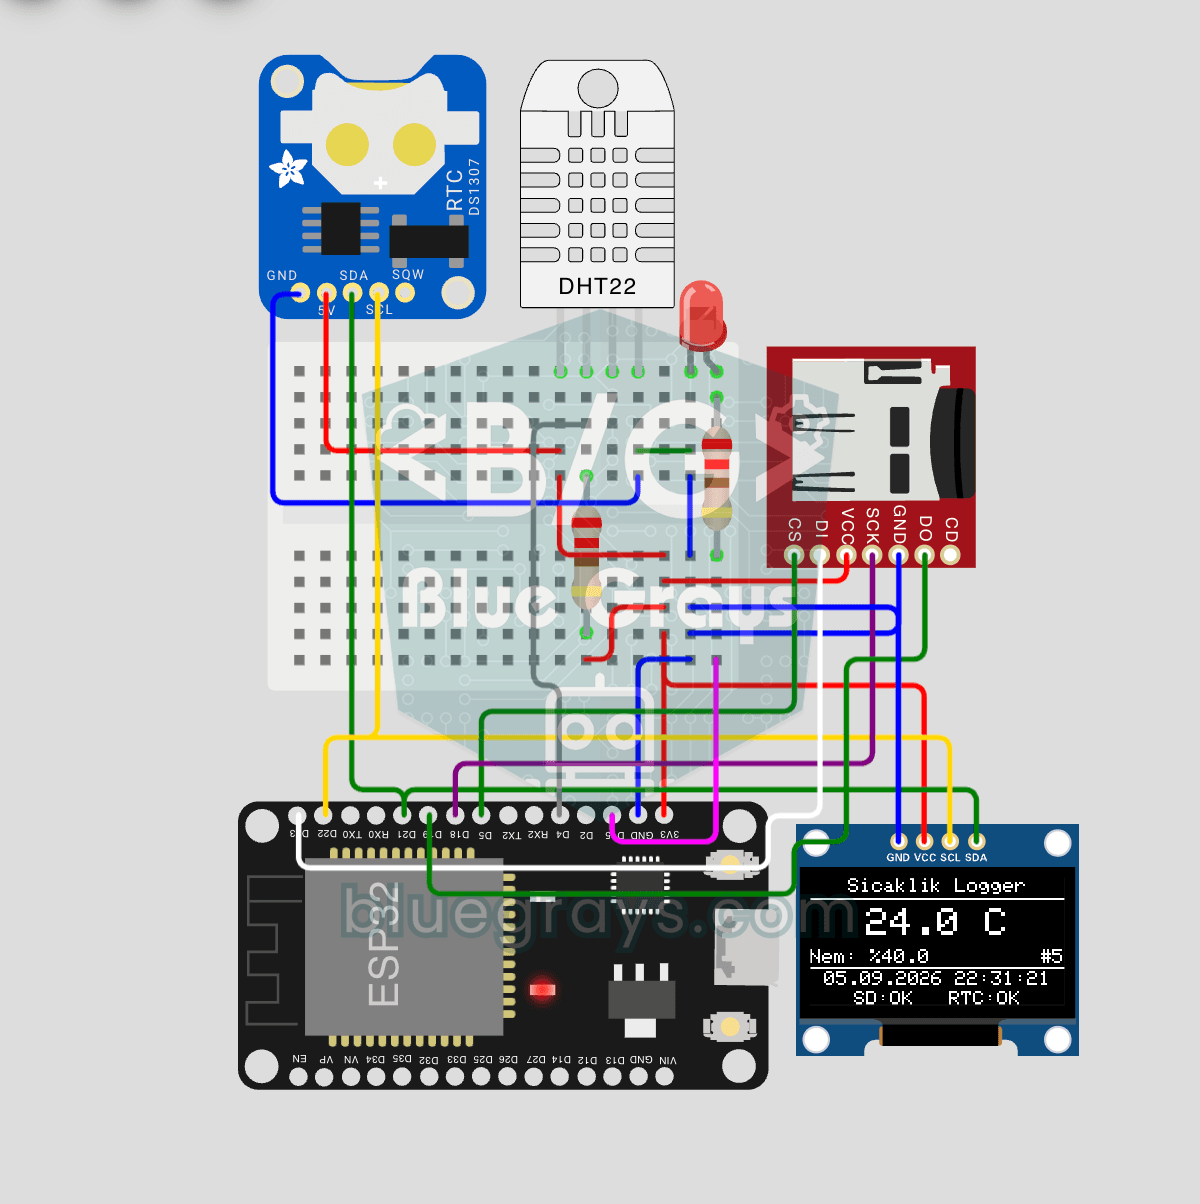
ESP32 Temperature Data Logger (DHT22 + DS1307 RTC + microSD + OLED)
Build a timestamped temperature logger with ESP32! Read DHT22 temperature/humidity every minute, get real-world time from DS1307 RTC, and log to microSD card as CSV. The OLED displays live temperature (large font), humidity percentage, timestamp, and log counter. The /temp_log.csv file on the SD card opens in Excel, Google Sheets, or Python pandas for analysis — perfect for greenhouse monitoring, home/room temperature tracking, laboratory data collection, food storage conditions, or beehiv