
ST7789 ESP32: Colour IPS Display with TFT_eSPI, Sprites, Clock
ST7789 ESP32 guide: TFT_eSPI and User_Setup.h, SPI pins labelled SCL/SDA, flicker-free sprite gauge and clock, Adafruit on the Uno, Pico, black screen fixes.
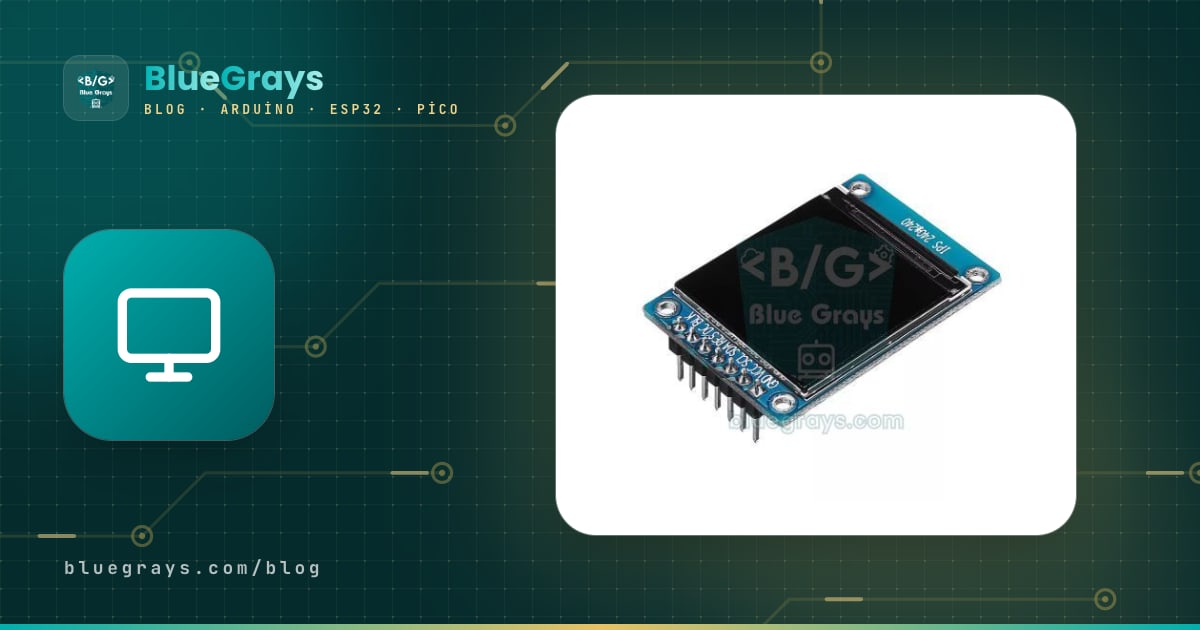
The ST7789 ESP32 pair is the cheapest way to give a small project a colour interface with phone-screen quality. The ST7789 is a TFT driver chip made by Sitronix and is found in most of the 1.3-inch 240x240, 1.54-inch 240x240, 1.69-inch 240x280 and 2.0-inch 240x320 IPS displays on the market. Thanks to the IPS panel the colours look vivid from every angle; with 65 thousand colours, high resolution and a fast SPI link you can draw gauges, graphs and animations that an OLED or a character LCD can't.
In this guide you'll see step by step how to connect the ST7789 to an ESP32 with the TFT_eSPI library, how to set up User_Setup.h, the most confusing part of the library, why the module is SPI and not I2C even though it says SCL and SDA, how to animate without flicker using a sprite, and how to build an analogue sensor gauge and an NTP-driven clock interface. We'll also cover the Adafruit_ST7789 library for the Arduino Uno, a library-free MicroPython driver for the Raspberry Pi Pico and every cause of the black screen problem.
What is the ST7789 and which displays use it?
The ST7789 is a driver chip that controls every pixel of the display and turns commands from the microcontroller into an image. Inside it has a 240x320-pixel frame memory; smaller displays use only part of it. Colours are usually sent in RGB565 format, that is 16 bits per pixel (5 bits red, 6 bits green, 5 bits blue). Communication runs over 4-wire SPI and the chip can handle clock speeds of around 60 MHz; in practice 40 MHz is a safe value with the ESP32. At that speed a full 240x240 frame is 921,600 bits and is sent in about 23 ms, so you can exceed 40 frames per second.
| Display | Resolution | Typical use |
|---|---|---|
| 1.14 inch | 135x240 | ESP32 boards with a built-in screen such as the TTGO T-Display |
| 1.3 inch and 1.54 inch | 240x240 | Smartwatches, small gauges, square interfaces |
| 1.69 inch | 240x280 | Watch screens with rounded corners |
| 1.9 inch | 170x320 | Long, narrow status bars |
| 2.0 inch | 240x320 | Menus, graphs and small game screens |
| Feature | Value |
|---|---|
| Driver chip | ST7789 (Sitronix) |
| Panel | IPS, wide viewing angle |
| Colours | 65 thousand (RGB565), the chip supports up to 262 thousand |
| Interface | 4-wire SPI (SCK, MOSI, DC, CS) plus RESET |
| Supply | 3.3 V on most modules |
| Logic level | 3.3 V |
| Current | About 20–40 mA including the backlight |
Pins: it says SCL and SDA, but this display is SPI
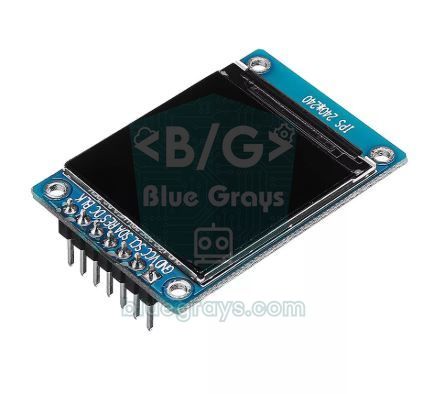
Cheap 1.3-inch ST7789 modules are labelled GND, VCC, SCL, SDA, RES, DC, BLK; some also have CS. The SCL and SDA labels confuse beginners more than anything else: this display doesn't use I2C, it uses SPI. SCL is really the SPI clock line (SCK) and SDA is the data line (MOSI). If you connect them to the ESP32's I2C pins, GPIO 21 and 22, the display will never work. We explain how SPI works in the what is SPI guide.
| Module pin | Function | ESP32 (TFT_eSPI) | Arduino Uno (Adafruit) | Raspberry Pi Pico |
|---|---|---|---|---|
| GND | Ground | GND | GND | GND |
| VCC | Supply | 3V3 | 3.3V | 3V3 (OUT) |
| SCL | SPI clock (SCK) | GPIO 18 | D13 | GP18 |
| SDA | SPI data (MOSI) | GPIO 23 | D11 | GP19 |
| RES | Reset | GPIO 4 | D8 | GP21 |
| DC | Data or command select | GPIO 2 | D9 | GP20 |
| CS | Chip select (if present) | GPIO 5 | D10 | GP17 |
| BLK | Backlight | GPIO 32 | 3.3V | GP22 |
Installing TFT_eSPI and setting up User_Setup.h

TFT_eSPI, written by Bodmer, is one of the fastest TFT libraries for the ESP32. Search for TFT_eSPI in the Library Manager and install it. Unlike other libraries, the display type and pins aren't set in your sketch but in the User_Setup.h file in the library folder. The file is in Documents > Arduino > libraries > TFT_eSPI and by default it's configured for an ILI9341 display. Open it in a text editor and replace its contents with the following:
1// User_Setup.h: ST7789 240x240 + ESP32 (dosyanın tamamını bununla değiştir / replace the whole file with this)
2#define ST7789_DRIVER                // sürücü yonga / driver chip
3#define TFT_WIDTH  240
4#define TFT_HEIGHT 240               // 240x320 ekranda 320 / 320 for a 240x320 panel
5
6#define TFT_MOSI 23                  // modüldeki SDA / SDA on the module
7#define TFT_SCLK 18                  // modüldeki SCL / SCL on the module
8#define TFT_CS    5                  // CS pini yoksa -1 / -1 if the module has no CS pin
9#define TFT_DC    2                  // veri-komut / data-command
10#define TFT_RST   4                  // reset (RES)
11#define TFT_BL   32                  // arka ışık (BLK) / backlight (BLK)
12#define TFT_BACKLIGHT_ON HIGH
13
14// #define TFT_RGB_ORDER TFT_BGR     // kırmızı ve mavi yer değiştirmişse aç / enable if red and blue are swapped
15// #define TFT_INVERSION_OFF         // renkler negatif görünüyorsa aç / enable if colours look inverted
16
17#define LOAD_GLCD                    // 8 px yazı tipi / 8 px font
18#define LOAD_FONT2                   // 16 px
19#define LOAD_FONT4                   // 26 px
20#define LOAD_FONT7                   // 48 px 7 segment rakam / 48 px 7-segment digits
21#define LOAD_GFXFF                   // Adafruit GFX yazı tipleri / Adafruit GFX fonts
22#define SMOOTH_FONT
23
24#define SPI_FREQUENCY 40000000 // 40 MHz; sorun olursa 27000000 / 40 MHz; drop to 27000000 if unstable- Install the TFT_eSPI library and replace User_Setup.h with the lines above.
- If you have a 240x320 display, set TFT_HEIGHT to 320; on a module without a CS pin, set TFT_CS to -1.
- Wire the display as in the table: SCL to GPIO 18, SDA to GPIO 23, RES to GPIO 4, DC to GPIO 2, CS to GPIO 5, BLK to GPIO 32.
- Close and reopen the Arduino IDE; the library settings are read at compile time.
- Upload the first test sketch below; you should see text and coloured shapes on the screen.
First test: text, shapes and colours
1#include <TFT_eSPI.h>                // ayarlar User_Setup.h içinde / settings live in User_Setup.h
2
3TFT_eSPI tft = TFT_eSPI();
4
5void setup() {
6  tft.init();
7  tft.setRotation(0);                // 0-3: ekranı 90'ar derece döndürür / rotates in 90° steps
8  tft.fillScreen(TFT_BLACK);
9
10  tft.setTextDatum(MC_DATUM);        // metni ortadan hizala / centre-align text
11  tft.setTextColor(TFT_WHITE, TFT_BLACK);
12  tft.drawString("BlueGrays", 120, 30, 4);        // metin, x, y, yazı tipi / text, x, y, font
13  tft.drawString("ST7789 240x240", 120, 60, 2);
14
15  tft.fillRect(20, 90, 60, 60, TFT_RED);           // dolu kare / filled square
16  tft.fillCircle(120, 120, 30, TFT_GREEN);         // dolu daire / filled circle
17  tft.fillTriangle(170, 150, 200, 90, 230, 150, TFT_BLUE);
18  tft.drawRoundRect(10, 170, 220, 50, 10, TFT_YELLOW);
19
20  uint16_t orange = tft.color565(255, 140, 0);     // kendi rengin (RGB565) / your own colour (RGB565)
21  tft.setTextColor(orange, TFT_BLACK);
22  tft.drawString("R  G  B", 120, 195, 4);
23}
24
25void loop() {
26}
In TFT_eSPI coordinates start at the top-left corner (0, 0), and the bottom-right corner of a 240x240 display is (239, 239). The last number in drawString(text, x, y, font) selects the font: 1 is a small 8-pixel font, 2 is 16 pixels, 4 is 26 pixels and 7 is a 48-pixel 7-segment digit font. setTextDatum(MC_DATUM) centres the text on the given point, which is very handy for gauges and clocks. Colours are given with ready-made names such as TFT_RED and TFT_GREEN, or with your own shades using color565(r, g, b).
| Function | What does it do? |
|---|---|
| fillScreen(colour) | Fills the whole screen |
| drawPixel(x, y, colour) | A single pixel |
| drawLine / drawWideLine | Thin or thick line |
| drawRect / fillRect / fillRoundRect | Rectangle, filled and with rounded corners |
| drawCircle / fillCircle | Circle |
| fillTriangle | Filled triangle |
| drawString / drawNumber / drawFloat | Text, integer and decimal number |
| setRotation(0-3) | Rotates the screen in 90° steps |
Flicker-free animation with sprites
When you draw straight to the screen, updating something means first erasing the old version and then drawing the new one. Between those two steps the screen is briefly blank, and the eye sees this as flicker. A sprite solves the problem: you draw on an invisible canvas in the ESP32's RAM first, and when the frame is completely ready you push it to the screen in one go with pushSprite(). A half-finished drawing never appears on the display.
The only cost of a sprite is memory. A 16-bit colour sprite uses 2 bytes per pixel: a full-screen 240x240 sprite takes 115,200 bytes and a 240x320 one 153,600 bytes. Although the ESP32 has 520 KB of RAM in total, the largest block that can be allocated in one piece is often around 110 KB, so a full-screen 16-bit sprite may not fit on a board without PSRAM. The fix is either to drop to 8-bit colour with setColorDepth(8) (57.6 KB for 240x240) or to draw only the changing area, for example the clock digits, as a small sprite. createSprite() returns nullptr if it can't find the memory; checking this prevents silent failures.
| Sprite size | 16-bit | 8-bit |
|---|---|---|
| 240x240 (full screen) | 115.2 KB | 57.6 KB |
| 240x320 (full screen) | 153.6 KB | 76.8 KB |
| 220x120 (clock area) | 52.8 KB | 26.4 KB |
| 100x50 (single value) | 10 KB | 5 KB |
Project: an analogue sensor gauge
The sketch below turns a potentiometer on GPIO 34 into a value from 0 to 100 and shows it with a needle on a 270-degree arc, like a car dashboard gauge. Scale ticks above 80 are red. Instead of the potentiometer you can feed the same function a temperature, humidity, gas or soil moisture reading. Because the sprite is cleared and redrawn from scratch every frame, the needle moves smoothly and never flickers.
1#include <TFT_eSPI.h>
2
3TFT_eSPI tft = TFT_eSPI();
4TFT_eSprite spr = TFT_eSprite(&tft);  // bellekteki çizim alanı / off-screen drawing area
5
6const int POT_PIN = 34;               // potansiyometre ya da sensör / potentiometer or sensor
7const int CX = 120, CY = 130, R = 100;
8float smooth = 0;
9
10void pointAt(float v, int radius, int &x, int &y) {   // 0-100 değeri yay üzerindeki noktaya çevir / value to a point on the arc
11  float a = radians(225 - v * 2.7);   // 270 derecelik yay / 270-degree arc
12  x = CX + cos(a) * radius;
13  y = CY - sin(a) * radius;
14}
15
16void drawGauge(int value) {
17  spr.fillSprite(TFT_BLACK);          // her kare temiz başlar / every frame starts clean
18  for (int v = 0; v <= 100; v += 5) { // ölçek çizgileri / scale ticks
19    int x0, y0, x1, y1;
20    pointAt(v, R, x0, y0);
21    pointAt(v, (v % 10 == 0) ? R - 14 : R - 7, x1, y1);
22    spr.drawLine(x0, y0, x1, y1, v >= 80 ? TFT_RED : TFT_LIGHTGREY);
23  }
24  int nx, ny;
25  pointAt(value, R - 20, nx, ny);
26  spr.drawWideLine(CX, CY, nx, ny, 4, TFT_ORANGE);  // ibre / needle
27  spr.fillCircle(CX, CY, 8, TFT_DARKGREY);
28
29  spr.setTextDatum(MC_DATUM);
30  spr.setTextColor(TFT_WHITE);
31  spr.drawNumber(value, CX, CY + 55, 7);            // 7 segment rakam / 7-segment digits
32  spr.drawString("%", CX + 62, CY + 62, 4);
33  spr.pushSprite(0, 0);               // tek seferde ekrana bas / push to the screen in one go
34}
35
36void setup() {
37  tft.init();
38  tft.fillScreen(TFT_BLACK);
39  spr.setColorDepth(8);               // 8 bit: 57,6 KB, 16 bit olsa 115 KB / 8-bit: 57.6 KB instead of 115 KB
40  if (spr.createSprite(240, 240) == nullptr) {      // bellek yetmezse / if memory runs out
41    tft.drawString("Sprite RAM yok", 10, 10, 2);
42    while (true) delay(100);
43  }
44}
45
46void loop() {
47  float raw = analogRead(POT_PIN) * 100.0 / 4095.0; // 0-100 aralığı / 0-100 range
48  smooth += (raw - smooth) * 0.2;                   // titremeyi yumuşat / smooth out jitter
49  drawGauge((int)smooth);
50  delay(20);                                        // yaklaşık 40 kare/sn / about 40 frames per second
51}
The pointAt() function in the code turns a value from 0 to 100 into a point on the arc: 0 corresponds to 225 degrees (bottom left) and 100 to −45 degrees (bottom right). Because the y axis grows downwards on the screen, there's a minus sign in front of the sine. The smooth variable filters out small fluctuations from the ADC; lower the 0.2 factor and the needle moves more heavily, raise it and it reacts faster. For more about the ESP32's ADC, see the what is ADC guide.
Project: a clock interface driven by NTP
One of the most popular uses of the ST7789 is a desk clock. The sketch below connects the ESP32 to Wi-Fi, gets the time from internet NTP servers in Turkish time and shows it in big 7-segment digits. This time, instead of a full-screen sprite, we use a 220x120 sprite that only covers the clock area; the day name is written straight to the screen because it changes just once a day. Change TZ_INFO for your own time zone; the details of NTP and time zone settings are in the ESP32 NTP time guide.
1#include <WiFi.h>
2#include <time.h>
3#include <TFT_eSPI.h>
4
5const char* WIFI_SSID = "AgAdi";
6const char* WIFI_PASS = "Sifre123";
7const char* TZ_INFO   = "<+03>-3";               // Türkiye UTC+3 / Turkey UTC+3
8const char* DAYS[] = {"Pazar", "Pazartesi", "Sali", "Carsamba", "Persembe", "Cuma", "Cumartesi"};
9
10TFT_eSPI tft = TFT_eSPI();
11TFT_eSprite clockSpr = TFT_eSprite(&tft);        // yalnız saat bölgesi / clock area only
12int lastSecond = -1;
13
14void setup() {
15  tft.init();
16  tft.fillScreen(TFT_NAVY);
17  tft.setTextDatum(MC_DATUM);
18  tft.setTextColor(TFT_WHITE, TFT_NAVY);
19  tft.drawString("Wi-Fi...", 120, 120, 4);
20
21  WiFi.begin(WIFI_SSID, WIFI_PASS);
22  while (WiFi.status() != WL_CONNECTED) delay(300);
23  configTzTime(TZ_INFO, "pool.ntp.org", "time.cloudflare.com");
24
25  tft.fillScreen(TFT_NAVY);
26  clockSpr.createSprite(220, 120);               // 16 bit: 52,8 KB / 16-bit: 52.8 KB
27  clockSpr.setTextDatum(MC_DATUM);
28}
29
30void loop() {
31  struct tm t;
32  if (!getLocalTime(&t, 100) || t.tm_sec == lastSecond) return;   // saniye değişince çiz / draw on each new second
33  lastSecond = t.tm_sec;
34
35  char hm[6], sec[3], date[11];
36  strftime(hm, sizeof(hm), "%H:%M", &t);
37  strftime(sec, sizeof(sec), "%S", &t);
38  strftime(date, sizeof(date), "%d.%m.%Y", &t);
39
40  clockSpr.fillSprite(TFT_NAVY);
41  clockSpr.fillRoundRect(0, 0, 220, 120, 14, TFT_BLACK);
42  clockSpr.setTextColor(TFT_CYAN);
43  clockSpr.drawString(hm, 95, 45, 7);            // büyük saat:dakika / big hours:minutes
44  clockSpr.setTextColor(TFT_ORANGE);
45  clockSpr.drawString(sec, 195, 55, 4);          // saniye / seconds
46  clockSpr.setTextColor(TFT_WHITE);
47  clockSpr.drawString(date, 110, 100, 4);
48  clockSpr.pushSprite(10, 40);                   // titremeden güncelle / update without flicker
49
50  tft.setTextColor(TFT_YELLOW, TFT_NAVY);
51  tft.fillRect(0, 175, 240, 30, TFT_NAVY);
52  tft.drawString(DAYS[t.tm_wday], 120, 190, 4);  // gün adı / day name
53}
The clock is only redrawn when the second changes, so while loop() spins the processor has time for other jobs. The built-in TFT_eSPI fonts have no accented characters, so the Turkish day names in the code are written without special letters; translate them into your own language if you like. If you want accented letters, you can create and load your own font with TFT_eSPI's smooth font feature. To add a weather line to this clock, simply combine it with the Open-Meteo code from the ESP32 weather API guide.
ST7789 with the Arduino Uno: Adafruit_ST7789
TFT_eSPI doesn't work on the Arduino Uno; here you use the Adafruit ST7735 and ST7789 Library together with Adafruit GFX. The Uno's 2 KB of RAM isn't enough even for one sprite, so everything is drawn directly on the screen and it's noticeably slower than the ESP32. It's still fine for menus, numbers and simple graphics. The hardware SPI pins are fixed: SDA (MOSI) goes to D11 and SCL (SCK) to D13; you can choose any digital pins for CS, DC and RST.
1#include <Adafruit_GFX.h>
2#include <Adafruit_ST7789.h>
3#include <SPI.h>
4
5#define TFT_CS   10                  // CS pini yoksa -1 / -1 if there is no CS pin
6#define TFT_DC    9
7#define TFT_RST   8
8// SDA (MOSI) -> D11, SCL (SCK) -> D13: donanım SPI / hardware SPI
9
10Adafruit_ST7789 tft = Adafruit_ST7789(TFT_CS, TFT_DC, TFT_RST);
11
12void setup() {
13  tft.init(240, 240);                // CS'siz modülde: tft.init(240, 240, SPI_MODE3) / without CS
14  tft.setRotation(0);
15  tft.fillScreen(ST77XX_BLACK);
16  tft.setTextColor(ST77XX_WHITE);
17  tft.setTextSize(3);
18  tft.setCursor(20, 20);
19  tft.print(F("BlueGrays"));
20  tft.setTextSize(2);
21  tft.setCursor(20, 70);
22  tft.print(F("A0 degeri:"));
23}
24
25void loop() {
26  int value = analogRead(A0);
27  tft.setTextColor(ST77XX_YELLOW, ST77XX_BLACK);   // arka plan rengi eski rakamı siler / background colour erases old digits
28  tft.setTextSize(5);
29  tft.setCursor(20, 110);
30  if (value < 1000) tft.print(' ');                 // basamak sayısı değişince boşluk / pad when digits shrink
31  if (value < 100)  tft.print(' ');
32  if (value < 10)   tft.print(' ');
33  tft.print(value);
34  delay(200);
35}
This sketch shows the Uno-friendly way to avoid flicker: when setTextColor(textColour, backgroundColour) is called with two colours, each character is drawn together with its own background and writes over the old digit. There's no need to clear the screen, and the number changes without flickering. Spaces are added in front so that leftovers of the old digits don't remain when the number gets shorter. If you'd like a similar display on a 2.4-inch touch panel, the ILI9341 TFT display guide follows the same logic.
ST7789 with the Raspberry Pi Pico (MicroPython)
MicroPython has no built-in ST7789 driver, but the chip's commands are simple enough to write your own small driver. The Pico's 264 KB of RAM is enough for a 115 KB frame buffer covering the whole 240x240 display. The code below initialises the display, draws text and shapes into the buffer with MicroPython's framebuf module and sends the buffer over SPI in one go; a moving square shows how to animate. The wiring uses the SPI0 bus: SCL to GP18 and SDA to GP19.
1from machine import Pin, SPI
2import framebuf
3import time
4
5W, H = 240, 240
6spi = SPI(0, baudrate=40_000_000, polarity=1, phase=1, sck=Pin(18), mosi=Pin(19))  # SPI mod 3 / SPI mode 3
7cs = Pin(17, Pin.OUT, value=1)           # CS'siz modülde boşta kalır / unused on modules without CS
8dc = Pin(20, Pin.OUT)
9rst = Pin(21, Pin.OUT, value=1)
10bl = Pin(22, Pin.OUT, value=1)           # arka ışık açık / backlight on
11
12def cmd(c, data=None):                   # komut + isteğe bağlı veri / command + optional data
13    cs(0)
14    dc(0)
15    spi.write(bytes([c]))
16    if data:
17        dc(1)
18        spi.write(data)
19    cs(1)
20
21def init():
22    rst(0); time.sleep_ms(50); rst(1); time.sleep_ms(150)
23    cmd(0x01); time.sleep_ms(150)        # SWRESET: yazılım reseti / software reset
24    cmd(0x11); time.sleep_ms(120)        # SLPOUT: uykudan çık / exit sleep
25    cmd(0x3A, b'\x55')                   # COLMOD: 16 bit RGB565
26    cmd(0x36, b'\x00')                   # MADCTL: yön, RGB sırası / orientation, RGB order
27    cmd(0x21)                            # INVON: IPS paneller için / for IPS panels
28    cmd(0x13)                            # NORON: normal mod / normal mode
29    cmd(0x29); time.sleep_ms(50)         # DISPON: ekranı aç / display on
30
31def show(buf):
32    cmd(0x2A, bytes([0, 0, 0, W - 1]))   # CASET: sütun 0-239 / columns 0-239
33    cmd(0x2B, bytes([0, 0, 0, H - 1]))   # RASET: satır 0-239 / rows 0-239
34    cmd(0x2C, buf)                       # RAMWR: tamponu gönder / send the buffer
35
36def rgb(r, g, b):                        # RGB565, bayt sırası ekrana göre çevrilmiş / byte-swapped for the panel
37    c = ((r & 0xF8) << 8) | ((g & 0xFC) << 3) | (b >> 3)
38    return ((c & 0xFF) << 8) | (c >> 8)
39
40init()
41buf = bytearray(W * H * 2)               # 115.200 bayt / 115,200 bytes
42fb = framebuf.FrameBuffer(buf, W, H, framebuf.RGB565)
43
44x, dx = 0, 4
45while True:
46    fb.fill(rgb(0, 0, 40))
47    fb.text("BlueGrays", 84, 20, rgb(255, 255, 255))
48    fb.text("Pico + ST7789", 68, 40, rgb(0, 200, 255))
49    fb.rect(20, 200, 200, 20, rgb(255, 255, 0))
50    fb.fill_rect(20 + x, 100, 40, 40, rgb(255, 60, 0))   # kayan kare / moving square
51    show(buf)                            # tüm kareyi tek seferde gönder / send the whole frame at once
52    x += dx
53    if x <= 0 or x >= 160:
54        dx = -dx
The rgb() function in the code solves an important detail: framebuf stores colours in memory low byte first, while the ST7789 expects the high byte first. If you don't swap the bytes, red looks blue and blue looks greenish. The 0x36 (MADCTL) command sets the display orientation and the RGB or BGR order; if you rotate the image by 180 degrees on a 240x240 panel, the image shifts to the lower part of the memory, so you need to add an 80-pixel offset to the row address. If you prefer the Arduino IDE, install the arduino-pico core on the Pico and use TFT_eSPI with its RP2040 settings. If you're new to MicroPython, start with the MicroPython basics guide.
Black screen and other problems: troubleshooting table
| Symptom | Likely cause | Fix |
|---|---|---|
| Screen completely black, no backlight | BLK not connected or LOW | Connect BLK to 3.3 V or the TFT_BL pin, with TFT_BACKLIGHT_ON set to HIGH |
| Backlight on but no image | User_Setup.h still set to ILI9341 or reset by an update | Check the ST7789_DRIVER line and the pins again |
| Backlight on, no image (module without CS) | Wrong SPI mode | Set TFT_CS to -1; with Adafruit use init(240, 240, SPI_MODE3) |
| Nothing happens at all | SCL and SDA wired to the I2C pins (21, 22) | Connect SCL to GPIO 18 and SDA to GPIO 23 |
| Works on and off | Reset pin floating, long wires or SPI too fast | Connect RES, shorten the wires, lower SPI_FREQUENCY to 27 MHz |
| Colours look like a negative | Colour inversion setting doesn't match the panel | Try TFT_INVERSION_OFF or TFT_INVERSION_ON |
| Red and blue swapped | The panel uses BGR order | Enable the TFT_RGB_ORDER TFT_BGR line |
| A noisy band on part of the screen | Wrong height (320 on a 240x240 panel) or rotation offset | Set TFT_HEIGHT correctly, test with setRotation |
| ESP32 crashes at tft.init() | Reported incompatibility with ESP32 core 3.x | Try a 2.0.x core from the Boards Manager or switch to the LovyanGFX library |
| Display gets hot or dies on the Uno | 5 V logic level | Use a level shifter |
ST7789 project ideas
- Smart desk clock: Show NTP time, the room temperature from a BME280 and today's weather from the internet on one screen.
- Sensor dashboard: Present temperature, humidity and gas readings on colourful gauges; turn the background red when the MQ-2 threshold is exceeded.
- Mini game console: Play snake, Pong or a space game with a joystick; sprites keep the game smooth.
- Music player interface: Show the song title, volume and a progress bar for a DFPlayer Mini.
- Oscilloscope-style graph: Draw analogRead values as a scrolling graph and watch the shape of the signal.
- Card reader display: Show the name and access status of a card read by an RFID RC522 on a colourful card.
Combined with an ESP32, the ST7789 turns a display costing a few dollars into a professional-looking interface. Once you set up User_Setup.h correctly and grasp the sprite idea, you can draw clocks, gauges, menus, games and any other interface without flicker. To compare which display suits your project, see the Arduino display types guide. In the BlueGrays app you'll find ESP32 weather, clock, colour mixer and parking sensor projects with OLED and LCD displays, with step-by-step circuit diagrams and code, and you can turn the same projects into colour versions with the ST7789.
Frequently asked questions
Is the ST7789 I2C or SPI?
The ST7789 uses SPI. The SCL and SDA labels on the module are misleading: SCL is the SPI clock line (SCK) and SDA is the data line (MOSI). On an ESP32 connect them to GPIO 18 and GPIO 23, not to the I2C pins 21 and 22.
Why does my ST7789 display stay black?
The most common causes are an unconnected backlight (BLK), User_Setup.h still selecting the ILI9341 driver, SCL and SDA wired to the I2C pins, and the wrong SPI mode on a module without CS. First make sure the backlight is on, then check the ST7789_DRIVER, TFT_WIDTH, TFT_HEIGHT and pin lines in User_Setup.h.
Does the ST7789 work with 5 V?
The ST7789 chip runs on 3.3 V and its pins aren't 5 V tolerant. The ESP32 and Pico can connect directly; with an Arduino Uno, power the module from 3.3 V and put a level shifter on the signal lines. Some modules have a regulator, but the data lines are still 3.3 V.
Where is the TFT_eSPI User_Setup.h file?
User_Setup.h is inside the TFT_eSPI folder in your Arduino libraries folder, usually Documents > Arduino > libraries > TFT_eSPI. The display driver, resolution, pins and SPI speed are defined in this file. It's reset when the library is updated, so keep a copy of your settings.
What is a sprite and why does it prevent flicker?
A sprite is an invisible drawing area held in the ESP32's RAM. You do all the drawing there first and send it to the screen in one go with pushSprite() when it's ready, so the in-between erased image never appears. The cost is memory: in 16-bit colour every pixel takes 2 bytes.
Can the ST7789 be used with an Arduino Uno?
Yes, with the Adafruit ST7789 and Adafruit GFX libraries, but drawing is slow because the Uno's 2 KB of RAM isn't enough for a sprite. Its pins are 5 V, so you need a level shifter in between. If you want a smooth colour interface, the ESP32 is a much better choice.
Projects to build after reading this
See all projects
ESP32 HTTPClient + Weather API (with SSD1306 OLED Display)
In this project the ESP32 makes a REST API call over the internet to a weather API (wttr.in) using HTTPClient.h. Unlike the I2C LCD version, it uses an SSD1306 OLED (128×64) display, with large text and vector icons for a richer look. Seven weather icons (sunny, rainy, snowy and more) are drawn on the fly, with no bitmap files.

ESP32 I2C LCD Display (16x2)
In this project we connect a 16x2 character LCD to the ESP32 over I2C and display text. With I2C, just 2 data pins (SDA and SCL) control the screen, instead of the 6+ pins a classic parallel connection wastes. The code prints a fixed message on the first line and a counter that goes up every second on the second. At startup an I2C scanner also prints the display's address to the Serial Monitor (usually 0x27 or 0x3F).

ESP32 TM1637 4-Digit 7-Segment Display
We are controlling a 4-digit 7-segment display module with a TM1637 driver using an ESP32. Using just 2 GPIO pins (CLK and DIO), we run a counter from 0 to 9999, adjust the brightness level, and display the colon (:) character in clock format. Thanks to the TM1637Display library, controlling numbers, hex values, segments, and strings is very easy.

ESP32 Deep Sleep — Battery Saving (OLED + RTC RAM Counter)
The ESP32's Deep Sleep mode shuts down the CPU and most peripherals, cutting current draw to about 10µA, which is vital for battery-powered IoT devices. This project uses three wake-up sources: a timer (15 s), an external pin (EXT0, the button on GPIO 33) and a touch pin (T0/GPIO 4). Counters marked with RTC_DATA_ATTR survive deep sleep.

ESP32 Prayer Rakat Counter (HC-SR04 + SSD1306 OLED + 2 Buttons)
Do you sometimes lose track of which rakat you are on during prayer? This project is a rakat counter that sits next to your prayer mat and counts your prostrations when you bring your hand close. The HC-SR04 ultrasonic distance sensor detects your hand, the SSD1306 OLED display shows the count, and two buttons let you choose 2, 3 or 4 rakats and reset. A 2.5-second debounce and a "hand-away" check make sure no prostration is counted twice.

ESP32 Color Mixer Light (3 Potentiometers + RGB LED + OLED)
A smart color-mixer lamp: turn 3 potentiometers on the ESP32 and mix any color you like! As you turn the red, green and blue potentiometers, the common-cathode RGB LED changes color instantly. The SSD1306 OLED display shows each channel's 0-255 value, fill bars and the HEX web color code (like #FF8040) live.

ESP32 Parking Sensor (HC-SR04 + 5-LED Bar + Buzzer + OLED)
The ESP32 version of a car parking sensor! The HC-SR04 ultrasonic sensor measures the distance to the object in front. As it gets closer, a 5-LED bar fills up (green → yellow → red) and the buzzer beeps faster. Very close (under 10 cm), a continuous alarm sounds and all LEDs light up. The SSD1306 OLED display shows the live distance in cm in large text, plus a status message.

Paddle Ball Game - SSD1306
A ball, two paddles and you: you play table tennis, one of the very first video games, on a small OLED screen.