
CCS811 Arduino Guide: eCO2 and TVOC Air Quality Sensor Tutorial
CCS811 Arduino guide: eCO2 and TVOC readings, I2C and the WAK pin, 20-minute warm-up and 48-hour burn-in, saving the baseline, BME280 compensation, ESP32.

In CCS811 Arduino projects, this small digital gas sensor with an I2C interface is used to measure indoor air quality. It detects volatile organic compounds (VOCs) in the room and gives two values: TVOC (total volatile organic compounds) in ppb and eCO2 (equivalent carbon dioxide) in ppm. The small processor inside manages the heater, runs the raw measurement through its own algorithm and hands you ready-made numbers. So unlike the analog MQ series, you can read meaningful values with a few lines of code without wrestling with calibration formulas.
In this guide we'll explain how the CCS811 works, why eCO2 isn't real CO2 and the most common stumbling block: the WAK pin. We'll take a first reading with an Arduino Uno, look at the 20-minute warm-up and the 48-hour initial burn-in, saving the baseline and temperature and humidity compensation with a BME280. Then we'll build an indoor air quality display with an OLED and LEDs on an ESP32, write library-free MicroPython code for the Raspberry Pi Pico and compare the CCS811 with the MQ-135.
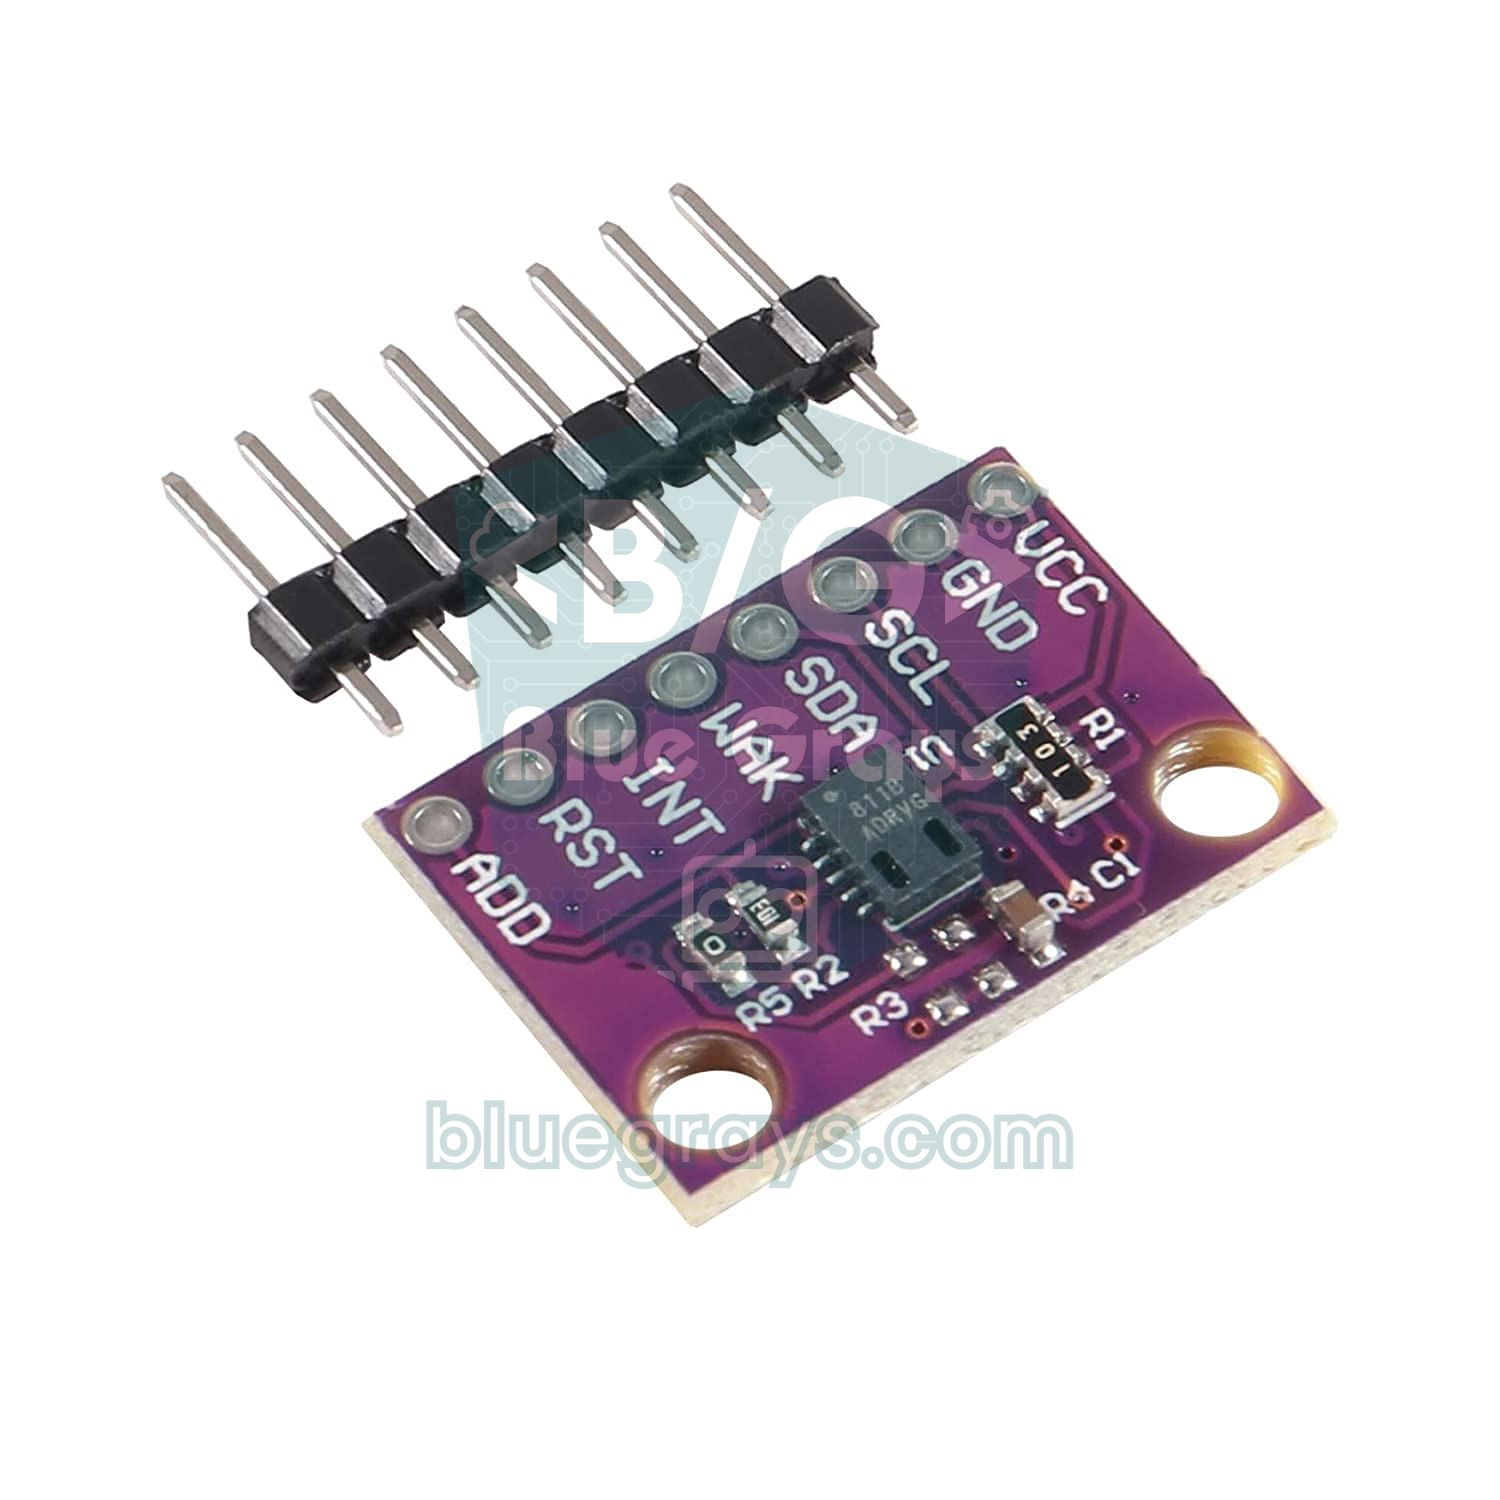
What is the CCS811 and how does it work?
The CCS811 is a metal oxide (MOX) gas sensor. Inside there's a tiny heater with a gas-sensitive layer on top. As alcohol, acetone, formaldehyde, perfume, cleaning products or the organic compounds in human breath increase in the air, the resistance of that layer changes. The microcontroller inside the sensor measures this resistance, corrects it with temperature and humidity information and calculates the result as TVOC. eCO2, on the other hand, is not measured but estimated: in a closed room people produce both CO2 and VOCs, and the algorithm estimates how much CO2 has probably risen from the VOC increase. The ranges are 400–8192 ppm for eCO2 and 0–1187 ppb for TVOC; the lowest value the sensor shows is 400 ppm, because that's the average CO2 level of outdoor air.
| Feature | Value |
|---|---|
| Sensor type | Metal oxide (MOX) with a built-in microcontroller |
| Outputs | eCO2 (400–8192 ppm), TVOC (0–1187 ppb), raw resistance data |
| Interface | I2C, address 0x5A (ADD to GND) or 0x5B (ADD to VCC) |
| Supply | 1.8–3.6 V (power the CJMCU-811 module from 3.3 V) |
| Current | About 30 mA in 1-second mode because of the heater, much less on average in 60-second mode |
| Measurement modes | Mode 1: 1 s, Mode 2: 10 s, Mode 3: 60 s, Mode 4: 250 ms (raw data only) |
| Warm-up | 20 minutes at every power-up |
| Initial burn-in | 48 hours for a new sensor |
CCS811 pinout and wiring
The most common CCS811 board is the CJMCU-811 module. It has eight pins, and four of them, VCC, GND, SDA and SCL, are wired like any I2C sensor. The pin that makes the difference is WAK (nWAKE). While this pin is low, the sensor listens on I2C; when it's high or floating, the sensor stays asleep and won't answer you. On the CJMCU-811 module WAK isn't tied to GND on the board, so you must connect it to GND yourself. The ADD pin selects the address: 0x5A when tied to GND, 0x5B when tied to VCC. INT gives an interrupt when new data is ready and RST is a hardware reset; you can leave both unconnected for your first test.
| CCS811 pin | Arduino Uno | ESP32 | Raspberry Pi Pico |
|---|---|---|---|
| VCC | 3.3V | 3V3 | 3V3 (OUT) |
| GND | GND | GND | GND |
| SDA | A4 | GPIO 21 | GP4 |
| SCL | A5 | GPIO 22 | GP5 |
| WAK | GND | GND | GND |
| ADD | GND (0x5A) | GND (0x5A) | GND (0x5A) |
| INT | Not connected (optionally D2) | Not connected | Not connected |
| RST | Not connected | Not connected | Not connected |
First reading with an Arduino Uno
- Open the Library Manager in the Arduino IDE, search for Adafruit CCS811 and install it with its dependencies.
- Wire the module according to the table above; don't forget to connect the WAK and ADD pins to GND.
- Upload the sketch below and open the Serial Monitor at 9600 baud.
- For the first few minutes eCO2 may sit around 400 and TVOC around 0; the values settle as the sensor warms up.
- Test it near a marker pen, hand sanitiser or your breath; you'll see TVOC and eCO2 rise within a few seconds.
1// CCS811 ile eCO2 ve TVOC okuma (Arduino Uno) / reading eCO2 and TVOC with CCS811
2// Bağlantı: VCC-3.3V, GND-GND, SDA-A4, SCL-A5, WAK-GND, ADD-GND (0x5A)
3#include <Wire.h>
4#include <Adafruit_CCS811.h>
5
6Adafruit_CCS811 ccs;
7
8void setup() {
9  Serial.begin(9600);
10  if (!ccs.begin(0x5A)) {                    // ADD GND'de ise 0x5A / 0x5A when ADD is low
11    Serial.println(F("CCS811 bulunamadi, WAK ve kablolari kontrol et"));
12    while (true) {}
13  }
14  ccs.setDriveMode(CCS811_DRIVE_MODE_1SEC);  // saniyede bir ölçüm / one reading per second
15  while (!ccs.available()) {}                // ilk veriyi bekle / wait for the first data
16}
17
18void loop() {
19  if (ccs.available()) {
20    if (ccs.readData() == 0) {               // 0 = başarılı / 0 = success
21      Serial.print(F("eCO2: "));
22      Serial.print(ccs.geteCO2());
23      Serial.print(F(" ppm  TVOC: "));
24      Serial.print(ccs.getTVOC());
25      Serial.println(F(" ppb"));
26    } else {
27      Serial.println(F("Okuma hatasi / read error"));
28    }
29  }
30  delay(1000);
31}| Function | Job |
|---|---|
| ccs.begin(0x5A) | Resets the sensor, checks its ID (0x81) and starts the application; returns false on failure |
| setDriveMode() | Chooses the measurement rate: 1SEC, 10SEC, 60SEC, 250MS or IDLE |
| available() | Returns true when a new measurement is ready |
| readData() | Reads the result; a return value of 0 means success |
| geteCO2() / getTVOC() | The last eCO2 (ppm) and TVOC (ppb) values read |
20-minute warm-up and 48-hour burn-in
A MOX sensor doesn't measure correctly until its layer reaches a certain temperature and becomes stable. The CCS811 has two separate periods that are often confused. The warm-up (run-in) is the roughly 20-minute period needed at every power-up; values read during this time aren't realistic, so it's right to show "warming up" on the display. The initial burn-in is the roughly 48-hour period a new sensor goes through once in its lifetime; during this time the layer settles chemically. Running a newly bought sensor for 48 hours without interruption before putting it into your project noticeably improves the stability of later readings.
| Period | When? | What to do |
|---|---|---|
| First 48 hours (burn-in) | Once in the sensor's lifetime | Run the sensor continuously, don't trust the values, don't save a baseline |
| 20 minutes at every power-up (run-in) | Every time power is applied | Show warming up on the display, restore the saved baseline at the end of this period |
| After changing mode | When switching to a slower mode | Wait for the first readings after the new mode starts |
What is the baseline and why save it?
The CCS811 keeps a reference value for clean air called the baseline. The algorithm adjusts this reference by itself over time, based on the cleanest air it has seen. The problem: every time the sensor loses power, the baseline resets and values can drift until the algorithm learns it again. The solution is to read the baseline with getBaseline() after the sensor has been running properly for a long time, write it to permanent memory, and restore it with setBaseline() after the 20-minute warm-up at the next power-up. The baseline is a two-byte number with no human-readable meaning; you just store it and give it back. The manufacturer recommends saving it every day during the first week after burn-in and every few weeks after that. On an Arduino you can write it to EEPROM, on an ESP32 to flash with Preferences. It's important that the sensor has seen clean air before you save; a few minutes of ventilation are enough.
Temperature and humidity compensation with a BME280
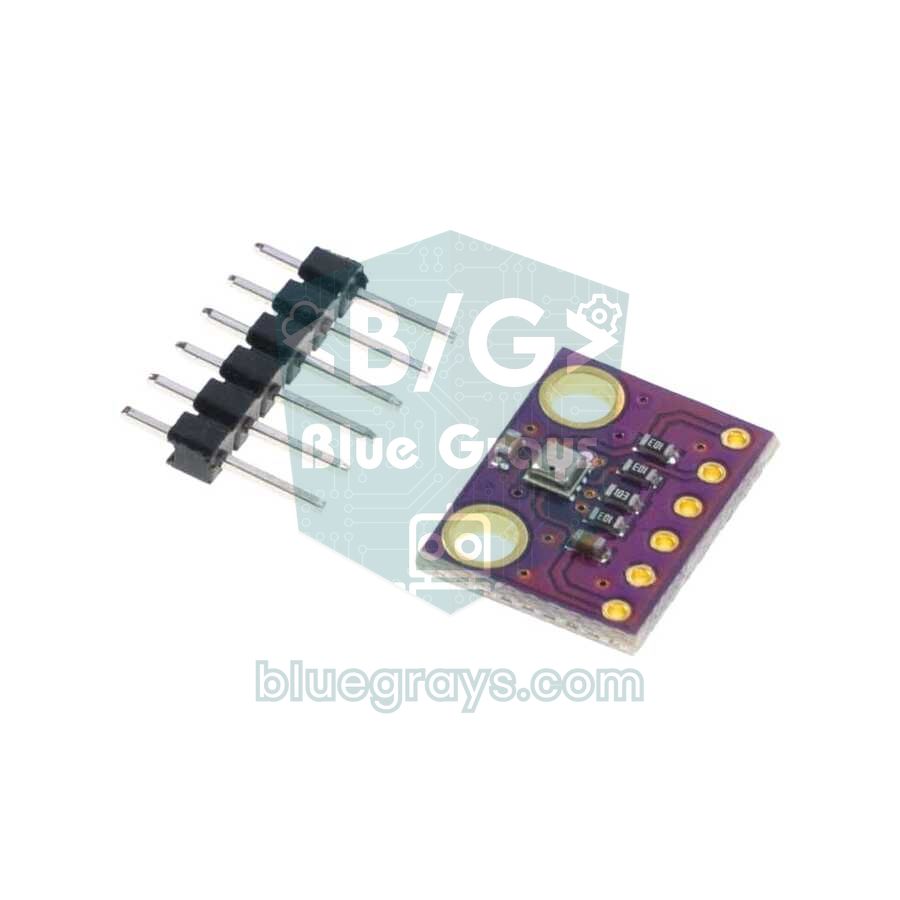
By default, the CCS811 algorithm assumes the room is at 25 °C and 50 percent humidity. As the real values move away from that, the TVOC and eCO2 calculations drift. If you tell the sensor the real values with setEnvironmentalData(humidity, temperature), the algorithm takes them into account. Watch the order: in the Adafruit library humidity comes first, then temperature. The sensor stores humidity in steps of 1/512 %RH and temperature in steps of 1/512 °C with a -25 °C offset; the library does this conversion for you. The best sensor for the job is the BME280 on the same I2C bus. If you've never used a BME280, take a look at the BME280 and BMP280 sensor article.
1// CCS811 + BME280: sıcaklık ve nem düzeltmesi / temperature and humidity compensation
2// İkisi de aynı I2C hattında: CCS811 0x5A, BME280 0x76 / both on the same I2C bus
3#include <Wire.h>
4#include <Adafruit_CCS811.h>
5#include <Adafruit_BME280.h>
6
7Adafruit_CCS811 ccs;
8Adafruit_BME280 bme;
9unsigned long sonBaseline = 0;
10
11void setup() {
12  Serial.begin(9600);
13  if (!ccs.begin(0x5A)) { Serial.println(F("CCS811 yok")); while (true) {} }
14  if (!bme.begin(0x76)) { Serial.println(F("BME280 yok (0x77 dene)")); while (true) {} }
15  ccs.setDriveMode(CCS811_DRIVE_MODE_1SEC);
16}
17
18void loop() {
19  float sicaklik = bme.readTemperature();    // °C
20  float nem = bme.readHumidity();            // %RH
21  ccs.setEnvironmentalData(nem, sicaklik);   // önce nem, sonra sıcaklık / humidity first
22
23  if (ccs.available() && ccs.readData() == 0) {
24    Serial.print(sicaklik, 1); Serial.print(F(" C  "));
25    Serial.print(nem, 0);      Serial.print(F(" %  eCO2: "));
26    Serial.print(ccs.geteCO2()); Serial.print(F(" ppm  TVOC: "));
27    Serial.print(ccs.getTVOC()); Serial.println(F(" ppb"));
28  }
29
30  if (millis() - sonBaseline > 60000UL) {    // dakikada bir baseline'ı göster / show baseline every minute
31    sonBaseline = millis();
32    Serial.print(F("Baseline: 0x"));
33    Serial.println(ccs.getBaseline(), HEX);
34  }
35  delay(2000);
36}Indoor air quality display with an ESP32
Now we put it all together: the ESP32 will read eCO2 and TVOC every two seconds, compensate with the BME280, show the results on a 0.96-inch OLED and use three LEDs to show the air condition by colour. During warm-up the display shows "Isiniyor" (warming up); after 20 minutes it restores the saved baseline, and once the board has run for 48 hours it saves the baseline to flash once a day. The four I2C devices share the same two wires; their addresses are different, so there are no conflicts.
| Part | ESP32 pin | Note |
|---|---|---|
| CCS811, BME280 and OLED SDA | GPIO 21 | All three modules on the same line |
| CCS811, BME280 and OLED SCL | GPIO 22 | All three modules on the same line |
| CCS811 WAK and ADD | GND | Address 0x5A |
| Green LED | GPIO 25 | With a 220 Ω resistor, eCO2 below 800 ppm |
| Yellow LED | GPIO 26 | With a 220 Ω resistor, 800–1199 ppm |
| Red LED | GPIO 27 | With a 220 Ω resistor, 1200 ppm and above |
| VCC of all modules | 3V3 | Grounds shared |
1// ESP32 iç mekân hava kalitesi göstergesi / ESP32 indoor air quality indicator
2// CCS811 + BME280 + SSD1306 OLED (I2C: SDA 21, SCL 22) + 3 LED (25, 26, 27)
3#include <Wire.h>
4#include <Preferences.h>
5#include <Adafruit_CCS811.h>
6#include <Adafruit_BME280.h>
7#include <Adafruit_GFX.h>
8#include <Adafruit_SSD1306.h>
9
10Adafruit_CCS811 ccs;
11Adafruit_BME280 bme;
12Adafruit_SSD1306 ekran(128, 64, &Wire, -1);
13Preferences ayarlar;                          // baseline kalıcı bellekte / baseline in flash
14
15const int YESIL = 25, SARI = 26, KIRMIZI = 27;
16const uint64_t ISINMA_SN = 20 * 60;           // 20 dakika ısınma / 20-minute warm-up
17const uint64_t ILK_KAYIT_SN = 48 * 3600;      // ilk kayıt 48 saat sonra / first save after 48 h
18const uint64_t KAYIT_ARALIK_SN = 24 * 3600;   // sonra günde bir / then once a day
19bool baselineYuklendi = false;
20uint64_t sonKayitSn = 0;
21
22uint64_t calismaSn() {
23  return esp_timer_get_time() / 1000000ULL;   // taşmayan çalışma süresi / non-overflowing uptime
24}
25
26void setup() {
27  Serial.begin(115200);
28  Wire.begin(21, 22);
29  pinMode(YESIL, OUTPUT);
30  pinMode(SARI, OUTPUT);
31  pinMode(KIRMIZI, OUTPUT);
32
33  if (!ccs.begin(0x5A)) { Serial.println("CCS811 yok"); while (true) delay(1000); }
34  if (!bme.begin(0x76)) { Serial.println("BME280 yok"); while (true) delay(1000); }
35  if (!ekran.begin(SSD1306_SWITCHCAPVCC, 0x3C)) { Serial.println("OLED yok"); }
36  ccs.setDriveMode(CCS811_DRIVE_MODE_1SEC);
37  ayarlar.begin("ccs811", false);
38}
39
40void loop() {
41  static unsigned long sonOkuma = 0;
42  if (millis() - sonOkuma < 2000) return;     // 2 saniyede bir / every 2 seconds
43  sonOkuma = millis();
44
45  float sicaklik = bme.readTemperature();
46  float nem = bme.readHumidity();
47  ccs.setEnvironmentalData(nem, sicaklik);
48  if (!ccs.available() || ccs.readData() != 0) return;
49
50  uint16_t eco2 = ccs.geteCO2();
51  uint16_t tvoc = ccs.getTVOC();
52  uint64_t sn = calismaSn();
53
54  // 20 dakika sonra kayıtlı baseline'ı geri yükle / restore the saved baseline after 20 min
55  if (!baselineYuklendi && sn > ISINMA_SN) {
56    uint16_t kayitli = ayarlar.getUShort("baseline", 0);
57    if (kayitli != 0) ccs.setBaseline(kayitli);
58    baselineYuklendi = true;
59  }
60  // 48 saatten sonra günde bir baseline'ı kaydet / save the baseline daily after 48 h
61  if (sn > ILK_KAYIT_SN && sn - sonKayitSn > KAYIT_ARALIK_SN) {
62    ayarlar.putUShort("baseline", ccs.getBaseline());
63    sonKayitSn = sn;
64  }
65
66  // LED: yeşil < 800, sarı 800-1199, kırmızı >= 1200 ppm / LED thresholds
67  digitalWrite(YESIL, eco2 < 800);
68  digitalWrite(SARI, eco2 >= 800 && eco2 < 1200);
69  digitalWrite(KIRMIZI, eco2 >= 1200);
70
71  ekran.clearDisplay();
72  ekran.setTextColor(SSD1306_WHITE);
73  ekran.setTextSize(1);
74  ekran.setCursor(0, 0);
75  ekran.print(sn < ISINMA_SN ? "Isiniyor..." : "Hava kalitesi");
76  ekran.setTextSize(2);
77  ekran.setCursor(0, 14);
78  ekran.print(eco2);
79  ekran.setTextSize(1);
80  ekran.print(" ppm eCO2");
81  ekran.setCursor(0, 36);
82  ekran.printf("TVOC: %u ppb", tvoc);
83  ekran.setCursor(0, 50);
84  ekran.printf("%.1f C  %.0f %%", sicaklik, nem);
85  ekran.display();
86
87  Serial.printf("eCO2 %u ppm  TVOC %u ppb  %.1f C  %.0f %%\n", eco2, tvoc, sicaklik, nem);
88}
In the code we measure uptime with esp_timer_get_time() instead of millis(); it returns microseconds as a 64-bit number, so there's no overflow in a display that runs for months. The baseline is written with the Preferences library to a namespace called "ccs811" and survives power cycles. When installing libraries, just install Adafruit CCS811, Adafruit BME280 and Adafruit SSD1306 with their dependencies. For OLED details, see the OLED display SSD1306 article.
| eCO2 (ppm) | TVOC (ppb) | Rating | What to do |
|---|---|---|---|
| 400–799 | 0–219 | Good | Nothing to do |
| 800–999 | 220–659 | Moderate | Ventilate when you can |
| 1000–1499 | 660–2199 | Poor | Open a window, find the VOC source |
| 1500 and above | 2200 and above | Very poor | Ventilate now, don't stay long |
The limits in the table are guideline values commonly used in indoor air quality displays; they're not legal limits, just a scale that points the way. Logging for a few days at home and watching how the values change in the morning, while cooking and after cleaning is the best way to tune the thresholds to your own environment.
CCS811 with the Raspberry Pi Pico (MicroPython)
On the Pico you can use the CCS811 with MicroPython without installing any library, by writing straight to its registers. The flow is the same as what the Adafruit library does: first read 0x81 from the ID register (0x20), do a software reset, start the application (0xF4) and select the measurement mode (0x01). Then, whenever the DATA_READY bit in the status register is 1, read four bytes from the result register (0x02). The code also includes a small function that writes humidity and temperature to the environment register (0x05). If you're new to MicroPython, take a look at the MicroPython basics article first.
1# Raspberry Pi Pico MicroPython: kütüphanesiz CCS811 / CCS811 without a library
2# Bağlantı: SDA GP4, SCL GP5, VCC 3V3, WAK GND, ADD GND (0x5A)
3from machine import I2C, Pin
4import time
5
6i2c = I2C(0, scl=Pin(5), sda=Pin(4), freq=100000)
7ADR = 0x5A
8
9def oku(reg, n):
10    return i2c.readfrom_mem(ADR, reg, n)
11
12if oku(0x20, 1)[0] != 0x81:                              # HW_ID 0x81 olmalı / must be 0x81
13    raise OSError("CCS811 bulunamadi")
14i2c.writeto(ADR, bytes([0xFF, 0x11, 0xE5, 0x72, 0x8A]))  # yazılım reseti / software reset
15time.sleep_ms(100)
16if not oku(0x00, 1)[0] & 0x10:                           # APP_VALID biti / APP_VALID bit
17    raise OSError("Uygulama gecersiz")
18i2c.writeto(ADR, bytes([0xF4]))                          # APP_START
19time.sleep_ms(100)
20i2c.writeto_mem(ADR, 0x01, bytes([0x10]))                # MEAS_MODE: mod 1, saniyede bir
21
22def ortam(nem, sicaklik):
23    # Nem 1/512 %RH, sıcaklık 1/512 °C ve -25 °C kaydırmalı / ENV_DATA format
24    h = int(nem * 512 + 0.5)
25    t = int((sicaklik + 25) * 512 + 0.5)
26    i2c.writeto_mem(ADR, 0x05, bytes([h >> 8, h & 0xFF, t >> 8, t & 0xFF]))
27
28ortam(45.0, 23.5)   # BME280 varsa gerçek değerlerle güncelle / use real BME280 values if you have one
29
30while True:
31    durum = oku(0x00, 1)[0]
32    if durum & 0x01:                                     # ERROR biti / ERROR bit
33        print("hata kodu:", oku(0xE0, 1)[0])
34    elif durum & 0x08:                                   # DATA_READY biti / DATA_READY bit
35        d = oku(0x02, 4)
36        eco2 = (d[0] << 8) | d[1]
37        tvoc = (d[2] << 8) | d[3]
38        print("eCO2:", eco2, "ppm  TVOC:", tvoc, "ppb")
39    time.sleep(1)
CCS811 vs MQ-135
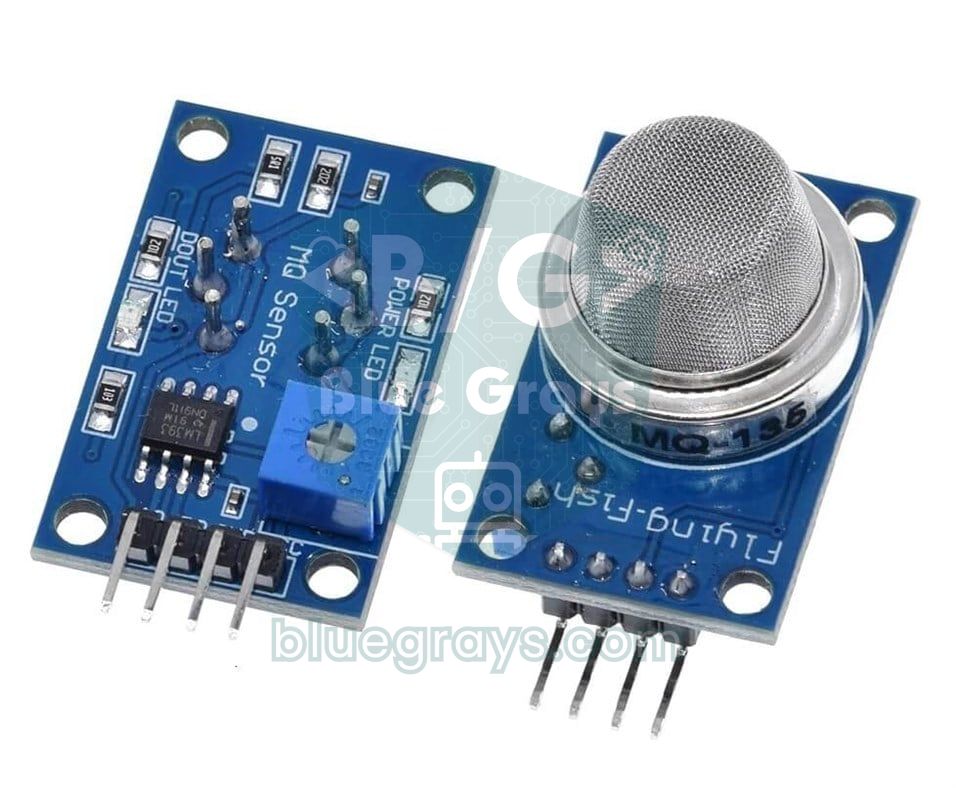
Both sensors are sold as "air quality sensors", but they work very differently. The MQ-135 is an analog sensor: its heater, powered from 5 V, draws about 150 mA, its output is a voltage and you have to do your own calibration to calculate ppm. The CCS811 is digital, uses little power and gives ready-made eCO2 and TVOC values. You'll find detailed calibration steps in the MQ135 air quality sensor article.
| Feature | CCS811 | MQ-135 |
|---|---|---|
| Output | Digital I2C: eCO2 and TVOC | Analog voltage (and a digital pin for a threshold) |
| Supply | 3.3 V | 5 V |
| Current | About 30 mA (1 s mode), much less in slow modes | About 150 mA |
| Calibration | Built-in algorithm and baseline | Manual, R0 measured in clean air |
| Warm-up | 20 min, 48 hours on first use | A few minutes, 24–48 hours on first use |
| Battery use | Suitable (60 s mode) | Not suitable |
| Price | More expensive | Cheaper |
Common mistakes and fixes
| Symptom | Likely cause | Fix |
|---|---|---|
| begin() returns false | WAK pin floating or wrong address | Connect WAK to GND, check 0x5A or 0x5B with an I2C scanner |
| eCO2 always 400, TVOC always 0 | Still warming up, or the air really is clean | Wait 20 minutes, test by breathing on the sensor |
| Values slowly drift | The baseline resets at every power-up | Save the baseline and restore it after 20 minutes |
| eCO2 in the thousands with nobody around | A VOC source such as perfume, alcohol or paint | Remember eCO2 is estimated from VOCs, remove the source |
| readData() returns an error | Loose wire, long I2C line or low supply | Shorten the wires, measure the 3.3 V supply, read the error with checkError() |
| Temperature higher than real | BME280 next to the heater | Move the BME280 away from the CCS811, or apply a fixed temperature correction on a combined module |
Project ideas
- Classroom or office ventilation alert: a red LED and a short buzzer beep when eCO2 passes 1000 ppm.
- Kitchen VOC monitor: track the TVOC rise while cooking and switch the extractor hood on automatically with a relay.
- Cloud logging: write the readings to Google Sheets with an ESP32 and plot daily and weekly charts.
- Smart home integration: send the values to Home Assistant over MQTT and set up an open-window alert or ventilation automation.
- Battery-powered portable meter: a device you carry from room to room, with the 60-second measurement mode and a small OLED display.
When it's wired correctly and the warm-up and baseline rules are followed, the CCS811 is a practical sensor that reliably shows changes in indoor air. In the BlueGrays app you'll find projects such as a gas sensor, a flame and gas alarm, temperature and humidity with the DHT11 and DHT22 and an ESP32 weather display with an OLED, each with a step-by-step circuit diagram and code; build the CCS811 display from this guide on top of them.
Frequently asked questions
What does the CCS811 sensor measure?
The CCS811 is a metal oxide sensor that measures volatile organic compounds (VOCs) in the air. It reports TVOC in ppb and eCO2 in ppm. eCO2 is an equivalent carbon dioxide value estimated from the VOC reading.
Does the CCS811 measure real CO2?
No. The eCO2 from the CCS811 is estimated from the VOC increase and doesn't measure real CO2 directly. For real CO2 you need an NDIR sensor such as the MH-Z19, SCD30 or SCD40.
Where does the CCS811 WAK pin connect?
The WAK (nWAKE) pin must be connected to GND. While it's low, the sensor answers over I2C; if it's left floating or high, the sensor stays asleep and the Arduino can't find it. On CJMCU-811 modules you have to make this connection yourself.
How long does the CCS811 take to warm up?
The CCS811 needs about 20 minutes of warm-up at every power-up. A new sensor should also go through an initial burn-in of about 48 hours once in its lifetime. Values read during these periods aren't reliable.
What is the CCS811 baseline?
The baseline is the reference value the sensor keeps for clean air. It resets when power is lost, so after a long run it should be read with getBaseline() and saved, then restored with setBaseline() after the 20-minute warm-up at the next power-up.
Does the CCS811 work with an Arduino at 5V?
The CCS811 chip works with at most 3.6 V and most CJMCU-811 modules have no regulator. Power the module from the Arduino's 3.3V pin. For permanent use with the Uno's 5 V I2C lines, a logic level converter is recommended.
Projects to build after reading this
See all projects
Temperature and Humidity with DHT11
How warm is your room, and is the air humid or dry? The DHT11 sensor measures temperature and humidity, and the Arduino writes the values on a two-line LCD screen, refreshing every couple of seconds.
Using a Gas Sensor
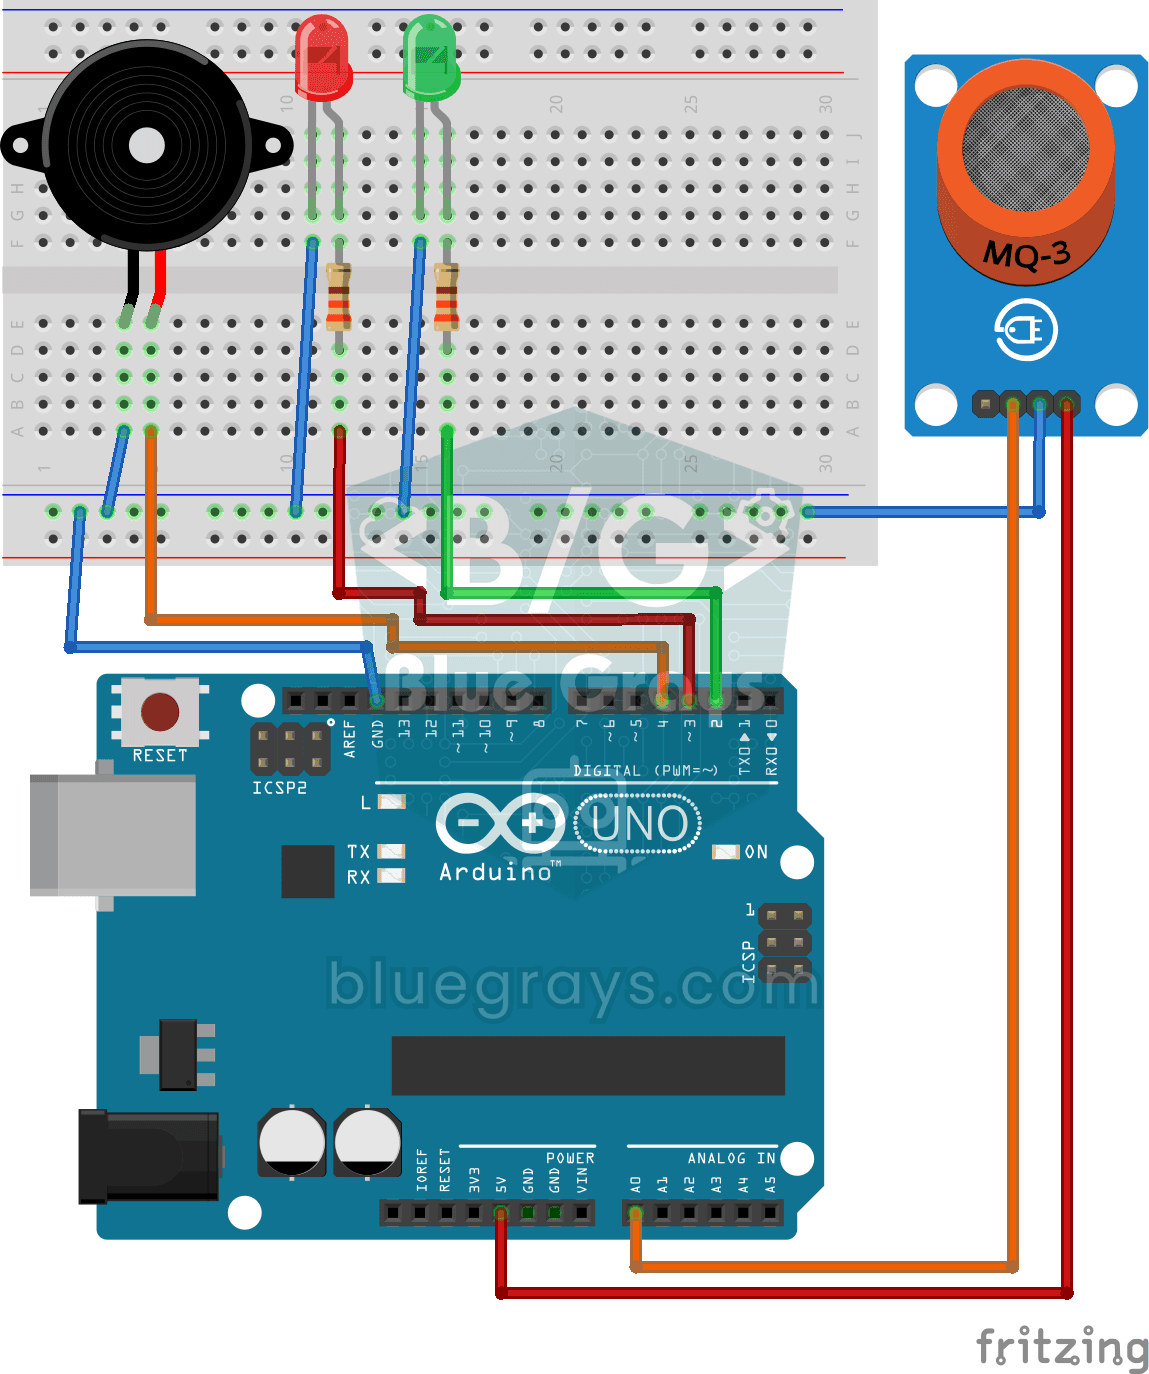
A little guard that notices a gas leak in the kitchen before you do. The gas sensor keeps sniffing the air; while everything is fine the green LED stays on, and when the gas in the air passes a…
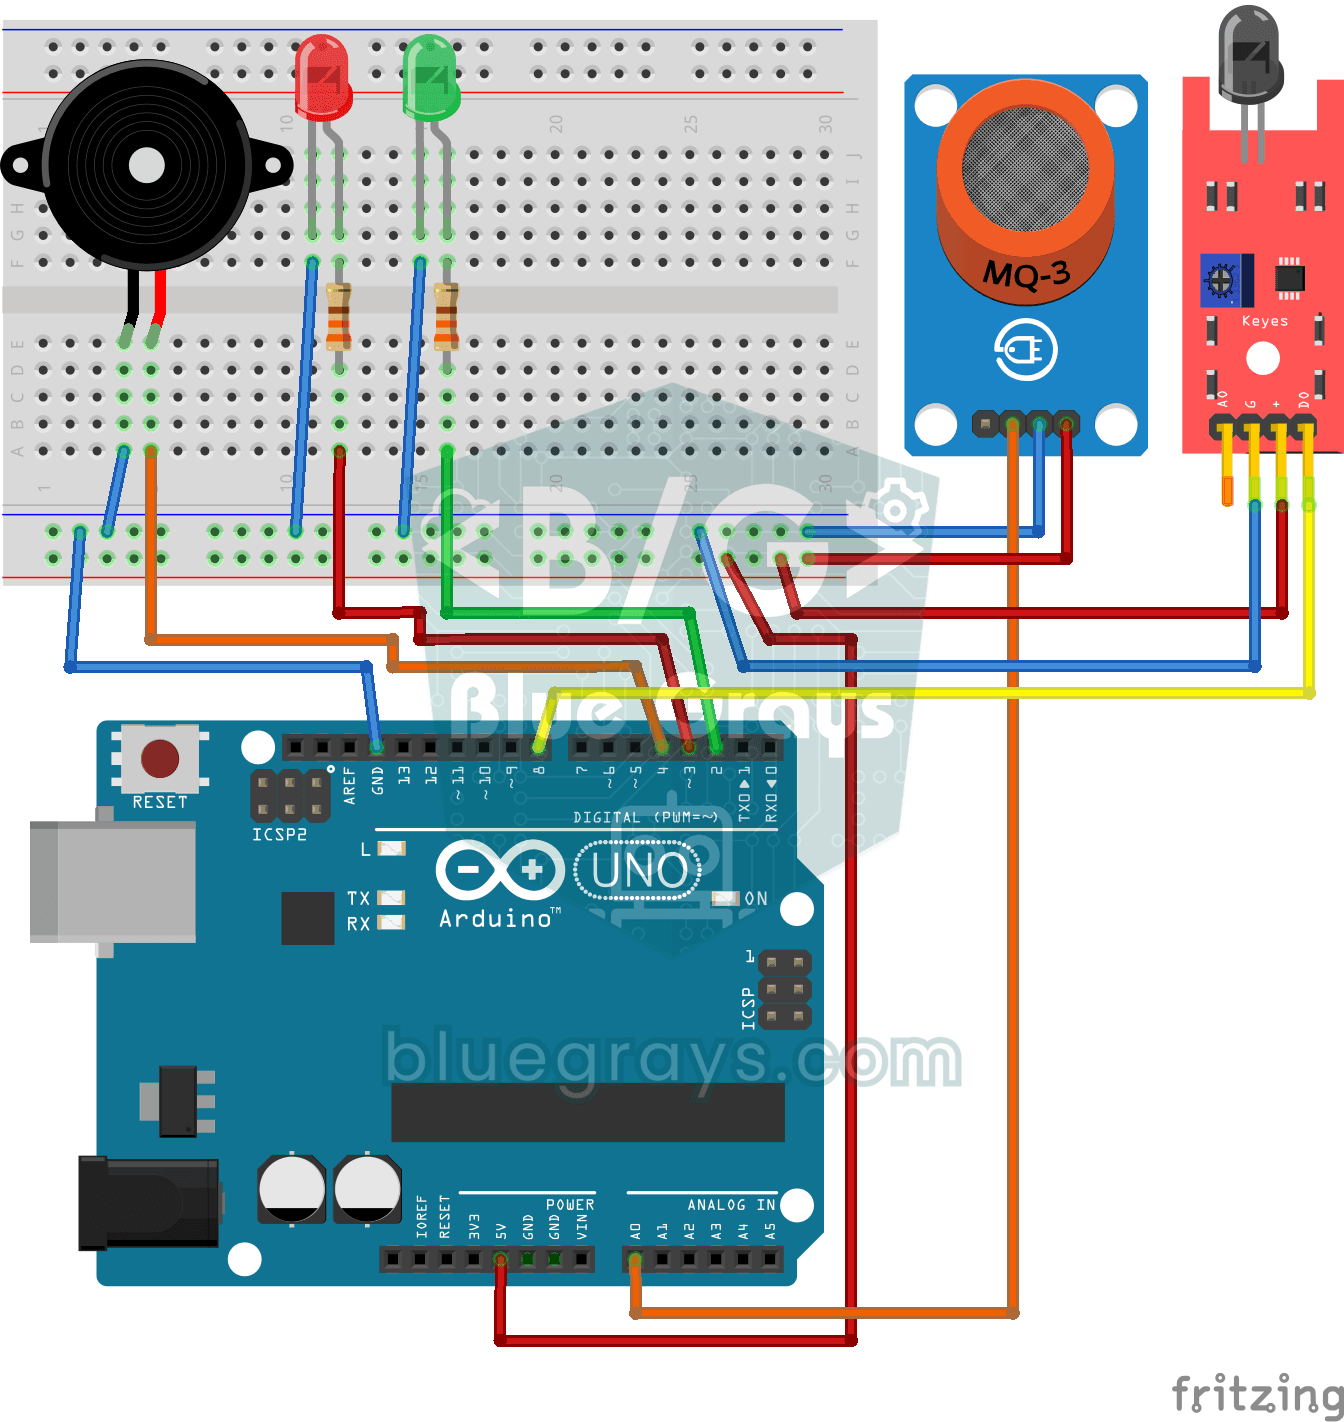
Flame and Gas Sensor Alarm
A little guard that warns you right away when gas leaks or a flame appears somewhere.

ESP32 DHT22 Temperature and Humidity (with LCD Display)
This project measures ambient temperature and humidity using a DHT22 sensor and displays the data in real time on a 16x2 I2C LCD. Data is read from the sensor using the one-wire protocol via the Adafruit DHT library. This project serves as the foundation for IoT weather stations, smart home automation, or environmental monitoring systems in greenhouses. Communication with the DHT22 is established via the ESP32's GPIO 4 pin.

ESP32 MQ-2 Gas/Smoke Detector Alarm
In this project, combustible gas (LPG, methane, propane) and smoke detection is performed using an MQ-2 gas sensor module, and a siren-like alarm is played through a passive buzzer upon detection. The sensor's digital threshold output (DO) is connected to GPIO 4 on the ESP32; when gas or smoke exceeds the threshold, DO goes LOW and the alarm is triggered. Sensitivity is adjusted via the module's potentiometer. The passive buzzer is driven using tone() to produce a two-frequency siren effect.

ESP32 HTTPClient + Weather API (with SSD1306 OLED Display)
In this project the ESP32 makes a REST API call over the internet to a weather API (wttr.in) using HTTPClient.h. Unlike the I2C LCD version, it uses an SSD1306 OLED (128×64) display, with large text and vector icons for a richer look. Seven weather icons (sunny, rainy, snowy and more) are drawn on the fly, with no bitmap files.

ESP32 Temperature Data Logger (DHT22 + DS1307 RTC + microSD + OLED)
Build a timed temperature and humidity logger with the ESP32! A DHT22 sensor reads temperature and humidity once a minute, and each reading is saved to a microSD card in CSV format with a real-time stamp from the DS1307 RTC module. The OLED display shows the latest temperature, humidity, timestamp and total number of records live, in large text.

ESP32 I2C LCD Display (16x2)
In this project we connect a 16x2 character LCD to the ESP32 over I2C and display text. With I2C, just 2 data pins (SDA and SCL) control the screen, instead of the 6+ pins a classic parallel connection wastes. The code prints a fixed message on the first line and a counter that goes up every second on the second. At startup an I2C scanner also prints the display's address to the Serial Monitor (usually 0x27 or 0x3F).