
ESP32 Alexa and Google Home Control: Espalexa vs Sinric Pro
Control an ESP32 or ESP8266 with Alexa and Google Home: local devices with Espalexa, cloud with Sinric Pro, relay wiring, discovery fixes and a comparison.

An ESP32 Alexa setup is the quickest way to control a lamp, fan or outlet you built yourself by saying "Alexa, turn on the light". There are two practical ways to connect an ESP32 or ESP8266 to Alexa and Google Home: the Espalexa library makes the board look like a Philips Hue bulb on your local network, while the Sinric Pro cloud service links it to Alexa and Google Home at the same time. Both take only a few lines of code, but they work in completely different ways behind the scenes.
In this guide you will first see how the two methods differ and when to choose each one. Then you will build an Espalexa project with a relay module and a dimmable LED strip, learn what to check when Alexa cannot find your device, and control the same relay from Google Home with Sinric Pro. The sketches compile unchanged on both the ESP32 and the ESP8266 (NodeMCU, Wemos D1 Mini).

How does an ESP32 talk to Alexa and Google Home?
Espalexa makes the ESP32 appear on your local network as a Philips Hue bridge. When your Echo gets the "discover devices" command, it sends an SSDP multicast message to the network; the ESP32 replies "I am a Hue bulb" and the Echo adds it to its list. From then on commands do not go through the internet but straight to the ESP32 over port 80 on your home network. This is fast and needs no account, but it only works with Alexa and only when an Echo device sits on the same network. Google Home does not support this local Hue emulation, so you have to reach it through the cloud: with Sinric Pro the ESP32 keeps a permanent WebSocket connection to the internet, you link your Sinric Pro account in the Alexa or Google app, and the voice command travels from the cloud to the board.
| Method | Alexa | Google Home | Internet | Effort | Note |
|---|---|---|---|---|---|
| Espalexa | Yes (local) | No | Not needed | Easy | Requires an Echo on the same network |
| FauxmoESP | Yes (local) | No | Not needed | Easy | Similar to Espalexa, needs Async libraries |
| Sinric Pro | Yes (skill) | Yes | Required | Easy | Needs an account and device ID; device count depends on the plan |
| Home Assistant + ESPHome | Yes | Yes | Usually for voice assistants | Medium | Runs the whole home from one hub |
| Matter (ESP32 core 3.x) | Yes | Yes | Not needed | Advanced | Needs a Matter-capable hub or speaker |
Parts list and wiring
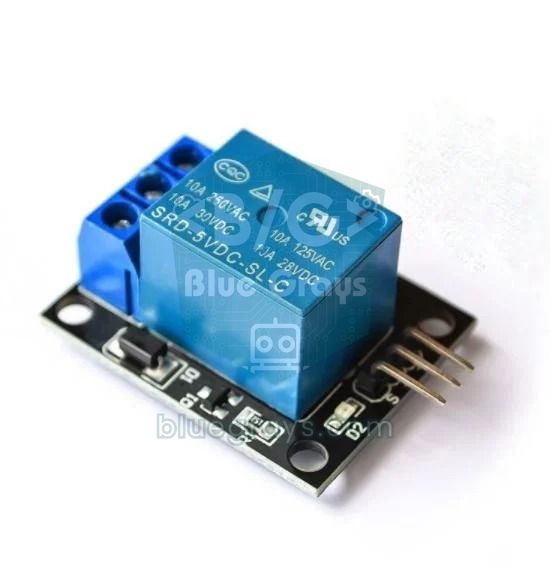
The examples use an ESP32 or ESP8266 board, a single-channel relay module and, optionally, a 12 V LED strip driven through a MOSFET. For the LED strip pick a logic-level MOSFET such as the IRLZ44N, add a 220 Ω series resistor on the gate and a 10 kΩ pull-down resistor between gate and GND; the details are in the MOSFET guide.
| Connection | ESP32 | ESP8266 (NodeMCU / Wemos D1 Mini) |
|---|---|---|
| Relay module VCC | VIN (5 V) | VIN or 5V |
| Relay module GND | GND | GND |
| Relay module IN | GPIO 26 | D1 (GPIO 5) |
| LED strip MOSFET gate | GPIO 25 | D2 (GPIO 4) |
| Button (Sinric Pro example) | GPIO 0 (BOOT) | D3 (GPIO 0, FLASH) |
Method 1: a local Alexa device with Espalexa
- Install the Espalexa library (Christian Schwinne) from the Library Manager.
- Enter your Wi-Fi name and password; the ESP32 and ESP8266 only connect to 2.4 GHz networks.
- Keep the device names short and easy to say, and make sure no other device in your Alexa app already uses the same name.
- Upload the sketch, read the board's IP address in the Serial Monitor and say "Alexa, discover devices", or open the Alexa app and go to Devices > + > Add Device > Other > Discover Devices.
- The devices show up in the Alexa app as Philips Hue-type lights; add them to rooms and groups if you like.
1#ifdef ESP8266
2  #include <ESP8266WiFi.h>
3#else
4  #include <WiFi.h>
5#endif
6#include <Espalexa.h>
7
8const char* WIFI_SSID = "WIFI_ADI";        // 2,4 GHz ağın adı / your 2.4 GHz network name
9const char* WIFI_PASS = "WIFI_SIFRESI";
10
11#ifdef ESP8266
12const int RELAY_PIN = 5;                   // D1
13const int LED_PIN = 4;                     // D2 (MOSFET üzerinden LED şerit / LED strip via MOSFET)
14#else
15const int RELAY_PIN = 26;
16const int LED_PIN = 25;
17#endif
18const int RELAY_ON = LOW;                  // çoğu röle modülü LOW ile çeker / most relay modules switch on LOW
19
20Espalexa espalexa;
21
22void setLed(uint8_t value) {               // 0-255 parlaklık / brightness
23#if defined(ESP8266)
24  analogWrite(LED_PIN, value);
25#elif ESP_ARDUINO_VERSION_MAJOR >= 3
26  ledcWrite(LED_PIN, value);
27#else
28  ledcWrite(0, value);
29#endif
30}
31
32// Aç-kapa cihaz: röle / on-off device: relay
33void onLight(EspalexaDevice* d) {
34  bool on = d->getState();
35  digitalWrite(RELAY_PIN, on ? RELAY_ON : !RELAY_ON);
36  Serial.printf("Light: %s\n", on ? "ON" : "OFF");
37}
38
39// Kısılabilir cihaz: 0 = kapalı, 1-255 = parlaklık / dimmable device: 0 = off, 1-255 = brightness
40void onStrip(uint8_t brightness) {
41  setLed(brightness);
42  Serial.printf("Strip: %d%%\n", brightness * 100 / 255);
43}
44
45void setup() {
46  Serial.begin(115200);
47  pinMode(RELAY_PIN, OUTPUT);
48  digitalWrite(RELAY_PIN, !RELAY_ON);      // başlangıçta kapalı / off at start
49#if defined(ESP8266)
50  pinMode(LED_PIN, OUTPUT);
51#elif ESP_ARDUINO_VERSION_MAJOR >= 3
52  ledcAttach(LED_PIN, 5000, 8);            // 5 kHz, 8 bit
53#else
54  ledcSetup(0, 5000, 8);
55  ledcAttachPin(LED_PIN, 0);
56#endif
57  setLed(0);
58
59  WiFi.mode(WIFI_STA);
60  WiFi.begin(WIFI_SSID, WIFI_PASS);
61  while (WiFi.status() != WL_CONNECTED) {
62    delay(500);
63    Serial.print(".");
64  }
65  Serial.println(WiFi.localIP());
66
67  // Alexa'daki adlar: kendi dilinde yaz (Lampe, Lamba...) / names in Alexa: use your own language
68  espalexa.addDevice("Light", onLight, EspalexaDeviceType::onoff);
69  espalexa.addDevice("LED Strip", onStrip, 0);
70  espalexa.begin();                        // 80. portta web sunucusu açar / starts a web server on port 80
71}
72
73void loop() {
74  espalexa.loop();                         // Alexa isteklerini dinle / handle Alexa requests
75  delay(1);
76}
The sketch defines two different devices. Light uses EspalexaDeviceType::onoff, can only be switched on and off and drives the relay; its callback receives an EspalexaDevice pointer and reads the state with getState(). LED Strip is dimmable: the 0–255 brightness value from Alexa goes straight to the PWM output, and 0 means off. The PWM part contains a switch for ESP32 core 2.x and 3.x: on 3.x you use ledcAttach(pin, frequency, resolution) and ledcWrite(pin, value), on 2.x ledcSetup and ledcAttachPin. The most important rule is in loop(): espalexa.loop() has to run very often; long delay() calls make Alexa report "device is not responding".
| Command | Example | Espalexa | Sinric Pro (Switch) |
|---|---|---|---|
| Turn on | Alexa, turn on the light / Hey Google, turn on the light | Yes | Yes |
| Turn off | Alexa, turn off the LED strip / Hey Google, turn off the light | Yes | Yes |
| Brightness | Alexa, set the LED strip to 40 percent | Yes (dimmable type) | With the Dimmable Switch type |
| Color | Alexa, set the light to blue | Yes (color type) | With the Light type |
| Routine and group | Alexa, good night | Yes, through routines in the app | Yes |
Alexa cannot find the device: Espalexa troubleshooting
- No Echo device: The Alexa app on your phone cannot discover local devices on its own; an Echo on the network does the search.
- Different networks: The ESP32 and the Echo must be on the same router and subnet. Guest networks, client (AP) isolation or a separate IoT network block multicast messages.
- Router settings: Some routers and mesh systems filter SSDP and UPnP traffic. Keep the ESP32 close to the router during discovery and leave multicast (IGMP) enabled.
- Port 80 in use: If another web server in the same sketch uses port 80, Espalexa will not work. Hand your server to Espalexa with espalexa.begin(&server) or merge the two.
- Renamed device: If you changed a device name in the code, delete the old devices in the Alexa app and run discovery again.
- Too many devices: The default limit is 10 devices. For more, write #define ESPALEXA_MAXDEVICES 20 before including Espalexa.h.
Method 2: Alexa and Google Home with Sinric Pro
- Create an account on the Sinric Pro website and add a device of type Switch under Devices > Add Device; name it the way you will say it.
- Copy the APP KEY and APP SECRET from the Credentials page and the Device ID from the device list into the sketch.
- Install the SinricPro library from the Library Manager; the required WebSockets and ArduinoJson libraries come along.
- In the Alexa app, enable the Sinric Pro skill under Skills & Games, link your account and let it discover devices.
- In the Google Home app, go to + > Set up device > Works with Google, search for Sinric Pro and sign in with the same account.
1#ifdef ESP8266
2  #include <ESP8266WiFi.h>
3#else
4  #include <WiFi.h>
5#endif
6#include <SinricPro.h>
7#include <SinricProSwitch.h>
8
9#define WIFI_SSID  "WIFI_ADI"
10#define WIFI_PASS  "WIFI_SIFRESI"
11#define APP_KEY    "APP_KEY_BURAYA"       // Sinric Pro > Credentials
12#define APP_SECRET "APP_SECRET_BURAYA"
13#define SWITCH_ID  "CIHAZ_ID_BURAYA"      // Sinric Pro > Devices
14
15#ifdef ESP8266
16const int RELAY_PIN = 5;                  // D1
17const int BUTTON_PIN = 0;                 // D3 (FLASH düğmesi / FLASH button)
18#else
19const int RELAY_PIN = 26;
20const int BUTTON_PIN = 0;                 // BOOT düğmesi / BOOT button
21#endif
22const int RELAY_ON = LOW;
23
24bool relayState = false;
25unsigned long lastPress = 0;
26
27void setRelay(bool on) {
28  relayState = on;
29  digitalWrite(RELAY_PIN, on ? RELAY_ON : !RELAY_ON);
30}
31
32// Alexa ya da Google Home'dan gelen komut / command from Alexa or Google Home
33bool onPowerState(const String& deviceId, bool& state) {
34  setRelay(state);
35  Serial.printf("Cloud: %s\n", state ? "ON" : "OFF");
36  return true;                            // komut uygulandı / command executed
37}
38
39void setup() {
40  Serial.begin(115200);
41  pinMode(RELAY_PIN, OUTPUT);
42  setRelay(false);
43  pinMode(BUTTON_PIN, INPUT_PULLUP);
44
45  WiFi.mode(WIFI_STA);
46  WiFi.begin(WIFI_SSID, WIFI_PASS);
47  while (WiFi.status() != WL_CONNECTED) {
48    delay(500);
49    Serial.print(".");
50  }
51
52  SinricProSwitch& mySwitch = SinricPro[SWITCH_ID];
53  mySwitch.onPowerState(onPowerState);
54  SinricPro.onConnected([]() { Serial.println("Sinric Pro: connected"); });
55  SinricPro.begin(APP_KEY, APP_SECRET);
56}
57
58void loop() {
59  SinricPro.handle();                     // bulut bağlantısını canlı tut / keep the cloud link alive
60
61  // Fiziksel düğme: röleyi değiştir, durumu uygulamalara bildir / physical button: toggle and report
62  if (digitalRead(BUTTON_PIN) == LOW && millis() - lastPress > 500) {
63    lastPress = millis();
64    setRelay(!relayState);
65    SinricProSwitch& mySwitch = SinricPro[SWITCH_ID];
66    mySwitch.sendPowerStateEvent(relayState);
67  }
68}
onPowerState runs whenever Alexa or Google Home sends an on/off command; returning true tells the cloud the command was carried out, while false makes the assistant say the device is not responding. The BOOT button on the board acts as a physical switch here: it toggles the relay and sends the new state to the cloud with sendPowerStateEvent, so the phone apps always show the real state. The half-second wait debounces the button and keeps the sketch from sending more than one event per second to the cloud. Because commands travel over the internet, the delay is usually between half a second and one second.
Using an ESP8266 (NodeMCU, Wemos D1 Mini)
Thanks to the #ifdef ESP8266 lines at the top, both sketches also compile for the ESP8266; only the Wi-Fi library and the pin numbers change. On the ESP8266, D1 (GPIO 5) and D2 (GPIO 4) are the safest pins for a relay. D3 (GPIO 0), D4 (GPIO 2) and D8 (GPIO 15) must sit at specific levels at boot, so a relay on them can stop the board from starting or click briefly at power-up. The ESP8266 generates PWM in software; since core 3.x analogWrite() uses a 0–255 range by default, so you can use Espalexa's brightness value directly. For board details see the ESP8266 NodeMCU guide.
Project ideas: lamp, smart plug, fan and LED strip
- Smart plug: Put the relay in a closed enclosure and add voice control to the ESP32 smart plug project.
- Silent switching: If the click bothers you, use a solid state relay (SSR) instead of a mechanical one.
- Colored light: Combine Espalexa's color type with a WS2812B strip and change colors with "Alexa, set the light to red".
- Ready-made firmware: For LED strips without writing code, install WLED, which already includes Espalexa.
- Compact power: Get 5 V straight from mains with an HLK-PM01 so the project fits inside a wall box.
- Fan and heater: Pair the relay with a temperature sensor and run the fan both automatically and by voice.
Common problems and fixes
| Symptom | Likely cause | Fix |
|---|---|---|
| Alexa cannot find the device | ESP on a guest network or no Echo on the network | Same 2.4 GHz network and subnet; run discovery through an Echo |
| "Device is not responding" | Long delay in loop() or Wi-Fi dropout | Remove delays, use millis(), reconnect Wi-Fi |
| Relay never turns off | 5 V module ignores the 3.3 V signal or LOW/HIGH logic is reversed | Change RELAY_ON; use a 3.3 V trigger module or a transistor |
| Relay clicks at power-up | Relay on a boot strapping pin | Use a safe pin such as GPIO 26 on the ESP32 or D1 on the ESP8266 |
| Sinric Pro does not connect | Wrong APP KEY, APP SECRET or Device ID | Copy the values from the portal again and check the Serial Monitor |
| Google Home does not show the device | Account not linked | Link Sinric Pro under Works with Google and sync devices |
| "std::variant" compile error | Sinric Pro 4.x or later with ESP32 core 2.x | Update the core to 3.x or install library version 3.5.0 |
Getting an ESP32 to talk to Alexa and Google Home is the first step into the smart home, and all it takes is a relay and a few lines of code: Espalexa is local and fast, while Sinric Pro gives you a flexible route to both assistants. In the BlueGrays app you will find ESP32 projects for Wi-Fi connection, web server, mDNS and over-the-air updates with step-by-step circuit diagrams and code, ready for you to add voice control on top.
Frequently asked questions
Does ESP32 Alexa control work without an Echo device?
Not with Espalexa, because local devices are discovered by an Echo speaker on the network; the phone app alone is not enough. Without an Echo, use a cloud service such as Sinric Pro, and commands will also work from the Alexa app on your phone.
Why can't Alexa discover my ESP32?
Most often the ESP32 and the Echo are on different networks, for example a guest network or a 5 GHz band the ESP32 cannot use. Also check whether another web server is holding port 80 and whether long delay calls are blocking loop(). After renaming a device, delete the old entries in the app and discover again.
Does Espalexa work with Google Home?
No. Espalexa imitates Alexa's local Philips Hue support, and Google Home does not use that method. For Google Home you need a route such as Sinric Pro, Home Assistant or Matter.
Espalexa vs FauxmoESP: which one should I use?
Both register the ESP as a local device with Alexa. Espalexa supports dimmable and color lights and runs on the standard web server, while FauxmoESP needs asynchronous libraries such as AsyncTCP. If you are just starting out, Espalexa is easier to set up.
What do I need to use Sinric Pro with an ESP32?
A Sinric Pro account, the ID of the device you created and your account's APP KEY and APP SECRET. The board has to stay online, because commands arrive through the cloud. Plans and device limits can change over time, so check the current terms when you sign up.
Is it safe to switch a mains lamp with an ESP32 and Alexa?
A relay module can do it technically, but mains voltage is life-threatening. Build it in a fused, insulated and closed enclosure, and ask an electrician if you are not sure. Always test with a low-voltage load first.
Projects to build after reading this
See all projects
LED Blink with ESP32
Teaches basic GPIO output usage with ESP32. We achieve a blinking effect by turning an LED on and off from a digital pin. ESP32 version of the classic blink project on Arduino UNO; the basic blink commands in the Arduino environment are the same, but the ESP32's pin layout and 3.3 V GPIO levels differ from those of the Arduino UNO.

ESP32 Built-in LED Blink
Blinking the built-in blue LED on the ESP32 DevKit V1. No external components required! The first project you should try when you buy an ESP32. GPIO 2 is connected to the built-in LED.

ESP32 Wi-Fi STA Connection (with LCD Screen)
In this project, we connect the ESP32 to the home Wi-Fi network in Station (STA) mode in a secure, fault-tolerant manner. We store the SSID and password in a separate secrets.h file to prevent leaking to Git, set up an auto-reconnect mechanism, and display the RSSI signal level and IP address on an I2C LCD screen. The internal LED works as a status indicator. It is a production-grade connection manager.

ESP32 Asynchronous Web Server (with IP Display on LCD)
In this project, we’re turning the ESP32 into an asynchronous web server that you can control from your phone or computer on the same Wi-Fi network. Thanks to the ESPAsyncWebServer library, the server can process multiple requests simultaneously (unlike the classic WebServer.h, which blocks on a single request). You’ll be able to open the ESP32’s IP address in a browser and click the ON/OFF buttons (the /on and /off routes) to turn the LED connected to GPIO 5 on and off.

ESP32 mDNS: Accessing the Device via bluegrays-esp.local (with LCD Screen)
In this project we add an mDNS (Multicast DNS) service to the ESP32, so you reach it by a readable host name like bluegrays-esp.local instead of an IP address. Even if the IP assigned by DHCP changes, the device always answers to the same name. A small web server on the board lets you control the LED from your browser at http://bluegrays-esp.local/.

ESP32 OTA Update — Wireless Firmware Installation (With LCD Screen)
In this project you'll learn to upload new firmware to the ESP32 over Wi-Fi, without a USB cable. With the ArduinoOTA library the ESP32 becomes visible on the network and shows up automatically as bluegrays-ota under "Network port" in the Arduino IDE. The first upload goes over USB; after that every update is wireless, a key feature for devices out in the field.

ESP32 Smart Lighting (PIR + LDR + Relay + OLED)
With an ESP32, a PIR motion sensor, an LDR light sensor and a relay module, we turn your hallway, bathroom or pantry into smart lighting. If the room is already bright, the light stays off even when there is motion, so it never wastes energy during the day. The light stays on for 30 seconds, and the time extends automatically while motion continues.

ESP32 WS2812B NeoPixel Strip Control
WS2812B (NeoPixel) addressable LEDs are smart RGB LEDs that can be chained and controlled from a single data pin. In this project we drive an 8-LED WS2812B strip with the Adafruit_NeoPixel library and create a smooth rainbow animation. The ESP32's 3.3V logic works with most WS2812B batches; if it gets unstable, we show the fix with a 470Ω series resistor and a 1000µF capacitor. The animation shifts the hue in HSV color space.