
ESP32 WiFiManager: Set Up Wi-Fi from Your Phone (Captive Portal)
ESP32 WiFiManager lets you enter the Wi-Fi password from your phone: captive portal, custom parameters like MQTT, a reset button, softAP and AP+STA web control.

ESP32 WiFiManager is a library that lets you connect your ESP32 to a network from your phone without writing the Wi-Fi name and password into the code. If the board cannot connect to a saved network, it opens its own Wi-Fi network; when you join it with your phone a settings page pops up, you pick your network from the list, type the password, and the ESP32 stores these details in its permanent memory and connects. That means you can use the same firmware at home, at school or at a friend's place without re-uploading it. Smart plugs and commercial IoT devices that you set up from your phone the first time work in exactly this way.
In this guide you will first learn the ESP32's Wi-Fi modes: station (STA), access point (AP) and AP+STA, where both run together. Then we will install the WiFiManager library, write a first sketch without a password, add a button that erases the settings or reopens the portal, and collect custom parameters such as an MQTT server, port and device name on the same page and store them permanently. In the last sections the ESP32 will build its own network with softAP, without any router, so you can control an LED from your phone; we will try AP+STA mode and set up an access point on the Raspberry Pi Pico W with MicroPython.

What is ESP32 WiFiManager and how does it work?
In a normal ESP32 sketch the network name and password are hardcoded in the WiFi.begin("HomeNet", "password") line. When you change your router, update the password or take the device to another home, you have to open the code and upload it again. WiFiManager moves this job to a web page. At startup it checks whether a network is saved in the ESP32's permanent memory (NVS) and, if so, tries to connect to it. If the connection succeeds, your code carries on without showing anything. If there is no saved network or the connection fails, the ESP32 opens its own access point, starts a DNS server and serves a settings page at 192.168.4.1. Because the DNS server answers every domain the phone asks for with this address, the phone opens the "sign in to network" window by itself as soon as it joins. It is the same idea as the login pages in hotels and cafés, and it is called a captive portal. When you choose your network on the page and save the password, the ESP32 connects to the new network, closes the access point and keeps the details for the next boot. All of this is built on the Wi-Fi modes the ESP32 supports:
| Mode | What it does | When to use it |
|---|---|---|
| WIFI_STA (station) | Joins a router as a client and gets an IP from it | Projects that go online and are reachable from every device on the home network |
| WIFI_AP (access point) | Broadcasts its own network and hands out 192.168.4.x addresses to clients | Places without a router, setup pages, phone control in the field |
| WIFI_AP_STA | Does both at once, with two separate IP addresses | WiFiManager portal, staying on the home network while a service network is open |
| WIFI_OFF | Switches the radio off completely | Saving battery, moments when Wi-Fi is not needed |
Installing the WiFiManager library
- Make sure the ESP32 board package is installed in the Arduino IDE. If it is not, follow the steps in What Is the ESP32?.
- Open Tools > Manage Libraries and type WiFiManager into the search box.
- Find the WiFiManager library whose author is tzapu and install the latest version (2.0.17 or newer).
- Select your board under Tools > Board (ESP32 Dev Module for most DevKits) and set the port.
- The library needs no extra packages: WebServer, DNSServer and Preferences already come with the ESP32 core.
First example: connecting to Wi-Fi without a password in the code
The sketch below is the simplest way to use WiFiManager. There is no network name or password in the code. If the board cannot connect to the saved network within 20 seconds, it opens a network called BlueGrays-Kurulum. The portal password is set to kurulum123; you could also open the portal without a password, but then anyone nearby could enter network details into your device. If the portal is not used for 180 seconds, the board restarts and tries the saved network again. This detail matters: if the router boots more slowly than the ESP32 after a power cut, the board does not get stuck in the portal and returns to your network on its own within a few minutes.
1#include <WiFi.h>
2#include <WiFiManager.h>   // tzapu WiFiManager
3
4void setup() {
5  Serial.begin(115200);
6  WiFi.mode(WIFI_STA);                    // önce istasyon modu / start in station mode
7
8  WiFiManager wm;
9  // wm.resetSettings();                  // test için kayıtlı ağı sil / erase saved network for testing
10  wm.setConnectTimeout(20);               // kayıtlı ağa 20 sn dene / try the saved network for 20 s
11  wm.setConfigPortalTimeout(180);         // portal 180 sn sonra kapanır / portal closes after 180 s
12
13  // Bağlanamazsa "BlueGrays-Kurulum" ağını açar / opens "BlueGrays-Kurulum" if it cannot connect
14  bool baglandi = wm.autoConnect("BlueGrays-Kurulum", "kurulum123");
15
16  if (!baglandi) {
17    Serial.println("Baglanamadi, yeniden baslatiliyor / Not connected, restarting");
18    delay(1000);
19    ESP.restart();                        // kayıtlı ağı yeniden dene / try the saved network again
20  }
21
22  Serial.print("Baglandi / Connected, IP: ");
23  Serial.println(WiFi.localIP());
24}
25
26void loop() {
27  // projenin asıl kodu buraya / your project code goes here
28}
After uploading, open the Serial Monitor at 115200 baud. Because the board is running for the first time, it has no saved network, and you will see in WiFiManager's lines starting with *wm: that the access point has been opened. Now take your phone and follow these steps:
- Find the BlueGrays-Kurulum network in your phone's Wi-Fi list and join it with the password kurulum123.
- Within a few seconds the sign-in page opens by itself. If it does not, type 192.168.4.1 into the browser.
- Tap Configure WiFi. The networks the ESP32 can see are listed together with their signal strength.
- Select your network, type its password and press Save.
- The ESP32 joins the new network, closes the access point and prints the IP address it got to the Serial Monitor. Your phone returns to its own network as well.
- Reset the board: this time the portal does not open, and the ESP32 connects to the saved network by itself within a few seconds.
The Info section of the portal shows the board's MAC address, chip details and memory status; Exit closes the portal without saving. These are the main WiFiManager functions you will use in this article:
| Function | What it does |
|---|---|
| autoConnect(name, password) | Tries the saved network; if that fails it opens the portal. Returns true once connected |
| startConfigPortal(name, password) | Opens the portal immediately without checking the saved network |
| setConfigPortalTimeout(s) | Closes the portal and returns false if it is unused for this many seconds |
| setConnectTimeout(s) | How long to try connecting to the saved network |
| resetSettings() | Erases the saved Wi-Fi name and password |
| addParameter(¶meter) | Adds a custom input field to the portal page |
| setSaveParamsCallback(function) | Calls your function when the custom parameters are saved |
| setConfigPortalBlocking(false) and process() | Keeps loop() running while the portal is open |
| setHostname("name") | Sets the board's name on the network, shown in the router's device list |
Reset button and on-demand portal
Once the device is closed in its case, you may need to change the Wi-Fi details. The easiest way to do that without uploading new code is a button. In the example below we use the BOOT button found on ESP32 DevKit boards; it is connected to GPIO 0 and, because there is a pull-up resistor on the board, it reads LOW when pressed. A short press opens the portal without erasing the saved network, so you can enter a new network or just change your custom settings. Holding it for 3 seconds erases the saved network completely and restarts the board. If you prefer a separate button, wire one to a free pin such as GPIO 4; the details are in How to wire a button. The onboard LED on GPIO 2 shows the connection status.
1#include <WiFi.h>
2#include <WiFiManager.h>
3
4const int BUTON_PIN = 0;       // DevKit üzerindeki BOOT butonu / BOOT button on the DevKit
5const int LED_PIN   = 2;       // dahili LED / onboard LED
6const char* PORTAL_ADI   = "BlueGrays-Kurulum";
7const char* PORTAL_SIFRE = "kurulum123";
8
9WiFiManager wm;
10
11void setup() {
12  Serial.begin(115200);
13  pinMode(BUTON_PIN, INPUT_PULLUP);
14  pinMode(LED_PIN, OUTPUT);
15  WiFi.mode(WIFI_STA);
16  wm.setConfigPortalTimeout(180);
17  if (!wm.autoConnect(PORTAL_ADI, PORTAL_SIFRE)) {
18    Serial.println("Agsiz devam / Continuing offline");   // butonla tekrar denenebilir / retry with the button
19  }
20}
21
22void butonuKontrolEt() {
23  if (digitalRead(BUTON_PIN) != LOW) return;
24  delay(50);                                    // ark önleme / debounce
25  if (digitalRead(BUTON_PIN) != LOW) return;
26
27  unsigned long basilma = millis();
28  while (digitalRead(BUTON_PIN) == LOW && millis() - basilma < 3000) {
29    delay(10);                                  // bırakılmasını ya da 3 sn'yi bekle / wait for release or 3 s
30  }
31
32  if (millis() - basilma >= 3000) {
33    Serial.println("Wi-Fi ayarlari siliniyor / Erasing Wi-Fi settings");
34    digitalWrite(LED_PIN, HIGH);
35    wm.resetSettings();                         // kayıtlı ağı sil / erase the saved network
36    delay(500);
37    ESP.restart();
38  } else {
39    Serial.println("Portal aciliyor / Opening portal");
40    if (wm.startConfigPortal(PORTAL_ADI, PORTAL_SIFRE)) {
41      Serial.print("Yeni IP / New IP: ");
42      Serial.println(WiFi.localIP());
43    } else {
44      Serial.println("Portal zaman asimi / Portal timeout");
45    }
46  }
47}
48
49void loop() {
50  butonuKontrolEt();
51  // bağlıyken LED yanar / LED is on while connected
52  digitalWrite(LED_PIN, WiFi.status() == WL_CONNECTED ? HIGH : LOW);
53}Custom parameters: MQTT server, port and device name
One of WiFiManager's most useful features is that you can add your own input fields to the portal page. If you are connecting a sensor board to Home Assistant over MQTT, you do not want to hardcode the server address, port number and device name either. For that you create WiFiManagerParameter objects and add them to the portal with addParameter(). There is just one thing to watch: WiFiManager stores the Wi-Fi name and password itself, but it does not store custom parameters. Saving the values the user types is your job. We will use the Preferences library that ships with the ESP32 core; Preferences writes key-value pairs to the NVS partition in flash, and they survive power cuts. If you are curious about the Arduino equivalent, see the Arduino EEPROM article.
1#include <WiFi.h>
2#include <WiFiManager.h>
3#include <Preferences.h>
4
5Preferences ayarlar;                              // NVS'te kalıcı ayarlar / persistent settings in NVS
6char mqttSunucu[40] = "192.168.1.10";            // varsayılan değerler / default values
7char mqttPort[6]    = "1883";
8char cihazAdi[24]   = "bluegrays-sensor";
9
10WiFiManager wm;
11// id, etiket, varsayılan değer, en fazla uzunluk / id, label, default value, max length
12WiFiManagerParameter pSunucu("sunucu", "MQTT sunucusu / server", mqttSunucu, 40);
13WiFiManagerParameter pPort("port", "MQTT port", mqttPort, 6);
14WiFiManagerParameter pAd("ad", "Cihaz adi / Device name", cihazAdi, 24);
15
16void ayarlariOku() {
17  ayarlar.begin("bluegrays", true);               // salt okunur aç / open read-only
18  if (ayarlar.isKey("sunucu")) {
19    ayarlar.getString("sunucu", mqttSunucu, sizeof(mqttSunucu));
20    ayarlar.getString("port", mqttPort, sizeof(mqttPort));
21    ayarlar.getString("ad", cihazAdi, sizeof(cihazAdi));
22  }
23  ayarlar.end();
24}
25
26// Portalda Kaydet'e basılınca çağrılır / called when Save is pressed in the portal
27void parametreleriKaydet() {
28  strlcpy(mqttSunucu, pSunucu.getValue(), sizeof(mqttSunucu));
29  strlcpy(mqttPort, pPort.getValue(), sizeof(mqttPort));
30  strlcpy(cihazAdi, pAd.getValue(), sizeof(cihazAdi));
31
32  ayarlar.begin("bluegrays", false);              // yazma için aç / open for writing
33  ayarlar.putString("sunucu", mqttSunucu);
34  ayarlar.putString("port", mqttPort);
35  ayarlar.putString("ad", cihazAdi);
36  ayarlar.end();
37  Serial.println("Parametreler kaydedildi / Parameters saved");
38}
39
40void setup() {
41  Serial.begin(115200);
42  WiFi.mode(WIFI_STA);
43  ayarlariOku();
44
45  // Kayıtlı değerleri form kutularına yaz / put saved values into the form fields
46  pSunucu.setValue(mqttSunucu, 40);
47  pPort.setValue(mqttPort, 6);
48  pAd.setValue(cihazAdi, 24);
49
50  wm.addParameter(&pSunucu);
51  wm.addParameter(&pPort);
52  wm.addParameter(&pAd);
53  wm.setSaveParamsCallback(parametreleriKaydet);
54  wm.setHostname(cihazAdi);                       // modemde görünen ad / name shown in the router
55  wm.setConfigPortalTimeout(180);
56
57  if (!wm.autoConnect("BlueGrays-Kurulum", "kurulum123")) {
58    ESP.restart();
59  }
60
61  uint16_t port = atoi(mqttPort);                 // metni sayıya çevir / convert text to a number
62  Serial.printf("IP: %s\n", WiFi.localIP().toString().c_str());
63  Serial.printf("MQTT: %s:%u, cihaz / device: %s\n", mqttSunucu, port, cihazAdi);
64}
65
66void loop() {
67  // MQTT bağlantısı burada mqttSunucu ve port ile kurulur / connect to MQTT here with mqttSunucu and port
68}
When you open the Configure WiFi page in the portal, you will see three new fields below the network list. They come pre-filled with the values saved in NVS, or with the defaults from the code if nothing is saved yet. When you press Save, WiFiManager first calls your parametreleriKaydet() function and then connects to Wi-Fi. Here is a summary of the parameters and functions:
| Item | Purpose | Note |
|---|---|---|
| WiFiManagerParameter(id, label, default, length) | Adds an input field to the portal | The id must be unique, with no spaces or special characters |
| getValue() | Returns the text the user typed | It is always text; use atoi() or atof() for numbers |
| setValue(value, length) | Fills in the field | Used to show the saved value in the form |
| setSaveParamsCallback() | Calls your function at the moment of saving | Do the NVS writing here |
| setParamsPage(true) | Moves the parameters to a separate Setup page | For updating settings only, without changing Wi-Fi |
Watch the length value: the array size and the parameter length should match, otherwise a long entry could overflow memory or get cut off. That is why the sketch copies the values with strlcpy(); this function never goes past the size of the target array. It is also a good habit to check that numeric values such as the port number are in a sensible range before using them.
The ESP32's own network: web control from your phone with softAP
WiFiManager's portal is really a ready-made use of the ESP32's access point feature, and you can use that feature yourself. When WiFi.softAP() is called, the ESP32 behaves like a router: it broadcasts its own network, gives the phone that joins an address such as 192.168.4.2 and sits at 192.168.4.1 itself. It is ideal for phone control in a garden with no router, at a school science fair or at a robot competition. The function takes the network name, password, channel, a hidden-network option and the maximum number of connections. The password must be at least 8 characters; if you pass a shorter one, softAP() returns false and the network never comes up. The default maximum number of connections is 4, and on the ESP32 it can be raised to 10. The sketch below serves a web page that switches the LED on GPIO 2 on and off from your phone:
1#include <WiFi.h>
2#include <WebServer.h>
3
4const char* AP_ADI   = "BlueGrays-LED";
5const char* AP_SIFRE = "bluegrays1";      // en az 8 karakter / at least 8 characters
6const int LED_PIN    = 2;
7
8WebServer sunucu(80);
9bool ledAcik = false;
10
11void anaSayfa() {
12  String html = "<!DOCTYPE html><html><head><meta charset='utf-8'>"
13                "<meta name='viewport' content='width=device-width,initial-scale=1'>"
14                "<title>ESP32 LED</title></head><body style='font-family:sans-serif;text-align:center'>"
15                "<h2>ESP32 softAP</h2><p>LED: <b>";
16  html += ledAcik ? "ACIK / ON" : "KAPALI / OFF";
17  html += "</b></p><p><a href='/ac'><button style='font-size:24px'>AC / ON</button></a> "
18          "<a href='/kapat'><button style='font-size:24px'>KAPAT / OFF</button></a></p>";
19  html += "<p>Bagli cihaz / Clients: " + String(WiFi.softAPgetStationNum()) + "</p></body></html>";
20  sunucu.send(200, "text/html", html);
21}
22
23void yonlendir() {                         // ana sayfaya geri dön / go back to the home page
24  sunucu.sendHeader("Location", "/");
25  sunucu.send(303);
26}
27
28void setup() {
29  Serial.begin(115200);
30  pinMode(LED_PIN, OUTPUT);
31
32  WiFi.mode(WIFI_AP);
33  // ad, şifre, kanal, gizli değil, en fazla 4 cihaz / ssid, password, channel, not hidden, max 4 clients
34  if (!WiFi.softAP(AP_ADI, AP_SIFRE, 6, 0, 4)) {
35    Serial.println("softAP acilamadi / softAP failed");
36    return;
37  }
38  Serial.print("Ag / Network: ");
39  Serial.println(AP_ADI);
40  Serial.print("Adres / Address: http://");
41  Serial.println(WiFi.softAPIP());         // genellikle 192.168.4.1 / usually 192.168.4.1
42
43  sunucu.on("/", anaSayfa);
44  sunucu.on("/ac", []() { ledAcik = true;  digitalWrite(LED_PIN, HIGH); yonlendir(); });
45  sunucu.on("/kapat", []() { ledAcik = false; digitalWrite(LED_PIN, LOW); yonlendir(); });
46  sunucu.begin();
47}
48
49void loop() {
50  sunucu.handleClient();                   // gelen istekleri işle / handle incoming requests
51}
Upload the code, join the BlueGrays-LED network with your phone and open 192.168.4.1 in the browser. The LED turns on and off as you press the buttons, and the page shows how many devices are connected. There is no captive portal here, so you have to type the address yourself. If the page does not load, remember that the phone may have switched to mobile data because there is no internet. If you want a control panel that updates instantly without reloading the page, you can use the method from the ESP32 web server and WebSocket article on the same softAP network.
AP+STA together: broadcasting your own network while on the home network
In WIFI_AP_STA mode the ESP32 joins the router and broadcasts its own network at the same time. The board then has two separate IP addresses: WiFi.localIP() gives the address on the home network and WiFi.softAPIP() gives 192.168.4.1 on its own network. The WiFiManager portal also runs in this mode, so it can scan for networks while serving a page to your phone. In your own projects you might choose AP+STA to leave a service network you can always join from your phone, even when the router is off, or to use ESP-NOW and Wi-Fi together. The sketch below serves the same page on both interfaces:
1#include <WiFi.h>
2#include <WebServer.h>
3
4const char* WIFI_ADI   = "EvAgi_2G";       // ev ağı / home network
5const char* WIFI_SIFRE = "sifre1234";
6const char* AP_ADI     = "BlueGrays-Servis";
7const char* AP_SIFRE   = "servis1234";
8
9WebServer sunucu(80);
10
11void anaSayfa() {
12  String html = "<h2>ESP32 AP+STA</h2>";
13  html += "<p>Ev agi / Home IP: " + WiFi.localIP().toString() + "</p>";
14  html += "<p>Kendi agi / Own AP IP: " + WiFi.softAPIP().toString() + "</p>";
15  html += "<p>Kanal / Channel: " + String(WiFi.channel()) + ", RSSI: " + String(WiFi.RSSI()) + " dBm</p>";
16  sunucu.send(200, "text/html", html);
17}
18
19void setup() {
20  Serial.begin(115200);
21  WiFi.mode(WIFI_AP_STA);                  // iki mod birlikte / both modes together
22  WiFi.softAP(AP_ADI, AP_SIFRE);           // servis ağı her zaman açık / service network always on
23  WiFi.begin(WIFI_ADI, WIFI_SIFRE);
24
25  unsigned long baslangic = millis();
26  while (WiFi.status() != WL_CONNECTED && millis() - baslangic < 15000) {
27    delay(500);
28    Serial.print('.');
29  }
30  Serial.println();
31  Serial.print("STA IP: ");
32  Serial.println(WiFi.localIP());          // bağlanamadıysa 0.0.0.0 / 0.0.0.0 if not connected
33  Serial.print("AP IP: ");
34  Serial.println(WiFi.softAPIP());
35
36  sunucu.on("/", anaSayfa);
37  sunucu.begin();                          // iki arayüzü de dinler / listens on both interfaces
38}
39
40void loop() {
41  sunucu.handleClient();
42}
AP+STA mode has an important limit you should know about: the ESP32 has a single radio, so both networks must run on the same channel. A network you open on channel 1 with softAP() moves to channel 11 the moment the ESP32 connects to a router on channel 11. During that switch the phone connected to the service network may lose its connection for a few seconds. Because the radio is shared between two networks, throughput drops and the board draws a little more current. If you no longer need the service network once setup is done, you can switch off the access point with WiFi.softAPdisconnect(true) and put the board back into station-only mode.
Access point with the Raspberry Pi Pico W and MicroPython
There is no exact equivalent of the Arduino WiFiManager on the Raspberry Pi Pico W, but setting up an access point takes just a few lines in MicroPython. network.WLAN(network.AP_IF) gives you the access point interface; you set the network name and password with config() and switch it on with active(True). The Pico W also hands out 192.168.4.x addresses to clients and sits at 192.168.4.1 itself. The code below is a small web server that turns the Pico W's onboard LED on and off from your phone:
1import network, socket, time
2from machine import Pin
3
4led = Pin("LED", Pin.OUT)          # Pico W kart üstü LED / Pico W onboard LED
5
6ap = network.WLAN(network.AP_IF)
7ap.config(essid="BlueGrays-Pico", password="bluegrays1")   # en az 8 karakter / at least 8 chars
8ap.active(True)
9while not ap.active():
10    time.sleep(0.1)
11print("AP IP:", ap.ifconfig()[0])  # genellikle 192.168.4.1 / usually 192.168.4.1
12
13SAYFA = """<!DOCTYPE html><html><head><meta name="viewport" content="width=device-width">
14<title>Pico W</title></head><body><h2>Pico W LED: DURUM</h2>
15<p><a href="/on">AC / ON</a> | <a href="/off">KAPAT / OFF</a></p></body></html>"""
16
17s = socket.socket()
18s.setsockopt(socket.SOL_SOCKET, socket.SO_REUSEADDR, 1)
19s.bind(("0.0.0.0", 80))
20s.listen(2)
21
22while True:
23    istemci, adres = s.accept()
24    try:
25        istek = istemci.recv(1024).decode()
26        if "GET /on " in istek:
27            led.on()
28        elif "GET /off " in istek:
29            led.off()
30        durum = "ACIK / ON" if led.value() else "KAPALI / OFF"
31        istemci.send("HTTP/1.0 200 OK\r\nContent-Type: text/html\r\n\r\n")
32        istemci.send(SAYFA.replace("DURUM", durum))
33    except OSError as hata:
34        print("Hata / Error:", hata)
35    finally:
36        istemci.close()           # bağlantıyı her istekten sonra kapat / close after each request
If you save the code to the Pico W as main.py with Thonny, the board sets up its network automatically every time it boots. Just join the BlueGrays-Pico network with your phone and open 192.168.4.1. If you want a captive portal on the Pico W, Pimoroni's phew library provides an access point and a DNS server that catches every domain; the idea is the same as WiFiManager. To join the Pico W to your home network and run a web server in station mode, see the Pico W Wi-Fi web server article, and if you are new to MicroPython, have a look at the MicroPython basics guide.
Project ideas with WiFiManager
- A temperature display you can give away: Let the person who receives a sensor board that shows its readings on a web page connect it to their own Wi-Fi from their phone.
- Smart home sensor: Connect a board that takes its MQTT server from the portal to Home Assistant; no re-upload when the server address changes.
- Alarm that notifies your phone: Build an ESP32 Telegram bot that takes the bot token as a custom parameter.
- Wireless updates for a boxed device: Send new code with an OTA update to a board that joined the network through WiFiManager.
- Internet clock: Build an NTP clock whose time zone is chosen in the portal.
- Field control without a router: Switch a garden irrigation pump on and off from your phone with softAP; use ESP-NOW for communication between several boards.
Common mistakes and fixes
| Symptom | Likely cause | Fix |
|---|---|---|
| The portal network does not show up on the phone | The board connected to the saved network, so the portal did not open | Check the Serial Monitor; run resetSettings() once for testing or open the portal with the button |
| I join the network but the page does not open | The phone switched to mobile data because there is no internet | Turn off mobile data and type 192.168.4.1 into the browser |
| The portal does not open and the Serial Monitor shows a password warning | The portal password is shorter than 8 characters | Use a password of at least 8 characters or leave out the password parameter |
| wm.process() or setParamsPage is not recognised | Wrong or very old WiFiManager library | Install the current tzapu WiFiManager and remove libraries with similar names |
| After Save the board opens the portal again | Wrong password entered or the network is 5 GHz | Check the password and pick the 2.4 GHz network; see the Wi-Fi not connecting guide for details |
| Custom parameters are lost after a restart | The values were not written to NVS | Save them with Preferences in setSaveParamsCallback, read them at startup and put them in the form with setValue() |
| The board keeps entering upload mode | The button is on GPIO 0 and pressed at power-up | Press the button after the board has started or use a non-strapping pin |
| The phone disconnects in AP+STA mode | The access point moved to the router's channel | This is normal; reconnect after a few seconds or use softAPdisconnect(true) when you are done |
WiFiManager is the easiest step to turn an ESP32 project from an experiment on your desk into a device other people can use: the password leaves the code, the settings are entered from a phone and a single button resets everything. Now that you also know softAP and AP+STA, you can build projects controlled from your phone in any setting, with or without a router. In the BlueGrays app you can explore ESP32 projects such as Wi-Fi connection, an async web server, mDNS, WebSocket, OTA updates and a Telegram alarm, each with step-by-step circuit diagrams and ready-to-use code.
Frequently asked questions
What does ESP32 WiFiManager do?
It lets you connect an ESP32 to a network from your phone without writing the Wi-Fi name and password into the code. If the board cannot connect to a saved network, it opens its own access point and serves a settings page at 192.168.4.1. The network and password you choose there are stored in permanent memory and used automatically on the next boot.
Where does WiFiManager store the saved Wi-Fi password?
On the ESP32, the Wi-Fi name and password are kept in the NVS partition of the flash memory as the Wi-Fi driver's own settings. They are not erased when you upload new code. To erase them, call resetSettings() or erase the flash completely.
How do I reset WiFiManager settings?
Call wm.resetSettings() in your code and restart the board. In practice it is best to tie this to a button: for example, add a check that erases the settings when the BOOT button is held for 3 seconds. If you only want to open the portal without erasing the saved network, use startConfigPortal().
Why does the ESP32 captive portal page not open?
The most common reason is that the phone sees there is no internet on the portal network and switches to mobile data; turn mobile data off and type 192.168.4.1 into the browser. If the board has already connected to a saved network, the portal does not open at all. Also make sure the portal password is at least 8 characters long.
Can the ESP32 be an access point and a station at the same time?
Yes. In WIFI_AP_STA mode the ESP32 broadcasts its own network while connected to the router and uses two separate IP addresses. Because there is only one radio, both networks have to use the same channel; when the board joins the router, the access point switches to the router's channel.
How many devices can connect to an ESP32 softAP?
In the Arduino core, softAP() allows up to 4 devices by default. On the ESP32 you can raise this to 10 with the fifth parameter of softAP(). You can read the number of connected devices with WiFi.softAPgetStationNum().
Projects to build after reading this
See all projects
ESP32 Wi-Fi STA Connection (with LCD Screen)
In this project, we connect the ESP32 to the home Wi-Fi network in Station (STA) mode in a secure, fault-tolerant manner. We store the SSID and password in a separate secrets.h file to prevent leaking to Git, set up an auto-reconnect mechanism, and display the RSSI signal level and IP address on an I2C LCD screen. The internal LED works as a status indicator. It is a production-grade connection manager.

ESP32 Asynchronous Web Server (with IP Display on LCD)
In this project, we’re turning the ESP32 into an asynchronous web server that you can control from your phone or computer on the same Wi-Fi network. Thanks to the ESPAsyncWebServer library, the server can process multiple requests simultaneously (unlike the classic WebServer.h, which blocks on a single request). You’ll be able to open the ESP32’s IP address in a browser and click the ON/OFF buttons (the /on and /off routes) to turn the LED connected to GPIO 5 on and off.

ESP32 mDNS: Accessing the Device via bluegrays-esp.local (with LCD Screen)
In this project we add an mDNS (Multicast DNS) service to the ESP32, so you reach it by a readable host name like bluegrays-esp.local instead of an IP address. Even if the IP assigned by DHCP changes, the device always answers to the same name. A small web server on the board lets you control the LED from your browser at http://bluegrays-esp.local/.

ESP32 WebSocket Counter (2 Buttons + LCD + Real-Time Web)
In this project, two buttons wired to the ESP32 (GPIO 5 counts up, GPIO 4 counts down) change a counter. The value updates instantly both on a 16x2 I2C LCD and, through the WebSocket support of ESPAsyncWebServer, in every connected browser without reloading the page. Instead of HTTP polling a single persistent connection is used, and the ESP32 sends the new value to everyone with ws.textAll().

ESP32 OTA Update — Wireless Firmware Installation (With LCD Screen)
In this project you'll learn to upload new firmware to the ESP32 over Wi-Fi, without a USB cable. With the ArduinoOTA library the ESP32 becomes visible on the network and shows up automatically as bluegrays-ota under "Network port" in the Arduino IDE. The first upload goes over USB; after that every update is wireless, a key feature for devices out in the field.

Real-Time Clock from the Internet via ESP32 NTP
The ESP32 connects to Wi-Fi and fetches the real time from NTP (Network Time Protocol) servers with millisecond precision. configTzTime() applies the Turkey time zone (TRT, UTC+3) automatically, and in countries with daylight saving time the DST switch is handled by a POSIX TZ string. The time is printed both to the Serial Monitor and to an optional I2C LCD.

ESP32 HTTPClient + Weather API (with LCD Screen)
In this project the ESP32 makes a REST API call over the internet to a weather API (wttr.in) using HTTPClient.h. The JSON response is parsed with ArduinoJson v7, and the city, temperature, humidity, weather and wind are shown on an I2C LCD. wttr.in needs no API key; just type the name of any city.
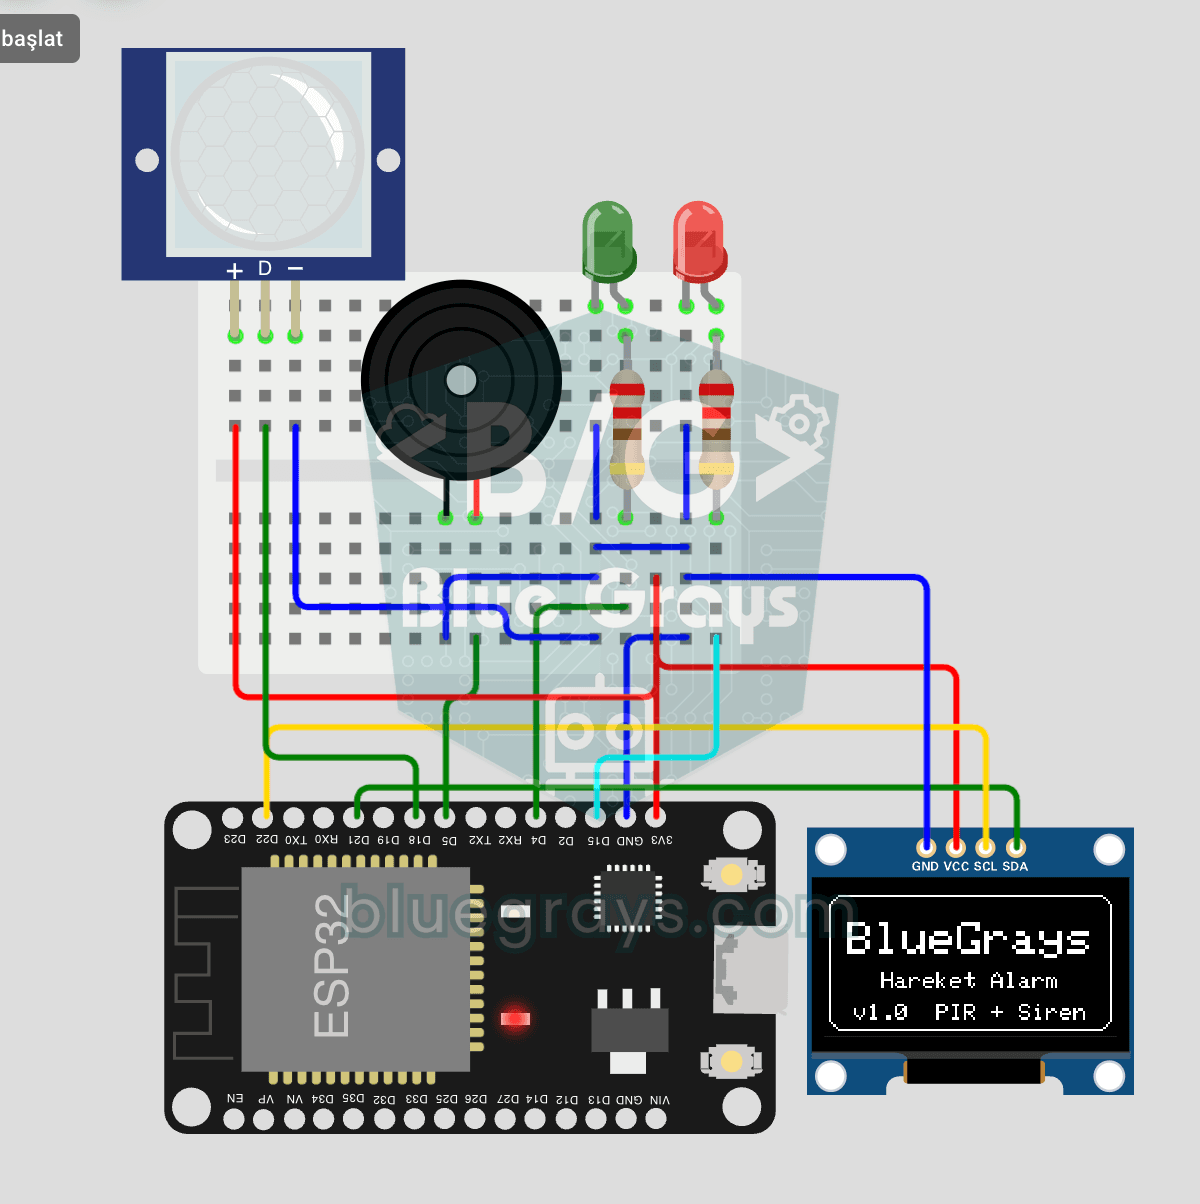
ESP32 Motion Alarm System (PIR + Buzzer + LED + Telegram)
A smart security alarm: when the PIR sensor detects motion, it sounds the buzzer, lights the LED and sends the owner an instant Telegram notification. A 30-second cooldown limits how often the alarm repeats; it does not filter out the PIR sensor's false detections. Use it at home, in a garage, a storeroom or a study.