
ESP-NOW Tutorial: ESP32 Wireless Communication Without a Router
ESP-NOW with the ESP32: find the MAC address, send a struct up to 250 bytes one-way or two-way, use up to 20 peers, range, core 3.x changes and Wi-Fi channels.
ESP-NOW is a wireless protocol developed by Espressif that lets ESP32 and ESP8266 boards send data straight to each other without a router, access point or internet connection. The boards use their Wi-Fi radio but never join a network; each device finds the other by its MAC address and delivers small packets of up to 250 bytes in a few milliseconds. Because there's no connection to set up, no IP address to obtain and no password to enter, a button press on one board can switch a relay on another board instantly, and a battery-powered sensor can wake up, send its reading and go straight back to sleep.
In this guide you'll set up ESP-NOW from scratch: first you'll read your boards' MAC addresses, then use one-way and two-way examples to send different values such as temperature, a counter and text in a single packet using a struct. After that you'll learn about the 20-peer limit, broadcast messages, range and speed, the functions that changed with ESP32 Arduino core 3.x, and channel matching, the one rule for using ESP-NOW and Wi-Fi at the same time. In the last part you'll send the readings of a battery-powered remote sensor in deep sleep to a gateway connected to Wi-Fi and watch them from your phone. If this is your first ESP32 project, finish the Arduino IDE setup in What Is the ESP32? first.
What is ESP-NOW and how does it work?
With normal Wi-Fi, the ESP32 first connects to the router, checks the password, gets an IP address via DHCP and only then can it send data; this usually takes 1–3 seconds. ESP-NOW skips all of these steps. It puts your data inside a short Wi-Fi packet called a vendor-specific action frame from the IEEE 802.11 standard and sends it directly to the other board's MAC address. The receiving board answers with a hardware acknowledgement (ACK) frame, and a callback function on the sending side tells you whether the packet was delivered. If no ACK arrives, the Wi-Fi layer automatically retries the packet a few times. In short, ESP-NOW works like an invisible mailbox between two boards: you write the address, drop the packet in, and you hear back when the other side has received it.
| Feature | Value |
|---|---|
| Developed by | Espressif Systems |
| Frequency | 2.4 GHz (Wi-Fi radio, channels 1–13) |
| Data per packet | 250 bytes (ESP-NOW v1); 1470 bytes with v2 on ESP-IDF 5.4 and later |
| Registered peers | Up to 20; up to 7 encrypted peers by default |
| Default data rate | 1 Mbps |
| Delivery acknowledgement | Yes for unicast (ACK), none for broadcast |
| Encryption | Optional, CCMP (AES-128); PMK and LMK keys of 16 bytes each |
| Router / access point | Not needed |
| Supported chips | ESP32 chips with Wi-Fi (ESP32, S2, S3, C2, C3, C6…) and ESP8266 |
The real advantages of ESP-NOW are fast response and low energy use. When you press a button, the LED on the other side lights up within a few milliseconds; doing the same over Wi-Fi means connecting first and then sending a request to a server. The difference is even bigger for a battery-powered sensor: while connecting to Wi-Fi, the radio draws more than 100 mA for seconds, whereas with ESP-NOW the board wakes up, sends its reading and goes back to sleep within a few hundred milliseconds in total. On the other hand, ESP-NOW doesn't reach the internet; if you want to get your data to the internet or your phone, there must be a gateway ESP32 connected to Wi-Fi somewhere in the network. We'll build that setup later in this guide.
ESP-NOW vs Wi-Fi vs Bluetooth vs nRF24L01
| Method | Extra module | Router | Packet size | Typical range (open space) | Best for |
|---|---|---|---|---|---|
| ESP-NOW | Not needed | Not needed | 250 bytes | 100–200 m, more in LR mode | Commands and sensor data between boards |
| Wi-Fi (HTTP, MQTT) | Not needed | Required | Practically unlimited | The router's coverage | Internet, web pages, cloud |
| Bluetooth (BLE) | Not needed | Not needed | 20 bytes by default | 10–20 m indoors | Connecting to a phone |
| nRF24L01 | Required (SPI) | Not needed | 32 bytes | Tens of metres, much more with the PA+LNA version | Boards without wireless such as the Arduino Uno and Nano |
| LoRa (SX1278) | Required (SPI) | Not needed | Up to 255 bytes | Several kilometres | Very long distances, infrequent data |
If you need to talk to a phone, Bluetooth is the right choice; if you need the internet, use Wi-Fi. But if you have several ESP32 boards that only need to talk to each other, ESP-NOW is usually the simplest way: no extra module, cable or router, and only a few lines of code. For boards without wireless like the Arduino Uno, the nRF24L01 is a better fit, and for kilometres of range, LoRa modules. To compare all the options side by side, see Arduino wireless communication options, and for connecting to a phone, check our ESP32 Bluetooth guide.
Which boards support ESP-NOW?
| Board / chip | ESP-NOW | Note |
|---|---|---|
| ESP32 (WROOM-32, DevKit) | Yes | Also supports Long Range (LR) mode |
| ESP32-S2, S3, C3, C6 | Yes | Same Arduino code, only the board selection changes |
| ESP32-C2 (ESP8684) | Yes | No LR mode |
| ESP32-H2 | No | No Wi-Fi radio, so no ESP-NOW |
| ESP8266 (NodeMCU, Wemos D1 Mini) | Yes | Different library (espnow.h), v1 and 250 bytes only |
| Raspberry Pi Pico W / Pico 2 W | No | The Wi-Fi chip (CYW43439) can't run ESP-NOW |
| Arduino Uno, Nano, Mega | No | Can be connected to an ESP32 over a serial port (UART) |
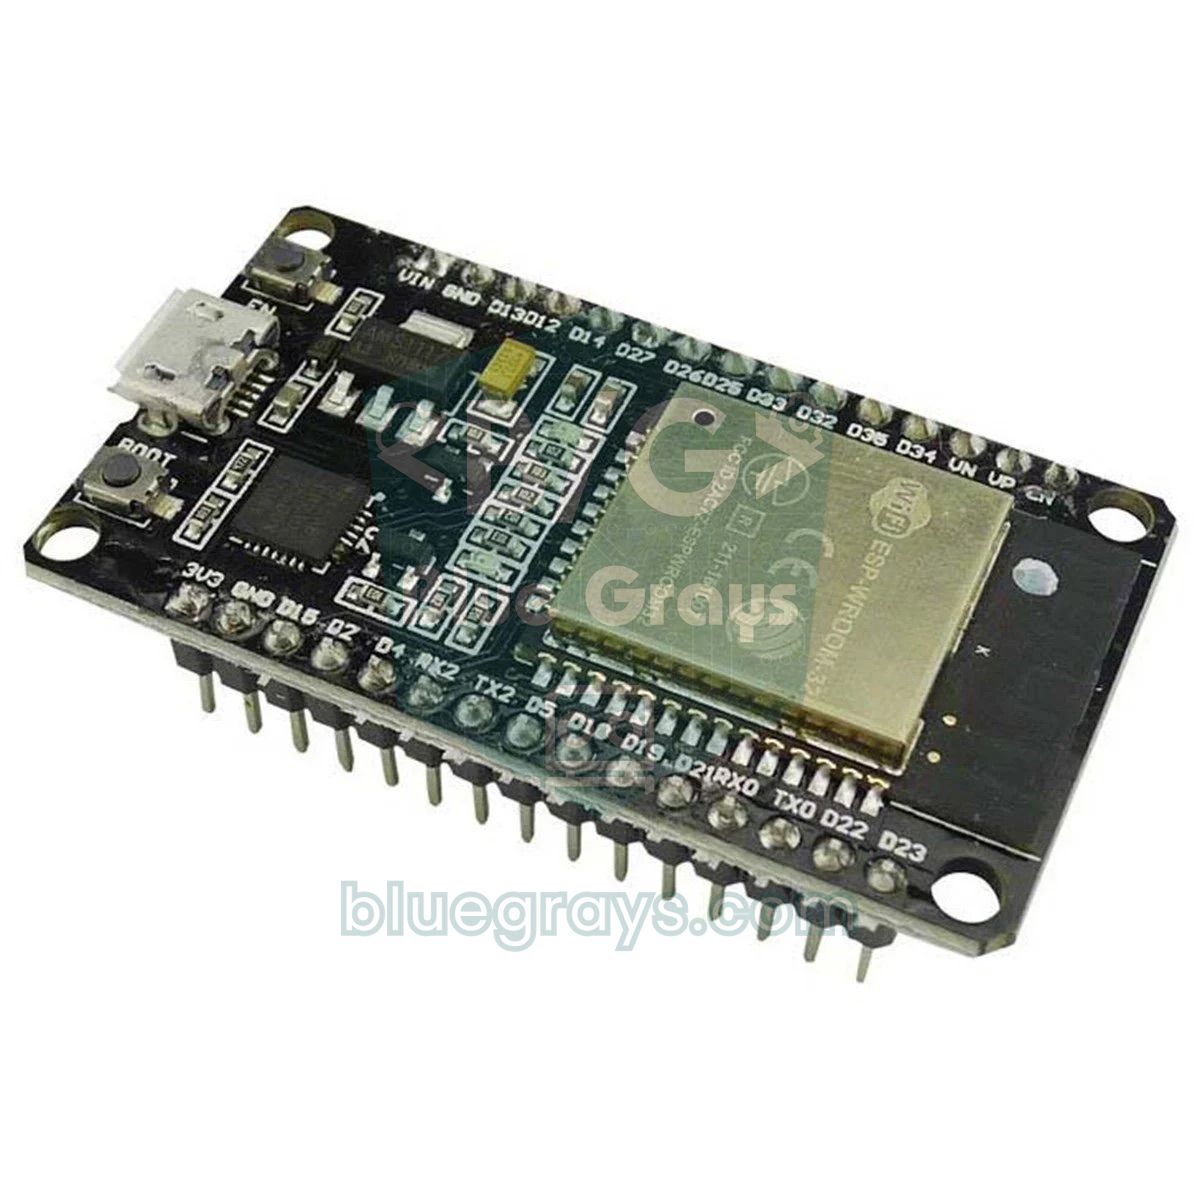
ESP-NOW also works between different ESP chips: an ESP32-C3 sensor can send packets to a classic ESP32 gateway or to an ESP8266 board. The only requirements are that both sides are on the same Wi-Fi channel and that the data structure is defined exactly the same on both sides. The examples below use two ESP32 DevKit boards; you can see which pins of your board are safe to use in the Pinout tool.
Step 1: Find the ESP32's MAC address
In ESP-NOW each board finds the other by its 6-byte MAC address; this address is written into every ESP32 at the factory and never changes. Upload the sketch below to the board you'll use as the receiver and open the Serial Monitor at 115200 baud. It prints the address both in readable form and as an array line you can paste straight into the other board's code. For the two-board examples, do this for both boards and write the addresses down.
1#include <WiFi.h>
2#include <esp_wifi.h>
3
4void setup() {
5  Serial.begin(115200);
6  delay(1000);
7  WiFi.mode(WIFI_STA);                 // ESP-NOW istasyon arayüzünü kullanır / ESP-NOW uses the station interface
8
9  uint8_t mac[6];
10  if (esp_wifi_get_mac(WIFI_IF_STA, mac) == ESP_OK) {
11    Serial.printf("STA MAC: %02X:%02X:%02X:%02X:%02X:%02X\n",
12                  mac[0], mac[1], mac[2], mac[3], mac[4], mac[5]);
13    // Diğer karta kopyalanacak satır / line to paste into the other board's code
14    Serial.printf("uint8_t karsiMac[] = {0x%02X, 0x%02X, 0x%02X, 0x%02X, 0x%02X, 0x%02X};\n",
15                  mac[0], mac[1], mac[2], mac[3], mac[4], mac[5]);
16  } else {
17    Serial.println("MAC okunamadi / could not read MAC");
18  }
19}
20
21void loop() {
22}Sending data with a struct and the 250-byte limit
ESP-NOW only sends an array of bytes and has no idea what's inside. The cleanest way to send several different values at once is to group them in a struct and send the struct's bytes exactly as they sit in memory. The receiver defines the same struct and copies the incoming bytes onto it with memcpy. For this to work, the struct must have the same order, the same types and the same size on both sides. The compiler may insert invisible padding bytes between fields for faster access: the Paket struct in the examples below normally takes 36 bytes, but drops to exactly 30 bytes once you add __attribute__((packed)). Using packed guarantees that every byte sits in the same place between an ESP32 and an ESP8266, or between Arduino and MicroPython.
| Type | Size | Note |
|---|---|---|
| bool, uint8_t, int8_t, char | 1 byte | Flag, small number, single character |
| int16_t, uint16_t | 2 bytes | −32768…32767 or 0…65535 |
| int, int32_t, uint32_t | 4 bytes | int is 4 bytes on the ESP32 and ESP8266, but 2 bytes on the Arduino Uno |
| float | 4 bytes | About 7 digits of precision |
| double | 8 bytes | Use float unless you really need it |
| char mesaj[16] | 16 bytes | Fixed-length text; must end with '\0' |
| String, char*, pointer | Can't be sent | Only a memory address goes out, which is meaningless on the other side |
A packet holds at most 250 bytes. This limit comes from the first version of ESP-NOW (v1) and applies to every board, including the ESP8266. Arduino core 3.2 and later, based on ESP-IDF 5.4, can send packets of up to 1470 bytes with ESP-NOW v2; however, a board running v1 (an ESP8266 or an ESP32 with an older core) truncates packets longer than 250 bytes or drops them entirely. So in a mixed network, staying within 250 bytes is the safest choice. The static_assert line in the sender sketch stops compilation with a clear message if the struct grows beyond 250 bytes. If you need to send bigger data, split it into numbered chunks and reassemble them in order on the receiver; for sensor values, button states or commands, a few dozen bytes are more than enough.
One-way ESP-NOW: the sender sketch
- Make sure both ESP32 boards are selected as ESP32 Dev Module in the Arduino IDE. The ESP-NOW library is part of the board package, so there's nothing else to install.
- Enter the MAC address you read from the receiver board into the aliciMac array in the code below.
- Connect a push button between GPIO 4 and GND on the sender; since we use INPUT_PULLUP, no extra resistor is needed. For details see How to connect a button to an Arduino.
- Upload the sketch to the sender and open the Serial Monitor at 115200 baud. While the receiver isn't running yet, it's normal to see "Teslim edilemedi / failed" every two seconds.
1#include <WiFi.h>
2#include <esp_now.h>
3#include <esp_idf_version.h>
4
5// Alıcının STA MAC adresi (mac_oku çıktısı) / receiver's STA MAC address (from the MAC sketch)
6uint8_t aliciMac[] = {0x24, 0x6F, 0x28, 0xAA, 0xBB, 0xCC};
7
8const int BUTON_PIN = 4;               // buton GPIO 4 ile GND arasında / button between GPIO 4 and GND
9
10// İki kartta da birebir aynı olmalı / must be identical on both boards
11typedef struct __attribute__((packed)) {
12  uint8_t  id;                         // gönderen kart numarası / sender board number
13  uint32_t sayac;                      // paket sayacı / packet counter
14  float    sicaklik;                   // °C
15  float    nem;                        // % bağıl nem / % relative humidity
16  bool     buton;                      // buton basılı mı / is the button pressed
17  char     mesaj[16];                  // kısa metin, String değil / short text, not String
18} Paket;
19static_assert(sizeof(Paket) <= 250, "Paket 250 bayti asamaz / packet must not exceed 250 bytes");
20
21Paket paket;
22
23// Teslim sonucu: alıcı paketi aldıysa SUCCESS / delivery result: SUCCESS if the receiver got it
24#if ESP_IDF_VERSION >= ESP_IDF_VERSION_VAL(5, 5, 0)
25void gonderimSonucu(const esp_now_send_info_t *bilgi, esp_now_send_status_t durum) {   // çekirdek 3.3+ / core 3.3+
26#else
27void gonderimSonucu(const uint8_t *mac, esp_now_send_status_t durum) {                // çekirdek 2.x-3.2 / core 2.x-3.2
28#endif
29  Serial.println(durum == ESP_NOW_SEND_SUCCESS ? "Teslim edildi / delivered" : "Teslim edilemedi / failed");
30}
31
32void setup() {
33  Serial.begin(115200);
34  pinMode(BUTON_PIN, INPUT_PULLUP);
35  WiFi.mode(WIFI_STA);                 // önce Wi-Fi, sonra ESP-NOW / Wi-Fi first, then ESP-NOW
36
37  if (esp_now_init() != ESP_OK) {
38    Serial.println("ESP-NOW baslatilamadi / ESP-NOW init failed");
39    return;
40  }
41  esp_now_register_send_cb(gonderimSonucu);
42
43  esp_now_peer_info_t es = {};         // tüm alanları sıfırla / zero every field
44  memcpy(es.peer_addr, aliciMac, 6);
45  es.channel = 0;                      // 0 = şu anki kanal / 0 = current channel
46  es.ifidx = WIFI_IF_STA;
47  es.encrypt = false;
48  if (esp_now_add_peer(&es) != ESP_OK) {
49    Serial.println("Es eklenemedi / failed to add peer");
50    return;
51  }
52  paket.id = 1;
53}
54
55void loop() {
56  paket.sayac++;
57  paket.sicaklik = 20.0 + random(0, 100) / 10.0;   // deneme değeri / test value
58  paket.nem = 40.0 + random(0, 200) / 10.0;
59  paket.buton = (digitalRead(BUTON_PIN) == LOW);
60  snprintf(paket.mesaj, sizeof(paket.mesaj), "Selam %lu", (unsigned long)paket.sayac);
61
62  esp_err_t sonuc = esp_now_send(aliciMac, (uint8_t *)&paket, sizeof(paket));
63  if (sonuc != ESP_OK) {
64    Serial.printf("Gonderme hatasi / send error: %s\n", esp_err_to_name(sonuc));
65  }
66  delay(2000);
67}
The sketch first starts Wi-Fi in WIFI_STA mode; ESP-NOW can't work without the Wi-Fi radio, so esp_now_init() must always come after the WiFi.mode() line. Then the receiver is added to the list as a peer. Clearing the esp_now_peer_info_t struct with = {} is important; random leftover values in uncleared fields cause the "Peer interface is invalid" error. channel = 0 means "use the board's current channel". esp_now_send() puts the packet in a queue and returns immediately; ESP_OK only means the packet was accepted for sending. The real result arrives a few milliseconds later in the gonderimSonucu() function: ESP_NOW_SEND_SUCCESS means the receiver acknowledged the packet at the hardware level. The #if block at the top picks the right form of the send callback, which depends on the core version; we explain this in the core 3.x section.
ESP-NOW receiver sketch
1#include <WiFi.h>
2#include <esp_now.h>
3#include <esp_idf_version.h>
4
5// Vericidekiyle birebir aynı yapı / exactly the same struct as the sender
6typedef struct __attribute__((packed)) {
7  uint8_t  id;
8  uint32_t sayac;
9  float    sicaklik;
10  float    nem;
11  bool     buton;
12  char     mesaj[16];
13} Paket;
14
15Paket gelen;
16volatile bool yeniPaket = false;
17
18// Wi-Fi görevinde çalışır: kısa tut / runs in the Wi-Fi task: keep it short
19#if ESP_IDF_VERSION_MAJOR >= 5
20void veriGeldi(const esp_now_recv_info_t *bilgi, const uint8_t *veri, int uzunluk) {   // çekirdek 3.x / core 3.x
21#else
22void veriGeldi(const uint8_t *mac, const uint8_t *veri, int uzunluk) {                // çekirdek 2.x / core 2.x
23#endif
24  if (uzunluk != sizeof(Paket)) return;  // farklı boyut: başka bir paket / wrong size: some other packet
25  memcpy(&gelen, veri, sizeof(Paket));   // veriyi hemen kopyala / copy the data right away
26  yeniPaket = true;
27}
28
29void setup() {
30  Serial.begin(115200);
31  WiFi.mode(WIFI_STA);
32
33  if (esp_now_init() != ESP_OK) {
34    Serial.println("ESP-NOW baslatilamadi / ESP-NOW init failed");
35    return;
36  }
37  esp_now_register_recv_cb(veriGeldi);
38  Serial.println("Alici hazir / receiver ready");
39}
40
41void loop() {
42  if (yeniPaket) {
43    yeniPaket = false;
44    Paket p = gelen;                     // kopya üzerinde çalış / work on a copy
45    p.mesaj[sizeof(p.mesaj) - 1] = '\0'; // metin her zaman sonlansın / always terminate the text
46    Serial.printf("id=%u sayac=%lu sicaklik=%.1f nem=%.1f buton=%d mesaj=%s\n",
47                  (unsigned)p.id, (unsigned long)p.sayac, p.sicaklik, p.nem, (int)p.buton, p.mesaj);
48  }
49}
On the receiver, packets arrive in the veriGeldi() function. This function doesn't run in your loop() but in Wi-Fi's high-priority task, so you shouldn't use Serial.print, delay or long calculations inside it. The right approach is to check that the packet size matches the expected struct, copy the data into your own variable with memcpy and tell loop() through a volatile flag. On core 3.x the bilgi parameter also tells you who sent the packet (bilgi->src_addr) and the signal strength (bilgi->rx_ctrl->rssi, in dBm); this information is only valid inside the function, so copy it if you need it later. The receiver doesn't need to add the sender as a peer: unencrypted unicast packets and broadcasts are accepted from boards that aren't on the list.
Two-way communication: two ESP32 boards controlling each other
In two-way communication every board is both a sender and a receiver. You'll upload the sketch below to both boards; the only difference is that on each board you put the other board's address in the karsiMac array. When you press the button on one board, the LED on the other board turns on or off, and the board that changed its LED reports back with an acknowledgement message. The wiring is the same on both boards:
| Part | ESP32 pin | Note |
|---|---|---|
| Button | GPIO 4 and GND | Uses the internal pull-up, no extra resistor needed |
| LED | GPIO 2 | Onboard blue LED on most DevKits; use a 220 Ω resistor for an external LED |
| Power | USB | The boards can be powered from separate USB ports or adapters |
1#include <WiFi.h>
2#include <esp_now.h>
3#include <esp_idf_version.h>
4
5// Bu kodu iki karta da yükle; yalnız karşı kartın MAC adresini değiştir
6// Upload to both boards; change only the other board's MAC address
7uint8_t karsiMac[] = {0x24, 0x6F, 0x28, 0xAA, 0xBB, 0xCC};
8
9const int BUTON_PIN = 4;               // buton GPIO 4 ile GND arasında / button between GPIO 4 and GND
10const int LED_PIN = 2;                 // dahili LED / onboard LED
11
12typedef struct __attribute__((packed)) {
13  uint8_t tur;                         // 1 = komut, 2 = onay / 1 = command, 2 = acknowledgement
14  bool    ledAcik;                     // istenen ya da uygulanan durum / requested or applied state
15} Mesaj;
16
17volatile bool komutGeldi = false;
18volatile bool onayGeldi = false;
19volatile bool gelenLed = false;
20bool karsiLed = false;                 // karşı karttaki LED için son isteğimiz / our last request for the other LED
21int sonButon = HIGH;
22
23#if ESP_IDF_VERSION_MAJOR >= 5
24void veriGeldi(const esp_now_recv_info_t *bilgi, const uint8_t *veri, int uzunluk) {   // çekirdek 3.x / core 3.x
25#else
26void veriGeldi(const uint8_t *mac, const uint8_t *veri, int uzunluk) {                // çekirdek 2.x / core 2.x
27#endif
28  if (uzunluk != sizeof(Mesaj)) return;
29  Mesaj m;
30  memcpy(&m, veri, sizeof(m));
31  if (m.tur == 1) {
32    gelenLed = m.ledAcik;
33    komutGeldi = true;
34  } else if (m.tur == 2) {
35    onayGeldi = true;
36  }
37}
38
39void gonder(uint8_t tur, bool ledAcik) {
40  Mesaj m = {tur, ledAcik};
41  esp_now_send(karsiMac, (uint8_t *)&m, sizeof(m));
42}
43
44void setup() {
45  Serial.begin(115200);
46  pinMode(BUTON_PIN, INPUT_PULLUP);
47  pinMode(LED_PIN, OUTPUT);
48  WiFi.mode(WIFI_STA);
49
50  if (esp_now_init() != ESP_OK) {
51    Serial.println("ESP-NOW baslatilamadi / ESP-NOW init failed");
52    return;
53  }
54  esp_now_register_recv_cb(veriGeldi);
55
56  esp_now_peer_info_t es = {};
57  memcpy(es.peer_addr, karsiMac, 6);
58  es.ifidx = WIFI_IF_STA;              // kanal 0, şifresiz / channel 0, unencrypted
59  esp_now_add_peer(&es);
60}
61
62void loop() {
63  // 1) Butona basılınca karşı kartın LED'ini değiştir / on press, toggle the other board's LED
64  int buton = digitalRead(BUTON_PIN);
65  if (buton != sonButon) {
66    delay(30);                         // kontak sıçramasını bekle / wait out contact bounce
67    buton = digitalRead(BUTON_PIN);
68    if (sonButon == HIGH && buton == LOW) {
69      karsiLed = !karsiLed;
70      gonder(1, karsiLed);
71      Serial.println(karsiLed ? "Komut: AC / command: ON" : "Komut: KAPAT / command: OFF");
72    }
73    sonButon = buton;
74  }
75
76  // 2) Gelen komutu uygula ve onay gönder / apply an incoming command and reply
77  if (komutGeldi) {
78    komutGeldi = false;
79    digitalWrite(LED_PIN, gelenLed ? HIGH : LOW);
80    gonder(2, gelenLed);
81  }
82
83  // 3) Karşı karttan gelen onay / acknowledgement from the other board
84  if (onayGeldi) {
85    onayGeldi = false;
86    Serial.println("Karsi kart uyguladi / the other board applied it");
87  }
88}
The tur field in the message struct says what the packet is: 1 is a command, 2 is an acknowledgement. The board whose button is pressed sends the state it wants for the other board's LED; the board that receives the command sets its LED and sends the same state back with type 2. This way the sender gets both the hardware ACK and the confirmation that "the LED really changed". The incoming command is again passed to loop() with volatile flags, and digitalWrite and the reply are done there. This is safer than calling esp_now_send() from inside the callback. The 30 ms wait on the button filters out contact bounce. Connect a relay instead of the LED and the same code becomes a wireless light switch; for relay wiring see What Is a Relay Module?.
Multiple devices: the 20-peer limit and broadcast
ESP-NOW supports all three layouts: one sender to many receivers (a remote to five relay boards), many senders to one receiver (five sensors to a single gateway) and networks where everyone talks to everyone. A board's peer list can hold at most 20 entries, and by default only 7 of them can be encrypted. This limit only applies to the boards you send to. A gateway doesn't have to add sensors that send it unencrypted packets, so it can listen to more than 20 sensors. If the list is full, esp_now_add_peer() returns ESP_ERR_ESPNOW_FULL; then you can remove peers you no longer need with esp_now_del_peer() and add new ones. The sketch below adds three receivers and the broadcast address to the list, then sends both one by one and as a broadcast:
1#include <WiFi.h>
2#include <esp_now.h>
3
4// Üç alıcının STA MAC adresleri / STA MAC addresses of three receivers
5uint8_t alicilar[3][6] = {
6  {0x24, 0x6F, 0x28, 0x11, 0x11, 0x11},
7  {0x24, 0x6F, 0x28, 0x22, 0x22, 0x22},
8  {0x24, 0x6F, 0x28, 0x33, 0x33, 0x33}
9};
10uint8_t yayinMac[6] = {0xFF, 0xFF, 0xFF, 0xFF, 0xFF, 0xFF};   // yayın adresi / broadcast address
11
12typedef struct __attribute__((packed)) {
13  uint8_t  hedef;                      // 0 = herkes, 1-3 = tek alıcı / 0 = everyone, 1-3 = one receiver
14  uint32_t sayac;
15} Komut;
16
17Komut komut;
18
19bool esEkle(const uint8_t *mac) {
20  esp_now_peer_info_t es = {};
21  memcpy(es.peer_addr, mac, 6);
22  es.ifidx = WIFI_IF_STA;
23  return esp_now_add_peer(&es) == ESP_OK;
24}
25
26void setup() {
27  Serial.begin(115200);
28  WiFi.mode(WIFI_STA);
29  if (esp_now_init() != ESP_OK) {
30    Serial.println("ESP-NOW baslatilamadi / ESP-NOW init failed");
31    return;
32  }
33  for (int i = 0; i < 3; i++) esEkle(alicilar[i]);
34  esEkle(yayinMac);                    // yayın da eş olarak eklenmeli / broadcast must be added as a peer too
35
36  esp_now_peer_num_t sayi;
37  esp_now_get_peer_num(&sayi);
38  Serial.printf("Kayitli es / registered peers: %d / 20\n", sayi.total_num);
39}
40
41void loop() {
42  komut.sayac++;
43
44  // 1) Tek tek: her alıcıya ayrı paket ve ayrı teslim onayı / one by one: separate packet and ACK each
45  for (int i = 0; i < 3; i++) {
46    komut.hedef = i + 1;
47    esp_now_send(alicilar[i], (uint8_t *)&komut, sizeof(komut));
48    delay(10);
49  }
50  delay(2000);
51
52  // 2) Yayın: tek paket, aynı kanaldaki herkes alır, onay yok / broadcast: one packet, everyone on the channel, no ACK
53  komut.hedef = 0;
54  esp_now_send(yayinMac, (uint8_t *)&komut, sizeof(komut));
55  delay(2000);
56}
The broadcast address FF:FF:FF:FF:FF:FF must also be added as a peer before you send to it. A single broadcast packet reaches every ESP-NOW receiver on the same channel; you don't need to know the receivers' MAC addresses, which makes it the easiest method to set up. The price is that broadcasts have no delivery acknowledgement, the send result always looks successful, and broadcast packets can't be encrypted. With one-by-one sending, each packet gets its own ACK. If you pass NULL as the address to esp_now_send(), the packet is sent separately to every peer on the list; if the broadcast address is on the list too, the packet also goes out once as a broadcast. A practical approach for many projects is to let the boards find each other with a broadcast on first boot, then learn their MAC addresses and switch to acknowledged unicast.
ESP-NOW range and speed
| Metric | Typical value | Note |
|---|---|---|
| Indoor range | 20–40 m (1–3 walls) | Reinforced concrete walls and metal objects weaken the signal the most |
| Open-space range | 100–200 m | With the onboard PCB antenna; increases when the boards are placed higher above the ground |
| LR (Long Range) mode | Up to 1 km | Espressif's line-of-sight figure; the rate drops to 0.5 or 0.25 Mbps |
| Default data rate | 1 Mbps | A higher rate means a shorter range |
| Airtime of a 250-byte packet | About 2.5 ms | About 3 ms per packet including ACK and waiting times |
| Theoretical packet rate | ~300 packets per second (~70 kB/s) | With 250-byte packets; lower in practice |
| Command latency | A few milliseconds | No connection setup or server needed |
These values vary a lot with the environment, but the maths is simple. At the default 1 Mbps, each byte stays in the air for 8 microseconds; 250 bytes of data with headers and the sync preamble take about 2.5 ms. With the receiver's ACK and the time spent waiting for a free channel, you need about 3 ms per packet, so at most around 300 packets can be sent per second. That's more than enough for sensor data and commands, but ESP-NOW isn't suitable for streaming audio or video. To increase range, place the boards high above the ground, don't cover the antenna with a metal box, batteries or cables, use modules with an external antenna (such as the ESP32-WROOM-32U) and enable Espressif's Long Range (LR) mode on both sides with esp_wifi_set_protocol(WIFI_IF_STA, WIFI_PROTOCOL_LR). LR only works between two ESP32 boards; an interface set to LR only can't connect to normal routers, and the ESP8266 and ESP32-C2 don't support this mode. When testing range on core 3.x, print bilgi->rx_ctrl->rssi on the receiver: −50 dBm is a very strong signal, −80 dBm is close to the limit, and packet loss starts around −90 dBm.
Changes in ESP32 Arduino core 3.x
Most ESP-NOW examples on the internet were written for ESP32 Arduino core 2.x. If you installed version 3.x from the Boards Manager, that code won't compile, because Espressif changed the form of the callback functions with ESP-IDF 5. The changes came in two steps: core 3.0 changed the receive callback, and core 3.3, based on ESP-IDF 5.5, changed the send callback. You can see which version you have next to the esp32 package under Tools > Board > Boards Manager.
| Topic | Core 2.x | Core 3.0–3.2 | Core 3.3 and later |
|---|---|---|---|
| Receive callback | (const uint8_t *mac, const uint8_t *veri, int uzunluk) | (const esp_now_recv_info_t *bilgi, const uint8_t *veri, int uzunluk) | Same as 3.0 |
| Sender address | mac | bilgi->src_addr | bilgi->src_addr |
| Send callback | (const uint8_t *mac, esp_now_send_status_t durum) | Same as 2.x | (const esp_now_send_info_t *bilgi, esp_now_send_status_t durum) |
| Largest packet | 250 bytes | 250 bytes; 1470 bytes with v2 on 3.2 | 1470 bytes with v2 |
| Setting the channel | esp_wifi_set_channel() | Also WiFi.setChannel() | Same as 3.0 |
| Ready-made class library | None | ESP32_NOW.h (ESP_NOW_Peer, ESP_NOW_Serial) | ESP32_NOW.h with v2 support |
When you compile old code on 3.x, you'll see the error invalid conversion from 'void (*)(const uint8_t*, const uint8_t*, int)' ... to 'esp_now_recv_cb_t' for the receive callback. The fix is to make the function's first parameter const esp_now_recv_info_t * and read the sender's address from bilgi->src_addr. When you move to core 3.3, a similar error appears, this time for esp_now_send_cb_t; the send callback's first parameter must be const esp_now_send_info_t *, and the receiver's address is in bilgi->des_addr. The sketches in this guide use the ESP_IDF_VERSION macro to pick the right form themselves, so they compile unchanged on 2.x, 3.0–3.2 and 3.3+. Core 3.x also introduced a class-based library called ESP32_NOW.h: you write onReceive() and onSent() in a class derived from ESP_NOW_Peer, and the ESP_NOW_Serial class lets you use an ESP-NOW link just like Serial. You'll find its examples under ESP_NOW in the File > Examples menu. We use the esp_now.h functions directly because they stay compatible with the ESP8266 and with older code.
ESP-NOW and Wi-Fi at the same time: matching the channel
The ESP32 has a single 2.4 GHz radio, and that radio can only work on one channel at a time. Once the board connects to a router, the router, not you, decides the channel; if the router is on channel 6, ESP-NOW also runs on channel 6. So every sensor that sends packets to a gateway connected to Wi-Fi must also switch to the router's channel. If the channels don't match, the sender prints "failed"; if you added the peer with a non-zero channel, the Serial Monitor also shows the error "ESPNOW: Peer channel is not equal to the home channel, send fail!". Follow these rules for a trouble-free setup:
- The gateway connects to Wi-Fi first, starts ESP-NOW after that and prints the router's channel to the Serial Monitor with WiFi.channel().
- The sensors don't connect to the router; they find the channel by scanning for the network name (WiFi.scanNetworks() and WiFi.channel(i)) or use a fixed channel in the code. They don't need the Wi-Fi password for this.
- Set your router's channel from "Auto" to a fixed channel (1, 6 or 11). In auto mode, if the router changes channel, the sensors lose the gateway.
- Turn off power saving on the gateway with WiFi.setSleep(false). By default, an ESP32 connected to a router puts its radio to sleep at intervals and can miss ESP-NOW packets arriving in that time.
- Enter the gateway's STA MAC address on the sensors; the gateway sketch below prints this address to the Serial Monitor at startup.
The gateway sketch below connects to your home network, stores the readings from up to five sensors and shows them on a simple web page you can open from a phone on the same network. Replace the network name and password with your own, and after uploading, open the IP address shown in the Serial Monitor in your phone's browser:
1#include <WiFi.h>
2#include <WebServer.h>
3#include <esp_now.h>
4#include <esp_idf_version.h>
5
6const char *ssid = "AgAdi"; // Wi-Fi adın / your Wi-Fi name
7const char *sifre = "Sifre123"; // Wi-Fi şifren / your Wi-Fi password
8
9// Sensör kodundakiyle birebir aynı / identical to the sensor sketch
10typedef struct __attribute__((packed)) {
11 uint8_t id; // sensör numarası 1-5 / sensor number 1-5
12 uint32_t sayac;
13 float sicaklik;
14 float nem;
15 float pil; // pil gerilimi (V) / battery voltage (V)
16} SensorPaketi;
17
18const int SENSOR_SAYISI = 5;
19SensorPaketi sonVeri[SENSOR_SAYISI + 1]; // 1..5 kullanılır / indexes 1..5 are used
20unsigned long sonZaman[SENSOR_SAYISI + 1]; // son paketin zamanı / time of the last packet
21QueueHandle_t kuyruk;
22WebServer server(80);
23
24#if ESP_IDF_VERSION_MAJOR >= 5
25void veriGeldi(const esp_now_recv_info_t *bilgi, const uint8_t *veri, int uzunluk) { // çekirdek 3.x / core 3.x
26#else
27void veriGeldi(const uint8_t *mac, const uint8_t *veri, int uzunluk) { // çekirdek 2.x / core 2.x
28#endif
29 if (uzunluk != sizeof(SensorPaketi)) return;
30 SensorPaketi p;
31 memcpy(&p, veri, sizeof(p));
32 xQueueSend(kuyruk, &p, 0); // kuyruğa at, Wi-Fi görevini bekletme / queue it, never block the Wi-Fi task
33}
34
35void anaSayfa() {
36 String html = "<meta name='viewport' content='width=device-width'>"
37 "<meta http-equiv='refresh' content='10'>"
38 "<h2>ESP-NOW sensorleri</h2><table border=1 cellpadding=6>"
39 "<tr><th>ID</th><th>Sicaklik</th><th>Nem</th><th>Pil</th><th>Son paket</th></tr>";
40 for (int i = 1; i <= SENSOR_SAYISI; i++) {
41 if (sonZaman[i] == 0) continue; // bu sensörden veri yok / no data from this sensor yet
42 html += "<tr><td>" + String(i) + "</td><td>" + String(sonVeri[i].sicaklik, 1) +
43 " °C</td><td>%" + String(sonVeri[i].nem, 0) + "</td><td>" + String(sonVeri[i].pil, 2) +
44 " V</td><td>" + String((millis() - sonZaman[i]) / 1000) + " sn once</td></tr>";
45 }
46 html += "</table>";
47 server.send(200, "text/html", html);
48}
49
50void setup() {
51 Serial.begin(115200);
52 kuyruk = xQueueCreate(10, sizeof(SensorPaketi));
53
54 WiFi.mode(WIFI_STA);
55 WiFi.begin(ssid, sifre);
56 while (WiFi.status() != WL_CONNECTED) delay(500);
57 WiFi.setSleep(false); // güç tasarrufu kapalı: paket kaçmaz / power save off: no missed packets
58
59 Serial.print("IP: ");
60 Serial.println(WiFi.localIP());
61 Serial.printf("Kanal / channel: %d\n", (int)WiFi.channel());
62 Serial.print("Gecit MAC / gateway MAC: ");
63 Serial.println(WiFi.macAddress()); // sensörlere bu adresi yaz / put this address in the sensors
64
65 if (esp_now_init() != ESP_OK) {
66 Serial.println("ESP-NOW baslatilamadi / ESP-NOW init failed");
67 return;
68 }
69 esp_now_register_recv_cb(veriGeldi);
70
71 server.on("/", anaSayfa);
72 server.begin();
73}
74
75void loop() {
76 SensorPaketi p;
77 while (xQueueReceive(kuyruk, &p, 0) == pdTRUE) {
78 if (p.id >= 1 && p.id <= SENSOR_SAYISI) {
79 sonVeri[p.id] = p;
80 sonZaman[p.id] = millis();
81 Serial.printf("Sensor %u: %.1f C %%%.0f %.2f V\n", (unsigned)p.id, p.sicaklik, p.nem, p.pil);
82 }
83 }
84 server.handleClient();
85}In the receive callback, the gateway only drops the packet into a FreeRTOS queue and returns immediately. loop() empties the queue and stores each sensor's latest reading and arrival time, and the web server shows that table. The queue makes sure no packet is lost when several sensors send at the same moment; it's also the practical way to follow Espressif's advice not to do long work inside callbacks. The page refreshes itself every 10 seconds, and the "Son paket" (last packet) column shows right away whether a sensor has gone quiet (flat battery or out of range?). If the gateway can't connect to Wi-Fi at all, the problem isn't ESP-NOW; go through the checks in ESP32 won't connect to Wi-Fi. If you want to feed the data into a home automation system, you can use MQTT and Home Assistant instead of the web page.
Remote sensor example: DHT22, deep sleep and ESP-NOW
Now let's build the battery-powered sensor that sends data to the gateway. Each time it wakes up, the sensor measures temperature, humidity and battery voltage, sends a single ESP-NOW packet, waits for the delivery ACK and goes into deep sleep for 60 seconds. We use a DHT22 for temperature and humidity; you need to install Adafruit's DHT sensor library from the Library Manager. You'll find how the sensor works in our DHT11 temperature and humidity sensor guide; the wiring is the same for the DHT22, and in the code you only set the sensor type to DHT22.
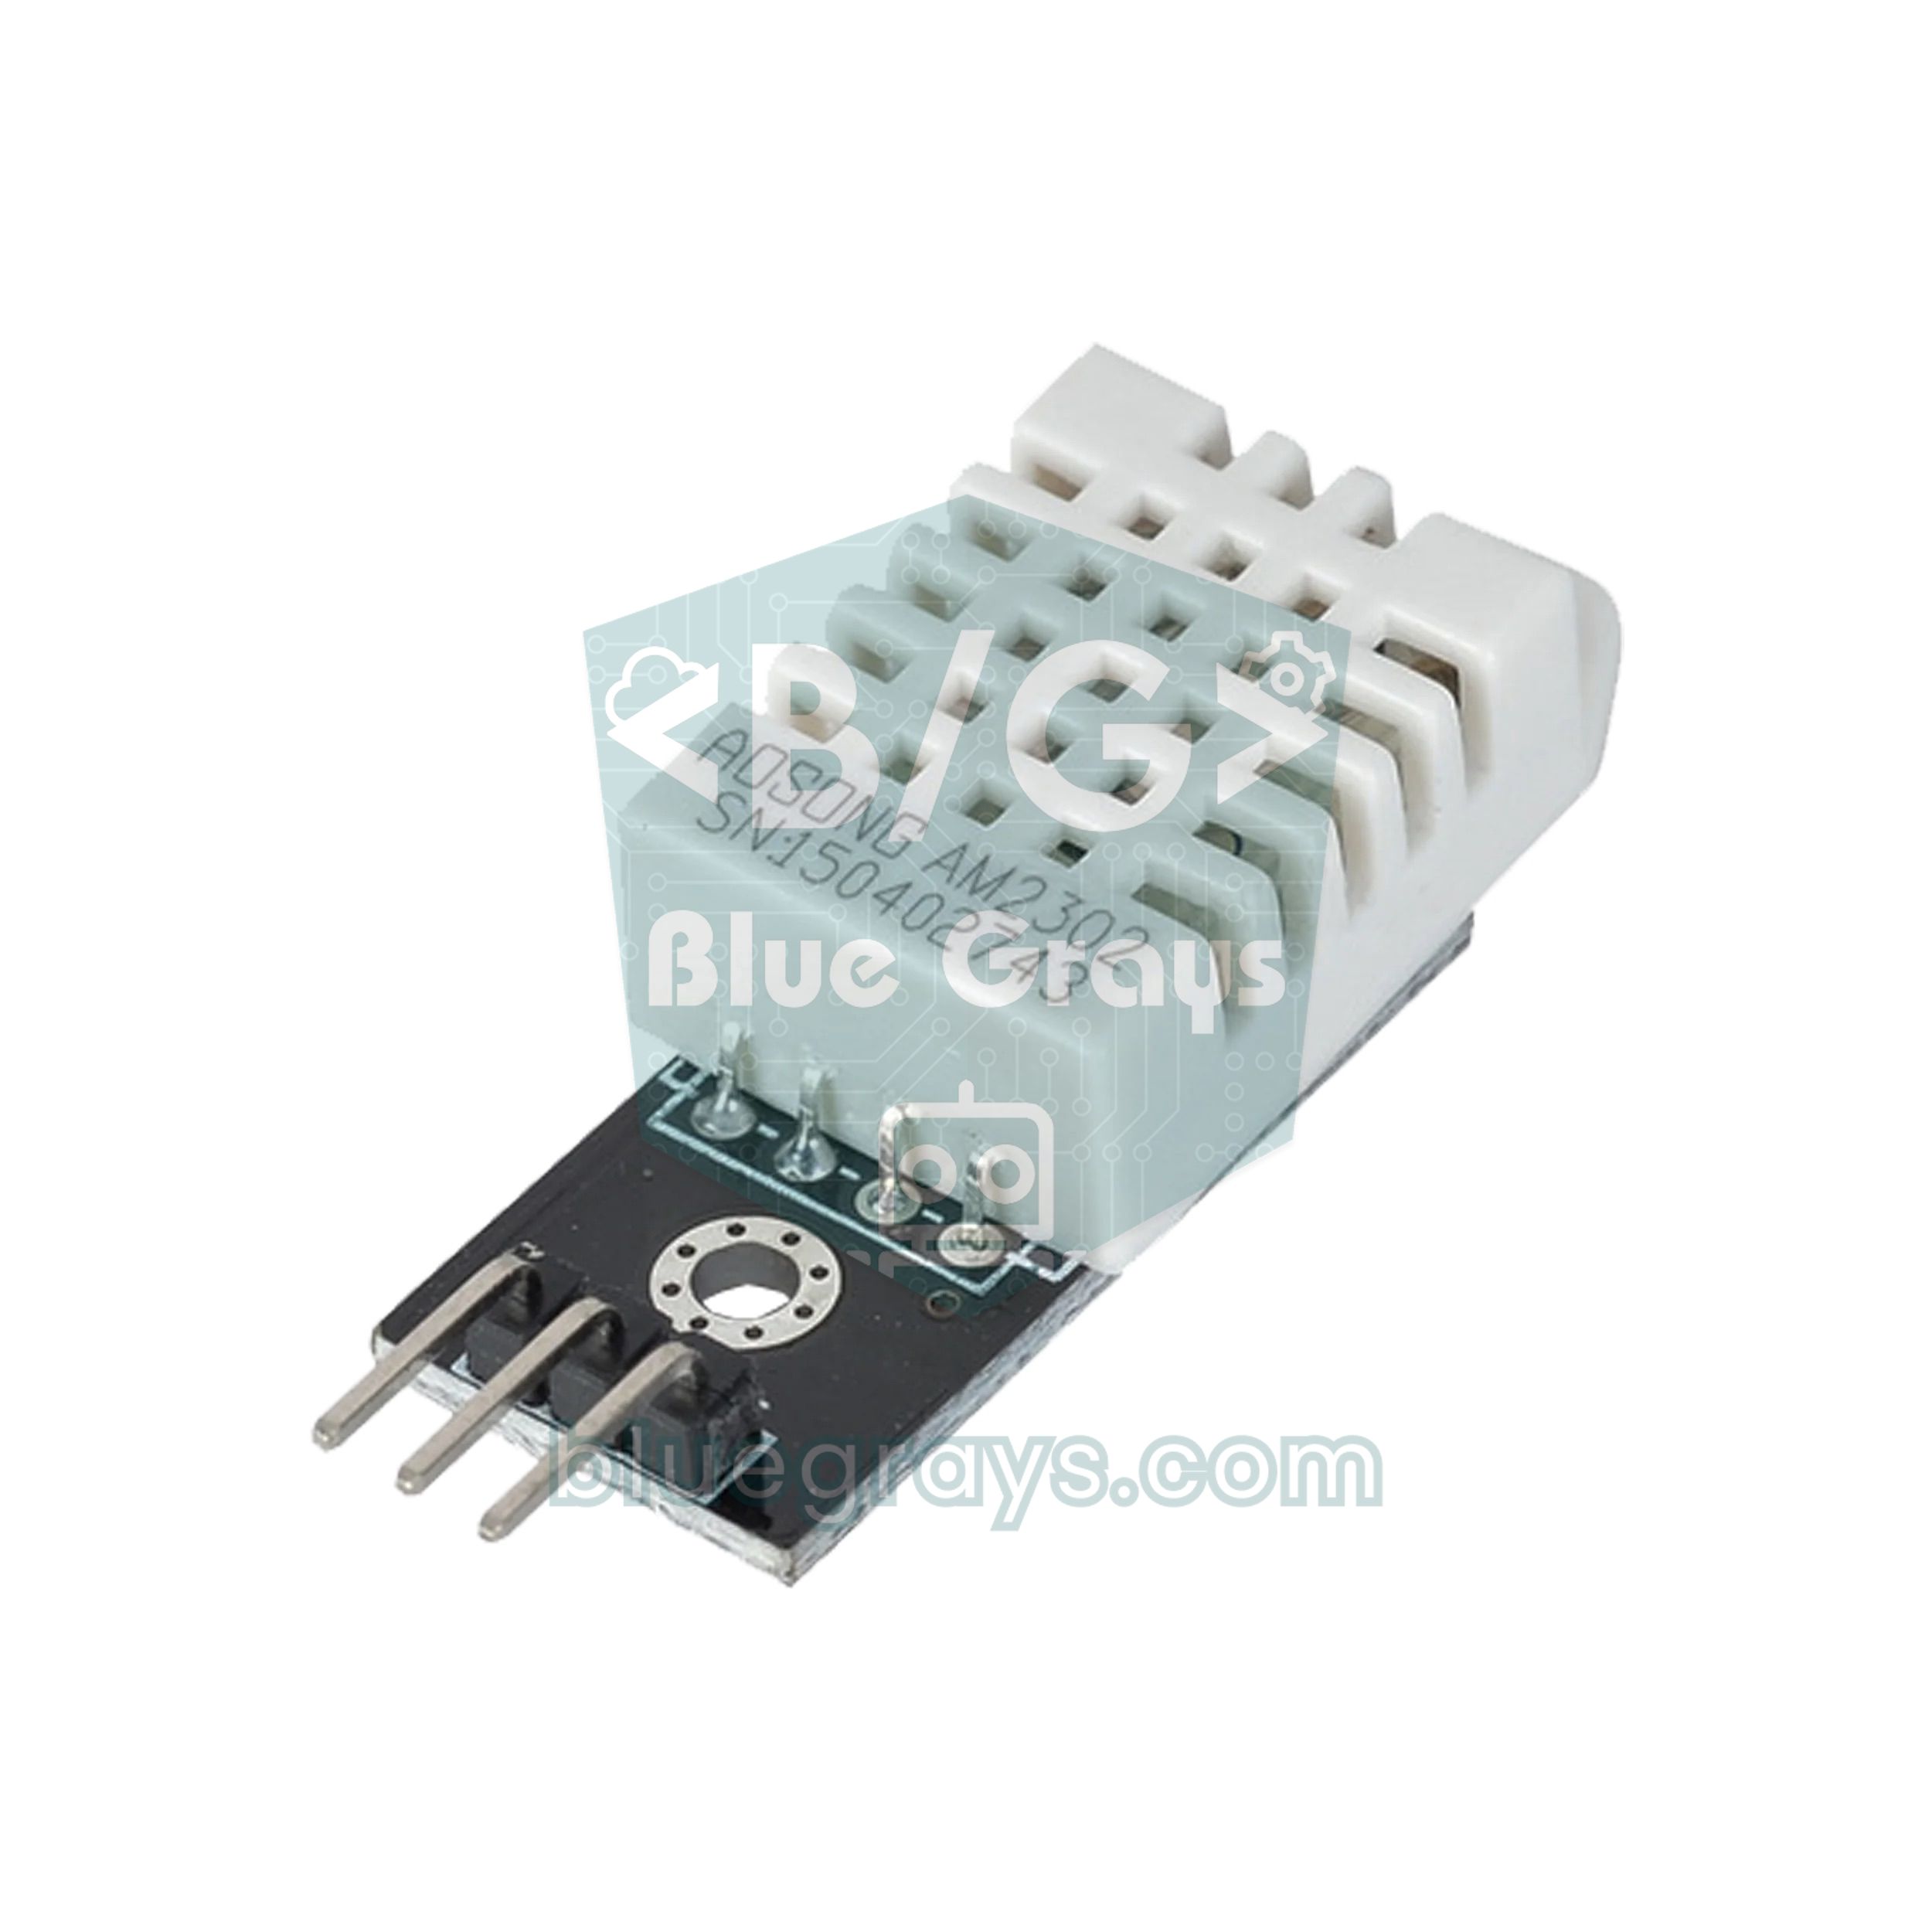
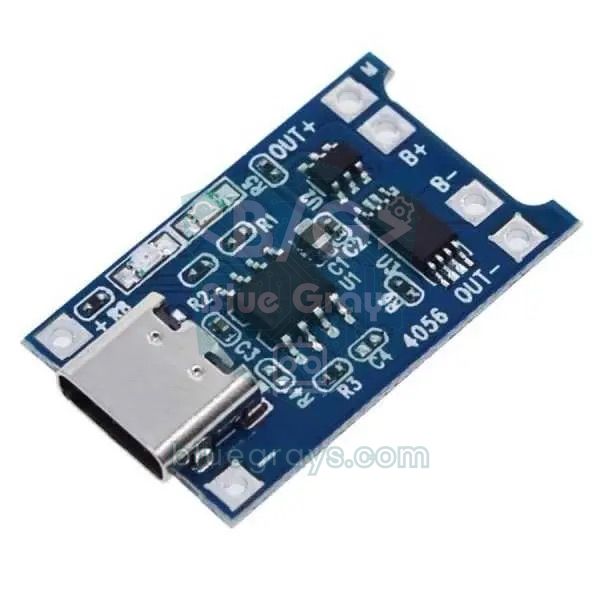
| Connection | ESP32 pin | Note |
|---|---|---|
| DHT22 VCC (+) | 3V3 | Works from 3.3–5 V |
| DHT22 DATA | GPIO 4 | On a bare sensor, add a 10 kΩ resistor between DATA and 3V3 |
| DHT22 GND (−) | GND | Common ground |
| Battery + | GPIO 34 (through the divider) | Two 100 kΩ resistors; a 4.2 V battery reaches the pin as 2.1 V |
| Battery − | GND | The divider's lower resistor also goes to GND |
1#include <WiFi.h>
2#include <esp_now.h>
3#include <esp_wifi.h>
4#include <esp_idf_version.h>
5#include <DHT.h>
6
7const char *AG_ADI = "AgAdi";          // ağ geçidinin bağlandığı Wi-Fi (şifre gerekmez) / Wi-Fi the gateway uses (no password needed)
8uint8_t gecitMac[] = {0x24, 0x6F, 0x28, 0xAA, 0xBB, 0xCC};   // ağ geçidinin STA MAC adresi / gateway STA MAC
9const uint8_t SENSOR_ID = 1;           // her sensöre farklı numara / a different number for each sensor
10const uint64_t UYKU_US = 60ULL * 1000000ULL;   // 60 saniye uyku / sleep for 60 seconds
11
12#define DHT_PIN 4
13#define PIL_PIN 34                     // ADC1 pini, 100k + 100k bölücü / ADC1 pin, 100k + 100k divider
14DHT dht(DHT_PIN, DHT22);
15
16typedef struct __attribute__((packed)) {
17  uint8_t  id;
18  uint32_t sayac;
19  float    sicaklik;
20  float    nem;
21  float    pil;
22} SensorPaketi;
23
24RTC_DATA_ATTR uint8_t kanal = 0;       // derin uykuda silinmez / kept during deep sleep
25RTC_DATA_ATTR uint32_t paketSayaci = 0;
26volatile bool sonucGeldi = false;
27volatile bool teslimEdildi = false;
28
29#if ESP_IDF_VERSION >= ESP_IDF_VERSION_VAL(5, 5, 0)
30void gonderimSonucu(const esp_now_send_info_t *bilgi, esp_now_send_status_t durum) {   // çekirdek 3.3+ / core 3.3+
31#else
32void gonderimSonucu(const uint8_t *mac, esp_now_send_status_t durum) {                // çekirdek 2.x-3.2 / core 2.x-3.2
33#endif
34  teslimEdildi = (durum == ESP_NOW_SEND_SUCCESS);
35  sonucGeldi = true;
36}
37
38uint8_t kanalBul(const char *ag) {     // ağın kanalını tarayarak bul / find the network's channel by scanning
39  int n = WiFi.scanNetworks();
40  for (int i = 0; i < n; i++) {
41    if (WiFi.SSID(i) == ag) return WiFi.channel(i);
42  }
43  return 1;                            // bulunamazsa kanal 1 / channel 1 if not found
44}
45
46void uyu() {
47  esp_sleep_enable_timer_wakeup(UYKU_US);
48  esp_deep_sleep_start();
49}
50
51void setup() {
52  Serial.begin(115200);
53  dht.begin();
54  WiFi.mode(WIFI_STA);
55
56  if (kanal == 0) kanal = kanalBul(AG_ADI);   // yalnız ilk açılışta ya da hatadan sonra tara / scan only at first boot or after a failure
57  esp_wifi_set_promiscuous(true);
58  esp_wifi_set_channel(kanal, WIFI_SECOND_CHAN_NONE);
59  esp_wifi_set_promiscuous(false);
60
61  if (esp_now_init() != ESP_OK) uyu();
62  esp_now_register_send_cb(gonderimSonucu);
63
64  esp_now_peer_info_t es = {};
65  memcpy(es.peer_addr, gecitMac, 6);
66  es.channel = kanal;
67  es.ifidx = WIFI_IF_STA;
68  esp_now_add_peer(&es);
69
70  SensorPaketi p;
71  p.id = SENSOR_ID;
72  p.sayac = ++paketSayaci;
73  p.sicaklik = dht.readTemperature();
74  p.nem = dht.readHumidity();
75  p.pil = analogReadMilliVolts(PIL_PIN) * 2 / 1000.0;   // bölücü yarıya indirir / the divider halves it
76
77  esp_now_send(gecitMac, (uint8_t *)&p, sizeof(p));
78  unsigned long baslangic = millis();
79  while (!sonucGeldi && millis() - baslangic < 200) delay(1);   // en fazla 200 ms bekle / wait up to 200 ms
80
81  Serial.printf("Kanal %u, %.1f C, %%%.0f, %.2f V, %s\n", (unsigned)kanal, p.sicaklik, p.nem, p.pil,
82                teslimEdildi ? "teslim edildi / delivered" : "teslim edilemedi / failed");
83  if (!teslimEdildi) kanal = 0;        // teslim edilemedi: sonraki uyanışta yeniden tara / not delivered: rescan next wake
84  Serial.flush();
85  uyu();
86}
87
88void loop() {
89}
The key to this sketch is the variables marked with RTC_DATA_ATTR. In deep sleep the ESP32's main memory is wiped, but these variables in RTC memory survive. The sensor only finds the channel by scanning on the first boot (which takes about 2 seconds) and uses that channel directly on later wake-ups; if a packet can't be delivered, it resets the channel variable and scans again on the next wake-up. So even if the router changes channel, the sensor recovers after one cycle. The battery voltage is read already calibrated with analogReadMilliVolts() and multiplied by 2 because the divider halves it; you can check the resistor values in the Voltage divider tool. GPIO 34 is an ADC1 pin; this matters because ADC2 pins can't take analog readings while the Wi-Fi radio is on. For the details of sleep modes, see our ESP32 Deep Sleep guide.
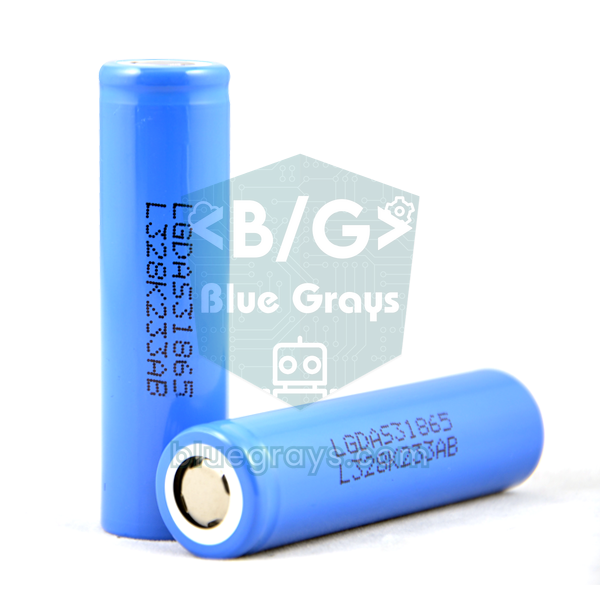
Let's roughly estimate the battery life. A wake-up without a scan (boot, measurement and sending) takes about 0.3 seconds and draws about 100 mA on average, which comes to roughly 0.008 mAh per wake-up. Waking once a minute gives 1440 wake-ups a day, for a total of about 12 mAh. A bare ESP32 module draws around 10 µA in deep sleep; together with the DHT22's standby current and the divider resistors, sleep consumption stays below 2 mAh a day. So the sensor uses about 14 mAh a day, and a 2000 mAh 18650 cell lasts 4–5 months. To run the numbers with your own values, use the Battery life calculator.
ESP-NOW with the ESP8266
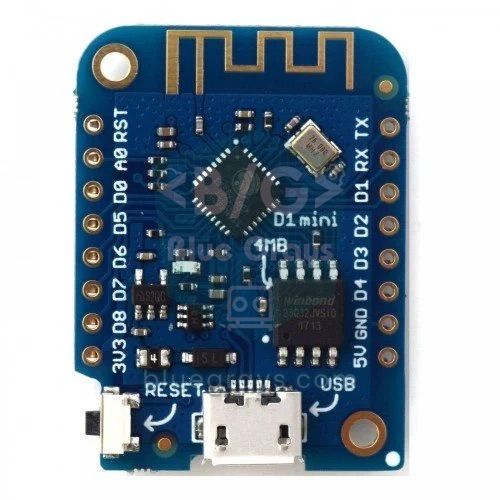
ESP8266 boards can use ESP-NOW on the same network as ESP32 boards, but their Arduino library is different: you include espnow.h instead of esp_now.h and ESP8266WiFi.h instead of WiFi.h, and the functions come from the ESP8266 SDK rather than ESP-IDF. The main differences are:
| Task | ESP32 (esp_now.h) | ESP8266 (espnow.h) |
|---|---|---|
| Initialise | esp_now_init() == ESP_OK | esp_now_init() == 0 |
| Role | Not needed | esp_now_set_self_role(ESP_NOW_ROLE_COMBO) |
| Add a peer | esp_now_add_peer(&es) with a struct | esp_now_add_peer(mac, ESP_NOW_ROLE_COMBO, channel, NULL, 0) |
| Receive callback | (const esp_now_recv_info_t *bilgi, const uint8_t *veri, int uzunluk) | (uint8_t *mac, uint8_t *data, uint8_t len) |
| Send callback | (..., esp_now_send_status_t durum) | (uint8_t *mac, uint8_t status); 0 means success |
| Largest packet | 250 bytes (1470 with v2) | 250 bytes |
On the ESP8266, don't forget to add WiFi.disconnect() after WiFi.mode(WIFI_STA); at startup the ESP8266 tries to reconnect to the last router it used on its own, which changes the channel and can cause lost packets. If you define the data struct as packed on both sides, the ESP32 and ESP8266 read the same bytes the same way, since both are 32-bit little-endian processors. For the ESP8266's pins and setup, see our ESP8266 NodeMCU guide.
ESP-NOW with MicroPython and the Raspberry Pi Pico
If you program the ESP32 in MicroPython, there's a ready-made espnow module for ESP-NOW; it's included in the MicroPython builds for the ESP32 and ESP8266. The code below receives the 30-byte Paket struct sent by the Arduino sender example and decodes it with struct.unpack(). In the format string, < means little-endian with no padding; B is a 1-byte number, I a 4-byte unsigned number, f a float and 16s 16 bytes of text. The bool field from Arduino is read as 0 or 1 with B. Upload the code to the board with Thonny and enter the MAC address it prints into the aliciMac array of the Arduino sender:
1import network
2import espnow
3import struct
4import binascii
5
6sta = network.WLAN(network.STA_IF)     # ESP-NOW istasyon arayüzünü kullanır / ESP-NOW uses the station interface
7sta.active(True)
8print("MAC:", binascii.hexlify(sta.config("mac"), ":").decode())   # bu adresi vericiye yaz / put it in the sender
9
10e = espnow.ESPNow()
11e.active(True)
12
13BICIM = "<BIffB16s"                    # Arduino'daki Paket yapısı / the Paket struct from Arduino
14BOYUT = struct.calcsize(BICIM)         # 30 bayt / 30 bytes
15
16while True:
17    mac, msg = e.recv()                # paket gelene kadar bekle / wait for a packet
18    if msg and len(msg) == BOYUT:
19        kimlik, sayac, sicaklik, nem, buton, mesaj = struct.unpack(BICIM, msg)
20        metin = mesaj.split(b"\x00")[0].decode()
21        print(binascii.hexlify(mac, ":").decode(), kimlik, sayac,
22              round(sicaklik, 1), round(nem, 1), bool(buton), metin)
Sending a packet from MicroPython takes two lines too: add the receiver with e.add_peer(mac) and send the same struct with e.send(mac, struct.pack(BICIM, 2, 1, 23.5, 45.0, 0, b"Selam")), so Arduino and MicroPython boards can work together on the same network. On a MicroPython board connected to Wi-Fi, turn off power saving with sta.config(pm=sta.PM_NONE) so you don't miss packets. If you're new to MicroPython, start with our MicroPython basics guide. The Raspberry Pi Pico family, however, has no ESP-NOW: the standard Pico has no wireless at all, and the CYW43439 chip on the Pico W and Pico 2 W only runs standard Wi-Fi and Bluetooth. To bring a Pico into an ESP-NOW network, connect a small ESP32-C3 to it over UART serial communication and use it as a bridge, or let the Pico W talk to the gateway over Wi-Fi; Wi-Fi on the Pico W is covered in Pico W Wi-Fi and web server. The same bridge approach works for the Arduino Uno.
Encrypting ESP-NOW packets
By default ESP-NOW packets are unencrypted; anyone on the same channel can capture them over the air and send fake packets that imitate your struct. Use encryption for projects like door locks or garage doors. ESP-NOW uses CCMP, as in WPA2, and works with two keys: a 16-byte PMK that is the same on all devices (set with esp_now_set_pmk()) and a separate 16-byte LMK for each peer. When adding the peer, you set es.encrypt = true and copy the key into es.lmk; the other side must also add you as an encrypted peer with the same LMK. To receive encrypted packets, the receiver must add the sender to its list. Broadcast packets can't be encrypted, and by default you can have at most 7 encrypted peers. Encryption alone doesn't stop a captured packet from being replayed later; adding an increasing counter to critical commands and rejecting old numbers on the receiver is a good extra safeguard.
ESP-NOW project ideas
- Wireless doorbell: When the button on the ESP32 at the door is pressed, a buzzer sounds on the board inside; for battery life, use the button as the pin that wakes the board from deep sleep.
- Multi-room temperature monitoring: Put a DHT22 or BME280 sensor in every room, collect the readings on one gateway and compare them on a web page.
- Garden watering: A soil moisture sensor sends a "water now" command to the board next to the pump; for wiring see Soil Moisture Sensor.
- Wireless robot remote: Send joystick values 20 times a second; for the mechanical side of the robot, see Building an Arduino Robot Car.
- Garden alarm: When a PIR sensor in the garden detects motion, the gateway sends a notification via Telegram.
- Synchronised light show: Switch the WS2812B strips on several boards to the same colour at once with a single broadcast packet.
Common ESP-NOW errors and fixes
| Symptom / error | Cause | Fix |
|---|---|---|
| "ESPNOW: Peer interface is invalid", peer can't be added | esp_now_peer_info_t used without clearing it | Clear the struct with = {} or memset and set ifidx = WIFI_IF_STA |
| Constant "failed" messages | Wrong MAC (AP address or a typo), receiver off or on another channel | Read the receiver's STA MAC address again and check both boards' channels |
| Packets arrive but the values are garbage | The struct differs between the two sides or contains a String | Define the struct as packed in the same order on both sides and use a char array for text |
| "invalid conversion ... to 'esp_now_recv_cb_t'" | Code written for core 2.x is compiled on 3.x | Write the receive callback with const esp_now_recv_info_t * |
| "invalid conversion ... to 'esp_now_send_cb_t'" | Code written for core 3.0–3.2 is compiled on 3.3+ | Write the send callback with const esp_now_send_info_t * or use the ESP_IDF_VERSION macro |
| "Peer channel is not equal to the home channel, send fail!" | The channel of the board connected to Wi-Fi differs from the peer's channel | Add the peer with channel = 0 and move the sensors to the router's channel |
| The gateway connected to Wi-Fi misses some packets | Wi-Fi power saving (modem sleep) | Use WiFi.setSleep(false) |
| ESP_ERR_ESPNOW_NOT_INIT | esp_now_init() wasn't called, or was called before Wi-Fi started | First WiFi.mode(WIFI_STA), then esp_now_init() |
| ESP_ERR_ESPNOW_FULL | The peer list has reached 20 entries | Remove old peers with esp_now_del_peer() or use broadcast |
| ESP_ERR_ESPNOW_NO_MEM | Packets are sent back to back before the send queue empties | Wait for the send result before sending the next packet |
| The MAC address shows 00:00:00:00:00:00 | On core 3.x, WiFi.macAddress() was called before Wi-Fi fully started | Use esp_wifi_get_mac() after WiFi.mode(WIFI_STA) |
ESP-NOW is the fastest way to make several ESP32 boards talk without a router, cables or extra modules: read the MAC address, define your data struct the same on both sides, add the peer and send. When you use it alongside Wi-Fi, remember the one rule: everyone must be on the same channel. In the BlueGrays app you can try every building block from this guide, including LED and button control with the ESP32, temperature measurement with the DHT22, Wi-Fi connection, a web server and deep sleep, step by step with circuit diagrams and ready-to-use code.
Frequently asked questions
Does ESP-NOW need a router or internet?
No. ESP-NOW uses the boards' Wi-Fi radio but doesn't join any network; the boards send packets directly to each other's MAC addresses. If you want to get data to the internet, you need one ESP32 acting as a gateway that is connected to both Wi-Fi and ESP-NOW.
What is the range of ESP-NOW?
With ESP32 boards that have an onboard antenna, you typically get 20–40 metres indoors depending on the walls and around 100–200 metres in open space. With external-antenna modules and LR (Long Range) mode enabled on both sides, Espressif says up to 1 kilometre is possible in line of sight.
How many devices can connect with ESP-NOW?
A board's peer list can hold up to 20 devices, and by default at most 7 of them can be encrypted. This limit is for the devices you send to: a gateway can listen to more than 20 sensors sending unencrypted packets, and a broadcast reaches every device on the same channel with a single packet.
Can ESP-NOW and Wi-Fi be used at the same time?
Yes, but because the ESP32's single radio works on one channel at a time, every ESP-NOW device must use the router's channel. Turn off power saving on the gateway with WiFi.setSleep(false), and on the sensors find the channel by scanning for the network name or set the router to a fixed channel.
Can an ESP32 and an ESP8266 communicate with ESP-NOW?
Yes. Both chips support ESP-NOW and can send packets to each other; only the library (espnow.h) and the function signatures are different on the ESP8266. Define the data struct as packed and identical on both sides, and keep packets under 250 bytes.
What is the maximum data size for ESP-NOW?
With ESP-NOW v1 a packet holds at most 250 bytes, and this limit applies to every board including the ESP8266. Boards running ESP-IDF 5.4 or later (Arduino core 3.2+) can send up to 1470 bytes with ESP-NOW v2, but boards using v1 can't receive packets longer than 250 bytes.
Projects to build after reading this
See all projects
LED Blink with ESP32
Teaches basic GPIO output usage with ESP32. We achieve a blinking effect by turning an LED on and off from a digital pin. ESP32 version of the classic blink project on Arduino UNO; the basic blink commands in the Arduino environment are the same, but the ESP32's pin layout and 3.3 V GPIO levels differ from those of the Arduino UNO.

ESP32 LED Control with Pushbutton (Toggle)
Each time the button is pressed the state of the LED changes: if it is on it turns off, if it is off it turns on. Classic toggle pattern. With debounce we clean up the mechanical noise of the pushbutton to ensure a single toggle with a single press.
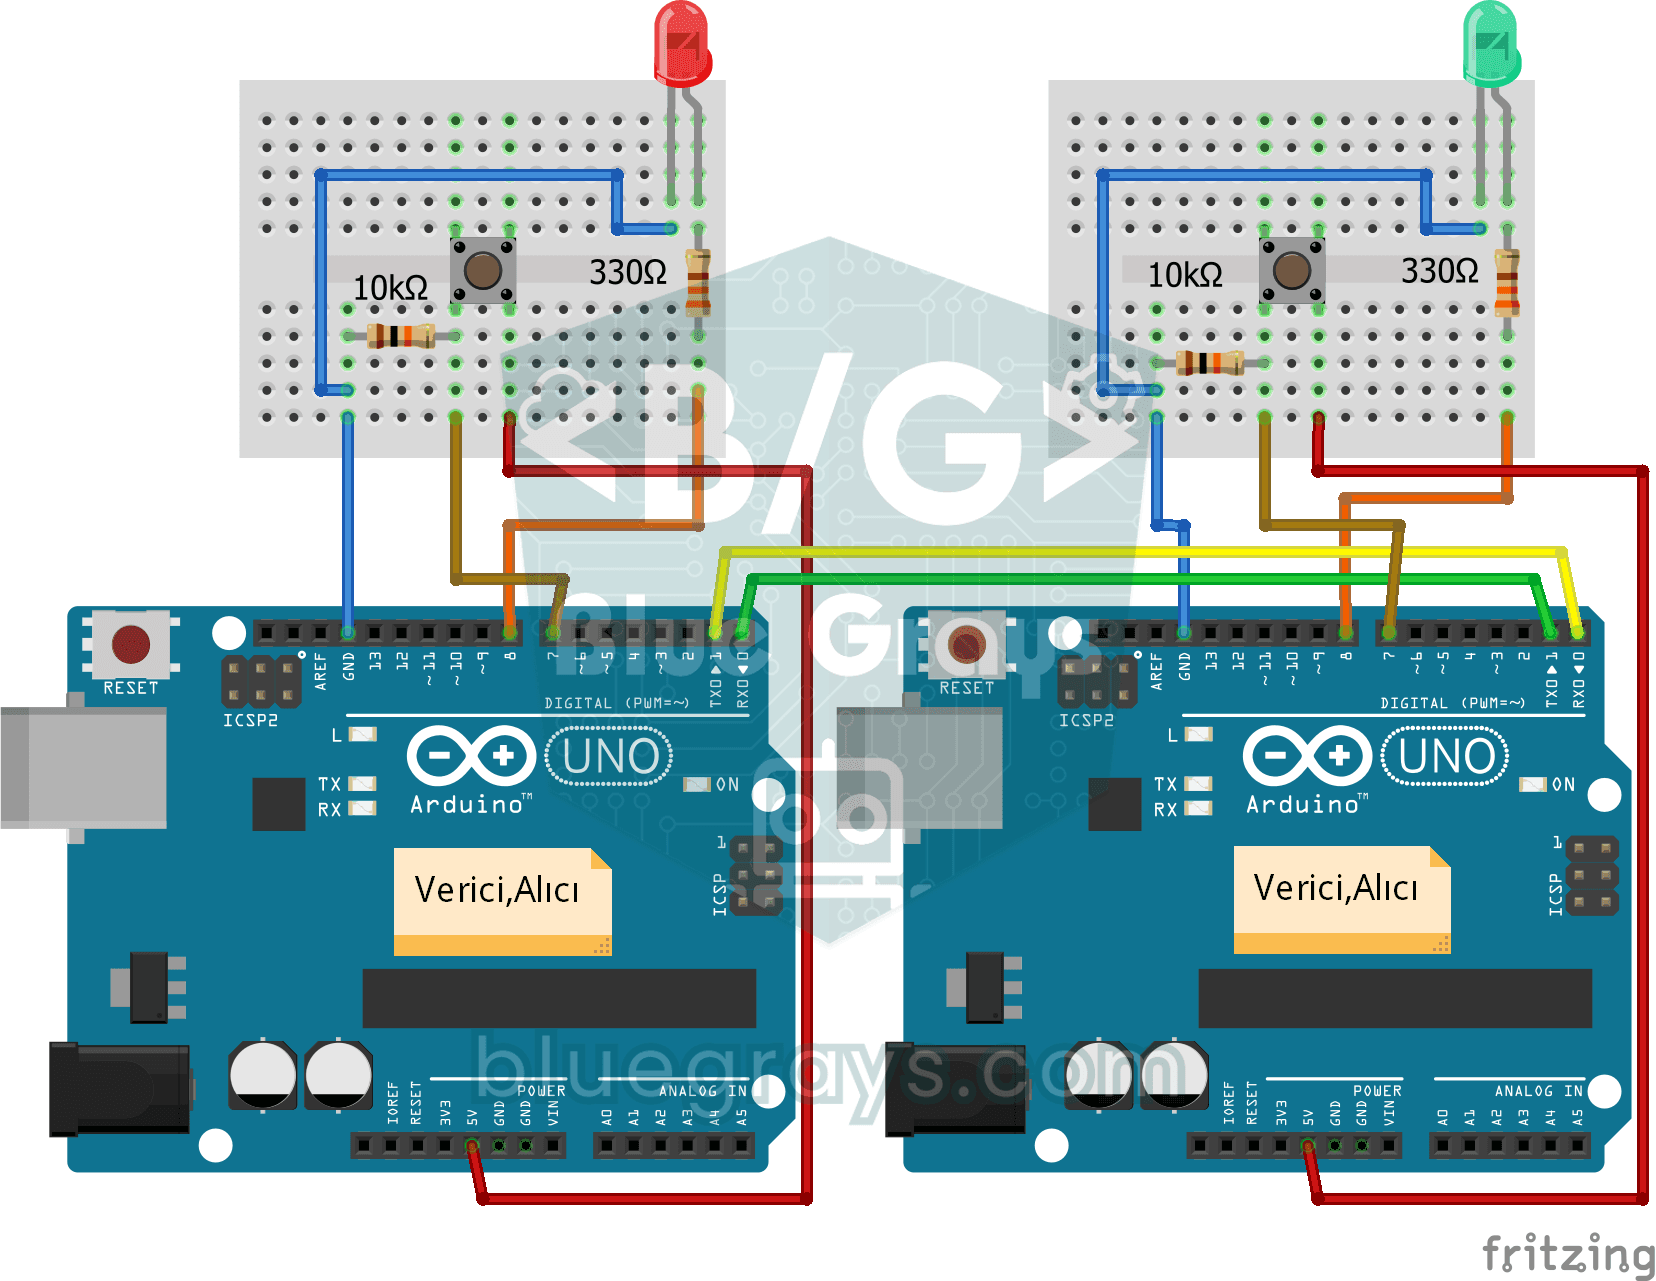
Two-Way Communication Between 2 Arduinos
Two Arduinos are wired together and talk to each other: press the button on one and the light on the other comes on, press it again and it goes off. Both boards run the same program, so each one both

ESP32 DHT22 Temperature and Humidity (with LCD Display)
This project measures ambient temperature and humidity using a DHT22 sensor and displays the data in real time on a 16x2 I2C LCD. Data is read from the sensor using the one-wire protocol via the Adafruit DHT library. This project serves as the foundation for IoT weather stations, smart home automation, or environmental monitoring systems in greenhouses. Communication with the DHT22 is established via the ESP32's GPIO 4 pin.

ESP32 Wi-Fi STA Connection (with LCD Screen)
In this project, we connect the ESP32 to the home Wi-Fi network in Station (STA) mode in a secure, fault-tolerant manner. We store the SSID and password in a separate secrets.h file to prevent leaking to Git, set up an auto-reconnect mechanism, and display the RSSI signal level and IP address on an I2C LCD screen. The internal LED works as a status indicator. It is a production-grade connection manager.

ESP32 Asynchronous Web Server (with IP Display on LCD)
In this project, we’re turning the ESP32 into an asynchronous web server that you can control from your phone or computer on the same Wi-Fi network. Thanks to the ESPAsyncWebServer library, the server can process multiple requests simultaneously (unlike the classic WebServer.h, which blocks on a single request). You’ll be able to open the ESP32’s IP address in a browser and click the ON/OFF buttons (the /on and /off routes) to turn the LED connected to GPIO 5 on and off.

ESP32 Deep Sleep — Battery Saving (OLED + RTC RAM Counter)
The ESP32's Deep Sleep mode reduces current consumption to ~10 µA by shutting down the CPU and most peripherals, making it critical for battery-powered IoT devices. In this project, we use three different wake-up sources: a timer (15 seconds), an external pin (EXT0 — button GPIO 33), and touch (T0/GPIO 4). Variables marked with RTC_DATA_ATTR are preserved during deep sleep—the boot counter, timer wake counter, and button wake counter are continuously tracked. On each wake-up, the SSD1306 OLED
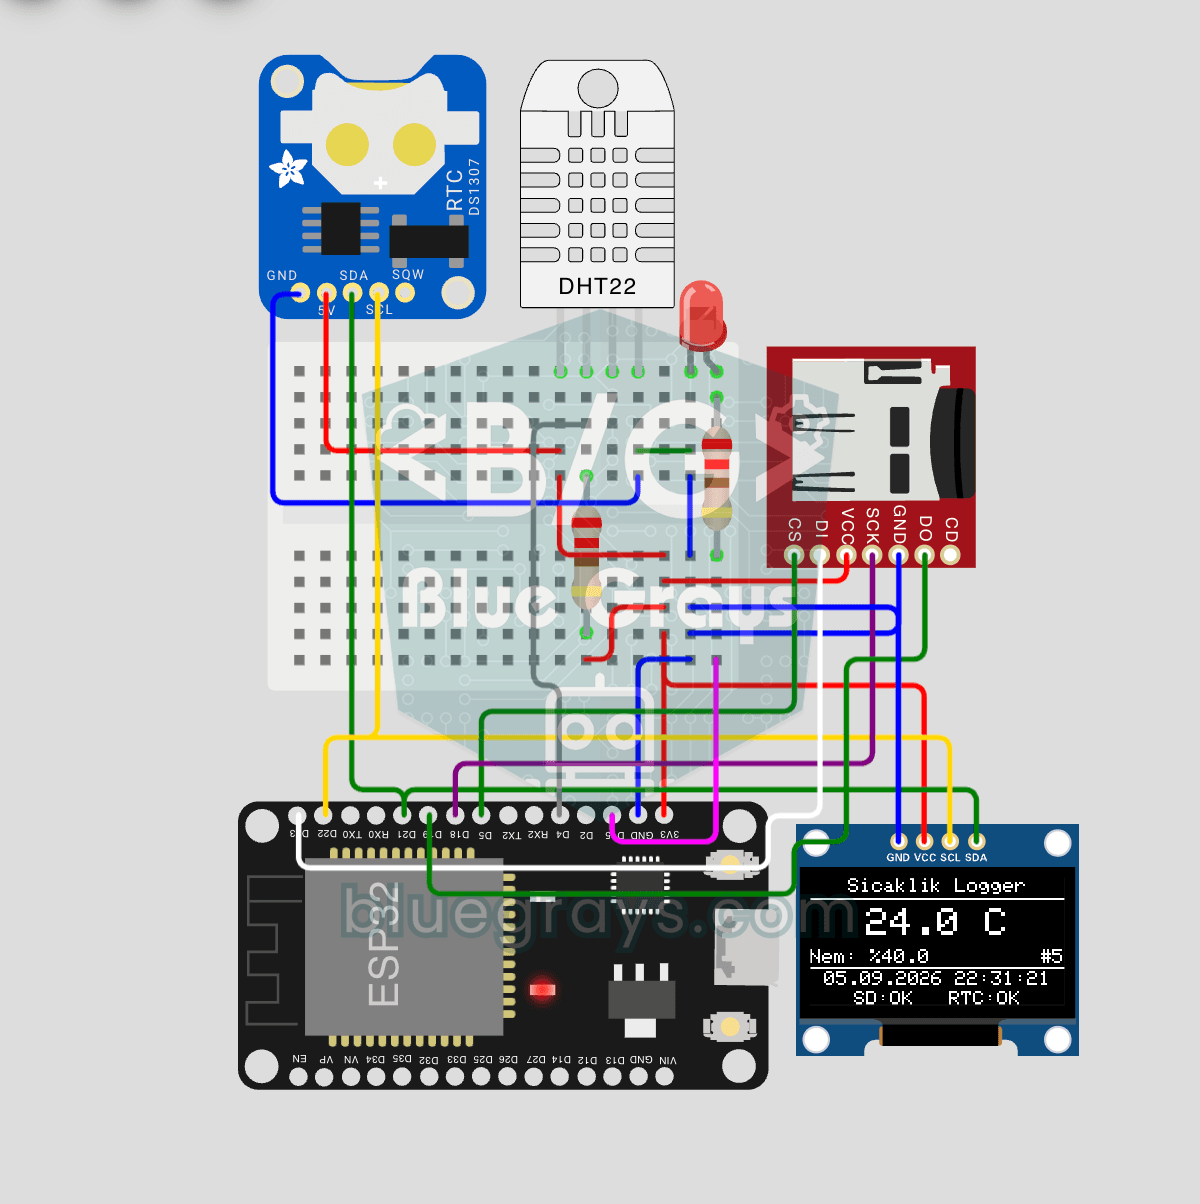
ESP32 Temperature Data Logger (DHT22 + DS1307 RTC + microSD + OLED)
Build a timestamped temperature logger with ESP32! Read DHT22 temperature/humidity every minute, get real-world time from DS1307 RTC, and log to microSD card as CSV. The OLED displays live temperature (large font), humidity percentage, timestamp, and log counter. The /temp_log.csv file on the SD card opens in Excel, Google Sheets, or Python pandas for analysis — perfect for greenhouse monitoring, home/room temperature tracking, laboratory data collection, food storage conditions, or beehiv