
How to Understand Arduino Code: Read a Sketch Line by Line
How to understand Arduino code: libraries, pin definitions, setup and loop, functions and if conditions, a sample sketch explained line by line, ESP32 and Pico.

Knowing how to understand Arduino code is the difference between copying a project and hoping it works and truly making it your own. Almost every sketch you find online, in books or from a friend follows the same skeleton: libraries and pin definitions at the top, a setup() that runs once in the middle, a loop() that runs forever below it and, if needed, a few functions of its own. Once you recognise that skeleton, you can look at code you've never seen and say "this line reads that pin, and in this case it starts that motor".
In this guide you'll learn a step-by-step method for reading Arduino code. First you'll get to know the parts of a sketch and what each one does, then we'll take apart, line by line, the code of a small bin whose lid opens when a hand comes close. After that we'll cover reading variables, conditions and functions, adapting someone else's code to your circuit and moving the same code to an ESP32 and a Raspberry Pi Pico. Finally, you'll see how to practise with the "Understand the code" tab in BlueGrays.
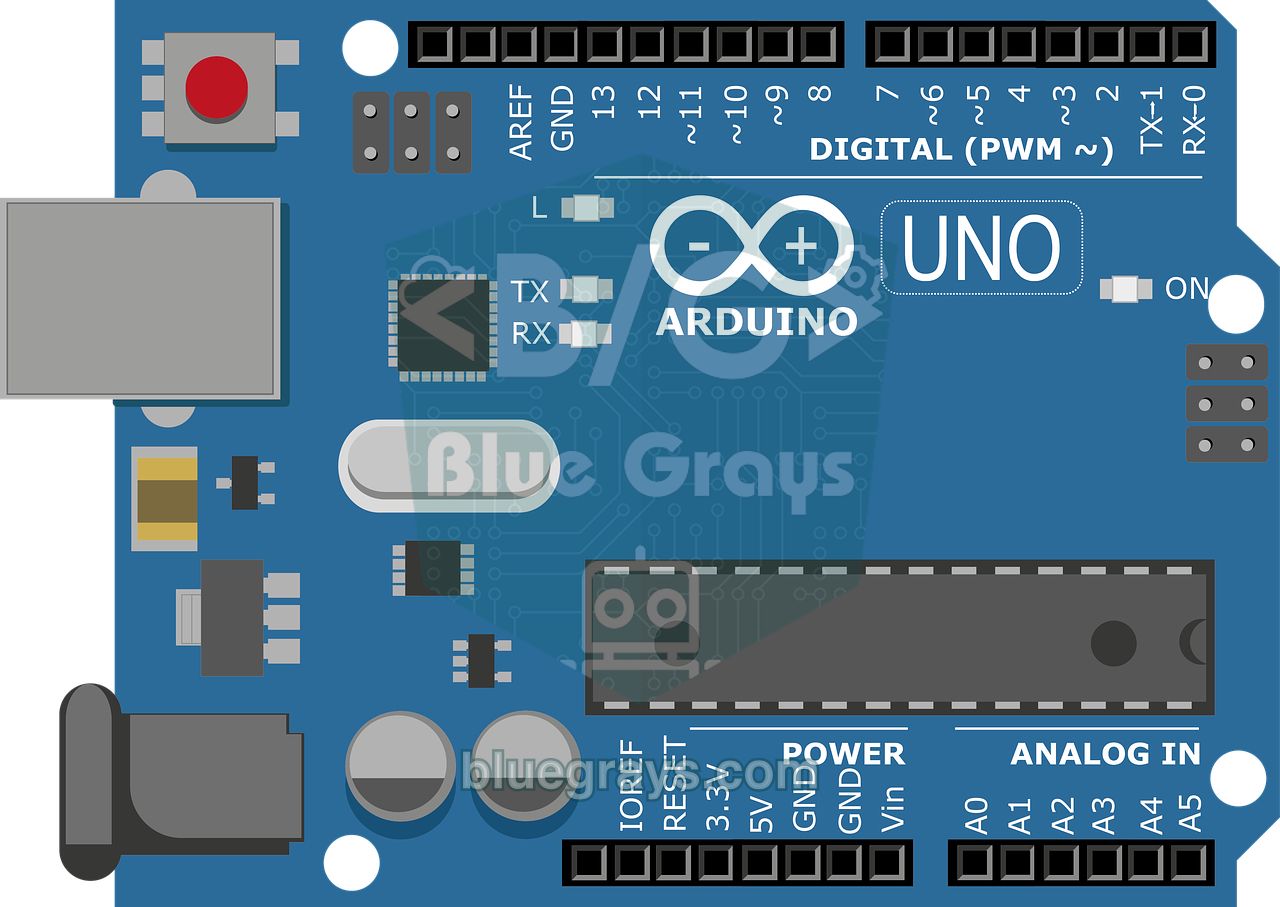
The anatomy of an Arduino sketch
Arduino sketches always follow the same order from top to bottom. The compiler reads the file from start to finish, but the board runs it in a different order: global declarations are prepared first, then setup() runs once, and then loop() repeats for as long as the board has power. The table sums up the parts you'll see when you open a sketch and how to recognise them:
| Part of the code | What it does | Typical line | How to spot it |
|---|---|---|---|
| Comments | Explain the code; the compiler ignores them | // note or /* ... */ | Start with //, shown in grey in the IDE |
| Libraries | Add ready-made code (servo, display, sensor) | #include <Servo.h> | Start with #, right at the top |
| Pin definitions and constants | Give names to pin numbers and thresholds | const int LED_PIN = 13; | Usually UPPERCASE names |
| Global variables and objects | Data you can reach from anywhere in the code | int count = 0; Servo lidServo; | Outside every function |
| setup() | Runs once at power-up | pinMode(LED_PIN, OUTPUT); | void setup() { ... } |
| loop() | Repeats endlessly; the real work happens here | if (distance < 20) { ... } | void loop() { ... } |
| Your own functions | Package a job you repeat | long readDistanceCm() { ... } | Separate blocks above or below loop |
Where to start reading: a five-step method
- Read the comments and libraries. The #include lines give away the hardware: Servo.h means a servo, LiquidCrystal_I2C.h an I2C LCD, DHT.h a temperature sensor.
- Write the pin definitions on paper. Turn every const int or #define line into a wiring list such as "TRIG = D9, ECHO = D10" and compare it with your circuit.
- Read setup(). This is where you see which pins are inputs and outputs, the serial speed and how the board starts (servo closed, LED off and so on).
- Run loop() once by hand. Pick a sensor value (say 45 cm) and follow the code line by line with it; note which if block you enter and which variables change.
- Dive into functions when you need to. When you see a call like readDistanceCm() inside loop(), guess what it does from its name first, then open the function to check your guess.
Example sketch: a line-by-line breakdown
For practice we picked the code of a real project: an HC-SR04 distance sensor sees a hand coming close, a servo opens the lid and closes it three seconds later, an LED lights up meanwhile and the number of openings is printed to the Serial Monitor. The sketch has a library, constants, a global variable, an object, setup, loop, a condition and a function of its own. Have a look at the whole thing first, then we'll go through it line by line with the table.
1// Akıllı çöp kutusu: el yaklaşınca kapak açılır / Smart bin: the lid opens when a hand comes close
2#include <Servo.h>                  // servo kütüphanesi / servo library
3
4const int TRIG_PIN = 9;             // HC-SR04 TRIG
5const int ECHO_PIN = 10;            // HC-SR04 ECHO
6const int SERVO_PIN = 6;            // servo sinyal kablosu / servo signal wire
7const int LED_PIN = 13;             // durum LED'i / status LED
8const int OPEN_DISTANCE = 20;       // bundan yakınsa aç (cm) / open if closer than this (cm)
9const int OPEN_ANGLE = 90;          // açık kapak açısı / open lid angle
10const int CLOSED_ANGLE = 0;         // kapalı kapak açısı / closed lid angle
11
12Servo lidServo;                     // servo nesnesi / servo object
13int openCount = 0;                  // kaç kez açıldı / how many times it opened
14
15void setup() {
16  Serial.begin(9600);
17  pinMode(TRIG_PIN, OUTPUT);
18  pinMode(ECHO_PIN, INPUT);
19  pinMode(LED_PIN, OUTPUT);
20  lidServo.attach(SERVO_PIN);
21  lidServo.write(CLOSED_ANGLE);     // açılışta kapalı / closed at power-up
22}
23
24void loop() {
25  long distance = readDistanceCm(); // mesafeyi ölç / measure the distance
26  Serial.print("Mesafe / Distance: ");
27  Serial.println(distance);
28
29  if (distance > 0 && distance < OPEN_DISTANCE) {
30    openCount++;                    // sayacı bir artır / add one to the counter
31    digitalWrite(LED_PIN, HIGH);
32    lidServo.write(OPEN_ANGLE);     // kapağı aç / open the lid
33    delay(3000);                    // 3 sn açık kal / stay open for 3 s
34    lidServo.write(CLOSED_ANGLE);   // kapağı kapat / close the lid
35    digitalWrite(LED_PIN, LOW);
36    Serial.print("Acilma sayisi / Times opened: ");
37    Serial.println(openCount);
38  }
39  delay(100);                       // saniyede yaklaşık 10 ölçüm / about 10 readings per second
40}
41
42// Mesafeyi santimetre olarak döndürür / returns the distance in centimetres
43long readDistanceCm() {
44  digitalWrite(TRIG_PIN, LOW);
45  delayMicroseconds(2);
46  digitalWrite(TRIG_PIN, HIGH);     // 10 µs tetik darbesi / 10 µs trigger pulse
47  delayMicroseconds(10);
48  digitalWrite(TRIG_PIN, LOW);
49  long duration = pulseIn(ECHO_PIN, HIGH, 30000);  // en fazla 30 ms bekle / wait at most 30 ms
50  return duration / 58;             // µs'yi cm'ye çevir / convert µs to cm
51}| Line | What it does | What happens if you change it? |
|---|---|---|
| #include <Servo.h> | Adds the Servo library to the sketch | Delete it and the compiler says "'Servo' does not name a type" |
| const int TRIG_PIN = 9; | Names pin 9 TRIG_PIN | If you move the wire, you only change this number |
| const int OPEN_DISTANCE = 20; | Threshold distance for opening the lid | Set it to 30 and the lid opens from further away |
| Servo lidServo; | Creates a servo object called lidServo | Every later line has to use the same name |
| int openCount = 0; | Global counter, zero at power-up | Move it into loop() and it resets every pass and always prints 1 |
| lidServo.attach(SERVO_PIN); | Connects the servo to pin 6 | Forget it and the servo never moves |
| long distance = readDistanceCm(); | Calls the function and stores the result | distance only exists inside loop() |
| if (distance > 0 && distance < OPEN_DISTANCE) | Enters the block if both conditions are true | distance > 0 filters out the 0 returned when no echo comes back |
| delay(3000); | Makes the board wait 3 seconds | During that time the Arduino checks nothing else |
| return duration / 58; | Converts the echo time into centimetres | Sound travels there and back, so 1 cm is about 58 µs |
Now let's run loop() by hand with two different situations. With nobody in front of it, the sensor measures 45 cm: distance becomes 45, the Serial Monitor shows "Mesafe / Distance: 45", the condition 45 < 20 is false so the block is skipped, the board waits 100 ms and loop() starts again. That repeats about ten times a second. Bring your hand to 12 cm and both conditions are true: openCount goes from 0 to 1, the LED lights up, the servo turns to 90 degrees, the board waits three seconds, the lid closes, the LED goes off and the Serial Monitor prints "Acilma sayisi / Times opened: 1". Following code with real numbers like this is the most reliable way to read it.
Notice one more detail: if pulseIn() gets no echo within 30 ms, it returns 0. Without the distance > 0 check, the 0 measured when the sensor faces empty space would count as "less than 20" and the lid would open for no reason. Well-written code is full of small checks like this; if you don't see why a line is there, delete it temporarily and watch what happens. You'll find how the sensor works in our HC-SR04 distance sensor guide and the full two-sensor version of the project in the smart bin guide.
Variables and data types: labels on boxes
A variable is a labelled box you put a number or some text into. The word at the start of the line tells you the type of box, in other words what fits inside. On an Arduino Uno, the wrong type causes silent bugs: store millis() in an int, for example, and the number turns negative after about 32 seconds.
| Type | Range (Arduino Uno) | Typical use |
|---|---|---|
| int | -32,768 to 32,767 | Pin numbers, analogRead values, counters |
| long | about ±2.1 billion | pulseIn durations, large numbers |
| unsigned long | 0 to about 4.29 billion | millis() and micros() times |
| float | Decimal numbers, 6–7 digits of precision | Temperature, voltage and distance maths |
| bool | true or false | Is something on or off? |
| byte | 0 to 255 | PWM values, small numbers |
| char / String | One character / text | Commands from the serial port, text for displays |
Where a variable is declared matters too; this is called its scope. In the example, openCount is declared outside every function, so it's global: its value is kept each time loop() runs. distance is declared inside loop(), so it's local: it's created on every pass and disappears when the pass ends. A variable with const in front is a constant and can't change while the program runs. For a deeper introduction, see our Arduino programming basics guide, and for keeping several values in one variable, the Arduino arrays guide.
How to read conditions, loops and functions
- if / else if / else: read it as "if ... then do this, otherwise do that". The curly braces { } show which lines depend on the condition.
- Comparisons: == means "equal to", != "not equal to", < "less than", >= "greater than or equal to". && means "and", || "or", ! "not".
- for loop: read for (int i = 0; i < 5; i++) as "start i at 0, repeat while i is less than 5, add one each time"; the block runs 5 times.
- while loop: while (digitalRead(BUTTON_PIN) == HIGH) reads as "wait as long as the button isn't pressed"; if the condition never changes, the code gets stuck there.
- switch / case: the program takes a different path depending on a variable's value; forget the break at the end of a case and the next case runs as well.
- Function definition: in long readDistanceCm(), long is the type of the value it returns, readDistanceCm is its name and the empty brackets mean it takes no parameters. Functions that start with void return nothing; they just do a job.
Recognising library functions
In a line like lidServo.write(90), the dot tells you the write function belongs to the lidServo object: "lidServo, go to 90 degrees". There are three easy ways to find out what a library function does: in Arduino IDE 2, hover over it to read its description or right-click and choose Go to Definition; open the library's own examples from File > Examples; or look at the function list in the library's .h file. We explain how to install libraries in our how to add an Arduino library guide. These are the basic functions you'll meet in almost every sketch:
| Function | What it does | Example |
|---|---|---|
| pinMode(pin, mode) | Makes a pin an input or an output | pinMode(13, OUTPUT); |
| digitalWrite(pin, value) | Sets an output to 5 V (HIGH) or 0 V (LOW) | digitalWrite(13, HIGH); |
| digitalRead(pin) | Reads whether an input is HIGH or LOW | digitalRead(2) |
| analogRead(pin) | Turns 0–5 V into a number from 0 to 1023 | analogRead(A0) |
| analogWrite(pin, 0–255) | Sets LED brightness or motor speed with PWM | analogWrite(9, 128); |
| delay(ms) | Pauses the board for the given time | delay(1000); |
| millis() | Milliseconds since power-up | if (millis() - last > 500) |
| Serial.begin / print / println | Sends text to the Serial Monitor | Serial.println(distance); |
| map(x, a, b, c, d) | Scales one range of values to another | map(value, 0, 1023, 0, 180) |
| pulseIn(pin, HIGH) | Measures the length of a pulse in µs | pulseIn(10, HIGH, 30000) |
For the full list with detailed examples, see our Arduino commands guide. Understanding the difference between delay() and millis() is one of the most useful things for reading sketches; the millis vs delay guide explains it with examples.
Adapting someone else's code to your circuit
- Pull a wiring table out of the code. Write all the pin constants one under the other; that list is the circuit of the person who wrote the code.
- Compare it with your own circuit. If you used different pins, don't move the wires: change only the numbers in the const lines and leave the rest of the code alone.
- Check for library differences. Two libraries with the same name can use different functions; with I2C LCDs, the 0x27 versus 0x3F address is also the most common mismatch.
- Watch out for active LOW and active HIGH. Most relay modules switch on with LOW; if the code turns things on with HIGH, your relay will do the exact opposite.
- Match the serial speed. If the code has Serial.begin(115200), select 115200 in the Serial Monitor too, or you'll see gibberish.
- Test piece by piece. Run only the part that reads the sensor first, then add the motor and the display once the values look right.
Moving the same code to an ESP32
The ESP32 is also programmed with the Arduino IDE, so most of the code runs as it is; what changes are the pin numbers, the voltage level and a few libraries. The table lists what to check when moving Arduino Uno code to an ESP32:
| Topic | Arduino Uno | ESP32 | What to do |
|---|---|---|---|
| Pin names | D2–D13, A0–A5 | GPIO numbers | Replace the constants with GPIO numbers; watch out for 6–11 and 34–39 |
| Operating voltage | 5 V | 3.3 V | Put a voltage divider on sensors with a 5 V output (HC-SR04 ECHO) |
| analogRead | 10-bit, 0–1023 | 12-bit, 0–4095 | Recalculate thresholds and map() ranges for four times the range |
| Servo library | Servo.h | ESP32Servo.h | Swap the library and give attach the pulse range |
| Serial speed | Usually 9600 | Usually 115200 | Match Serial.begin and the Serial Monitor |
| Memory | 2 KB of RAM | About 320 KB of RAM | Big arrays and Strings are no longer a problem |
1// ESP32 sürümü: değişen satırlar işaretli / ESP32 version: changed lines are marked
2#include <ESP32Servo.h>             // DEĞİŞTİ: Servo.h yerine / CHANGED: instead of Servo.h
3
4const int TRIG_PIN = 26;            // DEĞİŞTİ / CHANGED
5const int ECHO_PIN = 27;            // DEĞİŞTİ: 1k/2k bölücüyle / CHANGED: through a 1k/2k divider
6const int SERVO_PIN = 18;           // DEĞİŞTİ / CHANGED
7const int LED_PIN = 2;              // DEĞİŞTİ: çoğu DevKit'te dahili LED / CHANGED: onboard LED on most DevKits
8const int OPEN_DISTANCE = 20;
9const int OPEN_ANGLE = 90;
10const int CLOSED_ANGLE = 0;
11
12Servo lidServo;
13int openCount = 0;
14
15void setup() {
16  Serial.begin(115200);             // DEĞİŞTİ: ESP32'de yaygın hız / CHANGED: common ESP32 speed
17  pinMode(TRIG_PIN, OUTPUT);
18  pinMode(ECHO_PIN, INPUT);
19  pinMode(LED_PIN, OUTPUT);
20  lidServo.setPeriodHertz(50);      // EKLENDİ: standart servo 50 Hz / ADDED: standard servo 50 Hz
21  lidServo.attach(SERVO_PIN, 500, 2400);  // DEĞİŞTİ: darbe aralığı µs / CHANGED: pulse range in µs
22  lidServo.write(CLOSED_ANGLE);
23}
24
25void loop() {
26  long distance = readDistanceCm();
27  Serial.print("Mesafe / Distance: ");
28  Serial.println(distance);
29
30  if (distance > 0 && distance < OPEN_DISTANCE) {
31    openCount++;
32    digitalWrite(LED_PIN, HIGH);
33    lidServo.write(OPEN_ANGLE);
34    delay(3000);
35    lidServo.write(CLOSED_ANGLE);
36    digitalWrite(LED_PIN, LOW);
37    Serial.print("Acilma sayisi / Times opened: ");
38    Serial.println(openCount);
39  }
40  delay(100);
41}
42
43long readDistanceCm() {
44  digitalWrite(TRIG_PIN, LOW);
45  delayMicroseconds(2);
46  digitalWrite(TRIG_PIN, HIGH);
47  delayMicroseconds(10);
48  digitalWrite(TRIG_PIN, LOW);
49  long duration = pulseIn(ECHO_PIN, HIGH, 30000);
50  return duration / 58;
51}
As you can see, loop() and readDistanceCm() moved over without changing a single letter; everything that changed is at the top of the file and in setup(). That's a sign of well-written code: hardware details are gathered at the top and the logic below stays clean. Because the HC-SR04's ECHO pin outputs 5 V, it has to reach the ESP32 through a 1 kΩ and 2 kΩ voltage divider; the servo should be powered from the 5 V on the VIN pin, not from 3.3 V. We compare the other differences between the boards in our Arduino vs ESP32 guide.
The same logic on a Raspberry Pi Pico: MicroPython
When you program the Pico in MicroPython, the code looks different but the logic is the same. You write import instead of #include, and indentation replaces curly braces. There are no setup() and loop() keywords: the lines at the top of the file run once (the setup part) and the while True: block runs forever (the loop part). Functions start with def instead of void or long. Put this code next to the Arduino sketch above and you'll find the match for every line:
1from machine import Pin, PWM, time_pulse_us   # #include karşılığı / the #include part
2import time
3
4TRIG = Pin(14, Pin.OUT)              # HC-SR04 TRIG
5ECHO = Pin(15, Pin.IN)               # HC-SR04 ECHO, bölücüyle / through a divider
6LED = Pin(25, Pin.OUT)               # Pico dahili LED; Pico W'de Pin("LED") / onboard LED; Pin("LED") on Pico W
7servo = PWM(Pin(16))
8servo.freq(50)                       # servo 50 Hz ister / servos need 50 Hz
9
10OPEN_DISTANCE = 20                   # cm
11
12
13def set_angle(angle):
14    pulse_us = 500 + angle * 2000 // 180            # 0 derece 0,5 ms, 180 derece 2,5 ms / 0 deg 0.5 ms, 180 deg 2.5 ms
15    servo.duty_u16(pulse_us * 65535 // 20000)       # 20 ms periyodun oranı / share of the 20 ms period
16
17
18def read_distance_cm():
19    TRIG.low()
20    time.sleep_us(2)
21    TRIG.high()                      # 10 µs tetik darbesi / 10 µs trigger pulse
22    time.sleep_us(10)
23    TRIG.low()
24    duration = time_pulse_us(ECHO, 1, 30000)        # zaman aşımında negatif / negative on timeout
25    if duration < 0:
26        return 0
27    return duration // 58
28
29
30set_angle(0)                         # setup() karşılığı / the setup() part
31open_count = 0
32
33while True:                          # loop() karşılığı / the loop() part
34    distance = read_distance_cm()
35    print("Mesafe / Distance:", distance)
36    if 0 < distance < OPEN_DISTANCE:
37        open_count += 1
38        LED.on()
39        set_angle(90)
40        time.sleep(3)
41        set_angle(0)
42        LED.off()
43        print("Acilma sayisi / Times opened:", open_count)
44    time.sleep_ms(100)
Since Python has no Servo library here, the set_angle() function converts the angle into a pulse length itself: a servo takes its position from a 0.5–2.5 ms pulse that arrives every 20 ms. Writing 0 < distance < OPEN_DISTANCE is Python's short form of the C++ condition distance > 0 && distance < OPEN_DISTANCE. If you're new to MicroPython, our MicroPython basics guide covers the rules for indentation, variables and functions.
Practising with "Understand the code" in BlueGrays
In the BlueGrays app, every project's code screen also has an "Understand the code" tab. Its "What does this code do?" section first sums up the program's job in a few sentences. "Step by step" then splits the code into small pieces and explains under each one what those lines are for and what happens if you change them. "If you get stuck" lists the most common problems as symptom and fix, and "Try it yourself" gives you a small task with a hint and a solution, such as changing the threshold of a night light so the LED comes on earlier. You can use this guide's five-step method there too: read the summary, match each piece to your circuit, then solve the task by changing the code yourself.
Exercises for reading code
- Predict, then test: before you change a constant, write down what you expect, then upload the code and check your prediction.
- Comment out a line: put // in front of a line and upload again; whatever breaks shows you what that line was for.
- Explain it in your own words: turn every line of loop() into a plain sentence; a line you can't put into words is a line you don't understand yet.
- Draw a flowchart: sketch setup, loop, the if statements and function calls as boxes and arrows; it helps a lot with code that uses a state machine.
- Make a mistake on purpose: delete a semicolon and read the compiler's message; our Arduino compile errors guide explains the most common ones.
Common mistakes when reading code
| Mistake | Why it's a problem | The right approach |
|---|---|---|
| Treating the code as a list that runs once from top to bottom | loop() repeats forever and variables change between passes | Follow loop() for several passes with different values |
| Mixing up = and == | if (x = 5) is always true | Always use == to compare |
| Missing integer division | 5 / 2 gives 2; the decimal part is dropped | If you need decimals, write 5.0 / 2 or use a float |
| Forgetting that delay() stops everything | Buttons and sensors aren't read while it waits | Use millis() timing when several jobs run together |
| Ignoring library version differences | The same function can have another name in a newer version | Look in the comments for which library the code was written with |
| Changing a pin constant but not the wire | The code reads the right pin, the wire sits somewhere else | Update your wiring table after every change |
Reading code, just like reading a circuit diagram, gets faster with every example you see. To get started, open short projects in the BlueGrays app such as lighting an LED, the traffic light, the button-controlled LED or the LDR night light, and follow the "Understand the code" tab line by line; each one comes with its circuit diagram, a piece-by-piece explanation of the code and a small task for you.
Frequently asked questions
What language is Arduino code written in?
Arduino code is based on C and C++. Arduino adds ready-made functions such as pinMode and digitalWrite to make things easier, but the rules for if statements, for loops, variables and functions are straight C++. That's why a bit of C++ knowledge makes Arduino code much easier to read.
What is the difference between setup and loop?
setup() runs only once, when the board powers up or resets, and is used for preparation such as setting up pins and serial communication. loop() then repeats non-stop for as long as the board has power; that's where the real work happens, like reading sensors, making decisions and driving motors.
What does void mean in Arduino?
void means a function doesn't return a value. void setup() and void loop() do things but don't hand back a result. A function like long readDistanceCm(), on the other hand, returns a value of the type written before its name using return.
Why does my code compile but the circuit doesn't work?
The compiler only checks the syntax; a wrong pin number, a module wired the wrong way round or a bad threshold won't cause a compile error. Compare the pin constants in the code with your circuit and watch the values with Serial.println in the Serial Monitor; the problem is usually the wiring or a threshold.
Can I use Arduino code on an ESP32?
Most of the time, yes: the ESP32 is also programmed with the Arduino IDE and the basic functions are the same. You'll need to swap pin numbers for GPIO numbers, bring 5 V signals down to 3.3 V and replace some libraries, such as Servo, with their ESP32 versions. Also remember that analogRead returns values from 0 to 4095.
Where can I find Arduino code examples?
The File > Examples menu in the Arduino IDE is a great starting point, together with the examples that come with every library you install. The projects in the BlueGrays app also come with a circuit diagram and code explained line by line. Wherever the code comes from, reading it once with this guide's method before uploading helps you catch mistakes right away.
Projects to build after reading this
See all projects
LED Blink
The very first hello of electronics: switching a single LED on and off. The Arduino turns the LED on and off at short intervals, so the light blinks quickly.

Traffic Light
A tiny copy of the traffic light you see on the road every day. Red stays on for two seconds, yellow flashes for a moment, green stays on for two seconds, then it goes back to red through yellow…

LED Control with a Push Button (Push)
Just like a doorbell: the light stays on as long as you press, and goes off when you let go.

Night Light with Ldr
A little night light that turns on by itself when it gets dark and goes off when morning comes.
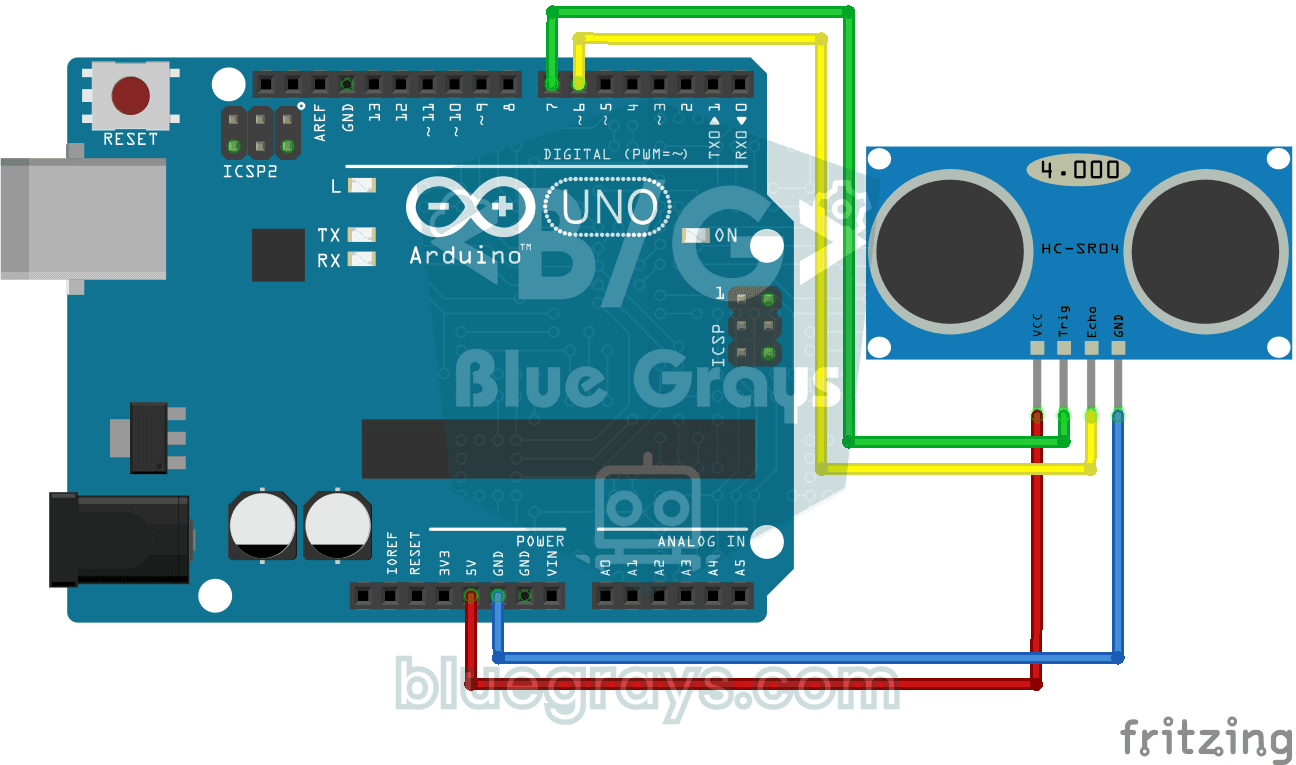
HC-SR04 Distance Measurement (Serial Display)
The HC-SR04 sensor works just like a bat finding its way in the dark: it sends out a sound you cannot hear, listens for the echo and measures how far away the object in front of it is.

Temperature and Humidity with DHT11
How warm is your room, and is the air humid or dry? The DHT11 sensor measures temperature and humidity, and the Arduino writes the values on a two-line LCD screen, refreshing every couple of seconds.
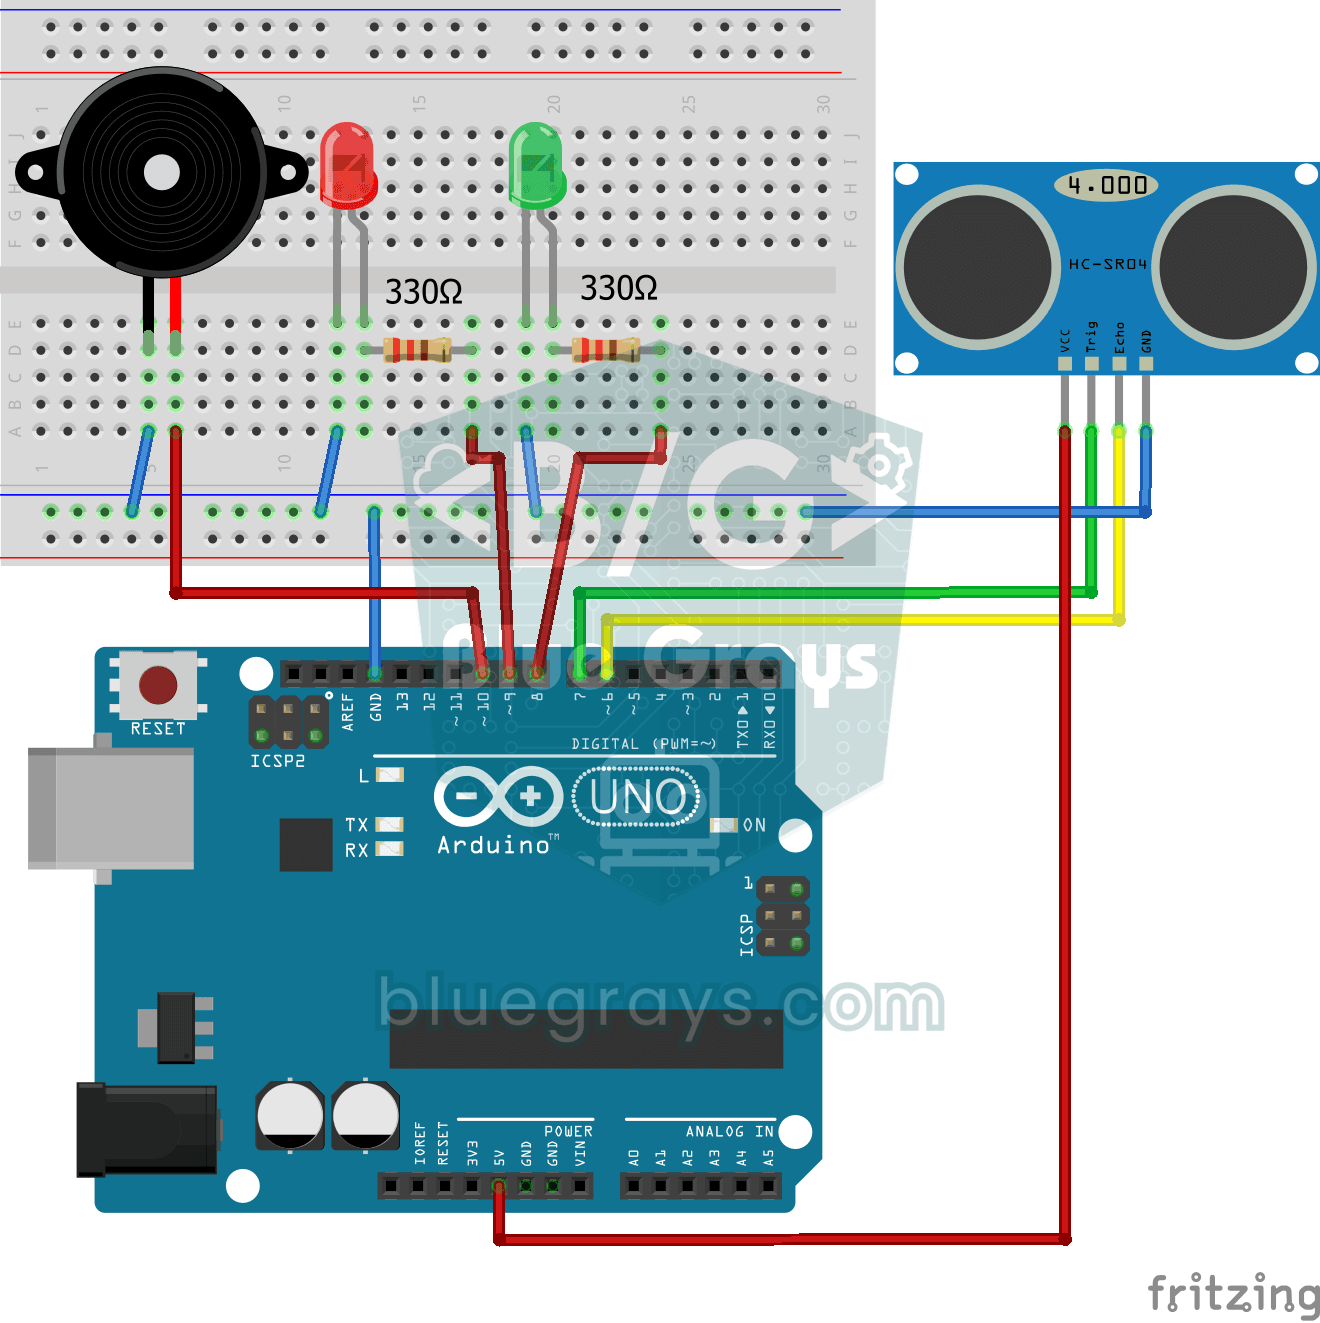
Parking Sensor with HC-SR04
A mini version of a car's parking sensor: the closer something gets, the faster the beeps.
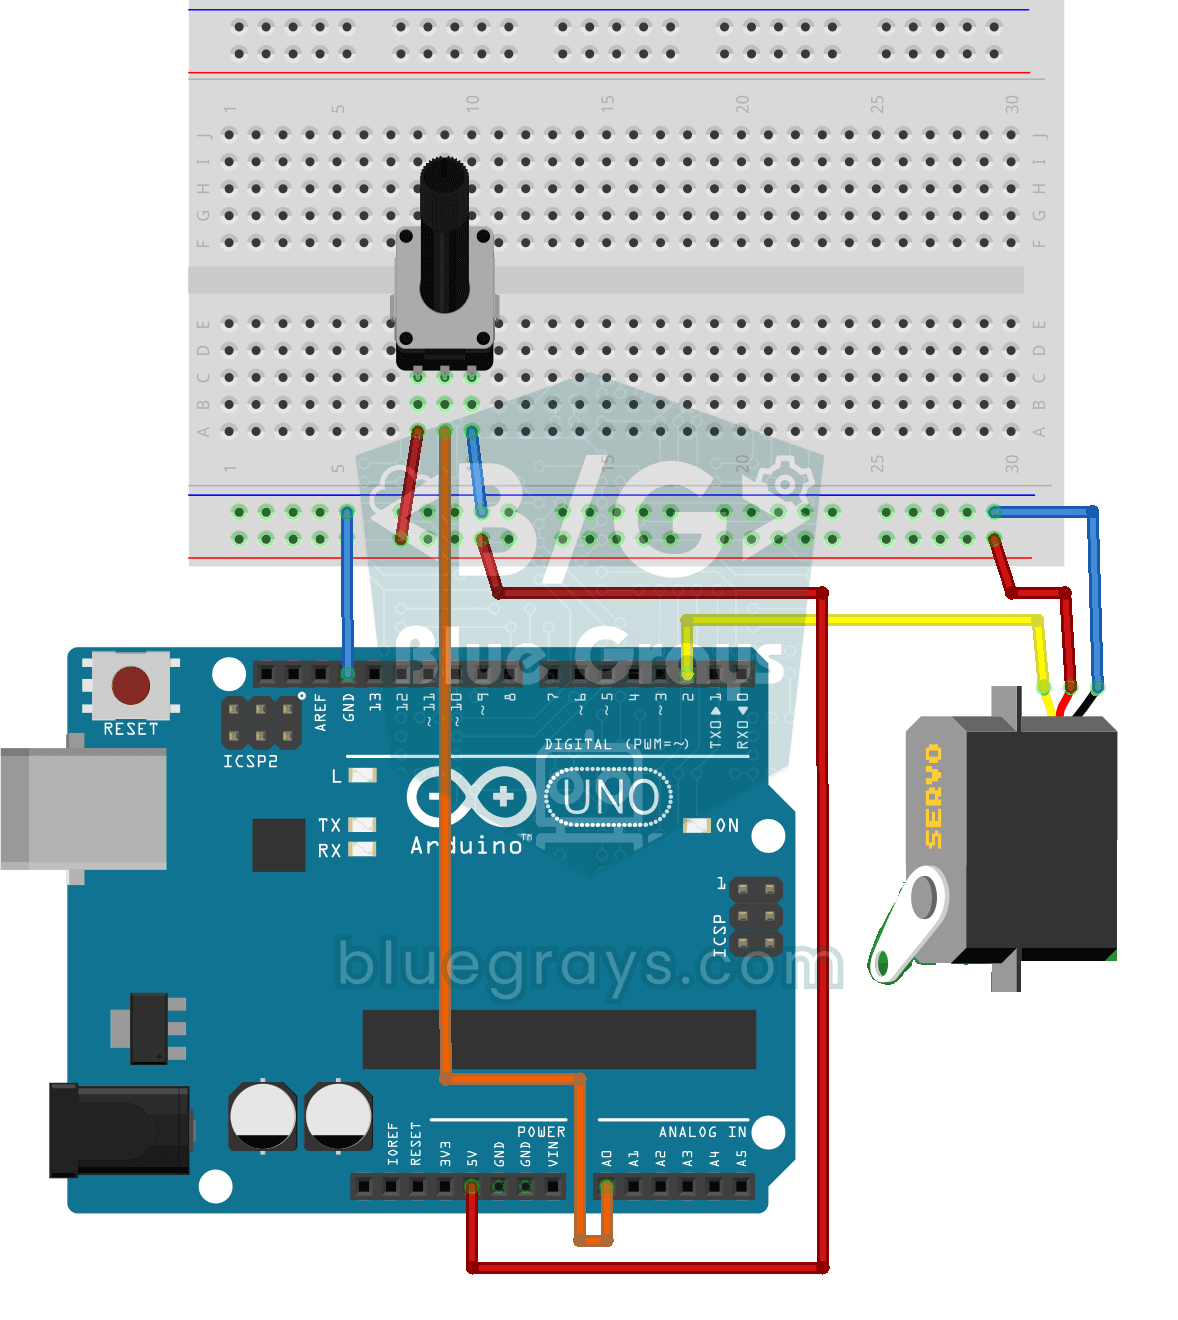
Servo Motor Operation with Potentiometer
As you turn the potentiometer knob, the servo motor's arm turns right along with it: one end of the knob means zero degrees, the other end means half a turn.