
Upload Arduino Code from Phone: Is It Possible? Phone + PC Guide
Can you upload Arduino code from a phone? An honest answer for Android OTG, iPhone, ESP32 OTA and Pico, a comparison table and a phone + computer workflow.
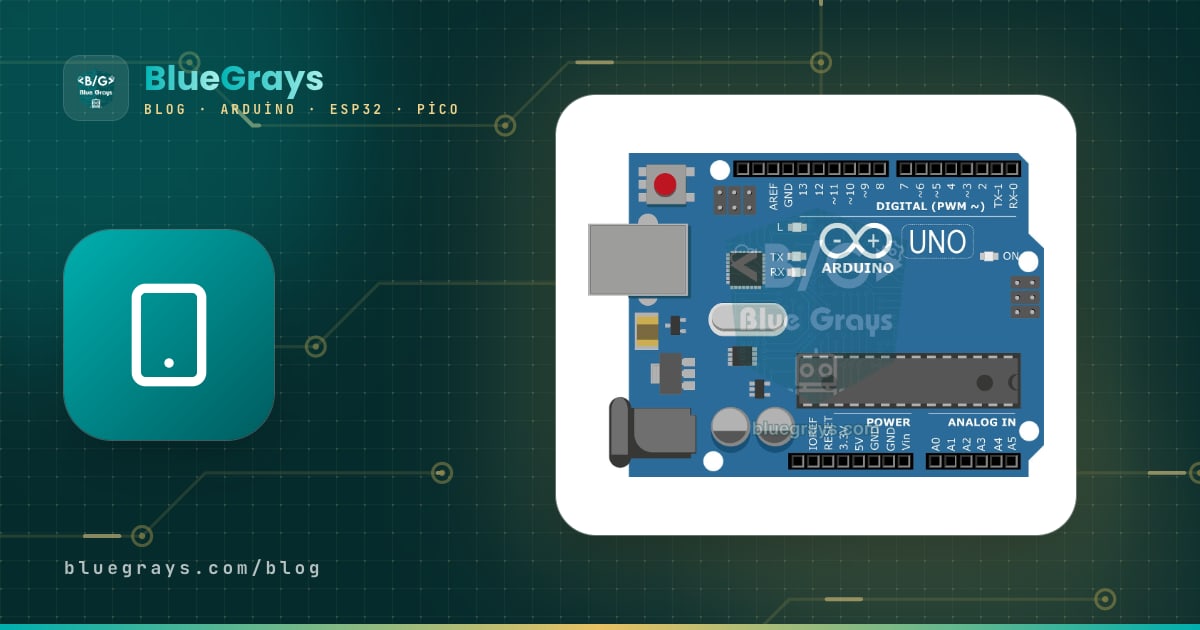
The honest answer to whether you can upload Arduino code from a phone: partly, but a computer is still the reliable way. On Android, a USB OTG cable and a third-party app can upload code to some boards such as the Uno and Nano, but not every phone, board or library is supported. On an iPhone, uploading over USB is practically not an option. Wireless (OTA) uploads to an ESP32 only work if an OTA-enabled sketch was uploaded to the board by cable first. On a Raspberry Pi Pico with MicroPython you can open a serial terminal on Android and type commands, but managing files is tedious.
BlueGrays does not program the board either: the app shows you the project, the circuit diagram, the code and the Understand the code walkthrough, and the Arduino IDE on a computer does the upload. In this post we compare the methods in a single table, show step by step how to use your phone and computer together, and cover what you can do with just a phone when the computer is not around, plus how to rotate a class when the school has few computers.

What does uploading code actually mean, and why does a phone struggle?
When you press Upload in the Arduino IDE, two things happen. First comes compiling: your C++ code and the libraries it uses are turned into machine code the board's processor understands. That needs a compiler and a board package specific to the board type, one for the ESP32 and another for the Uno. Then comes the transfer: the resulting file is sent to the board over the USB cable. The USB chip on the board shows up on the computer as a serial port, and a small loader program on the board (the bootloader) writes the incoming code to memory.
A phone struggles with both steps. Running compilers and board packages on a phone is not as easy as on a desktop; some apps do it on the phone, others on their own servers. For the transfer, the phone's USB port has to act as a USB host (OTG) and the app has to recognize the board's USB chip. Android allows this, while iOS generally does not let apps talk to USB serial devices. In short, the problem is not the phone's power; the tools and permissions were simply not designed for phones.
Compare the methods: which one works when?
The table below puts the known ways of programming a board side by side. We do not name apps, because apps of this kind change often and the only way to know whether one works with your phone and your board is to try it. As a rule: further down the list, setup does not get easier, it just comes with more conditions.
| Method | What you need | Boards that work | Limitations |
|---|---|---|---|
| Computer + Arduino IDE | A Windows, macOS or Linux computer, a USB cable that carries data, the board package | Arduino, ESP32, ESP8266; Pico with MicroPython via Thonny | First setup takes 15–20 minutes; clone boards may need a driver |
| Android + USB OTG + third-party app | A phone with OTG support, an OTG adapter or cable, an app that supports your board | Mostly classic boards like the Uno and Nano; others depend on the app | Not every phone or USB chip is supported, limited library support, few error messages |
| ESP32 wireless (OTA) upload | An OTA-enabled sketch uploaded by cable beforehand, the same Wi-Fi network | ESP32 and ESP8266 | First upload is by cable; every new sketch must keep the OTA part; compiling usually still happens on a computer |
| Browser-based editors | An up-to-date browser, usually an account; some need a small helper program on the computer | Boards the editor supports | Mostly designed for desktop browsers; uploading to a board from a phone browser is generally not supported |
| School, library or makerspace computer | A computer with the Arduino IDE and board packages already installed | All, depending on installed packages | Drivers and packages may not install without admin rights; talk to the IT staff in advance |
| iPhone or iPad over USB | None | Practically none for a standard Uno, Nano, ESP32 or Pico | iOS restricts app access to USB serial devices; here the phone serves as a guide |
Android and USB OTG: what works and where you get stuck
OTG (On-The-Go) means the phone's USB port behaves like a computer's and controls the device plugged into it. The setup looks simple: you plug an OTG adapter into the phone's USB-C port and connect the board's normal USB cable to it, or you use a one-piece USB-C to USB-B cable (for the Uno) or USB-C to Mini/Micro USB cable (for the Nano). If the app sees the board, it compiles the code or takes a precompiled file and sends it to the board. For a simple LED project this can genuinely take just a few minutes.
In practice, these are the points where you are most likely to get stuck. Knowing them up front stops you from wrongly concluding "it didn't work on the phone, so the board must be broken":
- Phone OTG support: Most recent Android phones support it, but some do not power the board or require OTG to be switched on in the settings.
- The board's USB chip: The USB chip on an original Uno differs from chips like the CH340 on clone boards. If the app does not recognize the chip on your board, the board never shows up.
- Libraries: Blinking an LED is easy; a project that needs an OLED display, a sensor or a Wi-Fi library may not compile on the phone, or adding the library may be a hassle.
- Error messages: On a computer, the Arduino IDE tells you which line has which error. In phone apps, messages are often short and vague.
- ESP32 and Pico: Support for these boards varies a lot from app to app; an app supporting the Uno does not mean it supports the ESP32.
iPhone and iPad: why uploading over USB is practically not an option
iOS generally does not allow App Store apps to talk directly to USB serial devices plugged into the phone. An Arduino Uno, Nano, ESP32 or Pico shows up as a serial port when connected to a computer; since iPhone and iPad do not open that connection to apps, wired uploads are practically impossible. Some boards and kits are specially designed to be programmed over Bluetooth, but they are not the same as a standard Uno. If all you have is an iPhone, use it to read the project, look at the diagram and understand the code, not to upload it; do the upload on a computer.
Wireless (OTA) uploads on the ESP32: one cable upload first
OTA (Over-The-Air) means sending new code to the board over Wi-Fi. It sounds like "wireless, so from the phone", but there are two conditions. First, the ESP32 must already have a sketch, uploaded by cable, that connects to Wi-Fi and listens for OTA requests; a fresh board does not wait for OTA by itself. Second, every new sketch must include that OTA part too; if you send a sketch without it, the next update needs a cable again. We covered what the board is and how to set it up in what is the ESP32.
The most common way to use OTA is still from a computer: the Arduino IDE shows an ESP32 on the same network as a network port in the port list, and the code goes over the air. Some OTA sketches open a small web page on the board; from it you can pick a compiled file (.bin) and upload it, and the page also opens in a phone browser. But producing that file usually still means compiling on a computer. So OTA is great for updating a sensor mounted on the ceiling without taking it down; it is not a computer-free programming solution. If you use OTA, set a password in the sketch and give the board a clear name (e.g. living-room-sensor); with several ESP32 boards on the same network, the name tells you which is which in the port list.
Raspberry Pi Pico and MicroPython: the REPL from your phone
The Pico is a bit different, because MicroPython is not compiled on the computer: an interpreter runs on the board and executes the lines you send. That is why a serial terminal app connected over OTG on Android gets you to the board's command line (REPL). Typing from machine import Pin and switching the onboard LED on and off, reading a sensor value or seeing which line an error is on all work this way.
The hassle starts with files. Saving main.py, the file the Pico runs automatically at startup, uploading several files or libraries, or deleting an old file can be done from a terminal, but it is slow and error-prone. Thonny on a computer does all of that in a few clicks. You can find how to set up the Pico in what is the Raspberry Pi Pico; think of the REPL on your phone as a tool for experiments and checks, and Thonny as your real workspace.
Splitting the work between phone and computer: which does what?
Instead of trying to replace the computer with the phone, it is far more productive to give each one its own job. The phone is always in your hand, so it suits reading, planning and following along while you build the circuit; the computer is for compiling, uploading and debugging. In BlueGrays this split falls into place naturally:
| Task | On the phone (BlueGrays) | On the computer |
|---|---|---|
| Choosing a project | Projects list, filters, Project Finder | Not needed |
| Checking parts | Required Components list, quantities | Not needed |
| Building the circuit | Circuit Diagram, zoom, Save to Gallery | Open the diagram on a big screen if you like |
| Understanding the code | Understand the code: summary, Step by step, Try it yourself | Not needed |
| Uploading the code | Source Code > Copy Link or Copy | Arduino IDE (Thonny for the Pico) |
| Testing and debugging | Comparing with the project video, Troubleshooting | Serial Monitor, error messages |
There are three ways to move code from the phone to the computer. Copy Link creates a short-lived link for opening the project's code on a computer; open it in the computer's browser and the code appears with a Copy Code button. Copy puts the code itself on the phone's clipboard, which is handy if you want to send it to yourself as a note or message. The third way is bluegrays.com: the code of free projects is also shown on the project page on the web, so you can find the project by name and copy the code there. For Premium projects, Copy Link is the quickest route. We covered the other sections of the project page in detail in the project page guide.
Step by step: uploading a project from your phone to the board via a computer
Take the free LED Blink project as an example; the same flow applies on the ESP32 to projects like ESP32 Built-in LED Blink. We assume the Arduino IDE is installed on the computer; if not, first follow the steps in the Arduino IDE installation post.
- Open the project in BlueGrays on your phone and lay out the parts from the Required Components list.
- Build the circuit by following the Circuit Diagram; keep the board's USB cable unplugged meanwhile.
- In the Source Code section, tap Copy Link and wait for the "Code link copied!" message.
- Send the link to yourself: an email to yourself, a note or your own chat in a messaging app all work.
- Open the link in the computer's browser; the page shows the code and how long the link stays valid. Click Copy Code.
- In the Arduino IDE, open a new sketch, delete its contents, paste the code and save it right away. Once saved, it no longer matters when the link expires.
- Connect the board over USB. Pick the right board and port from the Tools menu.
- Click Upload and wait for the upload-complete message in the console at the bottom.
- Compare the result with the project video or description on your phone; if it does not work, check the Troubleshooting section and the Serial Monitor.
If the link has expired, the browser shows a page saying so; just tap Copy Link again in the app to create a new one. For Pico projects, steps 6 and 7 happen in Thonny: select MicroPython as the interpreter, paste the code, optionally save it to the board as main.py, and click Run. If the project needs a library, see the installing Arduino libraries post; if the port does not show up or the upload fails, see Arduino code not uploading.
What you can do with just your phone when the computer is not around
If the computer is only free in the evening, or you can only use one at school, you can spend spare moments during the day preparing for the upload. Say you get 20 minutes at the computer tonight: finish the following on your phone during the day and those 20 minutes go purely to uploading and testing.
- Build the circuit: If you have the board, breadboard and parts with you, you can build the whole circuit from the diagram; the board gets plugged into the computer later for the upload.
- Save the diagram: Use Save to Gallery to put the diagram on your phone and open it while building, no internet needed.
- Understand the code: Read the summary and the Step by step part; if you know what each line does beforehand, you will spot errors faster after the upload. The section is explained in detail in Understand the code and Try it yourself.
- Solve the Try it yourself task on paper: Write the change from the task (e.g. changing the delay) on paper and predict what will happen; at the computer you just try it and check your prediction.
- Try it in a simulator: Browser-based simulators let you test the circuit and code without a board. They are not comfortable on a phone screen; a tablet or a school computer works better. Details in the Tinkercad Arduino simulation post.
- Daily questions: Review concepts with a short daily set; we explained how it works in the daily questions post.
- Tools: Work out the LED resistor with the LED resistor calculator and a resistor's value with the color code tool on your phone; all 18 tools are in the electronics calculator post.
One more thing: once uploaded, the code stays in the board's memory and the board runs without a computer. If you did the upload at school or on a friend's computer, take the board home and plug it into a USB charger or a power bank; the same program runs every time it powers up until you upload new code. On the Pico, this applies to the file you saved on the board as main.py. If you use an ESP32 or a Raspberry Pi Pico W, BlueGrays IoT also lets you control the board from your phone after the upload: pick one of 8 ready templates under Workshop › My devices › Add new device, Ohmi prepares the code with your device key, and you upload it once from the Arduino IDE with the BlueGraysIoT library; after that, switches, live values and charts are on your phone. It needs 2.4 GHz Wi-Fi and your first device is free; the steps are in the guide to controlling an ESP32 from your phone.
Few computers at school? Use station rotation
The phone + computer split works in class too. Say you have a class of 24, 8 kits and only 3 computers. With 8 groups of 3, the only task that needs a computer during the lesson is the upload, and it takes no more than 5 minutes per group. With 3 computers, the 8 groups upload in three rounds (3 + 3 + 2), roughly 15 minutes in total; for the rest of the time groups work at their tables with a phone.
| Stage | Where | What happens | Time |
|---|---|---|---|
| Before class | 3 computers | The teacher opens the code on each computer with Copy Link, pastes it into the Arduino IDE, saves it and tests the board and port | 10 min |
| 1. Preparation | Group table, phone | Open the project, read the Understand the code summary, write in one sentence what the code will do | 8 min |
| 2. Circuit | Group table, kit | Build the circuit from the diagram without USB; one group member checks the connections against the diagram | 10–12 min |
| 3. Upload | Computer station | The group brings the board and cable, uploads, tests the result and returns to the table | 5 min per group |
| 4. Try it yourself | Table, then station | Solve the task on paper and write a prediction; if a station is free, upload the change and try it | Remaining time |
To keep the order clear, number the groups by upload slot and write it on the board; a group stays at a station for 5 minutes at most, and if the problem is not solved it goes back to the table, checks Troubleshooting and returns at the next free slot. We gathered details such as roles, kit management and the help queue in the Arduino lessons in a large class post.
Cables, power, tablets and Chromebooks: quick answers
| Question | Short answer |
|---|---|
| Which OTG cable do I need? | An OTG adapter that fits your phone plus the board's own USB cable, or a one-piece USB-C to USB-B (Uno) or USB-C to Micro USB (Nano) cable. The cable must carry data; with charge-only cables the board never shows up. |
| Can the phone power the board? | Most phones with OTG support can; it is enough for an Uno and a few LEDs. It is not enough for a motor, servo or relay and drains the battery fast. |
| Can I upload with a tablet? | An Android tablet has the same conditions as an Android phone. On an iPad, uploading over USB is practically not an option. A Windows tablet is really a computer; if the Arduino IDE installs, it uploads the normal way. |
| Does it work on a Chromebook? | On some Chromebooks you can enable the Linux environment and install the Arduino IDE, and some browser-based editors support Chromebooks. On school-managed devices these options may be disabled; ask the IT staff first. |
| Does the code stay on the board? | Yes. The program stays in the board's memory until you upload new code and runs again every time the board is powered. |
| Does BlueGrays send code to the board? | No. BlueGrays gives you the project, diagram, code and its explanation; the Arduino IDE or Thonny uploads the code to the board. |
| Can I control the board from my phone after the upload? | With an ESP32 or Raspberry Pi Pico W, yes: with BlueGrays IoT you upload the code once from the Arduino IDE, then switches and live values are handled from the phone. The free plan has 1 device, chart history for 1 value and 24 hours of history; Premium has 10 devices, chart history for 20 values and 30 days of history. |
In short, the phone is the guide that never leaves your hand while you learn Arduino, and the computer is the tool that carries the code to the board. If you pick the project, build the circuit, understand the code and solve the task on paper on your phone during the day, the few minutes at the computer go purely to uploading and testing. If you want to try this setup, you can install BlueGrays on your phone and start with one of the free projects.
Frequently asked questions
Can you upload Arduino code from a phone?
On Android, a USB OTG cable and a suitable app can upload to some boards such as the Uno and Nano, but not every phone, board or library is supported. On an iPhone, uploading over USB is practically not an option. The reliable way is the Arduino IDE on a computer.
Can you program an Arduino with an iPhone?
Standard Arduino boards cannot be connected to an iPhone over USB and programmed, because iOS restricts app access to USB serial devices. You can use the iPhone to read the project, view the diagram and understand the code, and do the upload on a computer.
Can I upload Arduino code with an OTG cable?
Yes, if your phone supports OTG and the app you use recognizes the USB chip on your board. Chips on clone boards are not supported by every app, and projects that need libraries may not compile on the phone.
Can I upload code to an ESP32 from my phone?
If an OTA-enabled sketch was uploaded to the ESP32 by cable beforehand, new code can be sent over Wi-Fi, and some OTA sketches let you upload a file from a phone browser. Compiling that file usually still happens on a computer, though, and a fresh board does not wait for OTA.
Can you learn Arduino without a computer?
Building circuits, reading diagrams, understanding code, trying things in a simulator and answering quiz questions can all be done with a phone. Uploading code to a real board, however, needs a computer in most cases; a school or library computer is enough.
Does BlueGrays upload code to an Arduino?
No, BlueGrays does not program the board. The app shows the project, circuit diagram, code and the Understand the code walkthrough; you move the code to a computer with Copy Link and upload it with the Arduino IDE or Thonny.
Projects to build after reading this
See all projects
LED Blink
The very first hello of electronics: switching a single LED on and off. The Arduino turns the LED on and off at short intervals, so the light blinks quickly. You see in the simplest way how the board

Traffic Light
A tiny copy of the traffic light you see on the road every day. Red stays on for two seconds, yellow flashes for a moment, green stays on for two seconds, then it goes back to red through yellow again

LED Control with a Push Button (Push)
Just like a doorbell: the light stays on as long as you press, and goes off when you let go. The Arduino keeps listening to the button; while it's pressed the LED is on, and the moment you lift your f

Night Light with Ldr
A little night light that turns on by itself when it gets dark and goes off when morning comes. A light sensor measures how bright the room is, and the Arduino switches the LED on when it is dark enou

LED Blink with ESP32
Teaches basic GPIO output usage with ESP32. We achieve a blinking effect by turning an LED on and off from a digital pin. ESP32 version of the classic blink project on Arduino UNO; the basic blink commands in the Arduino environment are the same, but the ESP32's pin layout and 3.3 V GPIO levels differ from those of the Arduino UNO.

ESP32 Built-in LED Blink
Blinking the built-in blue LED on the ESP32 DevKit V1. No external components required! The first project you should try when you buy an ESP32. GPIO 2 is connected to the built-in LED.
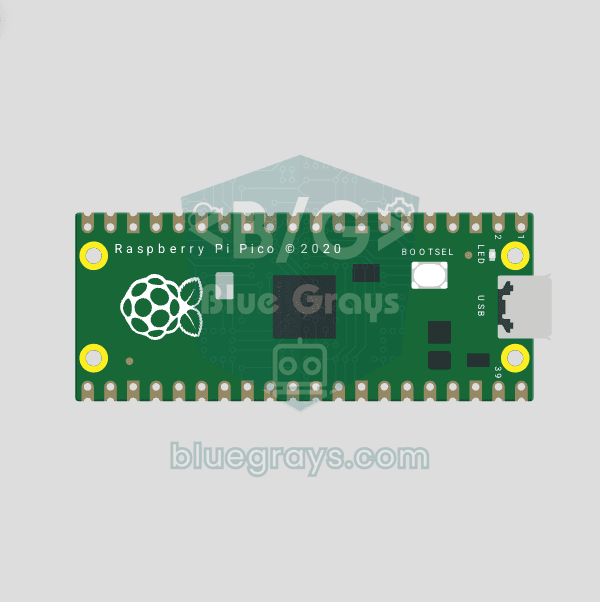
Raspberry Pi Pico Onboard LED Blink (Pico and Pico W)
The opening project of the Raspberry Pi Pico series! We blink the green onboard LED to verify the board works — a classic "Hello World" first experiment. NO external components, just Pico and USB cable. Code is written in MicroPython (the official language backed by Raspberry Pi Foundation). Learn machine.Pin class, Pin.OUT mode, led.on()/off() methods, and time.sleep() in Thonny IDE. Follow every toggle live in the Serial (REPL) output. Also perfect to verify

HC-SR04 Distance Measurement (Serial Display)
The HC-SR04 sensor works just like a bat finding its way in the dark: it sends out a sound you cannot hear, listens for the echo and measures how far away the object in front of it is. The Arduino wri