
APDS9960 Arduino: Gesture, Proximity and Colour Sensor Guide
APDS9960 Arduino guide: I2C and 3.3 V wiring, left-right-up-down gestures, proximity and RGB readings, SparkFun and Adafruit code, the INT pin, ESP32 and Pico.
APDS9960 Arduino projects let a single tiny chip do four jobs: it detects your hand moving right, left, up and down, measures how close an object is, and reads ambient light and colour split into red, green and blue channels. It's a relative of the phone sensor that turns the screen off when you hold it to your ear and adjusts brightness to the room. It's an ideal starting point for switching on a lamp, skipping a song or moving through a menu with a wave of your hand, without touching anything.
In this guide you'll see what's inside the APDS-9960, how it detects gestures, why it must run on 3.3 V and how to connect it to an Arduino Uno, ESP32 and Raspberry Pi Pico. With the SparkFun and Adafruit libraries you'll build a gesture test, an LED that gets brighter as your hand approaches, colour and lux measurements, gesture-controlled LEDs and music, and you'll learn how to use the INT pin as an interrupt and what the real range limits are.
What is the APDS-9960 and how does it work?
The APDS-9960 is a sensor made by Broadcom (formerly Avago) that packs an infrared (IR) LED and several light detectors into a package of about 4 × 2.4 mm. For proximity, the IR LED fires short pulses, light reflected from the object in front returns to the photodiodes, and the stronger the reflection, the closer the object. The result is a number between 0 and 255. Colour measurement doesn't use the LED: ambient light falls on four separate photodiodes with red, green, blue and unfiltered (clear) coatings, and each produces a 16-bit number.
Gesture detection is the cleverest part. Inside the chip there are four photodiodes facing up (U), down (D), left (L) and right (R). As your hand passes over the sensor, one diode sees the reflection first and the opposite one sees it later. When the proximity value crosses an entry threshold (40 in the SparkFun library), the gesture engine starts, writes the readings of the four diodes into a 32-entry FIFO buffer and stops when the hand moves away. The Arduino reads these entries and looks at how the difference between U and D, and between L and R, changes over time: if U is larger first and D is larger later, the hand moved downwards.
| Feature | Value |
|---|---|
| Manufacturer | Broadcom (formerly Avago) |
| Chip supply (VDD) | 2.4–3.6 V |
| IR LED supply (VL) | 3.0–4.5 V |
| Interface | I2C, up to 400 kHz |
| I2C address | 0x39 (fixed, cannot be changed) |
| Proximity | 8-bit (0–255) |
| Colour and light | 4 channels (clear, red, green, blue), 16 bits per channel |
| Gesture | 4 directional photodiodes (U, D, L, R), 32-entry FIFO |
| IR LED | 950 nm, current adjustable from 12.5 to 100 mA |
| Practical gesture range | About 10–20 cm |
| Interrupt output | INT, open-drain, goes LOW on an event |
Module pins and the 3.3 V question
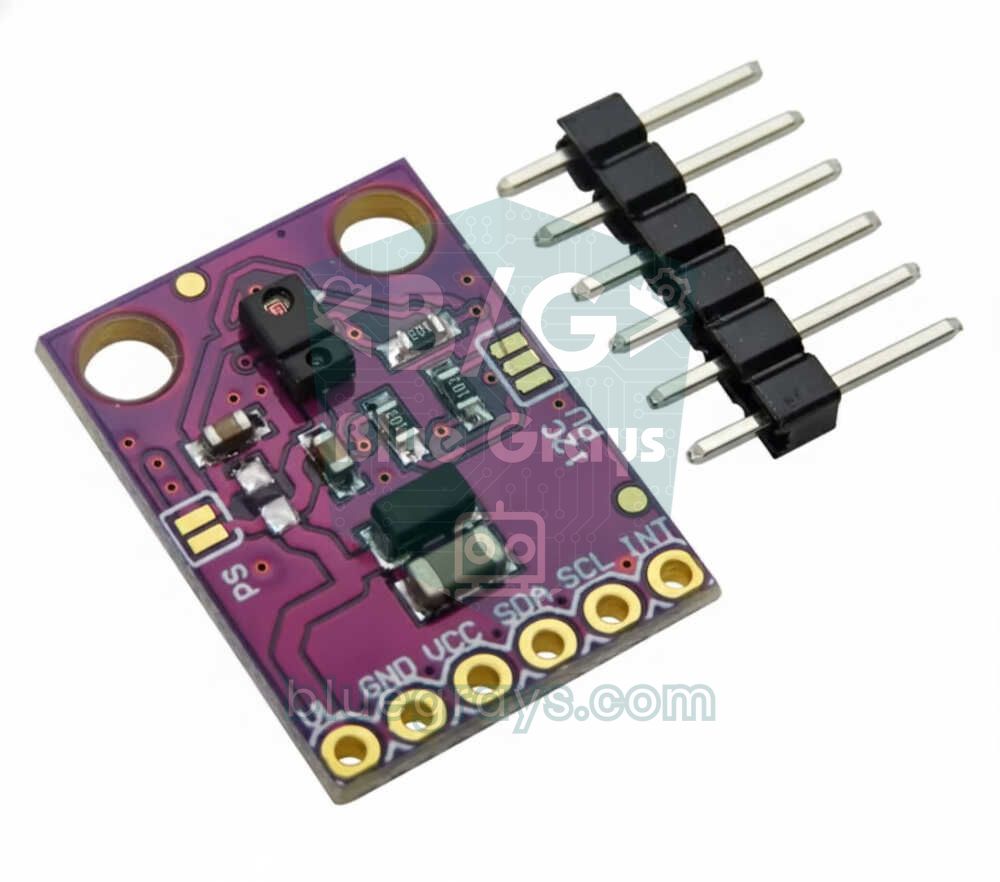
The most common boards are the SparkFun breakout and its purple clone, the GY-9960. Both have six pins. Most modules have a solder jumper called PS on the back; while it's closed, the IR LED supply (VL) is connected directly to VCC and you leave the VL pin unconnected.
| Pin | Function | Connect to |
|---|---|---|
| VL | IR LED supply input | Leave unconnected if the PS jumper is closed |
| GND | Ground | GND |
| VCC | Chip supply | 3.3 V |
| SDA | I2C data line | The board's SDA pin |
| SCL | I2C clock line | The board's SCL pin |
| INT | Interrupt output (open-drain) | A digital pin that supports interrupts |
Wiring: Arduino Uno, ESP32 and Raspberry Pi Pico
| APDS-9960 | Arduino Uno | ESP32 | Raspberry Pi Pico |
|---|---|---|---|
| VCC | 3.3V | 3V3 | 3V3 (OUT) |
| GND | GND | GND | GND |
| SDA | A4 (via a level shifter) | GPIO 21 | GP4 |
| SCL | A5 (via a level shifter) | GPIO 22 | GP5 |
| INT | D2 | GPIO 4 | GP15 |
| VL | Unconnected (PS closed) | Unconnected (PS closed) | Unconnected (PS closed) |
The ESP32 and the Pico already have 3.3 V pins, so they connect directly. On the Uno it's a little messier: the Uno's Wire library turns on internal pull-up resistors on SDA and SCL and pulls the lines towards 5 V, while the module's own resistors pull them to 3.3 V. It usually works in practice, but it pushes the chip's limits. The healthiest option is a bidirectional I2C level shifter between the Uno and the module. Because the INT pin is open-drain, the module's pull-up resistor keeps it at 3.3 V; the Uno reads that voltage as HIGH, so you don't need the internal pull-up for INT on the Uno. We explain how I2C works in the what is I2C guide.
SparkFun or Adafruit? Choosing a library
| Feature | SparkFun APDS9960 | Adafruit APDS9960 |
|---|---|---|
| Gesture directions | Up, down, left, right plus near and far | Up, down, left, right |
| Reading proximity | readProximity(variable) | Return value of readProximity() |
| Reading colour | Separate functions such as readRedLight() | All at once with getColorData(), plus lux and colour temperature |
| Interrupt settings | Gesture, proximity and light interrupts | Proximity and colour interrupts, threshold setting |
| Accepted chip ID | 0xAB and 0x9C | 0xAB only |
| Extra dependency | None (Wire only) | Adafruit BusIO |
Both libraries are in the Library Manager: search for SparkFun APDS9960 RGB and Gesture Sensor and Adafruit APDS9960 Library. For gestures, SparkFun's algorithm is a little more stable and also recognises near and far movements; for colour, Adafruit's lux and colour temperature functions make life easier. We'll use both in this guide. If it's your first time installing a library, have a look at the how to add an Arduino library guide.
Step by step: your first gesture test (with the INT pin)
- Wire the module according to the table above: VCC to 3.3V, SDA to A4, SCL to A5, INT to D2.
- Install the SparkFun library and upload the sketch below to the Uno.
- Open the Serial Monitor at 9600 baud and look for the "Jest sensoru hazir" (gesture sensor ready) message.
- Pass your hand 5–10 cm above the sensor from one edge to the other, at a speed that takes about half a second.
- You should see YUKARI (up), ASAGI (down), SOL (left) or SAG (right); if the directions are reversed, rotate the sensor by 90 or 180 degrees or swap the cases in the code.
1#include <Wire.h>
2#include <SparkFun_APDS9960.h>
3
4const int APDS_INT = 2;                 // kesme pini (Uno'da 2 ya da 3) / interrupt pin (2 or 3 on Uno)
5SparkFun_APDS9960 apds;
6volatile bool gestureFlag = false;
7
8void onGesture() {                      // INT LOW'a düşünce çalışır / runs when INT goes LOW
9  gestureFlag = true;
10}
11
12void handleGesture() {
13  if (!apds.isGestureAvailable()) return;
14  switch (apds.readGesture()) {
15    case DIR_UP:    Serial.println("YUKARI / UP");    break;
16    case DIR_DOWN:  Serial.println("ASAGI / DOWN");   break;
17    case DIR_LEFT:  Serial.println("SOL / LEFT");     break;
18    case DIR_RIGHT: Serial.println("SAG / RIGHT");    break;
19    case DIR_NEAR:  Serial.println("YAKIN / NEAR");   break;
20    case DIR_FAR:   Serial.println("UZAK / FAR");     break;
21    default:        Serial.println("BELIRSIZ / NONE");
22  }
23}
24
25void setup() {
26  Serial.begin(9600);
27  pinMode(APDS_INT, INPUT);             // modüldeki pull-up 3,3 V'a çeker / module pull-up to 3.3 V
28  attachInterrupt(digitalPinToInterrupt(APDS_INT), onGesture, FALLING);
29
30  if (!apds.init()) {                   // Wire.begin() kütüphanenin içinde / Wire.begin() is inside
31    Serial.println("APDS-9960 bulunamadi / not found");
32    while (true);
33  }
34  if (apds.enableGestureSensor(true)) { // true = jest olunca INT LOW / true = INT goes LOW on a gesture
35    Serial.println("Jest sensoru hazir / gesture sensor ready");
36  }
37}
38
39void loop() {
40  if (gestureFlag) {
41    detachInterrupt(digitalPinToInterrupt(APDS_INT));   // okurken yeni kesme gelmesin / no new IRQ while reading
42    handleGesture();
43    gestureFlag = false;
44    attachInterrupt(digitalPinToInterrupt(APDS_INT), onGesture, FALLING);
45  }
46}
When a gesture is ready, the APDS-9960 pulls the INT pin LOW, which triggers the interrupt on the Uno's D2 pin. The interrupt function only raises a flag; the actual reading happens in loop(), because readGesture() reads dozens of bytes over I2C and using I2C inside an interrupt causes lock-ups. Temporarily disabling the interrupt during the read also stops the same gesture from being handled twice. You'll find the logic of interrupts in detail in the Arduino interrupt guide.
Proximity detection: an LED that brightens as your hand approaches
Measuring proximity alone, instead of gestures, is much simpler and more stable. The sketch below sends the proximity value straight to an LED with PWM: the closer your hand, the brighter the LED, and it fades as you pull away. Connect the LED to D9 through a 220 Ω resistor; you can find the right value with the LED resistor calculator.
1#include <Wire.h>
2#include <SparkFun_APDS9960.h>
3
4SparkFun_APDS9960 apds;
5const int LED_PIN = 9;                  // PWM pini / PWM pin
6
7void setup() {
8  Serial.begin(9600);
9  pinMode(LED_PIN, OUTPUT);
10  if (!apds.init()) {
11    Serial.println("APDS-9960 bulunamadi / not found");
12    while (true);
13  }
14  apds.setProximityGain(PGAIN_2X);      // kazanç: 1X, 2X, 4X, 8X / gain
15  apds.enableProximitySensor(false);    // false = kesme yok / no interrupt
16}
17
18void loop() {
19  uint8_t prox = 0;                     // 0 = uzak, 255 = çok yakın / 0 far, 255 very close
20  if (apds.readProximity(prox)) {
21    analogWrite(LED_PIN, prox);         // el yaklaştıkça LED parlar / LED gets brighter as the hand comes closer
22    Serial.println(prox);
23  }
24  delay(50);
25}
The proximity value isn't centimetres; it's the strength of the reflected light. A sheet of white paper may give 40 at 15 cm while a black cloth at the same distance stays below 10. So use the APDS-9960 not as a distance meter but as the answer to "has something come close?". If you need an exact distance, the HC-SR04 ultrasonic sensor is a more accurate choice. If the values are very low, set the gain to PGAIN_4X or PGAIN_8X; if they sit at 255 all the time, drop to PGAIN_1X.
Measuring RGB colour and ambient light
On the colour side the APDS-9960 reads four channels: red (R), green (G), blue (B) and unfiltered total light (C). The Adafruit library also calculates an approximate lux value and the colour temperature of the light (in Kelvin) from these raw numbers. The sketch below prints the four channels, the lux and Kelvin values every half second and tells you which colour dominates.
1#include <Adafruit_APDS9960.h>
2
3Adafruit_APDS9960 apds;
4
5void setup() {
6  Serial.begin(9600);
7  if (!apds.begin()) {                  // kimlik 0xAB değilse false / false if the ID is not 0xAB
8    Serial.println("APDS-9960 bulunamadi / not found");
9    while (true);
10  }
11  apds.setADCIntegrationTime(100);      // 100 ms ölçüm: daha hassas / 100 ms integration: more sensitive
12  apds.enableColor(true);               // renk + ortam ışığı / colour + ambient light
13}
14
15void loop() {
16  uint16_t r, g, b, c;
17  while (!apds.colorDataReady()) delay(5);              // ölçüm bitene kadar bekle / wait for a reading
18  apds.getColorData(&r, &g, &b, &c);
19  uint16_t lux = apds.calculateLux(r, g, b);            // yaklaşık lüks / approximate lux
20  uint16_t cct = apds.calculateColorTemperature(r, g, b); // renk sıcaklığı (K) / colour temperature (K)
21
22  Serial.print("R:");  Serial.print(r);
23  Serial.print(" G:"); Serial.print(g);
24  Serial.print(" B:"); Serial.print(b);
25  Serial.print(" C:"); Serial.print(c);
26  Serial.print("  lux:"); Serial.print(lux);
27  Serial.print("  K:");   Serial.println(cct);
28
29  if (c > 100) {                        // yeterli ışık varsa baskın rengi söyle / name the dominant colour
30    if (r > g && r > b)      Serial.println("Kirmizi / red");
31    else if (g > r && g > b) Serial.println("Yesil / green");
32    else                     Serial.println("Mavi / blue");
33  }
34  delay(500);
35}
The raw values aren't absolute colours but amounts of light; the same red card gives very different numbers in a dim room and in sunlight. So compare ratios when you compare colours: the ratio of R to C stays more stable even when the light changes. If you want to read the colour of an object, hold it 1–2 cm from the sensor and block outside light with your hand or a tube. The lux value is an approximation; it won't replace a lux meter, but it's more than enough for "has the room gone dark?". For projects that need finer colour discrimination, consider sensors designed only for colour, such as the TCS3200 colour sensor or the TCS34725.
Controlling an LED with gestures (without the INT pin)
You don't have to connect the INT pin. The library can also find out whether there's a new gesture by polling the gesture engine's status register over I2C. This saves a pin and keeps the code simple; the price is that loop() generates constant I2C traffic. In the sketch below an up gesture turns the LED fully on, a down gesture turns it off, and right and left gestures raise and lower the brightness in quarter steps.
1#include <Wire.h>
2#include <SparkFun_APDS9960.h>
3
4SparkFun_APDS9960 apds;
5const int LED_PIN = 9;                  // PWM pini / PWM pin
6int level = 0;                          // parlaklık 0-255 / brightness 0-255
7
8void setup() {
9  Serial.begin(9600);
10  pinMode(LED_PIN, OUTPUT);
11  if (!apds.init()) {
12    Serial.println("APDS-9960 bulunamadi / not found");
13    while (true);
14  }
15  apds.enableGestureSensor(false);      // INT olmadan, sorgulayarak / polling, no INT pin
16}
17
18void loop() {
19  if (apds.isGestureAvailable()) {
20    switch (apds.readGesture()) {
21      case DIR_UP:    level = 255; break;                   // tam aç / fully on
22      case DIR_DOWN:  level = 0;   break;                   // kapat / off
23      case DIR_RIGHT: level = min(level + 64, 255); break;  // daha parlak / brighter
24      case DIR_LEFT:  level = max(level - 64, 0);   break;  // daha sönük / dimmer
25      default: break;
26    }
27    analogWrite(LED_PIN, level);
28    Serial.print("Parlaklik / brightness: ");
29    Serial.println(level);
30  }
31}
Controlling music with gestures: with the DFPlayer Mini
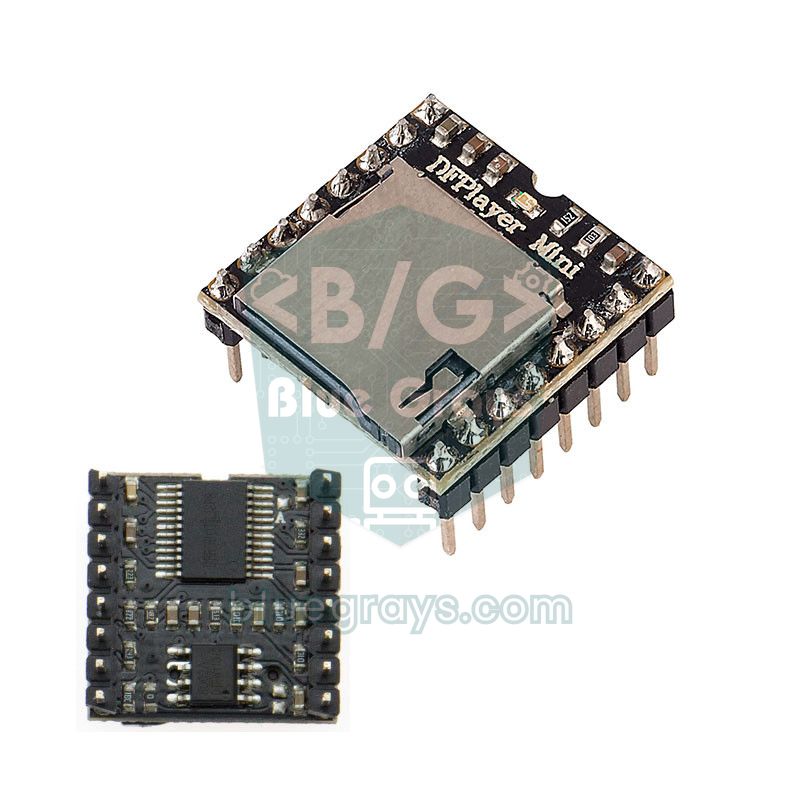
The most fun use of a gesture sensor is a touch-free music player. Connect the DFPlayer Mini's RX pin to the Uno's D11 through a 1 kΩ resistor and its TX pin to D10; attach the speaker to SPK_1 and SPK_2 and power the module from 5V. Copy your songs to the SD card named 0001.mp3, 0002.mp3 and so on. Module details are in the DFPlayer Mini guide. A right gesture skips to the next song and a left gesture to the previous one; up and down gestures raise and lower the volume, and holding your hand still over the sensor pauses and resumes playback.
1#include <Wire.h>
2#include <SoftwareSerial.h>
3#include <SparkFun_APDS9960.h>
4#include <DFRobotDFPlayerMini.h>
5
6SoftwareSerial mp3Serial(10, 11);       // RX, TX (TX hattına 1 kΩ / 1 kΩ on the TX line)
7DFRobotDFPlayerMini player;
8SparkFun_APDS9960 apds;
9bool playing = true;
10int volume = 18;                        // ses 0-30 / volume 0-30
11
12void setup() {
13  Serial.begin(9600);
14  mp3Serial.begin(9600);
15  if (!player.begin(mp3Serial)) { Serial.println("DFPlayer yok / not found"); while (true); }
16  if (!apds.init())             { Serial.println("APDS-9960 yok / not found"); while (true); }
17  apds.enableGestureSensor(false);
18  player.volume(volume);
19  player.play(1);                       // SD karttaki 0001.mp3 / 0001.mp3 on the SD card
20}
21
22void loop() {
23  if (!apds.isGestureAvailable()) return;
24  switch (apds.readGesture()) {
25    case DIR_RIGHT: player.next();     Serial.println("Sonraki / next");       break;
26    case DIR_LEFT:  player.previous(); Serial.println("Onceki / previous");    break;
27    case DIR_UP:    volume = min(volume + 3, 30); player.volume(volume);      break;
28    case DIR_DOWN:  volume = max(volume - 3, 0);  player.volume(volume);      break;
29    case DIR_NEAR:                      // eli sensör üzerinde sabit tut / hold the hand still
30      if (playing) player.pause(); else player.start();
31      playing = !playing;
32      break;
33    default: break;
34  }
35}
There's one detail you should know here: readGesture() doesn't return until the gesture is over, and it waits 30 ms between FIFO reads. As long as your hand stays over the sensor, the Arduino does nothing else. That's no problem for a music player, but if the same sketch has a motor or a display animation that needs a fast response, you'll have to plan them around the gesture reading.
The INT pin and the ESP32: interrupt-driven proximity detection
The INT pin isn't only for gestures; it can also be used for proximity and light thresholds. You set a threshold; when a reading crosses it, the APDS-9960 pulls INT LOW and keeps it there until you clear it. That way the microcontroller doesn't have to keep polling the sensor. The ESP32 sketch below uses the Adafruit library to trigger INT when proximity goes above 150 and toggles the on-board LED every time a hand approaches, like a touch-free light switch.
1#include <Wire.h>
2#include <Adafruit_APDS9960.h>
3
4const int INT_PIN = 4;                  // APDS INT -> GPIO 4
5const int LED_PIN = 2;                  // karttaki LED / on-board LED
6Adafruit_APDS9960 apds;
7bool ledOn = false;
8
9void setup() {
10  Serial.begin(115200);
11  pinMode(INT_PIN, INPUT_PULLUP);       // 3,3 V'a çekmek güvenli / pulling up to 3.3 V is safe
12  pinMode(LED_PIN, OUTPUT);
13  Wire.begin(21, 22);                   // SDA, SCL
14  if (!apds.begin()) {
15    Serial.println("APDS-9960 bulunamadi / not found");
16    while (true) delay(10);
17  }
18  apds.enableProximity(true);
19  apds.setProximityInterruptThreshold(0, 150);  // 150'yi aşınca INT LOW / INT goes LOW above 150
20  apds.enableProximityInterrupt();
21}
22
23void loop() {
24  if (digitalRead(INT_PIN) == LOW) {    // el yaklaştı / a hand came close
25    uint8_t p = apds.readProximity();
26    ledOn = !ledOn;                     // her yaklaşmada aç-kapa / toggle on every approach
27    digitalWrite(LED_PIN, ledOn);
28    Serial.printf("Yakinlik / proximity: %u  LED: %s\n", p, ledOn ? "ON" : "OFF");
29    while (apds.readProximity() > 100) delay(20);  // el çekilene kadar bekle / wait for the hand to leave
30    apds.clearInterrupt();              // INT'i serbest bırak / release INT
31  }
32}
The third parameter of setProximityInterruptThreshold() (4 by default) is the persistence: it says how many consecutive readings must cross the threshold before the interrupt fires, which filters out momentary noise. If you don't call clearInterrupt(), INT stays LOW and you'll miss the next approach. This setup is very useful in battery-powered projects: put the ESP32 into deep sleep and wake it from the INT pin with esp_sleep_enable_ext0_wakeup(GPIO_NUM_4, 0), and the board only wakes up when someone brings a hand close. GPIO 4 is an RTC pin, so it's suitable for this.
APDS-9960 with the Raspberry Pi Pico (MicroPython)
On the Raspberry Pi Pico you can run the APDS-9960 in MicroPython without any library by writing to its registers directly. The code below reads the chip ID, enables colour and proximity measurement and prints the four colour channels and the proximity value every 200 ms. The wiring uses the I2C0 bus: SDA to GP4, SCL to GP5 and VCC to the 3V3(OUT) pin.
1from machine import Pin, I2C
2import time
3
4ADDR = 0x39                              # APDS-9960 sabit adresi / fixed address
5i2c = I2C(0, sda=Pin(4), scl=Pin(5), freq=400000)
6
7def write(reg, val):
8    i2c.writeto_mem(ADDR, reg, bytes([val]))
9
10def read(reg, n=1):
11    return i2c.readfrom_mem(ADDR, reg, n)
12
13print("ID:", hex(read(0x92)[0]))         # orijinalde 0xAB / 0xAB on a genuine chip
14
15write(0x80, 0x00)                        # ENABLE: her şeyi kapat / everything off
16write(0x81, 0xDB)                        # ATIME: 37 döngü, ~103 ms / 37 cycles, ~103 ms
17write(0x8E, 0x87)                        # PPULSE: 16 us, 8 darbe / 16 us, 8 pulses
18write(0x8F, 0x09)                        # CONTROL: LED 100 mA, PGAIN 4x, AGAIN 4x
19write(0x80, 0x07)                        # ENABLE: PON + AEN (renk/colour) + PEN (yakınlık/proximity)
20time.sleep_ms(150)
21
22while True:
23    if read(0x93)[0] & 0x01:             # STATUS.AVALID: renk verisi hazır / colour data ready
24        d = read(0x94, 8)                # C, R, G, B: ikişer bayt / two bytes each
25        c = d[0] | d[1] << 8
26        r = d[2] | d[3] << 8
27        g = d[4] | d[5] << 8
28        b = d[6] | d[7] << 8
29        prox = read(0x9C)[0]             # PDATA: 0-255
30        print("C", c, "R", r, "G", g, "B", b, "yakinlik/prox", prox)
31    time.sleep_ms(200)
Here's what the registers in the code do: 0x80 (ENABLE) selects which blocks are on, 0x81 (ATIME) sets the colour integration time (2.78 ms per step), 0x8F (CONTROL) sets the IR LED current and the gains, 0x93 (STATUS) tells you whether data is ready, 0x94–0x9B hold the colour channels and 0x9C holds the proximity value. For gestures you'd have to read the FIFO and write a direction algorithm like SparkFun's, which is a longer job. If you prefer the Arduino IDE, install the arduino-pico core on the Pico and use the SparkFun library as it is; the default I2C pins are again GP4 and GP5.
Range limits and correct use
The APDS-9960 was designed as a phone sensor and its range is short. In practice gestures are reliable between 5 and 15 cm and reach 20 cm at best. Proximity readings are meaningful up to a similar distance. What sets this limit is the power of the IR LED and how much light your hand reflects; raising the LED current to 100 mA and the gain to maximum adds a little range, but also more noise.
| Factor | Effect | What to do |
|---|---|---|
| Distance | Gestures disappear beyond 15 cm | Pass your hand at 5–10 cm |
| Speed of movement | Very slow or very fast passes aren't detected | A smooth half-second movement |
| Sunlight | IR in sunlight saturates the photodiodes | Use it in the shade or indoors |
| Glass or clear cover | The cover reflects IR back, so proximity always reads high | Remove the cover or use a thin IR-transparent material |
| Surface colour | A black glove reflects less | Increase the gain |
| Sensor orientation | Directions rotate | Swap the direction cases in the code |
APDS-9960 project ideas
- Touch-free lamp: Toggle a relay module with the proximity interrupt; very handy in the kitchen when your hands are messy.
- Gesture colour lamp: Use right and left gestures to step through colours on an RGB LED or a WS2812B strip.
- Mid-air menu: Pick menu items on an OLED display with up and down gestures and confirm with NEAR.
- Gesture servo lid: Open the lid of a box with a gesture and a servo motor.
- Automatic display brightness: Adjust a screen or LED strip to the ambient light; compared with an LDR you get a steadier reading with colour information.
- Colour sorter: Sort coloured sweets or bricks coming down a chute by their colour channels.
Common mistakes and fixes
| Symptom | Likely cause | Fix |
|---|---|---|
| "APDS-9960 bulunamadi" (not found) | Wiring error, no 3.3 V or a different chip ID | Look for 0x39 with an I2C scanner, read the ID |
| Module found but init fails | A clone chip with a different ID such as 0xA8 | Add that value to the library's ID check |
| No gestures detected | Hand too far or too slow, VL not powered | Pass at 5–10 cm in half a second, check the PS jumper |
| Directions reversed or mixed up | The sensor's mounting orientation | Swap the DIR cases in the code |
| Proximity always high | Glass, a cover or a nearby surface in front | Remove the cover, lower the gain |
| Doesn't work outdoors | Sunlight drowns out the IR | Use it in the shade |
| Random freezes on the Uno | 5 V and 3.3 V I2C mismatch, long wires | Level shifter and short wires |
| INT stays LOW | Interrupt not cleared | Call clearInterrupt() after reading |
With one small module, the APDS-9960 adds touch-free control, proximity detection and colour measurement to your project. Keep its short range and the 3.3 V rule in mind and it becomes a reliable interface element. In the BlueGrays app you'll find RGB LED, LDR light measurement, motion sensor and distance measurement projects with step-by-step circuit diagrams and code, and you can add the APDS-9960 to them to build touch-free versions.
Frequently asked questions
Does the APDS-9960 work with 5 V?
No, the APDS-9960 chip runs on 2.4–3.6 V and 5 V can damage it. Power the module from the Arduino Uno's 3.3V pin and, if possible, put a level shifter on the SDA and SCL lines. Only special versions that clearly state they have an on-board regulator and level shifter can be used with 5 V.
What is the I2C address of the APDS-9960?
The APDS-9960's I2C address is 0x39 and it can't be changed. That's why you can't put two APDS-9960s on the same I2C bus; if you need two sensors, use an I2C multiplexer such as the TCA9548A or the second I2C bus on the ESP32 or Pico.
What is the gesture range of the APDS-9960?
In practice gestures are detected reliably between 5 and 15 cm and can reach 20 cm in good conditions. The range depends on how much light your hand reflects, the IR LED current and the gain setting. Sunlight and glass in front of the sensor reduce the range noticeably.
Do I have to connect the APDS-9960 INT pin?
No. The libraries can also read gestures and proximity by polling over I2C; in the SparkFun library enableGestureSensor(false) does this. The INT pin reports an event immediately without constant polling, which takes load off the processor and can wake an ESP32 from deep sleep.
How accurate is the APDS-9960 colour sensor?
The APDS-9960 measures its colour channels with 16-bit resolution, but it gives raw values that depend on ambient light rather than absolute colours. If you hold an object close and block outside light, it easily tells red, green and blue cards apart. For finer colour discrimination, sensors focused only on colour such as the TCS34725 or TCS3200 are a better choice.
Why do I get an APDS-9960 init failed error?
This error means the library couldn't read the sensor's ID or didn't find the value it expected. Check the wiring, the 3.3 V supply and that SDA and SCL aren't swapped, then look for address 0x39 with an I2C scanner. If the address shows up, the chip may be a clone; read the value in the ID register and add it to the list the library accepts.
Projects to build after reading this
See all projects
Measuring Light Intensity with an LDR
Want to see how bright your room is as a number? The LDR, a small part that reacts to light, measures the light around it, and the Arduino writes the value to your computer screen every half second.
Using an RGB LED
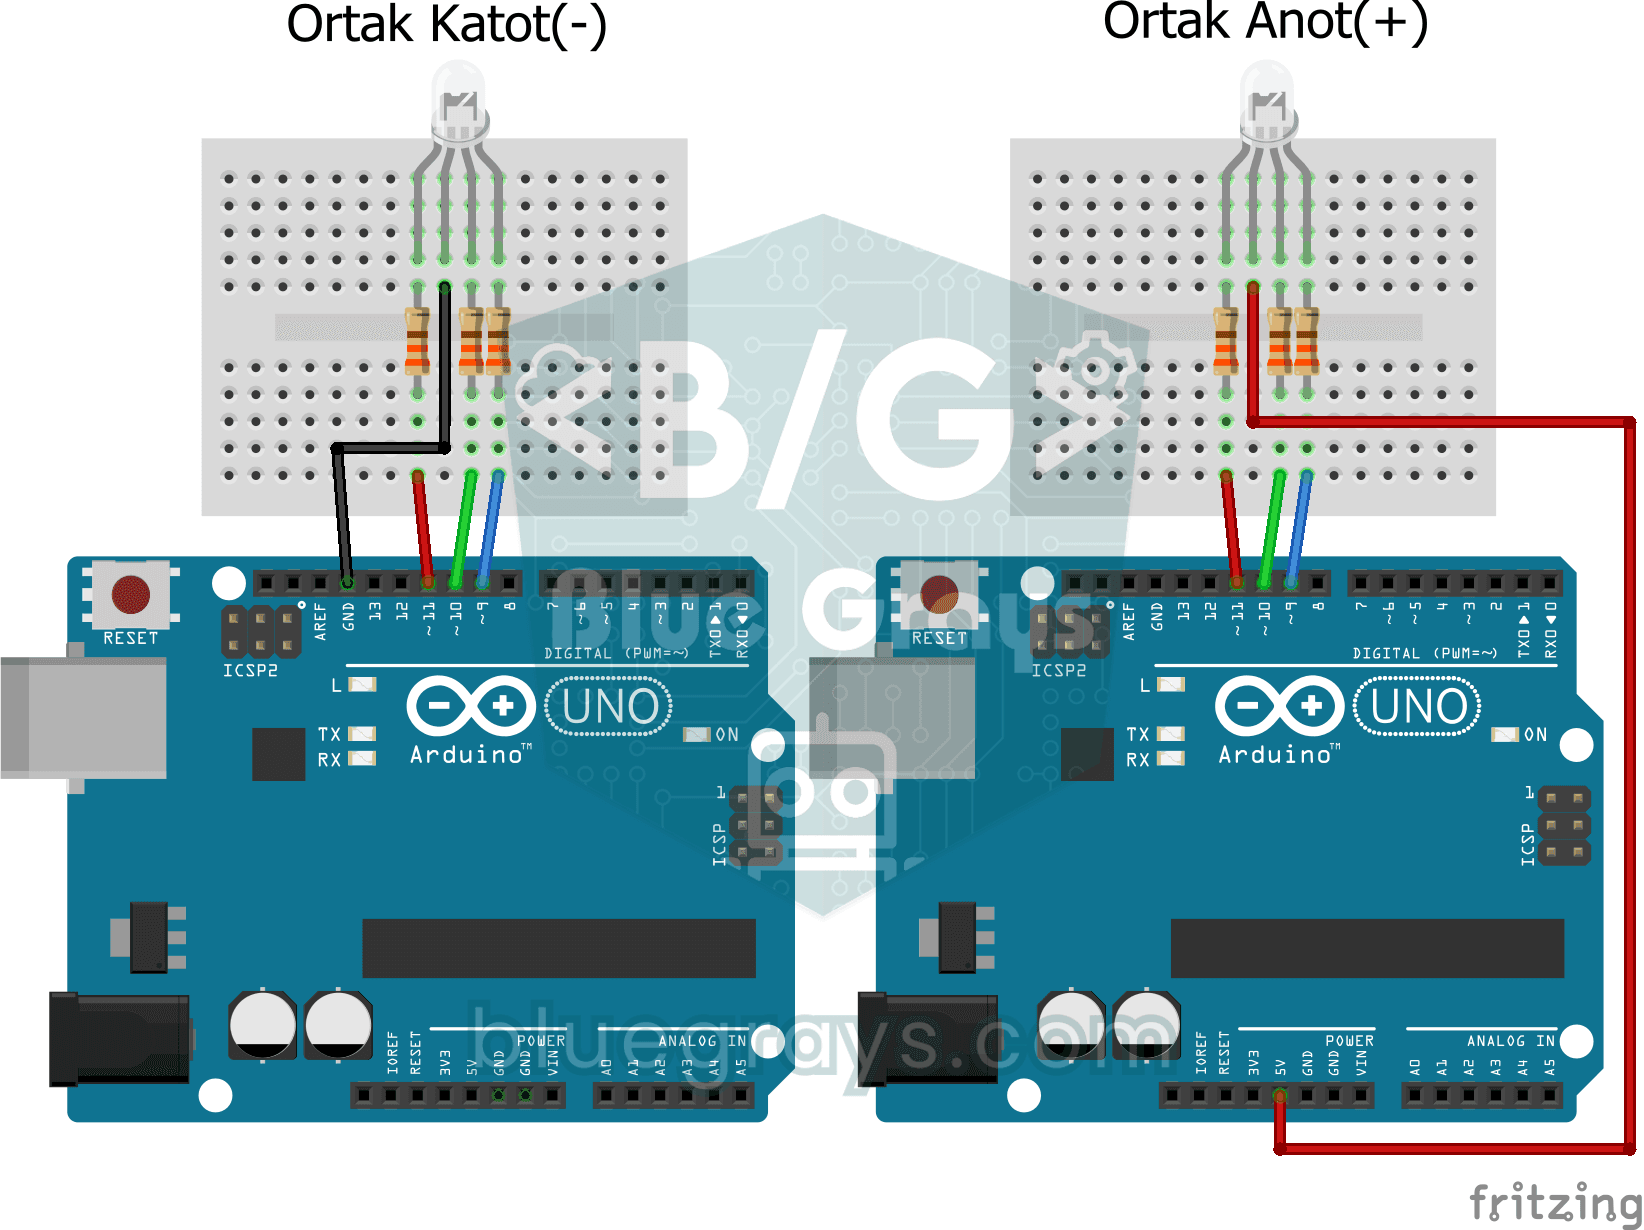
Three colours hide inside a single LED: the RGB LED lights up red, then green, then blue, each colour on for half a second and off for half a second, before the cycle starts again.
Smooth Color Transition with RGB Led
A single RGB LED drifts slowly from red to green, green to blue and back to red, looping through the rainbow without ever stopping.
Motion Detector with Motion Sensor
A simple guard that tells you when someone walks into the room. The motion sensor picks up the warmth given off by the human body, and the Arduino keeps the LED on as long as there is movement and…
Doorbell and Light with Motion Sensor
When someone comes up to your door, you know before they even ring. As soon as the motion sensor spots someone, the LED lights up and the buzzer plays a three-note chime from high to low; when the…

Reading Reflection (Proximity) with TCRT5000
With a small sensor that sends out invisible light and measures how much bounces back, you can detect the surface in front of it.

ESP32 RGB LED Control
Unlimited color generation with a single RGB LED instead of 3 separate LEDs. As in Arduino, we make a rainbow transition by setting the R/G/B values with analogWrite(). Color theory (such as red+green=yellow) is seen practically.

ESP32 Smart Lighting (PIR + LDR + Relay + OLED)
With an ESP32, a PIR motion sensor, an LDR light sensor and a relay module, we turn your hallway, bathroom or pantry into smart lighting. If the room is already bright, the light stays off even when there is motion, so it never wastes energy during the day. The light stays on for 30 seconds, and the time extends automatically while motion continues.