
Arduino Commands List: 36 Cards, C++ and MicroPython Side by Side
Arduino commands list in learning order: 18 cards from pinMode to tone, their MicroPython equivalents, side-by-side code, a 4-week plan and 8 common mistakes.
The most reliable way to learn Arduino commands is not to memorise a long list but to go through them in order, each with a small example and a real project. The BlueGrays app has a Code guide for exactly this in the Lessons section of its Learn tab: 18 cards on the Arduino C++ track, from pinMode to tone, and 18 cards on the MicroPython track, from import to I2C, 36 cards in total. Every card follows the same layout: What does it do?, Why?, Syntax, Example (with Blocks, Arduino and MicroPython tabs), Common mistake, Tip, See it in projects and a two-question Mini test. The order is fixed as well: pins first (pinMode, digitalWrite, digitalRead, analogRead, analogWrite), then time (delay, millis), then variables, conditions, loops and functions, and finally Serial, map, random and tone. If you use a Raspberry Pi Pico, you learn the same ideas on the MicroPython track with Pin, Pin.value, time.sleep, ADC.read_u16 and PWM.
This post is a map of the guide. First you'll see what is inside a card, then the 18 cards of each track in their real order in the app, with the equivalent in the other language. After that come three short examples that put the C++ and MicroPython versions of the same program side by side, how the mini test and progress tracking work, a 4-week learning order, a 20-minute daily routine and the 8 most common mistakes with these commands. If you are looking for a detailed explanation of each command, the Arduino commands list with examples post gives every command its own section; this post is about the order to learn them in and how to practise.

Where is the Code guide and how does it work?
You open the guide from the Learn tab at the bottom: in the Lessons section at the top, tap the Code guide tile. When the guide opens you see two tabs at the top: Arduino C++ and MicroPython; the app remembers which track you opened last. Below the tabs there is a What you've learned counter and a Next card line, so you never have to look for where you stopped. Cards are grouped by topic: Pins, Time, Variables, Conditions, Loops, Functions, Serial port, Math and Sound; the MicroPython track adds Basic structure and Error handling. The Code guide is free: you don't need Premium to read the cards, see the examples or solve the mini tests. The cards are available in 10 languages, so you read the explanations in whatever language you use the app in.
What is inside a card?
Every card uses the same skeleton, so after the third card you know exactly where to look. The table below shows the sections using the 7th card of the Arduino track, millis; the right-hand column is a short summary of what the card actually says. The order of the sections is itself a learning order: first you hear in one sentence what the command does, then you understand why you need it through an everyday comparison, you see how it is written, read a working example, learn the most common trap and test yourself with two questions.
| Section | What it covers | On the millis card |
|---|---|---|
| What does it do? | The command's job in one sentence | Tells you how many milliseconds have passed since the board started. |
| Why? | Why you need it, through an everyday comparison | Like putting a cake in the oven and glancing at the clock now and then: you do other things while you wait. |
| Syntax | How the command is written | unsigned long now = millis(); |
| Example | A short working program; Blocks, Arduino and MicroPython tabs | Code that toggles an LED every 500 ms; on the Pico the same job with time.ticks_ms |
| Common mistake | The trap beginners fall into most | Keeping millis in an int: the number breaks after about 33 seconds. |
| Tip | A small rule that makes life easier | Always write the check as now - previous >= interval. |
| See it in projects | Projects that use the command, from easy to hard | More than 50 projects; the list starts with a free ESP32 button project |
| Mini test | Two questions, a short explanation after each answer | What does millis() return? Which type should you store millis in? |
The Example section opens on the card's own track: on an Arduino card the Arduino tab comes first, on a MicroPython card the MicroPython tab. But the other tab is always there too, and that turns the guide into a dictionary. On the MicroPython track's Pin output: Pin(15, Pin.OUT) card, for example, the Arduino tab holds code that does the same job with pinMode and digitalWrite, and the comments say which line matches what (such as the line that stands in for led.toggle()). Almost every card also has a third tab, Blocks, which shows the example program as blocks. If you are moving from Arduino to the Pico, the quickest method is this: open a card you know, switch tabs and match the two programs line by line.
Arduino C++ track: 18 cards and their MicroPython equivalents
The table below is the real order of the Arduino track in the app; the last column shows how the same job is done in MicroPython on a Raspberry Pi Pico. Pin numbers match the examples on the cards: for an LED, 13 or 9 on the Uno and GP15 on the Pico; for a button, 2 on the Uno and GP14 on the Pico; for analog reading, A0 on the Uno and GP26 on the Pico. The first five cards cover pins, 6 and 7 cover time, 8 to 14 cover programming basics, and the last four cover the serial port, scaling, random numbers and sound. The order is deliberate: first you learn how the board touches the outside world, then you control those touches with variables, conditions and loops.
| No. | Card | What does it do? | MicroPython equivalent |
|---|---|---|---|
| 1 | pinMode | Tells the board whether a pin is an output (LED, buzzer) or an input (button, sensor) | Pin(15, Pin.OUT) · Pin(14, Pin.IN, Pin.PULL_UP) |
| 2 | digitalWrite | Turns an output pin on (HIGH, 5 V) or off (LOW, 0 V) | led.value(1) · led.on() · led.off() |
| 3 | digitalRead | Reads whether an input pin is HIGH or LOW | button.value() → 1 or 0 |
| 4 | analogRead | Turns the voltage on A0–A5 into a number from 0 to 1023 | ADC(26).read_u16() → 0–65535 |
| 5 | analogWrite (PWM) | Dims an LED or slows a motor with a value from 0 to 255 on a ~ pin | PWM(Pin(15)) · freq(1000) · duty_u16(0–65535) |
| 6 | delay | Pauses the code for the given number of milliseconds | time.sleep(0.5) · time.sleep_ms(500) |
| 7 | millis | Milliseconds since start-up; timing without stopping the code | time.ticks_ms() · time.ticks_diff() |
| 8 | Variables and types | Stores values with types such as int, float, bool, unsigned long | No type is written: count = 0, volts = 3.3 |
| 9 | if / else if / else | Runs different code depending on a condition | if / elif / else |
| 10 | Comparison and logical operators | Builds conditions with ==, !=, <, >, &&, ||, ! | ==, !=, <, > · and, or, not |
| 11 | for loop | Repeats a task a set number of times | for i in range(10): |
| 12 | while loop | Repeats as long as a condition is true | while condition: |
| 13 | Functions (void, parameters, return) | Splits code into named, reusable pieces | def blink(times): … return |
| 14 | Arrays | Keeps values of the same type in order under one name | List: pins = [2, 3, 4] · len(pins) |
| 15 | Serial.begin / print / println | Sends text and values to the computer (Serial Monitor) | print(x) · f-string; no Serial.begin needed |
| 16 | map | Scales one number range to another | No built-in command: raw * 255 // 1023 or your own function |
| 17 | random / randomSeed | Generates random numbers | import random · random.randint(1, 6) |
| 18 | tone / noTone | Plays a tone of a given frequency on a buzzer and stops it | PWM: freq(440) · duty_u16(32768); duty_u16(0) to silence it |
MicroPython track: 18 cards and their Arduino equivalents
The MicroPython track was written with the Raspberry Pi Pico in mind; the examples on the cards are short programs you can run on a Pico, for instance with Thonny. The order is a little different from the Arduino track, because in Python you first need to get used to the language's own rules: adding modules with import, printing with print, and the indentation and colon rule. Every MicroPython card's Arduino tab also holds the C++ version of the same program, so if you already know Arduino you can read the table from right to left. If you are using a Pico for the first time, the what is a Raspberry Pi Pico post is good preparation for setup and pins.
| No. | Card | What does it do? | Arduino equivalent |
|---|---|---|---|
| 1 | import and from … import | Adds modules such as machine and time to the program | #include for libraries; basic commands like pinMode and delay are built in |
| 2 | print and f-strings | Prints text and values to the Thonny shell | Serial.begin(9600) + Serial.println() |
| 3 | Pin output: Pin(15, Pin.OUT) | Makes a GP pin an output; value(), on(), off(), toggle() | pinMode(13, OUTPUT) + digitalWrite() |
| 4 | Pin input: Pin.IN, PULL_UP, PULL_DOWN | Makes a pin an input, picks the internal resistor, reads it with value() | pinMode(2, INPUT_PULLUP) + digitalRead() |
| 5 | time.sleep and sleep_ms | Pauses the program in seconds or milliseconds | delay() |
| 6 | while True: the endless loop | Repeats the lines below it for as long as the Pico is on | loop() |
| 7 | Indentation and the colon (:) | Decides which line belongs to which block | Curly braces { } and the semicolon ; |
| 8 | Variables: int, float, str, bool | Stores values; the type is set automatically | int, float, String, bool |
| 9 | if / elif / else, and / or / not | Branches on a condition and combines conditions | if / else if / else · &&, ||, ! |
| 10 | for and range | Repeats a set number of times; range(0, 10) counts from 0 to 9 | for (int i = 0; i < 10; i++) |
| 11 | Lists: [ ], index, len | Holds several values in order; the first item is at index 0 | Arrays: int pins[] = {2, 3, 4}; |
| 12 | def and return (functions) | Names reusable code and returns a result | void or typed functions, return |
| 13 | ADC: analog reading with read_u16 | Reads the voltage on GP26, GP27, GP28 as 0–65535 | analogRead() → 0–1023 |
| 14 | PWM: freq and duty_u16 | Dims an LED, plays notes on a buzzer | analogWrite() and tone() |
| 15 | time.ticks_ms and ticks_diff | Measures elapsed time without stopping the code | millis() |
| 16 | Pin.irq: buttons with interrupts | Runs a function the moment a button is pressed | attachInterrupt() |
| 17 | try / except (catching errors) | Keeps the program from stopping when an error occurs | No common equivalent in Arduino; you check return values |
| 18 | I2C and scan() | Finds the addresses of devices on the I2C bus | Wire.begin() + I2C scanner code |
The same program in two languages: 3 side-by-side examples
The first example is every language's "hello world": blinking the LED on the board every half second. On the Uno the built-in LED is connected to pin 13, so you don't need to build a circuit. The Pico is a little different: on the plain Pico the onboard LED is on GP25, but on the Pico W the LED is wired to the wireless chip and Pin(25) won't light it. That is why writing Pin("LED", Pin.OUT) in MicroPython is safer; in current MicroPython versions this name finds the onboard LED on both the Pico and the Pico W. If the firmware on your board doesn't recognise the name "LED", install a current MicroPython on the Pico. The free Raspberry Pi Pico Onboard LED Blink (Pico and Pico W) project explains exactly this difference.
1// Örnek 1: dahili LED'i yakıp söndür / Example 1: blink the built-in LED
2void setup() {
3  pinMode(13, OUTPUT);     // Uno'da dahili LED 13. pinde / built-in LED is on pin 13 on the Uno
4}
5
6void loop() {
7  digitalWrite(13, HIGH);  // LED yanar / LED on
8  delay(500);              // 500 ms bekle / wait 500 ms
9  digitalWrite(13, LOW);   // LED söner / LED off
10  delay(500);              // 500 ms bekle / wait 500 ms
11}1# Örnek 1: dahili LED'i yakıp söndür / Example 1: blink the onboard LED
2from machine import Pin
3import time
4
5led = Pin("LED", Pin.OUT) # Pico ve Pico W'de dahili LED / onboard LED on Pico and Pico W
6# Pin(25, Pin.OUT) yalnız düz Pico'da çalışır / Pin(25, Pin.OUT) works only on the plain Pico
7
8while True: # Arduino'daki loop() gibi / like loop() in Arduino
9 led.on() # LED yanar / LED on
10 time.sleep_ms(500) # 500 ms bekle / wait 500 ms
11 led.off() # LED söner / LED off
12 time.sleep_ms(500) # 500 ms bekle / wait 500 msThe second example adds an input: the LED is on while the button is pressed. The button goes between pin 2 and GND on the Uno, and between GP14 and GND on the Pico. On the Uno we use the built-in LED on pin 13 again; on the Pico, connect an external LED to GP15 through a 220 Ω resistor (the LED resistor tool works out this value for your own LED). Both languages switch on the internal pull-up resistor: INPUT_PULLUP in Arduino, Pin.PULL_UP in MicroPython. With this wiring the logic is inverted: pressing the button pulls the pin to GND, so the Arduino reads LOW and the Pico reads 0. The 20 ms pause at the end doesn't fully solve the button's mechanical bounce, but it reduces very short flickers. The details of button wiring are in the how to connect a button to Arduino post.
1// Örnek 2: butona basılıyken LED yanar / Example 2: LED on while the button is pressed
2const int BUTTON_PIN = 2;  // buton: 2. pin ile GND arasında / button between pin 2 and GND
3const int LED_PIN = 13;    // dahili LED / built-in LED
4
5void setup() {
6  pinMode(BUTTON_PIN, INPUT_PULLUP);  // iç pull-up direnci açık / internal pull-up on
7  pinMode(LED_PIN, OUTPUT);
8}
9
10void loop() {
11  if (digitalRead(BUTTON_PIN) == LOW) {  // basılıyken LOW okunur / reads LOW while pressed
12    digitalWrite(LED_PIN, HIGH);
13  } else {
14    digitalWrite(LED_PIN, LOW);
15  }
16  delay(20);  // kısa bekleme / short pause
17}1# Örnek 2: butona basılıyken LED yanar / Example 2: LED on while the button is pressed
2from machine import Pin
3import time
4
5button = Pin(14, Pin.IN, Pin.PULL_UP) # buton: GP14 ile GND arasında / button between GP14 and GND
6led = Pin(15, Pin.OUT) # LED: GP15 + 220 ohm direnç / LED on GP15 with 220 ohm
7
8while True:
9 if button.value() == 0: # basılıyken 0 okunur / reads 0 while pressed
10 led.value(1)
11 else:
12 led.value(0)
13 time.sleep_ms(20) # kısa bekleme / short pauseThe third example shows the most important difference between the two languages: number ranges. The potentiometer's middle pin goes to A0 on the Uno and GP26 on the Pico; the outer pins go to 5V and GND on the Uno, and to 3V3 (OUT) and GND on the Pico. The LED goes on pin 9 (marked ~) on the Uno and on GP15 on the Pico, each with a 220 Ω resistor. In Arduino, analogRead returns 0–1023 but analogWrite expects 0–255, which is why map(raw, 0, 1023, 0, 255) sits in between. On the Pico, both read_u16 and duty_u16 use 0–65535, so you can pass the reading straight to PWM. You'll find how PWM works in the what is PWM post, and how to watch values live in the Serial Monitor guide.
1// Örnek 3: potansiyometreyle LED parlaklığı / Example 3: LED brightness with a potentiometer
2const int POT_PIN = A0;  // potansiyometrenin orta ucu / potentiometer wiper
3const int LED_PIN = 9;   // ~ işaretli PWM pini / PWM pin marked with ~
4
5void setup() {
6  pinMode(LED_PIN, OUTPUT);
7  Serial.begin(9600);
8}
9
10void loop() {
11  int raw = analogRead(POT_PIN);               // 0-1023
12  int brightness = map(raw, 0, 1023, 0, 255);  // 0-255 aralığına ölçekle / scale to 0-255
13  analogWrite(LED_PIN, brightness);
14  Serial.println(raw);                         // Seri Monitör'de izle / watch in the Serial Monitor
15  delay(50);
16}1# Örnek 3: potansiyometreyle LED parlaklığı / Example 3: LED brightness with a potentiometer
2from machine import Pin, ADC, PWM
3import time
4
5pot = ADC(26) # GP26 = ADC0, orta uç / wiper on GP26 (ADC0)
6led = PWM(Pin(15)) # LED: GP15 + 220 ohm direnç / LED on GP15 with 220 ohm
7led.freq(1000) # saniyede 1000 aç-kapa / 1000 cycles per second
8
9while True:
10 raw = pot.read_u16() # 0-65535
11 led.duty_u16(raw) # aynı aralık, ölçekleme gerekmez / same range, no scaling needed
12 print(raw) # Thonny kabuğunda izle / watch in the Thonny shell
13 time.sleep_ms(50)| Concept | Arduino C++ | MicroPython (Pico) |
|---|---|---|
| Runs once | void setup() { … } | The lines before while True: |
| Repeats forever | void loop() { … } | while True: and the indented lines below it |
| Code block | Curly braces { } and ; at the end of a line | : at the end of a line and a 4-space indent |
| Comment | // comment | # comment |
| Output pin | pinMode(13, OUTPUT); digitalWrite(13, HIGH); | led = Pin(15, Pin.OUT) · led.value(1) |
| Input pin | pinMode(2, INPUT_PULLUP); digitalRead(2) | Pin(14, Pin.IN, Pin.PULL_UP) · button.value() |
| Analog reading | analogRead(A0) → 0–1023 | ADC(26).read_u16() → 0–65535 |
| PWM output | analogWrite(9, 0–255) | PWM(Pin(15)).duty_u16(0–65535) |
| Waiting | delay(500) | time.sleep_ms(500) or time.sleep(0.5) |
| Printing | Serial.begin(9600); Serial.println(x); | print(x) |
Mini test, "Got it" and your progress in My level
- Mini test: Every card ends with two questions, and the heading reads Mini test · 1 / 2. When you tap an option you immediately get Correct. or Not quite. with a short explanation; you carry on with Next question.
- Score: When both questions are done you see a score such as 2 / 2 correct. The card can't be finished without the test; in place of the button it says Solve the mini test to finish this card.
- Got it: Once the test is done, the Got it, next card button appears (on the last card of a track it is just Got it). Tapping it saves the card as learned on your account, a short celebration shows your progress, such as Nice! 5 / 18 cards, and the next card opens.
- Badge and counter: Cards you've learned show a Learned mark in the list, and the What you've learned counter at the top of the guide goes up. When you finish every card on a track you see You've learned every card on this track.
- My level: On the My level screen in the Learn section, under the Code guide heading and the Cards you've learned note, there are two separate bars: Arduino C++ x/18 and MicroPython x/18. These bars count only the cards in the code guide.
- An honest rule for yourself: The app doesn't stop you after a wrong answer; the Got it button appears once the test is done. So before you tap it, make sure you can explain out loud why both answers are correct; if you can't, go back to the Example section and read the code line by line once more.
See it in projects: finding the command in real code
The last step in learning a command is recognising it in a working project someone else wrote. The See it in projects section of a card shows a few selected projects with a sentence underneath saying how many projects use the command in their code; the All link opens the full list. The list is sorted from easy to hard and can be narrowed with the All, Free and Premium filters. millis, for example, appears in the code of more than 50 projects: the list starts with the free ESP32 LED Control with Pushbutton (Toggle), continues with beginner Pico projects such as Raspberry Pi Pico Button Piano (5 Buttons + Buzzer + Melody Recorder) and Raspberry Pi Pico Parking Sensor (HC-SR04 + 3 LEDs + Buzzer), and moves up to intermediate projects such as Raspberry Pi Pico Traffic Light with 4-Mode Button Selector (State Machine, GP11-13 + GP4) that combine a button with timing. Our suggestion: open a free project from the list, find the command in the code, change one value and predict the result first. To see what every line of the code does, the project's Understand the code tab is the natural next step.
Recommended learning order: a 4-week plan
Let's assume you can spend about 20 minutes a day, 5 days a week. To finish one track in 4 weeks, one card on most days is enough; on the other days you review and work on a project instead of a new card. If you have an Arduino, follow only the Arduino column; if you have a Pico, follow the MicroPython column. If you have both, finish the Arduino track first and move to MicroPython in the second month; the concepts are the same, so the second track goes much faster. All the projects in the table are free on BlueGrays. If you want a wider plan, the 30-day roadmap in the app to learn Arduino post works well alongside this table; if you teach with the Pico, the Raspberry Pi Pico lesson plan spreads the MicroPython cards over 6 weeks of lessons.
| Week | Arduino C++ cards | MicroPython cards | Free projects of the week | What you can do by the end of the week |
|---|---|---|---|---|
| 1 | 1–5: pinMode, digitalWrite, digitalRead, analogRead, analogWrite | 1–5: import, print, Pin output, Pin input, time.sleep | LED Blink, LED Control with a Push Button (Push); Pico: Raspberry Pi Pico Onboard LED Blink (Pico and Pico W) | Blink an LED, read a button; on Arduino, see an analog value |
| 2 | 6–10: delay, millis, variables, if / else, operators | 6–9: while True, indentation, variables, if / elif / else | Night Light with Ldr, ESP32 LED Control with Pushbutton (Toggle); Pico: Raspberry Pi Pico Alternating Two LEDs (Blink-Flip Pattern, GP14 + GP13) | Make decisions based on a reading, time things without stopping the program |
| 3 | 11–14: for, while, functions, arrays | 10–13: for and range, lists, def, ADC | Knight Rider LED Effect, LED Chaser; Pico: Raspberry Pi Pico Traffic Light Simulator (3 LEDs Sequential, GP11/GP12/GP13) | Put repetition in loops, pins in arrays and tasks in functions |
| 4 | 15–18: Serial, map, random, tone | 14–18: PWM, ticks_ms, Pin.irq, try / except, I2C | Using a Buzzer, Measuring Light Intensity with an LDR; Pico: Raspberry Pi Pico Traffic Light with 4-Mode Button Selector (State Machine, GP11-13 + GP4) | Print values, adjust sound and brightness, build a small project from scratch |
A 20-minute daily routine
- 3 minutes, warm-up: Solve the daily questions in the Learn section or redo yesterday's mini test. The aim is to check that you still remember yesterday's command today.
- 5 minutes, new card: Read the What does it do?, Why? and Syntax sections. Copy the syntax onto paper by hand; writing it out makes it harder for your eyes to skip brackets and semicolons.
- 3 minutes, example: Explain the example to yourself line by line, then switch tabs. On an Arduino card look at the MicroPython tab, on a MicroPython card the Arduino tab, and match the lines that do the same job in both programs.
- 2 minutes, mini test: Answer both questions and read the explanation of any you got wrong. Glance at the Common mistake and Tip boxes once more at this point.
- 6 minutes, project: Open a free, easy project from the See it in projects list, find the command in the code and change a single value: a delay, a pin number or a threshold. If your circuit is ready, upload it to the board; if not, predict the result and check it with Understand the code.
- 1 minute, note: Write one line in your notebook: the command's name, its meaning in one sentence and its equivalent in the other language. By the end of four weeks that page is your own command dictionary.
8 common mistakes with these commands
| Mistake | Symptom | Fix | Card |
|---|---|---|---|
| Forgetting pinMode | The LED doesn't light at all or is very dim | Write pinMode(pin, OUTPUT) in setup(); on the Pico create the pin with Pin(15, Pin.OUT) | pinMode · Pin output |
| Writing = instead of == in a condition | if (x = 5) is always true, so the program always runs the same branch | Use == to compare; in Python if x = 5 gives a SyntaxError straight away | if / else · operators |
| Locking the code with a long delay | You press the button but the reaction is late or never comes | Do the waiting with millis; on the Pico use time.ticks_ms and ticks_diff | delay · millis · ticks_ms |
| Mixing up the analogRead range | A threshold copied from Arduino never triggers on the Pico | analogRead gives 0–1023 on the Uno, read_u16 gives 0–65535 on the Pico; recalculate the threshold for the new range | analogRead · ADC |
| Carrying an analogWrite value over to duty_u16 | On the Pico, duty_u16(255) leaves the LED almost dark | duty_u16 expects 0–65535: half brightness is 32768, full brightness 65535 | analogWrite · PWM |
| Keeping millis in an int | On the Uno, timing breaks after about 33 seconds | Make time variables unsigned long and write the check as now - previous >= interval | millis |
| Expecting INPUT_PULLUP logic the other way round | You expect HIGH or 1 when you press the button, but get LOW or 0 | With a pull-up, pressed is LOW (0) and released is HIGH (1) | digitalRead · Pin input |
| Writing sleep(500) on the Pico | The Pico waits 500 seconds, more than 8 minutes, instead of half a second | sleep takes seconds: write sleep(0.5) or sleep_ms(500) | time.sleep |
The Blocks tab: understanding a command by seeing it
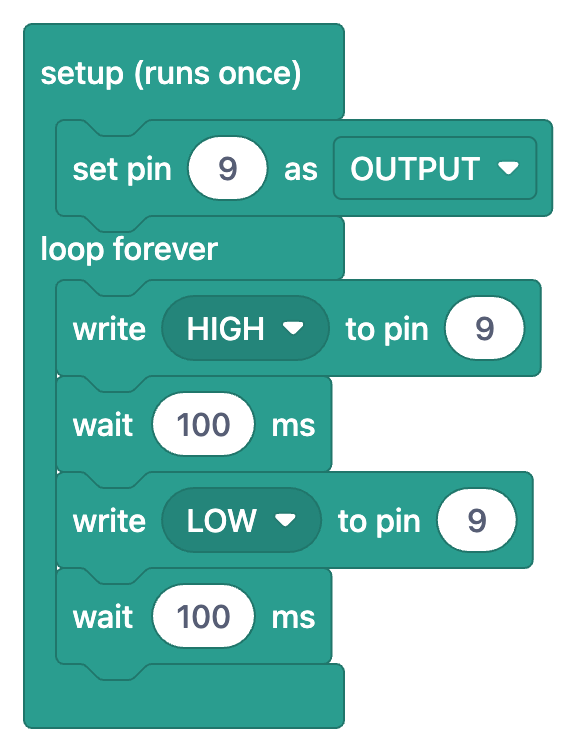
The Blocks tab lets you see what a command does without writing code, especially on the first cards of a track. In the image above, pinMode becomes the block "set pin 9 as OUTPUT", digitalWrite becomes "write HIGH to pin 9" and delay becomes "wait 100 ms"; on the pinMode card, a note under the block view also lists the dropdown options: OUTPUT, INPUT and INPUT_PULLUP. Blocks are shown in the app's language and are there for reading: you don't drag blocks around to write a program in the app, and the board always gets the real code. The suggested way to use them: first predict what the program will do on the Blocks tab, then switch to the Arduino tab and find which line each block is. In projects that have a block view, the Show as blocks switch on the project page lets you do the same matching for a whole project; the basics are in the what is block coding post.
In short, you don't need a long list to learn Arduino commands: the right order, a small working example for each command, a two-question check and a real project that uses the command are enough. If you start with the pinMode card today, in four weeks you will have finished all 18 cards and seen every command in at least one project with your own eyes; when you move to the Pico, you will get through the same concepts on the MicroPython track much faster. If you'd like to try the cards and the projects inside them, install BlueGrays on your phone and open the first card in the Learn section.
Frequently asked questions
What are the basic Arduino commands?
The most used Arduino commands are the pin commands (pinMode, digitalWrite, digitalRead, analogRead, analogWrite), the time commands (delay, millis), the serial port commands under Serial, and helpers such as map, random and tone. Alongside them, C++ structures such as if, for and while, plus functions, build the flow of the program. The Arduino C++ track of the BlueGrays Code guide covers these topics in order across 18 cards.
Which Arduino command should I learn first?
Start with pinMode and digitalWrite, because those two are enough to light an LED and you see the result straight away. Then add timing with delay and button reading with digitalRead. analogRead, millis, if and for all build on these four commands.
What is the difference between Arduino and MicroPython commands?
The concepts are the same, the spelling is different: Pin(15, Pin.OUT) and led.value(1) replace pinMode and digitalWrite, time.sleep_ms replaces delay, and while True replaces loop(). Number ranges change too; analogRead returns 0–1023 on the Uno, while read_u16 returns 0–65535 on the Pico. In Python, indentation and the colon take the place of C++ curly braces and semicolons.
Is there a delay command in MicroPython?
There is no command called delay; the time module's sleep (seconds), sleep_ms (milliseconds) and sleep_us (microseconds) do the same job. delay(500) in Arduino becomes time.sleep_ms(500) or time.sleep(0.5) on the Pico. For timing without stopping the code, time.ticks_ms and time.ticks_diff replace millis.
Which pin is the onboard LED on the Raspberry Pi Pico?
On the plain Pico the onboard LED is connected to GP25. On the Pico W the LED is wired to the wireless chip, so Pin(25) won't light it. In current MicroPython versions, Pin("LED", Pin.OUT) finds the onboard LED on both boards.
Is the BlueGrays Code guide free?
Yes, the Code guide is free: you can read all 36 cards, see the examples and solve the mini tests. The See it in projects lists on the cards contain both free and Premium projects; the Free filter shows only the free ones.
Projects to build after reading this
See all projects
LED Blink
The very first hello of electronics: switching a single LED on and off. The Arduino turns the LED on and off at short intervals, so the light blinks quickly. You see in the simplest way how the board

LED Control with a Push Button (Push)
Just like a doorbell: the light stays on as long as you press, and goes off when you let go. The Arduino keeps listening to the button; while it's pressed the LED is on, and the moment you lift your f

Night Light with Ldr
A little night light that turns on by itself when it gets dark and goes off when morning comes. A light sensor measures how bright the room is, and the Arduino switches the LED on when it is dark enou

ESP32 LED Control with Pushbutton (Toggle)
Each time the button is pressed the state of the LED changes: if it is on it turns off, if it is off it turns on. Classic toggle pattern. With debounce we clean up the mechanical noise of the pushbutton to ensure a single toggle with a single press.

Knight Rider LED Effect
The classic scanner light: a dot of light slides from one end of six LEDs to the other and then comes back. The Arduino lights each LED for a tenth of a second before moving on, turns around at each e
Raspberry Pi Pico Onboard LED Blink (Pico and Pico W)
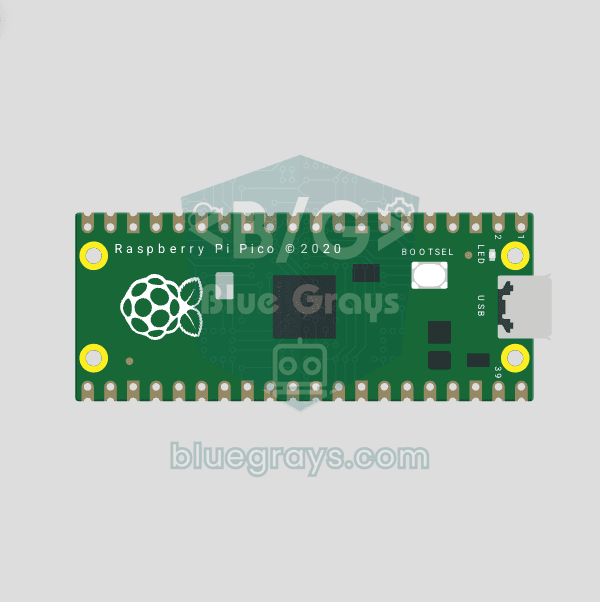
The opening project of the Raspberry Pi Pico series! We blink the green onboard LED to verify the board works — a classic "Hello World" first experiment. NO external components, just Pico and USB cable. Code is written in MicroPython (the official language backed by Raspberry Pi Foundation). Learn machine.Pin class, Pin.OUT mode, led.on()/off() methods, and time.sleep() in Thonny IDE. Follow every toggle live in the Serial (REPL) output. Also perfect to verify
Raspberry Pi Pico Alternating Two LEDs (Blink-Flip Pattern)
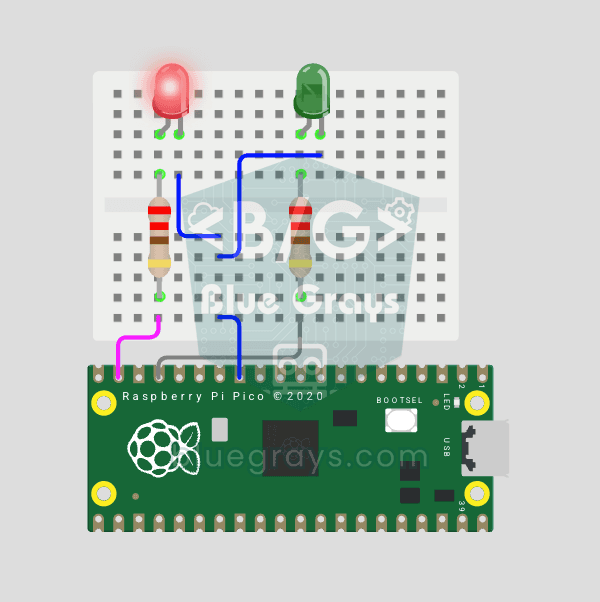
The next step after single LED on Pico: two LEDs blink alternately in a classic flip-flop pattern. When one turns off, the other lights up — the most basic example of multi-GPIO coordination. In this project two different color LEDs (red on GP14, green on GP13) swap states every 500ms. MicroPython's Pin.toggle() method makes the code short and clear. The same core logic is the foundation of traffic lights, police strobes, chasing LEDs and all multi-LED animations. Very simple circuit: 220Ω res
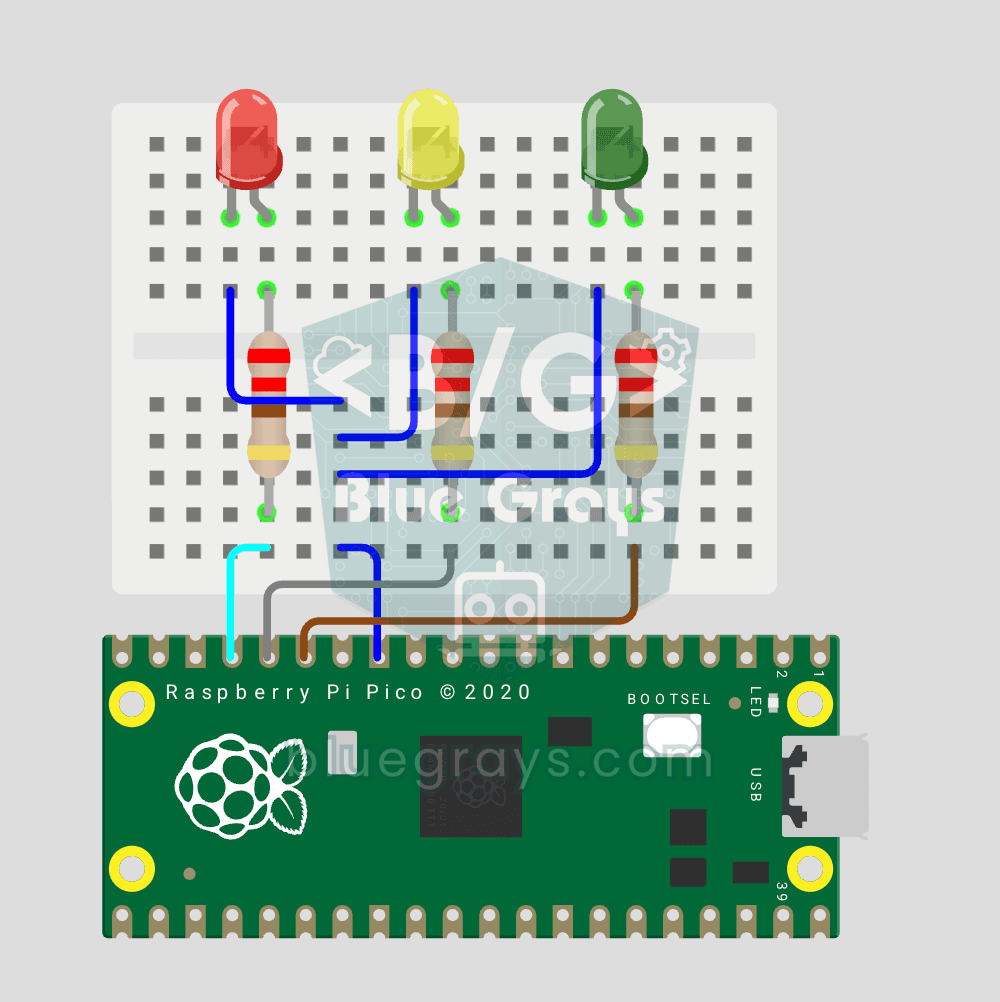
Raspberry Pi Pico Traffic Light Simulator (3 LEDs Sequential)
We simulate a real traffic light with red, yellow and green LEDs — the first 3-LED project of the Pico series! Green 4 sec "go", yellow 1.5 sec "ready", red 3 sec "stop" and red+yellow 1 sec "starting" (European traffic light pattern). Learn function definition (def all_off()), state machine logic (sequence) and multi-GPIO synchronization. Very simple circuit: 3 LEDs on GP11 (Green), GP12 (Yellow), GP13 (Red), each with a 220Ω current-limiting resistor. GP11-GP12-GP13 are ad