
ESP32 WiFi Car: Drive It with a Phone Joystick (L298N, SoftAP)
Build an ESP32 WiFi car you drive from your phone's browser: own softAP network, web joystick, L298N PWM speed control, parts cost table and a failsafe stop.
An ESP32 WiFi car is a robot car you drive with a joystick page in your phone's browser, without installing any app. The ESP32 creates its own WiFi network (softAP), your phone joins it, and when you type 192.168.4.1 into the browser a joystick appears. As you slide your finger, the ESP32 speeds up, slows down and turns two gear motors with PWM through an L298N motor driver. No router, no internet and no Bluetooth pairing are needed, and it works the same way on Android and iPhone.
In this guide we build the car from start to finish: the parts list and approximate cost, the ESP32–L298N wiring table, a first sketch that tests the motors without WiFi, the main sketch that embeds the joystick page inside the ESP32, and how a joystick position turns into the speed of two wheels. We also add a safety feature most examples forget: when the connection drops, the car stops by itself within half a second. The code compiles on both the 2.x and 3.x versions of the ESP32 Arduino core.

How does an ESP32 WiFi car work?
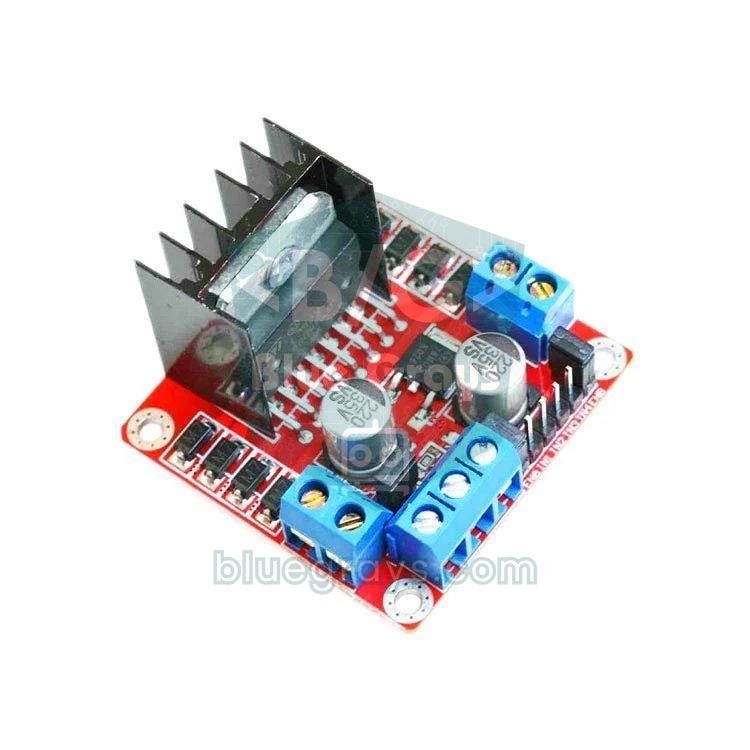
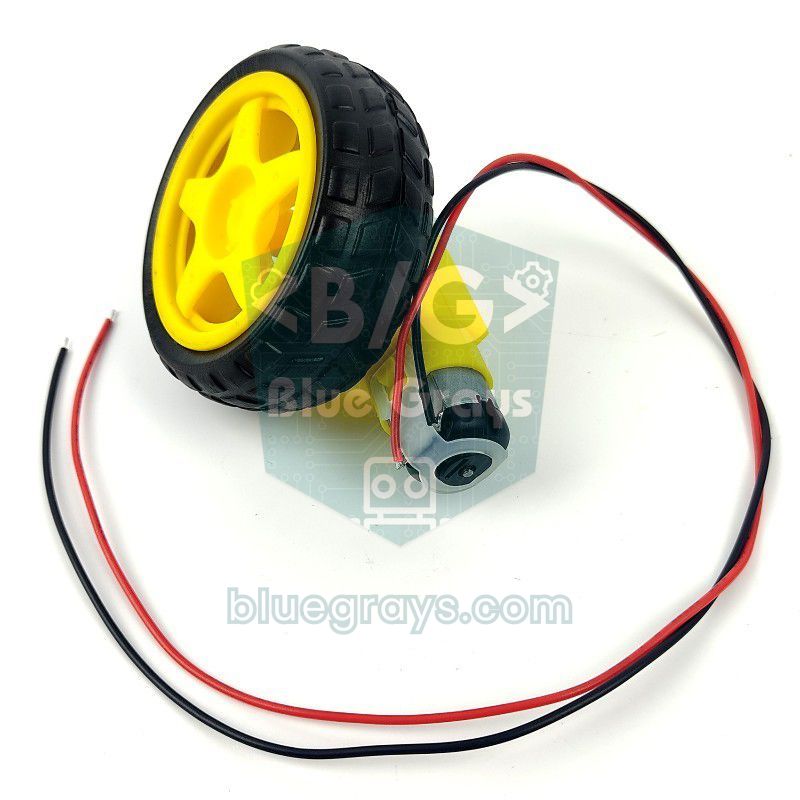
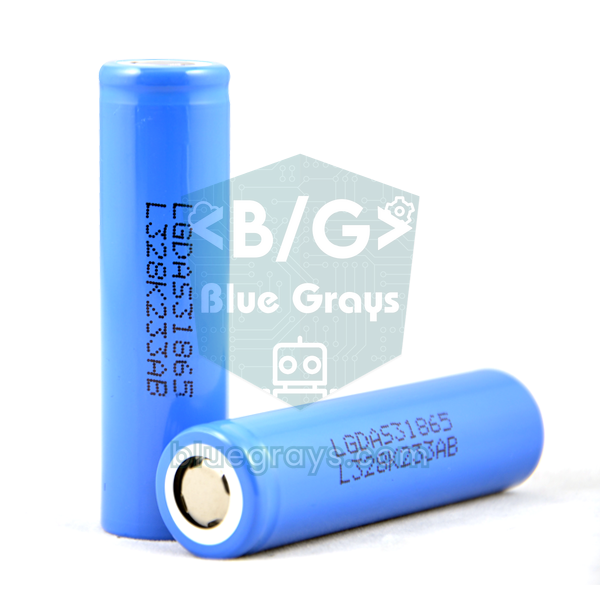
The system has four parts. The ESP32 is both the brain and a small web server: it sends the joystick page to the phone, then applies the "left motor at this speed, right motor at that speed" commands that arrive ten times per second. The L298N is a dual H-bridge; it turns the ESP32's weak 3.3 V signals into the current the motors need. Two yellow TT motors spin the wheels; there is no steering, the car turns by the speed difference between the two wheels (differential drive). Two 18650 cells power the motors and, through the 5 V regulator on the L298N board, the ESP32. In softAP mode the ESP32 acts like a router and always gives itself the address 192.168.4.1, so you can drive the car in the garden, at school or anywhere without a router.
| WiFi softAP (this guide) | Home WiFi (STA) | Bluetooth (HC-05 or classic BT) | |
|---|---|---|---|
| Router needed? | No | Yes | No |
| App on the phone | None, the browser is enough | None, the browser is enough | A Bluetooth terminal app is needed |
| iPhone support | Yes | Yes | No (iOS does not support classic Bluetooth serial) |
| Range outdoors | About 30–50 m | As far as the router's coverage | About 10–20 m |
| Command latency | About 20–50 ms | 20–100 ms depending on network traffic | About 20–40 ms |
Parts list and cost
| Part | Qty | Approx. price (USD) | Note |
|---|---|---|---|
| ESP32 DevKit V1 (30 or 38 pin) | 1 | 4–7 | The GPIOs we use exist on both boards |
| L298N motor driver module | 1 | 2–4 | 2 A per channel; drives two motors independently |
| 2WD robot car chassis kit | 1 | 8–15 | Usually includes 2 TT motors, 2 wheels, a caster and a switch |
| 18650 Li-ion cell | 2 | 6–12 | Branded cells rated for at least 5 A discharge |
| 2-cell 18650 holder (series) | 1 | 1–2 | A model with a switch makes wiring easier |
| 18650 charger | 1 | 3–10 | A charger that charges each cell separately |
| Jumper wires (female-female, male-female) | 10+ | 1–3 | Between the ESP32 and the L298N |
| 470 µF / 16 V and 100 nF capacitors | 1 + 2 | Less than 1 | Against supply dips and motor noise |
| Total | 25–50 | 15–25 if you already have cells and a charger |
Prices are typical values from online electronics stores and vary by country, shipping and exchange rate. The biggest items are the chassis kit and the cells. Don't save on the cells: very cheap ones labeled "9900 mAh" are usually fake, their voltage collapses when the motors start and the ESP32 resets. If you already have an Arduino robot car kit, you only need to buy an ESP32; the chassis, motors and L298N stay the same. We cover choosing cells in detail in 18650 Li-ion battery.
Wiring: ESP32, L298N and motors
| L298N | ESP32 | Description |
|---|---|---|
| ENA | GPIO 25 | Left motor speed (PWM); remove the ENA jumper |
| IN1 | GPIO 26 | Left motor direction |
| IN2 | GPIO 27 | Left motor direction |
| ENB | GPIO 33 | Right motor speed (PWM); remove the ENB jumper |
| IN3 | GPIO 18 | Right motor direction |
| IN4 | GPIO 19 | Right motor direction |
| +12V (VS) | – | Plus of the 2×18650 pack (after the switch) |
| GND | GND | Battery minus and ESP32 GND; a common ground is a must |
| +5V | VIN (5V) | Powers the ESP32 from the L298N regulator while the 5V-EN jumper is on |
| OUT1 / OUT2 | – | Left motor |
| OUT3 / OUT4 | – | Right motor |
The L298N logic inputs treat anything above 2.3 V as HIGH, so the ESP32's 3.3 V outputs can be connected directly without a level shifter. A fully charged pack gives 8.4 V; the L298N drops 1.5–3 V of that internally and the motors get 5–6 V, the ideal range for TT motors. The 78M05 regulator on the board makes 5 V from the same pack and feeds the ESP32 through its VIN pin. The pin choice isn't random either: GPIO 0, 2, 12 and 15 are strapping pins that set the boot mode, 6–11 are reserved for the flash memory and 34–39 are input only. 25, 26, 27, 33, 18 and 19 are safe outputs that exist on both 30-pin and 38-pin boards. We explain why the ground must be shared in GND and common ground.
Step-by-step build
- In the Arduino IDE Boards Manager install esp32 by Espressif Systems and select ESP32 Dev Module as the board.
- Screw the motors to the chassis; connect the motor wires to the L298N screw terminals OUT1-OUT2 (left) and OUT3-OUT4 (right).
- Remove the ENA and ENB jumpers on the L298N; leave the 5V-EN jumper in place.
- Connect the six signal wires from the table and the common GND with female-female jumper wires.
- Put the car on a box so the wheels are in the air; upload the motor test sketch and check the directions.
- Upload the main sketch, open the Serial Monitor at 115200 baud and note the address it prints.
- In your phone's WiFi settings join the BlueGrays-Car network with the password 12345678 and type 192.168.4.1 into the browser.
- Push the joystick gently; if the wheels turn the right way, put the car on the floor and drive.
Test the motors first
Before moving on to the WiFi code, check the wiring with this short sketch. It keeps ENA and ENB HIGH, so the motors run at full speed: one second forward, then backward, then spinning left and right in place. If one wheel turns backward on the forward command, don't touch the code; swap that motor's two wires on the L298N. If no motor turns at all, check the battery switch, the common GND and the ENA-ENB wires.
1// L298N bağlantı testi (Wi-Fi yok) / L298N wiring test (no Wi-Fi)
2// Sol motor / left motor: ENA=25, IN1=26, IN2=27 — Sağ motor / right motor: ENB=33, IN3=18, IN4=19
3const int ENA = 25, IN1 = 26, IN2 = 27;
4const int ENB = 33, IN3 = 18, IN4 = 19;
5
6void wheels(int l1, int l2, int r1, int r2) {
7  digitalWrite(IN1, l1); digitalWrite(IN2, l2);
8  digitalWrite(IN3, r1); digitalWrite(IN4, r2);
9}
10
11void setup() {
12  int pins[] = {ENA, IN1, IN2, ENB, IN3, IN4};
13  for (int p : pins) pinMode(p, OUTPUT);
14  digitalWrite(ENA, HIGH);                 // tam hız, PWM yok / full speed, no PWM
15  digitalWrite(ENB, HIGH);
16  wheels(LOW, LOW, LOW, LOW);
17  delay(3000);                             // tekerlekleri havaya kaldır / lift the wheels
18}
19
20void loop() {
21  wheels(HIGH, LOW, HIGH, LOW); delay(1000);   // ileri / forward
22  wheels(LOW, LOW, LOW, LOW);   delay(500);    // dur / stop
23  wheels(LOW, HIGH, LOW, HIGH); delay(1000);   // geri / backward
24  wheels(LOW, LOW, LOW, LOW);   delay(500);
25  wheels(LOW, HIGH, HIGH, LOW); delay(700);    // yerinde sola / spin left
26  wheels(HIGH, LOW, LOW, HIGH); delay(700);    // yerinde sağa / spin right
27  wheels(LOW, LOW, LOW, LOW);   delay(2000);
28}
Main sketch: a car that creates its own WiFi network (softAP)
In the main sketch the joystick page is embedded in the ESP32 as a single block of HTML, CSS and JavaScript text. You don't need to upload files or install libraries; only WiFi and WebServer, which ship with the ESP32 package, are used. Once the page is open, the browser sends a tiny request such as /d?l=60&r=-60 every 100 ms; the ESP32 reads the two numbers, applies them to the motors and notes the time of the command.
1#include <WiFi.h>
2#include <WebServer.h>
3
4const char* AP_SSID = "BlueGrays-Car";      // telefonda görünecek ağ adı / network name on the phone
5const char* AP_PASS = "12345678";           // en az 8 karakter / at least 8 characters
6
7// Sol motor / left motor: ENA=25, IN1=26, IN2=27 — Sağ motor / right motor: ENB=33, IN3=18, IN4=19
8const int ENA = 25, IN1 = 26, IN2 = 27;
9const int ENB = 33, IN3 = 18, IN4 = 19;
10
11const int PWM_FREQ = 1000;                  // Hz
12const int PWM_RES = 8;                      // 8 bit: 0-255
13const int MIN_DUTY = 90;                    // motorun kıpırdadığı en düşük değer / lowest duty that moves the motor
14const unsigned long FAILSAFE_MS = 500;      // bu süre komut gelmezse dur / stop if no command for this long
15
16WebServer server(80);
17unsigned long lastCmd = 0;
18
19const char PAGE[] PROGMEM = R"rawliteral(
20<!DOCTYPE html><html><head><meta charset="utf-8">
21<meta name="viewport" content="width=device-width,initial-scale=1,user-scalable=no">
22<title>BlueGrays Car</title>
23<style>
24body{margin:0;background:#0f172a;color:#e2e8f0;font-family:sans-serif;text-align:center;touch-action:none;user-select:none}
25#pad{width:260px;height:260px;margin:24px auto;border-radius:50%;background:#1e293b;position:relative}
26#knob{width:90px;height:90px;border-radius:50%;background:#38bdf8;position:absolute;left:85px;top:85px}
27input{width:220px}
28</style></head><body>
29<h3>BlueGrays Wi-Fi Car</h3>
30<div id="pad"><div id="knob"></div></div>
31<p>Max <input id="sp" type="range" min="30" max="100" value="80"></p>
32<p id="st">0 / 0</p>
33<script>
34const pad=document.getElementById('pad'),knob=document.getElementById('knob'),R=85;
35let x=0,y=0,busy=false,drag=false;
36function put(dx,dy){knob.style.left=(85+dx)+'px';knob.style.top=(85+dy)+'px';}
37function move(e){const b=pad.getBoundingClientRect(),t=e.touches?e.touches[0]:e;
38 let dx=t.clientX-b.left-130,dy=t.clientY-b.top-130,d=Math.hypot(dx,dy);
39 if(d>R){dx*=R/d;dy*=R/d;}
40 put(dx,dy);x=Math.round(dx/R*100);y=Math.round(-dy/R*100);e.preventDefault();}
41function end(){drag=false;x=0;y=0;put(0,0);}
42pad.addEventListener('touchstart',move,{passive:false});
43pad.addEventListener('touchmove',move,{passive:false});
44pad.addEventListener('touchend',end);
45pad.addEventListener('mousedown',e=>{drag=true;move(e);});
46document.addEventListener('mousemove',e=>{if(drag)move(e);});
47document.addEventListener('mouseup',end);
48setInterval(()=>{if(busy)return;busy=true;
49 const s=document.getElementById('sp').value/100;
50 const l=Math.round(Math.max(-100,Math.min(100,y+x))*s);
51 const r=Math.round(Math.max(-100,Math.min(100,y-x))*s);
52 document.getElementById('st').textContent=l+' / '+r;
53 fetch('/d?l='+l+'&r='+r).catch(()=>{}).finally(()=>{busy=false;});},100);
54</script></body></html>
55)rawliteral";
56
57void setMotor(int pwmPin, int channel, int inA, int inB, int speed) {   // speed: -100 … 100
58  speed = constrain(speed, -100, 100);
59  digitalWrite(inA, speed > 0);
60  digitalWrite(inB, speed < 0);
61  int duty = (speed == 0) ? 0 : map(abs(speed), 1, 100, MIN_DUTY, 255);
62#if ESP_ARDUINO_VERSION_MAJOR >= 3
63  ledcWrite(pwmPin, duty);                  // 3.x: pin numarasıyla / by pin number
64#else
65  ledcWrite(channel, duty);                 // 2.x: kanal numarasıyla / by channel number
66#endif
67}
68
69void drive(int left, int right) {
70  setMotor(ENA, 0, IN1, IN2, left);
71  setMotor(ENB, 1, IN3, IN4, right);
72}
73
74void handleDrive() {
75  drive(server.arg("l").toInt(), server.arg("r").toInt());
76  lastCmd = millis();
77  server.send(200, "text/plain", "ok");
78}
79
80void setup() {
81  Serial.begin(115200);
82  int pins[] = {IN1, IN2, IN3, IN4};
83  for (int p : pins) pinMode(p, OUTPUT);
84#if ESP_ARDUINO_VERSION_MAJOR >= 3
85  ledcAttach(ENA, PWM_FREQ, PWM_RES);
86  ledcAttach(ENB, PWM_FREQ, PWM_RES);
87#else
88  ledcSetup(0, PWM_FREQ, PWM_RES); ledcAttachPin(ENA, 0);
89  ledcSetup(1, PWM_FREQ, PWM_RES); ledcAttachPin(ENB, 1);
90#endif
91  drive(0, 0);
92
93  WiFi.softAP(AP_SSID, AP_PASS);            // kendi Wi-Fi ağını kurar / creates its own Wi-Fi network
94  Serial.print("Adres / address: http://");
95  Serial.println(WiFi.softAPIP());          // 192.168.4.1
96
97  server.on("/", []() { server.send(200, "text/html", PAGE); });
98  server.on("/d", handleDrive);
99  server.begin();
100}
101
102void loop() {
103  server.handleClient();
104  if (millis() - lastCmd > FAILSAFE_MS) drive(0, 0);   // bağlantı koptu: dur / link lost: stop
105}| Line | What it does |
|---|---|
| WiFi.softAP(AP_SSID, AP_PASS) | Turns the ESP32 into an access point; the password must be at least 8 characters or the network isn't created |
| PAGE[] = R"rawliteral(…)rawliteral" | The whole joystick page; as a raw string you don't have to escape the quotes |
| server.on("/d", handleDrive) | Reads the l and r values (-100 … 100) from the browser and applies them to the motors |
| map(abs(speed), 1, 100, MIN_DUTY, 255) | Starts even the lowest speed at the smallest PWM value that moves the motor |
| ledcAttach / ledcSetup + ledcAttachPin | Sets up PWM according to the core version (3.x / 2.x) |
| millis() - lastCmd > FAILSAFE_MS | Stops both motors if no command arrives for 500 ms |
How does the joystick turn into motor speed?
The joystick on the page measures your finger's position relative to the center as x (left-right) and y (forward-backward), from -100 to 100. A simple mix called tank drive gives the speed of each wheel: left = y + x, right = y − x. If the result goes beyond ±100 it is clipped, then multiplied by the max speed percentage from the slider. On the ESP32 side this percentage becomes a PWM value. There is a small but important trick here: TT motors hum but don't turn below a PWM value of about 80–90. That's why the code maps 1–100 not to 0–255 but to MIN_DUTY–255; 50% speed, for example, is map(50, 1, 100, 90, 255) = 171. If your car doesn't move at all at low speed, raise MIN_DUTY in steps of 10; if it jumps when you barely push the joystick, lower it.
| Joystick (x, y) | Left | Right | What the car does |
|---|---|---|---|
| (0, 100) | 100 | 100 | Full speed forward |
| (0, -100) | -100 | -100 | Full speed backward |
| (100, 0) | 100 | -100 | Spins right in place |
| (-100, 0) | -100 | 100 | Spins left in place |
| (50, 100) | 100 | 50 | Curves gently to the right while moving forward |
| (0, 0) | 0 | 0 | Stops |
PWM speed control: ESP32 core 2.x vs 3.x
On the ESP32, PWM is generated by a hardware unit called LEDC. The code uses a 1 kHz frequency and 8-bit resolution, so the duty cycle ranges from 0 to 255. The bipolar transistors inside the L298N switch slowly, so going above a few kHz doesn't make the motor faster, it only heats the driver more; the faint whine at 1 kHz is normal. Version 3.0 of the ESP32 Arduino core changed the PWM functions: the old ledcSetup(channel, frequency, resolution) and ledcAttachPin(pin, channel) pair was replaced by a single ledcAttach(pin, frequency, resolution), and ledcWrite now takes a pin number instead of a channel. The #if ESP_ARDUINO_VERSION_MAJOR >= 3 lines in the code pick the right function whichever version you have. You'll find the basics of PWM in What is PWM.
Stopping the car when the connection drops (failsafe)
For a WiFi-driven vehicle, the most dangerous moment is when the signal drops. The phone screen locks, the browser tab goes to the background or the car leaves the range; if the ESP32 keeps applying the last command, the car drives at full speed into a wall or down the stairs. In this code the page sends a command every 100 ms even when the joystick is still, and sends 0 / 0 when you lift your finger. The ESP32 stores the time of each command in lastCmd, and every pass of loop() checks how old the last command is. If no new request arrives for 500 ms, meaning five commands in a row are lost, the motors stop. The busy flag in the browser also keeps requests from piling up when the network slows down; a new one isn't sent before the reply arrives, so an old command can't be applied late.
Version that joins your home network (STA mode)
If you use the car at home, you can also connect the ESP32 to your router. Your phone then stays on its usual WiFi and keeps its internet connection, but the range is limited to the router's coverage and the ESP32's address is the IP the router gives it. Just replace the WiFi.softAP line in setup() with the snippet below. WiFi.setSleep(false) turns off the ESP32's modem sleep; without it, commands can occasionally be delayed by 100–200 ms. If it won't connect, see ESP32 not connecting to WiFi.
1// setup() içinde WiFi.softAP(...) satırının yerine / in setup(), instead of the WiFi.softAP(...) line
2WiFi.mode(WIFI_STA);
3WiFi.begin("EvAgim", "sifre123");          // ev ağının adı ve şifresi / your home network name and password
4while (WiFi.status() != WL_CONNECTED) delay(300);
5WiFi.setSleep(false);                      // modem uykusunu kapat, gecikme düşer / disable modem sleep, lower latency
6Serial.println(WiFi.localIP());            // tarayıcıya bu adresi yaz / type this address in the browser
Range, latency and phone settings
- "No internet" warning: The phone warns you when the BlueGrays-Car network has no internet; choose "Stay connected". On Android, if switching to mobile data automatically is enabled, the phone may leave the network; turning mobile data off while driving is the easiest fix.
- Range: With the on-board PCB antenna, expect 30–50 m outdoors and 10–20 m indoors through a wall or two. Keep the antenna at the edge of the board, in the open, away from metal parts and the cells.
- Channel: If there are many networks around, pick the emptiest of channels 1, 6 or 11 with a third parameter, like WiFi.softAP(AP_SSID, AP_PASS, 6).
- Latency: HTTP requests on softAP usually take 20–50 ms, more than enough to drive a car. For smoother control, or to send data from the car to the phone (battery voltage, distance), switch to WebSocket; ESP32 web server and WebSocket explains it step by step.
- One driver: If two phones join the network and use the joystick at the same time, the commands mix. Change the password to keep the car to yourself.
Common problems and fixes
| Symptom | Likely cause | Fix |
|---|---|---|
| The ESP32 resets when the motors start | The battery voltage dips for a moment (brownout) | Use quality 18650 cells; add 470 µF at the L298N supply input and 100 nF across the motor terminals |
| "'ledcSetup' was not declared" compile error | ESP32 core 3.x, the code uses the old PWM functions | Use the code in this guide with the #if ESP_ARDUINO_VERSION_MAJOR switch |
| The car doesn't move at low speed | The PWM value is below the motor's start threshold | Raise MIN_DUTY to 100–120 |
| One wheel turns backward | The motor wires are reversed | Swap that motor's two wires on the L298N |
| The car always runs at full speed | The ENA / ENB jumpers are still on | Remove the jumpers and wire the pins to GPIO 25 and 33 |
| 192.168.4.1 won't open | The phone left the network or is using mobile data | Turn off mobile data, rejoin the network and type the address with http:// |
| The car stutters | A crowded WiFi channel or a weak signal | Change the channel, keep the antenna in the open, raise FAILSAFE_MS a little |
| The L298N gets very hot | The motors are constantly strained or a wheel is jammed | Check that the wheels turn without binding; consider a more efficient driver (TB6612FNG) |
Ideas to upgrade your car
- Collision brake: Put an HC-SR04 at the front and ignore forward commands when an obstacle is closer than 20 cm. See HC-SR04 distance sensor for how to use it.
- Autonomous mode: Add a button to the page; when pressed, the car roams on its own like an obstacle avoiding robot.
- Battery gauge: Measure the pack voltage on an analog pin with a two-resistor voltage divider and show it on the joystick page.
- Wireless updates: With ESP32 OTA you can upload new code without plugging in a USB cable every time.
- Physical remote: Drive without a phone using a second ESP32 and a joystick module over ESP-NOW.
- Lights: Add WS2812B LEDs at the front and back; make the rear lights glow red when reversing.
An ESP32 WiFi car is a great first project that teaches a web server, PWM, a motor driver and safe control logic all at once. Later you can reuse the same joystick page on a robot arm or a camera car. If you're curious about how the motor driver works inside, read L298N DC motor control, and for the Bluetooth Arduino version see How to build an Arduino robot car. In the BlueGrays app you'll also find the Bluetooth L298N car, the obstacle avoiding robot and ESP32 web server projects with step-by-step circuit diagrams and code.
Frequently asked questions
Does an ESP32 WiFi car need internet?
No. In softAP mode the ESP32 creates its own wireless network and the phone connects to it directly; no router or internet connection is needed. The joystick page is stored in the ESP32's memory, so it opens completely offline.
What is the range of an ESP32 WiFi car?
With the on-board PCB antenna it is usually 30–50 m outdoors and 10–20 m indoors, depending on walls. Modules that accept an external antenna, such as the ESP32-WROOM-32U, extend the range noticeably.
Does the L298N work with the ESP32's 3.3 V logic?
Yes. The L298N inputs treat anything above 2.3 V as HIGH, so the ESP32 pins can be connected directly to IN1–IN4 and ENA–ENB. What matters is that the GND of both boards is connected together.
Do I need an app on my phone to drive the car?
No. The joystick is a web page served by the ESP32 and works in any browser such as Chrome, Safari or Firefox. That's why it works the same on Android phones, iPhones, tablets and computers.
Why does my ESP32 reset when the motors start?
Motors draw several amps for a moment when they start, and the voltage of weak cells collapses briefly; the ESP32 sees this as a brownout and restarts. Quality 18650 cells, 470 µF at the L298N input and 100 nF across the motor terminals solve most of it.
Is Bluetooth or WiFi better for a robot car?
WiFi needs no app, works with iPhone too and has a longer range. Classic Bluetooth (HC-05 or the ESP32's BluetoothSerial) gives a light connection but depends on Android and a terminal app. For an ESP32 car driven from a phone, WiFi is usually the more practical choice.
Projects to build after reading this
See all projects
Bluetooth Controlled Car with L298N
Turn your phone into a remote and drive your own robot car. The Arduino receives commands from a remote-control app on your phone through a Bluetooth module and spins the wheels with a motor driver…

Obstacle Avoidance Robot
How about building a smart vehicle that finds its own way? The Obstacle Avoidance Robot constantly scans its surroundings thanks to the ultrasonic sensor in front of it.

ESP32 Asynchronous Web Server (with IP Display on LCD)
In this project, we’re turning the ESP32 into an asynchronous web server that you can control from your phone or computer on the same Wi-Fi network. Thanks to the ESPAsyncWebServer library, the server can process multiple requests simultaneously (unlike the classic WebServer.h, which blocks on a single request). You’ll be able to open the ESP32’s IP address in a browser and click the ON/OFF buttons (the /on and /off routes) to turn the LED connected to GPIO 5 on and off.

ESP32 WebSocket Counter (2 Buttons + LCD + Real-Time Web)
In this project, two buttons wired to the ESP32 (GPIO 5 counts up, GPIO 4 counts down) change a counter. The value updates instantly both on a 16x2 I2C LCD and, through the WebSocket support of ESPAsyncWebServer, in every connected browser without reloading the page. Instead of HTTP polling a single persistent connection is used, and the ESP32 sends the new value to everyone with ws.textAll().

ESP32 Wi-Fi STA Connection (with LCD Screen)
In this project, we connect the ESP32 to the home Wi-Fi network in Station (STA) mode in a secure, fault-tolerant manner. We store the SSID and password in a separate secrets.h file to prevent leaking to Git, set up an auto-reconnect mechanism, and display the RSSI signal level and IP address on an I2C LCD screen. The internal LED works as a status indicator. It is a production-grade connection manager.

ESP32 LED Fade with PWM
Smoothly changing the brightness of the LED from 0 to max, from max to 0. We control PWM with analogWrite() as in Arduino - the same syntax as ESP32 Arduino Core 3.0+ works without problems. Pin definition + pinMode + analogWrite is enough.

ESP32 mDNS: Accessing the Device via bluegrays-esp.local (with LCD Screen)
In this project we add an mDNS (Multicast DNS) service to the ESP32, so you reach it by a readable host name like bluegrays-esp.local instead of an IP address. Even if the IP assigned by DHCP changes, the device always answers to the same name. A small web server on the board lets you control the LED from your browser at http://bluegrays-esp.local/.

ESP32 OTA Update — Wireless Firmware Installation (With LCD Screen)
In this project you'll learn to upload new firmware to the ESP32 over Wi-Fi, without a USB cable. With the ArduinoOTA library the ESP32 becomes visible on the network and shows up automatically as bluegrays-ota under "Network port" in the Arduino IDE. The first upload goes over USB; after that every update is wireless, a key feature for devices out in the field.