
ESP32 Weather API: Fetch Data, Parse JSON and Show It on OLED
ESP32 weather API guide: HTTPClient requests to Open-Meteo and OpenWeatherMap, ArduinoJson parsing, OLED/LCD display, HTTPS certificates, 401, 404, -1 errors.
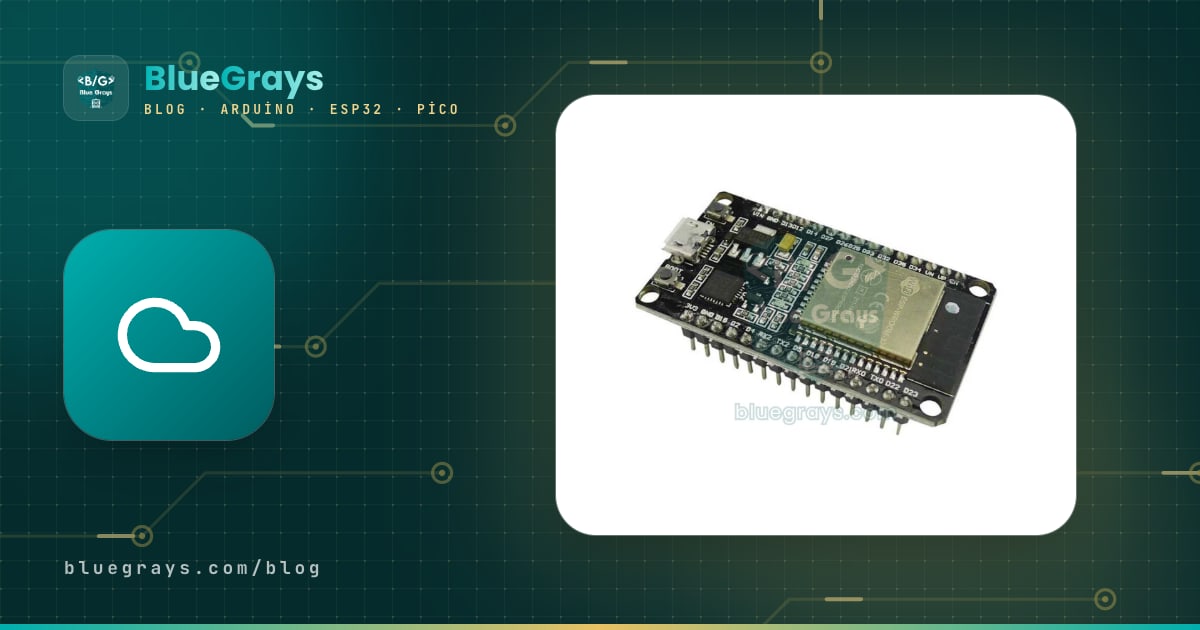
ESP32 weather projects come down to connecting the board to Wi-Fi, asking an online weather service a question and showing the answer on a display. Without a single sensor you can get your city's temperature, humidity, wind and tomorrow's forecast, because an API (application programming interface) fed by weather stations and forecast models has already done the measuring for you. The ESP32 sends this service an HTTP GET request just like a web browser, receives plain text in JSON format and uses the ArduinoJson library to pull the numbers out of it.
In this guide you'll first send a request to Open-Meteo, which needs no key, and then move on to OpenWeatherMap, which works with city names. You'll see how to parse JSON, turn WMO weather codes into words, show the result on a 0.96-inch OLED and a 16x2 I2C LCD, set up HTTPS and certificates, stay within rate limits, and what error codes such as 401, 404 and -1 mean. At the end there's an example that fetches exchange rates the same way, plus MicroPython code for the Raspberry Pi Pico W.

How does the ESP32 get data from the internet? API, HTTP and JSON
When you type an address into your browser, it sends an HTTP request to that server and the server returns a web page. An API works the same way; the only difference is that the answer isn't a page decorated for humans but structured text that programs can read easily. On the ESP32 this job is done by the HTTPClient library that ships with the core: you give it the address, it sends the GET request and hands you the server's status code and the body of the response. The response is usually JSON, made of "key": value pairs inside curly braces, which can contain nested objects or arrays.
| Term | Meaning | Weather example |
|---|---|---|
| API | The door programs use to exchange data | Open-Meteo forecast service |
| Endpoint | The address of the API that does one specific job | /v1/forecast |
| Query parameter | Settings after the ? in the address | latitude=41.01¤t=temperature_2m |
| GET request | Asking the server for data | http.GET() |
| Status code | A number describing the result of the request | 200 success, 404 not found |
| JSON | A text format made of keys and values | {"temperature_2m":17.3} |
| API key | A secret ID that identifies you | The OpenWeatherMap appid value |
Which service: Open-Meteo or OpenWeatherMap?
Plenty of weather services have a free tier, but two stand out for getting started. Open-Meteo needs no sign-up and no key: you give the location as latitude and longitude, choose only the fields you want, and the response stays short and light for the ESP32. OpenWeatherMap needs a free account and an API key, but in return it offers queries by city name, a ready-made description ("light rain", for example) and an icon code. The free plans of both are meant for personal and educational projects; if you're building a commercial product, read the terms of use separately.
| Feature | Open-Meteo | OpenWeatherMap (free) |
|---|---|---|
| Sign-up and key | Not needed | Account and API key required |
| Location | Latitude and longitude | City name, latitude-longitude or city ID |
| Free limit | 10,000 calls a day, 5,000 an hour, 600 a minute | 60 calls a minute, 1,000,000 a month |
| Data refresh | Current data every 15 minutes | About every 10 minutes |
| Weather condition | WMO number code (0, 3, 61...) | Description text and icon code |
| Units | °C and km/h (changeable with parameters) | °C and m/s with units=metric |
| Response size | Only the fields you choose, about 400 bytes | About 500 bytes |
What you need and setup
- Install the ESP32 board package in the Arduino IDE (Tools > Board > Boards Manager, esp32 by Espressif). The setup is explained in detail in the what is ESP32 guide.
- In the Library Manager search for ArduinoJson (Benoit Blanchon) and install version 7.x. The HTTPClient, WiFi and WiFiClientSecure libraries come with the ESP32 package and don't need to be installed separately.
- For the display version install the Adafruit SSD1306 and Adafruit GFX libraries, or LiquidCrystal I2C if you're using an LCD.
- Replace AgAdi and Sifre123 in the code with your own Wi-Fi name and password, select ESP32 Dev Module as the board and set the Serial Monitor to 115200 baud.
Step by step: your first GET request with HTTPClient
The first sketch has a single job: connect to Wi-Fi, ask Open-Meteo for the current weather in Istanbul and print the response to the Serial Monitor as it is. The current= parameter in the address says which fields you want; separated by commas, we picked temperature, humidity, weather code and wind speed. timezone=auto converts times to the location's local time.
1#include <WiFi.h>
2#include <HTTPClient.h>
3
4const char* WIFI_SSID = "AgAdi"; // Wi-Fi adı / Wi-Fi name
5const char* WIFI_PASS = "Sifre123"; // Wi-Fi şifresi / Wi-Fi password
6
7// İstanbul'un anlık hava durumu (anahtar gerekmez) / current weather for Istanbul (no key needed)
8const char* URL = "http://api.open-meteo.com/v1/forecast?latitude=41.01&longitude=28.98"
9 "¤t=temperature_2m,relative_humidity_2m,weather_code,wind_speed_10m"
10 "&timezone=auto";
11
12void setup() {
13 Serial.begin(115200);
14 WiFi.mode(WIFI_STA);
15 WiFi.begin(WIFI_SSID, WIFI_PASS);
16 Serial.print("Wi-Fi");
17 while (WiFi.status() != WL_CONNECTED) { // bağlanana kadar bekle / wait until connected
18 delay(500);
19 Serial.print(".");
20 }
21 Serial.println(" OK");
22
23 HTTPClient http;
24 http.begin(URL); // isteği hazırla / prepare the request
25 int code = http.GET(); // GET isteğini gönder / send the GET request
26 Serial.printf("HTTP kodu / code: %d\n", code);
27
28 if (code > 0) { // sunucu yanıt verdi / the server answered
29 Serial.println(http.getString()); // yanıtın gövdesi (JSON) / response body (JSON)
30 } else { // eksi kod: bağlantı sorunu / negative: connection problem
31 Serial.println(http.errorToString(code));
32 }
33 http.end(); // bağlantıyı kapat, belleği boşalt / close and free memory
34}
35
36void loop() {
37}After uploading you should see "HTTP kodu / code: 200" in the Serial Monitor, followed by a single line of JSON. The useful part of the response looks like this: "current":{"time":"2026-11-17T14:15","interval":900,"temperature_2m":17.3,"relative_humidity_2m":63,"weather_code":3,"wind_speed_10m":12.4}. The interval value of 900 tells you the data is refreshed every 900 seconds, in other words every 15 minutes; you'll need this later when deciding how often to send requests.
| Function | What does it do? |
|---|---|
| http.begin(url) | Parses the address and prepares the connection |
| http.GET() | Sends the request; returns the HTTP status code or a negative error code |
| http.getString() | Reads the response body as a String |
| http.getStream() | Hands you the body as a stream without buffering it (for large responses) |
| http.errorToString(code) | Turns a negative error code into readable text |
| http.setTimeout(ms) | How long to wait for a response (default 5000 ms) |
| http.end() | Closes the connection and frees the memory |
Parsing JSON with ArduinoJson
Showing raw JSON on a display is useless; you need to pull out the number 17.3 and put it into a float variable. ArduinoJson turns the text into a tree in memory, and you walk down its branches using the key names: doc["current"]["temperature_2m"] first goes to the current object, then to the temperature inside it. Whatever type of variable you assign the value to, the library converts it to that type. If you ask for a key that doesn't exist, the program doesn't crash; you get 0 for a number and a null pointer for text.
1#include <WiFi.h>
2#include <HTTPClient.h>
3#include <ArduinoJson.h>
4
5const char* WIFI_SSID = "AgAdi";
6const char* WIFI_PASS = "Sifre123";
7const char* URL = "http://api.open-meteo.com/v1/forecast?latitude=41.01&longitude=28.98"
8 "¤t=temperature_2m,relative_humidity_2m,weather_code,wind_speed_10m"
9 "&timezone=auto";
10
11bool fetchWeather() {
12 HTTPClient http;
13 http.begin(URL);
14 int code = http.GET();
15 if (code != HTTP_CODE_OK) { // 200 değilse vazgeç / give up if not 200
16 Serial.printf("Hata / error: %d %s\n", code, http.errorToString(code).c_str());
17 http.end();
18 return false;
19 }
20
21 JsonDocument doc; // ArduinoJson 7: boyut otomatik / size is automatic
22 DeserializationError err = deserializeJson(doc, http.getString());
23 http.end();
24 if (err) { // JSON bozuk ya da eksik / JSON broken or truncated
25 Serial.print("JSON hatasi / error: ");
26 Serial.println(err.c_str());
27 return false;
28 }
29
30 JsonObject now = doc["current"]; // "current" nesnesi / the "current" object
31 float temp = now["temperature_2m"]; // °C
32 int humidity = now["relative_humidity_2m"];
33 int wmo = now["weather_code"]; // WMO hava kodu / WMO weather code
34 float wind = now["wind_speed_10m"]; // km/sa / km/h
35 const char* t = now["time"]; // ölçüm zamanı / observation time
36
37 Serial.printf("%s %.1f C %%%d nem/hum kod/code %d ruzgar/wind %.1f km/h\n",
38 t, temp, humidity, wmo, wind);
39 return true;
40}
41
42void setup() {
43 Serial.begin(115200);
44 WiFi.begin(WIFI_SSID, WIFI_PASS);
45 while (WiFi.status() != WL_CONNECTED) delay(500);
46 fetchWeather();
47}
48
49void loop() {
50}This code is for ArduinoJson 7. The StaticJsonDocument and DynamicJsonDocument doc(1024) lines you'll see in older examples belong to version 6.x; in 7.x you simply write JsonDocument doc; and memory is allocated automatically as needed. If you get a "StaticJsonDocument is deprecated" warning when compiling old code, that's the reason: the code usually still works, but switching to the new style is cleaner. The reading side, the doc["key"] syntax, is the same in both versions.
WMO weather codes: turning the number into words
Open-Meteo doesn't describe the weather with a word like "cloudy" but with a number defined by the World Meteorological Organization (WMO). This makes the response language-independent, and you decide which language to use on your display. These are the codes you'll see most often:
| WMO code | Meaning |
|---|---|
| 0 | Clear sky |
| 1, 2, 3 | Mainly clear, partly cloudy, overcast |
| 45, 48 | Fog, depositing rime fog |
| 51, 53, 55 | Light, moderate, dense drizzle |
| 56, 57 | Freezing drizzle |
| 61, 63, 65 | Slight, moderate, heavy rain |
| 66, 67 | Freezing rain |
| 71, 73, 75 | Slight, moderate, heavy snowfall |
| 77 | Snow grains |
| 80, 81, 82 | Slight, moderate, violent rain showers |
| 85, 86 | Slight and heavy snow showers |
| 95 | Thunderstorm |
| 96, 99 | Thunderstorm with hail |
The wmoText() function in the OLED sketch below turns this table into short labels. The labels in the code are written in Turkish without special characters; change them to English ("Clear", "Rain", "Snow") if you like. If you want to draw your own icons, use the same ranges to pick sun, cloud or raindrop bitmaps; for example, one rain icon is enough for 61 to 67 and 80 to 82.
Weather by city name with OpenWeatherMap
After creating a free OpenWeatherMap account you'll find a 32-character key in the API keys section of your account. A new key can take from a few minutes to a few hours to activate; until then every request returns 401 and you may think your code is wrong. In the query, q=Ankara,TR sets the city name and country code, units=metric sets Celsius and m/s, and lang sets the language of the description.
1#include <WiFi.h>
2#include <HTTPClient.h>
3#include <ArduinoJson.h>
4
5const char* WIFI_SSID = "AgAdi";
6const char* WIFI_PASS = "Sifre123";
7const char* API_KEY   = "BURAYA_API_ANAHTARIN";   // OpenWeatherMap hesabındaki anahtar / key from your account
8const char* CITY      = "Ankara,TR";              // şehir,ülke kodu / city,country code
9
10void fetchCity() {
11  String url = String("http://api.openweathermap.org/data/2.5/weather?q=") + CITY +
12               "&appid=" + API_KEY + "&units=metric&lang=en";   // metric = °C ve m/s / °C and m/s
13  HTTPClient http;
14  http.begin(url);
15  int code = http.GET();
16  String body = (code > 0) ? http.getString() : "";
17  http.end();
18
19  if (code == 401) { Serial.println("401: anahtar gecersiz ya da henuz aktif degil / invalid or inactive key"); return; }
20  if (code == 404) { Serial.println("404: sehir bulunamadi / city not found"); return; }
21  if (code == 429) { Serial.println("429: istek siniri asildi / rate limit exceeded"); return; }
22  if (code != 200) { Serial.printf("Hata / error %d: %s\n", code, HTTPClient::errorToString(code).c_str()); return; }
23
24  JsonDocument doc;
25  if (deserializeJson(doc, body)) { Serial.println("JSON hatasi / error"); return; }
26
27  const char* name = doc["name"];                        // şehir adı / city name
28  float temp       = doc["main"]["temp"];                // sıcaklık / temperature
29  float feels      = doc["main"]["feels_like"];          // hissedilen / feels like
30  int humidity     = doc["main"]["humidity"];            // nem % / humidity %
31  int pressure     = doc["main"]["pressure"];            // hPa
32  const char* desc = doc["weather"][0]["description"];   // dizi: [0] ilk eleman / array: [0] first item
33  float wind       = doc["wind"]["speed"];               // m/s
34
35  Serial.printf("%s: %.1f C (hissedilen/feels %.1f), %%%d, %d hPa, %s, %.1f m/s\n",
36                name, temp, feels, humidity, pressure, desc, wind);
37}
38
39void setup() {
40  Serial.begin(115200);
41  WiFi.begin(WIFI_SSID, WIFI_PASS);
42  while (WiFi.status() != WL_CONNECTED) delay(500);
43  fetchCity();
44}
45
46void loop() {
47}
Two details in this response need attention. First, the weather field isn't an object but an array, so you reach the description through its first element: doc["weather"][0]["description"]. Second, with units=metric the wind speed comes in m/s; multiply by 3.6 to get km/h. Other values for lang give you descriptions in that language, but the default fonts of Adafruit GFX and HD44780 LCDs only cover basic ASCII, so accented letters such as é, ü or ñ come out garbled. lang=en with short labels of your own is the safest choice for small displays.
HTTPS and certificates: setInsecure or setCACert?
Most weather services now use HTTPS, and some don't accept plain HTTP at all. With HTTPS the traffic between the ESP32 and the server is encrypted; to be sure it's really talking to that server, the ESP32 also has to verify the certificate chain against a root certificate. For this you use WiFiClientSecure instead of the plain WiFiClient, and there are two options.
setInsecure() encrypts the connection but doesn't check the certificate. It's a practical and common choice for public, non-secret data such as weather, but someone in the middle could send you fake data. setCACert() verifies the chain with the root certificate you provide. Open-Meteo's certificate is issued by Let's Encrypt and chains up to the ISRG Root X1 root, which is valid until 2035. The server's own certificate is renewed every few months, so never put that in your code; always use the root at the top of the chain.
1#include <WiFi.h>
2#include <WiFiClientSecure.h>
3#include <HTTPClient.h>
4
5const char* WIFI_SSID = "AgAdi";
6const char* WIFI_PASS = "Sifre123";
7
8// ISRG Root X1: Let's Encrypt kök sertifikası, 2035'e kadar geçerli
9// ISRG Root X1: Let's Encrypt root certificate, valid until 2035
10const char* ROOT_CA = R"EOF(
11-----BEGIN CERTIFICATE-----
12MIIFazCCA1OgAwIBAgIRAIIQz7DSQONZRGPgu2OCiwAwDQYJKoZIhvcNAQELBQAw
13TzELMAkGA1UEBhMCVVMxKTAnBgNVBAoTIEludGVybmV0IFNlY3VyaXR5IFJlc2Vh
14cmNoIEdyb3VwMRUwEwYDVQQDEwxJU1JHIFJvb3QgWDEwHhcNMTUwNjA0MTEwNDM4
15WhcNMzUwNjA0MTEwNDM4WjBPMQswCQYDVQQGEwJVUzEpMCcGA1UEChMgSW50ZXJu
16ZXQgU2VjdXJpdHkgUmVzZWFyY2ggR3JvdXAxFTATBgNVBAMTDElTUkcgUm9vdCBY
17MTCCAiIwDQYJKoZIhvcNAQEBBQADggIPADCCAgoCggIBAK3oJHP0FDfzm54rVygc
18h77ct984kIxuPOZXoHj3dcKi/vVqbvYATyjb3miGbESTtrFj/RQSa78f0uoxmyF+
190TM8ukj13Xnfs7j/EvEhmkvBioZxaUpmZmyPfjxwv60pIgbz5MDmgK7iS4+3mX6U
20A5/TR5d8mUgjU+g4rk8Kb4Mu0UlXjIB0ttov0DiNewNwIRt18jA8+o+u3dpjq+sW
21T8KOEUt+zwvo/7V3LvSye0rgTBIlDHCNAymg4VMk7BPZ7hm/ELNKjD+Jo2FR3qyH
22B5T0Y3HsLuJvW5iB4YlcNHlsdu87kGJ55tukmi8mxdAQ4Q7e2RCOFvu396j3x+UC
23B5iPNgiV5+I3lg02dZ77DnKxHZu8A/lJBdiB3QW0KtZB6awBdpUKD9jf1b0SHzUv
24KBds0pjBqAlkd25HN7rOrFleaJ1/ctaJxQZBKT5ZPt0m9STJEadao0xAH0ahmbWn
25OlFuhjuefXKnEgV4We0+UXgVCwOPjdAvBbI+e0ocS3MFEvzG6uBQE3xDk3SzynTn
26jh8BCNAw1FtxNrQHusEwMFxIt4I7mKZ9YIqioymCzLq9gwQbooMDQaHWBfEbwrbw
27qHyGO0aoSCqI3Haadr8faqU9GY/rOPNk3sgrDQoo//fb4hVC1CLQJ13hef4Y53CI
28rU7m2Ys6xt0nUW7/vGT1M0NPAgMBAAGjQjBAMA4GA1UdDwEB/wQEAwIBBjAPBgNV
29HRMBAf8EBTADAQH/MB0GA1UdDgQWBBR5tFnme7bl5AFzgAiIyBpY9umbbjANBgkq
30hkiG9w0BAQsFAAOCAgEAVR9YqbyyqFDQDLHYGmkgJykIrGF1XIpu+ILlaS/V9lZL
31ubhzEFnTIZd+50xx+7LSYK05qAvqFyFWhfFQDlnrzuBZ6brJFe+GnY+EgPbk6ZGQ
323BebYhtF8GaV0nxvwuo77x/Py9auJ/GpsMiu/X1+mvoiBOv/2X/qkSsisRcOj/KK
33NFtY2PwByVS5uCbMiogziUwthDyC3+6WVwW6LLv3xLfHTjuCvjHIInNzktHCgKQ5
34ORAzI4JMPJ+GslWYHb4phowim57iaztXOoJwTdwJx4nLCgdNbOhdjsnvzqvHu7Ur
35TkXWStAmzOVyyghqpZXjFaH3pO3JLF+l+/+sKAIuvtd7u+Nxe5AW0wdeRlN8NwdC
36jNPElpzVmbUq4JUagEiuTDkHzsxHpFKVK7q4+63SM1N95R1NbdWhscdCb+ZAJzVc
37oyi3B43njTOQ5yOf+1CceWxG1bQVs5ZufpsMljq4Ui0/1lvh+wjChP4kqKOJ2qxq
384RgqsahDYVvTH9w7jXbyLeiNdd8XM2w9U/t7y0Ff/9yi0GE44Za4rF2LN9d11TPA
39mRGunUHBcnWEvgJBQl9nJEiU0Zsnvgc/ubhPgXRR4Xq37Z0j4r7g1SgEEzwxA57d
40emyPxgcYxn/eR44/KJ4EBs+lVDR3veyJm+kXQ99b21/+jh5Xos1AnX5iItreGCc=
41-----END CERTIFICATE-----
42)EOF";
43
44void setup() {
45 Serial.begin(115200);
46 WiFi.begin(WIFI_SSID, WIFI_PASS);
47 while (WiFi.status() != WL_CONNECTED) delay(500);
48
49 WiFiClientSecure client;
50 client.setCACert(ROOT_CA); // sunucuyu doğrula / verify the server
51 // client.setInsecure(); // yalnız deneme için: şifreler ama doğrulamaz / testing only: encrypts, no verification
52
53 HTTPClient http;
54 http.begin(client, "https://api.open-meteo.com/v1/forecast?latitude=39.93&longitude=32.86¤t=temperature_2m");
55 int code = http.GET();
56 Serial.printf("HTTPS kodu / code: %d\n", code);
57 if (code > 0) Serial.println(http.getString());
58 else Serial.println(HTTPClient::errorToString(code));
59 http.end();
60}
61
62void loop() {
63}Showing your city's weather on an OLED display
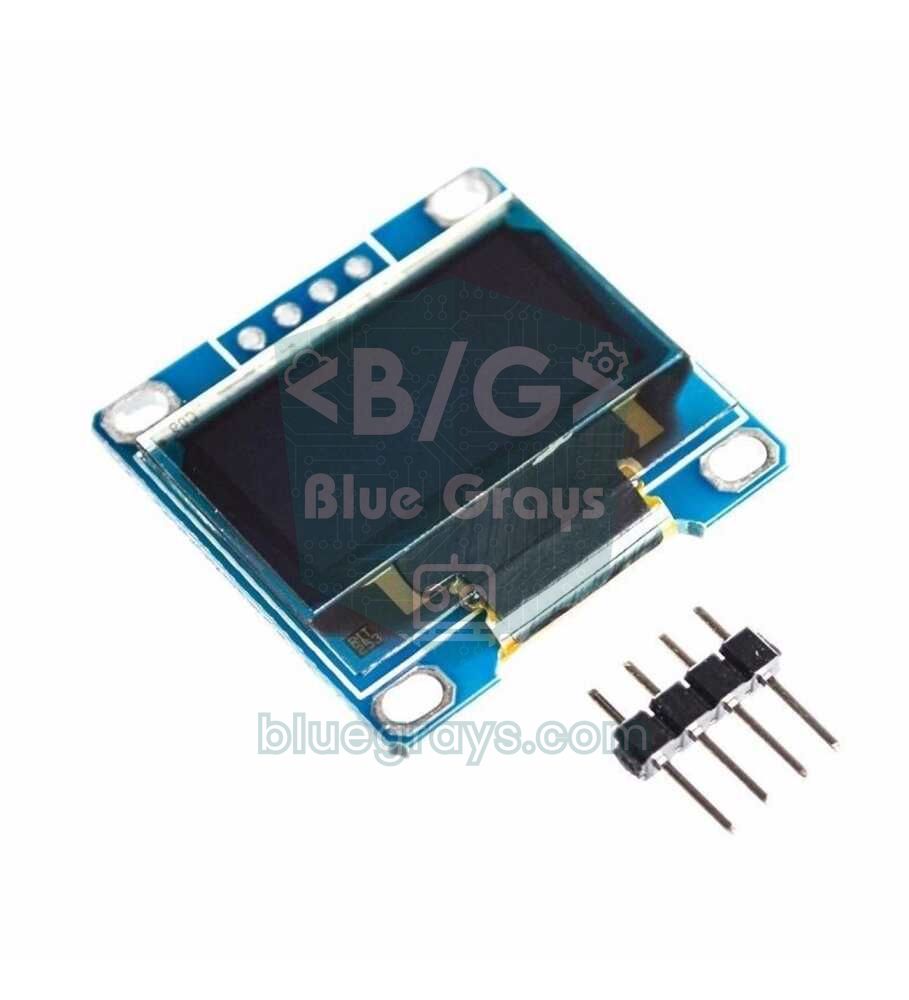
Now let's leave the Serial Monitor behind and build a real desktop weather station. The 0.96-inch SSD1306 OLED connects to the ESP32's I2C pins. For display basics and library details, see the SSD1306 OLED display guide.
| OLED pin | ESP32 |
|---|---|
| GND | GND |
| VCC | 3V3 |
| SCL | GPIO 22 |
| SDA | GPIO 21 |
1#include <WiFi.h>
2#include <WiFiClientSecure.h>
3#include <HTTPClient.h>
4#include <ArduinoJson.h>
5#include <Wire.h>
6#include <Adafruit_GFX.h>
7#include <Adafruit_SSD1306.h>
8
9const char* WIFI_SSID = "AgAdi";
10const char* WIFI_PASS = "Sifre123";
11const char* CITY_NAME = "Izmir"; // ekranda görünecek ad / name shown on screen
12const char* URL = "https://api.open-meteo.com/v1/forecast?latitude=38.42&longitude=27.14"
13 "¤t=temperature_2m,relative_humidity_2m,weather_code,wind_speed_10m"
14 "&timezone=auto";
15const unsigned long PERIOD = 10UL * 60UL * 1000UL; // 10 dakikada bir / every 10 minutes
16
17Adafruit_SSD1306 display(128, 64, &Wire, -1);
18unsigned long lastFetch = 0;
19bool firstRun = true;
20
21// WMO kodunu kısa metne çevir / turn a WMO code into a short label
22const char* wmoText(int c) {
23 if (c == 0) return "Acik"; // açık / clear
24 if (c <= 2) return "Az bulutlu"; // az bulutlu / partly cloudy
25 if (c == 3) return "Kapali"; // kapalı / overcast
26 if (c == 45 || c == 48) return "Sis"; // sis / fog
27 if (c >= 51 && c <= 57) return "Ciseleme"; // çiseleme / drizzle
28 if (c >= 61 && c <= 67) return "Yagmur"; // yağmur / rain
29 if (c >= 71 && c <= 77) return "Kar"; // kar / snow
30 if (c >= 80 && c <= 82) return "Saganak"; // sağanak / showers
31 if (c == 85 || c == 86) return "Kar saganagi"; // kar sağanağı / snow showers
32 if (c >= 95) return "Firtina"; // gök gürültülü fırtına / thunderstorm
33 return "?";
34}
35
36void showMessage(const char* line1, const char* line2) {
37 display.clearDisplay();
38 display.setTextSize(1);
39 display.setCursor(0, 0);
40 display.println(line1);
41 display.println(line2);
42 display.display();
43}
44
45void fetchAndShow() {
46 if (WiFi.status() != WL_CONNECTED) { // Wi-Fi koptuysa yeniden bağlan / reconnect if Wi-Fi dropped
47 showMessage("Wi-Fi yok", "yeniden baglaniyor");
48 WiFi.reconnect();
49 return;
50 }
51
52 WiFiClientSecure client;
53 client.setInsecure(); // şifreli, sertifika doğrulamasız / encrypted, no cert check
54 HTTPClient http;
55 http.setTimeout(8000); // yavaş ağlar için 8 sn / 8 s for slow networks
56 http.begin(client, URL);
57 int code = http.GET();
58 if (code != HTTP_CODE_OK) {
59 char buf[24];
60 snprintf(buf, sizeof(buf), "HTTP hata %d", code);
61 showMessage(buf, "10 dk sonra tekrar");
62 http.end();
63 return;
64 }
65
66 JsonDocument doc;
67 DeserializationError err = deserializeJson(doc, http.getString());
68 http.end();
69 if (err) { showMessage("JSON hatasi", err.c_str()); return; }
70
71 float temp = doc["current"]["temperature_2m"];
72 int humidity = doc["current"]["relative_humidity_2m"];
73 int wmo = doc["current"]["weather_code"];
74 float wind = doc["current"]["wind_speed_10m"];
75 const char* t = doc["current"]["time"]; // "2026-11-17T14:15"
76
77 display.clearDisplay();
78 display.setTextSize(1);
79 display.setCursor(0, 0);
80 display.print(CITY_NAME);
81 display.setCursor(98, 0);
82 if (t && strlen(t) >= 16) display.print(t + 11); // "T"den sonrası: "14:15" / the part after "T"
83 display.drawLine(0, 10, 127, 10, SSD1306_WHITE);
84
85 display.setTextSize(3); // büyük sıcaklık / big temperature
86 display.setCursor(0, 16);
87 display.print(temp, 1);
88 display.setTextSize(1);
89 display.print((char)247); // derece işareti / degree sign
90 display.print("C");
91
92 display.setCursor(0, 44);
93 display.print(wmoText(wmo));
94 display.setCursor(0, 55);
95 display.printf("Nem %%%d Ruzgar %.0f", humidity, wind);
96 display.display();
97}
98
99void setup() {
100 Serial.begin(115200);
101 Wire.begin(21, 22); // SDA, SCL
102 if (!display.begin(SSD1306_SWITCHCAPVCC, 0x3C)) {
103 Serial.println("OLED bulunamadi / not found");
104 for (;;);
105 }
106 display.setTextColor(SSD1306_WHITE);
107 display.cp437(true); // (char)247 derece olsun / so 247 is the degree sign
108 showMessage("Wi-Fi'ye", "baglaniyor...");
109 WiFi.mode(WIFI_STA);
110 WiFi.begin(WIFI_SSID, WIFI_PASS);
111 while (WiFi.status() != WL_CONNECTED) delay(500);
112}
113
114void loop() {
115 if (firstRun || millis() - lastFetch >= PERIOD) { // delay yerine millis / millis instead of delay
116 firstRun = false;
117 lastFetch = millis();
118 fetchAndShow();
119 }
120}At startup the sketch connects to Wi-Fi, fetches the first data immediately and then refreshes every 10 minutes. We used millis() instead of delay() for the wait, so you can add button reading or an animation while loop() spins freely. If the connection drops, the code shows a warning and tries to reconnect; if a request fails, it shows the error code. The time in the top right corner is the part after the letter T in the "2026-11-17T14:15" string of the response, so you see when the last observation was made without setting a clock. If you want a clock that ticks every second, add the method from the ESP32 NTP time guide to this sketch.
Showing it on a 16x2 I2C LCD
If you have a 16x2 character LCD instead of an OLED, you can fit the same data on two lines. Powering the LCD module from the ESP32's VIN pin, which provides 5 V, improves the contrast; connect SDA to GPIO 21 and SCL to GPIO 22. Because the module pulls the I2C lines up to 5 V, the safest option is a level shifter in between. Simply replace the drawing lines of the OLED sketch with a function like the one below; more details are in the I2C LCD display guide.
1#include <LiquidCrystal_I2C.h>
2
3LiquidCrystal_I2C lcd(0x27, 16, 2);                // adres 0x27 ya da 0x3F / address 0x27 or 0x3F
4
5// OLED kodundaki ekran kısmının yerine / replaces the OLED drawing part
6void showOnLcd(float temp, int humidity, const char* label) {
7  lcd.clear();
8  lcd.setCursor(0, 0);
9  lcd.print("Izmir ");
10  lcd.print(temp, 1);
11  lcd.print((char)223);                            // LCD'de derece işareti / degree sign on HD44780
12  lcd.print("C");
13  lcd.setCursor(0, 1);
14  lcd.print(label);                                // ör. "Yagmur" / e.g. "Yagmur"
15  lcd.print(" %");
16  lcd.print(humidity);
17}
18
19void setup() {
20  lcd.init();                                      // ESP32'de Wire.begin(21, 22) varsayılan / default pins
21  lcd.backlight();
22  showOnLcd(18.4, 62, "Az bulutlu");
23}
24
25void loop() {
26}
Request frequency and free limits
The most common mistake is putting delay(1000) in loop() and sending a request every second. That's both pointless and a quick way to hit the limits: Open-Meteo's current data is only refreshed every 15 minutes, so asking every second gets you the same answer 900 times. One request per second adds up to 86,400 a day and fills Open-Meteo's daily limit of 10,000 in under three hours. The maths is simple: requests per day equal 1440 divided by the interval in minutes.
| Interval | Requests per day | Verdict |
|---|---|---|
| 1 second | 86,400 | Over the limit; your IP address may be blocked temporarily |
| 1 minute | 1,440 | Within the limit but wasted, since the data doesn't change |
| 10 minutes | 144 | Ideal for a desktop weather station |
| 15 minutes | 96 | Matches Open-Meteo's refresh rate |
| 1 hour | 24 | Enough for battery-powered devices and daily forecasts |
Error codes: 401, 404, 429 and -1
http.GET() returns two kinds of numbers. Positive numbers are HTTP status codes from the server: the connection was made and the server heard you, but it didn't like something in your request. Negative numbers are the ESP32's own error codes and show that the request never reached the server or the response was cut off.
| Code | Meaning | What to do |
|---|---|---|
| 200 | Success | Read and parse the body |
| 400 | Bad request | Check the parameter names and commas in the address |
| 401 | Unauthorized: API key missing, wrong or not active yet | Copy the key again; if it's new, wait a while |
| 404 | Not found: wrong city name or address | Write the city in plain English letters (Istanbul,TR), check the address |
| 429 | Too many requests | Make the interval longer |
| 500-503 | Problem on the server side | Try again in a few minutes |
| -1 | No connection: no internet, domain not resolved, wrong address or failed HTTPS handshake | Check Wi-Fi, the address and the certificate |
| -5 | Connection lost halfway | Improve the Wi-Fi signal, retry the request |
| -11 | Read timeout | Increase the wait with http.setTimeout() |
OpenWeatherMap also returns JSON on errors: with a wrong key you get {"cod":401, "message":"Invalid API key..."}, and for an unknown city {"cod":"404","message":"city not found"}. In the first case cod is a number, in the second a string in quotes. If you base your code on the number returned by http.GET() rather than the cod field, this inconsistency won't affect you.
Large responses: filters, getStream and useHTTP10
When you ask for an hourly or 7-day forecast, the response can grow from a few kilobytes to dozens. getString() puts the whole response into a String first and then into the ArduinoJson tree, so memory is used twice. Instead you can parse the response as it arrives with http.getStream() and keep only the fields you need with a filter. There's a trap: if the server sends the response in chunks (chunked encoding), chunk sizes get mixed into the stream and the JSON breaks. Open-Meteo does send chunked responses; http.useHTTP10(true) makes the request over HTTP/1.0 and forces the server to send a plain response.
1#include <WiFi.h>
2#include <WiFiClientSecure.h>
3#include <HTTPClient.h>
4#include <ArduinoJson.h>
5
6const char* WIFI_SSID = "AgAdi";
7const char* WIFI_PASS = "Sifre123";
8const char* URL = "https://api.open-meteo.com/v1/forecast?latitude=41.01&longitude=28.98"
9                  "&daily=temperature_2m_max,temperature_2m_min,weather_code"
10                  "&forecast_days=3&timezone=auto";
11
12void setup() {
13  Serial.begin(115200);
14  WiFi.begin(WIFI_SSID, WIFI_PASS);
15  while (WiFi.status() != WL_CONNECTED) delay(500);
16
17  WiFiClientSecure client;
18  client.setInsecure();
19  HTTPClient http;
20  http.useHTTP10(true);                      // parçalı (chunked) yanıtı kapat / disable chunked replies
21  http.begin(client, URL);
22  if (http.GET() != HTTP_CODE_OK) { http.end(); return; }
23
24  JsonDocument filter;                       // yalnız gereken alanları tut / keep only what we need
25  filter["daily"]["time"] = true;
26  filter["daily"]["temperature_2m_max"] = true;
27  filter["daily"]["temperature_2m_min"] = true;
28  filter["daily"]["weather_code"] = true;
29
30  JsonDocument doc;
31  DeserializationError err = deserializeJson(doc, http.getStream(),   // String yerine akış / stream instead of String
32                                             DeserializationOption::Filter(filter));
33  http.end();
34  if (err) { Serial.println(err.c_str()); return; }
35
36  JsonArray days = doc["daily"]["time"];
37  for (size_t i = 0; i < days.size(); i++) {  // 3 gün / 3 days
38    const char* day = days[i];
39    float tmax = doc["daily"]["temperature_2m_max"][i];
40    float tmin = doc["daily"]["temperature_2m_min"][i];
41    int wmo    = doc["daily"]["weather_code"][i];
42    Serial.printf("%s  en dusuk/min %.0f  en yuksek/max %.0f  kod/code %d\n", day, tmin, tmax, wmo);
43  }
44}
45
46void loop() {
47}
In the same way you can request hourly=temperature_2m and draw a 24-hour temperature graph, or use daily=precipitation_probability_max to light an LED when rain is likely tomorrow. In Open-Meteo, forecast_days can be at most 16; between 3 and 7 days is a comfortable range for the ESP32.
Other APIs, same method: an exchange rate example
What you've learned here isn't specific to weather: the address, GET, JSON and parsing steps are the same for every REST API. For example, the Frankfurter service, which publishes the European Central Bank's daily reference rates, needs no key and returns currencies such as the dollar, the euro and the Turkish lira in a single request.
1#include <WiFi.h>
2#include <WiFiClientSecure.h>
3#include <HTTPClient.h>
4#include <ArduinoJson.h>
5
6const char* WIFI_SSID = "AgAdi";
7const char* WIFI_PASS = "Sifre123";
8// Avrupa Merkez Bankası kurları, anahtar gerekmez / European Central Bank rates, no key needed
9const char* URL = "https://api.frankfurter.dev/v1/latest?from=USD&to=TRY,EUR";
10
11void setup() {
12  Serial.begin(115200);
13  WiFi.begin(WIFI_SSID, WIFI_PASS);
14  while (WiFi.status() != WL_CONNECTED) delay(500);
15
16  WiFiClientSecure client;
17  client.setInsecure();
18  HTTPClient http;
19  http.begin(client, URL);
20  int code = http.GET();
21  if (code == HTTP_CODE_OK) {
22    JsonDocument doc;
23    if (!deserializeJson(doc, http.getString())) {
24      const char* date = doc["date"];          // kurun tarihi / rate date
25      float usdTry = doc["rates"]["TRY"];      // 1 USD kaç TL / how many TRY per USD
26      float usdEur = doc["rates"]["EUR"];
27      Serial.printf("%s  1 USD = %.2f TRY = %.4f EUR\n", date, usdTry, usdEur);
28      Serial.printf("1 EUR = %.2f TRY\n", usdTry / usdEur);   // çapraz kur / cross rate
29    }
30  } else {
31    Serial.printf("Hata / error: %d\n", code);
32  }
33  http.end();
34}
35
36void loop() {
37}
Central bank rates are updated once a day on working days, at around 16:00 Central European Time, so even one request an hour is more than enough. With the same skeleton you can fetch earthquake data, prayer times, cryptocurrency prices or a value from your own server. The only things that change are the address and the key names in the JSON, and you find those by opening the address in a browser and looking at the response.
Weather with the Raspberry Pi Pico W (MicroPython)
On the Wi-Fi members of the Raspberry Pi Pico family, the Pico W and Pico 2 W, the same job is done by MicroPython's urequests module, and you don't need a separate JSON library: r.json() converts the response straight into a Python dictionary. Flash the latest MicroPython with Thonny and save the code as main.py. Wi-Fi connection details are in the Pico W Wi-Fi web server guide.
1import network
2import time
3import urequests
4
5SSID = "AgAdi"
6PASS = "Sifre123"
7URL = ("https://api.open-meteo.com/v1/forecast?latitude=41.01&longitude=28.98"
8 "¤t=temperature_2m,relative_humidity_2m,weather_code&timezone=auto")
9
10wlan = network.WLAN(network.STA_IF)
11wlan.active(True)
12wlan.connect(SSID, PASS)
13while not wlan.isconnected(): # bağlanana kadar bekle / wait until connected
14 time.sleep(0.5)
15print("IP:", wlan.ifconfig()[0])
16
17while True:
18 try:
19 r = urequests.get(URL)
20 if r.status_code == 200:
21 now = r.json()["current"] # JSON -> sözlük / JSON -> dict
22 print(now["time"], now["temperature_2m"], "C",
23 "%", now["relative_humidity_2m"], "kod/code", now["weather_code"])
24 else:
25 print("HTTP hata / error:", r.status_code)
26 r.close() # soketi kapat, belleği boşalt / close socket, free memory
27 except OSError as e: # ağ hatası / network error
28 print("Baglanti hatasi / connection error:", e)
29 time.sleep(600) # 10 dakika bekle / wait 10 minutesMicroPython's urequests encrypts HTTPS connections but doesn't verify the server certificate; the security level is the same as setInsecure() on the ESP32. Calling r.close() after every request matters: if you forget, the Pico runs out of sockets and memory after a few requests and the code stops with an OSError.
ESP32 weather project ideas
- Desktop weather station: Show Open-Meteo data on an OLED and add the room's temperature and pressure with a BME280, so you see indoors and outdoors side by side.
- Umbrella reminder: An ESP32 next to the front door lights a red WS2812B LED when the day's chance of rain is above 60 percent.
- Smart irrigation: Skip watering if rain is expected tomorrow; combined with a soil moisture sensor you won't waste water.
- Morning notification: Send the day's forecast to your phone at 07:00 every morning with a Telegram bot.
- Home automation: Send the outdoor temperature to Home Assistant over MQTT and use it for heating decisions.
- Weather and currency board: Show the temperature, a 3-day forecast and the day's exchange rates as colourful cards on an ILI9341 TFT display.
Common mistakes and fixes
| Symptom | Likely cause | Fix |
|---|---|---|
| Endless dots in the Serial Monitor | Can't connect to Wi-Fi | 2.4 GHz network, correct password, closer to the router |
| HTTP code -1 | Internet, domain or HTTPS problem | Try the address in a browser, check WiFiClientSecure and the certificate |
| 401 Invalid API key | Wrong key or not active yet | Copy the key again; on a new account wait a while |
| JSON error InvalidInput | The response isn't JSON (an HTML error page) | Print the response with getString() first |
| JSON error IncompleteInput | Response cut off or chunked stream | Use getString() or add useHTTP10(true) |
| Temperature always 0.00 | Key name misspelled | Copy the name exactly from the JSON (temperature_2m) |
| Strange characters on the display | Accented letters or the ° sign missing from the font | Use lang=en, print the degree sign with (char)247 |
| Freezes after a few hours | Unclosed connections, memory fragmentation | Call http.end() after every request, lengthen the interval |
An ESP32 weather project teaches the basic pattern of every connected device: connect, request, parse, display and repeat at sensible intervals. Once you've got this pattern down, the same code can pull data from hundreds of different APIs. In the BlueGrays app you'll find projects that show a weather API on an LCD and an SSD1306 OLED using ESP32 HTTPClient, along with Wi-Fi connection and NTP clock projects, each with a step-by-step circuit diagram and code.
Frequently asked questions
How do I get weather data with an ESP32?
Connect the ESP32 to Wi-Fi and send a GET request to a service such as Open-Meteo or OpenWeatherMap with the HTTPClient library. Then read the temperature, humidity and weather code from the JSON response with the ArduinoJson library. Open-Meteo needs no API key, which makes it the easiest choice for a first try.
Is the Open-Meteo API free?
Open-Meteo is free for non-commercial use and needs no sign-up or API key. The free tier is limited to 10,000 calls a day, 5,000 an hour and 600 a minute. For a commercial product you need a paid plan.
Why does my OpenWeatherMap API key return error 401?
A 401 means the key is wrong, missing or not activated yet. Newly created keys take from a few minutes to a few hours to become active. Check that you copied the key without spaces and passed it in the address with the appid= parameter.
What does HTTP GET error -1 mean on the ESP32?
-1 is HTTPC_ERROR_CONNECTION_REFUSED, meaning no connection could be made at all. It's usually caused by no internet access, a domain name that can't be resolved, a mistyped address or connecting to an HTTPS server with the wrong certificate. Print http.errorToString(code) to the Serial Monitor to see the description.
How often should an ESP32 update the weather?
Every 10 to 15 minutes is enough, because the services refresh their data at about that rate. That's 96 to 144 requests a day, far below the free limits. Requesting every second wastes energy and can get you blocked.
What is the difference between ArduinoJson 6 and 7?
ArduinoJson 7 replaces StaticJsonDocument and DynamicJsonDocument with a single JsonDocument class that manages memory automatically. Old code still compiles with a warning, but in new projects JsonDocument doc; is all you need. The parsing call and the doc["key"] reading syntax are the same in both versions.
Projects to build after reading this
See all projects
ESP32 HTTPClient + Weather API (with LCD Screen)
In this project the ESP32 makes a REST API call over the internet to a weather API (wttr.in) using HTTPClient.h. The JSON response is parsed with ArduinoJson v7, and the city, temperature, humidity, weather and wind are shown on an I2C LCD. wttr.in needs no API key; just type the name of any city.

ESP32 HTTPClient + Weather API (with SSD1306 OLED Display)
In this project the ESP32 makes a REST API call over the internet to a weather API (wttr.in) using HTTPClient.h. Unlike the I2C LCD version, it uses an SSD1306 OLED (128×64) display, with large text and vector icons for a richer look. Seven weather icons (sunny, rainy, snowy and more) are drawn on the fly, with no bitmap files.

ESP32 Wi-Fi STA Connection (with LCD Screen)
In this project, we connect the ESP32 to the home Wi-Fi network in Station (STA) mode in a secure, fault-tolerant manner. We store the SSID and password in a separate secrets.h file to prevent leaking to Git, set up an auto-reconnect mechanism, and display the RSSI signal level and IP address on an I2C LCD screen. The internal LED works as a status indicator. It is a production-grade connection manager.

Real-Time Clock from the Internet via ESP32 NTP
The ESP32 connects to Wi-Fi and fetches the real time from NTP (Network Time Protocol) servers with millisecond precision. configTzTime() applies the Turkey time zone (TRT, UTC+3) automatically, and in countries with daylight saving time the DST switch is handled by a POSIX TZ string. The time is printed both to the Serial Monitor and to an optional I2C LCD.

ESP32 Asynchronous Web Server (with IP Display on LCD)
In this project, we’re turning the ESP32 into an asynchronous web server that you can control from your phone or computer on the same Wi-Fi network. Thanks to the ESPAsyncWebServer library, the server can process multiple requests simultaneously (unlike the classic WebServer.h, which blocks on a single request). You’ll be able to open the ESP32’s IP address in a browser and click the ON/OFF buttons (the /on and /off routes) to turn the LED connected to GPIO 5 on and off.

ESP32 I2C LCD Display (16x2)
In this project we connect a 16x2 character LCD to the ESP32 over I2C and display text. With I2C, just 2 data pins (SDA and SCL) control the screen, instead of the 6+ pins a classic parallel connection wastes. The code prints a fixed message on the first line and a counter that goes up every second on the second. At startup an I2C scanner also prints the display's address to the Serial Monitor (usually 0x27 or 0x3F).

ESP32 Deep Sleep — Battery Saving (OLED + RTC RAM Counter)
The ESP32's Deep Sleep mode shuts down the CPU and most peripherals, cutting current draw to about 10µA, which is vital for battery-powered IoT devices. This project uses three wake-up sources: a timer (15 s), an external pin (EXT0, the button on GPIO 33) and a touch pin (T0/GPIO 4). Counters marked with RTC_DATA_ATTR survive deep sleep.

ESP32 Temperature Data Logger (DHT22 + DS1307 RTC + microSD + OLED)
Build a timed temperature and humidity logger with the ESP32! A DHT22 sensor reads temperature and humidity once a minute, and each reading is saved to a microSD card in CSV format with a real-time stamp from the DS1307 RTC module. The OLED display shows the latest temperature, humidity, timestamp and total number of records live, in large text.