
Project-Based Learning with Arduino: A 4-Week Sample Unit
Project-based learning with Arduino: a driving question, a 4-week unit plan, 4 school problems and their sensors, team roles, a test log and pitch criteria.
Project-based learning with Arduino is a unit design in which students learn the content not after a lecture, but while trying to solve a real problem. The flow has five stages: you ask a driving question, teams research the problem and decide what to measure, they build a prototype with Arduino, they test and improve it around the school, and finally they present what they found to a real audience. The driving question of the sample unit in this post is: "How can we measure an energy, water, noise or classroom air problem at our school and warn people about it?" Over four weeks each team picks one of these problems, measures it with a sensor, builds a working device that gives a warning when a threshold is crossed, and uses the data it collected to make a recommendation to the school.
Below is everything you can take into class tomorrow: a week-by-week unit table, a lesson-by-lesson flow with exit questions, four problem scenarios with starter projects in BlueGrays, a materials list, a team contract and roles, the prototype loop and a test log template, checkpoint and final presentation criteria, common PBL pitfalls and a checklist. The examples all use the same assumption: let's say you have a class of 24, two lessons a week (2 × 40 minutes) and six teams of four. If you're looking for a plan that teaches skills in order, the 8-week robotics coding plan is a better fit, and for a short, intensive programme the 5-day Arduino workshop is. This unit works best after those, once students have already lit an LED and read a sensor.
What is project-based learning, and how is it different from a project assignment?
In the classic order, the topic is taught first and a project is handed out afterwards so students can show what they learned; the project is the dessert, not the meal. In project-based learning the order flips: the project is the lesson. Students learn analogRead(), thresholds or averaging at the moment they need them to solve the problem. Arduino fits this approach well because it turns the real world into numbers: an LDR measures the light in the corridor, a sound sensor the noise in the cafeteria, a DHT11 the temperature in the classroom. Prototypes are cheap and change in minutes; if a threshold is wrong, you change one number in the code and upload again. That squeezes the "try, measure, fix" loop at the heart of PBL into a single lesson. The table sums up the difference:
| Aspect | Classic project assignment | Project-based learning unit |
|---|---|---|
| Starting point | A topic or a ready-made project ("build a parking sensor") | A real problem ("the corridor lights stay on when nobody is there") |
| When is content taught? | Before the project, to the whole class at once | During the project, when a team needs it, in 10-minute mini-lessons |
| Product | One finished device | Device + measurement data + a reasoned recommendation |
| Mistakes | Lower the grade | Go into the test log and feed the next version |
| Assessment | At the end: does it work or not? | Throughout: problem definition, data, iteration and presentation |
| Audience | The teacher only | Real people affected by the problem (school leadership, school staff, another class) |
The driving question: one sentence that carries the unit
The driving question is the question that stays on the classroom wall for four weeks and that every lesson connects back to: "How did we get closer to this today?" In this unit the shared question is deliberately broad so that every team can pick its own piece: "How can we measure an energy, water, noise or classroom air problem at our school and warn people about it?" The job of the first week is to narrow this broad question down to the team's own sub-question. "Wasting energy at school" is not a sub-question; "How many minutes do the lights stay on in the empty class 7B during break, and who should we warn, and how?" is. The answer to a good sub-question starts with a number and ends with a device. Before you approve a team's sub-question, check it against these six criteria:
- Real: Someone at school actually has this problem and the team can say who: the teacher on duty, school staff, the cafeteria staff or the class representative.
- Measurable: A sensor you have turns the problem into a number: light, sound level, soil moisture, temperature or distance.
- Local and narrow: There is one place and one time slot; not "the school" but "second-floor corridor, lunch break".
- Open-ended: The answer isn't yes or no; the question asks "how", "when" or "how much".
- Fits in 4 weeks: The solution doesn't require touching mains wiring, joining the school network or waiting for budget approval.
- Ends with a warning: The device doesn't just measure and stay silent; at a threshold it alerts someone with an LED, a buzzer or a display.
A 4-week project-based learning unit
The plan is built on 8 lessons: two a week, 40 minutes each. The weeks follow the five PBL stages, but there's no thick wall between research and prototyping; in week 2 a team may still be narrowing down its problem, and in week 3 a new measurement may raise a new research question. What matters is that the output in the table exists at the end of each week. Your role changes week by week too: at first you're the one asking questions, in the middle you're the coach, and at the end you're the organiser who brings the audience into the room.
| Week | Stage | Student output | Teacher role | Support in the app |
|---|---|---|---|---|
| 1 | Driving question and research | Problem card: sub-question, quantity to measure, success criterion; signed team contract | Asks the question, runs the school walk, helps narrow the sub-question without giving answers | Starter project via Project Finder; the project's Required Components list |
| 2 | Prototype | Minimum working version: sensor value in the Serial Monitor, LED lights up above the threshold; checkpoint | Circuit and code coach; runs the checkpoint in lesson 4 | Circuit Diagram, Step by step inside Understand the code; with Premium, missing parts in Workshop › Parts |
| 3 | Test and improve | Measurements at 3 or more spots in the school, at least 2 new versions, a completed test log, peer feedback | Makes students question the data ("Why is this number like this?"), gives mini-lessons on averaging and thresholds | Practice changing code with Try it yourself tasks, the If you get stuck section |
| 4 | Presentation | Boxed prototype, one-page poster, 5-minute presentation and a written recommendation to the school | Invites the audience (school leadership, school staff, another class) and assesses | The team marks its starter project with I made it; the teacher can share a sample circuit as a Tutorial post in the Forum |
The table below breaks the same plan down lesson by lesson. The last 3 minutes of every lesson are for the exit question; the team writes its one-sentence answer at the bottom of the test log. These answers become the warm-up for the next lesson and the evidence of the process in the final presentation. Keep mini-lessons to 10 minutes; anything longer eats into the teams' working time and the unit quietly turns back into a classic lesson.
| Lesson | Focus | What happens? | Exit question |
|---|---|---|---|
| 1 | Discovering problems | The driving question is on a poster. A 15-minute school walk: teams take observation notes in the corridors, cafeteria, garden and classrooms. Teams are formed and the contract is read. | Which of the problems you saw could be measured with a sensor? |
| 2 | Sub-question | Each team picks a scenario, runs a short 3-question interview with 2 people affected by the problem and fills in the problem card. The starter project is found with Project Finder. | What is your team's question in one sentence? Which number will show success? |
| 3 | First circuit | The starter project's circuit is built from the diagram, the code is uploaded and read together with Understand the code. The sensor's first values appear in the Serial Monitor. | What does the sensor's number represent, and what happens when it goes up? |
| 4 | Minimum working version + checkpoint | A threshold and an LED are added to the code. In the last 15 minutes each team gives a 2-minute demo and the teacher ticks off the checkpoint criteria. | How did you choose the threshold: a guess or a measurement? |
| 5 | Field measurement | The prototype runs in at least 3 different places or times at school and the values go into the test log. Mini-lesson: turning a raw value into a percentage or a meaningful unit. | Did the measurements confirm your guess, and what surprised you? |
| 6 | Improvement | The threshold is updated based on the data; if the warning flickers, an average or two separate thresholds are added. Teams pair up and give each other two strengths and one suggestion. | What is the one thing you changed in this version, and why? |
| 7 | Final version and preparation | The prototype goes into a box, the warning takes its final form, the poster and presentation are prepared. No new features, only fixes. | Which single table or chart will you show in the presentation? |
| 8 | Final presentation | 6 teams × 5 minutes (3 minutes of talk and demo, 2 minutes of questions). The last 7 minutes are for reflecting on the unit. | If you had one more week, what would you change? |
4 problem scenarios and their starter projects in BlueGrays
Don't expect teams to write code from scratch; in PBL the goal is to solve the problem, not to write a program from the first line. For each scenario BlueGrays has a ready starter project with a circuit diagram, parts list and code; the team builds it, understands it and adapts it to its own problem. The free projects in the table are open to everyone, the Premium ones require Premium. With six teams, let at most two teams pick the same scenario. If two teams on the same scenario measure different places, you also get a comparison in the presentations.
| Problem | Quantity to measure | Sensor | Starter project | Extension |
|---|---|---|---|---|
| Energy: lights stay on in empty classrooms during breaks and after school | Ambient light and whether there is movement in the room | LDR + 10 kΩ resistor, then PIR (HC-SR501) | Night Light with Ldr (free) | Add motion with Motion Detector with Motion Sensor (Premium): warn if the lights are on and there has been no movement for 5 minutes. All-in-one example: ESP32 Smart Lighting (PIR + LDR + Relay + OLED) (Premium) |
| Water: plants in the school garden get too much or too little water | Soil moisture (raw value first, then a percentage) | Soil moisture sensor | Smart Irrigation Station (Premium); for an analog-reading warm-up, Measuring Light Intensity with an LDR (free) | Measure the water level in the watering can from above with HC-SR04 Distance Measurement (Serial Display) (free) |
| Noise: the sound level in the cafeteria and corridors is disturbing | Relative sound level (an analog value, not decibels) | KY-038 sound sensor module | Measuring Light Intensity with an LDR (free) as the analog-reading pattern + Traffic Light (free) for the warning lights | A noise traffic light: thresholds for green, yellow and red, a 1-minute average, a short beep on red with Using a Buzzer (free) |
| Classroom air: the room feels hot and stuffy in the afternoon | Temperature (°C) and relative humidity (%) | DHT11 or DHT22 | Temperature and Humidity with DHT11 (free) or ESP32 DHT22 Temperature and Humidity (with LCD Display) (free) | For logging all day, ESP32 Temperature Data Logger (DHT22 + DS1307 RTC + microSD + OLED) (Premium); real stuffiness needs a separate CO2 sensor |
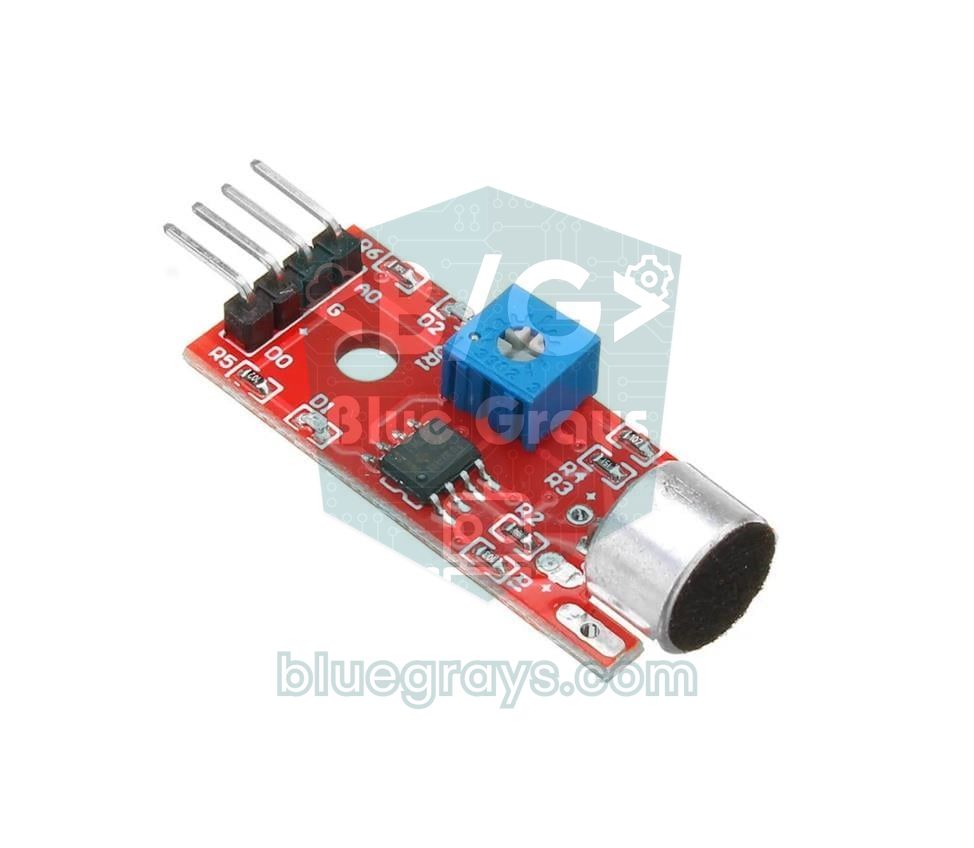
Be honest with students about two things from the start. First, the KY-038 is not a decibel meter: it turns the fluctuation the microphone picks up into a number between 0 and 1023. The team can't say "the cafeteria is at 85 dB", but it can say "at lunch the cafeteria gives much higher values than an empty classroom" and show the difference in numbers; comparative data is enough for PBL. You'll find how the sensor responds and how to adjust it in the KY-038 sound sensor post. Second, a DHT11 measures temperature and humidity, not stuffiness; in a closed classroom what really rises is carbon dioxide. The classroom air team can base its "open the windows" recommendation on temperature and humidity and say in the presentation that the next step is measuring CO2. For the energy and water teams' sensors, the LDR light sensor and soil moisture sensor posts cover calibration in detail.
Materials list: 6 teams + 1 spare kit
| Item | Per team | Class total | Note |
|---|---|---|---|
| Arduino Uno or compatible board + USB cable | 1 | 7 | All scenarios |
| Breadboard (830 holes) | 1 | 7 | All scenarios |
| Male-to-male jumper wires | 20 | about 150 | All scenarios |
| 5 mm LEDs (red, yellow, green) | 3 | about 30 | Warning lights |
| 330 Ω resistor | 3 | about 30 | One per LED |
| 10 kΩ resistor | 1 | 10 | For the LDR and DHT11 |
| Buzzer | 1 | 7 | Audible warning (optional) |
| LDR + PIR motion sensor (HC-SR501) | 1 + 1 | 3 + 3 | Energy teams (at most 2 teams + 1 spare) |
| Soil moisture sensor + plant pot | 1 | 3 | Water teams |
| HC-SR04 distance sensor + plastic container | 1 | 3 | Water teams, level measurement |
| KY-038 sound sensor module | 1 | 3 | Noise teams |
| DHT11 (or DHT22) + I2C 16x2 LCD | 1 + 1 | 3 + 3 | Classroom air teams; the DHT11 project uses the LCD |
| Cardboard box, tape, labels | 1 set | 7 | Boxing in weeks 3 and 4 |
Team contract and roles
In a team of four, if not everyone has a job, the fastest student does the work and the others watch. The simplest fix is four roles and a weekly rotation: 4 weeks, 4 roles, everyone takes each role once. A role doesn't mean "I only do this"; it means "I answer for this". The code lead isn't the only one who writes code, but that week they're the one who explains what the code does to the class. The team writes the contract itself in the first lesson; you only make the items below mandatory and approve it once all four have signed.
| Role | Responsibility | Weekly output |
|---|---|---|
| Project manager | Keeps the task list and the time, records team decisions, is the one who talks to the teacher | A 3-item task list at the start of the lesson, ticked off at the end |
| Circuit lead | Builds and checks the circuit against the diagram, counts the parts | Photo of the working circuit, a note of missing parts |
| Code lead | Uploads the code, makes the changes and explains each change in one line | The latest code and a "what changed?" note |
| Data and documentation lead | Takes the measurements, fills in the test log, shoots photos and video | A completed test log, at least one table for the presentation |
- Our sub-question: .................................................. (one sentence, one place, one time)
- Our success criterion: When .................. goes above .................., our device will warn with ...................
- Roles (week 1): Project manager ........, circuit ........, code ........, data and documentation ........ We rotate the roles by one person every week.
- Decision rule: If we can't agree, we measure first; if there's no measurement, the project manager decides and writes the decision in the test log.
- Help rule: Before going to the teacher, we check the diagram, the project's Understand the code section and a teammate.
- Absence: A teammate who misses a lesson reads the test log in the next lesson and catches up in 2 minutes; someone else covers their job that week.
- Signatures: .............. .............. .............. ..............
The prototype loop: the minimum working version
PBL units most often sink when teams spend the first two weeks designing the perfect device. The rule is simple: by the end of lesson 4 every team needs a minimum working version. It does three things: it reads the sensor, shows the value in the Serial Monitor and lights a single LED when the value crosses a threshold. No box, no display, no Wi-Fi; but it produces real data and can be tested. For the noise team this means adding an if statement and an LED to the code of Measuring Light Intensity with an LDR. For the energy team, Night Light with Ldr is almost this version already; only the logic is reversed: the LED lights up not in the dark but when the lights are on, and the question "is the room empty?" arrives with a PIR in the next version. Every version after that brings exactly one change and goes into the test log:
- Version 0, measurement: The sensor is read and the value is printed to the Serial Monitor once a second. The team sees the value change with a hand, light, sound or water.
- Version 1, minimum working version: An estimated threshold and one LED. When the threshold is crossed, the LED lights up. This is the version shown at the checkpoint in lesson 4.
- Version 2, calibration: After the field measurements, the threshold is chosen from data rather than a guess; for example, halfway between the empty-classroom value and the value during break.
- Version 3, stable warning: When the value hovers around the threshold, the LED flickers. The fix is to average the last 10 readings or to use two separate thresholds for switching on and off.
- Version 4, built for the user: The warning is shaped around the person affected by the problem: a three-colour light everyone can see in the cafeteria, a small LCD on the teacher's desk in a classroom. Boxing and placement happen in this version.
| Lesson | Version | What did we change? | How was it tested? | Expected | Measured | Decision |
|---|---|---|---|---|---|---|
| 5 | 1 | Added a threshold of 600 | At the cafeteria entrance, lunch break, 10 minutes | The red LED only lights up when someone shouts | The LED was on for about 8 of the 10 minutes | Threshold too low, raise it based on the data |
| 6 | 2 | Threshold raised to 780, averaging the last 10 readings | Same place, same time, 10 minutes | Red only at the busiest moments | Red came on twice; yellow flickers around its threshold | Use separate on and off thresholds for yellow |
| ... | ... | ... | ... | ... | ... | ... |
Checkpoint and final presentation criteria
For general criteria such as circuit, code, understanding, debugging and documentation, you can use the main rubric from the Arduino project rubric post as it is. In a PBL unit it's enough to add three criteria to it; they measure what a project assignment doesn't, but what this unit really teaches. The checkpoint happens in lesson 4 and looks only at the problem definition and the minimum working version; its purpose is to correct the direction, not to give a grade. In the final presentation all three criteria are scored. A prototype that stands out at the end of the unit can also go on to a science fair; for topic ideas see the science fair project ideas post.
| PBL criterion | 1 – Beginning | 2 – Developing | 3 – Ready |
|---|---|---|---|
| Problem definition | Topic is broad ("noise at school"), unclear who is affected | Place and time are clear, the quantity to measure is chosen | Place, time, affected person and success criterion in one sentence, backed by an interview |
| Decisions from data | Threshold and decisions are based on guesses | There are measurements, but they're loosely linked to decisions | Every key decision (threshold, placement, type of warning) is justified by a measurement |
| Iteration | One version; when something failed, the circuit was rebuilt from scratch | At least 2 versions, changes recorded | 3 or more versions, one change each; reason and result in the test log |
- Problem (30 seconds): The sub-question and one sentence from the person you interviewed describing the problem.
- Measurement (45 seconds): Where, when and how many times you measured; a single table or chart.
- Live demo (45 seconds): The device crosses the threshold in front of the audience and gives its warning. Have a short demo video ready as a backup.
- Versions (30 seconds): One decision from the test log: "We changed the threshold because of this measurement."
- Recommendation (30 seconds): A concrete recommendation to the school (where, how many devices, who looks after them) and what you'd do with one more week.
- Questions (2 minutes): The teacher or the audience directs a question to a team member of their choice, so everyone must be able to explain every part.
What does BlueGrays do in this unit?
- Starter project with Project Finder: In lesson 2 the team answers three questions: Measure and sense for "What would you like to build?", Arduino Uno / Nano as the board and, for most classes, "I've built a few projects" as the experience. Next to the best match, the results screen may also show a free warm-up project you can start with the same parts. Details are in the Project Finder post.
- Understanding code with Understand the code: Copying the starter project's code and moving on doesn't work in PBL, because the team is going to change that code. The Understand the code tab first gives the "What does this code do?" summary, then the Step by step explanation and finally a Try it yourself task that asks for a single change. It's open to everyone on free projects and unlocks with Premium on Premium projects. We showed how to use it in the Understand the code post.
- Planning parts with Workshop › Parts (Premium): If you enter the parts in your classroom cupboard into Workshop › Parts with their quantities, the Projects You Can Build and Projects with Missing Components lists show which scenario can start today and which needs an order. Details are in the Arduino projects with the parts you have post.
- Your own sample project: Before the unit you can build one scenario yourself and share it via Learn > Forum > New Post in the Tutorial category: add photos of the circuit (up to 5 images), put in your code with Add code and link the related ready-made projects. The post is published in the language you write it in; send its link to the class group with Share. You can pass on ready-made projects the same way with Share on the project page. The steps are in the teaching with your own project post.
- Premium access for the class: For Premium starter projects such as Smart Irrigation Station and for Workshop › Parts, you don't need a separate subscription for every student; we explained the one-time, non-renewing educator packages that students redeem without adding a card in the Premium codes for a whole class post.
Know what the app doesn't do, too: BlueGrays has no class creation, no dashboard showing team progress to the teacher and no assignment feature. The problem card, team contract and test log stay on paper or in a shared document your school uses. The app carries the "how do I build it, what does the code do, which part is missing?" side of the unit; the "why this threshold, who benefits?" side is the team's job and yours. That split suits PBL anyway: the thinking stays with the team, not on the screen.
Common PBL pitfalls and how to fix them
| Pitfall | How do you notice it? | Fix |
|---|---|---|
| The project starts without a problem ("let's build a robot") | The team describes the device but can't say whose problem it solves | No parts box until the problem card is approved |
| The question is too big ("let's cut the school's energy use") | By the end of lesson 2 there's no single quantity to measure | One place, one time, one quantity: "second-floor corridor, lunch break, light" |
| Time runs out chasing the perfect product | In lesson 4 there's still not a single value in the Serial Monitor | The minimum working version is mandatory by the end of lesson 4; box and display come later |
| One person does all the work | Only one student can explain the code or the circuit | Weekly role rotation; in the presentation you choose who answers |
| Feelings instead of data ("I think it's really loud") | No table or chart in the presentation, decisions without reasons | A test log every lesson; no threshold change without at least 3 measurements |
| Code gets copied but can't be changed | The team freezes when asked to change the threshold | In every version the code lead changes one line themselves and explains it; the Try it yourself task in Understand the code is the warm-up |
| Last-week pile-up | In lesson 7 the box, poster and code are all half-done | No new features after lesson 7; only fixes and presentation prep |
| The teacher turns into an answer machine | Teams wait for you every time they're stuck and the queue grows | "Three before me" rule: diagram, the If you get stuck section in Understand the code, a teammate; then the teacher |
Pre-unit checklist
- The driving question is written on a poster and up in the classroom.
- The 4 scenario cards (problem, possible sensor, starter project) are copied for every team.
- All 7 kits are counted; every sensor has been tried once and gives values in the Serial Monitor.
- The Arduino IDE and board driver are installed on the computers and the USB cables are tested.
- The starter projects open on students' phones or tablets; if Premium projects are used, the codes have been handed out.
- The problem card, team contract and test log forms are printed for every team.
- School leadership has approved the school walk and field measurements; measurement times for the cafeteria, corridor and garden are set.
- The audience for the final presentation (school leadership, school staff, another class) is invited and has a date.
- The PBL criteria table is printed for the checkpoint (lesson 4) and the final (lesson 8).
The real product of this unit isn't the device, it's the student's habit of "I measure first, then I decide"; the device sits on the desk as the evidence. On your first run you don't have to open all four scenarios; starting with two scenarios and six teams teaches the same loop. If you want to build the starter projects once yourself before taking them to class, just download the BlueGrays app and try Night Light with Ldr with its circuit diagram, code and Understand the code steps.
Frequently asked questions
What is project-based learning?
Project-based learning (PBL) is a teaching approach in which students learn the content while trying to solve a real problem. A unit starts with a driving question, moves through research, prototyping, testing and improvement, and ends with a presentation to a real audience. With Arduino, that means a working device that measures with a sensor and gives a warning, plus the data that backs it up.
What is the difference between project-based learning and doing projects?
When students simply do projects, the topic is taught first and the project at the end shows what they learned. In project-based learning the project is the lesson itself; students learn the content while solving the problem, at the moment they need it. Assessment looks not only at the product but also at the problem definition, data-driven decisions and improvement between versions.
How long should an Arduino PBL unit be?
For a class with two lessons a week, 4 weeks or 8 lessons is a good start: one week for the problem and research, one for the prototype, one for testing and improvement and one for presenting. Shorter units tend to lose the testing stage. It helps a lot if students have already lit an LED and read a sensor before the unit.
How do you write a driving question?
A good driving question is open-ended, matters to a real person at school and narrows down to a measurable quantity. Keep the shared question broad, for example "How can we measure an energy, water, noise or classroom air problem at our school and warn people about it?" Each team then narrows it to its own sub-question with one place, one time and one quantity.
What school problems can students solve with Arduino?
Lights left on in empty classrooms (LDR and PIR), watering plants in the school garden (soil moisture sensor), noise in the cafeteria and corridors (KY-038 sound sensor) and classroom temperature and humidity (DHT11 or DHT22) are four examples that fit into four weeks. All of them run on 5 V from USB and none needs mains wiring.
How do you assess project-based learning?
Add three PBL criteria to a general project rubric: problem definition, decisions from data and iteration. Use a short checkpoint in lesson 4 to correct the direction, then score all three criteria alongside the presentation in the last lesson. The test log and the exit question answers are the evidence for the process score.
Projects to build after reading this
See all projects
Night Light with Ldr
A little night light that turns on by itself when it gets dark and goes off when morning comes. A light sensor measures how bright the room is, and the Arduino switches the LED on when it is dark enou

Measuring Light Intensity with an LDR
Want to see how bright your room is as a number? The LDR, a small part that reacts to light, measures the light around it, and the Arduino writes the value to your computer screen every half second. C

Traffic Light
A tiny copy of the traffic light you see on the road every day. Red stays on for two seconds, yellow flashes for a moment, green stays on for two seconds, then it goes back to red through yellow again

Temperature and Humidity with DHT11
How warm is your room, and is the air humid or dry? The DHT11 sensor measures temperature and humidity, and the Arduino writes the values on a two-line LCD screen, refreshing every couple of seconds.

HC-SR04 Distance Measurement (Serial Display)
The HC-SR04 sensor works just like a bat finding its way in the dark: it sends out a sound you cannot hear, listens for the echo and measures how far away the object in front of it is. The Arduino wri

ESP32 DHT22 Temperature and Humidity (with LCD Display)
This project measures ambient temperature and humidity using a DHT22 sensor and displays the data in real time on a 16x2 I2C LCD. Data is read from the sensor using the one-wire protocol via the Adafruit DHT library. This project serves as the foundation for IoT weather stations, smart home automation, or environmental monitoring systems in greenhouses. Communication with the DHT22 is established via the ESP32's GPIO 4 pin.

Smart Irrigation Station
A gardener that waters your plants on its own, so they don't dry out while you're on vacation. A soil moisture sensor measures how wet the soil is; when it gets dry, the Arduino runs the water pump fo
Motion Detector with Motion Sensor
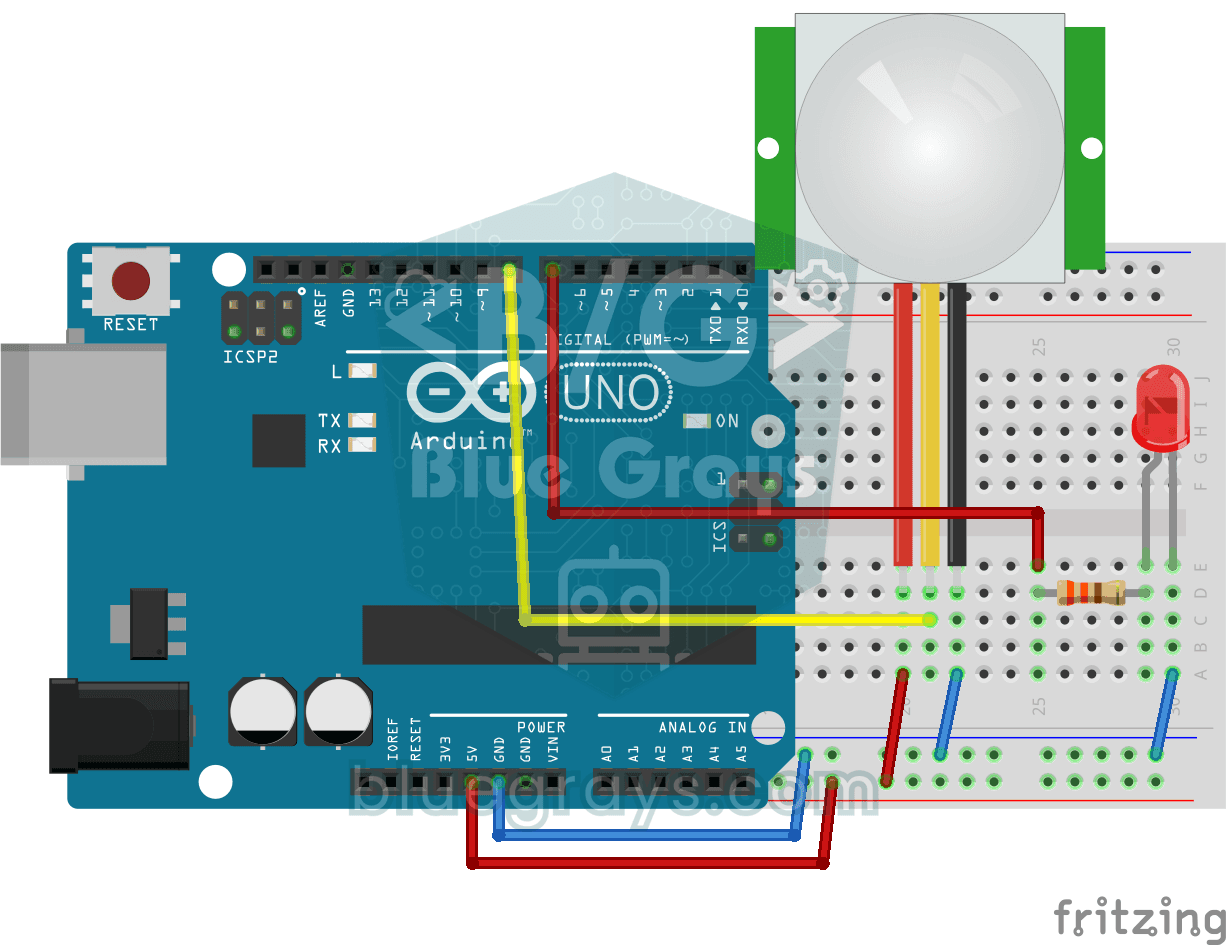
A simple guard that tells you when someone walks into the room. The motion sensor picks up the warmth given off by the human body, and the Arduino keeps the LED on as long as there is movement and tur