
School Arduino Lab Setup: Kit List, Layout and Budget Plan
School Arduino lab setup for 24 students in 8 groups: kit table, shared tools, storage system, consumables estimate, safety rules and a blank budget template.
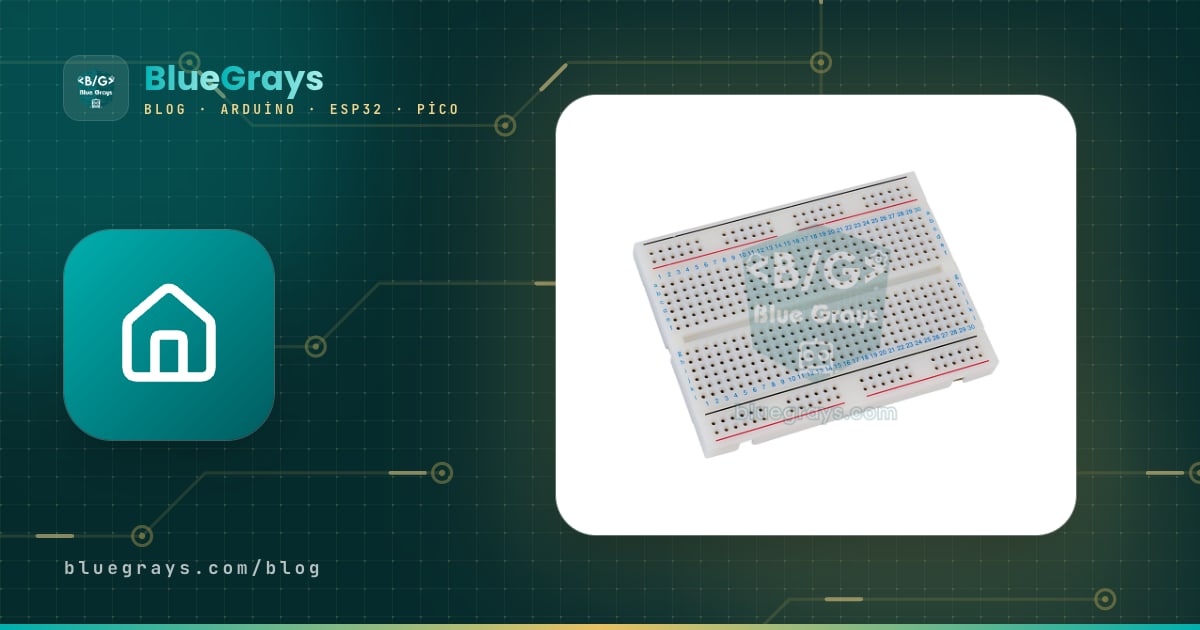
For a school Arduino lab setup, split your shopping list into three layers: group kits (the board, breadboard, wires and basic parts on each table), shared equipment (multimeters, hand tools, a spare-parts box and, if you want, a soldering station) and infrastructure (computers, USB connections, power outlets, tables and lockable storage). Say you are building it for a class of 24: 8 groups of 3, one Arduino Uno kit per group, 4 ESP32 boards and 4 Raspberry Pi Pico boards for the whole lab, 2 spare Unos, 5 multimeters and 8 computers make a solid start. Spend the budget on the first layer first and expand with sensor and module boxes in the second year. The first year of a lab is about buying; every year after that is about running it, which is why numbered boxes, colour coding and a stock count every term matter as much as the parts themselves.
This post covers setting up the lab and running it over the long term. We covered a single student's first shopping list in the Arduino starter kit post, and group roles, the help queue and handing out boxes at the start of a lesson in teaching Arduino to a large class. Here you will find, in order, the kit table, the shared equipment, the table and computer layout, a budget template with an empty price column, the second-year expansion boxes, the cupboard layout, a consumables estimate, safety rules, a yearly calendar and a funding pack. We don't list prices, because they change from country to country and month to month; instead we give every item with its quantity, and you fill in the price from your own supplier.
Three layers: group kits, shared equipment, infrastructure
Splitting the lab into layers helps in three ways. The first is priority: on a tight budget, group kits come first, because everything a student touches is in there; multimeters and tools can start in small numbers, and most of the infrastructure already exists in the school. The second is responsibility: a group kit is that group's box and the group counts it at the end of the lesson, shared equipment stays under the teacher's control and is lent out, and infrastructure is school property. The third is lifespan: boards, breadboards and multimeters last for years, while LEDs, resistors and jumper wires are consumables that need topping up every year. In the budget template you will track this split with two types, one-off and yearly.
| Layer | What's in it? | Who is responsible? | Lifespan and renewal |
|---|---|---|---|
| 1. Group kits | Board, USB cable, breadboard, jumper wires, LEDs, resistors, buttons, basic sensors, numbered box | The group; it counts the box at the end of the lesson | Boards and breadboards last for years; LEDs, resistors and wires are topped up every year |
| 2. Shared equipment | Multimeters, hand tools, safety glasses, spare-parts box, theme boxes, optional soldering station | The teacher; lent to groups | Tools last a long time; the spare box is refilled every term |
| 3. Infrastructure | Computers, USB extension or hub, earthed power strips, tables, lockable cupboard, projector | The school; the lab coordinator keeps track | Mostly already in place; set up once, maintained every term |
8 groups, 24 students: the core kit table
The table assumes 24 students, 8 groups of 3 and one or two lessons a week. The total column adds roughly 20–25% spares to what 8 groups need and rounds the result; sturdy parts such as boards and breadboards get few spares, easily lost parts such as LEDs and wires get more. The parts were not picked at random: most of the sensors and outputs in the list match at least one project that is free in BlueGrays with its circuit diagram and code, so the lab's first term fills up without buying anything extra. If you have a different number of groups, multiply the per-group column by your group count and add the same spare ratio.
| Item | Per group | Total (8 groups + spares) | Note |
|---|---|---|---|
| Arduino Uno compatible board | 1 | 10 | 2 are spares; same model in every kit |
| USB cable (USB-B for the Uno) | 1 | 10 | Short cables get tangled less on the table |
| Breadboard (830 holes) | 1 | 10 | Swap for a spare once the springs loosen |
| Male-to-male jumper wire | 30 | 260 | Consumable; topped up every year |
| Female-to-male jumper wire | 10 | 100 | For modules with exposed pins |
| 5 mm LED (red, yellow, green) | 15 | 150 | LED Blink, Traffic Light |
| RGB LED | 1 | 10 | Colour mixing and PWM |
| Resistors 220 Ω and 330 Ω | 10 + 10 | 200 | For LEDs; in a labelled compartment |
| Resistors 1 kΩ and 10 kΩ | 5 + 5 | 100 | For button and LDR circuits |
| Push button | 4 | 40 | LED Control with a Push Button (Push) |
| 10 kΩ potentiometer | 1 | 10 | Analog reading |
| Active and passive buzzer | 1 + 1 | 20 | Sound and frequency projects |
| LDR | 2 | 20 | Night Light with Ldr |
| HC-SR04 distance sensor | 1 | 10 | HC-SR04 Distance Measurement (Serial Display) |
| DHT11 temperature and humidity sensor | 1 | 10 | Temperature and Humidity with DHT11 |
| SG90 servo motor | 1 | 10 | Introduction to motion projects |
| Compartment storage box + contents card | 1 | 9 | 8 groups + 1 spare box |
| ESP32 dev board + matching USB cable | Shared | 4 | Boxes E1–E4; 3.3 V, LED Blink with ESP32 |
| Raspberry Pi Pico (with soldered headers) + USB cable | Shared | 4 | Boxes P1–P4; MicroPython, Raspberry Pi Pico: Controlling an External LED (GP14 + Breadboard) |
The reason to give most of the board mix to the Arduino Uno is simple: it runs at 5 V, almost every beginner sensor connects to it directly, its USB-B socket survives constant plugging and unplugging, and most teaching material is written for it. Of the 200+ projects in BlueGrays, roughly 110 are for Arduino, 50 for ESP32 and 30 for the Raspberry Pi Pico. Buy the ESP32 for an Internet of Things unit that needs Wi-Fi and Bluetooth, and the Pico for moving on to text-based programming with MicroPython. Since these two boards usually come in during the second half of the year, 4 of each are enough in the first year: in that unit, 4 groups work with the ESP32 or the Pico while the other 4 carry on with an Uno project, and they swap the following week. You can compare the boards in Arduino vs ESP32, and find first lessons in the ESP32 first lesson plan and the Pico MicroPython lesson plan.
Shared equipment: what lives in the cupboard, not on the tables
| Equipment | Quantity | What for? | When to buy |
|---|---|---|---|
| Digital multimeter | 4 + 1 for the teacher | Broken wires, flat batteries, voltage checks; one per two groups | First year |
| Side cutters and wire strippers | 4 each | Trimming legs, preparing wires | First year |
| Needle-nose pliers and tweezers | 4 each | Small parts, straightening bent pins | First year |
| Safety glasses | 24 | When trimming legs and soldering | First year |
| Spare-parts box (S) | 1 | Spare boards, wires, breadboards and sensors | First year |
| Label paper or a label maker, laminating | 1 | Box numbers and contents cards | First year |
| Temperature-controlled soldering station + stand + fume extractor | 2 | Soldering headers, permanent circuits, exhibition projects | Optional, when the need arises |
| Solder wire, desoldering pump, desoldering braid | 1 each | Consumables for the soldering corner | Together with the soldering station |
| Adjustable bench power supply | 1 | Teacher only; measurements in motor and battery projects | Second year, optional |
The soldering station is optional in this list on purpose. Projects built with a breadboard and jumper wires need no soldering, so the lab's first year can go by without any. The first need for soldering usually comes with modules sold without headers and with the Pico; buying Picos with soldered headers removes that need for the first year. When permanent circuits, exhibitions or club work begin, you set up a soldering corner with 2 temperature-controlled stations, ventilation and teacher supervision; details are in the soldering guide. A multimeter, on the other hand, is needed from day one: it is the fastest way to find a broken jumper wire, a flat battery or a leg pushed into the wrong row. In the first weeks, teach students only the continuity (beep) test and how to measure voltage correctly, and leave current measurement for later; we explain how in the multimeter guide.
Infrastructure: tables, power, computers and storage
- Table layout: 8 group tables, each with 3 chairs and 1 computer. Arrange the tables in a U along the walls or as islands of 2; put the teacher's desk next to the projector and leave a path of at least 1 metre between tables so you can move around easily. Stick the same number as the box on the corner of each table.
- Power: One switched, earthed power strip per table is enough. Run cables behind the tables or through a cable channel rather than across the floor, and don't daisy-chain power strips. Switching the strips off at the end of the lesson should be part of the routine for closing the lab.
- Computers: 8 group computers and 1 teacher computer. The desktop versions of the Arduino IDE and Thonny run on Windows, macOS and Linux; devices that only run a browser are not suitable for this setup. Older but reliable computers are good enough for the job.
- USB connection: If the computer's port is at the back, a short USB extension cable fixed to the table keeps the board from dangling. If there aren't enough ports, use a USB hub with its own power adapter (a powered hub); unpowered hubs can make the board reset when parts that draw current, such as a servo, are connected.
- Storage: A lockable cupboard or shelving system, with separate shelves for group boxes, theme boxes and spare stock. Inside the cupboard, a separate locked metal box or compartment for batteries and soldering irons.
- Display: A projector or an interactive whiteboard. Increase the font size of the Arduino IDE on the teacher's computer; letting the back-row group read the code takes less time than rewriting it on the board.
Computer and software setup
- Install the Arduino IDE on every computer and wait for the extra components it downloads on first launch to finish; the steps are in the Arduino IDE installation post.
- Install the driver for the USB chip on compatible boards (usually a CH340); on Windows this step needs administrator rights. If the port doesn't show up, follow the checklist in the Arduino upload error post.
- Install the ESP32 board package from the Boards Manager (covered in what is the ESP32). The package is large, so download it before lessons, while the school network is quiet.
- Install Thonny for the Pico and flash the MicroPython firmware onto each Pico once (what is the Raspberry Pi Pico). If you do this at the start of term, all that's left in the lesson is writing code.
- Install the libraries the year's projects need in advance (for example the DHT and I2C LCD libraries); the Servo library comes with the Arduino IDE.
- On each computer, upload the Blink example with that table's board, and once it works, stick the table number on the computer.
- Write all the steps on a one-page setup checklist. Whenever the computers are reset or a major update arrives, you run the checklist again from the top.
Sort out school network and computer restrictions before term starts. In most schools, the right to install software and drivers sits with the IT department; send them the setup checklist at least two weeks ahead and agree together which computers will be used with which user account. Some schools block USB storage devices; while the MicroPython firmware is being flashed, the Pico shows up on the computer like a USB drive, so if there is a block, do this step together with IT. ESP32 projects bring a separate issue: the classic ESP32 only connects to 2.4 GHz Wi-Fi, and most example code expects a simple password-protected network. On enterprise networks where you log in with a username and password, or on guest networks that open a sign-in page in the browser, these examples won't work as they are. With IT's approval, a simple 2.4 GHz access point dedicated to the lab and switched on only during lessons solves this problem for good.
Budget template: fill in prices from your own supplier
The table below is not a quote; it's a template to fill in. The quantity column comes from the tables above; you fill in the unit price and total columns with quotes from local suppliers. Get at least two quotes for each item and note which one you chose and why; when you apply for donations or grants, these notes become the strongest part of your application. Add up one-off and yearly items separately: in the first year you need the sum of both, and in later years mostly just the yearly items. Add a 10–15% contingency at the end; shipping, a broken board or a price that changes mid-term is covered by it. Sticking to a single board model and, if possible, a single supplier makes drivers and spare parts much easier for years.
| Item | Layer | Quantity | Unit price | Total | Type |
|---|---|---|---|---|---|
| Arduino Uno compatible board | 1 | 10 | One-off | ||
| ESP32 dev board | 1 | 4 | One-off | ||
| Raspberry Pi Pico (with soldered headers) | 1 | 4 | One-off | ||
| USB cables (to match the boards) | 1 | 18 | One-off | ||
| Breadboard (830 holes) | 1 | 10 | One-off | ||
| Basic parts and sensors (items in the kit table) | 1 | 8 kits + spares | One-off | ||
| Storage boxes and contents cards | 1 | 17 | One-off | ||
| Digital multimeter | 2 | 5 | One-off | ||
| Hand tools and safety glasses | 2 | As in the equipment table | One-off | ||
| Soldering station and consumables (optional) | 2 | 2 | One-off | ||
| Theme boxes (second year) | 2 | 5 boxes | One-off | ||
| USB extension or powered hub | 3 | 8 | One-off | ||
| Switched, earthed power strip | 3 | 9 | One-off | ||
| Lockable cupboard or shelving, battery box | 3 | 1 | One-off | ||
| Consumables top-up (LEDs, resistors, wires, buttons) | 1 | As in the consumables table | Yearly | ||
| Replacing broken boards and sensors | 1 | About 2 boards + a few sensors | Yearly | ||
| Contingency (10–15%) | – | – | Yearly |
Second year: sensor and module expansion boxes
Once the core kits have settled in, set up theme boxes instead of adding new modules to every group box. A theme box holds 2–8 of each module on one topic and is lent out by project: groups doing a display project that week take from the Display box and put everything back at the end of the lesson. That way you don't have to buy 8 of a module you rarely use, and the group boxes stay as simple as on day one. Put a lending sheet on the theme box's contents card where you write down which group took what next to the module names. When you decide which modules to buy, the BlueGrays Workshop list described below helps: when you enter the contents of a single group box, you see which missing part would unlock how many projects.
| Theme box | Contents (quantity) | Topics it opens up |
|---|---|---|
| Display | I2C 16x2 LCD (4), 0.96 inch OLED (4), TM1637 4-digit display (4) | Showing readings on a screen, counters, clocks, menus |
| Motion | SG90 servo (8), geared DC motor and wheel (4), L298N or L9110S driver (4), 28BYJ-48 stepper + ULN2003 (4), 4 x AA battery holder (4) | Robot car, barrier gate, turntable |
| Sensing | PIR (4), soil moisture (4), rain (4), DS18B20 (4), gas sensor (2), flame sensor (2) | Smart greenhouse, alarm, weather station |
| Identity and communication | RC522 RFID (4), infrared receiver + remote (4), keypad (4), HC-05 Bluetooth (2) | Card-operated door, keypad lock, remote control |
| Power (teacher-controlled) | MB102 breadboard power module (4), 18650 cell + holder (4), TP4056 charging module (4), LM2596 buck converter (2) | Battery-powered and portable projects |
Cupboard and box system: numbers, contents cards, colour coding
Everything portable in the lab should have a name and a place. Number the group boxes G1 to G8, the ESP32 boxes E1–E4, the Pico boxes P1–P4, the theme boxes by name and the spare box S; the board, USB cable and breadboard inside each box carry the same number. Fill the cupboard by weight and frequency of use: group boxes at eye level, G1 to G8 from left to right, theme boxes on the shelf above, heavy spare stock at the bottom, batteries and soldering irons in a separate locked compartment. Hang the hand tools on a wall board and draw around each one with a marker; at the end of the lesson an empty outline shows the missing tool without any counting. Stick a laminated contents card inside each box lid: part name, quantity, colour and a small drawing. The card should also have the date of the last count and a line for missing parts.
- Blue: Arduino Uno group boxes (G1–G8) and their cables.
- Green: ESP32 boxes (E1–E4); the 3.3 V warning is written on the lid.
- Purple: Raspberry Pi Pico boxes (P1–P4); the lid notes that MicroPython is installed.
- Yellow: Theme boxes; the lending sheet is inside the lid.
- Red: Things used only with the teacher: batteries, soldering irons, the power supply and the Power box.
- White: The spare box and consumables stock; not opened during lessons, only used to fill gaps.
The counting routine works layer by layer. The group counts its box at the end of every lesson; we covered this two-minute routine in the large-class post. You count the shared equipment and theme boxes once a week; thanks to the tool board and contents cards, it takes no more than five minutes. Don't count small consumables such as resistors, LEDs and wires one by one: put a "minimum" line on every bag or compartment, and when the level drops below the line, add it to the order list. Boards, sensors and modules, on the other hand, are counted individually, because losing an HC-SR04 is not the same as losing an LED. At the end of each term you do a full inventory and test the boards one by one. Instead of punishing lost and broken parts, record them: which part goes missing from which box and how often tells you what to order next and which rule isn't working.
Consumables: how much gets used up in a year?
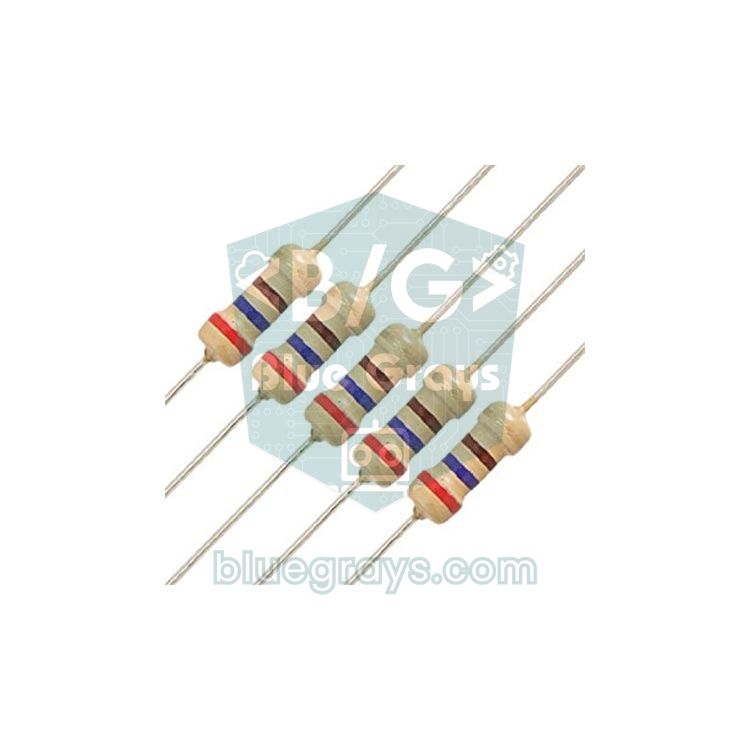
Consumables are the small parts that break, get lost or get damaged during lessons. The numbers below are not measurements but a rough planning estimate based on 8 groups and one lesson a week; use the count records from your first term to find your own rate and update the table. There are three main reasons parts run out: legs bent so often they break, LEDs connected without a resistor or the wrong way round, and small parts dropping under the tables. The first two shrink with good wiring habits, the third with compartment boxes and an end-of-lesson table check. Buying LEDs and resistors in large packs, in separate bags per colour and value, lowers the unit price and makes counting easier. So that students can put spilled resistors back in the right compartment, teach them to read values from the colour bands; the free Color code tool helps with this exercise.
| Consumable | Why it runs out | Yearly estimate (8 groups) | Note |
|---|---|---|---|
| 5 mm LED | Broken legs, no resistor, lost | 150–200 | Separate bag per colour |
| Resistors 220 Ω and 330 Ω | Bent legs, lost | 150–200 | Compartment labelled by value |
| Resistors 1 kΩ and 10 kΩ | Lost | 60–100 | Same compartment system |
| Male-to-male jumper wire | Broken tips, internal breaks | 100–150 | Sort out broken wires with a multimeter |
| Female-to-male and female-to-female jumpers | Loose sockets | 40–60 | A loose socket causes intermittent contact |
| Push button | Broken legs | 15–20 | Small and easily lost |
| Breadboard | Loose springs | 1–2 | Mark rows with poor contact |
| USB cable | Loose socket, broken wire | 2–3 | Retire a cable that connects intermittently right away |
| Solder wire (if you solder) | Use | 1 reel | Optional |
| Labels, bags, tape | Use | 1 pack | Renewing contents cards |
Safety: the 5 V limit, soldering, batteries and first aid
The lab's core safety rule is the power limit: in the first year, every circuit is powered from the computer's USB port, that is, from 5 V. That voltage is low in terms of electric shock; the real risks are parts and wires heating up in a short circuit, soldering iron burns and lithium batteries. Projects that use a relay to switch mains-powered devices are not done in the lab; relay projects use only a low-voltage load. If there will be soldering, make clear from the start that the iron tip is above 300 °C, that it is never left without its stand and that solder fumes are removed with an open window or a fume extractor; if leaded solder is used, hands are washed afterwards. Li-ion and 18650 cells are stored in a locked, fire-resistant box with their terminals unable to touch each other, and half charged for long storage; a swollen, crushed or warm battery is not used but taken to a battery collection point, and charging is never left unattended (details in the TP4056 charging module post). For minor burns, first aid means holding the area under cool running water for about 20 minutes; the location of the first aid kit and fire extinguisher should be posted by the door, and every incident is reported following your school's procedure. Hang the 8 rules below on an A3 poster by the door.
- The USB cable stays unplugged while you build or change a circuit.
- The only power source is the computer's USB; batteries, adapters and power modules are used with the teacher's permission.
- If you see a part that is hot, smells or smokes, unplug the USB and raise your hand.
- No food or drink on the tables; bags stay on the shelf by the entrance.
- Every part goes back to its own box; no swapping parts between boxes.
- Soldering irons, batteries and the power supply are used only at the teacher's desk and with the teacher.
- Wear glasses when trimming legs, and hold the end you are cutting off.
- Don't hide a broken, lost or damaged part; write it on the contents card and tell the teacher.
Yearly maintenance calendar
| When | Tasks | Time | Who? |
|---|---|---|---|
| Start of term (first 2 weeks) | Full count, Blink test with every board, IDE and driver check on the computers, renewing contents cards, reading the rules poster with students | 2–3 hours + first lesson | Teacher, student assistants |
| Every week | Counting theme boxes and the tool board, checking the "minimum" lines in consumables compartments | 5–10 minutes | Teacher |
| Mid-term | Collecting the lost and broken list, refilling the spare box, testing faulty boards, an interim order if needed | 1 hour | Teacher |
| End of term | Full inventory, loss report, cleaning boards and breadboards, bringing batteries to storage charge, order list | 2 hours | Teacher, student assistants |
| End of year | Renewal and expansion decision, updating the budget template, computer updates, yearly report to supporters | Half a day | Teacher and school leadership |
BlueGrays for lab inventory and project planning
You can keep the lab's inventory in BlueGrays with Workshop; since Parts is a Premium feature, you do this on your own teacher account. In Parts you add parts with their quantities, write details such as "330R" or "Red LED" in the Custom Name field and location information such as "G boxes, cupboard 2" in the note; a part whose quantity is running low shows up with a Low Stock label. The real gain is in planning: since Parts is a single inventory, if you enter the contents of one group box rather than the lab's total, the Projects You Can Build list shows the projects each group can build with the parts in its box, while Projects with Missing Components tells you, with labels such as "2 Missing", which projects open up if you add which part, so you can choose the second-year theme boxes accordingly. Details are in the finding projects with the parts you have post. While students follow a project on their own screens, the Required Components list shows quantities, so you can prepare that lesson's boxes to match. When you move beyond the free projects, you can give students Premium with educator packages, as codes bought with a one-time payment that need no card and don't renew automatically. If you want to bring a project specific to your lab into lessons, you share it under Learn > Forum > New Post in the Tutorial category: add photos of the circuit, your code with Add code and the related ready-made projects, then send the post's link to students with Share (steps in the teaching with your own project post).
Document checklist for donations, sponsors and grants
- One-page summary: The lab's purpose, how many students and which subjects it will serve, and how many hours a week it will be used.
- Three-layer needs list: The kit, equipment and infrastructure tables from this post, with quantities.
- Completed budget template: At least two quotes per item, the chosen quote and the reason, with one-off and yearly totals kept separate.
- Room information: Current photos of the room, a simple layout sketch, the state of power outlets and computers.
- Safety plan: The rules poster, how batteries and soldering equipment are stored, first aid and the person in charge.
- Operating plan: The yearly calendar, the counting routine and the name of the teacher responsible for the lab.
- Sustainability: Where the consumables and replacement budget for later years will come from.
- Measurable goals: For example, the number of projects completed per term, an end-of-year exhibition, club activities.
- School leadership approval: A letter of support from the school leadership and how the equipment will be entered in the school's asset register.
- Reporting commitment: When and with what content (photos, project list, inventory) you will report back to the supporter.
A school lab is never set up once and done; in the first year the kits, boxes and rules settle in, in the second year it grows with theme boxes, and in the years after that your count records tell you what runs out and what actually gets used. Once you have packed your first group box, installing BlueGrays on your phone and checking which free projects can be built with the parts in that box is an easy way to draw up your first term's lesson list.
Frequently asked questions
How many Arduino kits does a school lab need?
Divide the number of students by 3 and add about 20% spares. For a class of 24, 8 group kits and 2 spare boards are enough. Groups bigger than 3 tend to leave some students just watching.
Should a school buy Arduino, ESP32 or Raspberry Pi Pico boards?
Make most of them Arduino Uno boards: they run at 5 V, most sensors connect directly and there is plenty of teaching material. A few ESP32 boards cover Wi-Fi and Bluetooth projects, and a few Picos cover the move to MicroPython. For a lab with 8 groups, 4 ESP32 and 4 Pico boards are a good start in the first year.
Does an Arduino lab need a soldering station?
No. Projects built with a breadboard and jumper wires need no soldering, and the first year can go by without it. Buying Picos with soldered headers reduces the need even further. When permanent circuits or exhibition projects begin, you can set up a soldering corner with 2 temperature-controlled stations, ventilation and supervision.
Can you get an electric shock from an Arduino?
The 5 V from USB is a low voltage in terms of electric shock. The real risks are parts heating up in a short circuit, soldering iron burns and damaged lithium batteries. Projects that switch mains-powered devices should not be done in a school lab, and the USB should be unplugged while building circuits.
How should a school store Arduino kits?
Give each group a numbered compartment box with a contents card listing quantities inside the lid. Separate the boxes by colour, keep them in a lockable cupboard and store batteries in a separate fire-resistant box. An end-of-lesson group count, a weekly teacher count and a full inventory at the end of term catch losses early.
How do you plan a budget for a school Arduino lab?
Split the items into three layers, group kits, shared equipment and infrastructure, write down the quantity of each item and fill in the unit price from at least two local quotes. Add up one-off and yearly costs separately and add a 10–15% contingency at the end. This table is also the basis of any donation or grant application.
Projects to build after reading this
See all projects
LED Blink
The very first hello of electronics: switching a single LED on and off. The Arduino turns the LED on and off at short intervals, so the light blinks quickly. You see in the simplest way how the board

Traffic Light
A tiny copy of the traffic light you see on the road every day. Red stays on for two seconds, yellow flashes for a moment, green stays on for two seconds, then it goes back to red through yellow again

LED Control with a Push Button (Push)
Just like a doorbell: the light stays on as long as you press, and goes off when you let go. The Arduino keeps listening to the button; while it's pressed the LED is on, and the moment you lift your f

Night Light with Ldr
A little night light that turns on by itself when it gets dark and goes off when morning comes. A light sensor measures how bright the room is, and the Arduino switches the LED on when it is dark enou

HC-SR04 Distance Measurement (Serial Display)
The HC-SR04 sensor works just like a bat finding its way in the dark: it sends out a sound you cannot hear, listens for the echo and measures how far away the object in front of it is. The Arduino wri

Temperature and Humidity with DHT11
How warm is your room, and is the air humid or dry? The DHT11 sensor measures temperature and humidity, and the Arduino writes the values on a two-line LCD screen, refreshing every couple of seconds.

LED Blink with ESP32
Teaches basic GPIO output usage with ESP32. We achieve a blinking effect by turning an LED on and off from a digital pin. ESP32 version of the classic blink project on Arduino UNO; the basic blink commands in the Arduino environment are the same, but the ESP32's pin layout and 3.3 V GPIO levels differ from those of the Arduino UNO.
Raspberry Pi Pico: Controlling an External LED (Breadboard)
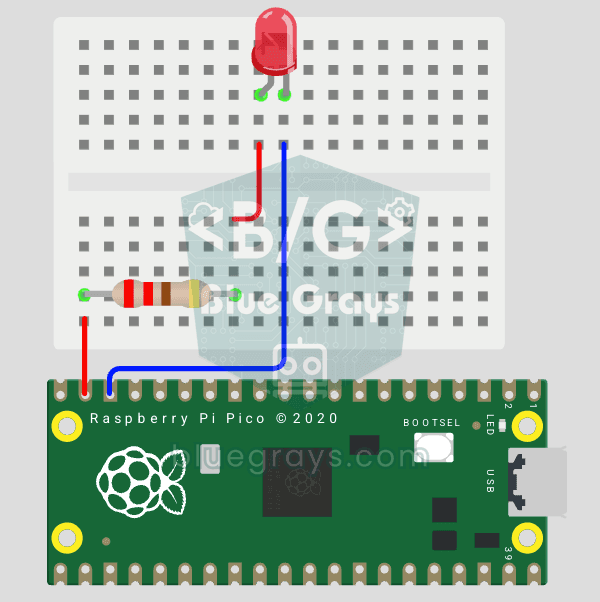
The next step after Pico’s built-in LED: connecting an external LED to the breadboard and controlling it via the GP14 pin. In this project, you’ll learn how to use any of the Pico’s general-purpose GPIO pins as an output, the LED’s polarity (long leg = anode/+, short leg = cathode/–), and why a current-limiting resistor (220Ω) is required. If you don’t include the resistor, excessive current will flow through the LED and it may burn out. The circuit is very simple: Pico GP14 → 220Ω resistor → LE