
Arduino Games: How to Build Pong, T-Rex, Snake and Simon
Arduino game projects step by step: Pong and T-Rex on an OLED, Snake on an LED matrix, Simon, an LCD runner and a reaction test, plus EEPROM high score code.
Making games with Arduino is the most fun way to learn electronics and programming: with an OLED display, a few buttons and a joystick you can build classics like Pong, the T-Rex runner, Snake and the Simon memory game yourself, then challenge your friends to beat your high score. While writing a game you also pick up the most important programming topics almost by accident: timing, state machines, coordinate systems, collision maths, random numbers and permanent memory. All of these games run on a single Arduino Uno; its 2 KB of RAM is enough as long as you use memory wisely.
In this guide we build six games from start to finish: Pong and the T-Rex runner on an OLED display, Snake on an 8x8 and a 16x16 NeoPixel LED matrix, Simon with four LEDs and four buttons, a runner game on a 16x2 LCD and a reaction test accurate to the millisecond. Every game comes with a parts list, wiring and code that compiles. We first learn the skeleton they all share, meaning the game loop, collision detection, scoring and saving a high score in EEPROM, and then reuse it in every game. At the end you'll also find ESP32 and Raspberry Pi Pico versions.
Which game needs which parts?
When you make a game with Arduino, the first decision is the display, because the display decides what kind of game you can make. With just a few LEDs you can already build Simon or a reaction test, while a 128×64-pixel OLED makes Pong and T-Rex possible, with moving graphics and physics. The table below sums up the games in this guide from easiest to hardest:
| Game | Display | Input | Other parts | Difficulty |
|---|---|---|---|---|
| Reaction test | 1 LED + Serial Monitor | 1 button | 220 Ω resistor, optional buzzer | Easy |
| Simon memory game | 4 coloured LEDs | 4 buttons | 4 × 220 Ω resistors, passive buzzer | Easy–medium |
| LCD runner | 16x2 I2C LCD | 1 button | Passive buzzer | Medium |
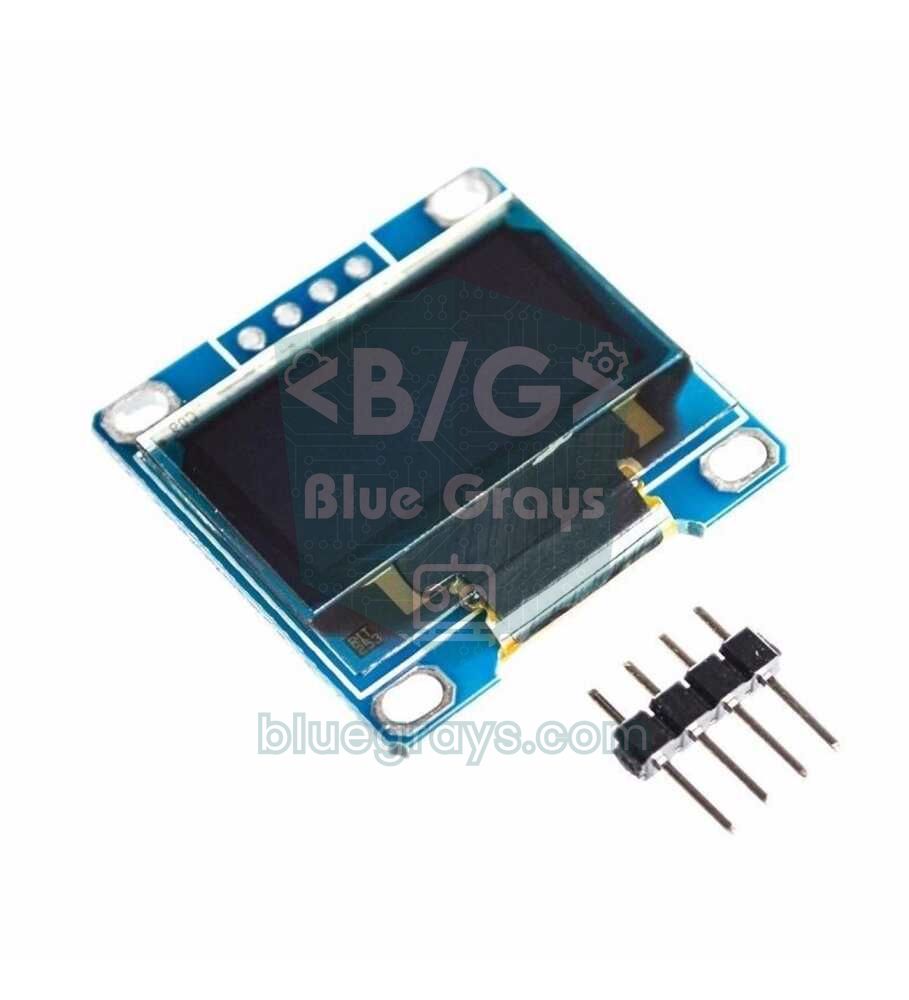
| Pong | 0.96" SSD1306 OLED | Joystick or 10 kΩ potentiometer | Passive buzzer | Medium |
| T-Rex runner | 0.96" SSD1306 OLED | 1 button or the joystick button | Passive buzzer | Medium |
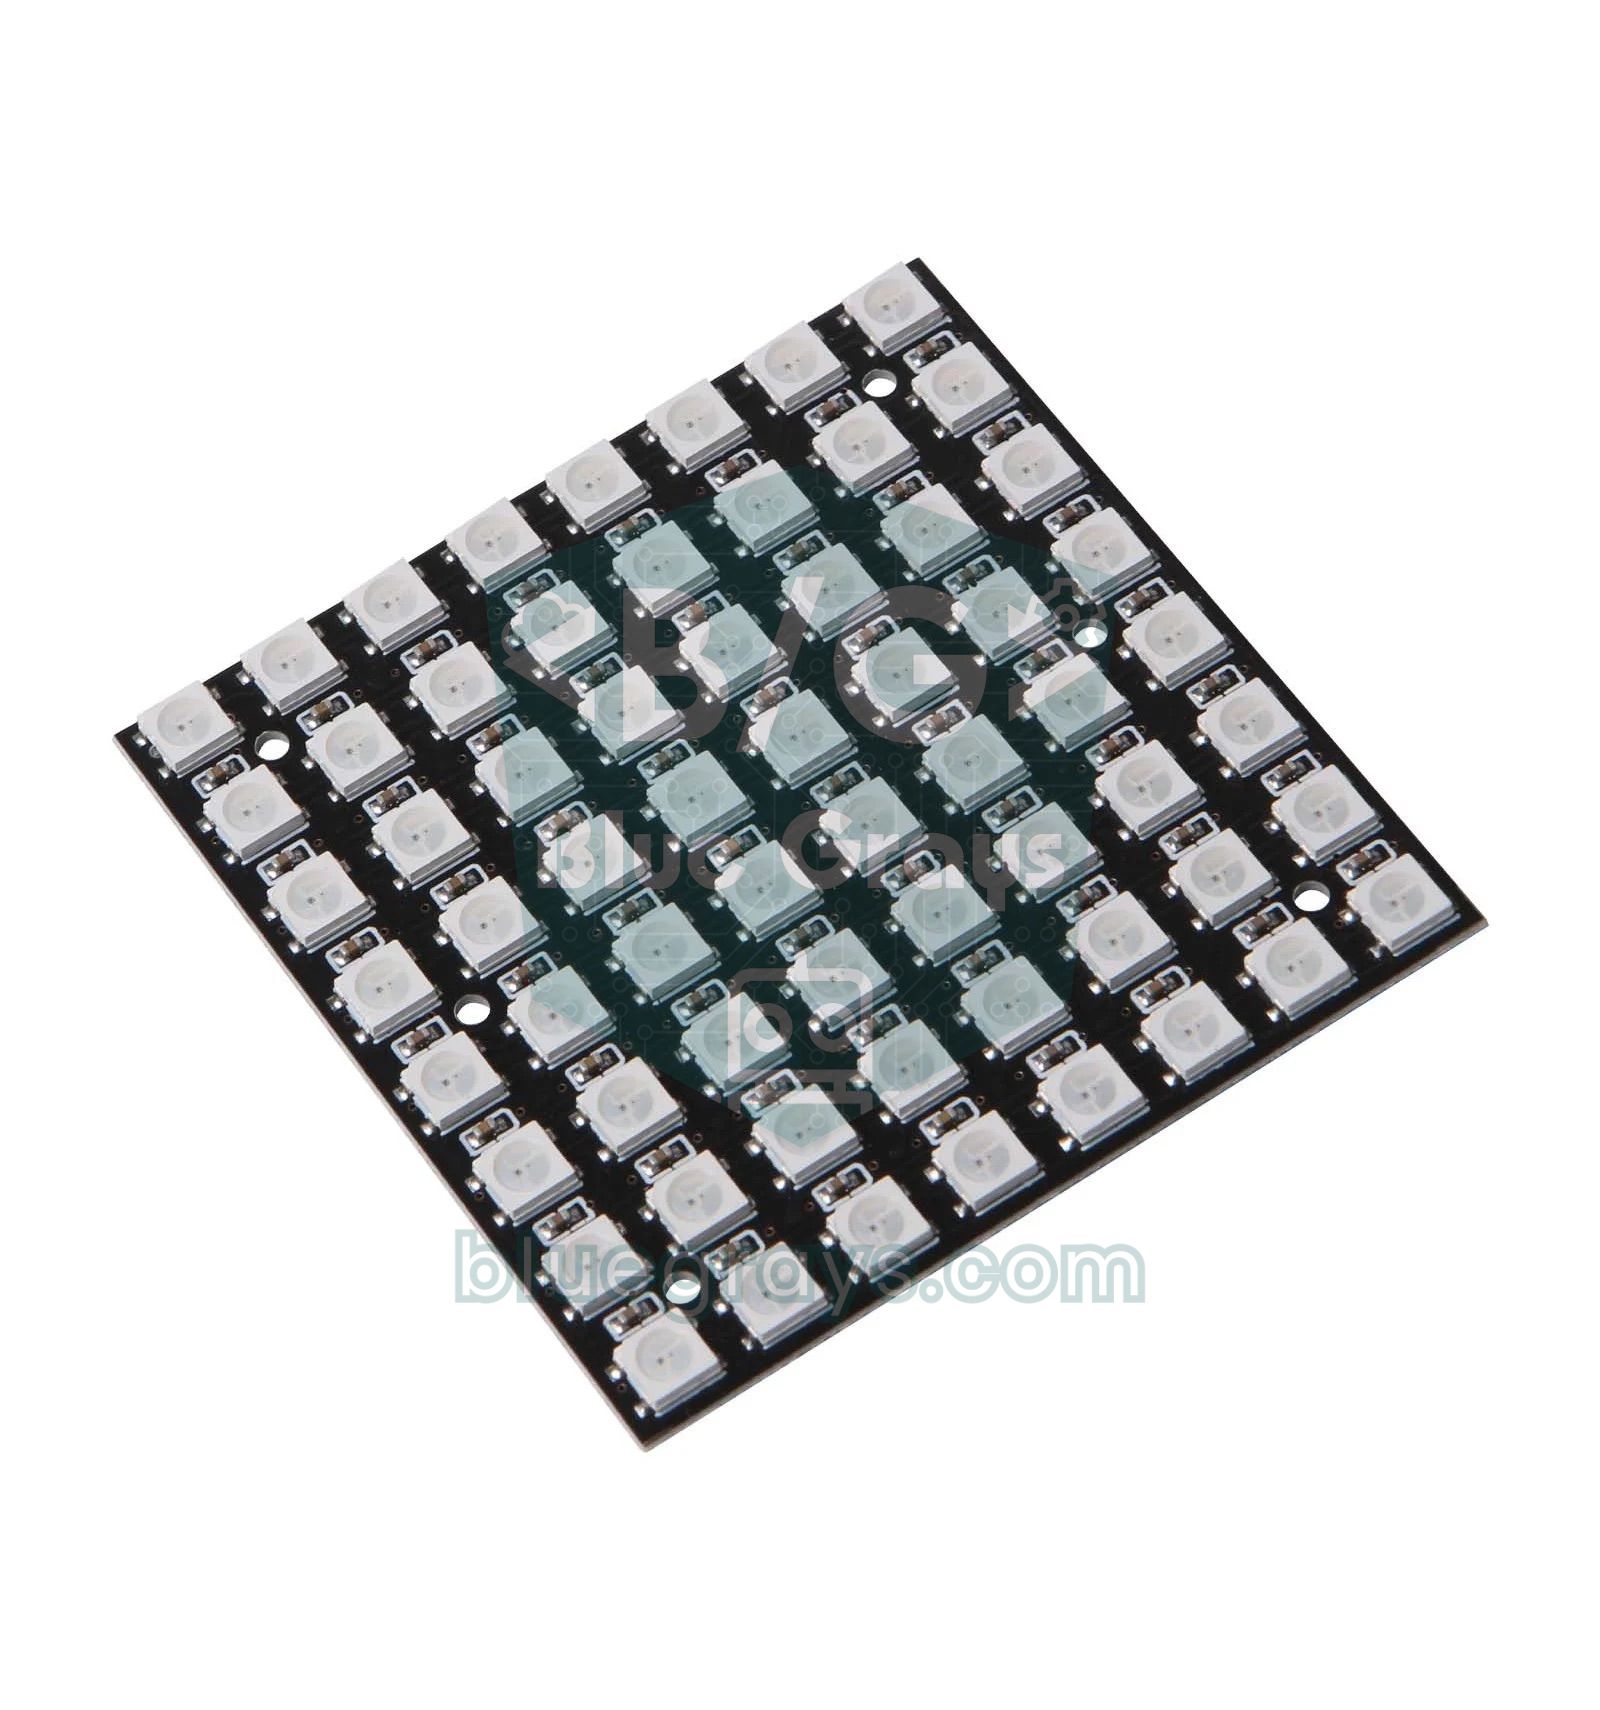
| Snake (8x8) | 8x8 NeoPixel matrix | Joystick | 330 Ω resistor, 1000 µF capacitor | Medium–advanced |
| Snake (16x16) | 16x16 NeoPixel matrix | Joystick | External 5 V 3–4 A power supply | Advanced |

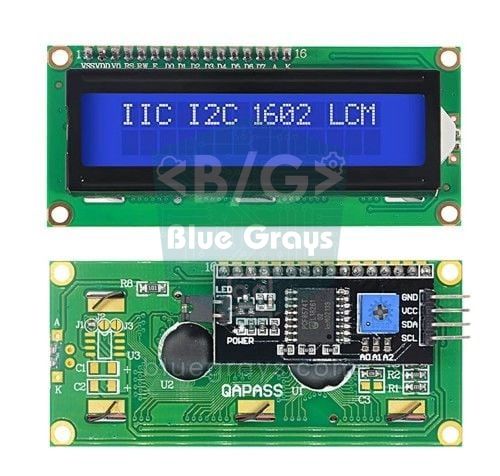
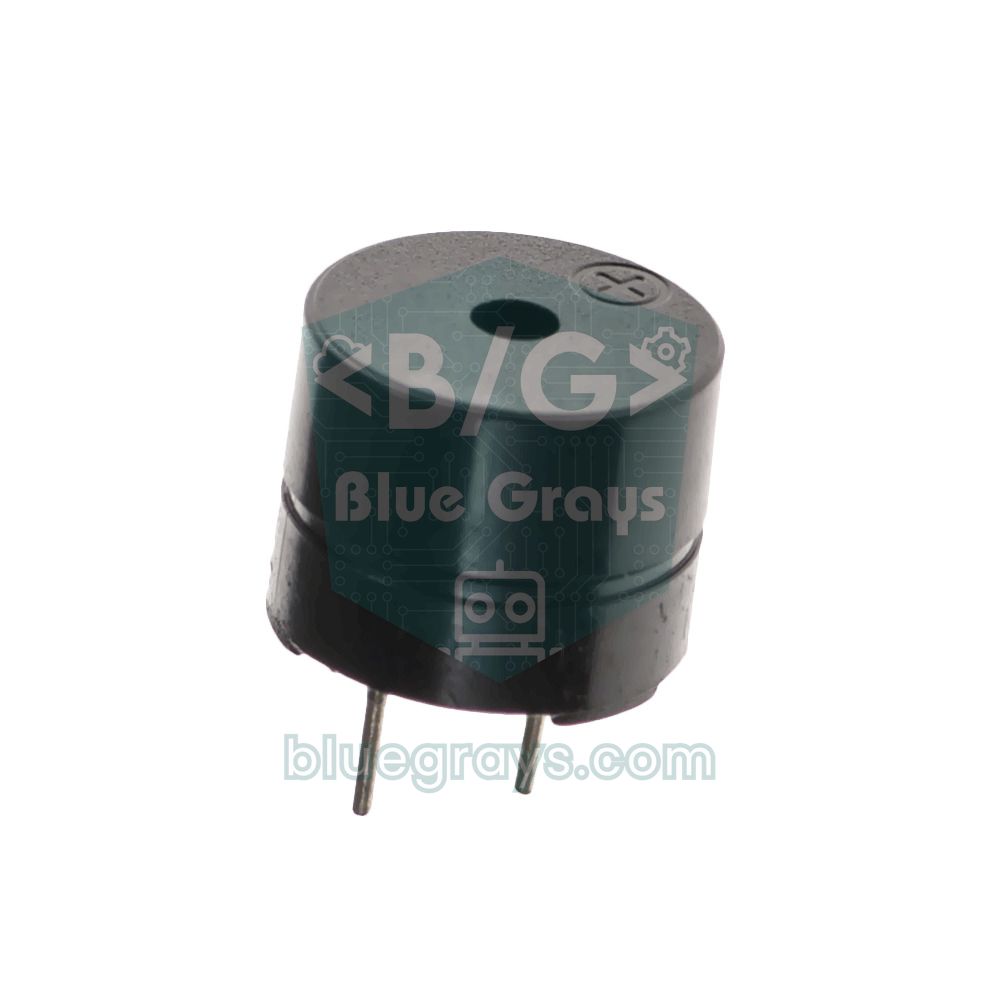
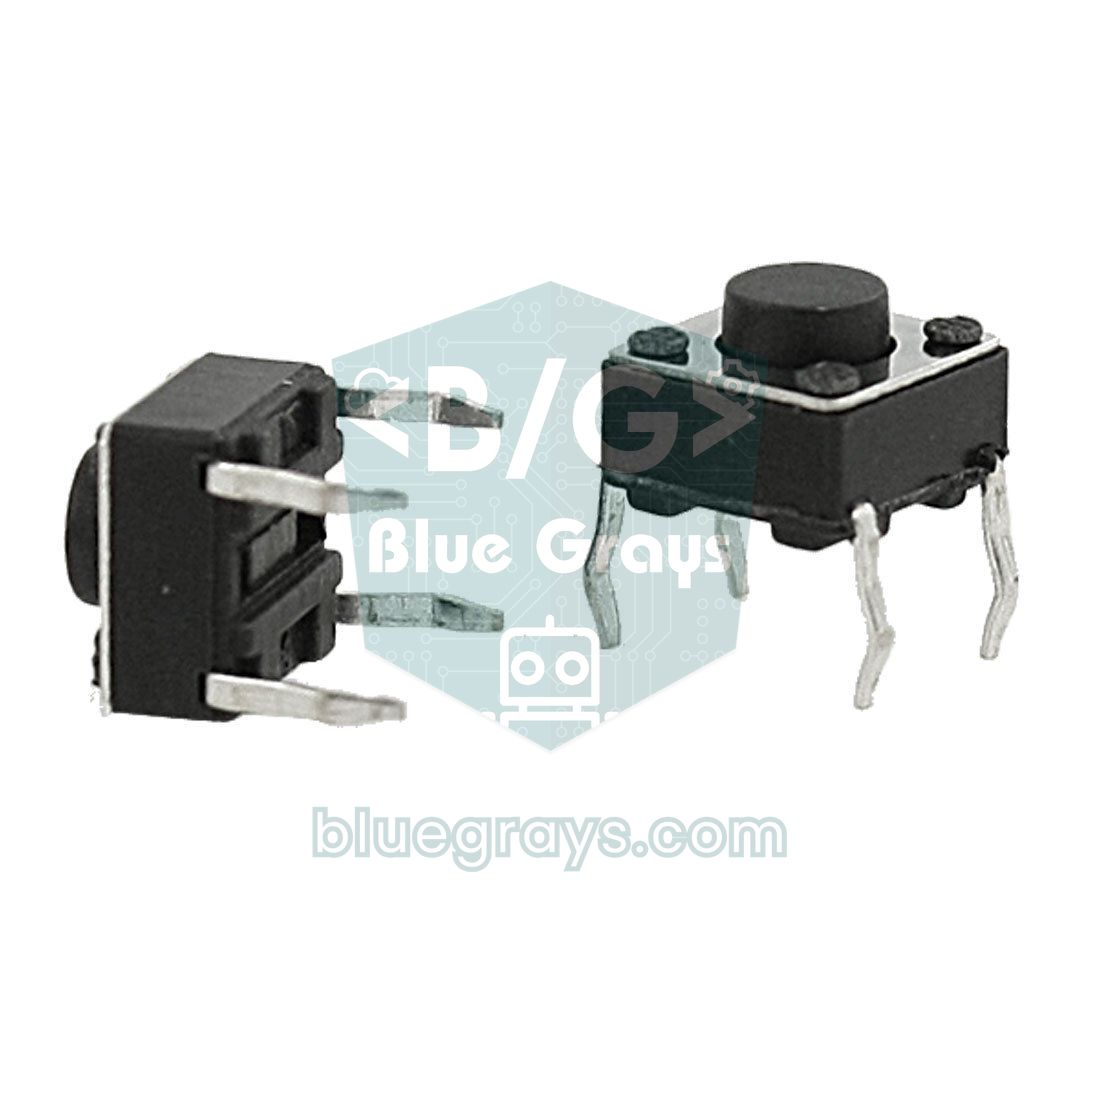
Shared wiring: one circuit as a game console
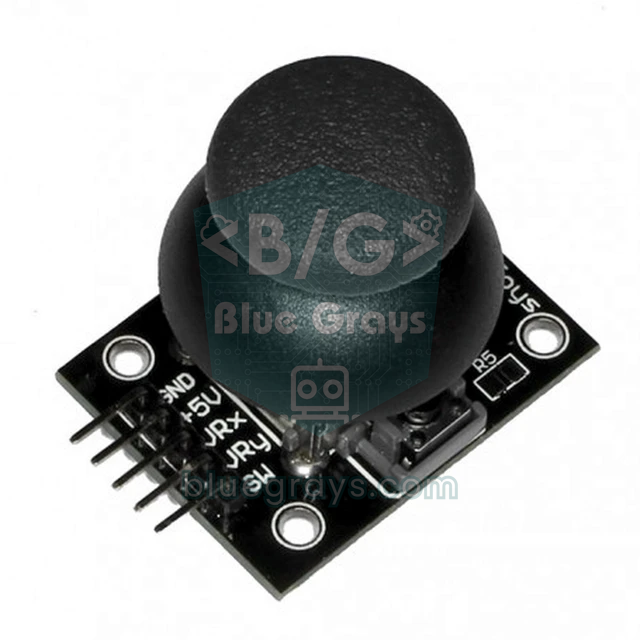
We picked shared pins so that every game except Simon runs on the same circuit. The OLED and the I2C LCD share the same two wires (SDA and SCL); the joystick goes to the analog inputs, the action button to D3 and the buzzer to D8. Once you've built this "game console", you switch games just by uploading different code. You can see your board's full pin map in the Pinout tool.
| Part / pin | Arduino Uno | ESP32 | Raspberry Pi Pico |
|---|---|---|---|
| OLED or I2C LCD: SDA | A4 | GPIO 21 | GP4 |
| OLED or I2C LCD: SCL | A5 | GPIO 22 | GP5 |
| Joystick VRx (X axis) | A0 | GPIO 34 | GP26 |
| Joystick VRy (Y axis) | A1 | GPIO 35 | GP27 |
| Joystick SW (button) | D2 | GPIO 25 | GP15 |
| Action button (other leg to GND) | D3 | GPIO 26 | GP14 |
| Passive buzzer (+) | D8 | GPIO 27 | GP16 |
| NeoPixel DIN (through 330 Ω) | D6 | GPIO 13 | GP22 |
How does a game loop work?
Every video game is built on a four-step loop that repeats dozens of times per second: read the input (buttons, joystick), update the world (position, speed, score), check for collisions and draw the screen. One pass through the loop is called a frame. Thirty frames per second (30 FPS) is enough to look smooth, which means each frame lasts about 33 ms. Arduino's loop() function is already a loop, but it runs very fast and irregularly, so you need to split it into fixed frames with millis().
Avoiding delay() here is essential. If you write delay(33), the Arduino does nothing for those 33 ms, can miss a short button press, and the game speed changes whenever drawing takes more or less time. With millis(), loop() reads the input on every pass but only advances the game when it's time for a new frame. You'll find the difference between the two explained in detail in Arduino millis vs delay. The skeleton below is the basis of every game in this guide:
1// Oyun döngüsü iskeleti / Game loop skeleton
2enum State { MENU, PLAYING, GAME_OVER };   // oyunun durumları / game states
3State state = MENU;
4
5const byte BUTTON_PIN = 3;                 // aksiyon butonu / action button
6const unsigned long FRAME_MS = 33;         // ~30 kare/sn / ~30 frames per second
7unsigned long lastFrame = 0;
8unsigned int score = 0;
9
10// Sıçramasız basış: yalnız basıldığı an true / bounce-free: true only at the moment of a press
11bool buttonPressed() {
12  static bool stable = HIGH, lastRead = HIGH;
13  static unsigned long changedAt = 0;
14  bool r = digitalRead(BUTTON_PIN);
15  if (r != lastRead) { lastRead = r; changedAt = millis(); }
16  if (millis() - changedAt > 15 && r != stable) {   // 15 ms sabit kaldı mı? / stable for 15 ms?
17    stable = r;
18    return stable == LOW;
19  }
20  return false;
21}
22
23void setup() {
24  pinMode(BUTTON_PIN, INPUT_PULLUP);       // basınca LOW / LOW when pressed
25  Serial.begin(9600);
26}
27
28void loop() {
29  bool pressed = buttonPressed();          // 1) giriş: her turda oku / input: read on every pass
30  if (pressed && state != PLAYING) {       // menüden ya da oyun sonundan başlat / start from menu or game over
31    score = 0;
32    state = PLAYING;
33  }
34  if (millis() - lastFrame < FRAME_MS) return;   // kare zamanı gelmedi / not time for a frame yet
35  lastFrame = millis();
36
37  if (state == PLAYING) {
38    score++;                               // 2) güncelle: konum, hız, puan / update: position, speed, score
39    if (score >= 300) state = GAME_OVER;   // 3) çarpışma ya da bitiş kontrolü / collision or end check
40    Serial.println(score);                 // 4) çiz: burada ekrana çizilir / draw: the screen is drawn here
41  }
42}
The second key idea in the code is the state machine. At any moment the game is in one of three states: MENU, PLAYING or GAME_OVER. Each state reacts differently to the same button: in the menu a press starts the game, during play it makes the character jump, and after a game over it starts a new round. Splitting the code like this removes nested if blocks and makes it easy to add a new state, such as PAUSE. We cover the topic in more depth in Arduino state machine.
Reading buttons and a joystick
Wiring buttons with INPUT_PULLUP is the cleanest method: no external resistor is needed, the pin reads HIGH when idle and LOW when pressed. However, a mechanical button bounces for a few milliseconds when it's pressed or released, and the Arduino sees this as several presses in a row. In a game that means jumping twice on one press, or Simon counting a wrong colour. The buttonPressed() function in the skeleton only accepts a new state once the pin has stayed the same for 15 ms, and returns true just once, at the moment of the press. For the circuit and other methods, have a look at How to connect a button to Arduino.
A joystick is made of two potentiometers and a button. On the Uno each axis gives a value from 0 to 1023, and with the stick released the centre is about 512, but this varies from module to module between roughly 490 and 530. That's why grid games use thresholds instead of exact values: below 300 means left or up, above 700 means right or down. The wide zone in between (the dead zone) stops the character from drifting by itself when you let go. In Pong, on the other hand, we map the analog value straight to the paddle: map() converts the 0–1023 range into the paddle's 0–48-pixel travel. Calibration and the direction table are in the joystick module guide.
How does collision detection work?
Collision detection asks whether two objects are in the same place at the same time. In games with a screen, the most common method is the AABB (axis-aligned bounding box) test: you treat each object as a rectangle. Two rectangles overlap only if all four conditions are true together: A's left edge is left of B's right edge, A's right edge is right of B's left edge, and the same two conditions hold on the vertical axis. In code it's a single line: ax < bx + bw && ax + aw > bx && ay < by + bh && ay + ah > by. In grid games (Snake, the LCD runner) it's even simpler: if two cells have the same coordinates, there's a collision.
| Game | What collides with what? | Method |
|---|---|---|
| Pong | Ball with the walls and paddles | AABB + reversing the velocity |
| T-Rex | Dinosaur with the cacti | AABB (with a slightly smaller box) |
| Snake | Head with the walls, body and food | Grid cell equality |
| LCD runner | Runner with a cactus | Same column and same row |
| Simon | Pressed colour with the colour in the sequence | Array element comparison |
| Reaction test | Press time with signal time | Time comparison (false start) |
Scoring and saving a high score in EEPROM
The score lives in a variable in RAM and disappears the moment you unplug the Arduino. To make a high score permanent you use EEPROM: the Arduino Uno's ATmega328P has 1024 bytes of EEPROM that keeps its contents without power. Two bytes of type uint16_t are enough for a high score (0–65535). EEPROM's only weak spot is write endurance: each cell can be written about 100,000 times. That sounds like a lot, but if you write the score every frame, 30 times per second, the cell wears out in about 55 minutes. The right way is to write only when the game ends and the record has been beaten; even with 10 new records a day the cell will last 27 years.
1#include <EEPROM.h>
2
3const int HISCORE_ADDR = 0;          // rekor EEPROM'un 0-1. baytında / high score in EEPROM bytes 0-1
4uint16_t hiScore = 0;
5
6uint16_t loadHiScore() {
7  uint16_t v;
8  EEPROM.get(HISCORE_ADDR, v);       // 2 bayt oku / read 2 bytes
9  if (v == 0xFFFF) v = 0;            // hiç yazılmamış EEPROM 0xFF okunur / blank EEPROM reads 0xFF
10  return v;
11}
12
13void saveIfRecord(uint16_t score) {
14  if (score > hiScore) {             // yalnız rekor kırılınca yaz / write only on a new record
15    hiScore = score;
16    EEPROM.put(HISCORE_ADDR, hiScore);   // put() yalnız değişen baytları yazar / put() writes only changed bytes
17  }
18}
19
20void setup() {
21  Serial.begin(9600);
22  hiScore = loadHiScore();
23  Serial.print(F("Rekor / High score: "));
24  Serial.println(hiScore);
25  saveIfRecord(120);                 // örnek: oyun 120 puanla bitti / example: a game ended with 120 points
26}
27
28void loop() {}
The code has two subtle points. First, every byte of an EEPROM that has never been written is 0xFF, so on the very first start the high score shows up as 65535, and the 0xFFFF check turns it into 0. In the reaction test it's the other way round: 0xFFFF means "no record yet", because a shorter time is better there. Second, EEPROM.put() reads each byte before writing and only writes the bytes that changed, which extends the lifespan even further. For the other EEPROM commands, see Using the Arduino EEPROM. So you can load the games in this guide onto the same Uno one after another, each game has its own address:
| Game | EEPROM address | Stored value |
|---|---|---|
| T-Rex runner | 0–1 | Highest score |
| Snake | 2–3 | Most food eaten |
| LCD runner | 4–5 | Highest score |
| Reaction test | 6–7 | Shortest time (ms) |
| Simon | 8–9 | Highest level reached |
Pong: OLED display and joystick
Pong is the table tennis game released in 1972 that kicked off the video game era. In our version you control the left paddle with the joystick's Y axis (or a potentiometer on A1), and the Arduino plays the right paddle. Parts: an Arduino Uno, a 0.96-inch SSD1306 I2C OLED, a joystick and a passive buzzer. When you install the Adafruit SSD1306 library from the Library Manager, also install its dependency, Adafruit GFX. The display wiring and drawing commands are explained in detail in OLED display SSD1306.
1#include <Wire.h>
2#include <Adafruit_GFX.h>
3#include <Adafruit_SSD1306.h>
4
5Adafruit_SSD1306 display(128, 64, &Wire, -1);
6
7const byte JOY_Y_PIN  = A1;          // joystick VRy ya da potansiyometre / joystick VRy or potentiometer
8const byte BUZZER_PIN = 8;           // pasif buzzer / passive buzzer
9const byte PADDLE_H = 16, PADDLE_W = 3;
10const byte WIN_SCORE = 5;            // 5 sayı alan kazanır / first to 5 wins
11const float MAX_SPEED = 2.8;         // raketten kalın olmasın / keep below paddle thickness + ball size
12const unsigned long FRAME_MS = 30;   // ~33 kare/sn / ~33 frames per second
13
14float ballX, ballY, velX, velY;
15float playerY = 24, cpuY = 24;
16byte playerScore = 0, cpuScore = 0;
17unsigned long lastFrame = 0;
18
19void serve(int dir) {                // topu ortadan at / serve from the center
20  ballX = 63; ballY = 31;
21  velX = 1.8 * dir;
22  velY = random(-10, 11) / 10.0;     // -1,0 ile 1,0 arası / between -1.0 and 1.0
23}
24
25// Topun rakete çarptığı nokta yeni açıyı belirler / where the ball hits the paddle sets the new angle
26void hitPaddle(float paddleY) {
27  float offset = (ballY + 1 - (paddleY + PADDLE_H / 2.0)) / (PADDLE_H / 2.0);  // -1 üst, +1 alt / -1 top, +1 bottom
28  velX = constrain(-velX * 1.05, -MAX_SPEED, MAX_SPEED);   // yön değiştir, %5 hızlan / reverse, 5% faster
29  velY = offset * 1.5;
30  tone(BUZZER_PIN, 880, 15);
31}
32
33void setup() {
34  Serial.begin(9600);
35  if (!display.begin(SSD1306_SWITCHCAPVCC, 0x3C)) {
36    Serial.println(F("SSD1306 allocation failed"));
37    for (;;);                        // ekran yoksa dur / halt without a display
38  }
39  display.setTextColor(SSD1306_WHITE);
40  randomSeed(analogRead(A3));        // boştaki analog pin / a floating analog pin
41  serve(1);
42}
43
44void loop() {
45  if (millis() - lastFrame < FRAME_MS) return;
46  lastFrame = millis();
47
48  // 1) Giriş: oyuncu raketi / Input: player paddle
49  playerY = map(analogRead(JOY_Y_PIN), 0, 1023, 0, 64 - PADDLE_H);
50
51  // 2) Basit yapay zekâ: CPU topu sınırlı hızla izler / Simple AI: the CPU follows the ball at limited speed
52  float target = ballY - PADDLE_H / 2.0;
53  cpuY += constrain(target - cpuY, -1.2, 1.2);
54  cpuY = constrain(cpuY, 0, 64 - PADDLE_H);
55
56  // 3) Topu hareket ettir / Move the ball
57  ballX += velX;
58  ballY += velY;
59
60  // 4) Çarpışmalar / Collisions
61  if (ballY <= 0 || ballY >= 62) {   // üst ve alt duvar / top and bottom walls
62    velY = -velY;
63    ballY = constrain(ballY, 0, 62);
64  }
65  if (velX < 0 && ballX <= 4 && ballX > 0 && ballY + 2 >= playerY && ballY <= playerY + PADDLE_H) {
66    ballX = 4;
67    hitPaddle(playerY);
68  }
69  if (velX > 0 && ballX >= 122 && ballX < 126 && ballY + 2 >= cpuY && ballY <= cpuY + PADDLE_H) {
70    ballX = 122;
71    hitPaddle(cpuY);
72  }
73
74  // 5) Sayı / Point
75  if (ballX <= 0)   { cpuScore++;    tone(BUZZER_PIN, 220, 200); serve(1); }
76  if (ballX >= 126) { playerScore++; tone(BUZZER_PIN, 660, 200); serve(-1); }
77
78  // 6) Çiz / Draw
79  display.clearDisplay();
80  for (byte y = 0; y < 64; y += 6) display.drawFastVLine(63, y, 3, SSD1306_WHITE);  // orta çizgi / center line
81  display.fillRect(1, (int)playerY, PADDLE_W, PADDLE_H, SSD1306_WHITE);
82  display.fillRect(124, (int)cpuY, PADDLE_W, PADDLE_H, SSD1306_WHITE);
83  display.fillRect((int)ballX, (int)ballY, 2, 2, SSD1306_WHITE);
84  display.setTextSize(1);
85  display.setCursor(52, 0); display.print(playerScore);
86  display.setCursor(70, 0); display.print(cpuScore);
87  display.display();
88
89  // 7) Oyun bitti mi? / Game over?
90  if (playerScore >= WIN_SCORE || cpuScore >= WIN_SCORE) {
91    display.setTextSize(2);
92    if (playerScore >= WIN_SCORE) { display.setCursor(22, 24); display.print(F("YOU WIN")); }
93    else                          { display.setCursor(10, 24); display.print(F("GAME OVER")); }
94    display.display();
95    delay(3000);
96    playerScore = cpuScore = 0;
97    serve(1);
98  }
99}
What makes Pong fun is the hitPaddle() function. If the ball hits the middle of the paddle it comes back almost straight; if it hits the edge it bounces off at a sharp angle and puts pressure on the opponent. We do this by scaling the ball's distance from the paddle's centre to a value between -1 and +1 and turning it into vertical speed. The ball speeds up by 5% with every hit and is capped by MAX_SPEED. The Arduino's paddle can move at most 1.2 pixels per frame, so if you give the ball a sharp angle it can't keep up and you score. To make the game harder, raise that value to 1.5; for two players, delete the CPU lines and control the second paddle with a potentiometer on A2.
Why a 30 ms frame time? The Uno sends the 1024-byte frame buffer to the OLED over 400 kHz I2C in about 25 ms, so the display can't show more than 35–40 frames per second. Keeping the frame time just above that transfer time makes the game speed steady. And don't be fooled by the compiler's "Global variables use 28%" report: the SSD1306 buffer is allocated at run time, so real RAM usage climbs to about 78%. If memory runs out you'll see the SSD1306 allocation failed error; we've collected the fixes in Arduino low memory.
T-Rex runner: jump physics and high score
We're bringing the dinosaur game that Chrome shows when you're offline to the OLED display. The dinosaur runs on the spot, cacti scroll from right to left and you jump over them by pressing the button. To make the jump look realistic we use simple physics: pressing the button sets the vertical speed to -4.2 pixels per frame, every frame gravity adds 0.3 to that speed, and the position changes by the speed. So the dinosaur rises while slowing down, hangs at the top for a moment and falls faster and faster; it climbs about 27 pixels and stays in the air for 27 frames, about 0.8 seconds. The parts are the same as for Pong; to jump you use the button on D3 or the joystick button.
1#include <Wire.h>
2#include <EEPROM.h>
3#include <Adafruit_GFX.h>
4#include <Adafruit_SSD1306.h>
5
6Adafruit_SSD1306 display(128, 64, &Wire, -1);
7
8const byte JUMP_PIN     = 3;         // aksiyon butonu / action button
9const byte JOY_SW_PIN   = 2;         // joystick butonu da zıplatır / the joystick button jumps too
10const byte BUZZER_PIN   = 8;
11const int  HISCORE_ADDR = 0;         // EEPROM 0-1. bayt / EEPROM bytes 0-1
12const byte GROUND_Y = 56;            // zemin çizgisi / ground line
13const byte DINO_X = 10, DINO_W = 14, DINO_H = 14;
14const float JUMP_V  = -4.2;          // zıplama hızı (piksel/kare) / jump speed (px/frame)
15const float GRAVITY = 0.3;           // yer çekimi (piksel/kare²) / gravity (px/frame²)
16const unsigned long FRAME_MS = 30;   // ~33 kare/sn / ~33 frames per second
17
18enum State { MENU, PLAYING, GAME_OVER };
19State state = MENU;
20
21struct Cactus { float x; byte w, h; };
22Cactus cacti[2];
23
24float dinoY, velY, speed;
25uint16_t score = 0, hiScore = 0;
26unsigned long lastFrame = 0;
27
28bool jumpHeld() {
29  return digitalRead(JUMP_PIN) == LOW || digitalRead(JOY_SW_PIN) == LOW;
30}
31
32uint16_t loadHiScore() {
33  uint16_t v;
34  EEPROM.get(HISCORE_ADDR, v);
35  return (v == 0xFFFF) ? 0 : v;      // boş EEPROM 0xFFFF okunur / blank EEPROM reads 0xFFFF
36}
37
38void placeCactus(byte i, float startX) {
39  cacti[i].x = startX;
40  cacti[i].w = random(4, 9);         // 4-8 piksel genişlik / 4-8 px wide
41  cacti[i].h = random(8, 17);        // 8-16 piksel yükseklik / 8-16 px tall
42}
43
44void resetGame() {
45  dinoY = GROUND_Y - DINO_H;
46  velY = 0;
47  speed = 2.0;
48  score = 0;
49  placeCactus(0, 140);
50  placeCactus(1, 140 + random(70, 140));
51}
52
53// İki dikdörtgen üst üste biniyor mu? (AABB) / Do two rectangles overlap? (AABB)
54bool overlap(int ax, int ay, int aw, int ah, int bx, int by, int bw, int bh) {
55  return ax < bx + bw && ax + aw > bx && ay < by + bh && ay + ah > by;
56}
57
58void drawDino(int x, int y, bool legA) {
59  display.fillRect(x + 6, y, 8, 5, SSD1306_WHITE);                  // kafa / head
60  display.drawPixel(x + 9, y + 1, SSD1306_BLACK);                   // göz / eye
61  display.fillRect(x, y + 5, 10, 6, SSD1306_WHITE);                 // gövde / body
62  display.fillRect(x + 2, y + 11, 2, legA ? 3 : 1, SSD1306_WHITE);  // sol bacak / left leg
63  display.fillRect(x + 6, y + 11, 2, legA ? 1 : 3, SSD1306_WHITE);  // sağ bacak / right leg
64}
65
66void drawScene() {
67  display.clearDisplay();
68  display.drawFastHLine(0, GROUND_Y, 128, SSD1306_WHITE);
69  bool onGround = dinoY >= GROUND_Y - DINO_H;
70  drawDino(DINO_X, (int)dinoY, onGround ? (score / 4) % 2 : true);  // koşma animasyonu / running animation
71  for (byte i = 0; i < 2; i++) {
72    display.fillRect((int)cacti[i].x, GROUND_Y - cacti[i].h, cacti[i].w, cacti[i].h, SSD1306_WHITE);
73  }
74  display.setTextSize(1);
75  display.setCursor(0, 0);  display.print(score);
76  display.setCursor(80, 0); display.print(F("HI ")); display.print(hiScore);
77}
78
79void showMessage(const __FlashStringHelper *msg) {
80  display.fillRect(14, 18, 100, 28, SSD1306_BLACK);
81  display.drawRect(14, 18, 100, 28, SSD1306_WHITE);
82  display.setCursor(64 - strlen_P((const char *)msg) * 3, 28);   // ortala (karakter 6 piksel) / center (6 px per char)
83  display.print(msg);
84  display.display();
85}
86
87void gameOver() {
88  tone(BUZZER_PIN, 150, 300);
89  if (score > hiScore) {             // yeni rekor: yalnız şimdi yaz / new record: write only now
90    hiScore = score;
91    EEPROM.put(HISCORE_ADDR, hiScore);
92  }
93  drawScene();
94  showMessage(F("GAME OVER"));
95  delay(800);                        // basılı buton hemen yeniden başlatmasın / a held button must not restart at once
96  state = GAME_OVER;
97}
98
99void setup() {
100  pinMode(JUMP_PIN, INPUT_PULLUP);
101  pinMode(JOY_SW_PIN, INPUT_PULLUP);
102  Serial.begin(9600);
103  if (!display.begin(SSD1306_SWITCHCAPVCC, 0x3C)) {
104    Serial.println(F("SSD1306 allocation failed"));
105    for (;;);
106  }
107  display.setTextColor(SSD1306_WHITE);
108  randomSeed(analogRead(A3));
109  hiScore = loadHiScore();
110  if (digitalRead(JUMP_PIN) == LOW) {    // açılışta basılıysa rekoru sıfırla / held at power-up: reset the record
111    hiScore = 0;
112    EEPROM.put(HISCORE_ADDR, hiScore);
113  }
114  resetGame();
115  drawScene();
116  showMessage(F("PRESS START"));
117}
118
119void loop() {
120  if (millis() - lastFrame < FRAME_MS) return;
121  lastFrame = millis();
122
123  if (state != PLAYING) {            // menü ya da oyun sonu: basınca başla / menu or game over: press to start
124    if (jumpHeld()) {
125      while (jumpHeld());            // bırakılmasını bekle / wait for release
126      resetGame();
127      state = PLAYING;
128    }
129    return;
130  }
131
132  // 1) Giriş ve fizik / Input and physics
133  bool onGround = dinoY >= GROUND_Y - DINO_H;
134  if (onGround && jumpHeld()) {
135    velY = JUMP_V;
136    tone(BUZZER_PIN, 1200, 20);
137  }
138  velY += GRAVITY;                   // her karede hız artar / velocity grows every frame
139  dinoY += velY;
140  if (dinoY > GROUND_Y - DINO_H) { dinoY = GROUND_Y - DINO_H; velY = 0; }   // yere indi / landed
141
142  // 2) Engeller ve çarpışma / Obstacles and collision
143  for (byte i = 0; i < 2; i++) {
144    cacti[i].x -= speed;
145    if (cacti[i].x < -(float)cacti[i].w) {            // ekrandan çıktı / left the screen
146      float otherX = cacti[1 - i].x;
147      placeCactus(i, max(128.0, otherX + random(70, 140)));
148    }
149    // biraz küçük çarpışma kutusu daha adil hissettirir / a slightly smaller hitbox feels fairer
150    if (overlap(DINO_X + 2, (int)dinoY + 1, DINO_W - 4, DINO_H - 2,
151                (int)cacti[i].x, GROUND_Y - cacti[i].h, cacti[i].w, cacti[i].h)) {
152      gameOver();
153      return;
154    }
155  }
156
157  // 3) Puan ve zorluk / Score and difficulty
158  score++;
159  if (score % 200 == 0 && speed < 5.0) speed += 0.25;   // yaklaşık 6 sn'de bir hızlan / speed up every ~6 s
160
161  // 4) Çiz / Draw
162  drawScene();
163  display.display();
164}| Setting | Value | Effect |
|---|---|---|
| JUMP_V | -4.2 | Jump strength; at -5 the dinosaur climbs about 40 pixels, close to the top of the screen |
| GRAVITY | 0.3 | A bigger value makes the jump shorter and sharper |
| speed | 2.0 → 5.0 | Speed of the cacti; grows by 0.25 every 200 frames |
| random(70, 140) | pixels | Distance between two cacti; smaller values make the game harder |
| Hitbox | 10×12 pixels | Smaller than the 14×14 drawn dinosaur, so near misses don't count as deaths |
The high score is written to EEPROM the moment the game ends, and only if it was beaten; it appears in the top-right corner as HI. If you hold the D3 button while powering up the board, the record is reset, handy when you start a new tournament with friends. The height and width of the cacti come from random(). To make every game start differently, the randomSeed(analogRead(A3)) line uses the noise of an unconnected analog pin as the seed.
Snake on an LED matrix (8x8 and 16x16)
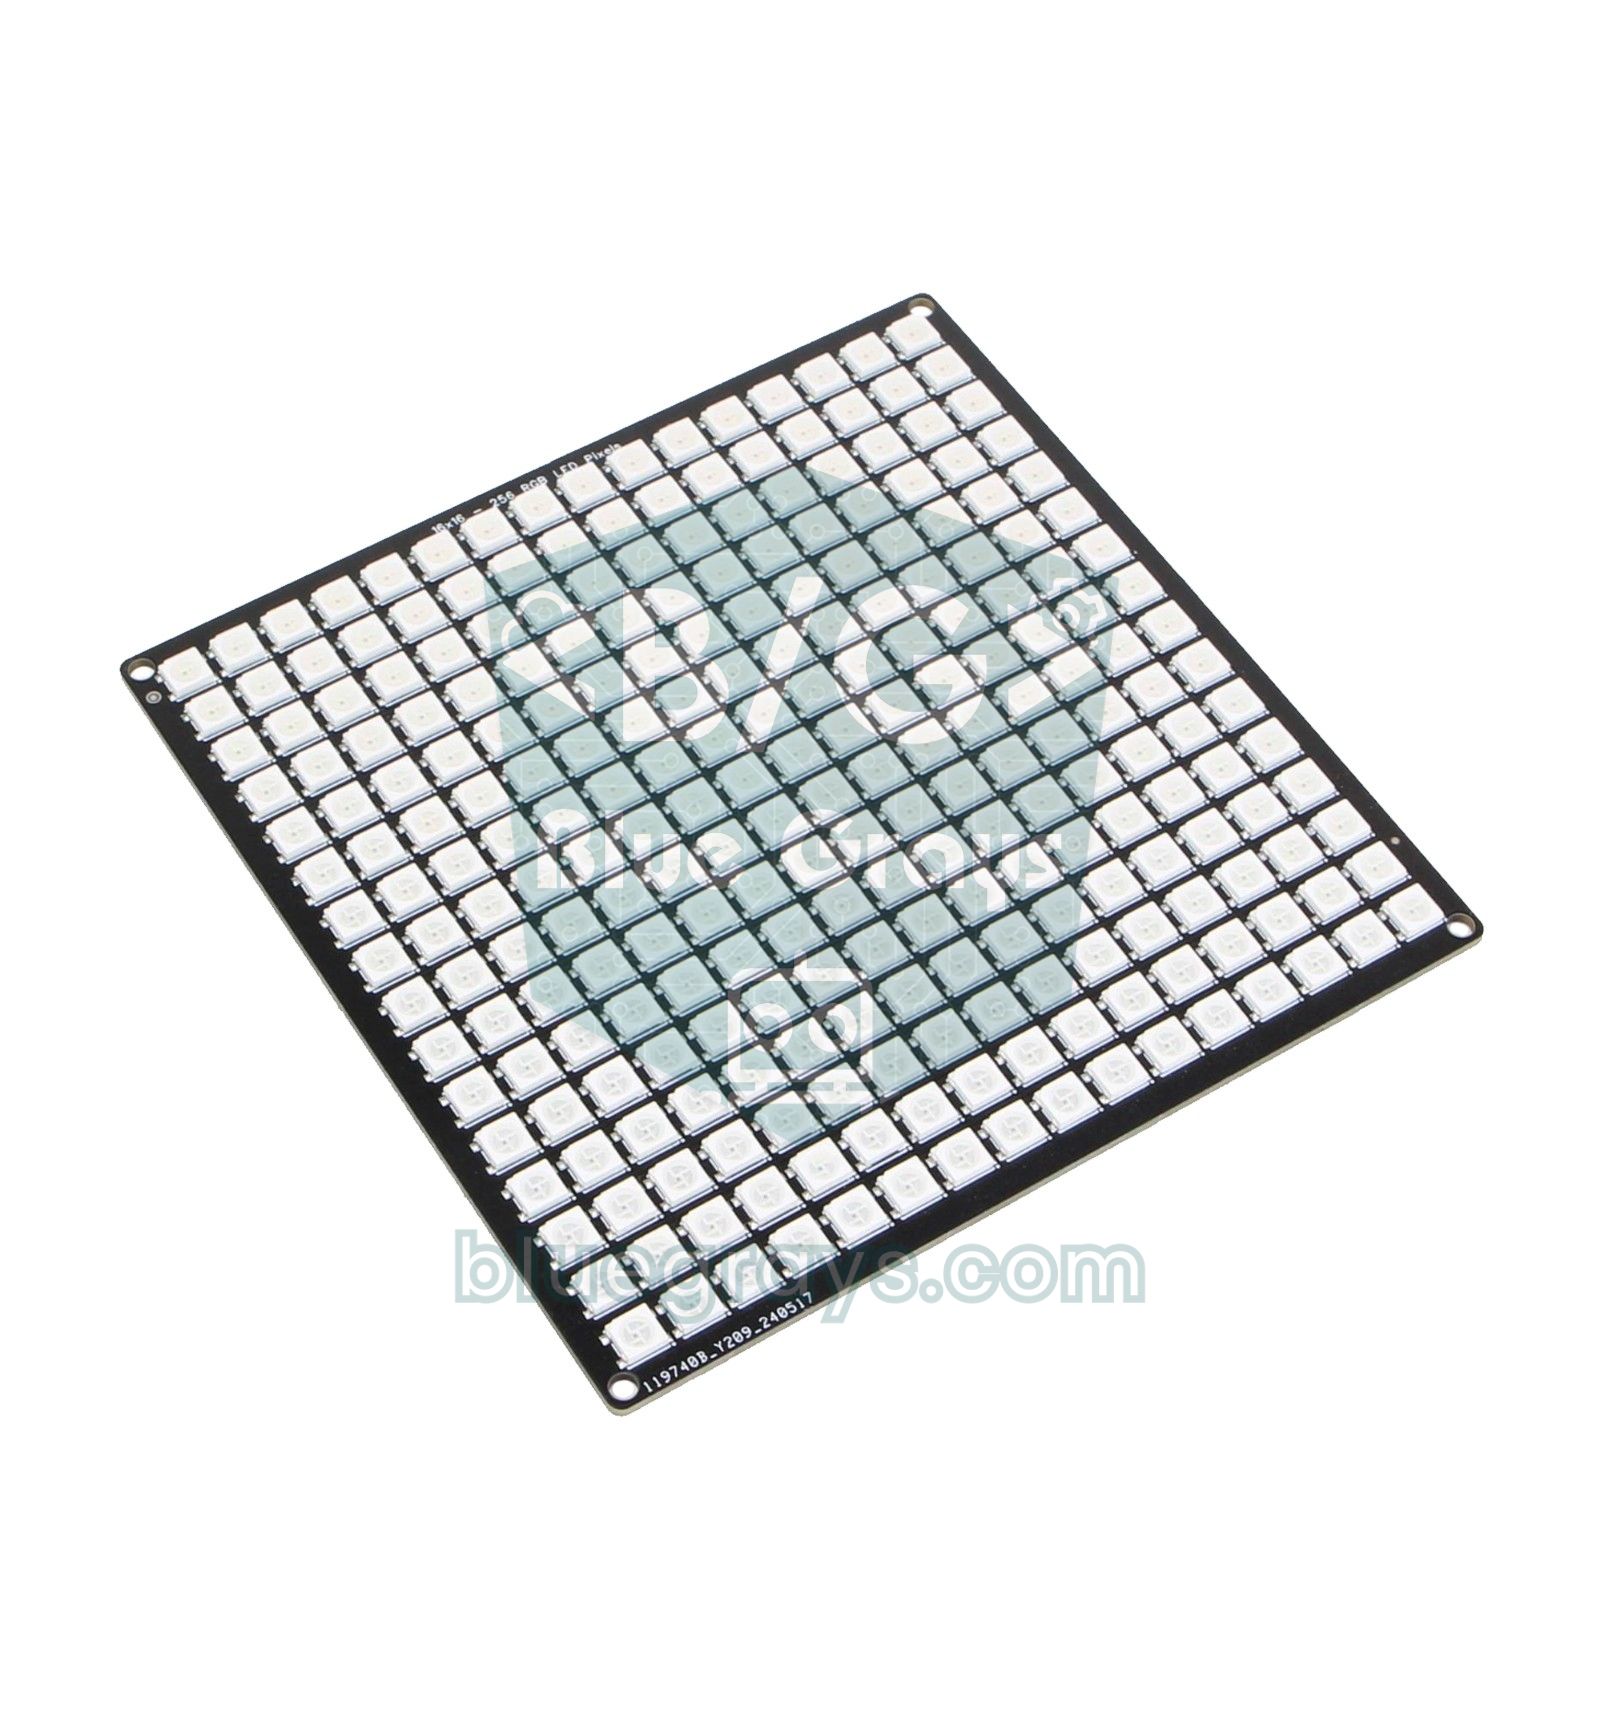
The Snake game made famous by old Nokia phones is best played on an LED matrix, because every LED is one game cell. We use a colour WS2812B NeoPixel matrix: the 8x8 version has 64 pixels and the 16x16 version 256, all driven over a single data wire. The snake's body is stored in two arrays (snakeX and snakeY), and element 0 is the head. On every step the body shifts by one cell and the new position is written to the head; when the snake eats, the tail isn't removed, so it grows by one cell. To compile the code, install the Adafruit NeoPixel library; wiring details are in the WS2812B NeoPixel guide.
1#include <Adafruit_NeoPixel.h>
2#include <EEPROM.h>
3
4const byte W = 8, H = 8;             // 16x16 matris için 16 yap / set to 16 for a 16x16 matrix
5const bool SERPENTINE = false;       // zikzak dizilimli panelde true / true for zigzag-wired panels
6const byte DATA_PIN = 6;             // DIN, 330 Ω üzerinden / DIN through 330 Ω
7const byte JOY_X = A0, JOY_Y = A1, JOY_SW = 2;
8const byte BUZZER_PIN = 8;
9const int  HISCORE_ADDR = 2;         // EEPROM 2-3. bayt / EEPROM bytes 2-3
10
11Adafruit_NeoPixel matrix(W * H, DATA_PIN, NEO_GRB + NEO_KHZ800);
12
13byte snakeX[W * H], snakeY[W * H];   // [0] baş, sonrası gövde / [0] head, then the body
14int snakeLen;
15int8_t dirX, dirY, nextDX, nextDY;
16byte foodX, foodY;
17unsigned int stepMs;
18unsigned long lastStep = 0;
19uint16_t hiScore;
20bool alive = false;
21
22// (x, y) → LED sırası / (x, y) → LED index
23uint16_t xyToIndex(byte x, byte y) {
24  if (SERPENTINE && (y & 1)) return y * W + (W - 1 - x);   // tek satırlar ters yönde / odd rows run backwards
25  return y * W + x;
26}
27
28bool onSnake(byte x, byte y) {
29  for (int i = 0; i < snakeLen; i++) {
30    if (snakeX[i] == x && snakeY[i] == y) return true;
31  }
32  return false;
33}
34
35void placeFood() {
36  do {                               // yem yılanın üstüne düşmesin / food must not land on the snake
37    foodX = random(W);
38    foodY = random(H);
39  } while (onSnake(foodX, foodY));
40}
41
42void resetGame() {
43  snakeLen = 3;
44  for (int i = 0; i < snakeLen; i++) { snakeX[i] = 3 - i; snakeY[i] = H / 2; }
45  dirX = nextDX = 1;                 // sağa doğru başla / start moving right
46  dirY = nextDY = 0;
47  stepMs = 300;
48  placeFood();
49  alive = true;
50}
51
52void readJoystick() {
53  int x = analogRead(JOY_X), y = analogRead(JOY_Y);
54  // Geri dönüş yasak: kontrol şimdiki yöne göre / no reversing: check against the current direction
55  if      (x < 300 && dirX != 1)  { nextDX = -1; nextDY = 0; }
56  else if (x > 700 && dirX != -1) { nextDX = 1;  nextDY = 0; }
57  else if (y < 300 && dirY != 1)  { nextDX = 0;  nextDY = -1; }
58  else if (y > 700 && dirY != -1) { nextDX = 0;  nextDY = 1; }
59}
60
61void draw() {
62  matrix.clear();
63  matrix.setPixelColor(xyToIndex(foodX, foodY), matrix.Color(255, 0, 0));      // yem kırmızı / food red
64  for (int i = snakeLen - 1; i >= 0; i--) {
65    uint32_t c = (i == 0) ? matrix.Color(255, 200, 0) : matrix.Color(0, 160, 0); // baş sarı / head yellow
66    matrix.setPixelColor(xyToIndex(snakeX[i], snakeY[i]), c);
67  }
68  matrix.show();
69}
70
71void gameOver() {
72  alive = false;
73  uint16_t score = snakeLen - 3;     // yenen yem sayısı / food eaten
74  tone(BUZZER_PIN, 150, 400);
75  if (score > hiScore) { hiScore = score; EEPROM.put(HISCORE_ADDR, hiScore); }
76  for (byte k = 0; k < 3; k++) {     // kırmızı yanıp sön / flash red
77    matrix.fill(matrix.Color(80, 0, 0)); matrix.show(); delay(200);
78    matrix.clear();                      matrix.show(); delay(200);
79  }
80  for (uint16_t i = 0; i < score && i < W * H; i++) matrix.setPixelColor(i, matrix.Color(0, 0, 120));  // puan kadar LED / one LED per point
81  matrix.show();
82  Serial.print(F("Skor / Score: "));  Serial.print(score);
83  Serial.print(F("  Rekor / Best: ")); Serial.println(hiScore);
84}
85
86void step() {
87  dirX = nextDX; dirY = nextDY;
88  int nx = snakeX[0] + dirX, ny = snakeY[0] + dirY;
89  if (nx < 0 || nx >= W || ny < 0 || ny >= H) { gameOver(); return; }   // duvar / wall
90
91  bool eat = (nx == foodX && ny == foodY);
92  // Yem yoksa kuyruk ucu boşalacağı için ona çarpmak sayılmaz / without food the tail tip moves away, so it is not a hit
93  int checkLen = eat ? snakeLen : snakeLen - 1;
94  for (int i = 0; i < checkLen; i++) {
95    if (snakeX[i] == nx && snakeY[i] == ny) { gameOver(); return; }    // kendine çarptı / hit itself
96  }
97
98  if (eat) snakeLen++;
99  for (int i = snakeLen - 1; i > 0; i--) {      // gövdeyi bir hücre kaydır / shift the body one cell
100    snakeX[i] = snakeX[i - 1];
101    snakeY[i] = snakeY[i - 1];
102  }
103  snakeX[0] = nx; snakeY[0] = ny;
104
105  if (eat) {
106    tone(BUZZER_PIN, 1000, 40);
107    if (stepMs > 120) stepMs -= 10;             // her yemde hızlan / faster after every food
108    if (snakeLen == W * H) { gameOver(); return; }   // tahta doldu: kazandın / board full: you win
109    placeFood();
110  }
111}
112
113void setup() {
114  pinMode(JOY_SW, INPUT_PULLUP);
115  Serial.begin(9600);
116  matrix.begin();
117  matrix.setBrightness(30);          // düşük parlaklık = düşük akım / low brightness = low current
118  randomSeed(analogRead(A3));
119  EEPROM.get(HISCORE_ADDR, hiScore);
120  if (hiScore == 0xFFFF) hiScore = 0;
121  resetGame();
122  draw();
123}
124
125void loop() {
126  if (!alive) {                      // oyun bitti: joystick butonuyla yeniden / game over: restart with the joystick button
127    if (digitalRead(JOY_SW) == LOW) { resetGame(); draw(); delay(300); }
128    return;
129  }
130  readJoystick();                    // her turda oku, hiçbir hareketi kaçırma / read on every pass, never miss a move
131  if (millis() - lastStep >= stepMs) {
132    lastStep = millis();
133    step();
134    if (alive) draw();
135  }
136}
There are three critical rules in the code. No reversing: if a snake moving right suddenly turns left, it runs into its own neck; readJoystick() checks the new direction against the snake's current direction rather than the pending one, so even two quick moves can't turn it around. Tail exception: on a step without food the tip of the tail moves away, so moving the head into that cell is not a collision. Placing food: placeFood() keeps trying until the food doesn't land on the snake. Each piece of food shortens the step time by 10 ms (from 300 ms down to 120 ms); when the game ends, one LED lights blue for every piece you ate, and the record goes into EEPROM.
It also matters how the LEDs in your matrix are wired. On most rigid 8x8 boards the LEDs run row by row in the same direction (SERPENTINE = false). Flexible 16x16 panels are usually wired in a zigzag: one row runs left to right, the next right to left. If the snake jumps diagonally or runs backwards on every other row, set SERPENTINE to true; if the directions come out reversed, rotate the joystick or swap the 300 and 700 thresholds. For 16x16, just set W and H to 16; the snake arrays then take 512 bytes, the NeoPixel buffer 768 bytes, and about 75% of the Uno's RAM is used.
Simon memory game: 4 LEDs and 4 buttons
Simon is the legendary memory game released in 1978: each round the device adds one colour to the sequence and you repeat the whole sequence in the same order. Parts: four coloured LEDs (green, red, yellow, blue), a 220 Ω resistor for each, four buttons and a passive buzzer. Connect the LEDs to D9–D12, the buttons to D2–D5 and the buzzer to D8; this game is a separate circuit from the shared console. You can pick the right resistor for your LEDs with the LED resistor calculator. The four sounds of the original Simon are notes of an A major chord; the code uses the same notes (330, 440, 554 and 659 Hz), so it sounds pleasant even when you press quickly.
1#include <EEPROM.h>
2
3const byte LED_PINS[4]    = {9, 10, 11, 12};       // yeşil, kırmızı, sarı, mavi / green, red, yellow, blue
4const byte BUTTON_PINS[4] = {2, 3, 4, 5};          // LED'lerle aynı sırada / same order as the LEDs
5const int  TONES[4]       = {330, 440, 554, 659};  // E4, A4, C#5, E5: A majör akoru / A major chord
6const byte BUZZER_PIN     = 8;
7const int  HISCORE_ADDR   = 8;                     // EEPROM 8-9. bayt / EEPROM bytes 8-9
8const byte MAX_LEVEL      = 50;
9
10byte sequence[MAX_LEVEL];
11byte level = 0;
12uint16_t hiScore;
13
14void playColor(byte c, int ms) {
15  digitalWrite(LED_PINS[c], HIGH);
16  tone(BUZZER_PIN, TONES[c]);
17  delay(ms);
18  digitalWrite(LED_PINS[c], LOW);
19  noTone(BUZZER_PIN);
20}
21
22// Basılan rengi döndürür; 3 sn içinde basılmazsa -1 / returns the pressed colour; -1 after 3 s
23int waitForButton() {
24  unsigned long start = millis();
25  while (millis() - start < 3000) {
26    for (byte i = 0; i < 4; i++) {
27      if (digitalRead(BUTTON_PINS[i]) == LOW) {
28        playColor(i, 200);                              // basılan rengi göster / show the pressed colour
29        while (digitalRead(BUTTON_PINS[i]) == LOW);     // bırakılmasını bekle / wait for release
30        delay(30);                                      // sıçramayı atla / skip the bounce
31        return i;
32      }
33    }
34  }
35  return -1;
36}
37
38// LED'ler döner; ilk basış oyunu başlatır ve rastgeleliği tohumlar
39// LEDs chase until the first press, which starts the game and seeds the randomness
40void waitForStart() {
41  byte i = 0;
42  while (true) {
43    digitalWrite(LED_PINS[i], HIGH);
44    for (byte t = 0; t < 20; t++) {                     // 200 ms boyunca butonlara bak / poll the buttons for 200 ms
45      for (byte b = 0; b < 4; b++) {
46        if (digitalRead(BUTTON_PINS[b]) == LOW) {
47          digitalWrite(LED_PINS[i], LOW);
48          randomSeed(micros());                         // basış anı her seferinde farklı / the press time always differs
49          while (digitalRead(BUTTON_PINS[b]) == LOW);
50          delay(600);
51          return;
52        }
53      }
54      delay(10);
55    }
56    digitalWrite(LED_PINS[i], LOW);
57    i = (i + 1) % 4;
58  }
59}
60
61void endGame(uint16_t score) {
62  tone(BUZZER_PIN, 110, 700);
63  for (byte k = 0; k < 3; k++) {                        // tüm LED'ler yanıp söner / all LEDs flash
64    for (byte i = 0; i < 4; i++) digitalWrite(LED_PINS[i], HIGH);
65    delay(200);
66    for (byte i = 0; i < 4; i++) digitalWrite(LED_PINS[i], LOW);
67    delay(200);
68  }
69  if (score > hiScore) { hiScore = score; EEPROM.put(HISCORE_ADDR, hiScore); }
70  Serial.print(F("Seviye / Level: "));  Serial.print(score);
71  Serial.print(F("  Rekor / Best: ")); Serial.println(hiScore);
72  level = 0;
73  delay(1000);
74}
75
76void setup() {
77  for (byte i = 0; i < 4; i++) {
78    pinMode(LED_PINS[i], OUTPUT);
79    pinMode(BUTTON_PINS[i], INPUT_PULLUP);              // basınca LOW / LOW when pressed
80  }
81  Serial.begin(9600);
82  EEPROM.get(HISCORE_ADDR, hiScore);
83  if (hiScore == 0xFFFF) hiScore = 0;
84}
85
86void loop() {
87  if (level == 0) waitForStart();
88  if (level == MAX_LEVEL) { endGame(MAX_LEVEL); return; }   // hepsini bildin / you completed every level
89
90  sequence[level++] = random(4);                       // diziye yeni bir renk ekle / append a new colour
91  int showMs = max(180, 520 - level * 20);             // seviye arttıkça hızlanır / faster at higher levels
92  for (byte i = 0; i < level; i++) {                   // diziyi baştan göster / replay the whole sequence
93    playColor(sequence[i], showMs);
94    delay(showMs / 2);
95  }
96  for (byte i = 0; i < level; i++) {                   // oyuncu aynı sırayı tekrarlar / the player repeats it
97    if (waitForButton() != sequence[i]) {              // yanlış ya da geç / wrong or too late
98      endGame(level - 1);
99      return;
100    }
101  }
102  delay(700);                                          // tur arası / pause between rounds
103}
In Simon, randomness is everything: if the sequence is the same in every game, the player just memorises it. The randomSeed(analogRead(A0)) method, which reads an unconnected pin, is weak in practice because the pin often reads similar values. This code uses a more robust trick: the game waits for the player's first press and uses the micros() value at that moment as the seed. Nobody can repeat the moment of a press to the microsecond, so every game starts differently. The display time gets 20 ms shorter with each level and settles at 180 ms; if you don't press within 3 seconds or press the wrong colour, the game ends, and the level you reached is saved to EEPROM if it's a record.
LCD runner game: custom characters on a 16x2 display
You can't draw pixels on a 16x2 character LCD, but with createChar() you can define up to 8 custom characters of 5×8 pixels each. Three are enough for the runner game: two running poses and a cactus. The bottom row of the display is the ground; cacti scroll from right to left, and when you press the button the runner moves to the top row and stays in the air for a few steps. Because this game is grid-based, the collision check is a single line: if there's a cactus in the runner's column while it's on the ground, the game is over. For the library and wiring, see I2C LCD display.
1#include <Wire.h>
2#include <EEPROM.h>
3#include <LiquidCrystal_I2C.h>
4
5LiquidCrystal_I2C lcd(0x27, 16, 2);  // adres 0x3F de olabilir / the address may also be 0x3F
6
7const byte JUMP_PIN = 3, BUZZER_PIN = 8;
8const int  HISCORE_ADDR = 4;         // EEPROM 4-5. bayt / EEPROM bytes 4-5
9const byte PLAYER_COL = 1;           // koşucunun sütunu / runner's column
10const byte JUMP_STEPS = 4;           // zıplama süresi (adım) / jump length (steps)
11const byte MIN_GAP = 4;              // kaktüsler arası en az boşluk / minimum gap between cacti
12
13// 5x8 özel karakterler / 5x8 custom characters
14byte runA[8]   = {0b01110, 0b01110, 0b00100, 0b01110, 0b10101, 0b00100, 0b01010, 0b10001};
15byte runB[8]   = {0b01110, 0b01110, 0b00100, 0b01110, 0b10101, 0b00100, 0b01010, 0b01010};
16byte cactus[8] = {0b00100, 0b00101, 0b10101, 0b10101, 0b10110, 0b01100, 0b00100, 0b00100};
17
18byte ground[16];                     // 1 = o sütunda kaktüs var / 1 = cactus in that column
19byte gap = 0, jumpLeft = 0;
20uint16_t score = 0, hiScore = 0;
21unsigned int stepMs = 300;
22unsigned long lastStep = 0;
23bool alive = false;
24
25// Sıçramasız basış: yalnız basıldığı an true / bounce-free: true only at the moment of a press
26bool buttonPressed() {
27  static bool stable = HIGH, lastRead = HIGH;
28  static unsigned long changedAt = 0;
29  bool r = digitalRead(JUMP_PIN);
30  if (r != lastRead) { lastRead = r; changedAt = millis(); }
31  if (millis() - changedAt > 15 && r != stable) {
32    stable = r;
33    return stable == LOW;
34  }
35  return false;
36}
37
38void draw() {
39  byte row = jumpLeft > 0 ? 0 : 1;   // havadaysa üst satır / top row while jumping
40  lcd.setCursor(0, 0);
41  for (byte c = 0; c < 11; c++) lcd.write((uint8_t)(row == 0 && c == PLAYER_COL ? 0 : ' '));
42  char buf[6];
43  sprintf(buf, "%5u", score);        // sağa yaslı skor / right-aligned score
44  lcd.print(buf);
45  lcd.setCursor(0, 1);
46  for (byte c = 0; c < 16; c++) {
47    if (row == 1 && c == PLAYER_COL) lcd.write((uint8_t)(score & 1));   // runA / runB sırayla / alternately
48    else lcd.write((uint8_t)(ground[c] ? 2 : ' '));
49  }
50}
51
52void startGame() {
53  memset(ground, 0, sizeof(ground));
54  gap = 0; jumpLeft = 0; score = 0; stepMs = 300;
55  alive = true;
56  lastStep = millis();
57  draw();
58}
59
60void die() {
61  alive = false;
62  tone(BUZZER_PIN, 150, 400);
63  if (score > hiScore) { hiScore = score; EEPROM.put(HISCORE_ADDR, hiScore); }
64  lcd.clear();
65  lcd.print(F("GAME OVER ")); lcd.print(score);
66  lcd.setCursor(0, 1);
67  lcd.print(F("BEST ")); lcd.print(hiScore);
68}
69
70void setup() {
71  pinMode(JUMP_PIN, INPUT_PULLUP);
72  lcd.init();
73  lcd.backlight();
74  lcd.createChar(0, runA);
75  lcd.createChar(1, runB);
76  lcd.createChar(2, cactus);
77  EEPROM.get(HISCORE_ADDR, hiScore);
78  if (hiScore == 0xFFFF) hiScore = 0;
79  randomSeed(analogRead(A3));
80  lcd.setCursor(0, 0); lcd.print(F("LCD RUNNER"));
81  lcd.setCursor(0, 1); lcd.print(F("BEST ")); lcd.print(hiScore);
82}
83
84void loop() {
85  if (buttonPressed()) {
86    if (!alive) startGame();                       // başlat / start
87    else if (jumpLeft == 0) {                      // yerdeyse zıpla / jump only from the ground
88      jumpLeft = JUMP_STEPS;
89      tone(BUZZER_PIN, 1200, 20);
90      draw();                                      // zıplamayı hemen göster / show the jump at once
91    }
92  }
93  if (!alive || millis() - lastStep < stepMs) return;
94  lastStep = millis();
95
96  for (byte c = 0; c < 15; c++) ground[c] = ground[c + 1];   // dünya sola kayar / the world scrolls left
97  if (gap >= MIN_GAP && random(100) < 35) { ground[15] = 1; gap = 0; }
98  else { ground[15] = 0; gap++; }
99
100  if (jumpLeft > 0) jumpLeft--;                              // havada geçen bir adım / one step in the air
101  if (jumpLeft == 0 && ground[PLAYER_COL]) { die(); return; } // yerdeyken kaktüse çarptı / hit a cactus on the ground
102
103  score++;
104  if (score % 25 == 0 && stepMs > 120) stepMs -= 15;         // giderek hızlan / speed up gradually
105  draw();
106}
Scrolling the world means copying every element of the ground array one place to the left; the rightmost column gets a new cactus with a 35 percent chance. The MIN_GAP = 4 rule leaves at least four empty columns between two cacti, so every obstacle can be cleared. Every 25 points the step time drops by 15 ms, from 300 ms down to 120 ms. Rewriting both rows on every step instead of wiping the display with lcd.clear() prevents flicker; the clear() command alone takes about 2 ms. If you only see blocks on the screen, turn the contrast trimmer on the back of the module; if you see nothing at all, change the address from 0x27 to 0x3F.
Reaction test: measure your reaction time in milliseconds
This is the simplest game and the most addictive one: an LED lights up at a random moment, you press the button as fast as you can, and the Arduino prints the elapsed time in milliseconds to the Serial Monitor. All you need is an LED on D7 with a 220 Ω resistor, the button on D3 and an optional buzzer. The waiting time is random, between 2 and 5 seconds; if you press while waiting you get a "too early" warning, so you can't cheat by guessing. The time is measured with micros(), your average is calculated and your best time is stored in EEPROM.
1#include <EEPROM.h>
2
3const byte LED_PIN = 7, BUTTON_PIN = 3, BUZZER_PIN = 8;
4const int  BEST_ADDR = 6;            // EEPROM 6-7. bayt / EEPROM bytes 6-7
5const bool USE_SOUND = false;        // true: LED ile birlikte bip / true: beep together with the LED
6
7uint16_t best;                       // en iyi süre (ms); 0xFFFF = kayıt yok / best time (ms); 0xFFFF = none
8unsigned long total = 0;
9unsigned int rounds = 0;
10
11bool pressed() { return digitalRead(BUTTON_PIN) == LOW; }
12
13void waitRelease() {
14  while (pressed());
15  delay(50);                         // bırakma sıçramasını atla / skip the release bounce
16}
17
18void setup() {
19  pinMode(LED_PIN, OUTPUT);
20  pinMode(BUTTON_PIN, INPUT_PULLUP);
21  Serial.begin(9600);
22  EEPROM.get(BEST_ADDR, best);       // boş EEPROM 0xFFFF = kayıt yok / blank EEPROM 0xFFFF = no record
23  Serial.println(F("Baslamak icin butona bas / Press the button to start"));
24}
25
26void loop() {
27  while (!pressed());                // başlatma basışı / start press
28  randomSeed(micros());
29  waitRelease();
30  Serial.println(F("Hazir ol... / Get ready..."));
31
32  unsigned long waitMs = random(2000, 5001);   // 2-5 sn rastgele bekleme / random 2-5 s wait
33  unsigned long start = millis();
34  while (millis() - start < waitMs) {
35    if (pressed()) {                 // erken basış / false start
36      tone(BUZZER_PIN, 150, 500);
37      Serial.println(F("Erken bastin! / Too early!"));
38      waitRelease();
39      return;
40    }
41  }
42
43  unsigned long t0 = micros();
44  digitalWrite(LED_PIN, HIGH);       // işaret / signal
45  if (USE_SOUND) tone(BUZZER_PIN, 2000, 50);
46  while (!pressed() && micros() - t0 < 2000000UL);   // en fazla 2 sn bekle / wait at most 2 s
47  unsigned long ms = (micros() - t0) / 1000;
48  digitalWrite(LED_PIN, LOW);
49
50  if (ms >= 2000) {
51    Serial.println(F("Cok yavas / Too slow"));
52    return;
53  }
54  total += ms; rounds++;
55  Serial.print(F("Sure / Time: ")); Serial.print(ms);
56  Serial.print(F(" ms   Ortalama / Average: ")); Serial.print(total / rounds);
57  Serial.println(F(" ms"));
58  if (ms < best) {                   // daha kısa süre daha iyi / shorter is better
59    best = ms;
60    EEPROM.put(BEST_ADDR, best);
61    tone(BUZZER_PIN, 1500, 150);
62    Serial.println(F("Yeni rekor! / New record!"));
63  }
64  Serial.print(F("Rekor / Best: ")); Serial.print(best); Serial.println(F(" ms"));
65  waitRelease();
66  delay(1000);
67}
The average human reaction time to light is about 200–250 ms; a well-focused player can get a little below that. If you set USE_SOUND to true, a beep plays together with the LED. Reactions to sound are usually a bit faster than to light, so comparing the records of the two modes makes an interesting experiment. Show the time on a 7-segment display or an OLED instead of the Serial Monitor and you have a battery-powered device that works without a computer.
Making games with the ESP32
Most of the code in this guide runs on the ESP32 with small changes: the Adafruit SSD1306 and NeoPixel libraries support the ESP32, and tone() is available in versions 2.x and 3.x of the ESP32 Arduino core. Three things need to change: the pins (the ESP32 column of the shared table), the joystick thresholds and how the high score is saved. The ESP32's ADC is 12-bit and returns values from 0 to 4095, so use about 1200 and 2800 instead of 300 and 700. Connect the joystick to the ADC1 pins, GPIO 32–39, because ADC2 pins can't be read while Wi-Fi is on.
The ESP32 has no real EEPROM; the EEPROM library emulates it in flash and needs EEPROM.begin() and EEPROM.commit() calls. The cleaner way is the Preferences library: it writes values under a namespace and a key name into the NVS partition in flash and spreads the wear by itself. The "tap race" game below counts how many times you can press the button in 5 seconds and stores the record with Preferences:
1#include <Wire.h>
2#include <Adafruit_GFX.h>
3#include <Adafruit_SSD1306.h>
4#include <Preferences.h>
5
6Adafruit_SSD1306 display(128, 64, &Wire, -1);   // SDA = GPIO 21, SCL = GPIO 22
7Preferences prefs;
8
9const int BUTTON_PIN = 26;           // aksiyon butonu / action button
10const int BUZZER_PIN = 27;           // pasif buzzer / passive buzzer
11const unsigned long ROUND_MS = 5000; // 5 saniyelik tur / 5-second round
12
13uint32_t best = 0;
14
15// Sıçramasız basış: yalnız basıldığı an true / bounce-free: true only at the moment of a press
16bool buttonPressed() {
17  static bool stable = HIGH, lastRead = HIGH;
18  static unsigned long changedAt = 0;
19  bool r = digitalRead(BUTTON_PIN);
20  if (r != lastRead) { lastRead = r; changedAt = millis(); }
21  if (millis() - changedAt > 10 && r != stable) {
22    stable = r;
23    return stable == LOW;
24  }
25  return false;
26}
27
28void screen(const char *title, uint32_t big, uint32_t small) {
29  display.clearDisplay();
30  display.setTextSize(1);
31  display.setCursor(0, 0);   display.print(title);
32  display.setCursor(0, 56);  display.print("BEST "); display.print(best);
33  display.setTextSize(3);
34  display.setCursor(0, 20);  display.print(big);
35  display.setTextSize(1);
36  display.setCursor(90, 56); display.print(small);
37  display.display();
38}
39
40void setup() {
41  pinMode(BUTTON_PIN, INPUT_PULLUP);
42  Serial.begin(115200);
43  if (!display.begin(SSD1306_SWITCHCAPVCC, 0x3C)) {
44    Serial.println("SSD1306 allocation failed");
45    for (;;) delay(1000);
46  }
47  display.setTextColor(SSD1306_WHITE);
48  prefs.begin("oyun", false);        // "oyun" ad alanı, okuma-yazma / "oyun" namespace, read-write
49  best = prefs.getUInt("rekor", 0);  // kayıt yoksa 0 / 0 when nothing is stored
50}
51
52void loop() {
53  screen("TAP RACE: PRESS", 0, 0);
54  while (!buttonPressed()) delay(1); // başlatma / start
55  for (int i = 3; i > 0; i--) {      // 3-2-1 geri sayım / 3-2-1 countdown
56    screen("GET READY", i, 0);
57    tone(BUZZER_PIN, 800, 80);
58    delay(1000);
59  }
60  tone(BUZZER_PIN, 1600, 150);
61
62  uint32_t taps = 0;
63  unsigned long start = millis(), lastDraw = 0;
64  while (millis() - start < ROUND_MS) {
65    if (buttonPressed()) taps++;
66    if (millis() - lastDraw > 100) { // ekranı 10 kez/sn çiz / redraw 10 times per second
67      lastDraw = millis();
68      screen("TAP!", taps, (ROUND_MS - (millis() - start)) / 1000 + 1);
69    }
70  }
71
72  if (taps > best) {                 // yeni rekor flash'a / new record to flash
73    best = taps;
74    prefs.putUInt("rekor", best);
75    tone(BUZZER_PIN, 2000, 300);
76  }
77  screen("RESULT", taps, 0);
78  Serial.printf("Basis / Taps: %lu  Rekor / Best: %lu\n", (unsigned long)taps, (unsigned long)best);
79  delay(3000);
80}
prefs.getUInt("rekor", 0) returns the second parameter if nothing is stored, so you never have to deal with the EEPROM 0xFFFF problem. Namespace and key names can be at most 15 characters long. Even though the ESP32's processor is many times faster than the Uno's, the OLED uses the same I2C bus, so the frame rate barely changes; for much smoother and colourful games you can use an SPI ILI9341 TFT display. The ESP32's Bluetooth, in turn, is a good starting point for turning a phone into a game controller.
Games with the Raspberry Pi Pico and MicroPython
If you program the Raspberry Pi Pico in MicroPython, the game logic is the same and only the syntax changes: time.ticks_ms() and time.ticks_diff() instead of millis(), read_u16(), which returns 0–65535, instead of analogRead(), and PWM instead of tone(). The Pico has no EEPROM, but thanks to MicroPython's file system it's very easy to write the record to a small text file in flash. The code below is the Pico version of the reaction test and keeps the record in the file rekor.txt; save it to the board as main.py in Thonny and it starts by itself on every power-up. If you're new to MicroPython, read What is the Raspberry Pi Pico? first.
1from machine import Pin, PWM
2import time, random
3
4led = Pin("LED", Pin.OUT)                 # kart üstündeki LED / onboard LED
5button = Pin(14, Pin.IN, Pin.PULL_UP)     # GP14, basınca 0 / 0 when pressed
6buzzer = PWM(Pin(16))                     # GP16, pasif buzzer / passive buzzer
7buzzer.duty_u16(0)                        # başlangıçta sessiz / silent at start
8FILE = "rekor.txt"                        # rekor flash'ta dosyada / record kept in a file on flash
9
10def beep(freq, ms):
11    buzzer.freq(freq)
12    buzzer.duty_u16(32768)                # %50 görev oranı / 50% duty cycle
13    time.sleep_ms(ms)
14    buzzer.duty_u16(0)
15
16def load_best():
17    try:
18        with open(FILE) as f:
19            return int(f.read())
20    except (OSError, ValueError):         # dosya yok ya da bozuk / file missing or corrupt
21        return 99999
22
23def save_best(ms):
24    with open(FILE, "w") as f:
25        f.write(str(ms))
26
27def wait_release():
28    while button.value() == 0:
29        time.sleep_ms(5)
30    time.sleep_ms(50)                     # bırakma sıçraması / release bounce
31
32best = load_best()
33print("Baslamak icin butona bas / Press the button to start")
34
35while True:
36    while button.value() == 1:            # başlatma basışı / start press
37        time.sleep_ms(5)
38    wait_release()
39    print("Hazir ol... / Get ready...")
40
41    wait = random.randint(2000, 5000)     # 2-5 sn rastgele bekleme / random 2-5 s wait
42    start = time.ticks_ms()
43    early = False
44    while time.ticks_diff(time.ticks_ms(), start) < wait:
45        if button.value() == 0:
46            early = True
47            break
48    if early:
49        print("Erken bastin! / Too early!")
50        beep(150, 400)
51        wait_release()
52        continue
53
54    t0 = time.ticks_us()
55    led.on()                              # işaret / signal
56    while button.value() == 1 and time.ticks_diff(time.ticks_us(), t0) < 2000000:
57        pass
58    ms = time.ticks_diff(time.ticks_us(), t0) // 1000
59    led.off()
60
61    if ms >= 2000:
62        print("Cok yavas / Too slow")
63        continue
64    print("Sure / Time:", ms, "ms")
65    if ms < best:                         # daha kısa süre daha iyi / shorter is better
66        best = ms
67        save_best(best)
68        print("Yeni rekor! / New record!")
69        beep(1500, 150)
70    print("Rekor / Best:", best, "ms")
71    wait_release()
72    time.sleep(1)
Using ticks_diff() when measuring time matters: the counters wrap around after a certain value, and simply subtracting two values gives a wrong result at that moment; ticks_diff() handles the wrap-around correctly. For OLED games, the ssd1306 driver you install from Thonny's package manager offers fill_rect(), text() and show() commands similar to Adafruit GFX. The neopixel module you need for a NeoPixel matrix ships with MicroPython. That way you can port Pong and Snake to the Pico with the same logic.
Common mistakes and how to fix them
| Symptom | Cause | Fix |
|---|---|---|
| Blank screen | If the Serial Monitor shows "SSD1306 allocation failed", RAM has run out; if not, the address or the wiring is wrong | Put fixed text inside F() and shrink large arrays; without the message, check the SDA/SCL wires and try address 0x3D |
| The game starts the same way every time | No randomSeed() or always the same seed | Seed with the micros() value of the player's first press |
| One press makes it jump twice | Button bounce | Use the buttonPressed() function that waits for 15 ms of stability |
| The high score shows 65535 | Never-written EEPROM reads 0xFF | Treat 0xFFFF as 0 |
| The character drifts when the joystick is released | The centre isn't 512 and the dead zone is too narrow | Keep the 300/700 thresholds or measure the centre at start-up and calibrate |
| The snake jumps diagonally | The matrix is wired in a zigzag | Set SERPENTINE = true |
| The Arduino resets when brightness goes up | The LED matrix draws too much current | Lower setBrightness() and use an external 5 V supply |
| PWM on pin 3 or 11 breaks when tone() plays | On the Uno, tone() uses Timer2 | Move the part that needs PWM to pin 5, 6, 9 or 10 |
| The game slows down as it goes on | Serial.print or unnecessary drawing every frame | Remove serial output and keep the frame time above the display's transfer time |
| The LCD only shows blocks | Contrast setting or wrong address | Turn the trimmer on the back and try address 0x27 or 0x3F |
Ideas to take your games further
- Two-player Pong: delete the CPU lines, control the second paddle with a potentiometer on A2 and run both controllers to opposite ends of the table on long wires.
- Tilt control: use an MPU6050 instead of the joystick and steer the snake or the paddle by tilting the board.
- Music and sound effects: play game music with a DFPlayer Mini; for short effects a passive buzzer is enough.
- Play from your phone: turn your phone into a wireless controller with an HC-05 Bluetooth module.
- A gamepad for your computer: since the Arduino Leonardo can act as a USB keyboard, you can build a controller for PC games with a joystick and buttons.
- Scoreboard: show the high scores as scrolling text on a 4-in-1 MAX7219 module.
- Games of chance: build a roulette wheel with a WS2812B ring or an electronic die with LEDs; the most fun way to practise random().
Making games with Arduino is the most enjoyable way to learn code and hardware at the same time. Once you've understood the game loop, collision detection and the EEPROM high score, designing your own game is just a matter of having an idea; for more inspiration, browse the Arduino project ideas list. In the BlueGrays app you'll find Pong, the OLED T-Rex, 8x8 and 16x16 matrix Snake, Simon, the LCD runner and the reaction test as step-by-step projects with circuit diagrams and ready-to-use code.
Frequently asked questions
What games can you make with an Arduino?
With an Arduino Uno you can make Pong, the T-Rex runner, Flappy Bird-style games, Snake, simple block games, the Simon memory game, a reaction test and games of chance like dice or roulette. A 128×64 OLED is enough for games with graphics, and a NeoPixel LED matrix for colourful grid games. Games like Simon and the reaction test are played with just LEDs and buttons, without any display.
What is the best display for an Arduino game?
For beginners the best choice is the 0.96-inch SSD1306 OLED: it's cheap, connects with just two data wires and draws moving graphics at 128×64 pixels. If you want a larger colour picture, an ILI9341 or ST7789 TFT display fits, and for pixel-art games an 8x8 or 16x16 LED matrix. A 16x2 LCD with custom characters is also enough for simple runner games.
How do you save a high score on Arduino?
If you write the high score to EEPROM, it isn't lost when the power goes off. You write it with EEPROM.put(address, score) and read it with EEPROM.get(address, score); the Arduino Uno has 1024 bytes for this. Since each cell can be written about 100,000 times, only write when the game is over and the record has been beaten.
Can you make a gamepad with an Arduino?
Yes. Boards with the ATmega32U4 processor, such as the Arduino Leonardo, Micro or Pro Micro, can appear to the computer as a USB keyboard, mouse or game controller; they read the joystick and buttons and send key presses. The Arduino Uno can't do this directly, but it can send the joystick values over the serial port to a program on the computer.
Why is my Arduino game slow or laggy?
The most common causes are loops built with delay(), Serial.print calls every frame and the display's transfer time. On the Uno, sending the whole OLED screen takes about 25 ms, so a 30 ms frame time is realistic. Use a fixed frame time with millis() instead of delay(), remove serial output and only draw what's needed.
What is the easiest Arduino game for beginners?
The reaction test is the easiest: it takes one LED, one button and a short sketch, yet it teaches core ideas like timing, random numbers and EEPROM. After that, moving on to Simon with four LEDs and four buttons, and then to Pong and T-Rex on an OLED display, is a good learning path.
Projects to build after reading this
See all projects
Paddle Ball Game - SSD1306
A ball, two paddles and you: you play table tennis, one of the very first video games, on a small OLED screen. Two buttons move your paddle on the right up and down, while the computer controls the le

OLED T-Rex Run: Arduino Dinosaur Game
The dinosaur game that pops up when your internet goes down, now on your desk: the dinosaur runs across the small OLED screen, cacti come at you, and you jump with a single button. Your score climbs l

Pixel Snake 8x8 Matrix
Build the classic snake game with your own hands and play it. On a colorful 8x8 light matrix, you steer a green snake with a joystick and eat red apples; with every apple the snake grows, speeds up a

Matrix Snake 16x16
The classic snake game, this time on a huge LED display made of 256 lights. You steer the green snake with a joystick and collect red apples; with every apple the snake grows, your score goes up on a

Arduino Memory Game (4 LEDs + 4 Buttons + Buzzer)
Do you trust your memory? Four colored LEDs light up in a sequence, each playing its own note, and you repeat the same order by pressing the buttons. Every correct round adds a new color to the sequen

Arduino LCD Runner Game
Side scrolling endless runner game running on 16x2 character LCD screen. Hero runs automatically, player jumps over obstacles by pressing the button. Random obstacles appear on the top and bottom row. Passive buzzer plays opening melody, jumping sound, 50 point celebration sound and end of game melody. "BlueGrays - Arduino Projects" splash screen is shown on startup. The score is updated instantly in the upper right corner of the screen.
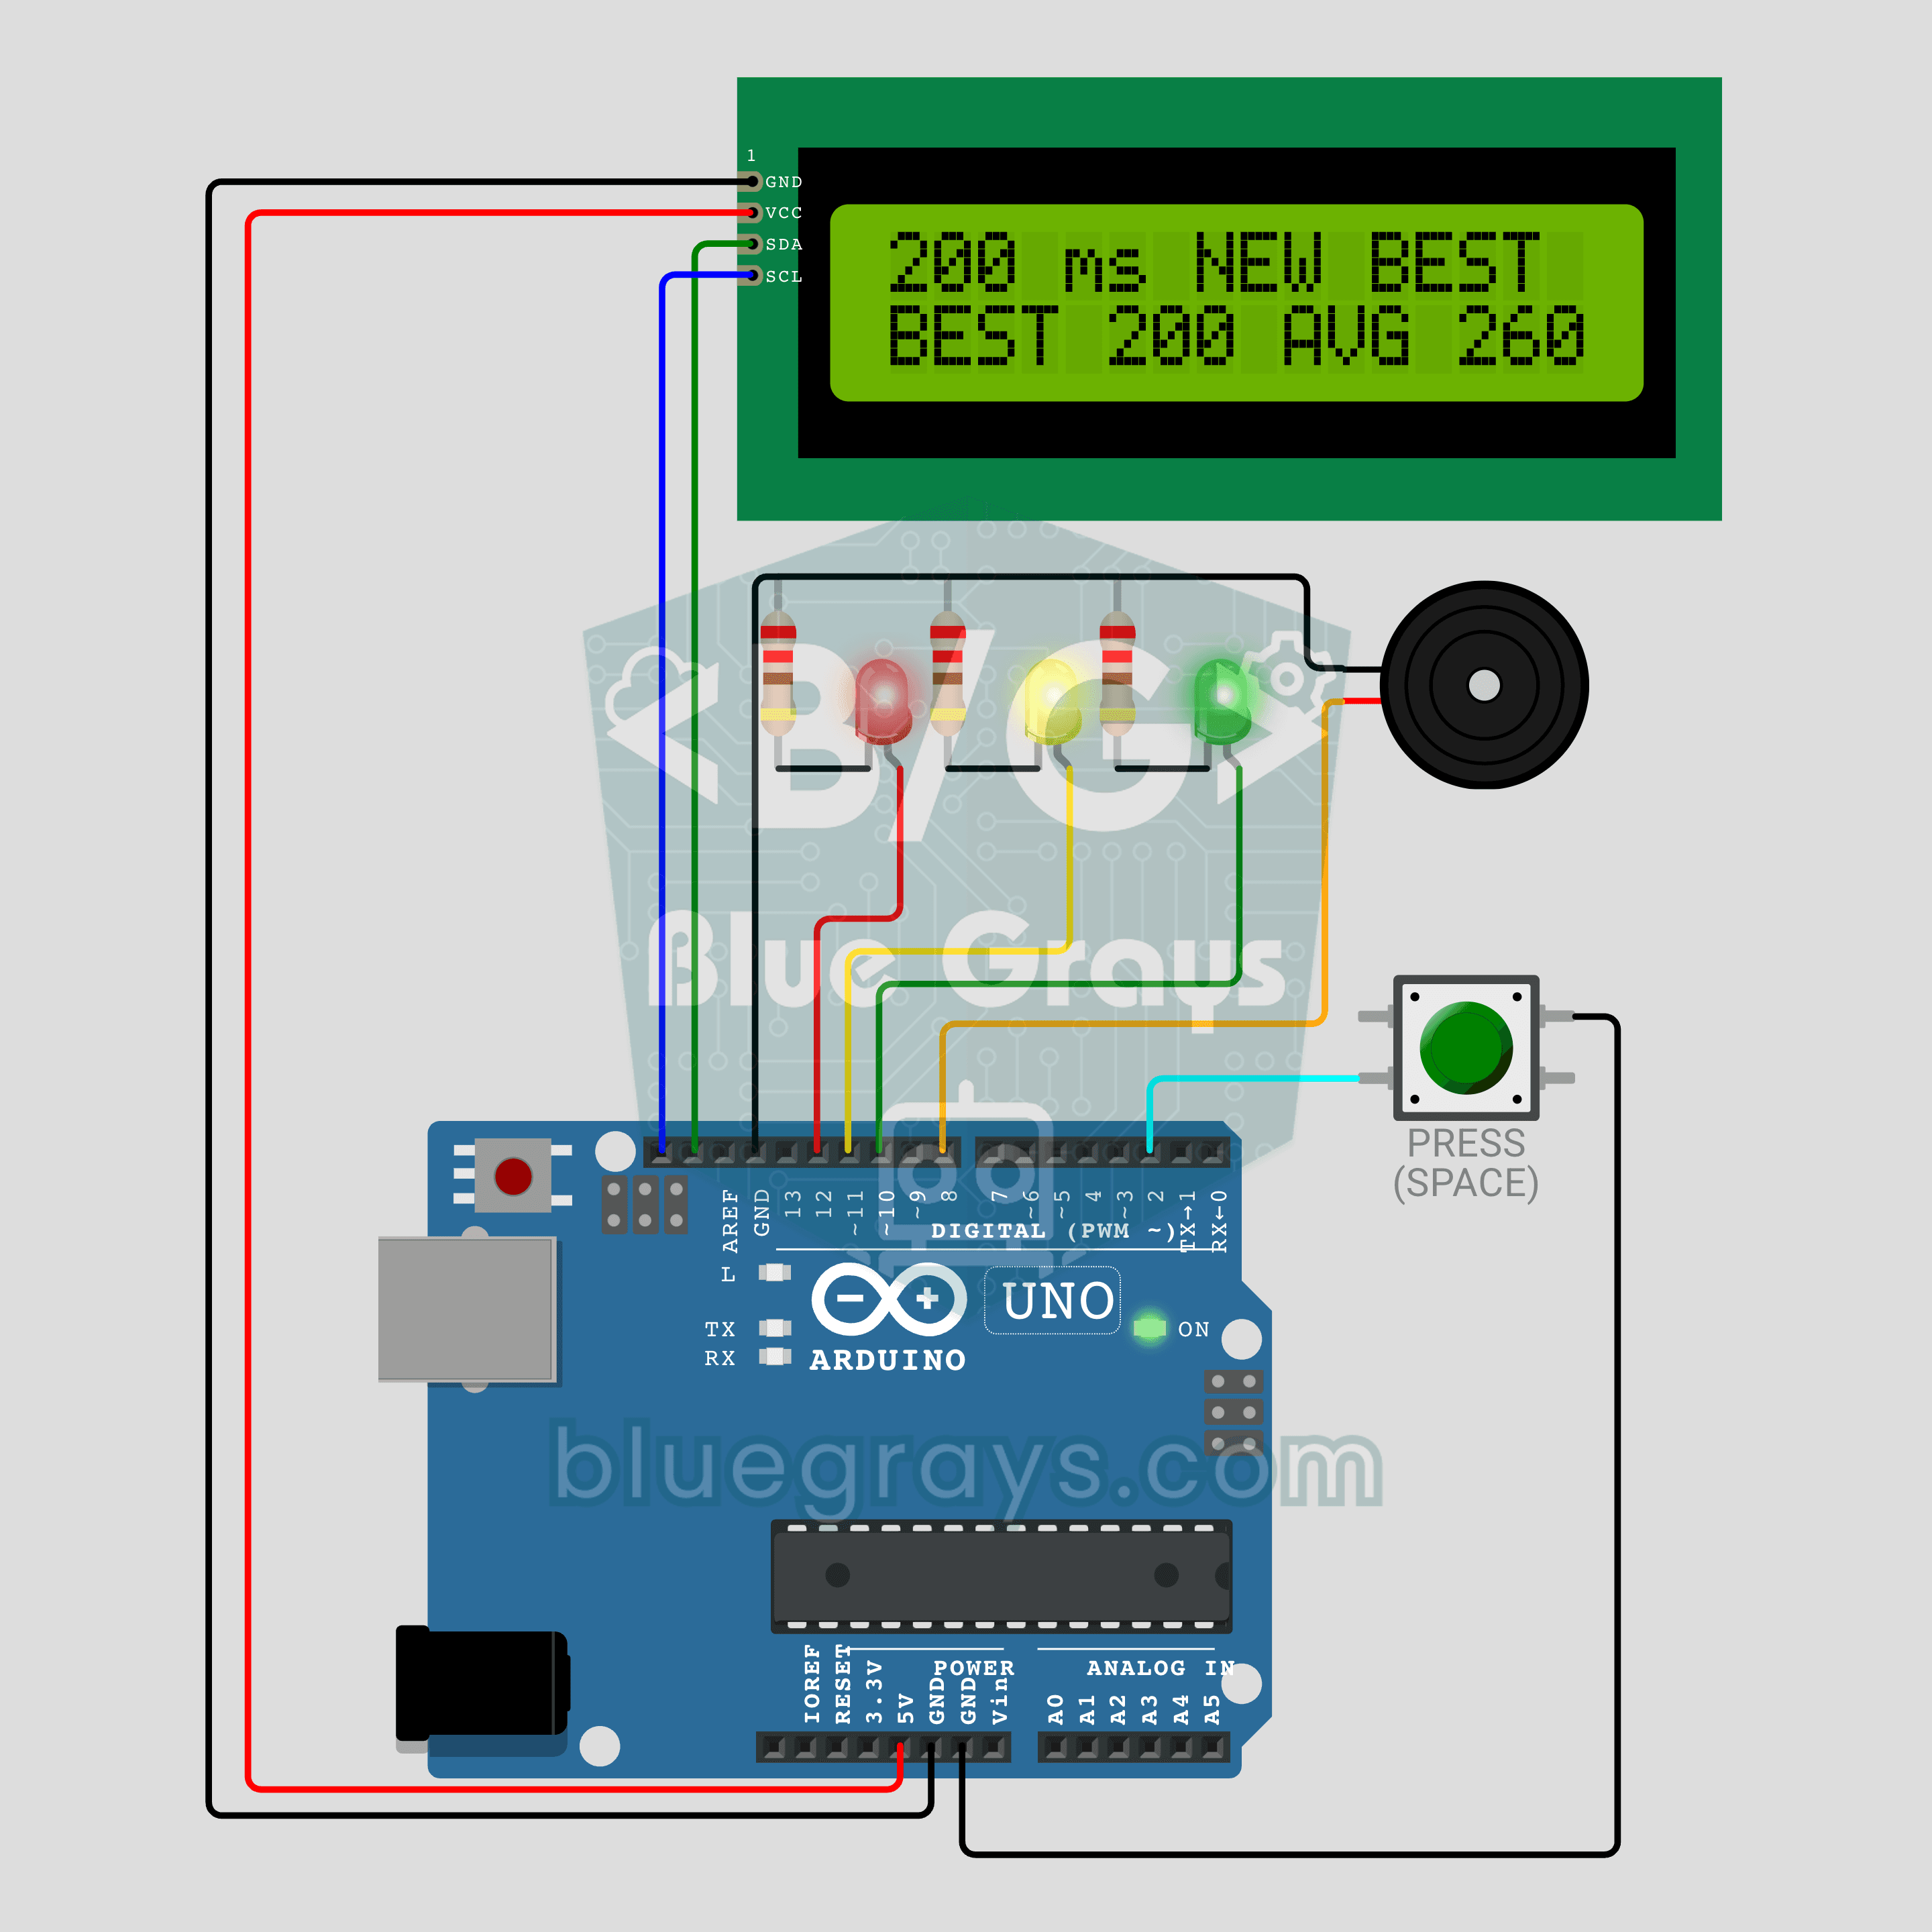
Arduino Reaction Time Test with Sound Cue: Measure Your Reflexes in Milliseconds (LCD + Buzzer + 3 LEDs)
How fast are your reflexes? Press the button: the red LED says get ready, the yellow LED says steady and a random wait of 1.5 to 3.5 seconds begins. The moment the green LED lights up and the buzzer beeps, press again; your reaction time appears on the I2C LCD in milliseconds, with your session best and average below it. Press before green and the screen shows TOO EARLY! with a losing sound. Hold the button for a new player, so everyone races the same wait order.