
Arduino vs ESP32 vs Raspberry Pi Pico for Schools: Which Board?
Arduino vs ESP32 vs Raspberry Pi Pico for schools: decision tables by lesson goal, grade level, setup on school PCs and budget, plus a layered one-year plan.
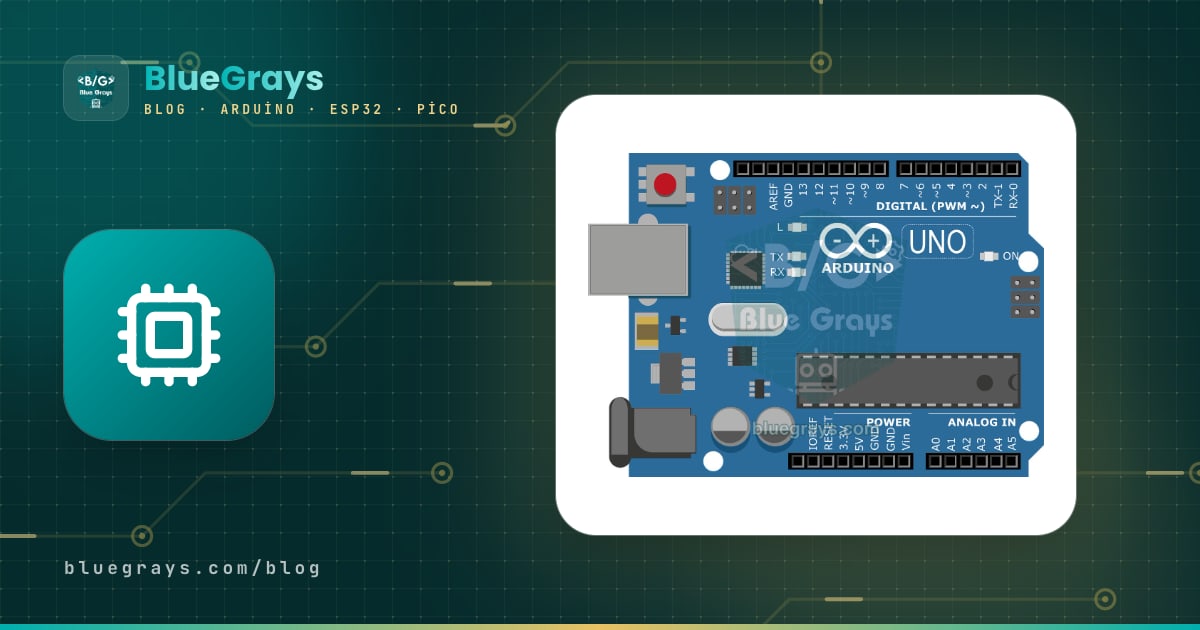
The short answer to Arduino vs ESP32 vs Raspberry Pi Pico for schools: most schools should start with the Arduino Uno. If your course goals include the Internet of Things (IoT), meaning devices that send data over Wi-Fi or are controlled from a phone, add the ESP32 as a second step; if your school already teaches Python, make the Raspberry Pi Pico the second board. Instead of trying to spend the whole year on one board, think in layers: in the first term the 5 V, error-tolerant and well-documented Uno builds the foundations of electronics and programming, and in the second term the same projects are repeated and extended on the second board that fits your goal.
This is not a personal buying guide; we covered which board one person should buy in which Arduino should I buy and Arduino vs ESP32, and you can get to know each board in what is ESP32 and what is Raspberry Pi Pico. Here we look at the question through a school's eyes: 24 students, 8 groups, computers that need administrator rights, 40–45 minute lessons and a cupboard full of equipment that will be used for several years. First comes the technical decision table, then recommendations by lesson goal and grade level, setup differences and a sample one-year plan.

Why is a school decision different from a personal one?
For someone buying one board at home, the key question is “what can I build with this board?”. At school the question becomes “what can 24 students learn with this board, at the same time, in the same lesson, with the fewest problems?”. A student who cannot find the port loses 5 minutes at home; in class, if three of eight groups cannot find the port, the lesson is over. That is why megahertz and kilobytes take a back seat at school. The questions that matter are: how many steps does setup take, does a wrongly placed wire damage the board, can sensors be connected directly, and can the teacher find ready-made lesson material?
Then there is time. School boards are usually used for several years, not one, and every year a new class opens the same cupboard. So the choice should not be “which board is more powerful?” but “which sequence of boards takes students to the next step?”. Program logic learned on the Uno continues on the ESP32 in the same language and on the Pico with the same concepts; that is where the strength of a layered plan comes from. Spending the whole year on one board is possible, but then either the first weeks become needlessly hard or students leave at the end of the year without ever seeing an important step such as wireless connectivity or a second language.
Decision table: how do Uno, ESP32 and Pico compare at school?
The table below compares the boards on the criteria that really make a difference at school. The ESP32 column is the 30-pin ESP32 DevKit (with an ESP32-WROOM-32 module), the most common one in schools; the Pico column covers the Raspberry Pi Pico and its wireless version, the Pico W. The Uno column is for the classic Uno R3; you will find the differences of the Uno R4 in our Arduino Uno R4 article.
| Criterion | Arduino Uno (R3) | ESP32 (DevKit) | Raspberry Pi Pico |
|---|---|---|---|
| Operating voltage (pins) | 5 V; pins output and accept 5 V signals | 3.3 V; pins are not 5 V tolerant | 3.3 V; pins are not 5 V tolerant |
| Programming language | Arduino C++ (readable as blocks) | Mostly Arduino C++; MicroPython also runs | Mostly MicroPython; can also be programmed in Arduino C++ |
| Ease of setup | Easiest: install the Arduino IDE, select board and port, upload | Medium: separate ESP32 board package in the IDE, BOOT button while uploading on some boards | Easy: install Thonny, flash MicroPython to the board once |
| Wi-Fi / Bluetooth | None (the Uno R4 WiFi has it) | Wi-Fi (2.4 GHz), Bluetooth Classic and BLE | None; the Pico W has Wi-Fi and Bluetooth |
| Error tolerance | High: wide 5 V margin, comfortably drives an LED with its resistor at the recommended 20 mA per pin | Medium: a 5 V signal damages the pin; circuits on boot (strapping) pins such as GPIO0, 2, 12, 15 can break uploading | Medium: a 5 V signal damages the pin; on the software side it can always be recovered with BOOTSEL |
| Sensor compatibility | Most 5 V modules connect directly (HC-SR04, relay module, 5 V LCD) | 3.3 V sensors directly; 5 V output modules need a voltage divider or level shifter | Same as ESP32; only 3 analog inputs (GP26–GP28) |
| Analog reading | 6 pins, 10-bit (0–1023) | Many pins, 12-bit; ADC2 pins cannot be read while Wi-Fi is on | 3 pins, 12-bit (0–65535 with read_u16 in MicroPython) |
| Amount of teaching material | Largest: used in schools for years, plenty of material in many languages | Large, especially for IoT and smart home | Growing; good MicroPython documentation, fewer ready-made lesson materials |
| Setup on school computers | Arduino IDE; no driver for the original board, compatible boards with CH340 may need one | Arduino IDE + a board package of several hundred MB + CP210x or CH340 driver depending on the USB chip | Thonny; no separate driver on Windows 10/11, macOS and Linux |
| Relative board cost | The original Uno is the most expensive of the three; compatible Uno boards are cheaper | Usually low | Usually the lowest |
Pay particular attention to two rows: operating voltage and error tolerance. Because the Uno's pins work at 5 V, most sensor modules on the market connect to it directly, and a wire a student plugs into the wrong hole usually just means the circuit does not work. The ESP32 and Pico pins are 3.3 V; if a 5 V signal reaches these pins, the pin or the board can be damaged. For one student this is a small detail, but in a class of 8 groups it directly affects your spare-board budget. The cost row should not decide on its own either: the price of the board is a small share of the total once breadboards, wires, sensors and spares are added.
Which board for which lesson goal?
Before choosing a board, write down in one sentence what students should be able to do at the end of the course. “Explain by measuring why an LED needs a resistor” and “see temperature data on a phone” call for different boards. All the starter projects in the table below are free in BlueGrays and open with their circuit diagram, parts list and code.
| Lesson goal | First board | Why? | Free starter project |
|---|---|---|---|
| Basic electronics (current, voltage, resistance, LED) | Arduino Uno | In 5 V circuits measured values easily match calculations, and mistakes rarely damage the board | LED Blink, Traffic Light |
| Algorithms and C++ | Arduino Uno, then ESP32 | Same language and same IDE; setup(), loop(), if and for learned on the Uno carry over to the ESP32 unchanged | Toggle an LED with a Button (On/Off) |
| Programming with Python | Raspberry Pi Pico | Python knowledge from the computer moves to the board; a line typed in Thonny shows its result without waiting for a compile | Raspberry Pi Pico: Controlling an External LED (GP14 + Breadboard) |
| Internet of Things (IoT) | ESP32 (alternative: Pico W) | Wi-Fi and Bluetooth are built in; ESP32 projects are also Arduino C++, so first-term knowledge is not wasted | ESP32 Wi-Fi STA Connection (with LCD Screen) |
| Robotics (motors, servos, distance) | Arduino Uno; ESP32 for wireless control | Most motor driver boards and 5 V modules were designed with the Uno in mind; ESP32 if you want a car driven from a phone | HC-SR04 Distance Measurement (Serial Display) |
| Science experiments and data logging | Arduino Uno | A sensor and the Serial Monitor are enough; 5 V modules such as the DHT11 connect directly | Temperature and Humidity with DHT11 |
The two most often misunderstood rows are Python and IoT. Choosing the Pico to teach Python means students apply the for loop and if statement they write on the computer to an LED with the same syntax; a single line typed into Thonny's Shell lights the LED on the board immediately. For IoT, the ESP32's advantage is not only that Wi-Fi is on the board but that ESP32 projects are written in Arduino C++ just like on the Uno: the pinMode(), digitalRead() and if statements learned in the first term are used unchanged in the second, and students only learn how to connect to Wi-Fi and serve a web page. The Pico W can also connect to Wi-Fi; if your school wants both Python and IoT, the Pico W covers both needs on one board.
Recommendations by grade level
Age alone does not decide; of two classes of the same age, one may have done block coding before and the other may never have had a computing lesson. Still, lesson length, students' habits with keyboards and files, and the school timetable change noticeably by level. The table below sums up these differences; the “next step” column shows the step to take when students are ready, not necessarily within the same year.
| Level | Starting board | Next step | What to watch |
|---|---|---|---|
| Middle school (about ages 11–14) | Arduino Uno | No need to switch boards in the same year; phone control with the ESP32 in a club or elective | The program is read as blocks and the real code is uploaded ready-made; setup should not eat 10 minutes of a lesson |
| High school (general) | Arduino Uno (first term) | Pico if there is a Python course, otherwise ESP32 (second term) | Present the switch not as a new topic but as a known project repeated on a new board |
| Vocational school (electrical/electronics, IT) | Arduino Uno and a multimeter | IoT with the ESP32; level shifting and power calculations become topics too | Teach the 3.3 V vs 5 V difference by having students measure it, not by explaining it |
| Adult course | One board chosen by the course goal | Straight to ESP32 for groups who want home automation, Pico for groups who know Python | In short courses, do not spend time setting up two boards |
Starting with blocks in middle school makes programs easier to read, but it does not change the board choice: most BlueGrays projects with blocks are Arduino projects, and the blocks are for reading the program; the board always gets the project's real code. If you want to see the C++ and MicroPython equivalents of the blocks side by side, check the blocks to C++ transition table. In high school and vocational training, knowing two boards is an achievement in itself: a student who has run the same sensor on a 5 V and a 3.3 V board will not ignore voltage levels again. In adult courses most participants come with a specific goal; asking “what do you want to build?” in the first lesson and choosing the board accordingly works better than walking everyone down the same path.
Setup on school computers: drivers, board package, Thonny and admin rights
The hidden cost of choosing a board at school is setup. A setup done once at home is repeated at school on 8 student computers and one teacher computer, and in most schools only the IT administrator is allowed to install software. The setup load of the three boards is clearly different:
| Step | Arduino Uno | ESP32 | Raspberry Pi Pico |
|---|---|---|---|
| Software | Arduino IDE 2 | Arduino IDE 2 | Thonny (comes with its own Python) |
| Extra package | None, Uno support comes built in | esp32 by Espressif Systems from the Boards Manager, several hundred MB | A MicroPython UF2 file flashed to the board once |
| USB driver | None for the original board; compatible boards with CH340 may need one | CP210x, CH340 or CH9102 depending on the chip on the board | Not needed |
| Admin rights | Usually needed for installing the IDE and the driver | Needed for the IDE and driver; the board package goes into the user's folder | Lighter load since there is no driver; Thonny can often be installed into the user account |
| Common first-upload problem | Wrong port, charge-only cable | No port, “Failed to connect” (BOOT button), long compile time | Interpreter not selected in Thonny, board without MicroPython |
One detail of the ESP32 board package often causes trouble at school: the package is not installed for the whole computer but into the folder of the user who is logged in. If students log in with a shared account, there is no problem; if everyone uses their own account, the package is downloaded again for each one. On computers that reset themselves to a clean state at every restart, the installation disappears the next day; in that case ask the IT administrator to add the package to the protected image. The Pico does not have this problem because MicroPython lives on the board itself: you prepare the board once, and Thonny recognises it on whichever computer it is plugged into all year.
When you go to the IT administrator, bring a clear list; instead of saying “please install Arduino”, hand over the items below. You can send the list with the Uno items before the first term and with the ESP32 or Pico items before the second:
- The desktop version of Arduino IDE 2 on 8 student computers and 1 teacher computer.
- The CH340, CP210x or CH9102 driver, depending on the USB chip of the compatible Uno or ESP32 boards; read the chip on the board once the order arrives.
- If the ESP32 is used: the esp32 by Espressif Systems package from the Boards Manager and the libraries used in class; they must also be visible in student accounts.
- If the Pico is used: Thonny. If a policy blocks USB storage, the RPI-RP2 drive the Pico shows in BOOTSEL mode will not appear either; flash MicroPython to the boards once on your own computer at the start of the term.
- Student accounts must not be restricted from accessing USB serial ports.
- After setup, a 10-minute test with a student account: plug in a board, select the port, upload example code.
A layered plan: a one-year example
Let's say you have 2 lessons a week, a class of 24 and students working in 8 groups of three. Assume you can use about 14 weeks of each term for hands-on work. In the first term everyone builds the same foundation on the Uno; in the second term, depending on the school's goal, you choose path A (ESP32, IoT) or path B (Pico, Python). Both paths deliberately start with a familiar project: students rebuild the first project of term one on the new board and see the difference for themselves. All the projects in the table are free.
| Term and week | Board | Topic | Free project |
|---|---|---|---|
| Term 1, weeks 1–3 | Uno | What a program is, digital output, timing | LED Blink, Traffic Light |
| Term 1, weeks 4–6 | Uno | Input, conditions, keeping state | Toggle an LED with a Button (On/Off) |
| Term 1, weeks 7–9 | Uno | Analog sensor, threshold value | Night Light with Ldr |
| Term 1, weeks 10–14 | Uno | Measuring distance and environment, Serial Monitor, mini project | HC-SR04 Distance Measurement (Serial Display), Temperature and Humidity with DHT11 |
| Term 2 path A, weeks 1–3 | ESP32 | The same LED and button on the ESP32, the 3.3 V difference, board package | LED Blink with ESP32 |
| Term 2 path A, weeks 4–8 | ESP32 | Sensor and LCD, connecting to Wi-Fi | ESP32 DHT22 Temperature and Humidity (with LCD Display), ESP32 Wi-Fi STA Connection (with LCD Screen) |
| Term 2 path A, weeks 9–14 | ESP32 | A web page reachable from a phone, IoT final project | ESP32 Asynchronous Web Server (with IP Display on LCD) |
| Term 2 path B, weeks 1–4 | Pico | Python syntax, LED, traffic light | Raspberry Pi Pico: Controlling an External LED (GP14 + Breadboard), Raspberry Pi Pico Traffic Light Simulator (3 LEDs Sequential, GP11/GP12/GP13) |
| Term 2 path B, weeks 5–14 | Pico | Distance, sound, button arrays, final project | Raspberry Pi Pico Parking Sensor (HC-SR04 + 3 LEDs + Buzzer), Raspberry Pi Pico Button Piano (5 Buttons + Buzzer + Melody Recorder) |
In the first week of term two, do not teach a new topic; have students build the familiar LED project on the new board and ask only “what changed?”. Pin numbers, 3.3 V, selecting the board package on the ESP32 or the code being Python on the Pico are the answers, and students do not forget differences they found themselves. We prepared the first lesson of path A minute by minute in the ESP32 first lesson plan and the rest week by week in the 8-week ESP32 IoT module; for path B the 6-week Pico MicroPython plan can be used as is.
A layered plan also splits the budget. In the first year you invest only in Uno kits; because the second board works with the LEDs, resistors, buttons, LDRs and sensors from those kits, it mostly means just boards, cables and a few extra parts. In setting up a school Arduino lab we suggested a few ESP32 and Pico boards for demonstrations; if the whole class moves to the second board, count boards by the number of groups, not by the demonstration set. The second-layer list for 8 groups and 1 spare:
- Path A: 1 ESP32 DevKit per group, 9 for the class; 9 data cables that fit the board's USB port. Most ESP32 DevKits cover almost all of a single breadboard; joining two breadboards side by side and seating the board across the middle makes wiring easier.
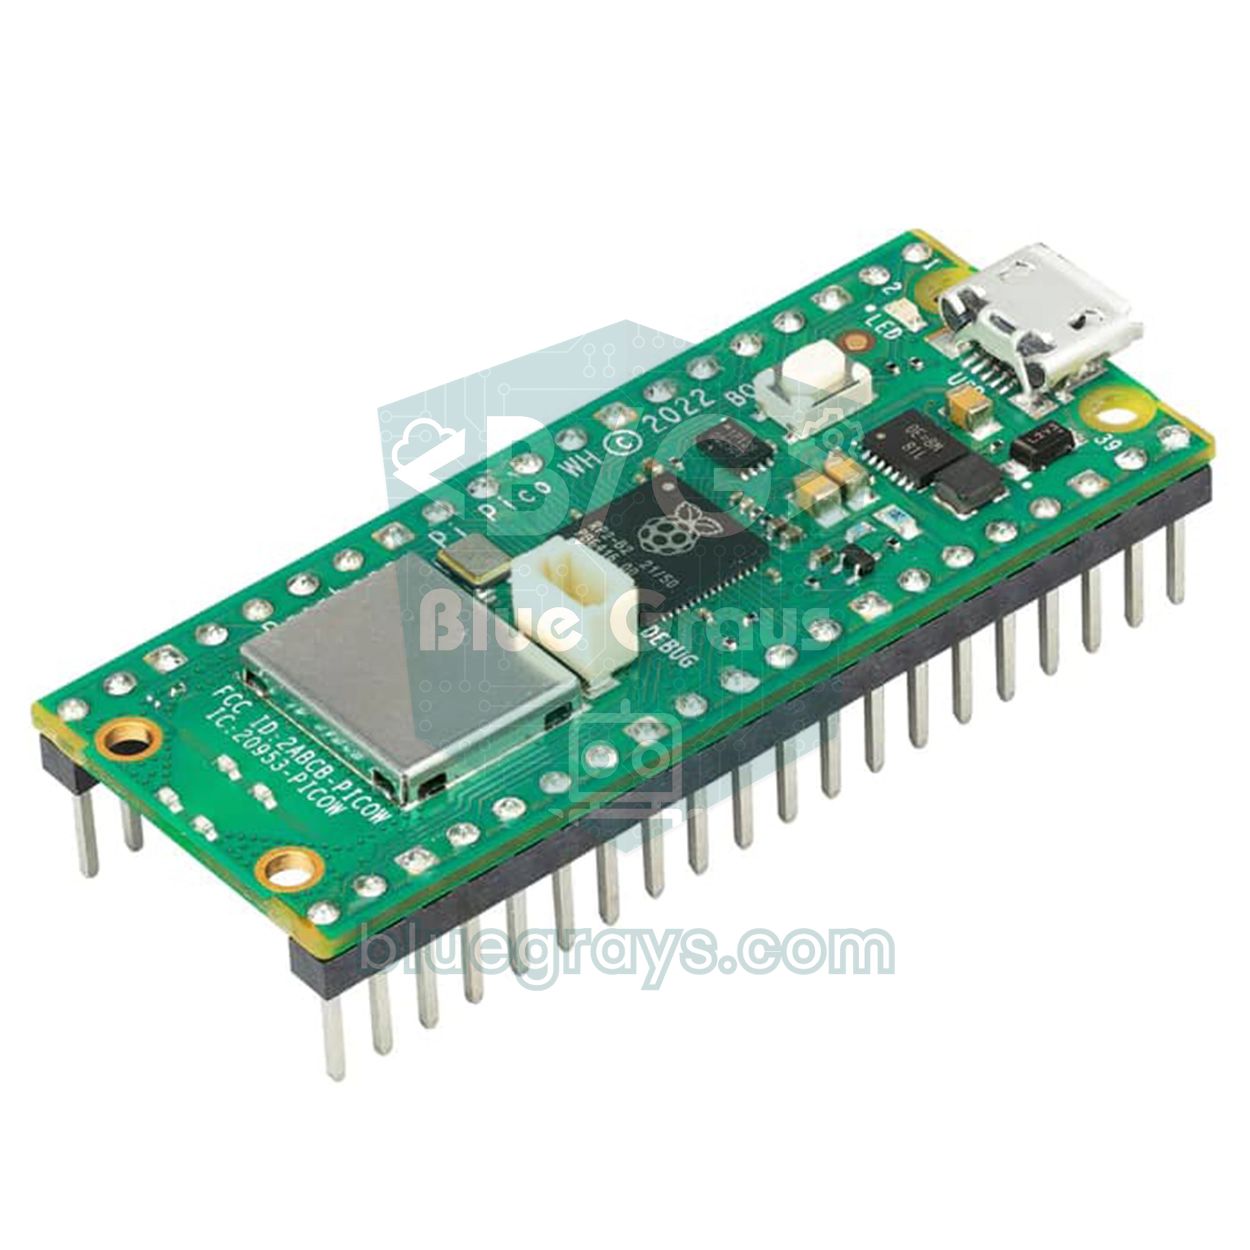
- Path B: 1 Raspberry Pi Pico H or Pico WH (headers soldered) per group, 9 for the class; 9 micro USB data cables. If you buy Pico boards without headers, you need to set aside soldering time for 9 boards.
- For both paths: if a 5 V HC-SR04 is used, one 1 kΩ and one 2 kΩ resistor per group, 9 of each for the class; or a 3.3 V version of the sensor.
- For wireless weeks: a phone hotspot broadcasting at 2.4 GHz or a separate router instead of the school network (path A, and path B with the Pico W).
5 common mistakes schools make when choosing a board
- Buying an IoT board without an IoT goal: because the ESP32 is powerful, buying ESP32s for everyone in the first year is tempting. But if Wi-Fi is not used, students live with the 3.3 V limitation and extra setup steps without getting anything in return.
- Mixing boards in the same lesson: if four groups work with the Uno and four with the Pico, you are teaching two lessons at once. Switch boards at the end of a term or unit; in a mixed-ability class, differentiate with task difficulty, not with the board.
- Confusing the Pico with the Pico W: only the W version has Wi-Fi. If you plan a wireless unit, check for the W when ordering; for an introduction to Python the plain Pico is enough.
- Coming to class with charge-only cables: charge-only USB cables power the board but show no port, and students spend ages hunting for a driver problem. Test the cables one by one with a board at the start of term and mark the data cables.
- Assuming compatible boards are identical to the originals: compatible Uno and ESP32 boards make sense for a school budget, but their USB chips can differ and may need a driver. Before a bulk order, test a sample board on a school computer with a student account.
What the three boards look like in BlueGrays
BlueGrays groups its projects into three platforms, and the split fits a layered plan: there are more than 110 projects for Arduino, about 50 for the ESP32 and more than 30 for the Raspberry Pi Pico. 60 of them are completely free: 20 Arduino, 20 ESP32 and 20 Pico projects. Free projects include the circuit diagram, parts list, code and the Understand the code section; all the projects in the plan table above were picked from them. Arduino and ESP32 project code is Arduino C++, Pico project code is MicroPython. In Discover › Projects, use Filter to pick the platform and Price to list the free projects that match your course board.
- Project Finder: its second question is “Which board do you have?”, with the options Arduino Uno / Nano, ESP32, Raspberry Pi Pico and “I don't have a board yet”. Students get suggestions by picking the board they have, and the WARM UP FIRST · FREE suggestion on the results screen shows a free project to start with the same parts. More in the Project Finder article.
- Code guide: the Code guide in the Learn section has two tracks, Arduino C++ and MicroPython, with 18 cards each. Each card's example comes with Block, Arduino and MicroPython tabs, so a student on path B sees the C++ and Python versions of the same command side by side. The card list is in the code guide article.
- Daily questions: the Code language in questions setting can be Both, Arduino or MicroPython; a class on path B can switch to MicroPython questions in the second term.
- Let's build it together: the 3. Upload the code step of the guided mode changes with the board: for Arduino and ESP32 projects you choose the board and port from the Arduino IDE Tools menu, for Pico projects you choose the MicroPython interpreter in Thonny. Going through this step together on the projector in the first lesson cuts down setup questions.
- Premium and educator packages: Premium is tied to the account and unlocks the projects of all three platforms together; students do not need to buy anything else to move to the ESP32 or Pico in the second term. For a whole class, we explained how the 5- and 10-code, non-renewing packages under Profile > Educator Packages work in bulk Premium codes for your class.
6 questions to answer before deciding: take them to your department meeting
- What should students be able to do at the end of the course: explain a circuit, write code, send data to a network?
- Does the school teach Python or C++, and if so, in which year groups?
- How many groups will work, and how many spare boards will you keep?
- Who has the rights to install software on the computers, and how long will setup take?
- Are your sensors 5 V or 3.3 V, and do they fit the second board?
- Does the school network allow devices to connect, or will you need a hotspot?
If the answers to the first two questions are clear, the board follows on its own: the Uno for basic electronics and algorithms, the ESP32 for connectivity, the Pico for Python. Before you decide, opening the free projects in this plan in the BlueGrays app with their circuit diagrams and code and going through them one evening is the quickest way to see which path suits your class.
Frequently asked questions
Should schools teach Arduino or Raspberry Pi Pico?
For basic electronics and programming logic, the Arduino Uno is the safer start: it runs at 5 V, most sensors connect directly and there is plenty of teaching material. If your school teaches Python, the Pico fits well as a second board. Sequencing the two boards term by term usually works better than picking just one.
Is the ESP32 hard for beginners?
The coding side is not hard; the ESP32 is also programmed with the Arduino IDE in the same C++. The difficulty lies in setup (an extra board package, a USB driver, sometimes the BOOT button) and the 3.3 V limit. That is why it is easier to introduce the ESP32 at school after students have learned to build basic circuits on the Uno.
Is the Raspberry Pi Pico the same as a Raspberry Pi?
No. A Raspberry Pi is a small computer that runs an operating system; the Pico is a microcontroller board that runs a single program, like an Arduino. You do not connect a screen or keyboard to a Pico; it plugs into a computer over USB and is programmed in MicroPython from Thonny.
Do you need admin rights to install the Arduino IDE on school computers?
In most schools, installing software and USB drivers requires administrator rights, so plan it with your IT administrator. The ESP32 board package also goes into the logged-in user's folder, so testing with a student account is essential. The Pico side is lighter because no separate driver is needed.
Should a school buy the Pico or the Pico W?
If you will only teach Python and basic electronics, the Pico is enough. If you plan a unit with Wi-Fi or Bluetooth, buy the Pico W; both are programmed the same way in class. Choose the Pico H or Pico WH versions with soldered headers so they plug straight into a breadboard.
How many boards does a class need?
A class of 24 in groups of three makes 8 groups; 9 boards including one spare are enough. If you prefer pairs, count 12 groups and 1–2 spares. The same count applies when moving to the second board; a few boards bought for lab demonstrations are not enough for the whole class to switch.
Projects to build after reading this
See all projects
LED Blink
The very first hello of electronics: switching a single LED on and off. The Arduino turns the LED on and off at short intervals, so the light blinks quickly. You see in the simplest way how the board

Traffic Light
A tiny copy of the traffic light you see on the road every day. Red stays on for two seconds, yellow flashes for a moment, green stays on for two seconds, then it goes back to red through yellow again

Night Light with Ldr
A little night light that turns on by itself when it gets dark and goes off when morning comes. A light sensor measures how bright the room is, and the Arduino switches the LED on when it is dark enou

HC-SR04 Distance Measurement (Serial Display)
The HC-SR04 sensor works just like a bat finding its way in the dark: it sends out a sound you cannot hear, listens for the echo and measures how far away the object in front of it is. The Arduino wri

LED Blink with ESP32
Teaches basic GPIO output usage with ESP32. We achieve a blinking effect by turning an LED on and off from a digital pin. ESP32 version of the classic blink project on Arduino UNO; the basic blink commands in the Arduino environment are the same, but the ESP32's pin layout and 3.3 V GPIO levels differ from those of the Arduino UNO.

ESP32 DHT22 Temperature and Humidity (with LCD Display)
This project measures ambient temperature and humidity using a DHT22 sensor and displays the data in real time on a 16x2 I2C LCD. Data is read from the sensor using the one-wire protocol via the Adafruit DHT library. This project serves as the foundation for IoT weather stations, smart home automation, or environmental monitoring systems in greenhouses. Communication with the DHT22 is established via the ESP32's GPIO 4 pin.
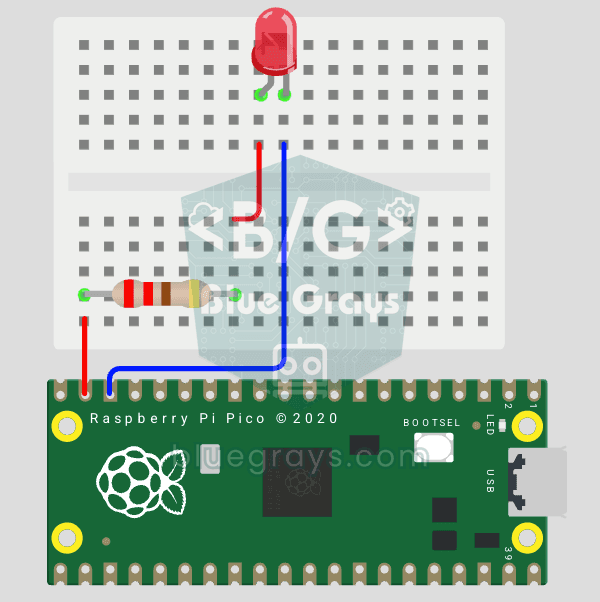
Raspberry Pi Pico: Controlling an External LED (Breadboard)
The next step after Pico’s built-in LED: connecting an external LED to the breadboard and controlling it via the GP14 pin. In this project, you’ll learn how to use any of the Pico’s general-purpose GPIO pins as an output, the LED’s polarity (long leg = anode/+, short leg = cathode/–), and why a current-limiting resistor (220Ω) is required. If you don’t include the resistor, excessive current will flow through the LED and it may burn out. The circuit is very simple: Pico GP14 → 220Ω resistor → LE
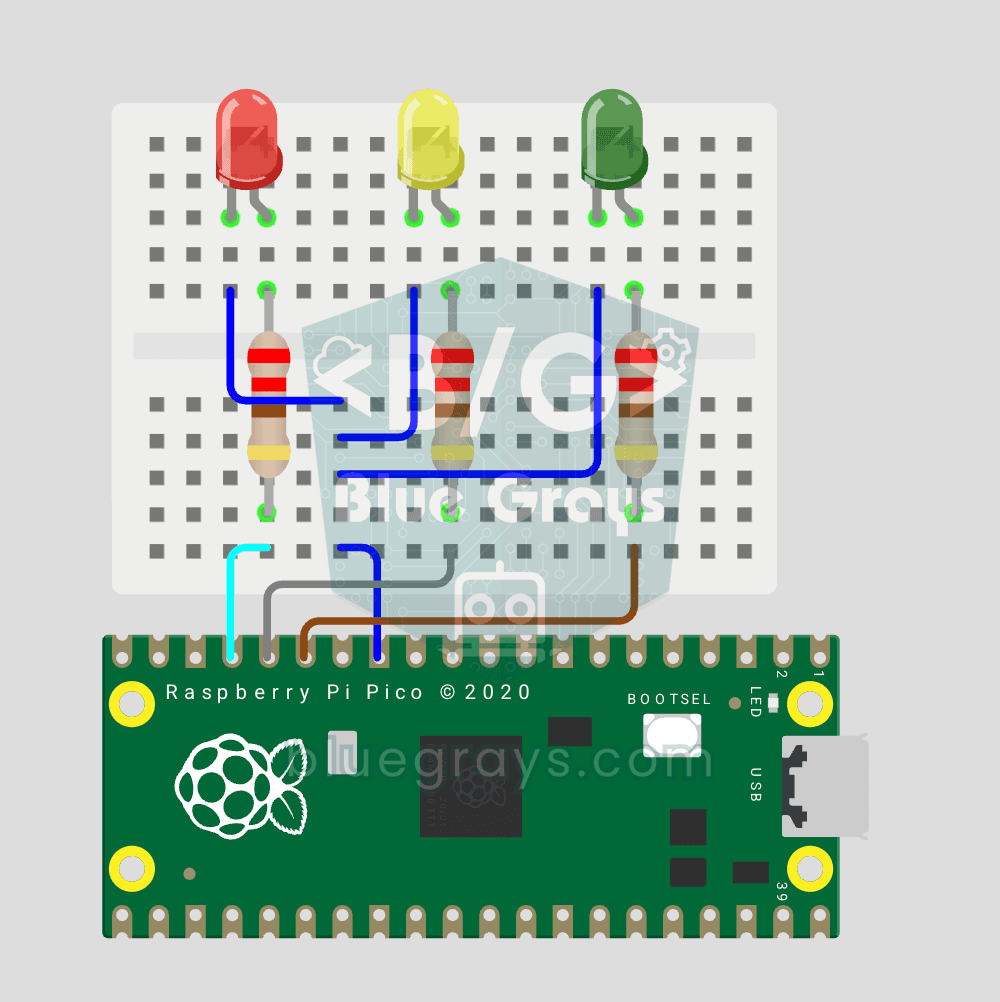
Raspberry Pi Pico Traffic Light Simulator (3 LEDs Sequential)
We simulate a real traffic light with red, yellow and green LEDs — the first 3-LED project of the Pico series! Green 4 sec "go", yellow 1.5 sec "ready", red 3 sec "stop" and red+yellow 1 sec "starting" (European traffic light pattern). Learn function definition (def all_off()), state machine logic (sequence) and multi-GPIO synchronization. Very simple circuit: 3 LEDs on GP11 (Green), GP12 (Yellow), GP13 (Red), each with a 220Ω current-limiting resistor. GP11-GP12-GP13 are ad