
Frost Alarm with Arduino: DS18B20 for Greenhouse, Pipes and Car
Build an Arduino frost alarm: waterproof DS18B20, 0–3 °C threshold with hysteresis, buzzer and LED on Uno, Telegram alerts and deep sleep on ESP32.

An Arduino frost alarm is a simple but very useful system that warns you in advance when the temperature drops dangerously close to zero. A waterproof DS18B20 sensor measures the temperature; when it falls below the threshold you set (usually between 0 and 3 °C), an Arduino Uno raises the alarm with a buzzer and LED, while an ESP32 sends a Telegram or WhatsApp message straight to your phone. Getting a warning the night before can prevent serious damage to seedlings in a greenhouse, water pipes on an outside wall, a garden tap, a chicken coop, a water tank, or the car you need in the morning.
In this guide you'll see step by step why the sensor should be a DS18B20, how to choose threshold and hysteresis values, and where to place the sensor in a greenhouse, on a pipe and on a car. Then we'll build the sound-and-light alarm code for the Uno, a battery-friendly ESP32 version that sends Telegram notifications and spends the time in between asleep with deep sleep, and finally the MicroPython code for the Raspberry Pi Pico. We'll also work out battery life with concrete current figures.
What is a frost alarm and how does it work?
A frost alarm repeats three jobs continuously: it measures the temperature, compares the reading with a threshold and warns you when the threshold is crossed. The trick is why the threshold is set a little above 0 °C rather than exactly at 0 °C. Weather stations measure temperature about 1.5–2 metres above the ground; on clear, windless nights, leaf surfaces, soil and road asphalt radiate heat to the sky and can be 2–3 °C colder than the surrounding air. So on a night when your sensor reads 2 °C, frost can form on leaves and roads can ice over on bridges. Setting the threshold a few degrees higher closes that gap and gives you time to take action. The second key concept is hysteresis: if the alarm turns on at 2 °C, it shouldn't turn off at 2.1 °C, but wait until, say, 3.5 °C. Otherwise, as the temperature hovers around the threshold, the buzzer switches on and off constantly and the ESP32 sends you dozens of messages.
| Application | Warning threshold | Critical threshold | What should you do? |
|---|---|---|---|
| Greenhouse and seedlings | 3 °C | 1 °C | Switch on the heater, cover the seedlings |
| Water pipe on an outside wall | 3 °C | 0.5 °C | Switch on the heating cable, let the tap drip slightly or drain the line |
| Car and road icing | 4 °C | 1 °C | Cover the windows, drive carefully in the morning |
| Water tank, chicken coop, barn | 3 °C | 1 °C | Use a heat lamp or add insulation |
Why the DS18B20? Specifications
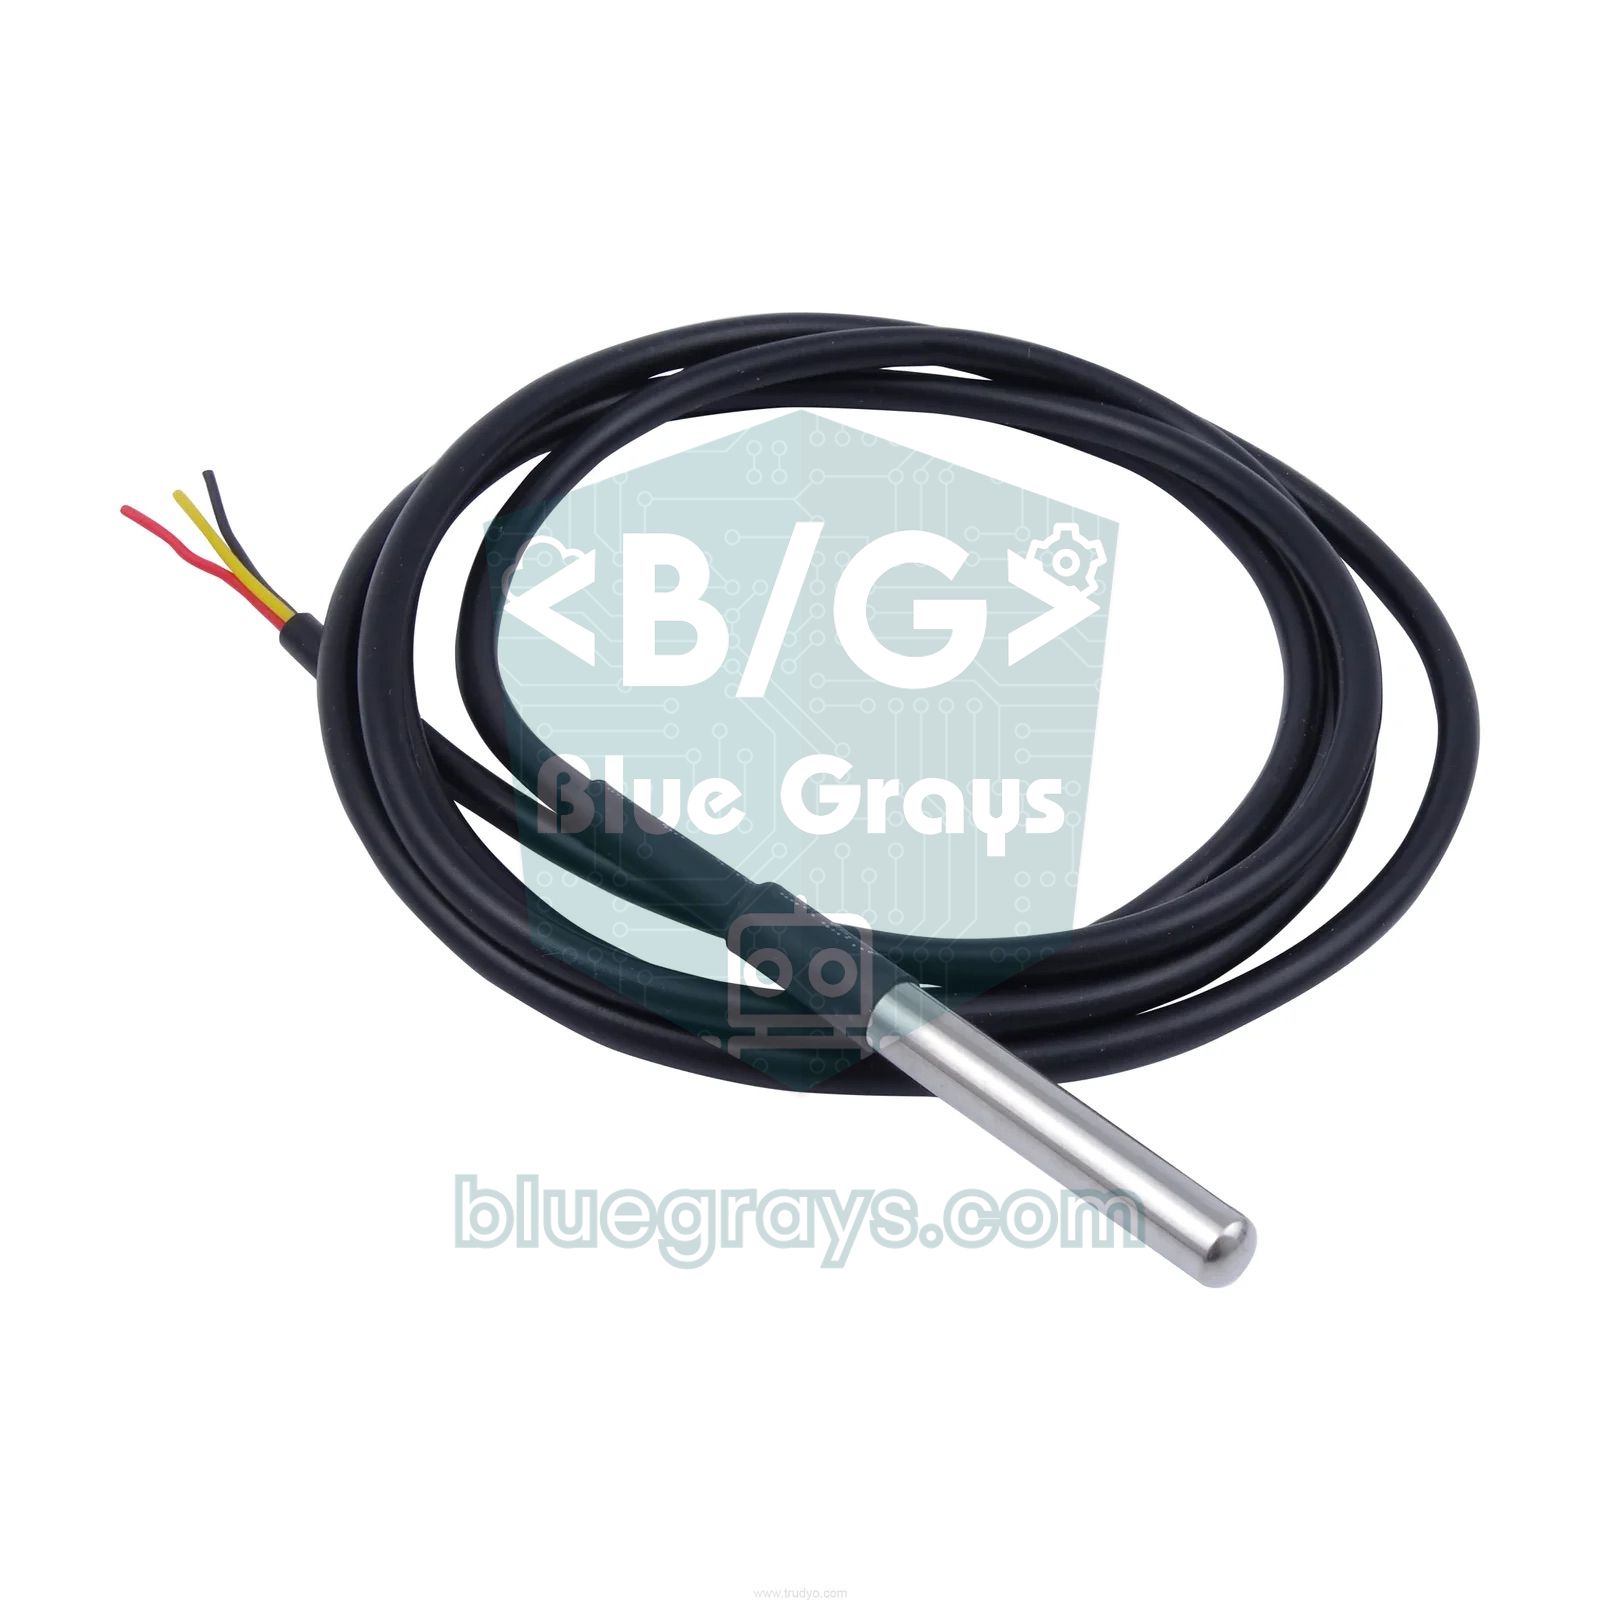
The most common mistake with a frost alarm is using the DHT11 you happen to have lying around. The DHT11's measuring range is 0–50 °C, so it can't give a correct reading below zero, exactly the region you care about. The DHT22 measures down to -40 °C but isn't waterproof; condensation in a greenhouse and frost outdoors will ruin the sensor quickly. An NTC thermistor is cheap but needs calibration, and on a long cable the wire resistance shifts the reading. The waterproof DS18B20, on the other hand, is a digital sensor sealed in a stainless steel sheath: it does the measurement internally and sends the result as a number over a single data line using the 1-Wire protocol. That way cable length doesn't corrupt the measurement, and because every sensor has a unique 64-bit address written at the factory, you can connect several sensors to the same line. For a detailed introduction to the sensor, see DS18B20 Temperature Sensor, and for a comparison with other options, see the temperature sensor comparison.
| Feature | Value |
|---|---|
| Measuring range | -55 to +125 °C |
| Accuracy | ±0.5 °C (between -10 and +85 °C) |
| Resolution | 9–12 bits (0.5 / 0.25 / 0.125 / 0.0625 °C) |
| Conversion time | About 94 ms at 9 bits, up to 750 ms at 12 bits |
| Supply | 3.0–5.5 V |
| Current | Up to 1.5 mA while measuring, about 1 µA in standby |
| Communication | 1-Wire, unique 64-bit address on every sensor |
| Wire colours (most probes) | Red VDD, black GND, yellow (sometimes white) DATA |
Frost alarm wiring: Arduino Uno, ESP32 and Pico
| Connection | Arduino Uno | ESP32 | Raspberry Pi Pico |
|---|---|---|---|
| DS18B20 red (VDD) | 5V | 3V3 | 3V3(OUT), pin 36 |
| DS18B20 black (GND) | GND | GND | GND |
| DS18B20 yellow (DATA) | D2 | GPIO 4 | GP16 |
| 4.7 kΩ pull-up resistor | Between DATA and 5V | Between DATA and 3V3 | Between DATA and 3V3(OUT) |
| Active buzzer (+) | D8 | Not used (notification via Telegram) | GP15 |
| LED + 220 Ω resistor | D7 | Not used | GP14 |
Some probes come with a small adapter board that already carries the resistor; in that case you don't need to fit one separately. You may need to extend the cable to reach the greenhouse or a pipe in the basement. If you use twisted-pair cable (for example one pair of a CAT5 network cable for DATA and GND and another pair for VDD), 10–20 metres usually works without problems; on longer runs, powering at 5 V and lowering the pull-up to 2.2 kΩ helps. If you're connecting several sensors, chain them one after another on a single line; branching in a star shape causes reflections and read errors. Also solder the joints and cover them with heat-shrink tubing, because outdoor moisture will corrode an exposed splice within a few weeks. Parasitic power mode, which uses only two wires, works over short distances, but for a job that demands reliability like a frost alarm, prefer the normal three-wire mode.
Where should you place the sensor?
- Greenhouse: Hang the sensor at seedling height, 20–50 cm above the ground. The probe shouldn't get direct sun or it will read 40 °C during the day; a white plastic cup with the bottom cut out or a cut-down bottle makes a simple sun shield. Don't bury the probe in the soil, because you're measuring the air temperature.
- Water pipe: Fasten the probe tip firmly to the coldest point of the pipe, usually on an outside wall or a windy corner, with aluminium tape or a clamp, and wrap it together with the pipe insulation. That way you measure the pipe's surface temperature rather than the air, and you get a warning before the water in the pipe freezes.
- Car: For the outside temperature, place the probe behind the front bumper, away from the engine, radiator and exhaust. Many cars' own displays also show an ice symbol at around 3–4 °C. If you want to monitor windscreen icing, you can put a second sensor inside the cabin.
- Water tank and chicken coop: On a tank, fix the probe to the coldest side surface; in a coop, put it high enough that the animals can't peck at it, near the water container.
Step by step: frost alarm with buzzer and LED on an Arduino Uno
- Open the Library Manager in the Arduino IDE and install the OneWire (Paul Stoffregen) and DallasTemperature (Miles Burton) libraries. If you don't know how, see adding libraries to Arduino.
- Connect the DS18B20's red wire to 5V, the black one to GND and the yellow one to D2; fit a 4.7 kΩ resistor between D2 and 5V.
- Connect the active buzzer's positive lead to D8 and the LED to D7 through a 220 Ω resistor; the negative leads of both go to GND.
- Upload the code below, open the Serial Monitor at 9600 baud and check that the temperature arrives every second.
- Test the alarm by dipping the probe in a glass of ice water; when the value drops below 1 °C, the LED should blink quickly and the buzzer should beep in short bursts.
- Change the thresholds for your own application using the ESIK_UYARI and ESIK_ALARM constants.
1#include <OneWire.h>
2#include <DallasTemperature.h>
3
4#define ONE_WIRE_PIN 2   // DS18B20 veri (sarı) / DS18B20 data (yellow)
5#define BUZZER_PIN   8   // aktif buzzer / active buzzer
6#define LED_PIN      7   // uyarı LED'i (220 ohm) / warning LED (220 ohm)
7
8const float ESIK_UYARI  = 3.0;  // uyarı eşiği / warning threshold
9const float ESIK_ALARM  = 1.0;  // alarm eşiği / alarm threshold
10const float HISTEREZIS  = 0.5;  // geri dönüş payı / hysteresis band
11const float KALIBRASYON = 0.0;  // buzlu su testine göre düzelt / offset from ice-water test
12
13OneWire oneWire(ONE_WIRE_PIN);
14DallasTemperature sensors(&oneWire);
15
16byte durum = 0;              // 0 normal, 1 uyarı / warning, 2 alarm, 3 sensör hatası / sensor error
17unsigned long sonOlcum = 0;
18unsigned long sonSinyal = 0;
19bool sinyalAcik = false;
20
21void setup() {
22  Serial.begin(9600);
23  pinMode(BUZZER_PIN, OUTPUT);
24  pinMode(LED_PIN, OUTPUT);
25  sensors.begin();
26  sensors.setResolution(12);            // 0,0625 °C adım / 0.0625 °C step
27  sensors.setWaitForConversion(false);  // beklemeden ölç / non-blocking conversion
28  sensors.requestTemperatures();
29  sonOlcum = millis();
30}
31
32void durumGuncelle(float t) {
33  switch (durum) {
34    case 0:                                   // normal
35      if (t <= ESIK_ALARM) durum = 2;
36      else if (t <= ESIK_UYARI) durum = 1;
37      break;
38    case 1:                                   // uyarı / warning
39      if (t <= ESIK_ALARM) durum = 2;
40      else if (t >= ESIK_UYARI + HISTEREZIS) durum = 0;
41      break;
42    case 2:                                   // alarm
43      if (t >= ESIK_UYARI + HISTEREZIS) durum = 0;
44      else if (t >= ESIK_ALARM + HISTEREZIS) durum = 1;
45      break;
46  }
47}
48
49void sinyalVer(unsigned long simdi) {
50  if (durum == 0) {                           // her şey sessiz / all quiet
51    digitalWrite(LED_PIN, LOW);
52    digitalWrite(BUZZER_PIN, LOW);
53    return;
54  }
55  if (durum == 3) {                           // hata: LED sabit yanar / error: LED steady on
56    digitalWrite(LED_PIN, HIGH);
57    digitalWrite(BUZZER_PIN, LOW);
58    return;
59  }
60  unsigned long aralik = (durum == 2) ? 200 : 1000;  // alarmda hızlı / fast in alarm
61  if (simdi - sonSinyal >= aralik) {
62    sonSinyal = simdi;
63    sinyalAcik = !sinyalAcik;
64    digitalWrite(LED_PIN, sinyalAcik ? HIGH : LOW);
65    digitalWrite(BUZZER_PIN, (durum == 2 && sinyalAcik) ? HIGH : LOW);  // buzzer yalnız alarmda / buzzer only in alarm
66  }
67}
68
69void loop() {
70  unsigned long simdi = millis();
71  if (simdi - sonOlcum >= 1000) {             // 750 ms dönüşüm bitti / conversion finished
72    sonOlcum = simdi;
73    float t = sensors.getTempCByIndex(0);
74    sensors.requestTemperatures();            // sonraki ölçümü başlat / start next conversion
75    if (t == DEVICE_DISCONNECTED_C) {         // -127: sensör yok / sensor missing
76      durum = 3;
77      Serial.println(F("Sensor yok / Sensor missing"));
78    } else {
79      t += KALIBRASYON;
80      if (durum == 3) durum = 0;              // sensör geri geldi / sensor is back
81      durumGuncelle(t);
82      Serial.print(F("Sicaklik / Temp: "));
83      Serial.print(t, 2);
84      Serial.print(F(" C  Durum / State: "));
85      Serial.println(durum);
86    }
87  }
88  sinyalVer(simdi);
89}| Code part | What does it do? |
|---|---|
| setWaitForConversion(false) | The requestTemperatures() command doesn't halt the program for 750 ms; the buzzer and LED keep working during that time. |
| 1-second loop with millis() | Reads the measurement after the previous conversion has finished and immediately starts the next one; delay() isn't used. |
| durum variable (0–3) | A simple state machine that holds the normal, warning, alarm and sensor error states. |
| HISTEREZIS | Requires the temperature to rise 0.5 °C above the threshold before moving to a higher state; prevents the buzzer from chattering. |
| KALIBRASYON | A constant offset added to correct the deviation you measured in the ice water test. |
| DEVICE_DISCONNECTED_C | The -127 value the library returns when it can't reach the sensor; it catches a broken cable and keeps the LED on. |
Telegram notifications and deep sleep with the ESP32
A buzzer is only useful when you're next to it; if the greenhouse is at the bottom of the garden or the pipes in your holiday home are hundreds of kilometres away, the warning has to reach your phone. The ESP32 is ideal for this: with its built-in Wi-Fi it can send an HTTPS request straight to the Telegram Bot API. To create a bot, you just need to talk to BotFather on Telegram to get a token and find out your own chat id; details are in ESP32 Telegram Bot. The code below doesn't stay on all the time: it wakes up, measures, sends a message if needed and goes into deep sleep for 10 minutes. The only extra libraries you need are OneWire and DallasTemperature; WiFiClientSecure and HTTPClient come with the ESP32 core, and the code compiles the same way on both 2.x and 3.x core versions.
1#include <WiFi.h>
2#include <WiFiClientSecure.h>
3#include <HTTPClient.h>
4#include <OneWire.h>
5#include <DallasTemperature.h>
6#include <esp_sleep.h>
7
8const char* WIFI_SSID = "WIFI_ADI";              // Wi-Fi adın / your Wi-Fi name
9const char* WIFI_PASS = "WIFI_SIFRESI";          // Wi-Fi şifren / your Wi-Fi password
10const char* BOT_TOKEN = "123456789:ABCdefGhIJK"; // BotFather'dan / from BotFather
11const char* CHAT_ID   = "123456789";             // sohbet kimliğin / your chat id
12
13#define ONE_WIRE_PIN 4                 // DS18B20 veri pini / DS18B20 data pin
14const float ESIK_ALARM  = 2.0;         // altına inerse uyar / warn below this
15const float ESIK_NORMAL = 3.5;         // üstüne çıkınca normal / back to normal above this
16const uint32_t UYKU_NORMAL_DK = 10;    // normalde 10 dk uyu / sleep 10 min normally
17const uint32_t UYKU_ALARM_DK  = 5;     // alarmdayken 5 dk / 5 min while in alarm
18
19RTC_DATA_ATTR bool alarmVar = false;        // uykuda silinmez / survives deep sleep
20RTC_DATA_ATTR bool hataBildirildi = false;  // sensör hatası bildirildi mi / sensor error reported?
21
22OneWire oneWire(ONE_WIRE_PIN);
23DallasTemperature sensors(&oneWire);
24
25bool telegramGonder(const String& mesaj) {
26  WiFi.mode(WIFI_STA);
27  WiFi.begin(WIFI_SSID, WIFI_PASS);
28  unsigned long t0 = millis();
29  while (WiFi.status() != WL_CONNECTED && millis() - t0 < 15000) {  // en fazla 15 sn bekle / wait max 15 s
30    delay(250);
31  }
32  if (WiFi.status() != WL_CONNECTED) return false;
33
34  WiFiClientSecure client;
35  client.setInsecure();                // sertifika doğrulaması yok / skip certificate check
36  HTTPClient http;
37  String url = String("https://api.telegram.org/bot") + BOT_TOKEN + "/sendMessage";
38  if (!http.begin(client, url)) return false;
39  http.addHeader("Content-Type", "application/json");
40  String govde = String("{\"chat_id\":\"") + CHAT_ID + "\",\"text\":\"" + mesaj + "\"}";
41  int kod = http.POST(govde);
42  Serial.print("HTTP kodu / HTTP code: ");
43  Serial.println(kod);
44  http.end();
45  return kod == 200;
46}
47
48void uykuyaGec(uint32_t dakika) {
49  WiFi.disconnect(true);
50  WiFi.mode(WIFI_OFF);
51  esp_sleep_enable_timer_wakeup((uint64_t)dakika * 60ULL * 1000000ULL);  // mikrosaniye / microseconds
52  esp_deep_sleep_start();
53}
54
55void setup() {
56  Serial.begin(115200);
57  sensors.begin();
58  sensors.setResolution(12);
59  sensors.requestTemperatures();       // 750 ms bekler / waits 750 ms
60  float t = sensors.getTempCByIndex(0);
61  Serial.print("Sicaklik / Temp: ");
62  Serial.println(t, 2);
63
64  if (t == DEVICE_DISCONNECTED_C) {    // -127: sensör yok / sensor missing
65    if (!hataBildirildi && telegramGonder("Don alarmı: sensör okunamıyor!")) {
66      hataBildirildi = true;
67    }
68    uykuyaGec(UYKU_NORMAL_DK);
69  }
70  hataBildirildi = false;
71
72  if (!alarmVar && t <= ESIK_ALARM) {
73    if (telegramGonder(String("DON UYARISI! Sıcaklık: ") + String(t, 1) + " °C")) {
74      alarmVar = true;                 // yalnız mesaj gidince / only after the message is sent
75    }
76  } else if (alarmVar && t >= ESIK_NORMAL) {
77    if (telegramGonder(String("Don tehlikesi geçti. Sıcaklık: ") + String(t, 1) + " °C")) {
78      alarmVar = false;
79    }
80  }
81  uykuyaGec(alarmVar ? UYKU_ALARM_DK : UYKU_NORMAL_DK);
82}
83
84void loop() {
85  // buraya hiç gelinmez / never reached
86}
During deep sleep the ESP32's main memory is erased and the program restarts from setup() when it wakes. To remember whether the alarm is active, variables marked with RTC_DATA_ATTR are stored in the small RTC memory that stays powered during sleep. This way a message isn't sent on every wake-up as long as the temperature stays below the threshold; you receive just two messages, when the alarm starts and when the danger has passed. The state variable is updated only when the message was sent successfully; if Wi-Fi isn't reachable at that moment, the ESP32 tries again on the next wake-up. While the alarm is active, the sleep time drops to 5 minutes. If you'd rather get messages on WhatsApp instead of Telegram, you only need to change the telegramGonder() function; you can use the method in WhatsApp messages with the ESP32 for that. Sleep modes are covered in detail in ESP32 deep sleep, and fixes for connection problems are in ESP32 won't connect to Wi-Fi.
How do you calculate battery life with deep sleep?
Frost alarms often work away from a power outlet, in a greenhouse or on a garden wall, so battery life matters at least as much as the code. The calculation is simple: multiply the current in each state by the time spent in it and add up the daily total. An ESP32 that wakes every 10 minutes wakes 144 times a day and draws about 40 mA for roughly 1 second each time (start-up and the 750 ms measurement); that comes to about 1.6 mAh per day. If you assume two messages are sent on a cold night, each lasting 5 seconds at an average of 120 mA including the Wi-Fi connection, that adds another 0.3 mAh per day. Everything else depends on the board's sleep current, and as you'll see in the table below, the real consumption comes not from the ESP32 chip but from the regulator, USB chip and power LED on the development board. To calculate with your own values, you can use the battery life calculator.
| Board / state | Sleep current | Daily consumption | With a 2500 mAh 18650 |
|---|---|---|---|
| Standard ESP32 DevKit (AMS1117, USB chip, power LED) | About 6 mA | About 146 mAh | About 17 days |
| Board with a low-current regulator or bare module | 10–20 µA | About 2.2–2.4 mAh | In theory over 2 years, in practice easily gets through a winter |
| Always on without deep sleep (Wi-Fi off) | About 40 mA | About 960 mAh | About 2.6 days |
Frost alarm with the Raspberry Pi Pico and MicroPython
On the Pico you don't need to install anything extra for the DS18B20; the onewire and ds18x20 modules come built into MicroPython. Connect the sensor to GP16, the buzzer to GP15 and the LED to GP14, and again place a 4.7 kΩ resistor between the DATA line and 3V3(OUT). The code below sets up a simple alarm with hysteresis; if the sensor is unplugged, the LED blinks to report the error, and when the sensor is reconnected it rescans the line automatically. If you're using a Pico W, you can send the same measurement to your phone or home automation system over MQTT with the Pico W. If you're new to MicroPython, first take a look at MicroPython basics.
1from machine import Pin
2import onewire, ds18x20, time
3
4ds = ds18x20.DS18X20(onewire.OneWire(Pin(16)))  # GP16, 4,7 kΩ pull-up şart / pull-up required
5led = Pin(14, Pin.OUT)
6buzzer = Pin(15, Pin.OUT)
7
8ESIK_ALARM = 2.0    # alarm eşiği / alarm threshold
9ESIK_NORMAL = 3.5   # normale dönüş / back to normal
10alarm = False
11roms = ds.scan()
12print("Sensörler / Sensors:", roms)
13
14while True:
15    if not roms:                      # sensör yok / no sensor
16        led.toggle()
17        time.sleep(1)
18        roms = ds.scan()
19        continue
20    try:
21        ds.convert_temp()
22        time.sleep_ms(750)            # 12 bit dönüşüm / 12-bit conversion
23        t = ds.read_temp(roms[0])
24    except Exception:                 # CRC ya da kablo hatası / CRC or wiring error
25        roms = []
26        continue
27    if not alarm and t <= ESIK_ALARM:
28        alarm = True
29    elif alarm and t >= ESIK_NORMAL:
30        alarm = False
31    print("Sıcaklık / Temp: {:.2f} C  alarm={}".format(t, alarm))
32    if alarm:
33        for _ in range(3):            # 3 kısa bip / 3 short beeps
34            led.on()
35            buzzer.on()
36            time.sleep_ms(150)
37            led.off()
38            buzzer.off()
39            time.sleep_ms(150)
40    else:
41        led.off()
42        buzzer.off()
43        time.sleep(1)
Frost alarm project ideas
- Automatic greenhouse heater: Switch the heater on at the alarm threshold with a relay module and off at 5 °C; this is exactly the logic of a thermostat.
- Smart greenhouse station: Combine the frost alarm with soil moisture and ventilation control; details are in the smart greenhouse project.
- Multi-point pipe monitoring: Connect three DS18B20 sensors to a single 1-Wire line for the basement, an outside wall and the attic, and monitor each one separately by its address.
- Alert linked to home automation: Send the ESP32's measurement to MQTT and Home Assistant and trigger other devices in the house when there's a frost risk.
- Winter data logging: Write measurements through the night to an SD card or a Google Sheets spreadsheet to find the coldest hours in your greenhouse.
- Car thermometer with a display: Show the outside temperature on an OLED display and draw a snowflake icon below 3 °C.
Common mistakes and how to fix them
| Symptom | Likely cause | Fix |
|---|---|---|
| Constantly -127 °C | No pull-up resistor, DATA on the wrong pin or a broken cable | Fit a 4.7 kΩ resistor between DATA and VDD, check the pin number in the code |
| Constantly 85 °C | Read before the measurement finished or inadequate supply | Wait 750 ms for the conversion, use the three-wire connection instead of parasitic mode |
| Alarm keeps switching on and off | No hysteresis or too narrow | Leave at least 0.5 °C between the on and off thresholds |
| Greenhouse reads 35–40 °C in the daytime | The probe is in direct sunlight | Move the probe into shade or inside a ventilated shield |
| No Telegram message arrives | Wrong token or chat id, or you've never messaged the bot | Send /start to the bot first, check in the Serial Monitor that the HTTP code is 200 |
| ESP32 resets when Wi-Fi turns on | The battery or regulator can't handle the sudden current surge | Add a 100–470 µF capacitor to the supply; see the brownout article |
| Battery dies in a few days | The development board's regulator and USB chip draw current during sleep | Use a board with a low-current LDO, remove the power LED |
A frost alarm is one of those rare projects where a cheap sensor and a short piece of code can prevent real damage: a single message the night before can save a greenhouse full of seedlings or the repair bill for a burst water pipe. First build the buzzer version with the Uno and try out your thresholds, then make it wireless and battery-powered with the ESP32 and deep sleep. In the BlueGrays app you'll find projects on temperature measurement, using a buzzer, ESP32 deep sleep and alarms with Telegram notifications, complete with step-by-step circuit diagrams and code, and you can extend the frost alarm in this guide to suit your own needs.
Frequently asked questions
Which temperature sensor should I use for a frost alarm?
The best choice is the waterproof DS18B20: it measures down to -55 °C, is accurate to ±0.5 °C, and its stainless steel sheath withstands moisture and frost. The DHT11 can't be used for a frost alarm because its measuring range starts at 0 °C. The DHT22 and BME280 can measure below zero but need protection from condensation outdoors.
Why does my DS18B20 show -127 degrees?
-127 is the error value the DallasTemperature library returns when it can't reach the sensor. The most common cause is a missing 4.7 kΩ pull-up resistor between DATA and VDD. A wrong pin definition, a broken cable or reversed power can give the same result.
At what temperature should a frost alarm go off?
For most applications, a 2–3 °C warning and a 0–1 °C critical alarm is a good starting point. On clear, windless nights, leaves, pipes and road surfaces can be 2–3 °C colder than the air, so setting the threshold at exactly 0 °C would make you too late. To stop the alarm from chattering, keep the switch-off threshold at least 0.5 °C above the switch-on threshold.
How long can a DS18B20 cable be?
With twisted-pair cable and a 4.7 kΩ pull-up, 10–20 metres usually works without problems. On longer runs you should power at 5 V, lower the pull-up to 2.2 kΩ and chain the sensors on a single line rather than in a star. Parasitic power mode isn't reliable on long cables.
How long does a battery last with ESP32 deep sleep?
With a bare module or a board with a low-current regulator, a frost alarm measuring every 10 minutes uses about 2–3 mAh per day; a 2500 mAh 18650 cell lasts over two years in theory. On standard DevKit boards, the regulator and USB chip draw a few mA during sleep, so that drops to two or three weeks. Also keep in mind that cold reduces battery capacity.
Can an Arduino Uno send a frost warning to my phone?
The Uno has no Wi-Fi, so it can't send one directly. The easiest way is to use an ESP32 or ESP8266 and send notifications through Telegram or WhatsApp. In a location without Wi-Fi, you can add a GSM module such as the SIM800L to the Uno and send SMS messages.
Projects to build after reading this
See all projects
Temperature and Humidity with DHT11
How warm is your room, and is the air humid or dry? The DHT11 sensor measures temperature and humidity, and the Arduino writes the values on a two-line LCD screen, refreshing every couple of seconds.
Using a Buzzer
Ever wondered how a doorbell or an alarm makes its sound? The Arduino makes a small buzzer beep at short intervals: beep, pause, beep, pause.
Temperature Measurement with NTC and 2x16 Lcd Display
Measure the temperature around you with a sensor that looks like a tiny bead. This part, called an NTC, lets electricity through more easily as it warms up; the Arduino reads that change, turns it…

ESP32 DHT22 Temperature and Humidity (with LCD Display)
This project measures ambient temperature and humidity using a DHT22 sensor and displays the data in real time on a 16x2 I2C LCD. Data is read from the sensor using the one-wire protocol via the Adafruit DHT library. This project serves as the foundation for IoT weather stations, smart home automation, or environmental monitoring systems in greenhouses. Communication with the DHT22 is established via the ESP32's GPIO 4 pin.

ESP32 Deep Sleep — Battery Saving (OLED + RTC RAM Counter)
The ESP32's Deep Sleep mode shuts down the CPU and most peripherals, cutting current draw to about 10µA, which is vital for battery-powered IoT devices. This project uses three wake-up sources: a timer (15 s), an external pin (EXT0, the button on GPIO 33) and a touch pin (T0/GPIO 4). Counters marked with RTC_DATA_ATTR survive deep sleep.

ESP32 Temperature Data Logger (DHT22 + DS1307 RTC + microSD + OLED)
Build a timed temperature and humidity logger with the ESP32! A DHT22 sensor reads temperature and humidity once a minute, and each reading is saved to a microSD card in CSV format with a real-time stamp from the DS1307 RTC module. The OLED display shows the latest temperature, humidity, timestamp and total number of records live, in large text.
ESP32 Motion Alarm System (PIR + Buzzer + LED + Telegram)
A smart security alarm: when the PIR sensor detects motion, it sounds the buzzer, lights the LED and sends the owner an instant Telegram notification. A 30-second cooldown limits how often the alarm repeats; it does not filter out the PIR sensor's false detections. Use it at home, in a garage, a storeroom or a study.

Dot Matrix Clock, Calendar and Weather Station (MAX7219, DS1307)
A scrolling-text board for your desk or wall that shows the time, the date and the room's weather in turn.