
ESP32 Projects for Beginners: 20 Ideas From Easy to Advanced
20 ESP32 projects for beginners, from the onboard LED and a web server to an NTP clock, a DHT22 web page and a Telegram alarm, with parts, time and libraries.
When you're looking for ESP32 projects for beginners, the biggest trap is trying to build an alarm that sends Telegram alerts on day one and getting buried in cable, driver, Wi-Fi and library problems all at once. The 20 projects in this guide go from easy to advanced, and each one adds just one new thing to the previous one. First you blink the board's onboard LED, then you add buttons, sensors and displays, then you join your Wi-Fi and build pages you control from your phone, and finally you move on to devices that pull data from the internet, send notifications and run for months on a battery.
The projects are split into four levels and all of them sit in a single table, so you can see each one's parts, rough build time and library at a glance. Under each level you'll find what every project teaches, which pins to watch out for and the guides with the full walkthrough. The code for three of the projects is right on this page: a touch-pin LED, an NTP internet clock and a DHT22 temperature web page.

Before you start: setup and ground rules
- Arduino IDE and the ESP32 package: install Espressif's esp32 package from the Boards Manager and select ESP32 Dev Module as the board; the steps are in the Arduino IDE installation guide.
- If no port shows up: swap the cable first, then install the driver for your board's USB chip (CP2102 or CH340); details are in the CH340 driver guide.
- The 3.3 V rule: the ESP32's pins run at 3.3 V and aren't 5 V tolerant. For sensors with a 5 V output, put a voltage divider in between.
- Safe pins: GPIO 6 to 11 are wired to the flash memory and GPIO 34 to 39 are input only. See your board's map in the Pinout tool.
- Wi-Fi: the ESP32 only connects to 2.4 GHz networks; it can't see 5 GHz ones.
- Power: when Wi-Fi starts, the board draws peaks of up to 250 mA; a poor cable or a weak port keeps resetting it. The fix is in the ESP32 brownout guide.
All 20 ESP32 projects in one table
| # | Project | Parts | Time | Library |
|---|---|---|---|---|
| 1 | Blink the onboard LED | Just the ESP32 | 10 min | None |
| 2 | LED with a button (momentary and toggle) | Button, LED, 220 Ω | 20 min | None |
| 3 | Traffic light | 3 LEDs, 3 × 220 Ω | 20 min | None |
| 4 | Fade an LED with PWM | LED, 220 Ω | 20 min | None (LEDC is in the core) |
| 5 | LED with a touch pin | One jumper wire | 15 min | None |
| 6 | Night light with an LDR | LDR, 10 kΩ, LED | 30 min | None |
| 7 | LED brightness with a potentiometer | 10 kΩ potentiometer, LED | 30 min | None |
| 8 | HC-SR04 distance meter | HC-SR04, 1 kΩ and 2 kΩ resistors | 40 min | None |
| 9 | Thermometer with DHT22 and I2C LCD | DHT22, 16x2 I2C LCD | 45 min | DHT sensor library, LiquidCrystal_I2C |
| 10 | Automatic light with a PIR sensor | HC-SR501, LED or relay | 30 min | None |
| 11 | Connect to Wi-Fi and show the IP | Just the ESP32 | 15 min | WiFi (core) |
| 12 | Control an LED from your phone | LED, 220 Ω | 30 min | WiFi, WebServer (core) |
| 13 | NTP internet clock | Just the ESP32 (OLED optional) | 30 min | WiFi, time.h (core) |
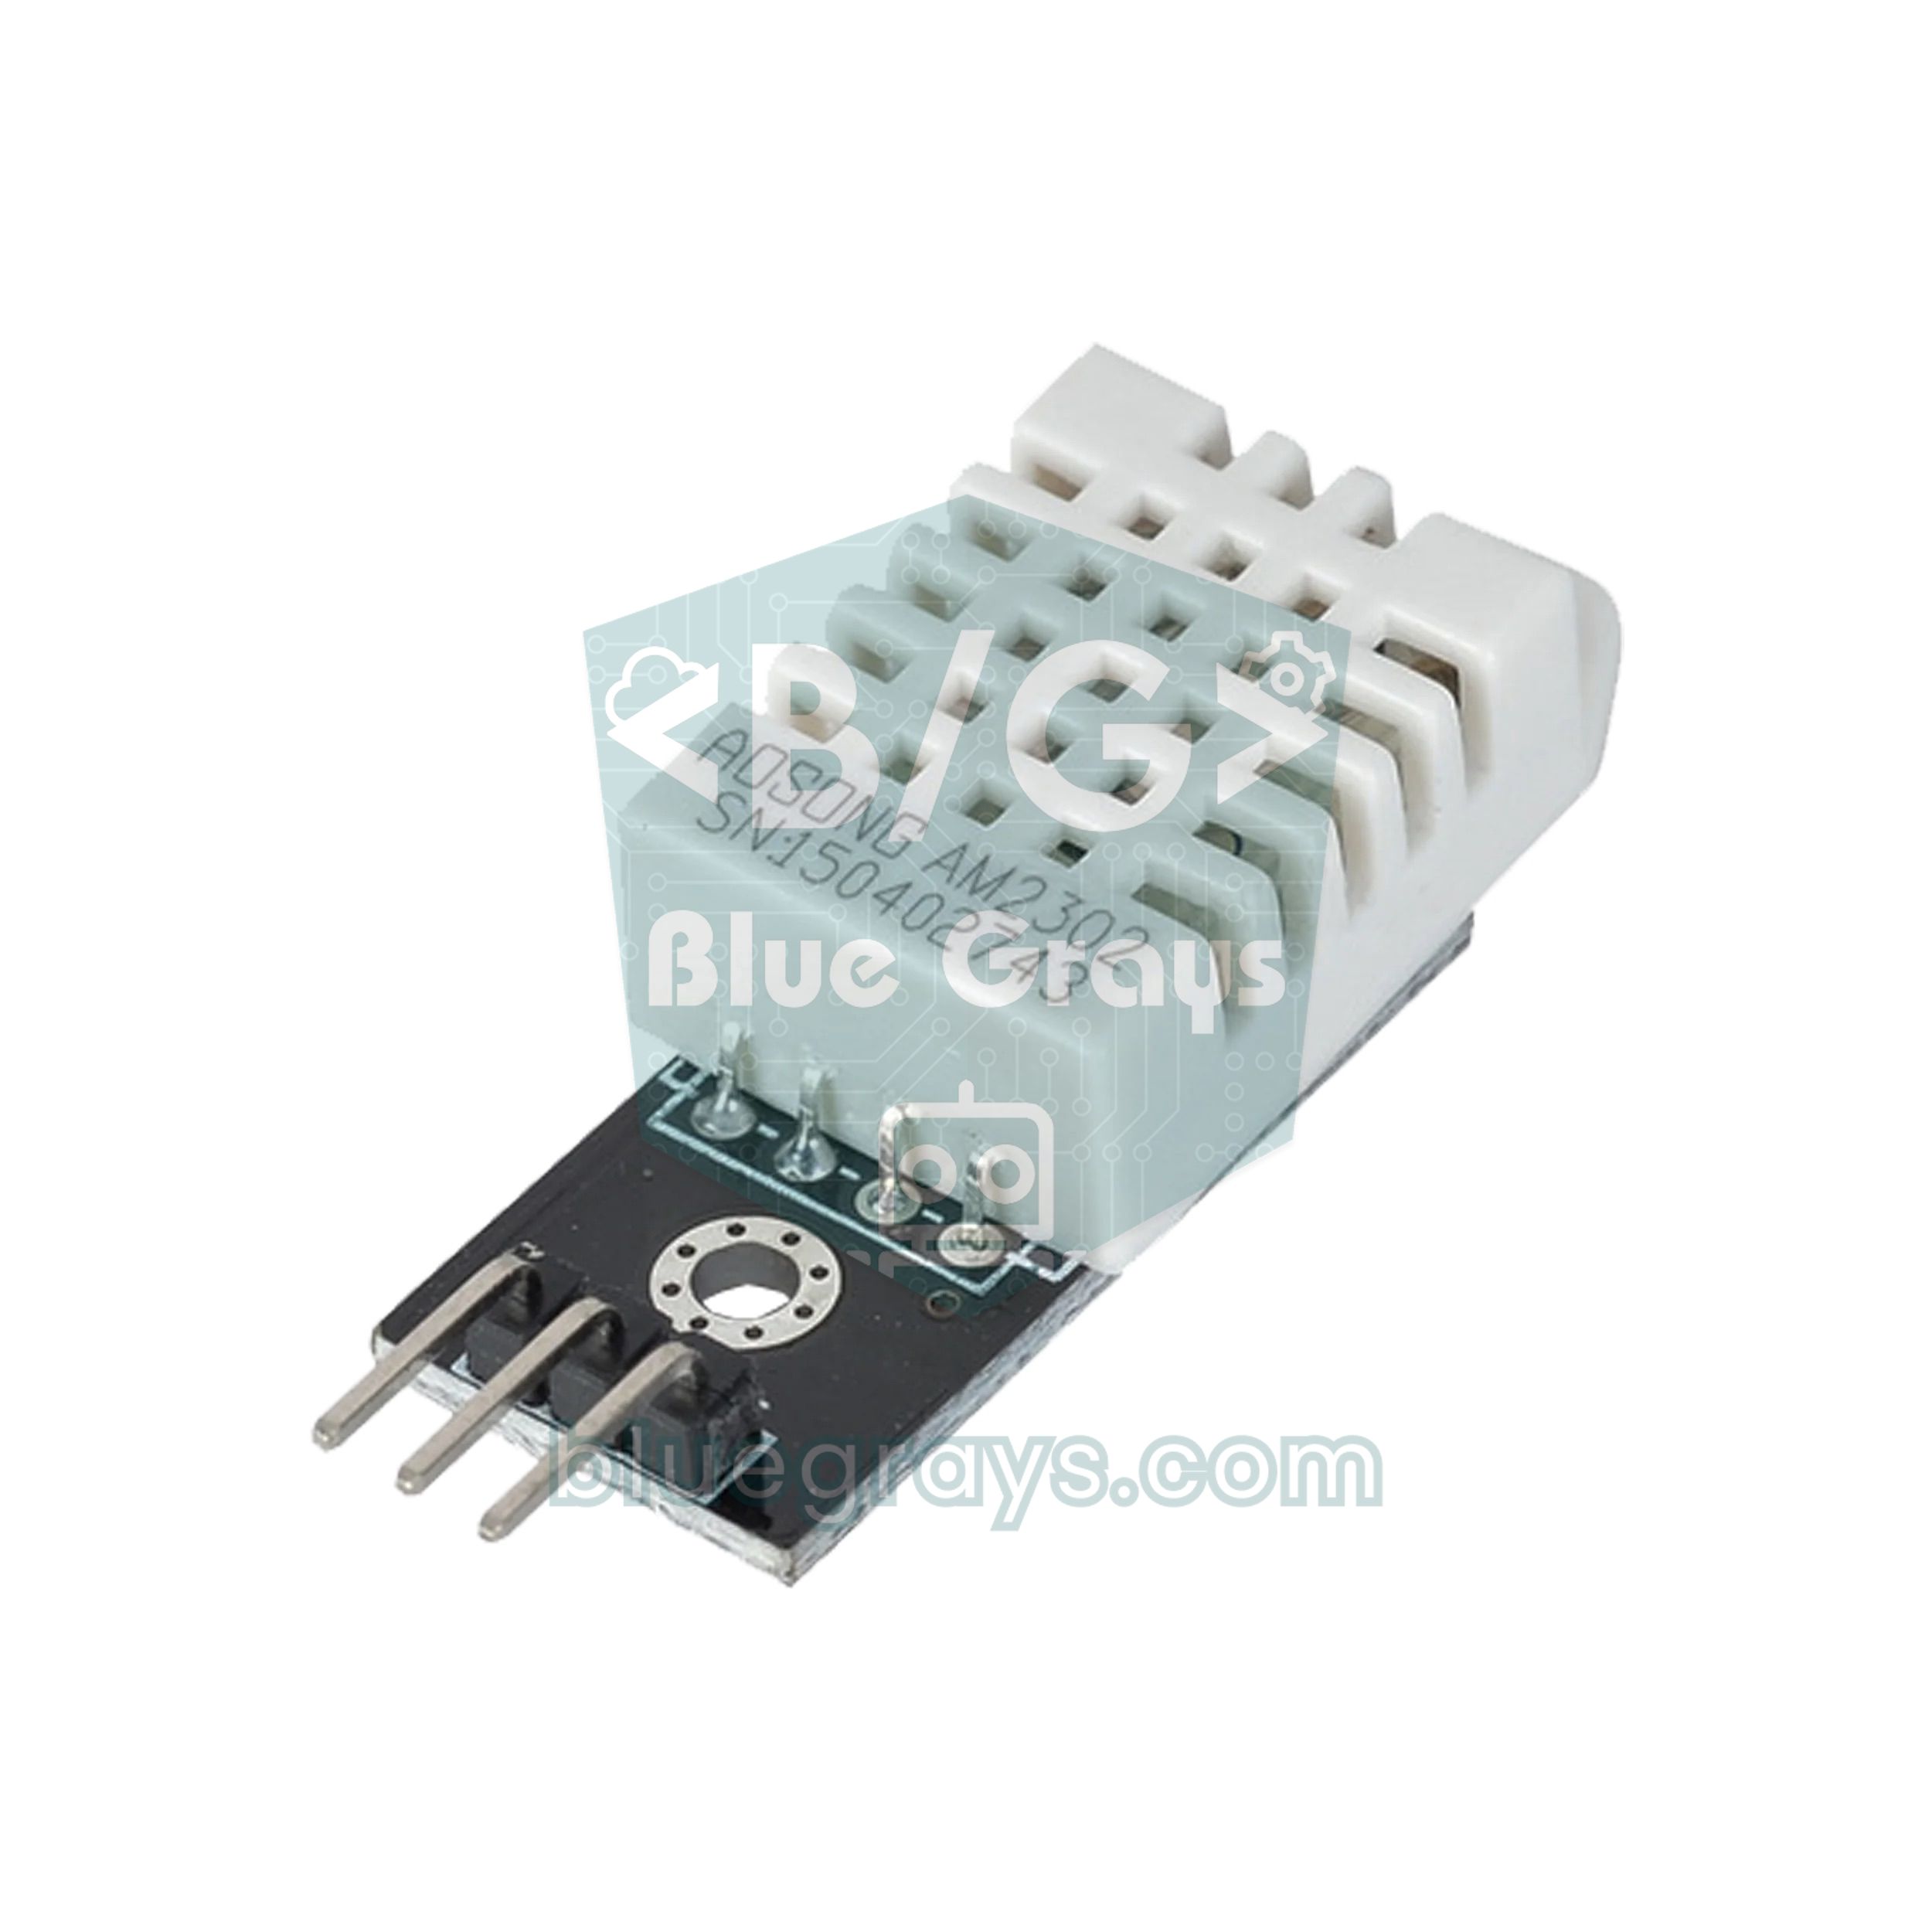
| 14 | DHT22 temperature web page | DHT22 | 45 min | DHT sensor library, WebServer |
| 15 | RGB color picker on your phone | RGB LED, 3 resistors | 45 min | WebServer (core) |
| 16 | Weather display | 0.96 inch OLED | 1 hour | HTTPClient, ArduinoJson, Adafruit SSD1306 |
| 17 | Live WebSocket control panel | 2 buttons, LED | 1 hour | ESPAsyncWebServer, AsyncTCP |
| 18 | Telegram motion alarm | HC-SR501, buzzer | 1 hour | UniversalTelegramBot, ArduinoJson |
| 19 | Battery sensor with deep sleep | DHT22, 18650 cell, TP4056 | 1 hour | esp_sleep (core) |
| 20 | Wireless code upload with OTA | Just the ESP32 | 30 min | ArduinoOTA (core) |
Level 1: first steps without Wi-Fi (1–5)
The first five projects are about getting to know the ESP32, and none of them uses Wi-Fi. In project 1 you blink the blue LED that sits on GPIO 2 on most DevKits and see that pinMode, digitalWrite and delay work exactly as they do on an Arduino. In project 2 you wire a button between GPIO 4 and GND and use INPUT_PULLUP; the toggle version teaches you how to deal with switch bounce (debounce), covered in detail in the how to wire a button to Arduino guide. Project 3 lights three LEDs in sequence and teaches you to think in timings and states. In project 4 you use LEDC, the ESP32's PWM peripheral, to make an LED fade in and out as if it were breathing; this is where you'll notice that the functions changed in the 3.x core, and the basics are in the what is PWM guide.
Project 5 shows the first feature that sets the ESP32 apart from the Arduino Uno: touch pins. Ten of the ESP32's pins can measure the tiny change in capacitance a finger causes when it touches them; GPIO 4, called T0, is one of them. Just plug a jumper wire into the pin and touch its end. In the Serial Monitor you'll see values of around 60 to 80 untouched and 10 to 20 when touched; putting the threshold between the two is all it takes. The other touch pins and how to get stable readings are covered in the ESP32 touch pins guide.
1// Proje 5: ESP32 dokunmatik pin ile LED / project 5: LED with an ESP32 touch pin
2const int TOUCH_PIN = T0;        // T0 = GPIO 4
3const int LED_PIN = 2;           // çoğu DevKit'te dahili LED / onboard LED on most DevKits
4const int THRESHOLD = 30;        // Seri Monitör'deki değere göre ayarla / tune to the Serial Monitor value
5
6void setup() {
7  Serial.begin(115200);
8  pinMode(LED_PIN, OUTPUT);
9}
10
11void loop() {
12  int value = touchRead(TOUCH_PIN);    // dokununca değer düşer / the value drops when touched
13  Serial.println(value);
14  digitalWrite(LED_PIN, value < THRESHOLD ? HIGH : LOW);
15  delay(100);
16}
Level 2: sensors and displays (6–10)
On the second level you use the ESP32's analog inputs and sensors. The ESP32's ADC is 12-bit: analogRead returns values from 0 to 4095, four times finer than the Arduino's 0–1023 range. In project 6 you wire the LDR as a voltage divider with a 10 kΩ resistor and switch the LED on when it gets dark (LDR light sensor). In project 7 you map the potentiometer's 0–4095 reading to PWM and set the LED's brightness (what is a potentiometer).
In project 8 you measure distance with the HC-SR04; since the sensor runs on 5 V, you have to bring its ECHO pin down to 3.3 V with a divider made of 1 kΩ and 2 kΩ resistors (HC-SR04 distance sensor). Project 9 is a real thermometer that shows the DHT22's temperature and humidity on a 16x2 I2C LCD (DHT11 and DHT22, I2C LCD display). In project 10, an HC-SR501 PIR sensor switches on an LED, or a lamp through a relay, when it detects motion; the PIR's output is already 3.3 V, so it connects directly (PIR motion sensor).
| Sensor or module | ESP32 pin | Note |
|---|---|---|
| LDR (divider with 10 kΩ) | GPIO 34 | ADC1 pin, input only |
| Potentiometer (wiper) | GPIO 35 | ADC1 pin, ends to 3V3 and GND |
| HC-SR04 TRIG / ECHO | GPIO 5 / GPIO 18 | ECHO brought down to 3.3 V with a 1 kΩ and 2 kΩ divider |
| DHT22 data | GPIO 4 | If it isn't a module, add a 10 kΩ pull-up resistor |
| I2C LCD SDA / SCL | GPIO 21 / GPIO 22 | The LCD runs on 5V (VIN); a level shifter is the safest option |
| HC-SR501 PIR output | GPIO 27 | 3.3 V output, connects directly |
Level 3: your first steps with Wi-Fi (11–15)
Level three unlocks the ESP32's real power. In project 11 you join your home network and print the IP address your router hands out in the Serial Monitor; if it won't connect, the causes are listed one by one in the ESP32 won't connect to Wi-Fi guide. In project 12 the ESP32 becomes a small web server and you switch the LED on and off with two buttons on a page you open in your phone's browser; the complete code is in the what is the ESP32 guide. Project 13 gets the real time from the internet: the ESP32 asks NTP servers, works out the time zone and daylight saving time itself, and you no longer need an RTC module.
1// Proje 13: NTP ile internet saati / project 13: internet clock with NTP
2#include <WiFi.h>
3#include <time.h>
4
5const char* WIFI_SSID = "AgAdi";        // Wi-Fi adın / your Wi-Fi name
6const char* WIFI_PASS = "Sifre123";     // Wi-Fi şifren / your Wi-Fi password
7
8// Saat dilimi (POSIX) / time zone (POSIX):
9// Orta Avrupa / Central Europe: "CET-1CEST,M3.5.0,M10.5.0/3"
10// Türkiye: "<+03>-3"   México: "CST6"   Argentina: "<-03>3"   UK: "GMT0BST,M3.5.0/1,M10.5.0"
11const char* TZ_INFO = "CET-1CEST,M3.5.0,M10.5.0/3";
12
13void setup() {
14  Serial.begin(115200);
15  WiFi.begin(WIFI_SSID, WIFI_PASS);
16  while (WiFi.status() != WL_CONNECTED) {
17    delay(500);
18    Serial.print(".");
19  }
20  Serial.println();
21  configTzTime(TZ_INFO, "pool.ntp.org", "time.google.com");   // saati internetten al / get the time online
22}
23
24void loop() {
25  struct tm now;
26  if (getLocalTime(&now)) {
27    char text[32];
28    strftime(text, sizeof(text), "%d.%m.%Y %H:%M:%S", &now);
29    Serial.println(text);
30  } else {
31    Serial.println("Saat bekleniyor / waiting for time");
32  }
33  delay(1000);
34}
The TZ_INFO line in the code defines the time zone in POSIX format, daylight saving changes included; pick yours from the examples in the comment. configTzTime sets up the connection to the NTP servers in the background, and getLocalTime returns false while the time hasn't arrived yet, so it's normal to see the "waiting" message for the first few seconds. To show the time on an OLED or LCD and set an alarm, move on to the ESP32 NTP clock guide.
Project 14 combines levels two and three: you show the DHT22's temperature and humidity on a web page that any phone on the same network can open. The page refreshes itself every five seconds; the DHT22 doesn't like being read more often than every two seconds, so that pace suits the sensor too. In project 15 you set an RGB LED's color with your phone's color picker; HEX to RGB conversion and gamma correction are explained step by step in the ESP32 RGB LED web server guide.
1// Proje 14: DHT22 sıcaklık ve nemi web sayfasında göster
2// Project 14: show DHT22 temperature and humidity on a web page
3#include <WiFi.h>
4#include <WebServer.h>
5#include <DHT.h>
6
7const char* WIFI_SSID = "AgAdi"; // Wi-Fi adın / your Wi-Fi name
8const char* WIFI_PASS = "Sifre123"; // Wi-Fi şifren / your Wi-Fi password
9const int DHT_PIN = 4; // DHT22 veri pini / DHT22 data pin
10
11DHT dht(DHT_PIN, DHT22);
12WebServer server(80);
13
14void handleRoot() {
15 float t = dht.readTemperature();
16 float h = dht.readHumidity();
17 String html = "<!DOCTYPE html><html><head><meta charset='utf-8'>"
18 "<meta name='viewport' content='width=device-width'>"
19 "<meta http-equiv='refresh' content='5'>" // 5 saniyede bir yenile / refresh every 5 s
20 "<title>ESP32 DHT22</title></head>"
21 "<body style='font-family:sans-serif;text-align:center'>";
22 if (isnan(t) || isnan(h)) {
23 html += "<h2>Sensör okunamadı / sensor read failed</h2>";
24 } else {
25 html += "<h1>" + String(t, 1) + " °C</h1>";
26 html += "<h2>" + String(h, 0) + " %</h2>";
27 }
28 html += "</body></html>";
29 server.send(200, "text/html", html);
30}
31
32void setup() {
33 Serial.begin(115200);
34 dht.begin();
35 WiFi.begin(WIFI_SSID, WIFI_PASS);
36 while (WiFi.status() != WL_CONNECTED) {
37 delay(500);
38 Serial.print(".");
39 }
40 Serial.println();
41 Serial.println(WiFi.localIP()); // bu adresi tarayıcıda aç / open this address in a browser
42 server.on("/", handleRoot);
43 server.begin();
44}
45
46void loop() {
47 server.handleClient();
48}Level 4: internet, notifications and batteries (16–20)
On the last level the ESP32 talks not just to your home network but to the internet. In project 16 you send a request to a weather service with HTTPClient, parse the JSON reply with ArduinoJson and show the temperature on an OLED display (ESP32 weather API). In project 17 you build a live control panel that works without reloading the page: thanks to WebSocket, the counter on your phone changes the instant you press the button on the board (ESP32 WebSocket).
Project 18 is a security system: when the PIR detects motion, the buzzer sounds and a Telegram message lands on your phone; setting up the bot is covered in the ESP32 Telegram bot guide. In project 19 you learn deep sleep: the board wakes up every ten minutes, takes a reading and goes back to sleep. The bare ESP32 chip draws about 10 µA in deep sleep; on DevKit boards the regulator and the USB chip keep using a few mA, so real battery life depends on the board's design (ESP32 deep sleep). Project 20 shows how to upload code over Wi-Fi without a USB cable (OTA), so you can update a device mounted on the ceiling or out in the garden without taking it down (ESP32 OTA update).
Which project should you start with?
| Your situation | Start with | Then move on to |
|---|---|---|
| You've never done any electronics | 1, 2 and 3 | 6 and 7 |
| You know Arduino but the ESP32 is new to you | 4 and 5 | 11, 12 and 13 |
| You have nothing but the ESP32 | 1, 5, 11 and 13 | 20 |
| You're preparing a school assignment or science fair | 9 and 14 | 18 and 19 |
| You're into home automation | 10 and 12 | 17, then MQTT |
After the 20 projects: what's next
- ESP-NOW: link two ESP32 boards without a router, hundreds of meters apart (ESP-NOW).
- Bluetooth Low Energy: exchange data with your phone over BLE (ESP32 Bluetooth BLE).
- Home Assistant: connect your sensors to your smart home system over MQTT (ESP32 MQTT and Home Assistant).
- WiFiManager: instead of hard-coding the network name and password, use a setup page you fill in from your phone (ESP32 WiFiManager).
- Data logging: send your readings to Google Sheets and chart them (ESP32 Google Sheets).
- Two cores: with FreeRTOS tasks, run Wi-Fi on one core and your measurements on the other (ESP32 FreeRTOS).
The most common ESP32 beginner mistakes
- Using GPIO 6 to 11: these pins are wired to the board's flash memory; use them and the board won't boot or will crash.
- Feeding a 5 V signal straight into a pin: bring 5 V outputs such as the HC-SR04's ECHO down to 3.3 V with a divider.
- An ADC2 pin in a Wi-Fi project: move the analog sensor to the ADC1 pins, GPIO 32 to 39.
- A long delay in a web server: a delay(5000) inside loop leaves the page unanswered for five seconds; handle timing with millis.
- The "Failed to connect" error: hold the BOOT button as the upload starts; the permanent fix is in the ESP32 Failed to Connect guide.
- Copying old code from the internet: the LEDC and timer functions changed in the ESP32 3.x core, so PWM code from 2020 may not compile.
Use this list as a roadmap: each time you finish a project, tick its row in the table and move on to the next. In the BlueGrays app you'll find most of these ESP32 projects, from the onboard LED to the Telegram alarm, step by step with a wiring diagram, a parts list and ready-to-use code; whenever you get stuck, come back to the matching guide for the details.
Frequently asked questions
What is the first project to do with an ESP32?
The best start is blinking the board's onboard LED on GPIO 2: it needs no extra parts and proves your setup works. Then carry on with an LED and a button and an LED that fades with PWM, and only move on to Wi-Fi once those basic projects run smoothly.
Is the ESP32 good for beginners?
Yes. The ESP32 is programmed in the Arduino IDE with the same Arduino functions, and most code you wrote for an Arduino runs with small changes. The main differences to keep in mind are its 3.3 V pins, the fact that ADC2 pins can't read analog values while Wi-Fi is on, and that GPIO 6 to 11 must not be used.
What do I need to start ESP32 projects?
To begin, an ESP32 DevKit, a breadboard, jumper wires, a few LEDs and resistors, a button, an LDR and a potentiometer are enough. Add a DHT22, an HC-SR04, a PIR sensor, an I2C LCD and an OLED display and you can build almost all 20 projects on this list.
Can an ESP32 work without the internet?
Yes. The first ten projects on this list don't use Wi-Fi at all, and without the internet the ESP32 works like a very capable Arduino. It can also create its own Wi-Fi network or talk to other ESP32 boards over ESP-NOW without a router.
Should a beginner start with an ESP32 or an Arduino Uno?
If you want projects with Wi-Fi, Bluetooth or phone control, start with the ESP32. The Arduino Uno runs at 5 V and works directly with many older sensors, which means fewer surprises for absolute beginners; on the ESP32 you need a voltage divider for 5 V sensors.
Is it better to program the ESP32 with the Arduino IDE or MicroPython?
The examples on this list use the Arduino IDE because it has far more tutorials and libraries. MicroPython also runs well on the ESP32 and lets you try code without compiling; if you already know Python, it's a good choice for simple projects.
Projects to build after reading this
See all projects
LED Blink with ESP32
Teaches basic GPIO output usage with ESP32. We achieve a blinking effect by turning an LED on and off from a digital pin. ESP32 version of the classic blink project on Arduino UNO; the basic blink commands in the Arduino environment are the same, but the ESP32's pin layout and 3.3 V GPIO levels differ from those of the Arduino UNO.

ESP32 Built-in LED Blink
Blinking the built-in blue LED on the ESP32 DevKit V1. No external components required! The first project you should try when you buy an ESP32. GPIO 2 is connected to the built-in LED.

ESP32 LED Control with Push Button (Push)
The LED lights up when the button is pressed and turns off when released. Shows how the ESP32's digital input pin and internal pull-up resistor are used. The INPUT_PULLUP mode eliminates the need for an external resistor.

ESP32 Traffic Light
Real traffic light simulation with 3 LEDs red-yellow-green. Timings close to real traffic logic: red long, yellow short, green long. Classic example of sequential GPIO control.

Reading Light Intensity with the ESP32 LDR Module
Real-time monitoring of the LDR module's raw ADC value and relative light percentage calculated from dark and light reference values in the Serial Monitor. This percentage is not a lux measurement. Teaches the module’s calibration logic. It is ideal to complete this before Project 10, as it is used to determine the threshold value.

Real-Time Clock from the Internet via ESP32 NTP
The ESP32 connects to Wi-Fi and fetches the real time from NTP (Network Time Protocol) servers with millisecond precision. configTzTime() applies the Turkey time zone (TRT, UTC+3) automatically, and in countries with daylight saving time the DST switch is handled by a POSIX TZ string. The time is printed both to the Serial Monitor and to an optional I2C LCD.

ESP32 Asynchronous Web Server (with IP Display on LCD)
In this project, we’re turning the ESP32 into an asynchronous web server that you can control from your phone or computer on the same Wi-Fi network. Thanks to the ESPAsyncWebServer library, the server can process multiple requests simultaneously (unlike the classic WebServer.h, which blocks on a single request). You’ll be able to open the ESP32’s IP address in a browser and click the ON/OFF buttons (the /on and /off routes) to turn the LED connected to GPIO 5 on and off.
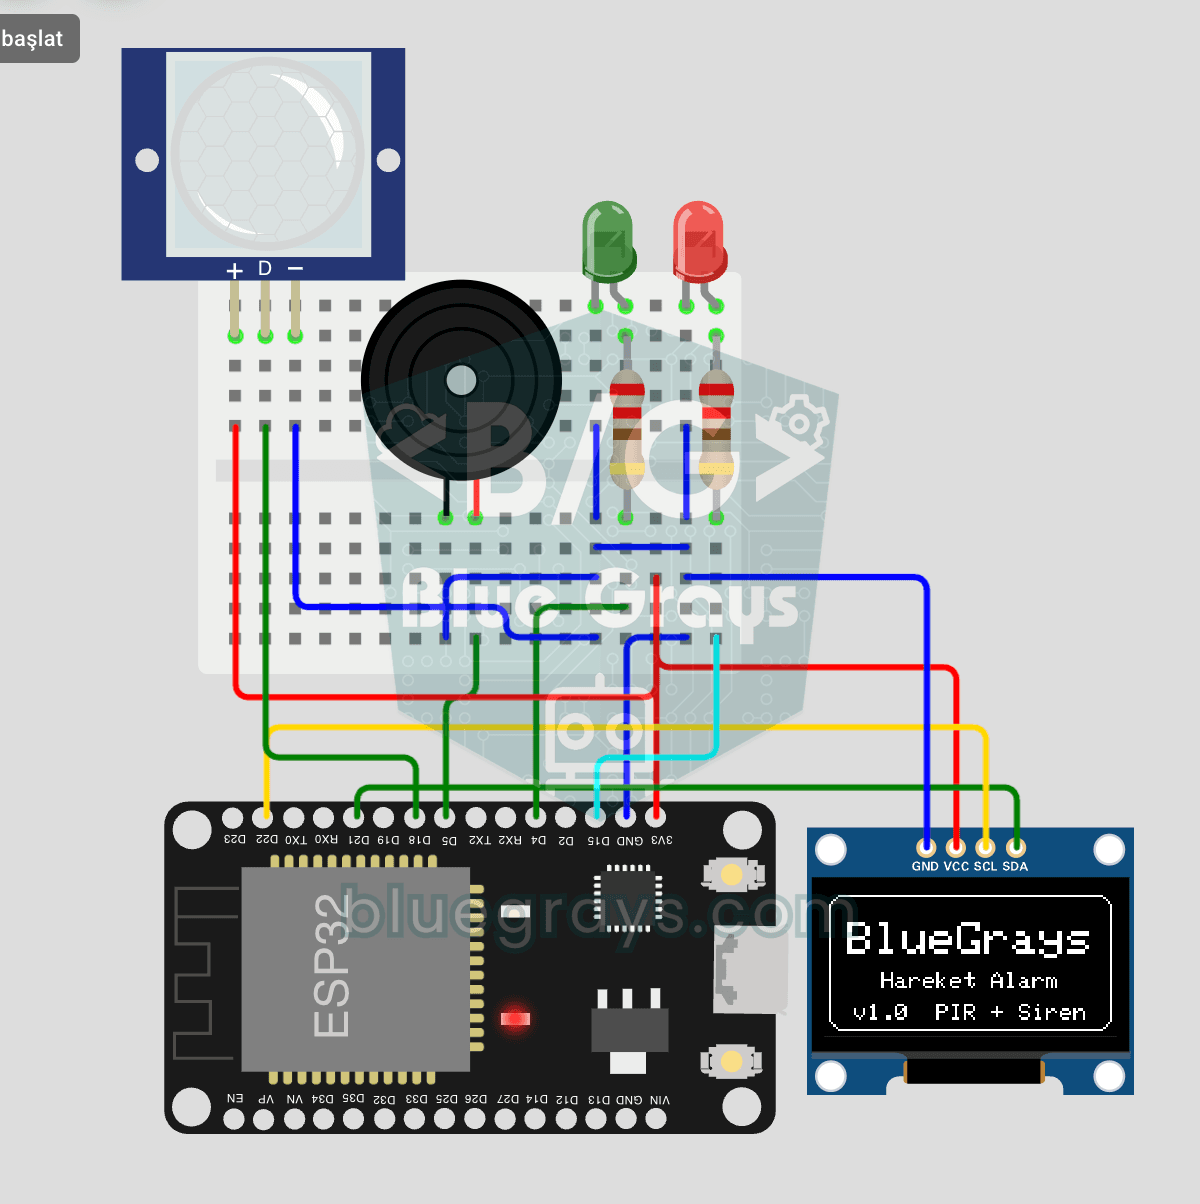
ESP32 Motion Alarm System (PIR + Buzzer + LED + Telegram)
A smart security alarm: when the PIR sensor detects motion, it sounds the buzzer, lights the LED and sends the owner an instant Telegram notification. A 30-second cooldown limits how often the alarm repeats; it does not filter out the PIR sensor's false detections. Use it at home, in a garage, a storeroom or a study.