
Arduino Components List: A Guide to 130 Parts and Their Uses
Arduino components list in one map: 130 parts in 12 groups, the 10 most used parts, the first 12 parts to learn and how to go from a part to a project.
The fastest way to learn what each part in an Arduino components list does is to see it together with the projects that use it, not on its own. In the BlueGrays app, Discover › Components does exactly that: each of the 130 parts has a page with a photo, a short description and a Used in Projects section listing every project that uses it. To identify a part you have in your hand, type its name or the model code printed on it into the search box; its page tells you what it does, shows where it is used and lets you jump to a suitable project. Once you have tried a part you mark it Used It, and with Premium you save it to your workshop with Add to Workshop. In the list, filters such as I Have It, Used It and Free plus the Sort options narrow down what you are looking for.
The blog already has many posts that cover single sensors, from the DHT11 to the HC-SR04. This post doesn't replace them; it puts a map on top of them. First you'll see how the Components screen works, then how the 130 parts fall into groups. After that we cover how to identify an unknown part, how to go from a part to a project, the ten parts used in the most projects, the order of the first 12 parts for a beginner and the part pairs people confuse most often. Inside each group we link to the parts that have a detailed guide, so you can go deeper whenever you want.
What's in Discover › Components?
When you open Discover from the bottom menu and switch to the Components segment at the top, you see a search box reading Search components... at the top, a sort button next to it and a row of filter chips you can swipe sideways just below. Search looks for your word in both the name and the description of each part. That's why a model code like "HC-SR04" brings up the part directly, while a general word like "I2C" lists every part whose description mentions it. The filter row has the chips All, Used It, Didn't Use It, I Have It, I Don't Have It, Free and Premium. Tapping a chip turns the filter on; tapping the same chip again takes the list back to All.
The Sort button offers eight options: Newest, Oldest, Name (A-Z), Name (Z-A), Highest Rated, Most Used and an ID sort in both directions. There is a small but important detail here: Most Used does not sort by how many projects use a part, but by how many times users have marked it Used It. So this sort answers the question "what has the community tried most?". We give the number of projects per part in a separate table further down.
Tap a part and the Component Detail page opens. At the top there is a large photo; tap it to open it full screen and zoom in. In the corner of the photo you see the part's Free or Premium label, an In My Workshop chip if the part is in your workshop and a Used It chip if you have marked it. Below are the part's name, its star rating, how many people rated it, how many times it was marked as used and the part number (such as #21). The description that follows explains in a few sentences what the part is and where it is typically used. Under the description there are three tiles: Used It, Rate and Favorite. The Add to Workshop button stays fixed at the bottom of the screen, and the Used in Projects list closes the page. Some component pages can be marked Premium; if you tap a Premium page with a free account, a screen describing the Premium plans opens instead of the page.
| On-screen element | What it does | When it helps |
|---|---|---|
| Search components... | Searches the name and description of each part | When you have read the code printed on your part |
| Sort | Orders the list by one of 8 options | To see the newest or the highest rated parts |
| Used It / Didn't Use It chips | Separates the parts you have marked | To find parts you haven't tried yet |
| I Have It / I Don't Have It chips | Filters by the parts in your Workshop | When you list the parts you are missing |
| Free / Premium chips | Separates pages by access type | To see which pages your account opens |
| Used It tile | Adds the part to the parts you have tried | Right after you finish a project |
| Rate and Favorite | Gives 1–5 stars and adds to favorites | To reach the parts you come back to quickly |
| Add to Workshop | Saves the part with quantity and custom name to your workshop (Premium) | When you count the parts in your box |
| Used in Projects | Shows the projects that use the part as cards | When you wonder what you can build with it |
Category map: 130 parts in 12 groups
In the app the parts sit in a single list; there is no separate category tab. The grouping below is a map we built to help a beginner place the 130 parts. Each group answers one question: boards answer "who runs the program?", sensors "what am I measuring around me?", displays and sound "how do I show the result?", motors "what am I moving?" and the power group "what powers all of this?". When you look at a project's parts list you almost always see one board, a few basic parts, one or two inputs and at least one output. You can type the example names from the table, or just their model codes, straight into the search box.
| Group | What it does | Example parts in the app | Parts |
|---|---|---|---|
| Development boards | The brain that runs the code and controls the other parts through its pins | Arduino Uno, Arduino Nano, Arduino Mega, ESP32, ESP32 CAM, NodeMCU V3 (ESP8266), Raspberry Pi Pico W | 15 |
| Basic parts | Build the circuit, limit current, switch signals | Breadboard, jumper wire, resistor, capacitor, diode, transistor, 74HC595 shift register | 7 |
| Input parts | Pass the user's command to the board | Push button, potentiometer, joystick, keypad, KY-040 rotary encoder module, remote control, infrared receiver | 8 |
| Sensors | Measure the environment: distance, light, temperature, gas, moisture, pulse | HC-SR04 distance sensor, LDR, DHT11, MQ-135 air quality sensor, soil moisture sensor, RC522 RFID module | 35 |
| LEDs and light | Show a state with light or create effects | LED, RGB LED, WS2812B NeoPixel LED, 8x8 NeoPixel LED matrix, laser module | 7 |
| Displays | Show numbers, text or graphics | 7-segment display, TM1637 4-digit 7-segment display module, I2C 2x16 LCD display, 0.96 inch I2C OLED display, ILI9341 TFT color display module | 12 |
| Sound | Play a beep, a tone or recorded sound | Buzzer, speaker (8 Ω, 0.5–3 W), DFPlayer Mini MP3 player module | 3 |
| Motors and drivers | Create motion; the driver board carries the motor current | SG90 servo motor, MG996R servo motor, 28BYJ-48 stepper motor with ULN2003A driver board, NEMA 17 stepper motor, L298N motor driver module, A4988 stepper driver module, relay | 17 |
| Communication | Connect the board to a phone, another board or a computer | HC-05 Bluetooth module, nRF24L01 2.4 GHz wireless module, SIM800L GSM/GPRS module, NEO-6M GPS module, CH340 USB-TTL converter | 8 |
| Time and data logging | Keep the time and write measurements to a card | RTC clock module, DS1307 RTC module, SD card module, MicroSD card module | 4 |
| Power | Power the circuit, step voltage down, charge batteries | AA battery holder, 18650 Li-ion battery, TP4056 Li-Po / Li-ion charging module, MB102 breadboard power supply module, LM7805 voltage regulator, AMS1117 3.3V voltage regulator, LM2596 step-down (buck) module | 11 |
| Meters and helpers | Measure the circuit or accompany another part | Voltmeter, ammeter, magnet | 3 |
The numbers in the table make one thing clear: the largest group in the library is sensors with 35 parts, followed by motors and drivers with 17. Yet almost every project passes through the first two groups, a board and basic parts. Parts that do the same job also sit in the same group: the L298N, the L9110S and the chip and shield versions of the L293D all drive DC motors; the 7-segment display, the TM1637 module and the MAX7219 modules all show numbers or patterns. If you don't have a part listed in a project, looking at a similar part from the same group is a good start. Keep in mind that the wiring and the library usually change, so you will need to adapt the code as well.
Sensors: identifying 35 parts in 8 subgroups
When you choose and wire a sensor, the first thing to check is not so much what it measures as how it passes the measurement to the board. A sensor with an analog output produces a voltage and is read on analog pins such as A0–A5 on the Arduino Uno; analogRead() returns a number from 0 to 1023. A sensor with a digital output only gives HIGH or LOW and can go on any digital pin. Sensors that use I2C talk over two lines (SDA and SCL), and several devices can share the same lines; on the Uno these are A4 and A5, while ESP32 development boards mostly use GPIO21 and GPIO22. Protocols such as the single-wire protocol of the DHT11, the 1-Wire bus of the DS18B20, the SPI link of the RC522 and the UART of fingerprint sensors usually need a library. In the table below you'll find the typical output type of each subgroup and the detailed guides on the blog.
| Subgroup | Parts in the app | Typical output | Detailed guide |
|---|---|---|---|
| Distance and motion | HC-SR04 distance sensor, PIR motion sensor, TCRT5000, MPU-6050, reed switch (listed as reed relay) | Pulse width (HC-SR04), digital (PIR, reed), analog and digital (TCRT5000), I2C (MPU-6050) | HC-SR04, PIR, MPU6050, TCRT5000 |
| Vibration and sound | SW-420 vibration sensor, KY-038 sound sensor module | Digital threshold output; the KY-038 also has an analog output | KY-038 sound sensor |
| Light, color and flame | LDR, TCS3200 color sensor, TCS34725 color sensor, APDS-9960 color, proximity and gesture sensor, flame sensor module | Analog (LDR), frequency (TCS3200), I2C (TCS34725, APDS-9960), analog and digital (flame module) | LDR, TCS3200, flame sensor |
| Temperature, humidity and pressure | DHT11, DHT22, DS18B20, NTC thermistor, BMP280, BME280 | Single-wire digital (DHT11, DHT22), 1-Wire (DS18B20), analog (NTC), I2C or SPI (BMP280, BME280) | DHT11, DS18B20, BME280 and BMP280 |
| Gas and air quality | Gas sensor, MQ-135 air quality sensor, CJMCU-811 (CCS811) air quality sensor | Analog and digital threshold (MQ series), I2C (CCS811) | MQ-2 gas sensor |
| Water and soil | Soil moisture sensor, rain sensor module, water level sensor, float switch, non-contact liquid level sensor (XKC-Y25), TDS water quality and conductivity sensor | Analog (soil, rain, water level, TDS), contact (float switch), digital (XKC-Y25) | soil moisture, rain sensor |
| Pulse, fingerprint and card reading | Pulse Sensor, KY-039 heartbeat sensor, AS608 fingerprint sensor, Waveshare fingerprint reader module (UART), RC522 RFID module | Analog (pulse), UART (fingerprint), SPI (RC522) | pulse sensor, fingerprint, RC522 |
| Weight and current | Load cell, HX711 load cell amplifier module, ACS712 | The HX711 turns the load cell's millivolt-level output into digital data; the ACS712 is analog | HX711, ACS712 |
Displays, sound, motors, communication and power
With output parts, the choice depends on what you want to show. A single LED is enough for one state; if you need color use an RGB LED, and if you want to control dozens of pixels from one pin use the WS2812B NeoPixel LED and its ring or matrix versions (WS2812B guide). To show numbers, the 7-segment display is the most instructive choice because it teaches you to drive each segment separately (7-segment guide); if you want to drive four digits with two pins, the TM1637 module is more practical. For text, the I2C 2x16 LCD display shows two rows of 16 characters and needs only two data lines (I2C LCD guide). For graphics, icons or games, the 0.96 inch I2C OLED display (128×64 pixels) is a common pick (OLED guide); when you need a large color picture you move on to TFT displays like the ILI9341 (ILI9341 guide). For scrolling text and LED matrices, the MAX7219 modules are used (MAX7219 guide).
There are three sound parts. The buzzer is used for alert beeps and simple melodies; you'll find the difference between active and passive types in the confused-parts table below. The speaker (8 Ω, 0.5–3 W) is not connected directly to a board pin; it is driven by an amplifier or by a module with its own small amplifier, such as the DFPlayer Mini MP3 player module. The DFPlayer plays MP3 files from a microSD card, and the Arduino tells it over a serial port which file to play (DFPlayer guide).
The most important rule in the motor group is to think of each motor together with its driver. A small servo such as the SG90 servo motor takes its signal straight from the board, but several servos or a strong model like the MG996R servo motor need a separate supply (servo guide). Geared DC motors connect to an H-bridge driver such as the L298N, L9110S or L293D for direction and speed (L298N guide). In the app, the 28BYJ-48 stepper motor is listed as a single part together with its ULN2003A driver board (28BYJ-48 guide); the NEMA 17 stepper motor needs an A4988 driver and a supply in the 8–35 V range, usually 12 V (A4988 guide). The relay also belongs here, because it switches a motor, pump or lamp at a current and voltage the board cannot handle. Build the mains side only under the supervision of someone experienced and inside a closed enclosure (relay guide).
In the communication group, the HC-05 and HC-06 Bluetooth modules connect the board to a phone; the HC-05 can work as master or slave, the HC-06 only as slave (HC-05 guide). For wireless data between two boards you use nRF24L01 modules (nRF24L01 guide), for SMS and calls the SIM800L GSM/GPRS module (SIM800L guide) and for location the NEO-6M GPS module (GPS guide). The CH340 and CP2102 USB-TTL converters handle serial communication with a computer; you need them to program boards without a USB port, such as the Arduino Pro Mini or the ESP-01. Besides batteries and holders, the power group includes the TP4056 module that charges an 18650 cell (TP4056 guide), the MB102 module that feeds 5 V and 3.3 V to a breadboard and the step-down regulators LM7805, AMS1117 3.3V and LM2596 (7805 guide, running an Arduino on batteries).
How do you identify a part you have?
- Read the text printed on it. Modules carry a model code (HC-SR04, DHT11, RC522) and chips a part number (74HC595, ULN2003A, LM7805). Zooming in with your phone camera makes tiny text easier to read.
- Search for the code in Components. Type the code into the search box; if nothing comes up, try only the digits (such as "7805"). Because search also looks at descriptions, you can reach a similar part even if the exact one isn't in the library.
- Check the pin labels. VCC and GND mean power; SDA and SCL mean I2C, Trig and Echo ultrasonic distance, AO and DO analog and digital output, and IN1–IN4 motor driver inputs.
- Look at the shape and the number of legs. A small two-legged cylinder with color bands is a resistor. A black three-legged half-moon body can be a transistor or a temperature sensor, so always read the code on it.
- Decode the value of passive parts with a tool. Use the tools in the table below for resistor bands, SMD codes and capacitor codes.
- Open the part page and Used in Projects. The description tells you what the part does, and the circuit diagrams in the projects show how it is wired.
- Save it. Mark the part you tried with Used It; with Premium, add it to your workshop with its quantity using Add to Workshop.
| What you see on it | Most likely | How to confirm |
|---|---|---|
| Small two-legged cylinder with color bands | Resistor | Select the bands in order in the Color code tool |
| Small black rectangle with a 3–4 character code (103, 4702, 01C, 4R7) | SMD resistor | Type the code into the SMD code tool |
| Small yellow or orange disc with a number like 104 or 103 | Ceramic capacitor | Type the code into the Capacitor code tool |
| Cylinder marked with µF and V and a stripe on one side | Electrolytic capacitor | The value is printed on it; the leg on the striped side is negative |
| Black body with a silver or white band at one end (1N4007) | Diode | The banded end is the cathode; confirm the direction with the multimeter's diode mode |
| Black half-moon body with three legs (BC547, 2N2222, DS18B20) | Transistor or temperature sensor | Search the code on it; different parts use the same package |
| Three-legged body with a metal back (7805) | Voltage regulator | On the 7805 the order is input, ground, output; other regulators may differ |
| Small board with a blue trimmer pot and AO and DO pins | Sensor module with analog and digital outputs | Look at the sensing element at the end: a rain plate, a microphone or a gas sensor |
| SDA and SCL printed on the pins | Module that talks over I2C | Find its address with an I2C scanner sketch |
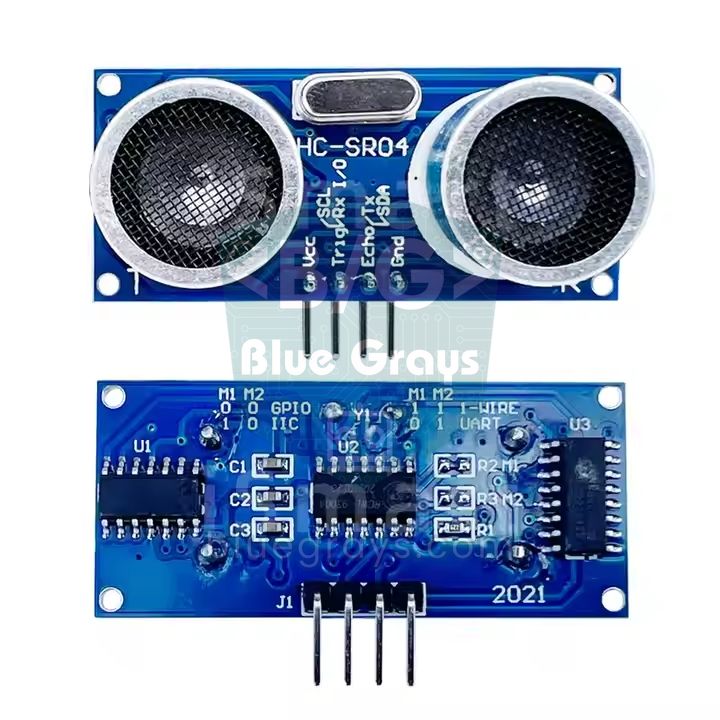
| Trig and Echo printed on the pins | Ultrasonic distance sensor | Open the HC-SR04 page in Components |
Three free tools solve most of this; you'll find them all on the Tools screen of the app. In the Color code tool you pick the bands in order: a resistor with brown, black, orange and gold bands is 10 × 1000 = 10 kΩ with ±5% tolerance (for the meaning of the bands see the resistor guide). The SMD code tool decodes three- and four-digit SMD resistor codes as well as EIA-96 codes: 103 means 10 × 10³ = 10 kΩ, 4702 means 470 × 10² = 47 kΩ and 01C means 100 × 100 = 10 kΩ, while the R in 4R7 stands for the decimal point, so 4.7 Ω. The Capacitor code tool reads ceramic capacitor codes: 104 is 10 × 10⁴ pF = 100 nF = 0.1 µF (details in the capacitor guide). Once you know the value, open the page of a part such as the resistor in Components and look at the projects that use it.
Used in Projects: from a part to a project
Once you know a part, the natural next question is "what can I build with it?". The answer is in the Used in Projects section at the end of the part page. Each card shows the project photo, its number, difficulty level, a Free or Premium badge and a Completed label if you have finished it. For example, the HC-SR04 distance sensor page lists 13 projects. Three of them are free: HC-SR04 Distance Measurement (Serial Display) with Arduino, ESP32 HC-SR04 Ultrasonic Distance Sensor with ESP32 and Raspberry Pi Pico Parking Sensor (HC-SR04 + 3 LEDs + Buzzer) with the Raspberry Pi Pico. The Premium ones include Parking Sensor with HC-SR04, Height Measurement Project and an obstacle-avoiding robot. So a single sensor gives you a route from printing a distance on the serial monitor to a robot that avoids obstacles.
We suggest three rules for using this section well. First, start with the free project at Beginner level; you see the part's basic behavior with the fewest extra parts. Second, pick a second project that combines the same part with another one; for the HC-SR04 that could be a parking sensor that turns distance into a warning with a buzzer or LEDs. Third, when you tap the card of a Premium project, the project page still opens and shows a locked preview of what the project does; that alone can be enough to pick your next goal. Some parts don't have a project yet; in that case the Used in Projects section doesn't appear at all. If you want to search the other way round, use the Components option in the Filter menu in Discover › Projects to pick a part and list only the projects that use it.
The 10 components used in the most projects
The table below was built by counting the parts lists of the projects in the app at the start of November 2026; the app has 200+ projects and the numbers grow as new projects are added. A number shows how many different projects list the part, not how many pieces they use: a project with four LEDs is counted once in the LED row.
| Rank | Component | Projects | Why so common? |
|---|---|---|---|
| 1 | Jumper wire | 185 | Carries the connection between the board and the breadboard in almost every circuit |
| 2 | Breadboard | 133 | Lets you build circuits without soldering; module-based projects may not need it |
| 3 | Arduino Uno | 111 | The main board of the Arduino projects |
| 4 | Resistor | 105 | Limits LED current, acts as a pull-down for buttons and a voltage divider for sensors |
| 5 | LED | 76 | The simplest output and status indicator |
| 6 | Buzzer | 50 | The sound of alarm, game and melody projects |
| 7 | ESP32 | 49 | The board for projects that need Wi-Fi and Bluetooth |
| 8 | Push button | 48 | The most common user input |
| 9 | I2C 2x16 LCD display | 29 | The easiest way to show a result without a computer |
| 10 | Raspberry Pi Pico W | 25 | The board of the MicroPython projects |
The lesson from the table: the first five rows are infrastructure and form the core of any parts box. The buzzer and the push button are the interaction parts projects use most; both are easy to learn and cheap. Just outside the list come the 0.96 inch I2C OLED display (21 projects), the SG90 servo motor (15 projects), and the potentiometer and the HC-SR04 distance sensor (13 projects each). The ESP32 and Raspberry Pi Pico W rows reflect the platform split: since every project built on these boards lists the board itself, the numbers roughly equal the number of projects on that platform.
Used It, I Have It and the Workshop
The two marks on the Components screen record different things. Used It means "I have worked with this part at least once"; you add it by tapping the tile on the part page, and it works with a free account too. In the list, the Used It and Didn't Use It chips filter by this mark; the Didn't Use It chip is a ready-made list of suggestions for your next part. I Have It, on the other hand, means "this part is in my box right now" and is tied to the parts inventory in Workshop › Parts. The Add to Workshop button on the part page opens the add screen with the part already selected; there you enter the quantity and a custom name such as "Red LED" or "10k Ohm". Parts is a Premium feature; with a free account this button opens the Premium screen.
After you add your parts, the real payoff shows up in the Workshop tab: Projects You Can Build lists the projects for which you have every part, and Projects with Missing Components lists the ones that are close, showing how many parts are missing. The I Don't Have It chip in Components helps here too: when you buy a missing part, you find it in the list right away and add it to your workshop. We walk through this flow step by step in the post which Arduino project can I build with the parts I have.
The first 12 parts to learn as a beginner
For a beginner it is more effective to learn parts in an order where each one builds on the last, not at random. The order below advances the core Arduino skills together with the parts used in the most projects: first digital output, then digital input, analog input, sound, sensor reading, display and motion. For each item we suggest a project or a guide for trying the part for the first time. Every part except the SG90 servo is used in at least one free project, so you can do the first eleven steps from start to finish without Premium.
- Arduino Uno: the board of 111 projects; it connects over USB, runs at 5 V and has the most examples. First project: LED Blink.
- Breadboard: the basis of building circuits without solder. A circuit built without knowing its internal connections often fails because of a single hole shift (breadboard guide).
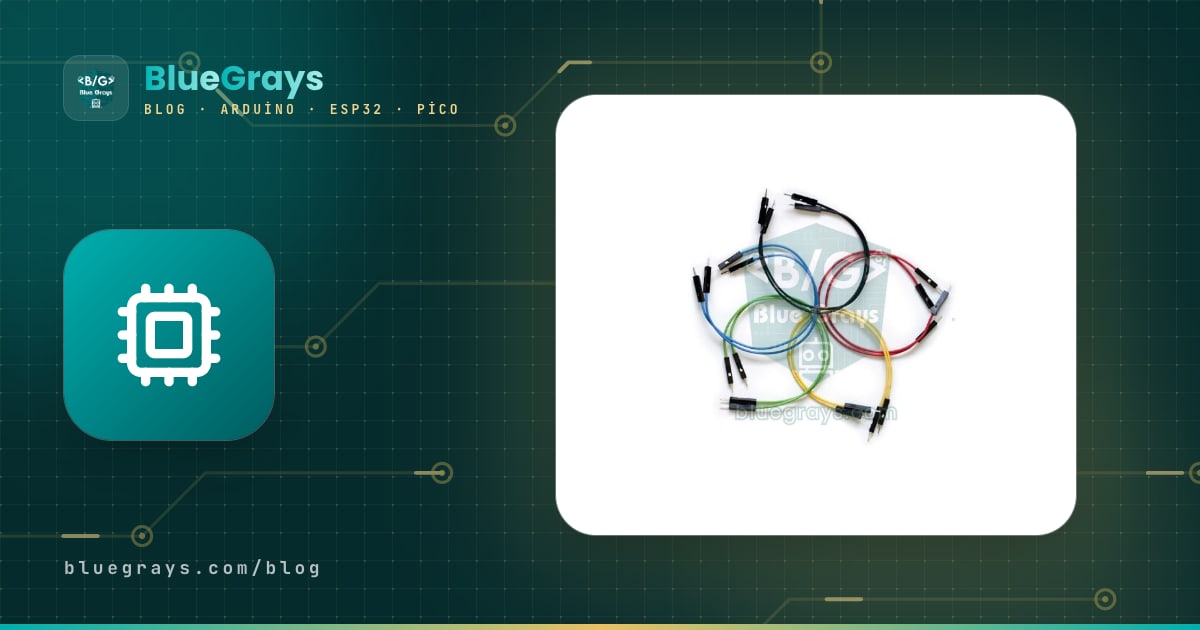
- Jumper wire: male-to-male wires are for the breadboard, male-to-female wires for module pins. The color doesn't change the electricity, but keeping red for 5 V and black or blue for GND makes finding mistakes easier.
- LED: the long leg is the anode (plus), the short leg the cathode (minus); always connect it with a series resistor (LED guide).
- Resistor: 220–330 Ω for LEDs and 10 kΩ for buttons and sensors are the most common values. Learn to read the bands with the Color code tool at this stage (resistor guide).
- Push button: your first digital input, where you learn pull-up and pull-down resistors. First project: LED Control with a Push Button (Push) (button guide).
- Potentiometer: your first analog input; you read values from 0 to 1023 with analogRead(). First project: LED Chaser with Adjustable Speed (potentiometer guide).
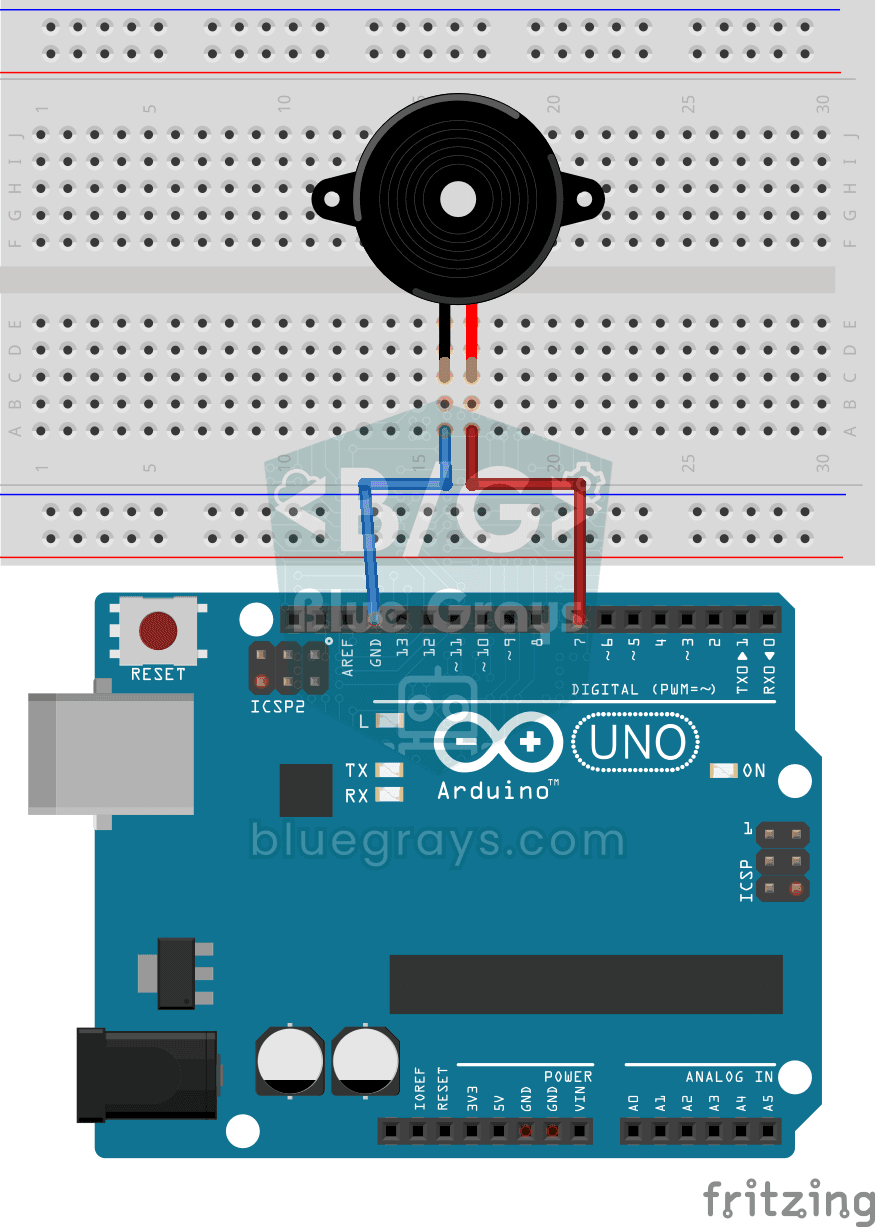
- Buzzer: your first sound output; you change the frequency with the tone() function. First project: Using a Buzzer (buzzer guide).
- LDR: your first real sensor; you build a voltage divider with a resistor and read light as an analog value. First project: Night Light with Ldr (LDR guide).
- HC-SR04 distance sensor: teaches you to compute distance by measuring time; you measure the echo's return time with pulseIn() and convert it to centimeters using the speed of sound. First project: HC-SR04 Distance Measurement (Serial Display).
- I2C 2x16 LCD display: your first library install and your first I2C connection; you show results without a computer. First project: Temperature and Humidity with DHT11 (I2C LCD guide).
- SG90 servo motor: your first motion. With the Servo library you set an angle between 0 and 180°; several servos need a separate supply (servo guide).
Commonly confused parts and their differences
| Confused pair | Key difference | How to tell them apart in hand | Detailed guide |
|---|---|---|---|
| Active buzzer / passive buzzer | The active one has a built-in oscillator and plays one tone when powered; the passive one plays the frequency you set with tone() | Sealed bottom and a sticker on top usually means active; a visible circuit board underneath means passive | buzzer guide |
| LDR / photodiode | An LDR's resistance changes with light and reacts slowly; a photodiode produces current from light, is very fast and polarized | An LDR has a wavy track on top; a photodiode looks like an LED with a clear or dark body | LDR guide |
| Servo / stepper / DC motor | A servo goes to an angle, a stepper turns step by step, a DC motor spins continuously | A servo has 3 wires, a stepper 4–5 wires, a DC motor 2 terminals | motor differences |
| HC-SR04 / VL53L0X | The HC-SR04 measures with sound waves, the VL53L0X with the time of flight of laser light | The HC-SR04 has two large cylinders, the VL53L0X a single chip on a small board | HC-SR04 guide |
| Relay / reed switch (reed relay) | A relay is a switch pulled by a coil that turns large loads on and off; a reed switch is a contact that closes when a magnet comes near | A relay module has a blue box and screw terminals; a reed switch is a small glass tube with two thin reeds inside | relay guide |
| 2x16 LCD / I2C 2x16 LCD | Same display; the I2C version has an I2C module on the back and needs only 2 data lines | A small 4-pin board and a blue contrast pot on the back mean the I2C version | I2C LCD guide |
| DHT11 / DHT22 | The DHT22 measures over a wider range and more precisely; the DHT11 can be read once per second, the DHT22 once every two seconds | The DHT11 is usually blue, the DHT22 white | DHT11 guide |
| BMP280 / BME280 | Both measure temperature and pressure; the BME280 also measures humidity | The boards look almost identical; the chip ID reads 0x58 on the BMP280 and 0x60 on the BME280 | BME280 guide |
| Potentiometer / rotary encoder | A potentiometer gives an absolute position within a limited angle; an encoder turns endlessly and counts steps | A potentiometer stops at an end point; the KY-040 encoder clicks round endlessly and can be pressed | rotary encoder guide |
Two of these pairs deserve a closer look. The quickest way to tell an active buzzer from a passive one is to connect it for a few seconds between the board's 5V and GND pins: an active buzzer gives a steady single tone, while a passive one only makes a faint click at the moment you connect it. Projects that play melodies need a passive buzzer, because tone() sets the frequency of each note. Choosing between the HC-SR04 and the VL53L0X depends on the surface you measure. The HC-SR04 sends a sound wave and measures within a wide cone; it works from a few centimeters to a few meters but can be fooled by surfaces that absorb sound, like fabric, and by slanted walls. The VL53L0X measures with a narrow beam up to about 2 meters, connects over I2C and is much smaller; on the other hand, its range shrinks in strong sunlight. The VL53L0X is not in the app's component library at the moment.
Use the Components library like a dictionary: find the name of the part you have, read what it does, move to a project from Used in Projects and mark it Used It when you finish. Keep this loop going for a few weeks with the first 12 parts and, when you meet a new sensor, you'll know where to look first: the output type, the supply voltage and the library it needs. If you don't have BlueGrays on your phone yet, you can download the app and start by opening the parts from this post one by one in Discover › Components.
Frequently asked questions
What are the most commonly used Arduino components?
Based on the project parts lists in BlueGrays, the most used parts are jumper wires, the breadboard, the Arduino Uno, resistors and LEDs. They are followed by the buzzer, ESP32, push button, I2C 2x16 LCD display and Raspberry Pi Pico W. The first five form the base of almost every circuit.
What components do I need to start with Arduino?
With an Arduino Uno, a breadboard, jumper wires, a few LEDs, 220–330 Ω and 10 kΩ resistors, a push button, a potentiometer, a buzzer and an LDR you can comfortably build your first ten projects. Adding an HC-SR04 distance sensor, an I2C 2x16 LCD and an SG90 servo is a good next step.
What types of sensors are used with Arduino?
You can group sensors by what they measure: distance and motion, vibration and sound, light and color, temperature and humidity, gas, water and soil, biometrics and card reading, weight and current. For wiring, the output type matters most: analog, digital, I2C, SPI, UART or special protocols such as 1-Wire.
How can I identify an electronic component I have?
First read the model code or chip number printed on it and search for it. If there is no code, look at the pin labels (VCC, GND, SDA, SCL, AO, DO) and the shape of the body. You can decode the value of passive parts such as resistors and capacitors with color code, SMD code and capacitor code tools.
What is the difference between a sensor and a sensor module?
The sensor is the sensing element itself, for example a bare LDR. A module puts the sensor on a small board with the required resistor, a comparator chip and an adjustment potentiometer, and offers ready pins such as VCC, GND, AO and DO. A module is easier to wire; with a bare sensor you build the circuit yourself.
How do I find out which projects use a component?
In BlueGrays, search for the part in Discover › Components and check the Used in Projects section at the end of its page; each project card shows its difficulty and whether it is Free or Premium. To search the other way round, use the Components option in the Filter menu in Discover › Projects.
Projects to build after reading this
See all projects
LED Blink
The very first hello of electronics: switching a single LED on and off. The Arduino turns the LED on and off at short intervals, so the light blinks quickly. You see in the simplest way how the board

LED Control with a Push Button (Push)
Just like a doorbell: the light stays on as long as you press, and goes off when you let go. The Arduino keeps listening to the button; while it's pressed the LED is on, and the moment you lift your f

LED Chaser with Adjustable Speed
Six LEDs light up one after another, so the light seems to run from one end to the other. Turn the potentiometer knob and the speed of that run changes instantly: one way and the light races along, th
Using a Buzzer
Ever wondered how a doorbell or an alarm makes its sound? The Arduino makes a small buzzer beep at short intervals: beep, pause, beep, pause. You see how sound is made with electricity and take the fi

Night Light with Ldr
A little night light that turns on by itself when it gets dark and goes off when morning comes. A light sensor measures how bright the room is, and the Arduino switches the LED on when it is dark enou

HC-SR04 Distance Measurement (Serial Display)
The HC-SR04 sensor works just like a bat finding its way in the dark: it sends out a sound you cannot hear, listens for the echo and measures how far away the object in front of it is. The Arduino wri

Temperature and Humidity with DHT11
How warm is your room, and is the air humid or dry? The DHT11 sensor measures temperature and humidity, and the Arduino writes the values on a two-line LCD screen, refreshing every couple of seconds.

ESP32 HC-SR04 Ultrasonic Distance Sensor
The HC-SR04 ultrasonic sensor calculates distance by measuring the time it takes for the sound wave it emits to bounce off an object and return (Time of Flight). In this project, we will send a 10-microsecond pulse from the ESP32 to the sensor's TRIG pin and read the echo duration from the ECHO pin using pulseIn(). We will display the calculated distance in centimeters on a 16x2 I2C LCD. Since the HC-SR04 operates at 5V, a voltage divider is required on the ECHO pin—otherwise, the ESP32’s